
If you’re looking for a unique and adorable addition to your winter wardrobe, look no further than a knit mushroom hat. This whimsical hat pattern is fun to make and even more fun to wear. Whether you’re a beginner knitter or an experienced one, this pattern is sure to delight.
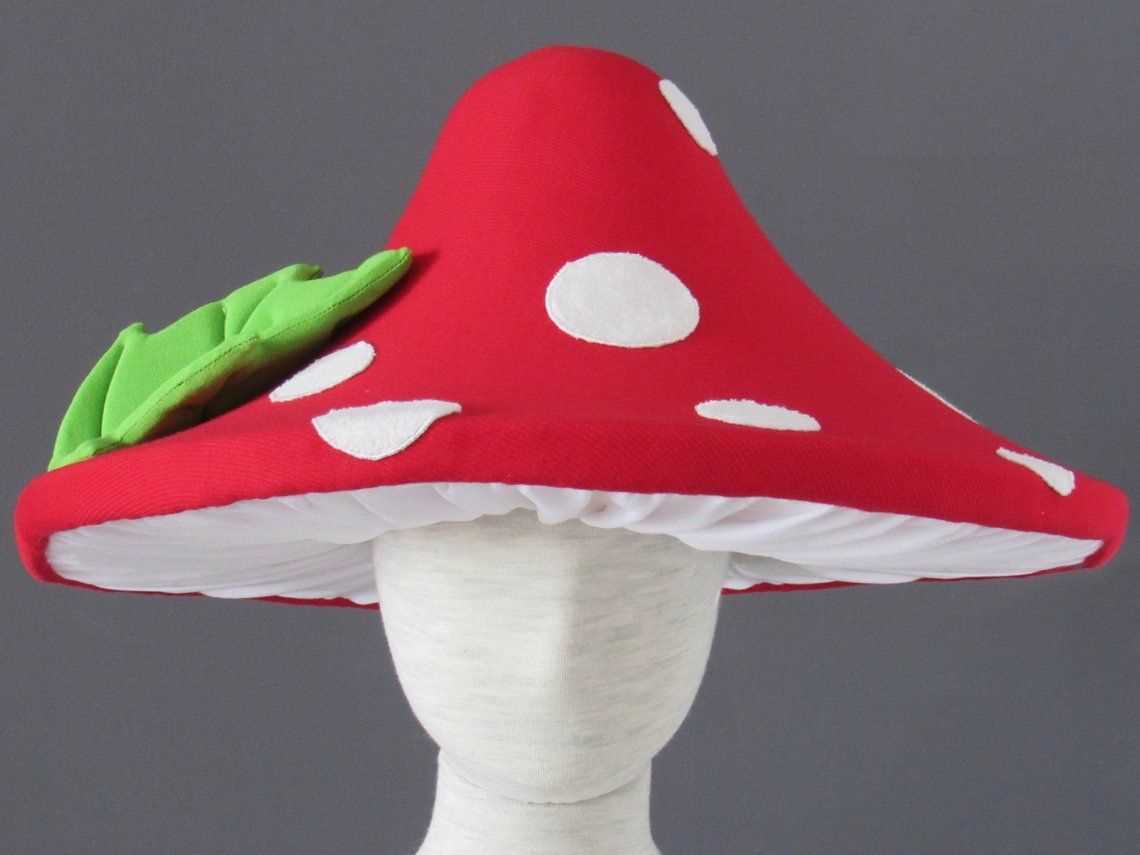
The knit mushroom hat pattern features a distinctive shape with a rounded crown and a wide brim resembling the cap and stem of a mushroom. The pattern uses basic knit and purl stitches, making it accessible to knitters of all skill levels. With its cute and playful design, this hat is perfect for both kids and adults.
Not only does this hat keep you warm during the chilly winter months, but it also adds a touch of charm to any outfit. You can choose from a variety of colors to match your personal style or even create a striped design for a more vibrant look. Knitting this hat is a great way to showcase your creativity and make a fashion statement.
How to Knit a Mushroom Hat: Complete Pattern and Instructions

If you’re looking for a fun and unique project to take on, knitting a mushroom hat is a great option. Not only is it a cozy and warm accessory for the colder months, but it also adds a touch of whimsy to any outfit. In this pattern and instructions, we’ll walk you through the steps of creating your own mushroom hat.
Materials Needed:
- Worsted weight yarn in two contrasting colors – one for the cap and one for the stem.
- Size 8 (5mm) circular knitting needles 16″ long.
- Set of Size 8 (5mm) double-pointed knitting needles.
- Tapestry needle.
- Stitch marker.
Pattern:
- Cap: Using the circular needles and the cap color yarn, cast on 88 stitches. Join in the round, being careful not to twist the stitches. Place the stitch marker to mark the beginning of the round.
- Work in a K2, P2 ribbing for 2 inches.
- Switch to stockinette stitch and continue knitting until the cap measures 5 inches from the cast-on edge.
- Decrease rounds: *K6, K2tog,* repeat to the end of the round (77 stitches remaining).
- Knit one round.
- *K5, K2tog,* repeat to the end of the round (66 stitches remaining).
- Knit one round.
- *K4, K2tog,* repeat to the end of the round (55 stitches remaining).
- Knit one round.
- *K3, K2tog,* repeat to the end of the round (44 stitches remaining).
- Knit one round.
- *K2, K2tog,* repeat to the end of the round (33 stitches remaining).
- Knit one round.
- *K1, K2tog,* repeat to the end of the round (22 stitches remaining).
- Stem: Switch to the stem color yarn and knit in stockinette stitch until the stem measures 3 inches from the cap.
- Switch to the double-pointed needles when necessary.
- Decrease rounds: *K2, K2tog,* repeat to the end of the round (16 stitches remaining).
- Knit one round.
- *K1, K2tog,* repeat to the end of the round (11 stitches remaining).
- Finishing: Cut the yarn, leaving a long tail. Thread the tail through the tapestry needle and slide the needle through the remaining stitches, removing them from the knitting needle. Pull tight to close the top of the hat.
- Weave in any remaining yarn tails and block the hat to shape, if desired.
With these complete instructions and pattern, you’ll be able to knit a charming mushroom hat to wear and enjoy. Customize it with your favorite colors and get creative with different yarn textures to make it truly unique. Happy knitting!
Materials Needed for Knitting a Mushroom Hat
Knitting a mushroom hat requires a few specific materials to ensure the best results. Here is a list of the materials you will need:
- Yarn: Choose a soft and warm yarn in the colors of your choice. A medium weight or worsted weight yarn is recommended for this project.
- Needles: Use a set of double-pointed needles or a circular needle in the appropriate size for your yarn. The size will depend on your gauge and the finished size of the hat.
- Tapestry needle: A tapestry needle with a large eye will be used for weaving in ends and sewing any seams.
- Stitch markers: Stitch markers are helpful for keeping track of your stitches and any pattern repeats.
- Scissors: A pair of sharp scissors is essential for cutting yarn and snipping any loose ends.
- Pom pom maker (optional): If you want to add a pom pom to the top of your hat, a pom pom maker will make the process quick and easy.
Having all of these materials on hand before starting your knitting project will ensure a smooth and enjoyable knitting experience. Make sure to choose high-quality materials for the best results in both the look and durability of your finished mushroom hat.
Choosing the Right Yarn for Your Mushroom Hat
When it comes to knitting a mushroom hat, choosing the right yarn is essential to achieve the desired texture and look. The yarn you select will impact the durability, warmth, and overall appearance of the finished hat. There are several factors to consider when making your yarn selection.
Fiber Content
The first thing to consider is the fiber content of the yarn. For a mushroom hat, it is important to choose a yarn that is soft and comfortable against the skin. Natural fibers, such as merino wool or alpaca, are excellent choices as they provide warmth and are gentle on the skin. Acrylic yarns can also be suitable, especially if you prefer a vegan-friendly or more affordable option.
Weight and Gauge
Another important factor to consider is the weight and gauge of the yarn. The weight of the yarn will determine how thick or thin the hat will be. For a mushroom hat, you may want to choose a medium weight (worsted) yarn to ensure it has enough structure and warmth. Additionally, it is essential to match the recommended gauge mentioned in the pattern to achieve the correct size and fit.
Color and Texture
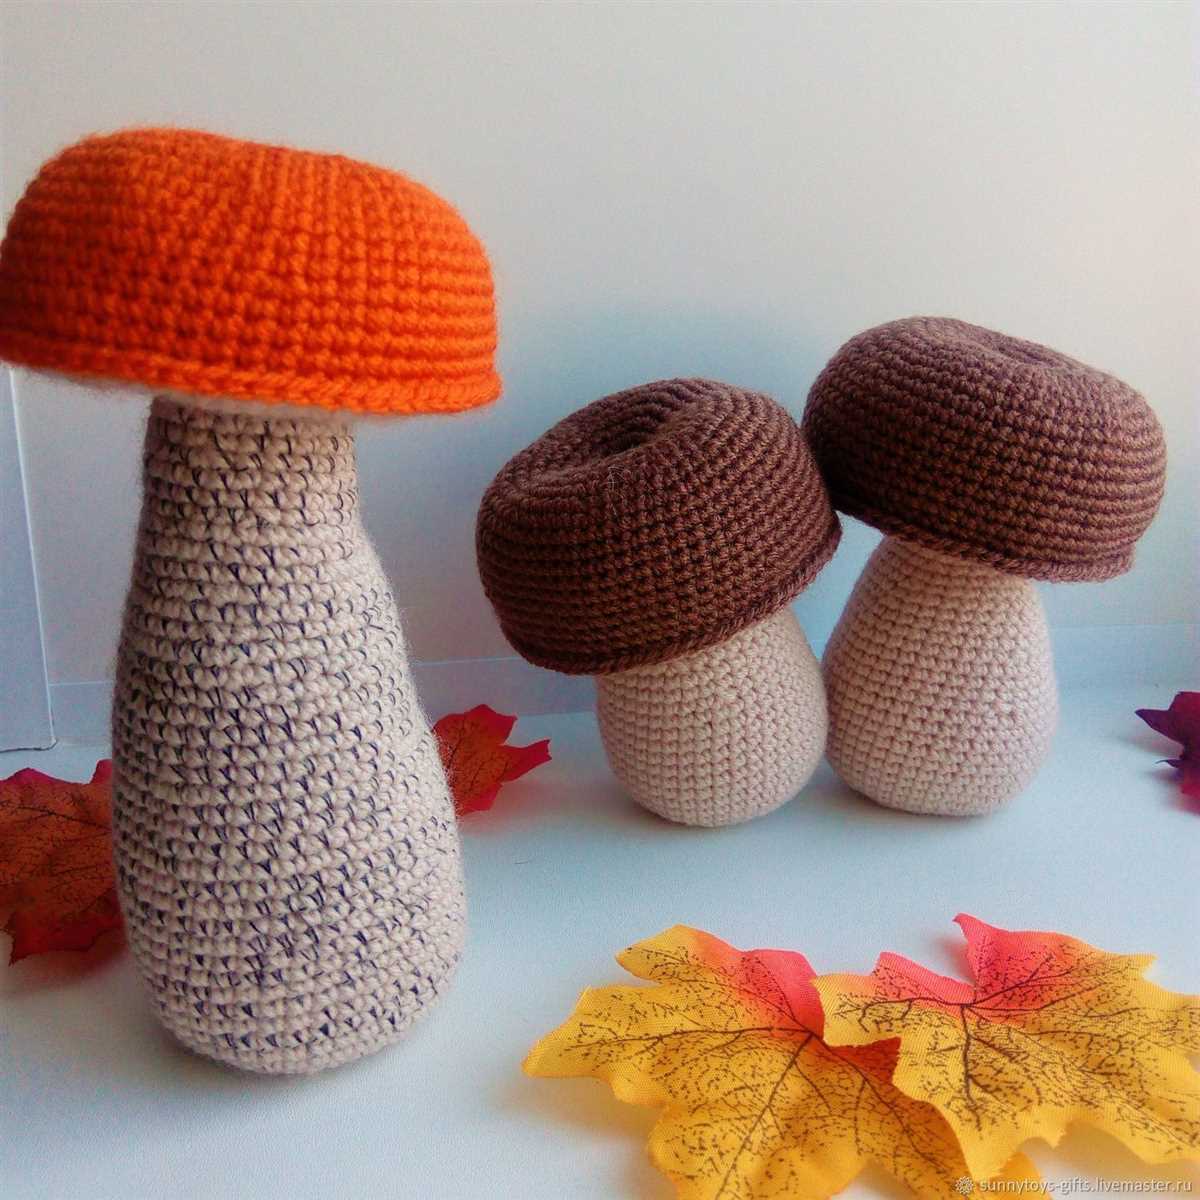
The color and texture of the yarn can significantly impact the final appearance of the mushroom hat. Opt for earthy tones, such as browns, greys, or creams, to imitate the natural colors of a mushroom. If you prefer a more whimsical or playful look, you can experiment with brighter colors or variegated yarns. Additionally, consider the texture of the yarn–whether you want a smooth and sleek finish or a more textured look.
Yarn Brand and Quality
Lastly, consider the brand and quality of the yarn. Investing in a high-quality yarn from a reputable brand can make a significant difference in the overall durability and longevity of the hat. Look for yarn brands known for their expertise in producing knitting yarns and check customer reviews or recommendations from fellow knitters.
By carefully considering the fiber content, weight, gauge, color, texture, and yarn brand, you can ensure that you choose the right yarn for your mushroom hat, resulting in a beautiful and comfortable finished product.
Getting Started: Casting On and Creating the Brim
When beginning your knitting project for a mushroom hat, the first step is to cast on your stitches. The number of stitches you will need may vary depending on the size of the hat you are making. It is recommended to use a circular needle for this pattern.
To create the brim of the hat, you will start by knitting in a rib stitch pattern. This will give the brim a stretchy and snug fit. The rib stitch pattern is created by alternating knit and purl stitches. For example, you could start by knitting one stitch, followed by purling one stitch, and continue this pattern until the brim reaches the desired width.
Step 1: With your circular needle, make a slipknot and place it on the needle. This will be your first stitch.
Step 2: Insert the needle into the slipknot and pull the working yarn through to create a new stitch. Place this new stitch onto the needle.
Step 3: Repeat step 2 until you have cast on the required number of stitches for your pattern.
Step 4: Once you have cast on your stitches, you can begin working the rib stitch pattern for the brim. Start by knitting one stitch, followed by purling one stitch. Repeat this pattern until the brim reaches the desired width.
Creating a rib stitch pattern for the brim of your mushroom hat will provide both style and functionality. The ribbed design allows the hat to fit snugly on the head while providing some stretch for comfort. By following these steps, you will be on your way to completing the first part of your knitting project.
Knitting the Stem of the Mushroom Hat
One of the key features of a mushroom hat is its stem, which adds a unique and whimsical touch to the design. Knitting the stem is a relatively simple process that requires basic knitting skills and some attention to detail.
To begin, you will need to cast on the desired number of stitches for the stem. This will depend on the size of the hat and the thickness of the yarn you are using. It is important to choose an appropriate needle size to achieve the desired gauge and ensure that the stem is not too loose or too tight.
Once you have cast on, you can begin knitting the stem in the round. You can use a variety of stitch patterns to create different textures and designs on the stem, or simply stick to a basic stockinette stitch for a smooth and seamless look.
As you work your way up the stem, it is important to periodically check the length to ensure that it matches your desired height. Keep in mind that the stem should be tall enough to reach the top of the hat when it is attached, but not so long that it overwhelms the overall design.
Once you have reached the desired length, you can bind off your stitches and weave in any loose ends. Depending on the pattern, you may need to seam the stem to the top of the hat, or you may be able to simply attach it using a few stitches.
Overall, knitting the stem of a mushroom hat is a fun and creative process that allows for personalization and customization. Whether you choose to keep it simple or experiment with different stitch patterns, the stem adds an interesting element to the hat and makes it truly unique.
Shaping the Mushroom Cap
The mushroom cap is the main focus of this knit mushroom hat pattern. It is what gives the hat its unique and adorable shape. To achieve the desired shape, special shaping techniques are employed.
1. Decreases: The first step in shaping the mushroom cap is to decrease stitches. This is done by knitting or purling two stitches together, which effectively reduces the number of stitches on the needle. Decreases are typically placed evenly across the rows to create a symmetrical shape.
2. Short Rows: Short rows are another technique used to shape the mushroom cap. They involve knitting or purling a partial row and then turning the work before reaching the end. By repeating this process, certain sections of the cap can be made longer or shorter, creating the distinct domed shape of a mushroom.
3. Crown Shaping: The crown of the mushroom cap is where all the shaping comes together. This is the topmost part of the cap that is typically rounded and smooth. Crown shaping is achieved through a combination of decreases and short rows, creating a gradual taper towards the center of the cap.
4. Blocking: Once the knitting is complete, the mushroom cap may require blocking to help it maintain its shape. Blocking involves wetting the finished piece and then stretching and pinning it into the desired shape. This can be especially useful for ensuring the mushroom cap retains its rounded and domed appearance.
By utilizing these shaping techniques, knitters can create a charming mushroom cap for their hat. Whether for a cute and whimsical accessory or as a fun gift, the shaping of the mushroom cap adds an extra touch of creativity and flair to the knit hat pattern.
Adding the Gills to Your Mushroom Hat
Once you have completed the main body of your knitted mushroom hat, it’s time to add the gills. The gills are an important feature that give the hat its characteristic mushroom appearance. They are knitted separately and then sewn onto the underside of the brim of the hat.
To make the gills, start by casting on the required number of stitches using the same yarn and needle size as you used for the hat. The number of stitches will depend on the size of your hat and the desired width of the gills. Knit in stockinette stitch until the gills reach the desired length, making sure to keep track of the number of rows you knit.
Once you have finished knitting the gills, cut the yarn, leaving a long tail for sewing. Thread the tail onto a tapestry needle, and align the gills along the underside of the brim of the hat. Use a whip stitch to sew the gills onto the hat, making sure to secure them firmly in place. Take care to space the gills evenly around the brim and adjust their positioning to achieve the desired mushroom shape.
Once you have sewn all the gills onto the hat, weave in any loose ends and trim off any excess yarn. Give the hat a final inspection to ensure that all the gills are securely attached and that the mushroom shape is well-defined. Your knitted mushroom hat is now complete, ready to keep you warm and stylish on chilly days!
Blocking and Finishing Your Knitted Mushroom Hat
Once you have completed knitting your mushroom hat, the next step is to block and finish it. Blocking is an important process that helps to give your hat a polished, professional look. It also helps to even out any uneven stitches and ensure that your hat maintains its shape when worn.
To begin the blocking process, you will need to gather the necessary materials. This includes a blocking mat or towel, rust-proof pins, and a spray bottle filled with water. Lay your hat flat on the blocking mat or towel, gently stretching it to the desired shape and size. Secure the hat in place using the rust-proof pins, making sure to evenly distribute them around the edges.
Once your hat is securely pinned in place, use the spray bottle to lightly mist the hat with water. This will help to relax the fibers and make them more pliable. Allow the hat to dry completely before removing the pins. This may take several hours or even overnight, depending on the humidity level in your area.
After your hat has dried, it is time to finish it off. Weave in any loose ends and trim them to keep the hat looking tidy and professional. If desired, you can also add a pom-pom or other embellishments to personalize your hat. Once all finishing touches are complete, your knitted mushroom hat is ready to be worn or gifted to someone special.
Customizing Your Mushroom Hat: Embellishment Options
When knitting a mushroom hat, there are several embellishment options you can consider to add a unique touch to your finished project. Whether you want to make your hat more whimsical or elegant, these ideas will help you customize your mushroom hat to suit your style.
1. Embroidery
One way to add some character to your mushroom hat is by incorporating embroidery. You can use colored yarn to create intricate designs on the brim or the body of the hat. Consider stitching small flowers, leaves, or even cute mushrooms onto the surface of the hat. This simple and fun technique will transform a plain mushroom hat into a charming masterpiece.
2. Pom-poms
Pom-poms are a classic embellishment option that can give your mushroom hat a playful and cozy look. You can make pom-poms in matching or contrasting colors and attach them to the top or the side of the hat. A cluster of pom-poms can also be used as a border or trim on the brim. Experiment with different sizes and textures to achieve the desired effect.
3. Appliques
Another way to customize your mushroom hat is by adding appliques. You can create small knitted or crocheted pieces, such as flowers, butterflies, or animals, and then sew them onto the hat. This will give your hat a three-dimensional effect and make it truly unique. Appliques can be placed strategically on the brim or scattered all over the hat for a whimsical look.
4. Buttons
Using buttons is a versatile option for adding embellishments to your mushroom hat. You can sew on decorative buttons in various shapes, sizes, and colors to create visual interest. Choose buttons that complement the color scheme of your hat and arrange them creatively on the hat’s brim or body. Buttons can add a touch of elegance or playfulness, depending on your personal style.
In conclusion, there are many ways to personalize and embellish your mushroom hat. Whether you choose to embroider, add pom-poms, attach appliques, or incorporate buttons, these options will allow you to create a hat that reflects your individuality and creativity.
Tips and Tricks for Knitting a Perfect Mushroom Hat
Knitting a mushroom hat can be a fun and rewarding project. Whether you’re a beginner or an experienced knitter, here are some tips and tricks to help you create a perfect mushroom hat.
1. Choose the right yarn:
When selecting yarn for your mushroom hat, consider using a worsted weight yarn in a color that resembles the cap of a mushroom. Avoid yarns that are too thin or too bulky, as they may not give you the desired texture and shape.
2. Start with a gauge swatch:
Before diving into the actual pattern, it’s important to knit a gauge swatch to determine the number of stitches and rows per inch. This will ensure that your hat fits properly and is the right size.
3. Pay attention to tension:
Consistent tension is key to achieving an even and professional-looking hat. Make sure not to pull the yarn too tight or too loose as you knit. If you notice that your stitches appear uneven, try adjusting your tension until you achieve the desired result.
4. Use stitch markers:
When working on the crown of the hat, it can be helpful to place stitch markers to keep track of increases and decreases. This will make it easier to follow the pattern and ensure that your hat has the correct shape and structure.
5. Block your hat:
Blocking is an essential step in finishing your mushroom hat. It helps to even out any uneven stitches and gives your hat a polished look. Follow the blocking instructions for your chosen yarn to achieve the desired shape and size.
6. Add embellishments:
To make your mushroom hat truly unique, consider adding some embellishments. You could sew on some buttons or crochet small flowers to decorate the base of the hat. Get creative and make it your own!
With these tips and tricks, you’ll be well-equipped to tackle your mushroom hat knitting project. Remember to have fun and enjoy the process of creating something beautiful and functional!
Common Mistakes to Avoid While Knitting a Mushroom Hat
Knitting a mushroom hat can be a fun and rewarding project, but it’s important to avoid some common mistakes that can lead to unsatisfactory results. By being aware of these mistakes and taking the necessary precautions, you can ensure that your mushroom hat turns out just the way you envisioned it.
Mistake 1: Using the Wrong Yarn
One of the most crucial mistakes you can make when knitting a mushroom hat is using the wrong type of yarn. It’s important to choose a yarn that is appropriate for the pattern and desired outcome. For a mushroom hat, you’ll want a yarn that is lightweight, soft, and has a good amount of stretch. Avoid using heavy or bulky yarns, as they can make the hat too dense and uncomfortable to wear.
Mistake 2: Not Checking Gauge
Another mistake that many knitters make is not checking their gauge before starting the project. Gauge refers to the number of stitches and rows per inch in your knitting. It’s important to match the gauge specified in the pattern to ensure that your hat will be the right size. Skipping this step can result in a hat that is too small or too large, which can be disappointing.
Mistake 3: Poor Stitch Consistency
Knitting a mushroom hat requires a consistent and even stitch tension. Inconsistent tension can result in a hat that doesn’t lie flat or has puckered areas. To avoid this, make sure you’re consistently knitting or purling with the same amount of tension throughout the project. Take breaks if necessary to avoid fatigue, as tired hands can lead to uneven stitching.
Mistake 4: Neglecting to Block the Hat
Blocking is an essential step in knitting that helps to shape and even out the stitches in your finished project. Neglecting to block your mushroom hat can result in a hat that doesn’t sit properly on the head or has an uneven appearance. Take the time to block your hat according to the yarn’s instructions, and you’ll be rewarded with a professional-looking finished product.
Mistake 5: Lack of Attention to Detail
Finally, a common mistake is failing to pay attention to the details of the pattern. When knitting a mushroom hat, it’s important to carefully follow the instructions, especially when it comes to shaping the crown or adding details like mushrooms. Make sure to count your stitches and rows accurately and double-check any special instructions before proceeding. Being meticulous in your knitting will result in a hat that looks polished and well-crafted.
Avoiding these common mistakes can help you achieve a beautifully knitted mushroom hat that you can be proud to wear or gift to someone special. Remember to take your time, pay attention to the details, and enjoy the process of creating a unique and cozy accessory. Happy knitting!
Pattern Variations: Knitting a Mini Mushroom Hat
Knitting a mini mushroom hat can be a fun and creative project, and there are many pattern variations to choose from. These variations allow you to customize the hat to your own style and preferences. Whether you prefer a simple and classic design or want to add some unique touches, there is a pattern out there for you.
One popular variation is the striped mushroom hat. This pattern calls for alternating colors for the cap and the stem of the hat, creating a fun and eye-catching design. You can choose any colors you like to create your own unique striped pattern.
Another variation is the textured mushroom hat. This pattern involves using different stitch patterns to create a textured effect on the hat. You can experiment with different stitch patterns, such as ribbing, cables, or lace, to add interesting details and enhance the overall look of the hat.
If you’re feeling adventurous, you can try the embellished mushroom hat. This pattern includes adding decorative elements to the hat, such as buttons, flowers, or embroidery. These embellishments can elevate the hat from a simple accessory to a statement piece.
In addition to these variations, you can also customize the size of the hat to fit different head sizes, add a pompom to the top, or even knit a matching set of mushroom hat and mittens.
With so many pattern variations to choose from, knitting a mini mushroom hat allows you to unleash your creativity and create a unique and stylish accessory. Whether you’re a beginner or an experienced knitter, there’s a pattern out there for you to try.
Ways to Style and Wear Your Knitted Mushroom Hat
Now that you have your cozy and stylish knitted mushroom hat, let’s explore some fun ways to style and wear it. Whether you’re going for a casual look or trying to add a touch of whimsy to your outfits, the mushroom hat can be a versatile accessory. Here are a few ideas to get you started:
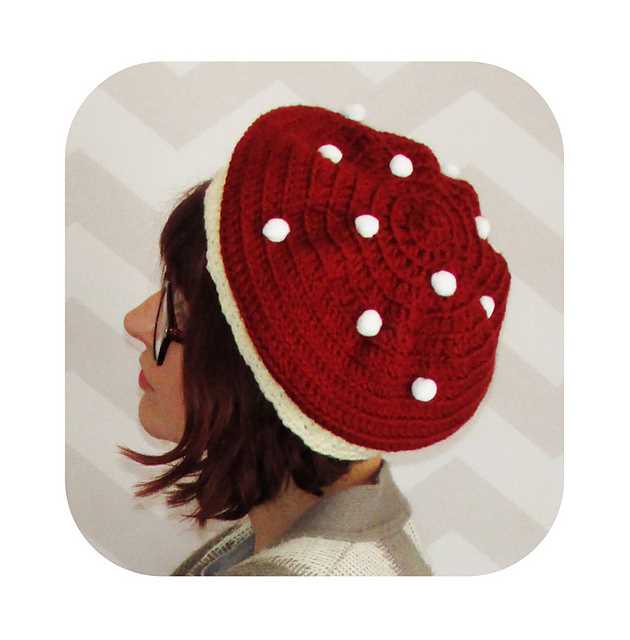
1. Classic Beanie Style
The simplest way to wear your mushroom hat is as a classic beanie. Simply pull it over your head, making sure it covers your ears, and let it slouch at the back. This style is perfect for keeping warm during chilly days and can be paired with any casual outfit.
2. Side-Pinned
Add a touch of elegance to your mushroom hat by pinning one side up with a decorative brooch or a hairpin. This style is ideal for adding a feminine and vintage-inspired flair to your look. Experiment with different pin placements to find the perfect balance between style and functionality.
3. Rolled Brim
If you prefer a more structured look, try rolling the brim of your mushroom hat up for a cleaner finish. This style works well with a slightly slouchy fit and can give your hat a more polished and tailored appearance. It pairs beautifully with a coat or jacket during the colder months.
4. Double Layered
For extra warmth and a unique look, consider layering your mushroom hat over another beanie or a knit headband. This style adds depth and texture to your outfit and allows you to show off multiple colors or patterns. Experiment with different combinations to create a cozy and fashion-forward ensemble.
5. Mix and Match
Don’t limit yourself to wearing your mushroom hat only during winter. Get creative and incorporate it into your spring and fall outfits as well. Mix and match it with floral dresses, denim jackets, or oversized sweaters to create a playful and eclectic look. Don’t be afraid to experiment and have fun with your accessories!
The knitted mushroom hat is not only a practical and warm accessory but also a versatile fashion statement. Whatever style you choose, make sure to wear it with confidence and embrace your unique fashion sense. Happy styling!
Q&A:
Where can I find a knit mushroom hat pattern?
You can find a knit mushroom hat pattern on various knitting websites, such as Ravelry and Knitting Pattern Central. You can also search for specific patterns on search engines like Google.
Are there different sizes available for the knit mushroom hat pattern?
Yes, many knit mushroom hat patterns offer different sizes to accommodate different head sizes. Be sure to check the pattern details for information on sizing options.
What materials are needed to make a knit mushroom hat?
To make a knit mushroom hat, you will typically need a worsted weight yarn in your desired colors, knitting needles in the recommended size for the pattern, a yarn needle for sewing in ends, and optional embellishments like buttons or pom poms.
Is the knit mushroom hat pattern suitable for beginners?
Some knit mushroom hat patterns may be more suitable for intermediate or advanced knitters, especially if they include more intricate stitch patterns. However, there are also simple patterns available that beginners can try. Look for patterns labeled as beginner-friendly or with clear instructions.
Can I sell the knit mushroom hats that I make from the pattern?
It depends on the specific pattern and the designer’s terms of use. Some patterns may allow you to sell finished items made from their pattern, while others may have restrictions. Always check the pattern or contact the designer for clarification on their individual policies regarding selling finished items.
What is a mushroom hat?
A mushroom hat is a knitted hat that features a rounded shape resembling a mushroom. It typically has a wide brim and a slouchy crown, providing a unique and playful look.