
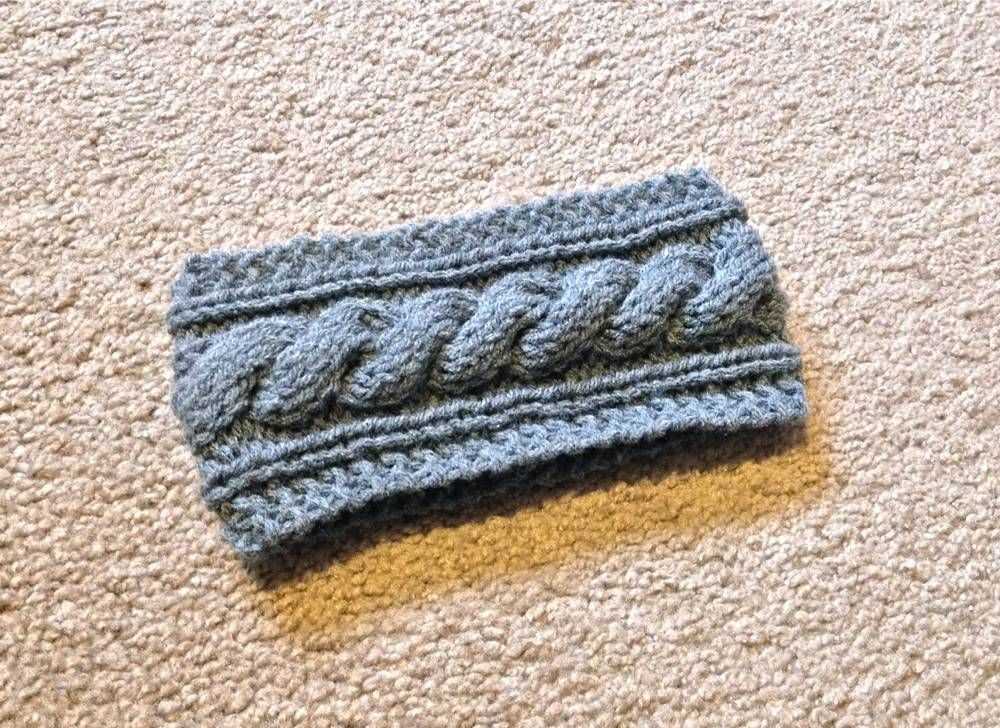
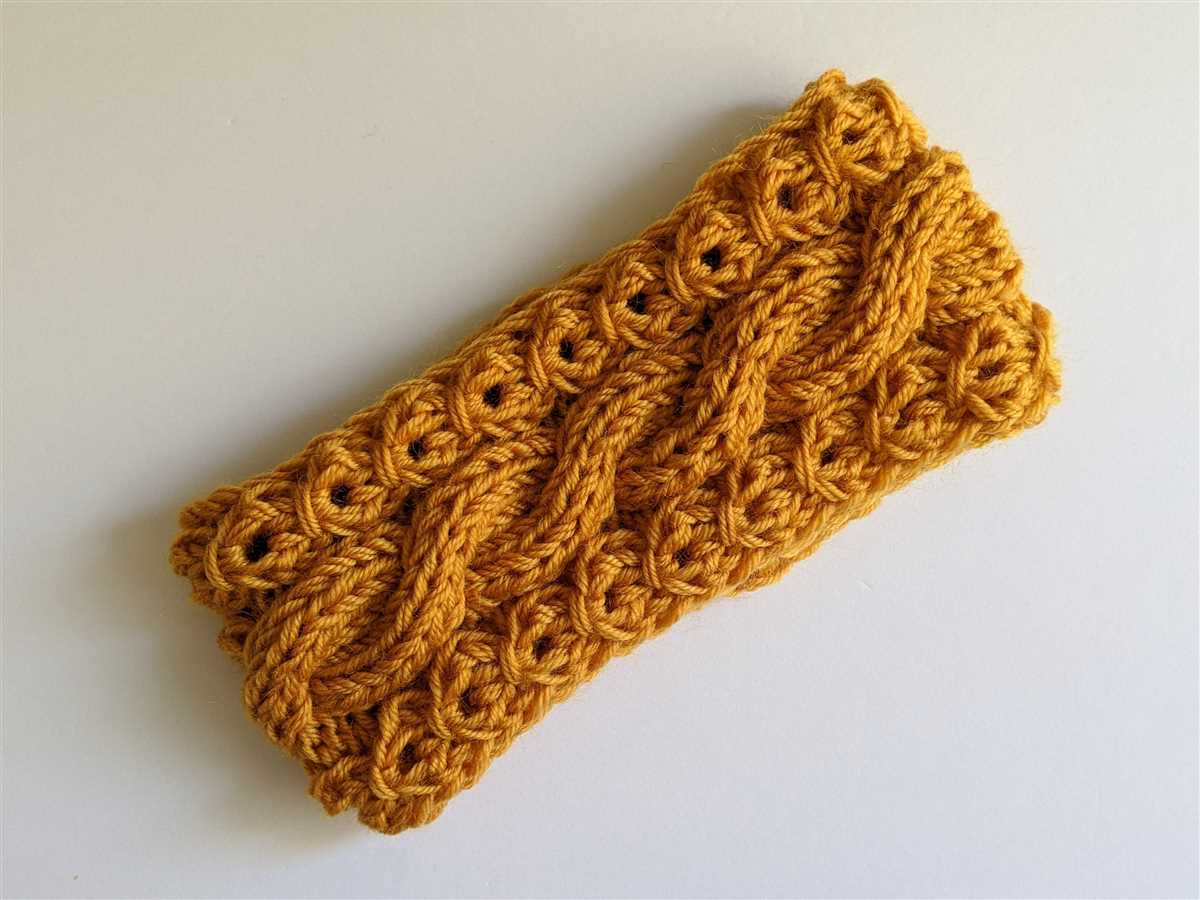
A knit headband is a stylish and practical accessory that can keep your ears warm on chilly days. If you’re looking to add a touch of elegance and sophistication to your winter wardrobe, then a cable-knit headband is the perfect choice. The intricate cable pattern adds texture and visual interest to an otherwise simple design.
Creating your own cable-knit headband is a fun and rewarding project that doesn’t require a lot of time or expertise. With a basic knowledge of knitting techniques and some patience, you can easily knit a beautiful headband that will impress everyone who sees it. Whether you’re a beginner or an experienced knitter, this pattern is suitable for all skill levels.
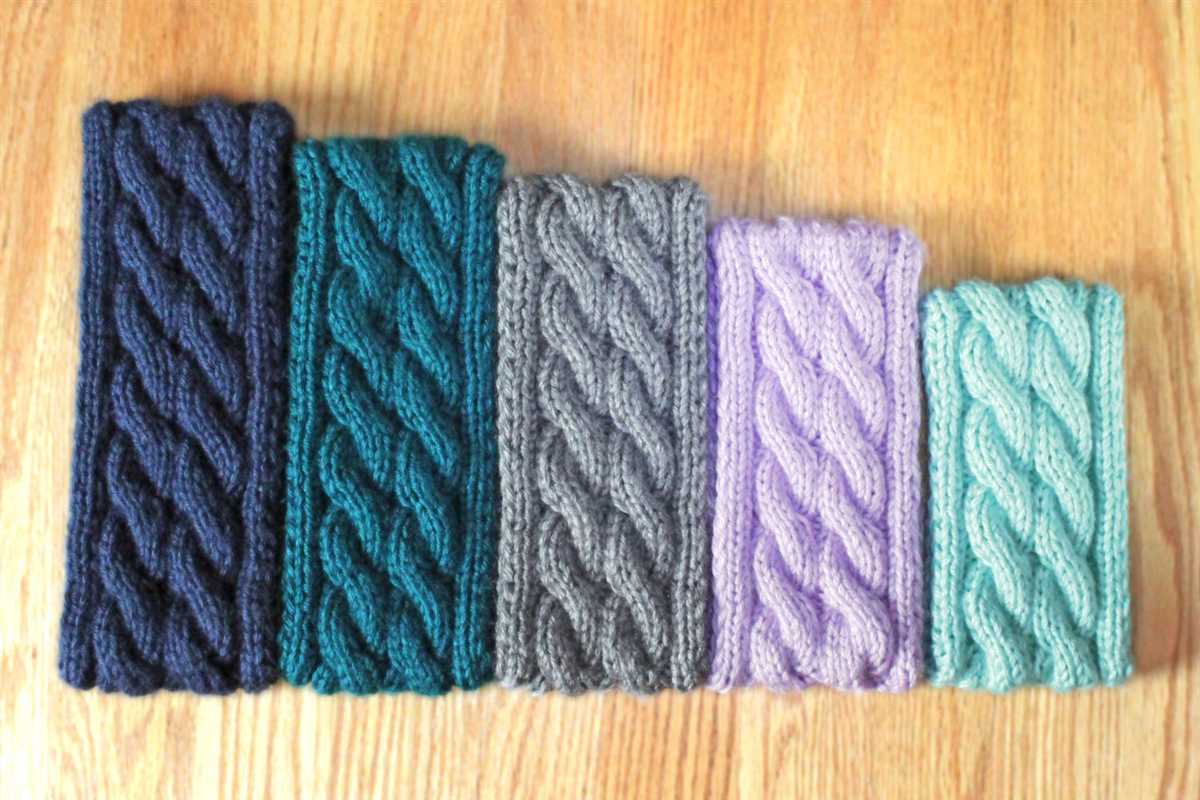
One of the great things about knitting is that you have the freedom to choose your own colors and yarns. You can go with a classic neutral shade like black or gray for a timeless look, or you can opt for a vibrant color to make a bold fashion statement. No matter what color you choose, the cable pattern will add a touch of elegance and sophistication to your headband.
Knit Headband Pattern Cable
Are you looking for a stylish and cozy accessory to keep your ears warm during the colder months? Look no further than the knit headband pattern cable. This classic knitting pattern features a beautiful cable design that adds an elegant touch to any outfit.
The knit headband pattern cable is perfect for both experienced knitters and beginners looking to expand their skills. With its repetitive pattern, this project is a great way to practice working with cables and to create a versatile accessory that can be worn with any winter ensemble.
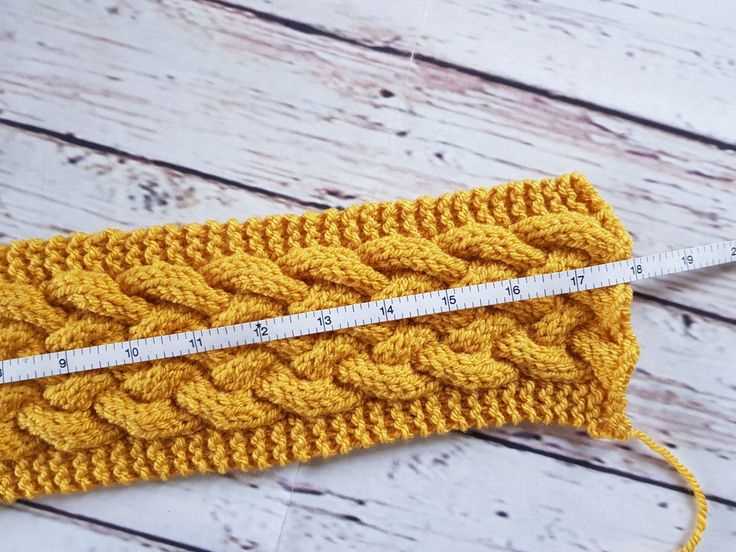
To create the knit headband pattern cable, all you need is some yarn in your favorite color and a pair of knitting needles. The pattern typically calls for medium weight yarn and size 8 knitting needles, but you can customize the materials to achieve your desired look and fit.
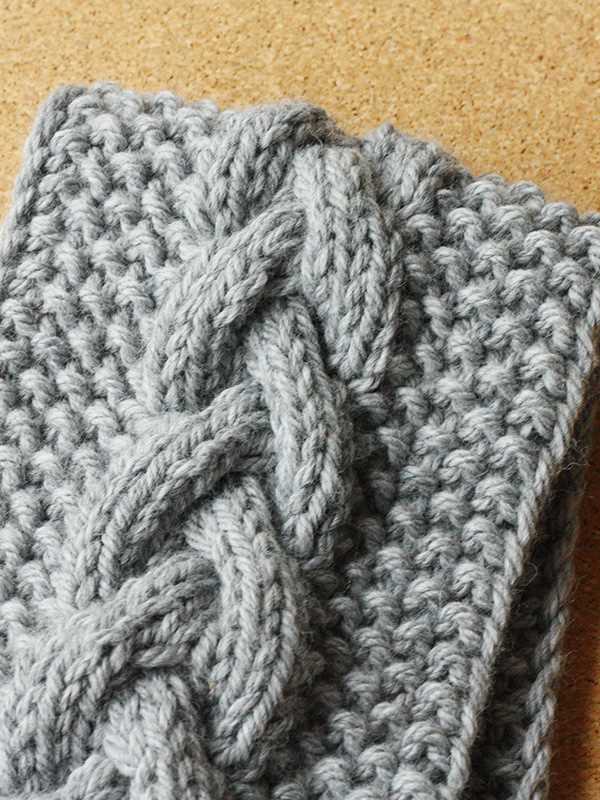
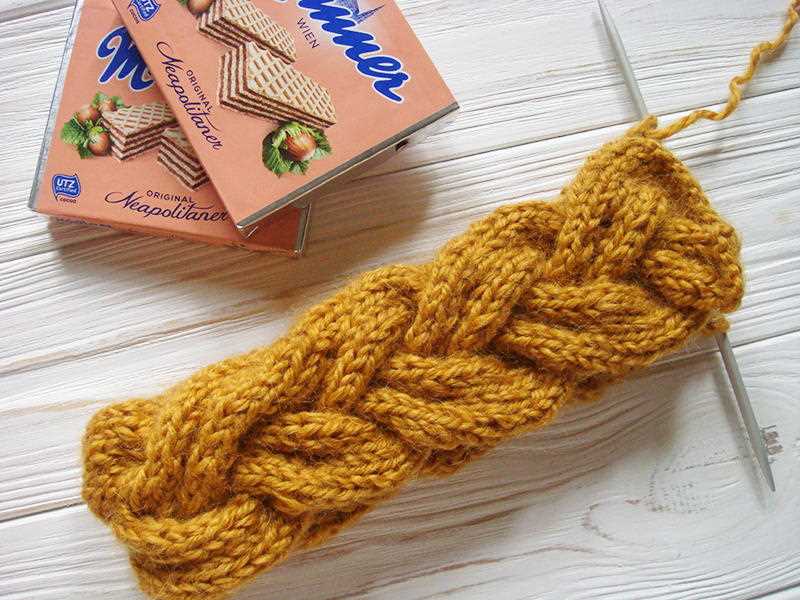
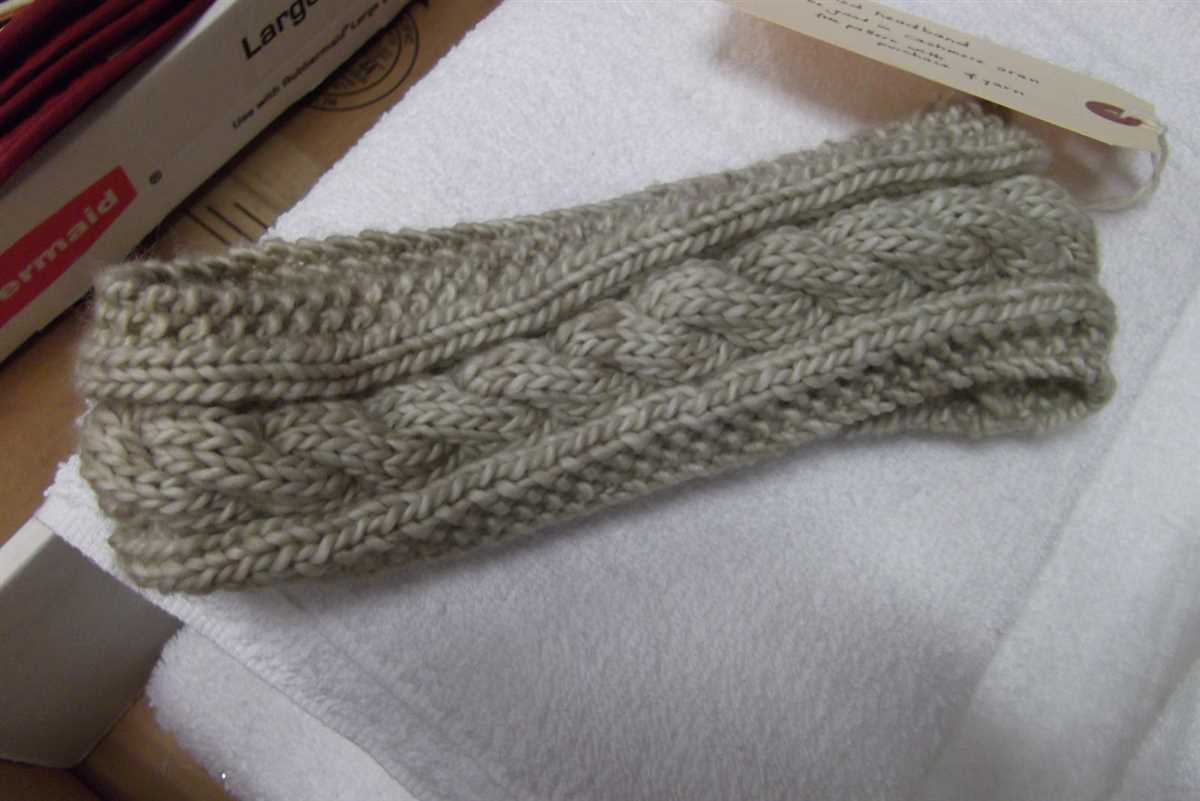
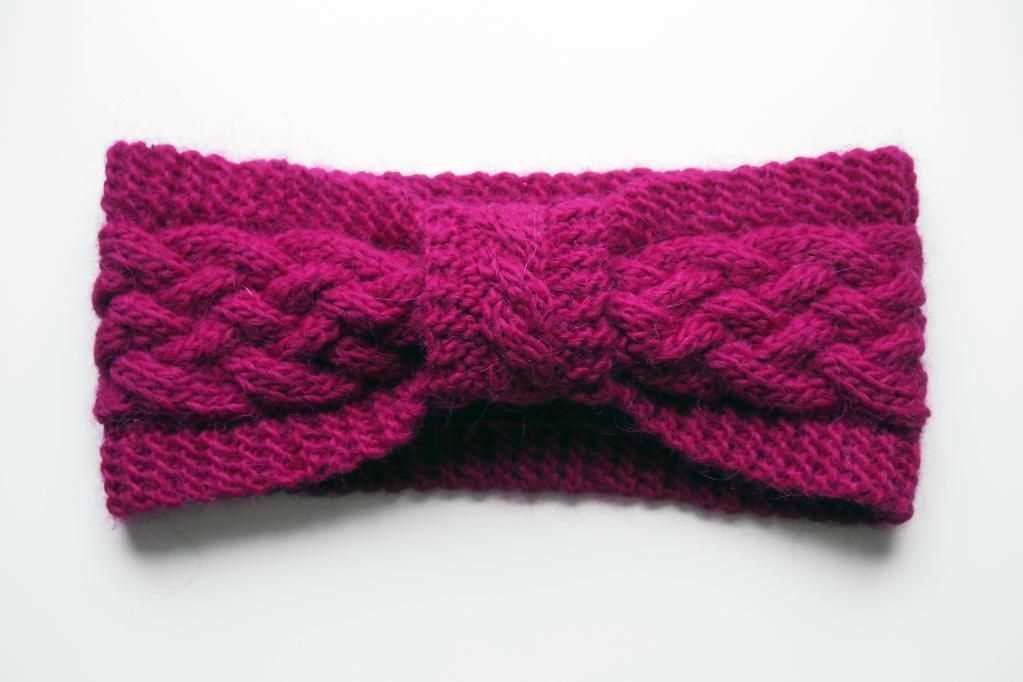
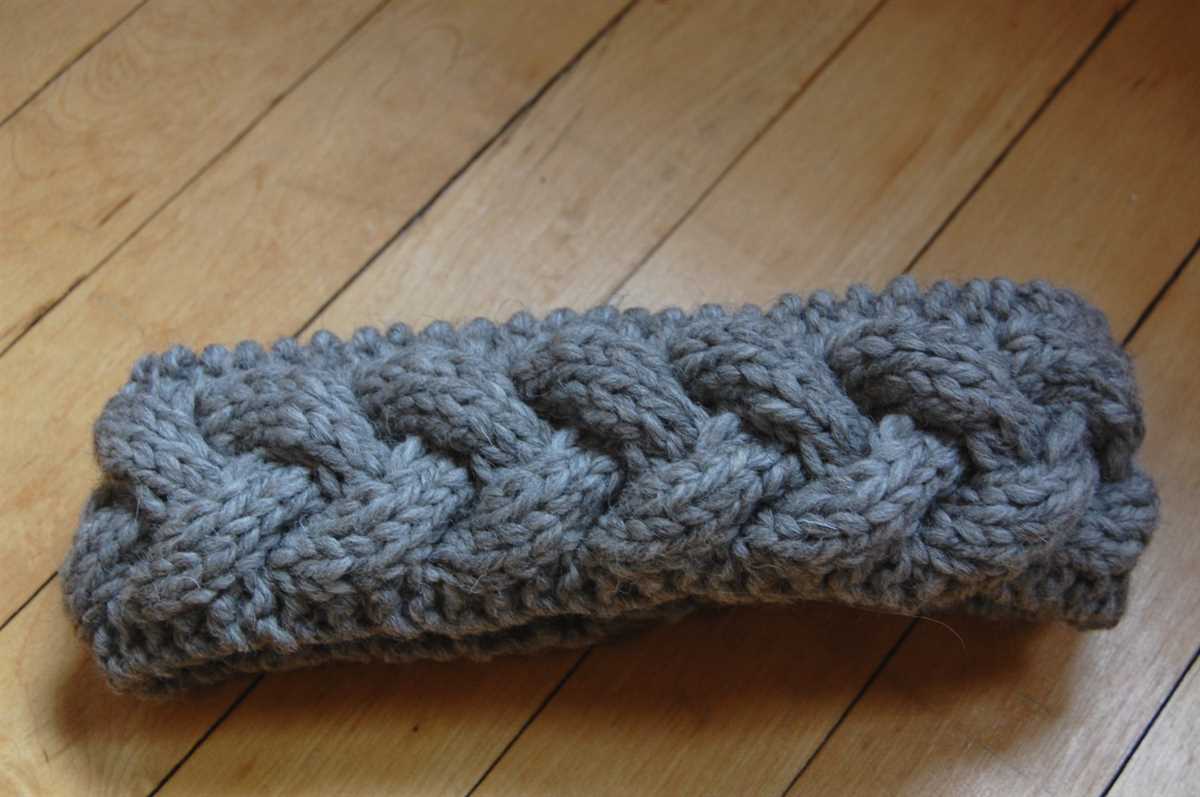
The cable design in the knit headband adds texture and visual interest to the finished piece. It creates a twisted rope-like appearance that stands out against the smooth background of the headband. Whether you choose to make a wide or narrow version, the cable pattern will be the star of the show.
Once you have completed your knit headband pattern cable, you can wear it on its own or pair it with other winter accessories, such as a scarf or gloves. The stretchy nature of the headband allows it to fit comfortably on most head sizes, making it a versatile and practical accessory for anyone.
So, if you’re ready to take on a new knitting project and add a stylish touch to your winter wardrobe, give the knit headband pattern cable a try. With its classic design and cozy feel, this headband is sure to become a favorite accessory for many seasons to come.
What is a cable knit headband?
A cable knit headband is a type of headband that is knitted using a cable stitch pattern. Cable knitting involves creating interwoven patterns that resemble twists and braids, giving the finished fabric a unique and textured look.
The cable stitch pattern is created by crossing stitches over each other to form the cables. This is done by knitting or purling stitches out of sequence, usually by using a cable needle to hold stitches temporarily while working other stitches. The process of knitting cables can be challenging for beginners, but with practice, it becomes easier to create intricate designs.
One of the advantages of using cable knit headbands is their ability to provide extra warmth and insulation during colder weather. The thick, textured fabric created by the cable stitches helps to trap heat and keep your head and ears cozy. Additionally, the interwoven cables add an attractive and stylish element to the headband, making it a fashionable accessory.
Cable knit headbands are versatile and can be customized in various ways. They can be made with different types of yarn, ranging from lightweight and breathable fibers for spring and summer wear, to chunky and cozy yarns for winter. The width of the headband can also be adjusted to suit individual preferences, with wider bands offering more coverage and narrower bands creating a more delicate look.
Overall, a cable knit headband is a practical and stylish accessory that can be worn year-round. It adds warmth and texture to any outfit, making it a popular choice for both fashion and functionality.
Why choose a cable knit headband?
When it comes to keeping warm and looking stylish during the colder months, a cable knit headband is a perfect choice. This type of headband is not only functional but also adds a touch of elegance to any outfit.
One of the main reasons why people choose cable knit headbands is their ability to provide extra warmth. The unique cable knitting pattern creates a thick and cozy fabric that helps to keep your ears and forehead protected from the cold. Whether you’re going for a walk in the park or hitting the slopes, a cable knit headband will keep you comfortable and snug.
Additionally, cable knit headbands offer a timeless and classic aesthetic. The intricate cable design adds texture and visual interest to the headband, making it a fashionable accessory that can be worn with any outfit. Whether you prefer a casual or more dressed-up look, a cable knit headband will effortlessly elevate your style.
Not only are cable knit headbands practical and fashionable, but they are also versatile. They come in a variety of colors and designs, allowing you to choose one that best suits your personal style. Whether you want a neutral-toned headband that matches everything in your wardrobe, or a bold and vibrant one to make a statement, there’s a cable knit headband for everyone.
Overall, choosing a cable knit headband is a great investment for the colder months. Its warmth, style, and versatility make it a must-have accessory for any fashion-forward individual.
Materials needed for a cable knit headband
When it comes to knitting a cable knit headband, there are a few essential materials you will need to get started. Whether you are an experienced knitter or a beginner, having the right supplies is key to creating a beautiful and functional headband.
1. Yarn: One of the most important materials you will need is yarn. Choose a yarn that is suitable for knitting a headband, such as medium weight or worsted weight yarn. You can opt for a soft and cozy yarn like merino wool or a durable and easy-care acrylic blend.
2. Knitting needles: To knit the headband, you will need a pair of knitting needles. The size of the needles will depend on the yarn you are using and the desired gauge. Typically, a set of size 8 (5mm) knitting needles will work well with medium-weight yarn.
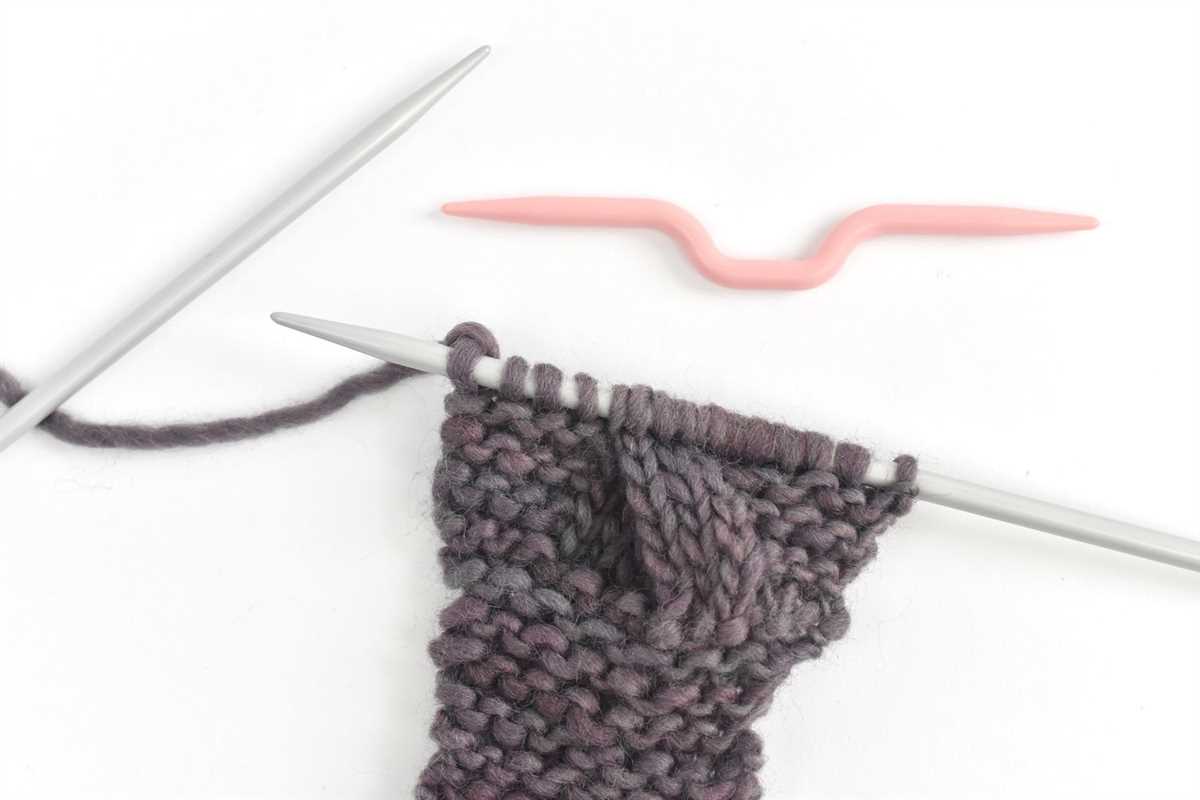
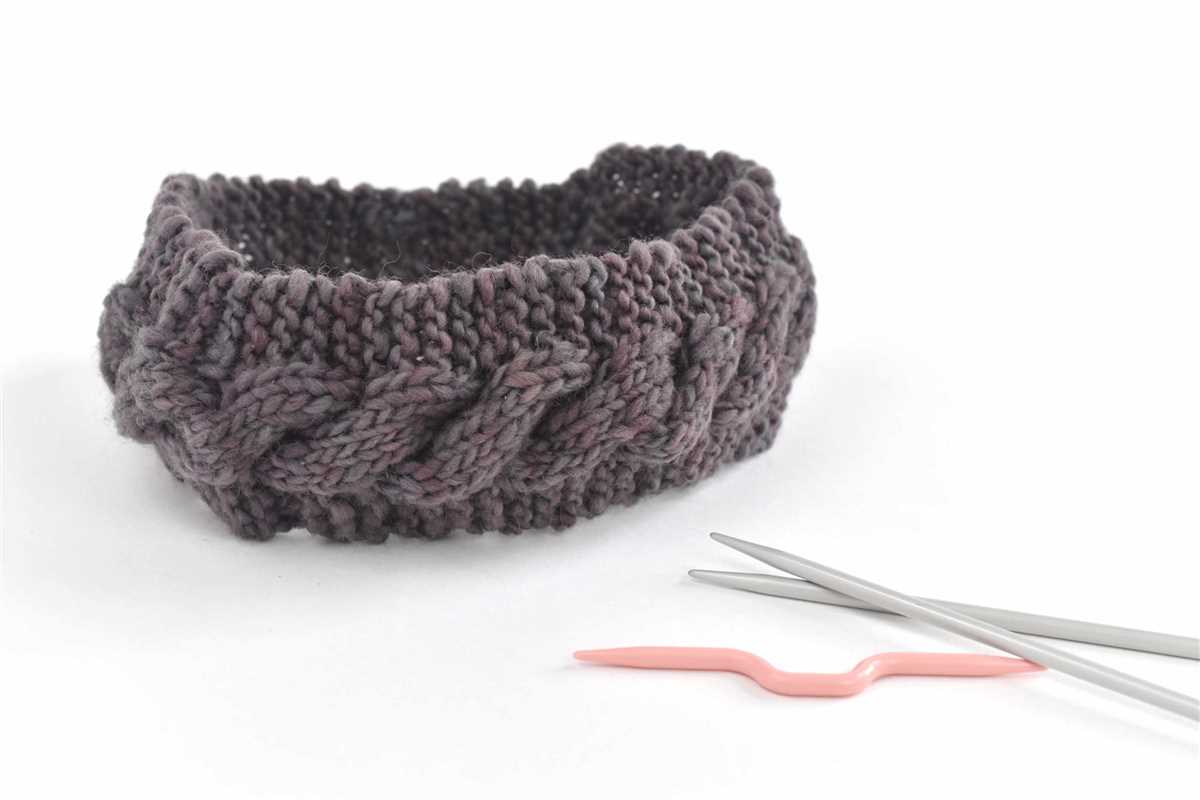
3. Cable needle: Since you will be knitting cables, a cable needle is an essential tool. It is a short, double-pointed needle used to hold stitches while you cross them over each other. A cable needle can be made of metal, plastic, or wood, depending on your preference.
4. Stitch markers: Stitch markers are useful for keeping track of where you are in your knitting pattern. You can use removable stitch markers or even scraps of contrasting yarn to mark specific points in your project.
5. Scissors and tapestry needle: You will need scissors to cut the yarn and a tapestry needle to weave in any loose ends. The tapestry needle is also useful for sewing the ends of the headband together.
6. Optional: Cable pattern and instructions: If you are new to cable knitting, it is helpful to have a cable pattern and instructions to follow. This will guide you through the process of creating the beautiful cable design on your headband.
By gathering these materials, you will be well-prepared to start knitting your cable knit headband. With a little practice and patience, you will have a stylish and cozy accessory to wear during the colder months.
Tips for choosing the right yarn
Choosing the right yarn is essential for a successful knitting project. Here are some tips to help you make the best choice:
Consider the fiber content
The first thing to consider when choosing yarn is the fiber content. Different fibers have different properties that can affect the durability, drape, and overall look of your finished project. Common fiber options for knitting headbands include wool, acrylic, and cotton. Wool is a popular choice for cold weather accessories, as it is warm and insulating. Acrylic yarn is a budget-friendly option that is also easy to care for. Cotton is a great choice for those with sensitive skin, as it is hypoallergenic and breathable.
Check the weight and gauge
Another important factor to consider is the weight or thickness of the yarn. This will determine how the finished headband will look and feel. For a chunky, cozy headband, you may want to choose a bulky or super bulky weight yarn. If you prefer a more delicate, lightweight headband, consider using a fingering or sport weight yarn. It’s also important to check the recommended gauge on your pattern and make sure your chosen yarn matches it. Using the wrong gauge can result in a finished headband that is either too small or too large.
Consider color and texture
When choosing yarn for your headband, don’t forget to consider color and texture. The color of your yarn can greatly impact the overall look of your headband, so choose a color that complements your style and wardrobe. Additionally, consider the texture of the yarn. Cables and other stitch patterns will stand out more on a yarn with more texture, while a smooth yarn will create a more polished and sleek look.
By considering the fiber content, weight and gauge, as well as color and texture, you can ensure that you choose the right yarn for your knitting project. Take your time to explore different options and find the yarn that will help you create the perfect headband.
Step-by-step instructions for knitting a cable knit headband
Knitting a cable knit headband is a fun and rewarding project that can be completed by knitters of all skill levels. Follow these step-by-step instructions to create your own stylish headband:
Materials:
- Worsted weight yarn in your desired color
- Size 8 knitting needles
- Cable needle
- Tapestry needle
Instructions:
- Start by casting on 20 stitches using the long-tail cast on method. Make sure to leave a long tail for later use.
- Row 1: *Knit 4, purl 1* repeat until the end of the row.
- Row 2: *Knit 1, purl 4* repeat until the end of the row.
- Repeat rows 1 and 2 for a total of 10 rows, creating a ribbed pattern.
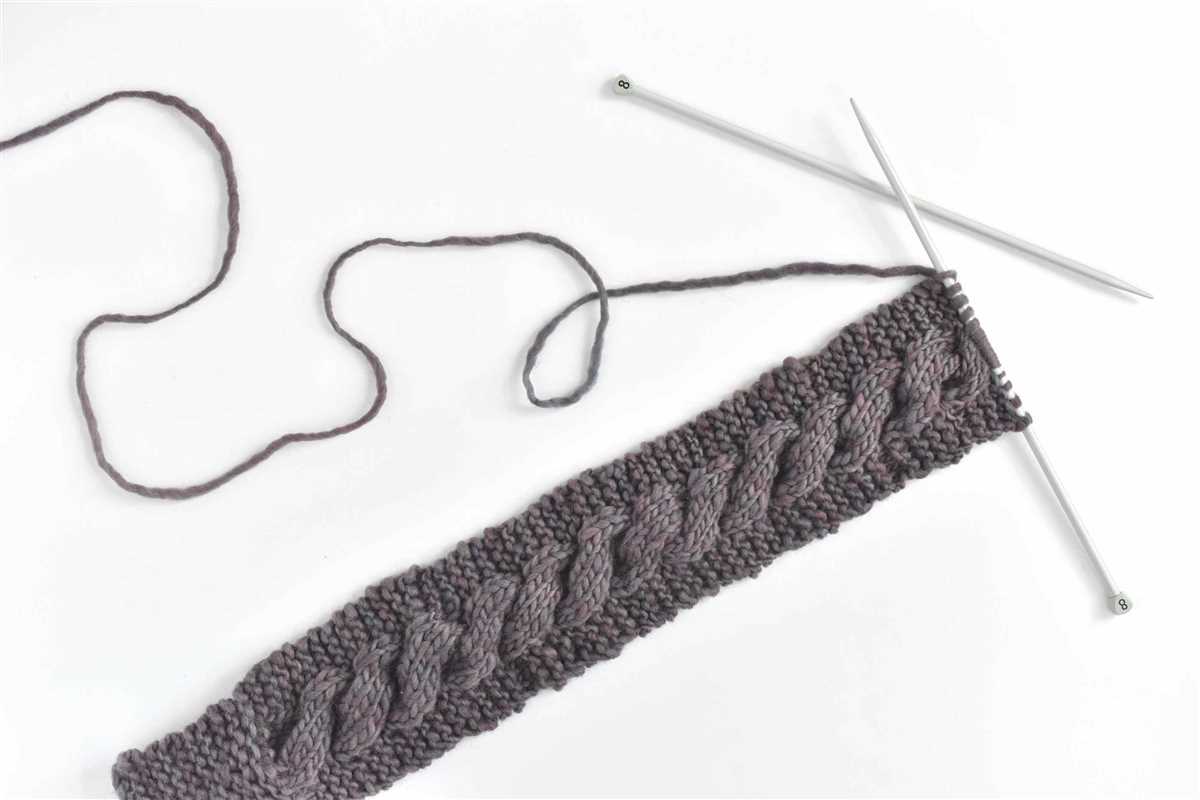
- Next, it’s time to start the cable pattern. Row 11: *Knit 4, slip 2 stitches onto the cable needle and hold in the front, knit the next 2 stitches, then knit the 2 stitches from the cable needle. Purl 1* repeat until the end of the row.
- Row 12: *Knit 1, purl 4* repeat until the end of the row.
- Repeat rows 11 and 12 for a total of 10 rows, creating a cable pattern.
- Continue repeating the ribbed pattern for 10 rows, then the cable pattern for another 10 rows until your headband reaches the desired length.
- Finish off with 10 more rows of the ribbed pattern.
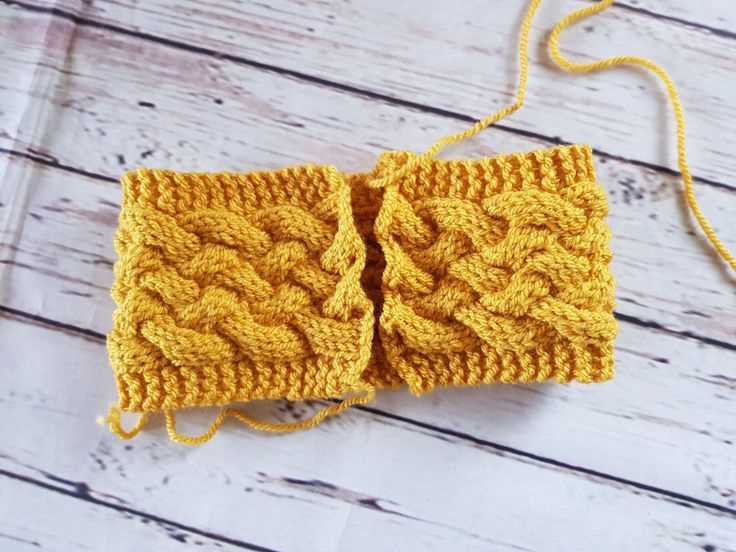
- Bind off all stitches and cut the yarn, leaving a long tail.
- Use the tapestry needle to sew together the two ends of the headband with the long tail of yarn.
And voila! You have successfully knitted a beautiful cable knit headband. Dress it up or down, and enjoy the warmth and style it adds to your cold weather outfits.
How to Read a Cable Knit Headband Pattern
Cable knit headbands are popular accessories that add a touch of style and warmth to any outfit. If you’re new to cable knitting or want to try your hand at making your own headband, it’s important to know how to read a cable knit pattern. Here are some key steps to help you understand and follow a cable knit headband pattern.
1. Understand the Abbreviations
Before you begin, familiarize yourself with the abbreviations used in the pattern. Common cable knitting abbreviations include: C4B (slip 2 stitches to the back, knit 2 stitches, then knit 2 slipped stitches), C4F (slip 2 stitches to the front, knit 2 stitches, then knit 2 slipped stitches), and C6F (slip 3 stitches to the front, knit 3 stitches, then knit 3 slipped stitches). These abbreviations represent the different cable stitches you’ll need to create the pattern.
2. Familiarize Yourself with the Chart
Most cable knit headband patterns include a chart that visually represents the pattern. Each symbol on the chart represents a different stitch or action. Pay close attention to the legend or key that explains what each symbol means. The chart will guide you through each row of the pattern, showing you where to create the cable stitches and when to knit or purl.
3. Read the Written Instructions
In addition to the chart, cable knit patterns also include written instructions. These instructions provide a step-by-step guide on how to create the cable stitches and follow the pattern. Take your time to carefully read and understand each instruction. Pay attention to any repeats or special stitches that may be mentioned. It’s a good idea to highlight or mark off each row as you complete it to keep track of your progress.
4. Check Your Gauge
Gauge is an important factor in cable knitting. It determines the size and fit of your headband. Before you begin, take the time to knit a gauge swatch using the recommended yarn and needle size. Compare your gauge to the pattern’s gauge to ensure they match. If necessary, adjust your needle size to achieve the correct gauge.
5. Start Knitting!
Once you have a good understanding of the pattern, abbreviations, chart, and instructions, it’s time to start knitting! Follow the pattern row by row, creating the cable stitches as indicated. Take your time and enjoy the process. With practice, cable knitting will become easier and you’ll be able to create beautiful headbands.
By following these steps and understanding the cable knit headband pattern, you’ll be able to confidently create your own stylish and cozy headbands to wear or gift to others. Have fun exploring different cable patterns and experimenting with different yarns and colors!
Common mistakes to avoid when knitting a cable knit headband
Knitting a cable knit headband can be a fun and rewarding project, but it’s important to be aware of common mistakes that can occur during the process. By understanding these mistakes and how to avoid them, you can ensure that your headband turns out beautifully and meets your expectations.
1. Incorrect cable crossings
One common mistake when knitting cable knit headbands is making incorrect cable crossings. It’s essential to follow the pattern instructions carefully to ensure that your cables are crossing in the right direction. Incorrect cable crossings can result in a messy and uneven appearance, so pay close attention to the symbols or explanations provided in the pattern.
2. Tension inconsistencies
Another mistake to watch out for is tension inconsistencies throughout your knitting. Cable knit patterns often require concentration and careful stitch manipulation, which can impact your overall tension. Uneven tension can lead to a headband that appears bulky and unattractive. Take your time and focus on maintaining consistent tension throughout the project.
3. Not using a cable needle
Some knitters may be tempted to skip using a cable needle and attempt to cross the stitches without one. However, this can result in dropped or twisted stitches, leading to a messy and imperfect cable pattern. Take the time to use a cable needle and transfer your stitches securely to avoid any mishaps.
4. Misreading the pattern
Misreading or misunderstanding the cable knit pattern can lead to errors and frustration. Make sure to carefully read and understand each instruction before proceeding with your knitting. If you’re unsure about any part of the pattern, seek clarification or consult with a more experienced knitter.
5. Not blocking the finished headband
After completing your cable knit headband, it’s important to block it to achieve a polished and professional finish. Blocking helps the stitches to even out and the cables to settle into their intended shape. Neglecting to block your headband can result in a less refined appearance and may cause the cables to appear distorted.
Avoiding these common mistakes can help you create a beautiful cable knit headband that you’ll be proud to wear or give as a gift. Remember to be patient, take your time, and double-check your work as you go to ensure the best possible outcome.
Finishing touches for your cable knit headband
Once you have completed knitting your cable headband pattern, it’s time to add the finishing touches to make it perfect. These final steps will ensure that your headband looks polished and professional.
1. Blocking: Before you begin adding any additional elements to your headband, it’s important to block it to give it a refined look. Wet blocking is the most common method used for cable knits. Gently soak your headband in lukewarm water, squeeze out the excess water, and then stretch it to the desired dimensions. Leave it flat to dry completely.
2. Buttons and embellishments: Adding buttons or other embellishments can give your headband a unique and stylish look. You can sew buttons along the edge of the headband or choose to add a decorative brooch or flower. Get creative and experiment with different designs to make your headband stand out.
3. Lining: To make your cable knit headband even cozier, consider adding a lining. You can use a soft fabric like fleece or flannel to provide extra warmth and comfort. Cut the lining fabric to match the size of your headband and sew it into place, making sure to leave the edges smooth and stitch-free.
4. Tags and labels: If you’re making headbands to sell or give as gifts, adding a personalized tag or label can add a professional touch. You can attach a small fabric label with your name or logo to the inside of the headband or sew in a small tag with care instructions. This will give your headbands a signature look and make them extra special.
5. Packaging: Finally, consider packaging your cable knit headbands in an attractive and presentable way. You can wrap them in tissue paper and tie them with a ribbon or place them in a decorative box. This will make the recipient feel like they are receiving a special gift and add a finishing touch to your handmade creations.
Styling Ideas for Wearing a Cable Knit Headband
A cable knit headband is not only a practical accessory to keep your ears warm during the colder months, but it can also add a stylish touch to your outfit. Here are some styling ideas to help you make the most of your cable knit headband:
1. Classic and Cozy: Pair your cable knit headband with a chunky sweater, jeans, and boots for a timeless and cozy look. The intricate cable pattern adds texture and visual interest to your outfit, making it the perfect accessory for a casual day out.
2. Sporty and Active: If you’re planning on going for a jog or hitting the slopes, a cable knit headband can keep your hair in place and your ears warm. Pair it with your favorite activewear, such as leggings and a sweat-wicking top, to add a touch of style to your sporty look.
- 3. Headband and Ponytail:
For an effortless yet chic hairstyle, wear your cable knit headband with a ponytail. Gather your hair into a low or high ponytail and secure it with an elastic band. Then, slip the headband over your head, positioning it above the ponytail for a fashionable twist.
- 4. Bohemian Vibe:
Add a bohemian touch to your outfit by pairing your cable knit headband with flowing maxi dresses, layered jewelry, and ankle boots. The cozy yet stylish headband will help create a laid-back and free-spirited look that is perfect for festivals or outdoor gatherings.
Remember, a cable knit headband is a versatile accessory that can be dressed up or down depending on the occasion. Don’t be afraid to experiment with different hairstyles and outfits to find your favorite way of wearing it.
Other knitting patterns to try
Looking for more knitting patterns to try? Here are a few other patterns that you might enjoy:
1. Lace shawl pattern
For a delicate and elegant accessory, try knitting a lace shawl. Lace patterns often feature intricate and delicate designs that add a touch of sophistication to any outfit. Whether you choose a simple lace pattern or a more intricate design, knitting a lace shawl is a great way to challenge your knitting skills and create a beautiful accessory.
2. Ribbed scarf pattern

A ribbed scarf is a classic knitting project that never goes out of style. The rib stitch creates a textured and stretchy fabric, making it perfect for scarves. Whether you choose a simple 1×1 rib or a more complex pattern, knitting a ribbed scarf is a great way to practice your knitting techniques and create a versatile accessory.
3. Colorwork hat pattern
If you’re looking to dive into colorwork, knitting a hat is a great place to start. Colorwork involves knitting with multiple colors to create patterns and designs. Knitting a colorwork hat allows you to experiment with different color combinations and create a unique and eye-catching accessory.
4. Fingerless gloves pattern
Fingerless gloves are a practical and stylish accessory, perfect for keeping your hands warm while still allowing you to use your fingers. Knitting fingerless gloves is a great way to practice knitting in the round and create a useful and fashionable accessory.
No matter which knitting pattern you choose, knitting is a relaxing and rewarding hobby that allows you to create beautiful and personalized accessories. So grab your knitting needles and yarn, and start exploring all the wonderful patterns that the knitting world has to offer!