
If you’re in need of a cozy and stylish hat for the winter season, look no further than this knit hat with sock yarn pattern. Made with soft and warm sock yarn, this hat is perfect for keeping your head warm on those chilly days. Whether you’re a beginner or an experienced knitter, this pattern is sure to be a hit.
One of the great things about this pattern is that it can be done with any kind of sock yarn, making it easy to find the perfect color and design to match your personal style. The pattern itself is simple and straightforward, with clear instructions and a stitch count to help you keep track of your progress.
Not only is this hat practical and functional, but it also makes for a great gift. Knitting this hat for a loved one is a thoughtful and heartfelt gesture that is sure to be appreciated. With its unique design and customizable options, this hat is sure to become a staple in your winter wardrobe.
So grab your favorite pair of knitting needles and some sock yarn, and get ready to create a beautiful and cozy hat that will keep you warm all winter long. Whether you’re knitting for yourself or someone else, this pattern is sure to be a crowd pleaser. Happy knitting!
How to Knit a Hat with Sock Yarn: A Step-by-Step Guide
Knitting a hat with sock yarn is a fun and creative way to make a cozy and stylish accessory. Sock yarn, known for its durability and stretch, is the perfect choice for a hat that will keep you warm in colder weather. In this step-by-step guide, we will walk you through the process of knitting a hat with sock yarn from start to finish.
Materials Needed:
- Sock yarn (approximately 100 grams)
- Set of double-pointed knitting needles (size US 6 or size needed to obtain gauge)
- Stitch markers
- Tapestry needle
- Scissors
Step 1: Gauge and Cast On
Before you begin knitting your hat, it’s important to determine your gauge. Using your chosen sock yarn and double-pointed needles, create a swatch of stockinette stitch. Measure the number of stitches and rows in a 4×4 inch square. This will help ensure that your hat will fit properly.
Once you have determined your gauge, use the long-tail cast-on method to cast on the desired number of stitches for your hat. Make sure to join the cast-on edge in a circle, being careful not to twist the stitches. Place a stitch marker to mark the beginning of the round.
Step 2: Ribbing and Body
Start your hat by knitting a ribbing stitch pattern, such as a 1×1 or 2×2 rib, for the brim. This will give your hat some stretch and help it stay in place. Continue working the ribbing until it reaches the desired length for your brim.
Once the ribbing is complete, switch to stockinette stitch for the body of the hat. Knit every round until the hat measures approximately 2 inches from the end of the ribbing. You can also add stripes or other stitch patterns to customize your hat.
Step 3: Decrease Rounds
As the hat gets taller, it’s time to start decreasing the stitches to shape the crown. Divide the stitches evenly onto three or four double-pointed needles, depending on the number of stitches you have. Use stitch markers to mark the beginning of each round.
On the first decrease round, knit the first two stitches together, then knit the next stitches until two stitches remain. Knit these two stitches together. Continue working decrease rounds every few rows, knitting two stitches together at the beginning and end of each needle, until there are only a few stitches left.
Step 4: Finishing
Once you have only a handful of stitches remaining, cut the yarn leaving a long tail. Thread the tail through a tapestry needle and slide it through the remaining stitches, removing them from the needles. Pull tight to close the top of the hat.
Weave in any remaining yarn ends and block your hat if desired. Your knitted hat with sock yarn is now complete and ready to be worn or gifted to someone special!
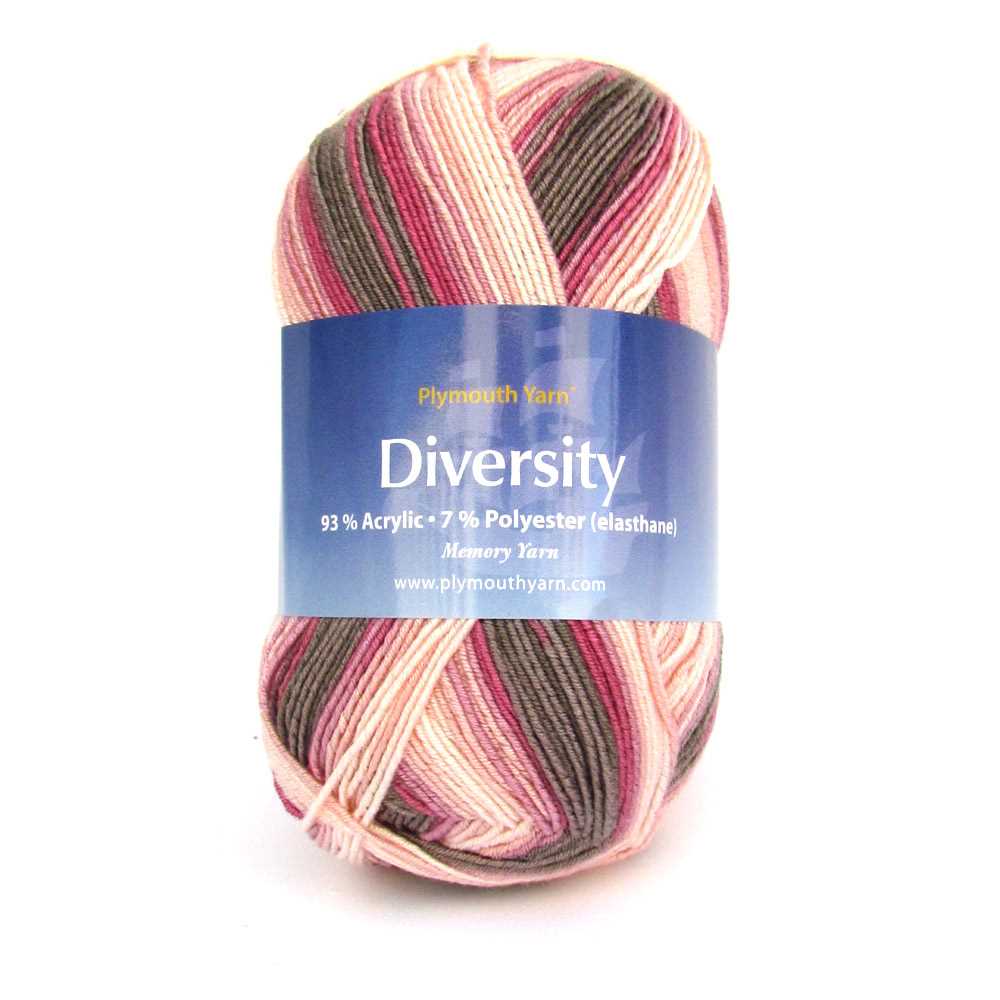
Choosing the Right Sock Yarn for Your Knit Hat
When it comes to knitting a hat with sock yarn, choosing the right yarn is essential to ensure both comfort and durability. Sock yarn is typically made from a blend of fibers, such as wool, nylon, and sometimes even a bit of elastic, to give it the stretch and resilience needed for socks. This makes it an excellent choice for hats as well, as it provides warmth and elasticity.
Consider the fiber content: When selecting sock yarn for a knit hat, consider the fiber content of the yarn. Wool is a popular choice, as it is warm, breathable, and has natural moisture-wicking properties. Nylon or other synthetic fibers are often added to provide strength and durability. Some sock yarns also include cashmere or silk for added softness and luxury.
Think about the color and pattern: Sock yarn comes in a wide range of colors and patterns, giving you plenty of options to choose from for your knit hat. Whether you prefer bold and bright colors or subtle and neutral tones, there is a sock yarn out there to suit your style. Consider the pattern you plan to knit and how it will look with the yarn you choose.
Check the yardage: Sock yarn typically comes in smaller skeins compared to other types of yarn, so it’s important to check the yardage before starting your project. Make sure you have enough yarn to complete your hat, as running out midway can be frustrating. If you’re unsure, it’s always a good idea to buy an extra skein just in case.
Don’t forget about gauge: Before starting your hat, make sure to check the recommended gauge for the yarn. Sock yarn is often finer and thinner than other types of yarn, so you may need to adjust your needle size to achieve the correct gauge. This will ensure that your hat turns out the right size and fit.
Consider washability: Finally, consider the washability of the sock yarn. If you’re knitting a hat that will be worn frequently, it’s important to choose a yarn that can withstand regular washing. Look for machine-washable yarns or those that can be easily hand washed without losing their shape or color.
In conclusion, when choosing sock yarn for your knit hat, consider the fiber content, color and pattern, yardage, gauge, and washability. By taking these factors into account, you can ensure that your hat not only looks great but also stands up to regular wear and provides warmth and comfort.
Understanding the Gauge and Needle Size

Gauge refers to the number of stitches and rows in a given measurement of fabric. It is an important factor to consider when knitting a hat with sock yarn, as it determines the overall size and fit of the finished product. The gauge is typically measured in terms of stitches per inch (spi) and rows per inch (rpi).
When working with sock yarn, it is important to check the gauge specified in the pattern and adjust your needle size accordingly. This is because sock yarn is typically thinner than other types of yarn, and using the wrong needle size can result in a hat that is too small or too large.
To determine the gauge, you can create a swatch by casting on the specified number of stitches and knitting a sample section in the stitch pattern specified in the pattern. Once you have completed your swatch, you can measure the number of stitches and rows in a given measurement and compare it to the gauge specified in the pattern. If your gauge does not match, you can try changing your needle size to achieve the correct gauge.
Needle size also plays a significant role in achieving the correct gauge. Different needle sizes can produce different stitch sizes and tensions, which can affect the overall size and drape of the fabric. When knitting with sock yarn, it is important to use the needle size recommended in the pattern to ensure the best results.
Needle sizes are typically indicated using a numbering system, with smaller numbers denoting smaller needle sizes. However, it is important to note that needle size can also be influenced by factors such as yarn weight, personal knitting tension, and desired fabric density.
In conclusion, understanding the gauge and needle size is crucial when knitting a hat with sock yarn. By paying attention to these factors and making any necessary adjustments, you can ensure that your finished hat has the correct size, fit, and overall appearance.
Casting On and Creating the Ribbing
When starting to knit a hat with sock yarn, it is important to begin with casting on. This is the process of creating the foundation stitches for your project. To cast on, you can use the long-tail cast on method or any other preferred method. Make sure to leave a long enough tail to work with later on.
After casting on, the next step is to create the ribbing for the hat. Ribbing is a common stitch pattern that adds elasticity to knitted fabric. It is often used for cuffs, hems, and bands. To create the ribbing, you will alternate knit stitches and purl stitches in a specific pattern.
To start the ribbing, knit the first stitch. This is done by inserting the right-hand needle into the first stitch on the left-hand needle and wrapping the working yarn counterclockwise around the right-hand needle. Then, pull the yarn through the stitch, slipping the stitch off the left-hand needle. Repeat this process for the desired number of stitches.
Once you have knit the first stitch, it is time to create the purl stitch. To purl, you will insert the right-hand needle into the next stitch on the left-hand needle from right to left. Wrap the working yarn counterclockwise around the right-hand needle and pull the yarn through the stitch, slipping the stitch off the left-hand needle. Repeat this process for the desired number of stitches, alternating between knit and purl stitches.
Continue alternating between knit and purl stitches until you have completed the desired length of ribbing for your hat. The number of rows will depend on your pattern, but a common length is 1-2 inches. Ribbing not only adds stretch to the hat but also provides a visually pleasing texture. After completing the ribbing, you are ready to move on to the main body of the hat and continue with your pattern.
Knitting the Body of the Hat
After completing the ribbed brim of the hat, it’s time to move on to knitting the body. This part of the hat will determine its length and shape, and can be customized to fit your preferences.
To begin, continue knitting in the round with your chosen sock yarn. You can use a circular needle or double-pointed needles, depending on your preference. Make sure to keep track of your stitches and use stitch markers if needed to mark the beginning of each round.
For the body of the hat, you can choose to knit in a plain stockinette stitch for a simple and classic look. Alternatively, you can incorporate different stitch patterns or techniques to add texture and interest to the hat. Some popular options include seed stitch, cables, or lace patterns.
If you prefer a slouchy hat, you can increase the number of stitches gradually as you knit the body. This will create a looser and more relaxed fit. On the other hand, if you prefer a fitted beanie style, you can continue knitting with the same number of stitches as the ribbed brim.
Continue working on the body of the hat until it reaches your desired length. You can measure the length by trying the hat on periodically or by using a tape measure. Remember that the hat will stretch slightly when worn, so it’s better to err on the side of making it slightly shorter rather than longer.
Once you are satisfied with the length of the hat, you can proceed to the next step, which is usually shaping the crown. This can be done by decreasing the stitches gradually to create a tapered top. The specific decreases and pattern will depend on your chosen design and style.
Overall, knitting the body of the hat is where you can get creative and customize your project to your liking. Take your time to experiment with different stitch patterns and techniques, and don’t be afraid to try something new. With the right yarn and needle size, you’ll be able to create a beautiful and cozy knit hat.
Shaping the Crown
When knitting a hat with sock yarn, one of the essential steps is shaping the crown. This process determines the final shape and fit of the hat, and there are several different techniques you can use to achieve the desired look. One popular method is decreasing stitches gradually towards the top of the hat, creating a rounded crown. This can be done by knitting two stitches together at regular intervals, usually every other row or round, until you have the desired number of stitches remaining.
Another technique for shaping the crown is using short rows. Short rows involve knitting or purling a partial row and then turning the work without completing the full row. By evenly distributing the short rows around the crown, you can create shaping that is more dramatic on one side of the hat, giving it a unique and stylish look. This method is often used for creating slouchy or asymmetrical hats.
If you prefer a more geometric or structured crown, you can also incorporate stitch patterns into the shaping. For example, you could work a series of decreases within a particular stitch pattern, such as a cable or lace motif, to create interesting texture and shaping. This adds an extra level of detail to the hat and allows you to showcase your knitting skills.
No matter which method you choose, it’s essential to follow a pattern or plan your crown shaping carefully to ensure the proper fit and look of the hat. Consider the yarn you’re using, the desired style of the hat, and any additional design elements you want to incorporate. With careful attention to detail and some experimentation, you can create a beautiful knit hat with sock yarn that fits perfectly and keeps you warm and stylish all winter long.
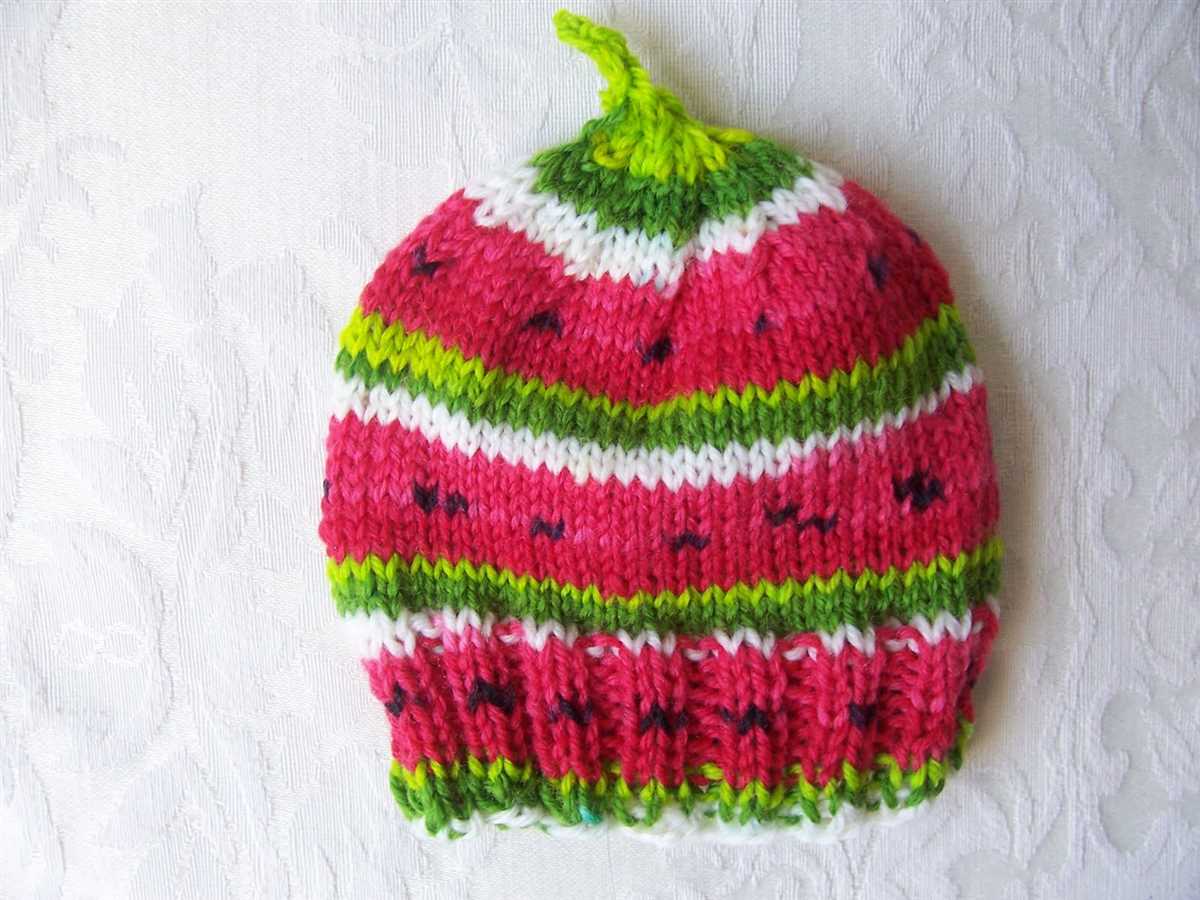
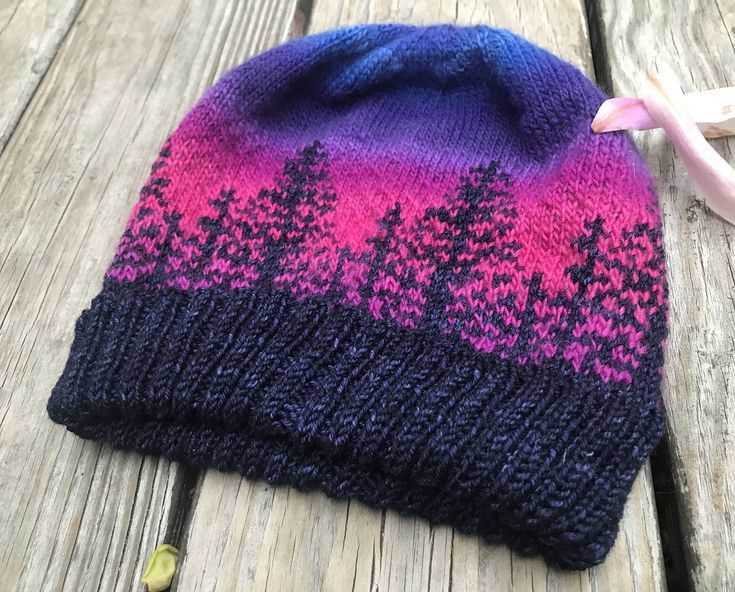
Adding Colorwork or Texture
When knitting a hat with sock yarn, you have the opportunity to add colorwork or texture to your project. Colorwork involves knitting with multiple colors to create patterns or designs on your hat. This can be done using techniques such as stranded knitting or fair isle knitting. With sock yarn, you have the advantage of working with smaller stitches, making intricate colorwork easier to achieve.
Texture can also be added to your hat using different stitch patterns. You can incorporate cables, lace, or ribbing to create a unique and visually appealing hat. By combining different textures, you can create a hat with a variety of patterns and designs.
One popular technique for adding colorwork to a hat is fair isle knitting. This involves knitting with two or more colors and carrying the unused colors along the back of the work. It creates a beautiful, intricate design that can be customized to your preferences.
If you prefer a simpler approach, you can choose to use self-striping sock yarn to create a colorful hat without the need for colorwork. The yarn itself will create stripes as you knit, resulting in a visually interesting finished product.
Regardless of the technique you choose, adding colorwork or texture to your hat knit with sock yarn can elevate your project from simple to stunning. Get creative and experiment with different stitch patterns and color combinations to make a hat that is uniquely yours.
Creating a Pom Pom or Tassel
Adding a pom pom or tassel to your knit hat can be a fun and stylish way to personalize your creation. Whether you prefer the fluffy look of a pom pom or the dangling strands of a tassel, there are several techniques you can try to create these decorative elements.
Pom Pom
To create a pom pom, you will need a pom pom maker, which is a handy tool specifically designed for this purpose. Start by wrapping yarn around the pom pom maker, making sure to cover it completely and creating several layers for a full and fluffy pom pom. Once you have wrapped enough yarn, close the pom pom maker and secure it with a knot. Carefully cut the yarn along the edges of the pom pom maker, and then fluff and shape the pom pom to your desired size and appearance. Attach the pom pom to the top of your hat by sewing it on securely.
Tassel
To create a tassel, start by wrapping yarn around a cardboard or book to create the desired length of the tassel. The more you wrap, the fuller the tassel will be. Once you have wrapped enough yarn, carefully slide it off the cardboard, but leave one end of the yarn intact. Take another piece of yarn and tie it tightly around the top of the tassel, about an inch below the end. Cut through the loops of yarn at the bottom of the tassel and trim any uneven ends. Attach the tassel to your hat by sewing it on securely, making sure to hide the knot and top of the tassel inside the hat.
- Use different colors or textures of yarn to create unique pom poms and tassels.
- Experiment with different sizes and shapes to suit your personal style.
- Consider adding multiple pom poms or tassels for a more playful and whimsical look.
- Don’t be afraid to get creative and try out different techniques to achieve the look you want.
Blocking and Finishing the Hat
Once you have finished knitting your hat with sock yarn, the next step is to block and finish it. Blocking is an important process that helps to shape and size your hat. It involves wetting the knitted fabric and then carefully stretching and shaping it to the desired size. This not only ensures that the hat fits well, but also helps to even out the stitches and give the hat a polished look.
To block your hat, start by filling a basin or sink with lukewarm water. Gently submerge the hat in the water, making sure it is fully saturated. Let it soak for about 10-15 minutes, allowing the fibers to absorb the water. Then, carefully remove the hat from the water and gently squeeze out the excess moisture. Avoid wringing or twisting the hat, as this can damage the fibers.
Next, lay a clean towel on a flat surface and place the hat on top of it. Use your hands to gently stretch and shape the hat to the desired size. Pay attention to any specific shaping or blocking instructions that may be provided in the pattern. Use pins to secure the hat in place, if needed. Allow the hat to dry completely, which may take a day or two depending on the thickness of the yarn.
Once the hat is dry, it’s time to finish it. This involves tucking in any loose ends and adding any desired embellishments, such as a pom-pom or a decorative brim. Use a yarn needle to weave in any loose ends, making sure to secure them tightly so they don’t unravel. If you are adding a pom-pom, use a strong thread to attach it securely to the top of the hat.
With the blocking and finishing complete, your hat is now ready to be worn and enjoyed! The process of blocking and finishing helps to give your hat a professional and polished look, ensuring that it looks great and fits well. Take the time to properly block and finish your hat, and you will be rewarded with a beautiful and cozy accessory that you can proudly wear or gift to someone special.
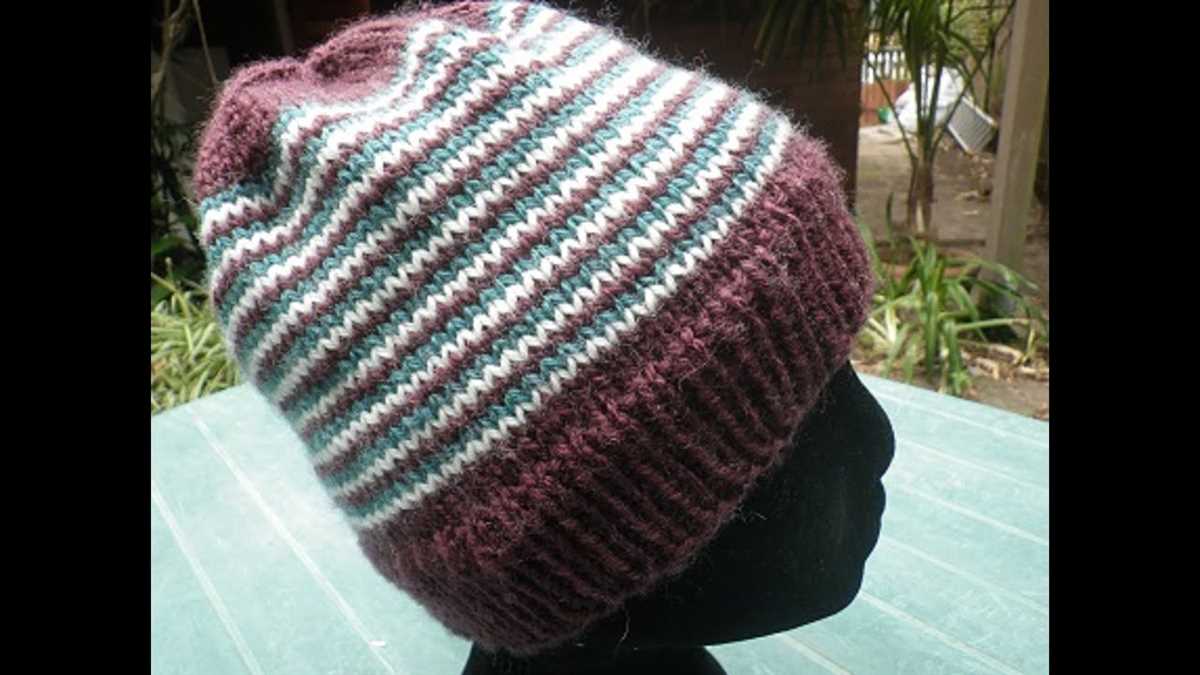
Knitting Hat Variations: Slouchy, Cuffed, or Earflap
When it comes to knitting hats, there are several variations that you can try to create different styles and looks. Whether you prefer a slouchy hat, a cuffed hat, or one with earflaps, these variations can be achieved with different knitting techniques and patterns.
A slouchy hat is a popular choice for those who want a relaxed and casual look. It usually has extra length and fabric that creates a slouchy effect when worn. To knit a slouchy hat, you can use a larger needle size and choose a pattern that incorporates ribbing or textured stitches. This will give the hat more drape and looseness, resulting in a stylish slouchy appearance.
On the other hand, a cuffed hat offers a more traditional and fitted style. It features a folded brim or cuff that adds structure to the hat and helps to keep it in place. Knitting a cuffed hat involves starting with a ribbed or stockinette stitch section for the brim, then transitioning to a different stitch pattern for the body of the hat. This creates a contrast in texture and adds visual interest to the overall design.
If you’re looking for a hat that provides extra warmth and protection, an earflap hat is a great choice. Earflaps are extensions of the hat that cover the ears, providing insulation against cold weather. You can knit earflaps separately and then attach them to the sides of the hat, or incorporate them into the hat as you knit. To add extra flair, you can also knit braids or tassels at the ends of the earflaps.
In conclusion, when it comes to knitting hats, there are various variations you can explore to create different styles. Whether you prefer a slouchy, cuffed, or earflap hat, you can customize your pattern and technique to achieve the desired look. So grab your knitting needles and start creating your own unique hat designs!
Tips and Tricks for Knitting a Hat with Sock Yarn
Knitting a hat with sock yarn can be a fun and rewarding project. Sock yarn is known for its durability and stretchiness, making it a great choice for a hat that will fit snugly and keep you warm. However, there are a few tips and tricks that can help make your knitting experience even better and ensure that your hat turns out beautifully. Here are some things to keep in mind:
1. Choose the Right Needle Size

When knitting with sock yarn, it’s important to choose the right needle size to achieve the desired gauge. Too small of a needle can result in a stiff and dense fabric, while too large of a needle can create a loose and floppy hat. Check the recommended gauge in your pattern and use a needle size that will allow you to match it.
2. Use a Stretchy Cast-On
The cast-on edge of your hat is an important factor in ensuring a comfortable fit. Since sock yarn can be less forgiving than other types of yarn, it’s best to use a stretchy cast-on method, such as the long-tail or tubular cast-on. These methods provide some elasticity to the edge, allowing the hat to stretch and fit comfortably around your head.
3. Consider a Ribbed or Garter Stitch Band

A ribbed or garter stitch band at the brim of your hat can provide additional comfort and stretchiness. These stitch patterns naturally have more give and can help accommodate different head sizes. Plus, they add a nice texture and visual interest to your hat.
4. Opt for Short Rows for a Better Fit
If you’re looking for a hat with a more tailored fit, consider using short rows to shape the crown. Short rows allow you to add extra fabric in certain areas of the hat, such as the back of the head, while keeping the rest of the hat snug. This can result in a more comfortable and flattering fit.
5. Choose a Pattern with Texture

Sock yarn often has beautiful color variations and subtle speckles that can get lost in a plain stockinette stitch. To make the most of your yarn, consider choosing a hat pattern that incorporates texture, such as cables, lace, or slipped stitches. Not only will this showcase the yarn, but it will also add visual interest to your finished hat.
6. Block Your Hat
Blocking your hat after knitting can help even out the stitches and give it a polished look. This is especially important if you’re using a stitch pattern that tends to curl or if you want to shape the hat into a specific style. Follow the blocking instructions for your yarn to ensure the best results.
With these tips and tricks in mind, you’ll be well-equipped to knit a fabulous hat with sock yarn. Whether you’re making one for yourself or as a gift, the stretchiness, durability, and versatility of sock yarn will ensure that your hat is both functional and stylish.