
Knitting is a popular craft that allows you to create beautiful and functional items with just a pair of needles and some yarn. From scarves to sweaters, there are endless possibilities for what you can create. One popular project that knitters love is making blankets. Blankets are not only cozy and warm, but they also make great gifts for loved ones.
If you are looking for a unique and eye-catching blanket pattern to knit, you should consider trying the knit flower blanket pattern. This pattern incorporates a variety of stitches and techniques to create a stunning floral design. The finished blanket is not only functional, but it also makes a beautiful statement piece for your home.
The knit flower blanket pattern is suitable for knitters of all skill levels. Whether you are a beginner or have been knitting for years, you can easily follow this pattern and create a gorgeous blanket. The pattern provides clear instructions and includes both written instructions and charts, so you can choose which method you prefer.
With this pattern, you can choose your own color scheme and create a blanket that is unique to your style and preferences. Whether you prefer bright and vibrant flowers or subtle and elegant blooms, the options are endless. The pattern also provides suggestions for yarn types and sizes, so you can select the perfect materials for your project.
Knit Flower Blanket Pattern: Add Color and Texture to Your Home

Looking for a creative way to add color and texture to your home? Why not try knitting a flower blanket? This beautiful and vibrant blanket pattern is a wonderful addition to any living space, bringing a touch of nature indoors. Whether you’re an experienced knitter or a beginner looking for a new project, this pattern is sure to inspire and delight.
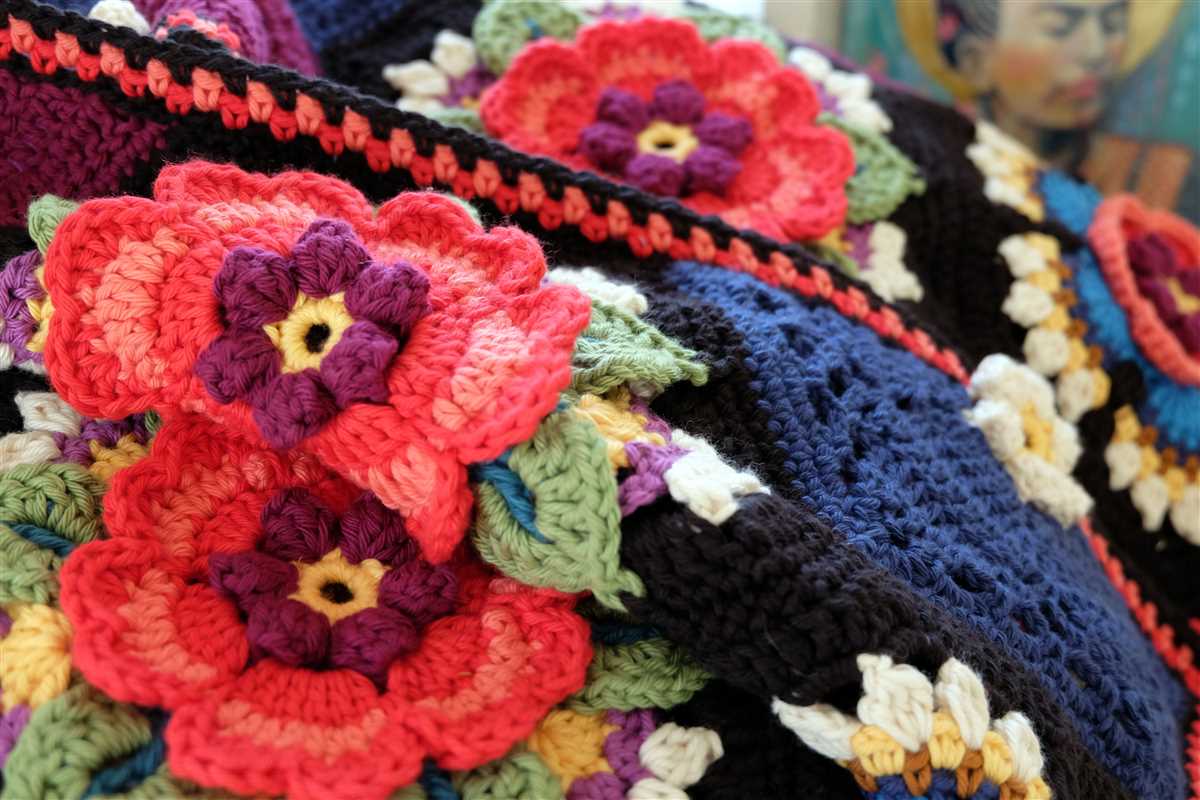
The knit flower blanket pattern features a variety of flower motifs, each with its own unique design. From dainty roses to bold sunflowers, these motifs add a pop of color and visual interest to the blanket. The pattern also incorporates different knitting techniques, such as lace and cable stitches, to create texture and depth. The combination of colorful flowers and intricate stitches makes this blanket a true work of art.
Materials
- Worsted weight yarn in various colors
- Knitting needles, size 8 (5mm)
- Yarn needle
- Scissors
Instructions
- Start by casting on the desired number of stitches for your blanket.
- Follow the pattern chart to create the flower motifs, changing colors as needed.
- Continue knitting the flower motifs in the desired arrangement until the blanket reaches your desired size.
- Finish the blanket by binding off all stitches and weaving in any loose ends.
- Block the blanket to enhance the stitch definition and give it a polished look.
Once you’ve completed your knit flower blanket, you can use it as a cozy throw on your couch, a decorative accent on your bed, or even as a wall hanging. Its vibrant colors and intricate design will instantly brighten up any room and add a touch of elegance and warmth. So grab your knitting needles and get ready to embark on a colorful and creative journey with the knit flower blanket pattern!
Choosing the Right Yarn and Needles for Your Flower Blanket
When it comes to knitting a flower blanket, choosing the right yarn and needles is essential to achieve the desired result. The yarn you select will determine the overall look and feel of your blanket, while the size of the needles will impact the finished dimensions and texture.
Yarn: For a flower blanket, it’s best to choose a soft and cozy yarn that will keep you warm and comfortable. Look for yarns specifically designed for blankets or textured projects, as they will provide the necessary structure and durability. A bulky or super bulky weight yarn will work well for this project, as it will create a thick and cozy blanket with prominent flower designs.
Needles: The size of the needles you choose will depend on your desired gauge and the thickness of the yarn. For a flower blanket, larger needles are typically used to create an open and airy texture that showcases the flower motifs. Circular needles are recommended, as they allow you to easily accommodate the large number of stitches. Make sure to check the recommended needle size for your chosen yarn and adjust accordingly.
Choosing the right yarn and needles for your flower blanket is an important step that will greatly influence the outcome of your project. By selecting a soft and cozy yarn and using appropriately sized needles, you can ensure that your flower blanket turns out beautifully and meets your expectations for both appearance and functionality.
Getting Started: Casting on and Knitting the Foundation Rows

When starting a knit flower blanket, the first step is to cast on the desired number of stitches onto your knitting needles. This will create the foundation for your blanket. You can use any cast-on method you prefer, such as the long-tail cast on or the knitted cast on. Make sure to leave a long tail at the end of your cast on to weave in later.
Once you have cast on your stitches, you are ready to begin knitting the foundation rows. The foundation rows are the base of your blanket and will determine the width and length of your finished project. You can choose to knit these rows in a basic knit stitch or any pattern you prefer. If you want a simple, textured look, you could use a garter stitch with all knit stitches on every row.
To knit the foundation rows, insert your right needle into the first stitch on your left needle, from left to right. Wrap the yarn around the right needle counterclockwise, bringing it over the top of the right needle and towards you. Use the right needle to pull the new loop of yarn through the first stitch, slipping the old stitch off the left needle. Repeat this process for each stitch until you have completed a row.
Continue knitting the foundation rows until you have reached the desired length for your blanket. Remember to keep your tension consistent throughout to create an even fabric. Once you have finished the foundation rows, you can move on to adding the flower pattern to your blanket to create a beautiful and unique design.
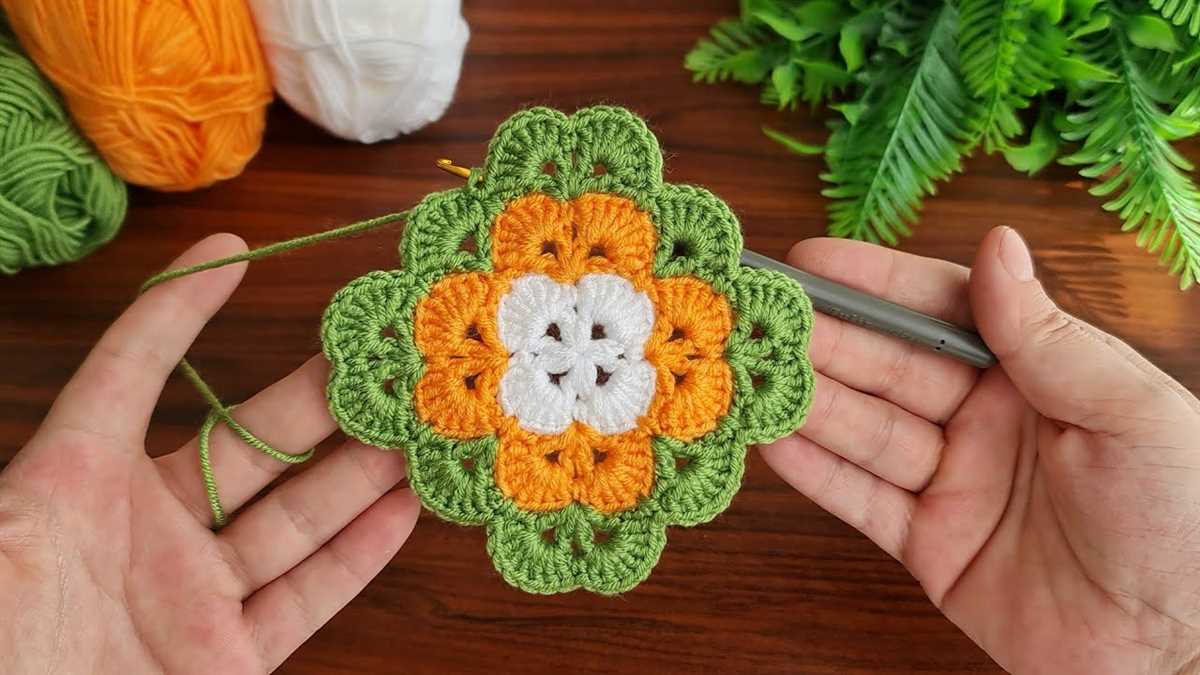
Creating the Beautiful Flower Motifs
Knitting a flower motif can be a delightful and rewarding project. These beautiful blossoms can add a touch of charm and whimsy to any knitting project, and they are relatively easy to create once you understand the basic techniques.
To start, you will need to gather the necessary materials. This may include different colors of yarn to represent the petals and center of the flower, as well as a set of knitting needles suitable for the chosen yarn weight. It’s important to choose yarn colors that complement each other and create a visually appealing contrast. Once you have all the materials, you can begin knitting your flower motifs.
Step 1: Begin by casting on the required number of stitches for your chosen flower motif pattern. This will typically involve casting on a small number of stitches in a circular arrangement to form the center of the flower.
Step 2: Once you have completed the center circle, you can start knitting the petals of the flower. This is done by increasing regularly at specific points around the circle. Follow your pattern instructions to determine how many stitches to increase and where to place the increases. The increases will gradually shape the petals of the flower.
Step 3: Continue knitting the petals of the flower until you have reached the desired size. This may involve repeating a series of knit and increase rows to create the desired number of petals. Remember to keep track of your stitch count to ensure the symmetry of the flower motif.
Step 4: Once you have completed all the petals, you can finish off the flower motif by gradually decreasing the number of stitches. This will help create a smooth, rounded edge for the flower. Follow your pattern instructions for the specific decreasing technique to use.
Step 5: After you have finished knitting the flower motif, you can weave in any loose ends and block the motif to ensure it retains its shape. Blocking involves soaking the motif in water, gently shaping it, and allowing it to dry flat. This will give the flower motif a professional and polished appearance.
By following these steps, you can create beautiful flower motifs to embellish your knitting projects. Whether you choose to use them as decorative elements on a blanket or as standalone motifs on a scarf or hat, these flowers will add a touch of elegance and creativity to your knitting.
Arranging and Joining the Flower Motifs
Once you have completed knitting all the flower motifs for your blanket, it’s time to arrange them in the desired pattern and join them together. This step is crucial in creating a cohesive and visually appealing design.
Start by laying out your flower motifs on a flat surface, such as a table or the floor, and experiment with different arrangements until you are satisfied with the overall look. You can try placing them in a symmetrical pattern, alternating different colors, or creating a gradient effect.
Joining Techniques
There are several methods you can use to join the flower motifs together. One popular technique is the whip stitch. To do this, thread a tapestry needle with the same color yarn as the yarn used for the motifs, and sew through the back loops of the stitches along the edges of two adjacent motifs, creating a seamless connection. Repeat this step until all the motifs are securely joined.
Seamless Joining
If you prefer a more seamless look, you can use the slip stitch join method. This technique involves slip stitching the edges of the motifs together to create an almost invisible join. To do this, insert your hook through the back loops of the stitches on two adjacent motifs and yarn over, then pull through both loops on the hook. Repeat this step for each stitch along the edges of the motifs until they are all joined.
Remember to weave in any loose ends and block your blanket to ensure that the flower motifs are flat and evenly aligned. By taking your time to arrange and join the flower motifs with care, you will create a beautiful and unique knit flower blanket that you can cherish for years to come.
Adding Borders to Your Flower Blanket

Once you have completed knitting your flower blanket, adding a border can be a great way to give it a finished look and add some extra flair to your design. There are many different border options you can choose from, depending on your personal style and the overall look you want to achieve.
1. Simple Ribbing Border: One classic option for a border is to add a simple ribbing pattern. This involves knitting a few rows of rib stitch, alternating knit and purl stitches, around the edges of the blanket. This creates a neat and structured border that complements the flower pattern.
2. Scalloped Edge Border: If you want to add a feminine touch to your flower blanket, a scalloped edge border can be a beautiful choice. To achieve this look, you can knit a row of small loops or shells along the edge of the blanket. This creates a delicate and decorative border that mimics the petals of the flowers in your design.
3. Eyelet Lace Border: For a more intricate and delicate border, an eyelet lace pattern can be a stunning option. This involves creating small eyelet holes and lace motifs using yarn overs and decreases. The result is a delicate and airy border that adds a touch of elegance to your flower blanket.
4. Garter Stitch Border: If you prefer a simpler border that doesn’t distract from the main flower pattern, a garter stitch border can be a great choice. This involves knitting every row, creating a textured and squishy border that adds a nice contrast to the smooth stockinette stitch of the blanket.
5. Striped Border: If you want to add some color to your flower blanket, a striped border can be a fun and playful choice. You can knit a few rows in a contrasting color or multiple colors to create a bold and vibrant border that complements your flower design.
Whichever border option you choose, make sure to measure and plan your stitches carefully to ensure a neat and even border. Take your time and enjoy the process of adding the finishing touch to your beautiful flower blanket!
Blocking and Finishing Your Knit Flower Blanket
After you have completed knitting your flower blanket, the next step is to block and finish it. Blocking is an important process that helps to shape and set your knitted fabric, ensuring that the finished project looks its best. Additionally, finishing details such as weaving in ends and adding any desired embellishments can give your blanket a polished and professional appearance.
Before blocking, it is essential to read the care instructions for the yarn you used to ensure that you don’t damage or shrink the fabric. Once you have determined the appropriate method for blocking, whether it be wet blocking or steam blocking, begin by gently soaking your blanket in cold water or misting it with water if steam blocking. Lay your blanket flat on a clean towel or blocking mat, carefully shaping it into the desired dimensions.
Blocking Tips:
- Use rustproof pins or blocking wires to hold your blanket in place while drying.
- Pay attention to the edges and corners, making sure they are smooth and even.
- Allow your blanket to dry completely before removing the pins or wires.
Once your blanket is dry and blocked, it’s time to finish any remaining details. Start by weaving in any loose ends from joining yarn or changing colors. You can use a tapestry or yarn needle to carefully tuck the ends into the stitches to secure them. If desired, you can also add decorative elements such as crochet borders or embroidered motifs to enhance the overall design.
Finishing Tips:
- Choose a complementary color for the border or embellishments to make them stand out.
- Take your time when weaving in ends to ensure they are securely hidden.
- Experiment with different embellishments to add your personal touch to the blanket.
With the blocking and finishing steps complete, your beautiful knit flower blanket is now ready to be enjoyed or gifted. The time and effort put into creating this cozy and decorative piece will surely be appreciated by anyone lucky enough to receive it.
Tips and Tricks for a Successful Knit Flower Blanket Project
Knitting a flower blanket can be a fun and rewarding project. Whether you are a beginner or an experienced knitter, here are some tips and tricks to help you succeed:
1. Choose the Right Yarn
When knitting a flower blanket, it’s important to choose the right yarn that will create a soft and cozy texture. Opt for a yarn that is not too bulky or too thin, as this can affect the overall look and feel of the blanket. Consider using a yarn that is specifically designed for blankets, as it will be durable and easy to care for.
2. Use Circular Needles
Using circular needles instead of straight ones can make knitting a flower blanket more comfortable and convenient. Circular needles allow you to knit a larger number of stitches and easily move them around, making it easier to work on a large project like a blanket. Additionally, circular needles can help distribute the weight of the blanket evenly, reducing strain on your hands and wrists.
3. Stay Organized
Keeping your knitting project organized is essential when working on a flower blanket. Use stitch markers to mark the beginning of each round, especially if you are using circular needles. This will help you keep track of your progress and avoid mistakes. Additionally, consider using a row counter or keeping track of your rows on a piece of paper to ensure that you don’t miss any increases or decreases.
4. Practice the Flower Motif
If you are using a flower motif in your blanket, it’s helpful to practice the pattern before starting the project. Knit a few practice flowers to familiarize yourself with the stitches and techniques involved. This will help you work more confidently and accurately when knitting the actual blanket.
5. Block Your Blanket
After completing your flower blanket, consider blocking it to enhance its appearance. Blocking involves gently wetting the blanket and shaping it to its desired dimensions. This process can help even out the stitches and give the blanket a polished and professional look.
Knitting a flower blanket is a beautiful and creative project. By following these tips and tricks, you can ensure that your knit flower blanket turns out just the way you envision it.
Exploring Different Color Combinations for Your Flower Blanket
When it comes to knitting a flower blanket, one of the most exciting parts is choosing the color combinations. The right combination of colors can make your blanket come alive and add a unique touch to your project. Here are some ideas to help you explore different color combinations for your flower blanket:
1. Monochromatic Palette: If you want a more subtle and elegant look, consider using different shades of the same color. For example, you could choose various shades of pink or purple to create a soft and harmonious blanket. This monochromatic palette can give your blanket a cohesive and soothing appearance.
2. Complementary Colors: If you prefer a bold and vibrant look, try using complementary colors. Complementary colors are opposite each other on the color wheel, such as blue and orange or yellow and purple. Using these colors together can create a striking contrast and give your flower blanket a lively and energetic feel.
3. Analogous Colors: If you want a more harmonious and calming look, consider using analogous colors. Analogous colors are next to each other on the color wheel, such as blue and green or yellow and orange. Using these colors together can create a soothing and cohesive effect, perfect for a cozy flower blanket.
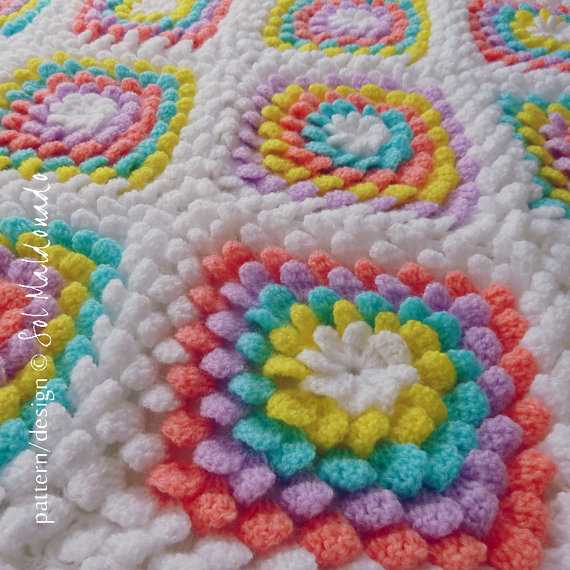
4. Pastel Palette: For a soft and delicate look, consider using pastel colors. Pastel colors are light and pale shades of primary colors, such as baby blue, mint green, or blush pink. Using pastel colors can give your flower blanket a feminine and charming appearance, perfect for a baby shower gift or a cozy addition to your home decor.
5. Rainbow Spectrum: If you want a vibrant and playful look, consider using a rainbow spectrum of colors. This means using all the colors of the rainbow, from red to violet. This colorful approach can create a cheerful and eye-catching flower blanket, perfect for brightening up any room.
Remember, the possibilities are endless when it comes to choosing color combinations for your flower blanket. Don’t be afraid to experiment and find what speaks to your personal style and vision. Have fun exploring different color combinations and create a unique flower blanket that reflects your creativity!
Inspiration: Showcasing Stunning Examples of Knit Flower Blankets
Knit flower blankets are not only cozy and functional, but they can also be incredibly beautiful and visually striking. To inspire your next knitting project, we have gathered a collection of stunning examples of knit flower blankets. These blankets showcase the creativity and skill of talented knitters and serve as a testament to the versatility of this popular knitting motif.
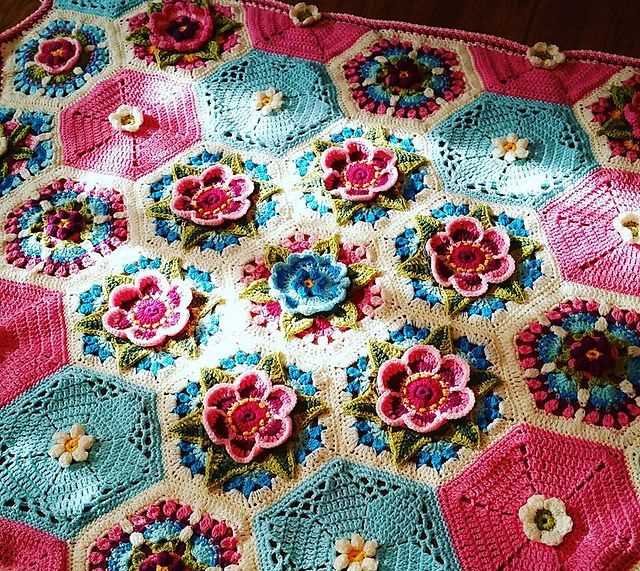
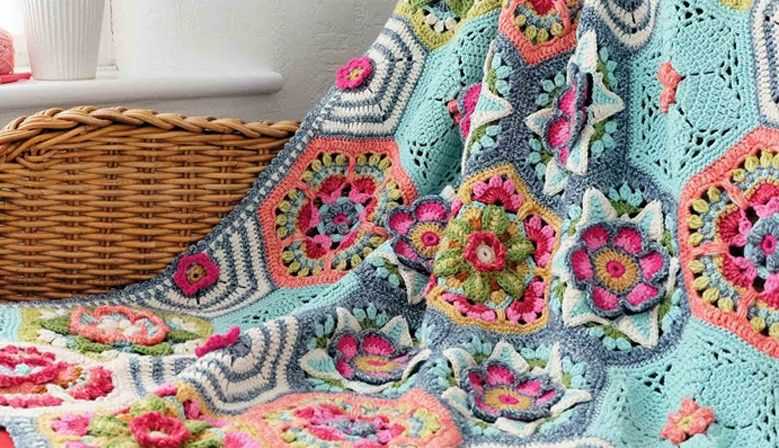
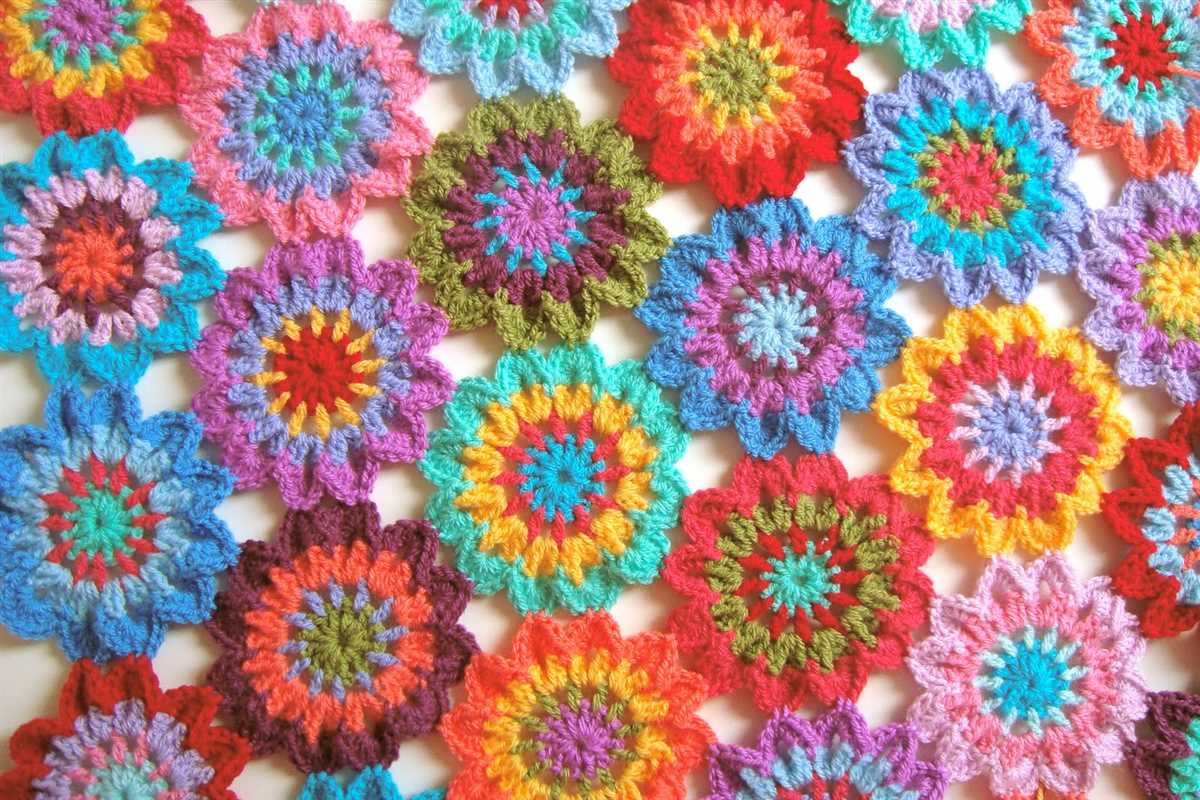
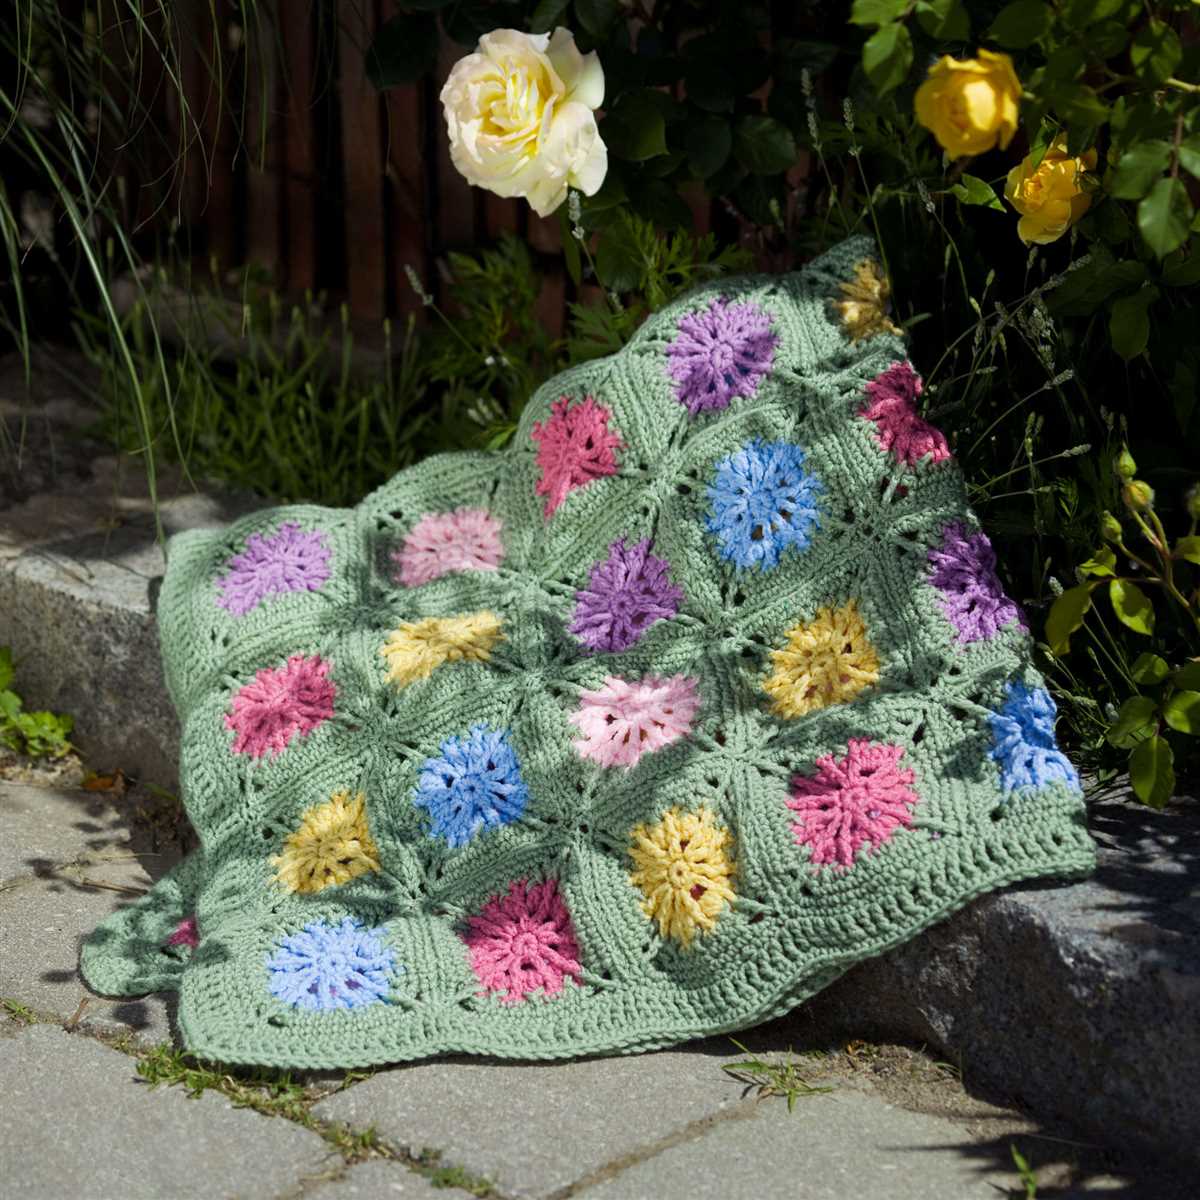
1. Hand-Stitched Garden: This knit flower blanket features a vibrant and intricate design that resembles a blooming garden. Each flower is meticulously hand-stitched, creating a truly one-of-a-kind masterpiece. The combination of colorful blossoms and delicate leaves adds depth and dimension to this stunning blanket.
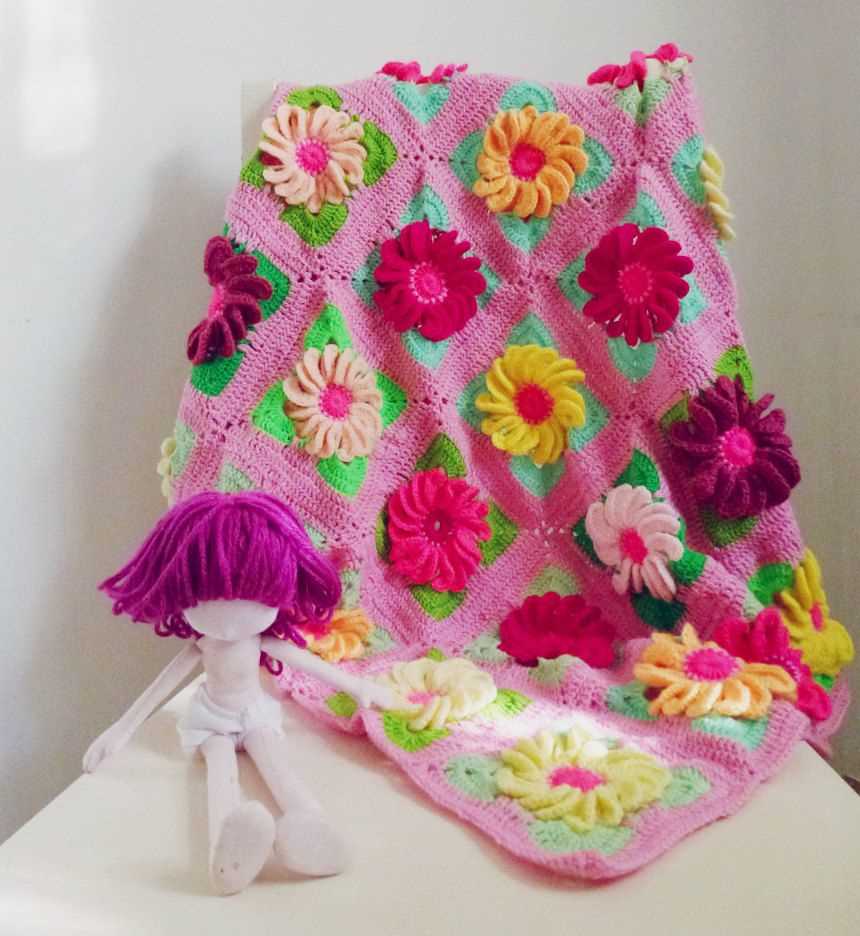
2. Pastel Petals: This knit flower blanket uses soft pastel yarns to create a dreamy and whimsical color palette. The flowers are knitted with intricate lace patterns, adding an elegant touch to the overall design. This blanket is perfect for adding a touch of romance and femininity to any room.
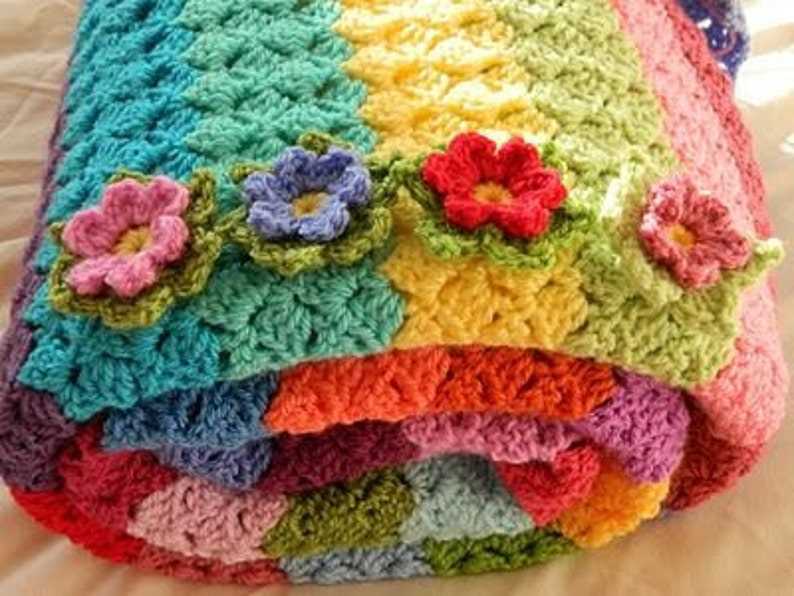
- 3. Floral Bouquet: Inspired by a bouquet of fresh flowers, this knit flower blanket showcases a variety of different blooms, including roses, daisies, and sunflowers. The combination of bold and vibrant colors creates a visually stunning blanket that is sure to brighten up any space.
- 4. Minimalist Blooms: For those who prefer a more understated look, this knit flower blanket features a minimalist design with simple yet elegant flower motifs. The monochromatic color scheme adds a modern and sophisticated touch, making it a perfect addition to any contemporary interior.
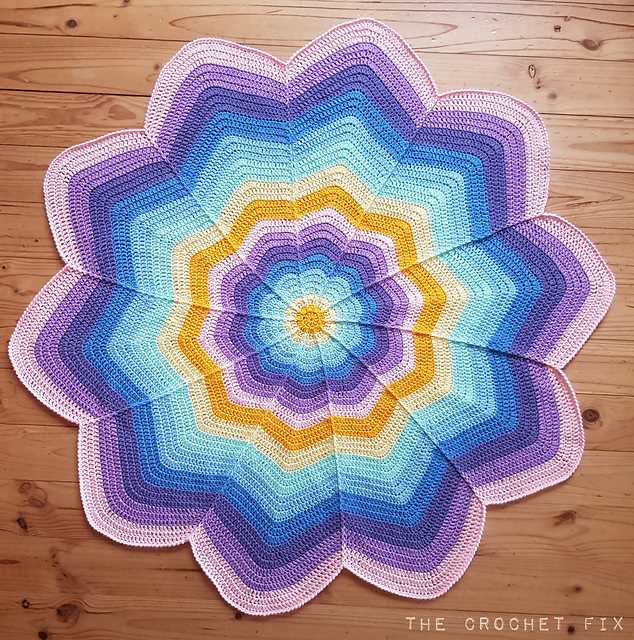
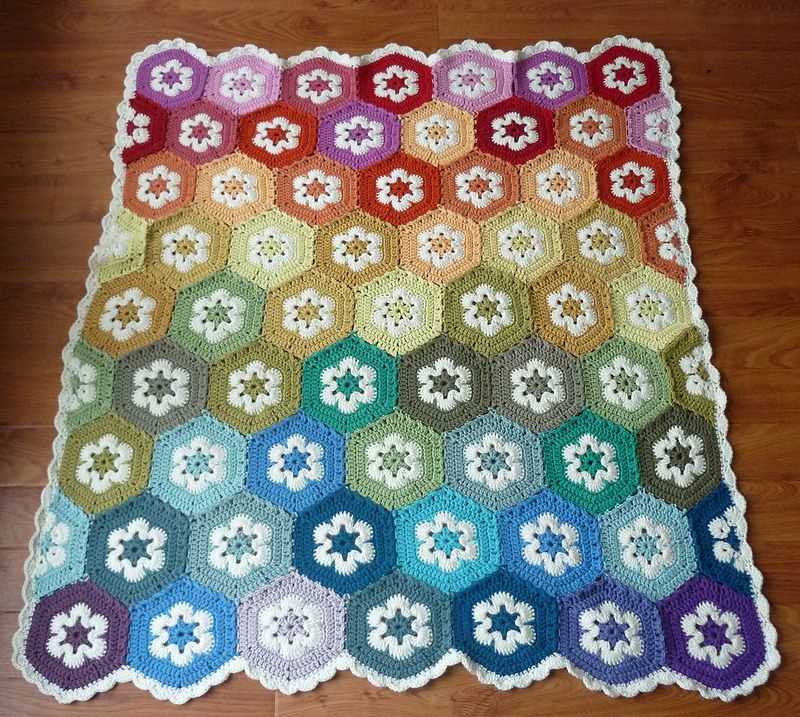
- 5. Garden of Gradients: This knit flower blanket utilizes gradient yarn to create a stunning ombre effect. The flowers are knit in different shades of the same color, creating a visually captivating design that transitions seamlessly from light to dark. This blanket is a true work of art.
Whether you prefer bold and vibrant designs or soft and delicate patterns, these examples of knit flower blankets are sure to inspire your next knitting project. With their intricate details and beautiful color schemes, these blankets are both functional and visually striking. So grab your knitting needles and create your own stunning masterpiece!