
If you’re a knitting enthusiast looking for a new and exciting project, why not try your hand at knitting a humpback whale? These majestic marine creatures have long been a source of fascination and intrigue, and now you can bring their beauty into your own home with this adorable knitting pattern.
Knitting a humpback whale may seem like a daunting task, but with the right pattern and a little bit of patience, it can be a rewarding and enjoyable project. This pattern will guide you through the process step by step, from casting on to shaping the body and adding the finishing touches.
One of the great things about this pattern is that it can be easily customized to suit your own style and preferences. You can choose different colors of yarn to create a unique and personalized whale, or you can experiment with different stitch patterns to add texture and depth to your creation. The possibilities are endless!
Humpback Whale Knitting Pattern
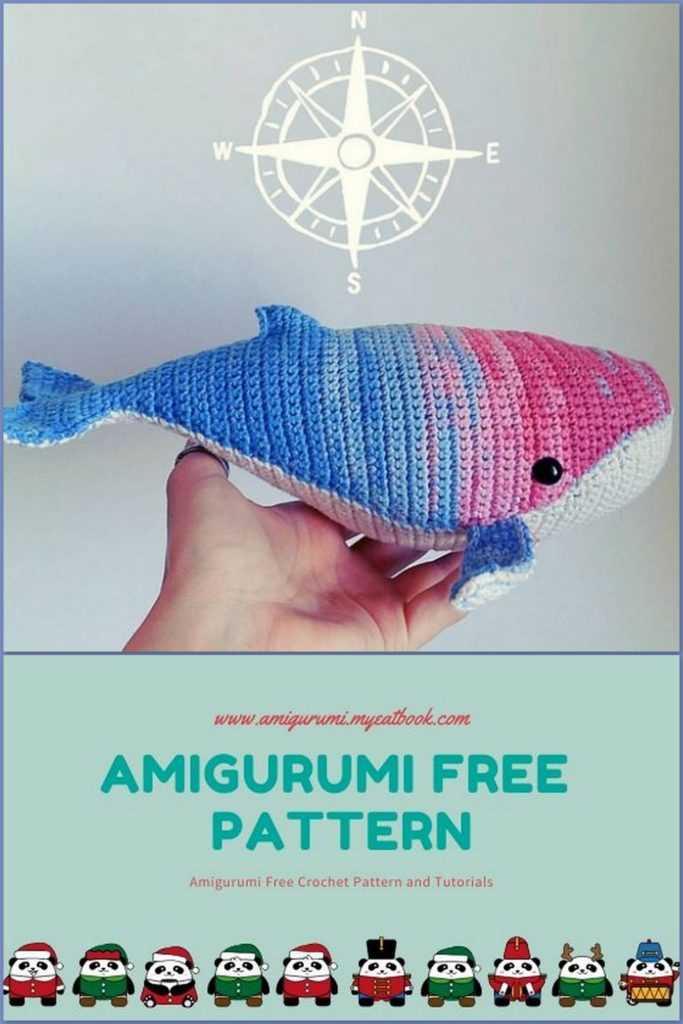
Knitting has been a popular craft for centuries, and there are countless patterns and designs to choose from. One unique pattern that has gained popularity in recent years is the humpback whale knitting pattern. This adorable pattern allows knitters to create their very own whale plushie, perfect for adding a nautical touch to any home or gifting to a marine lover.
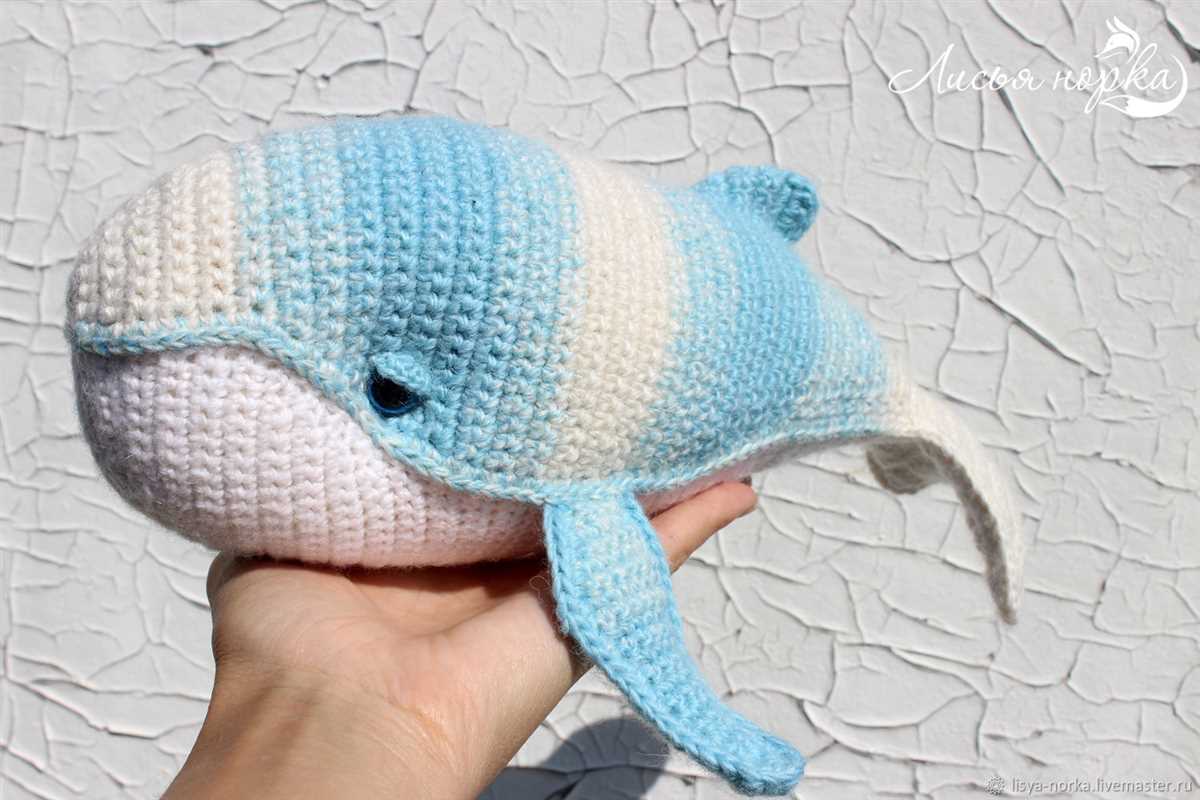
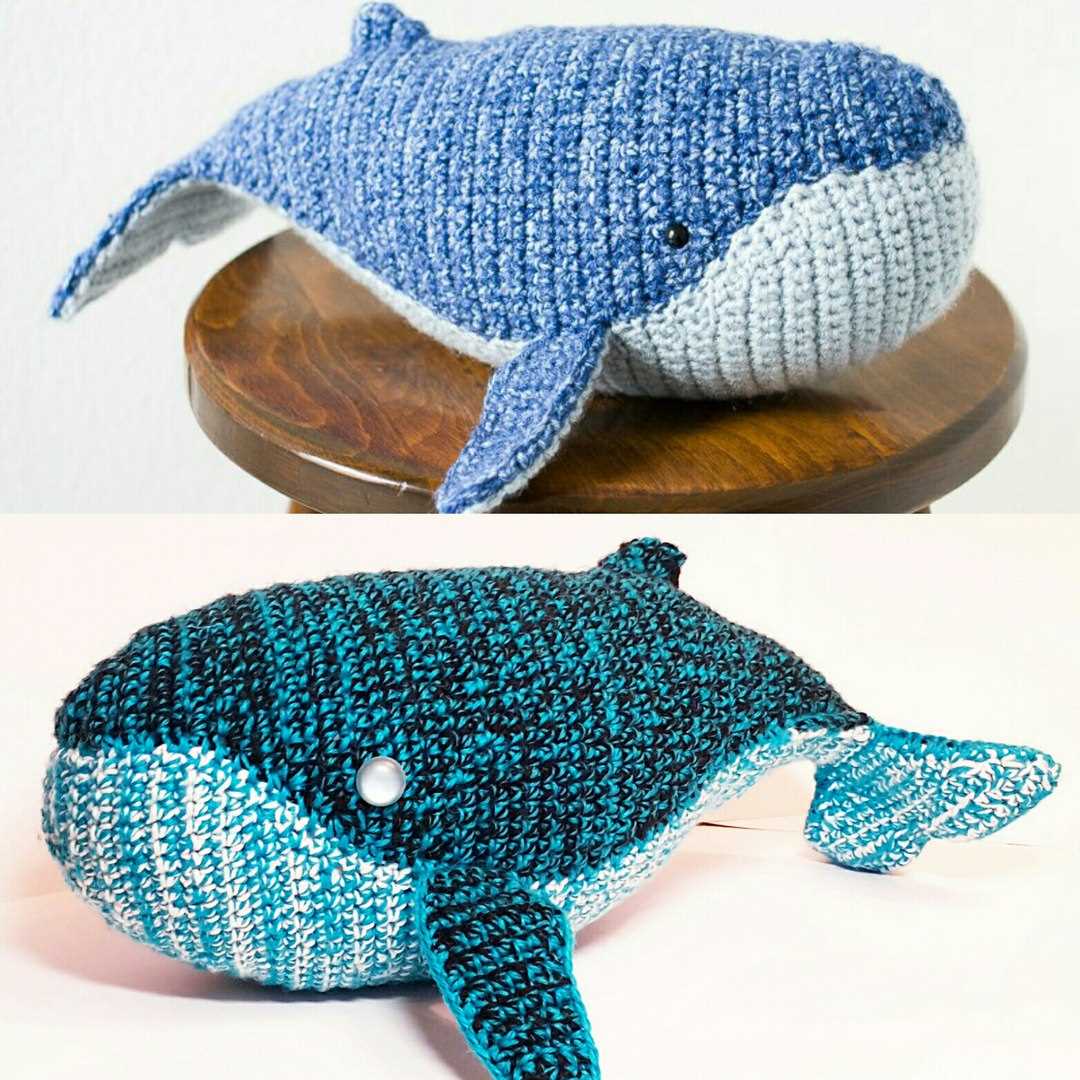
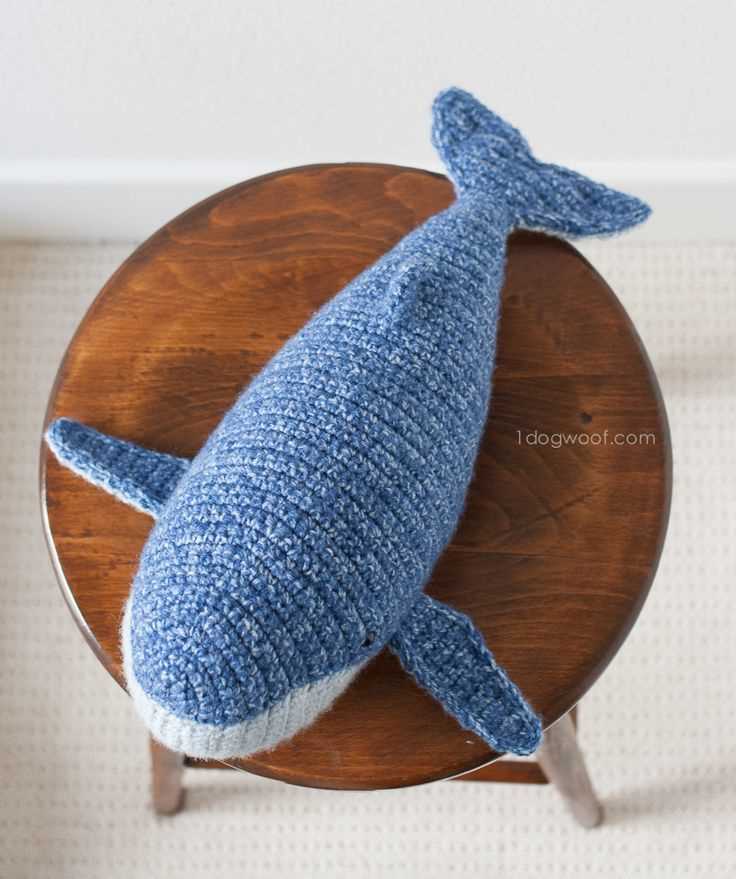
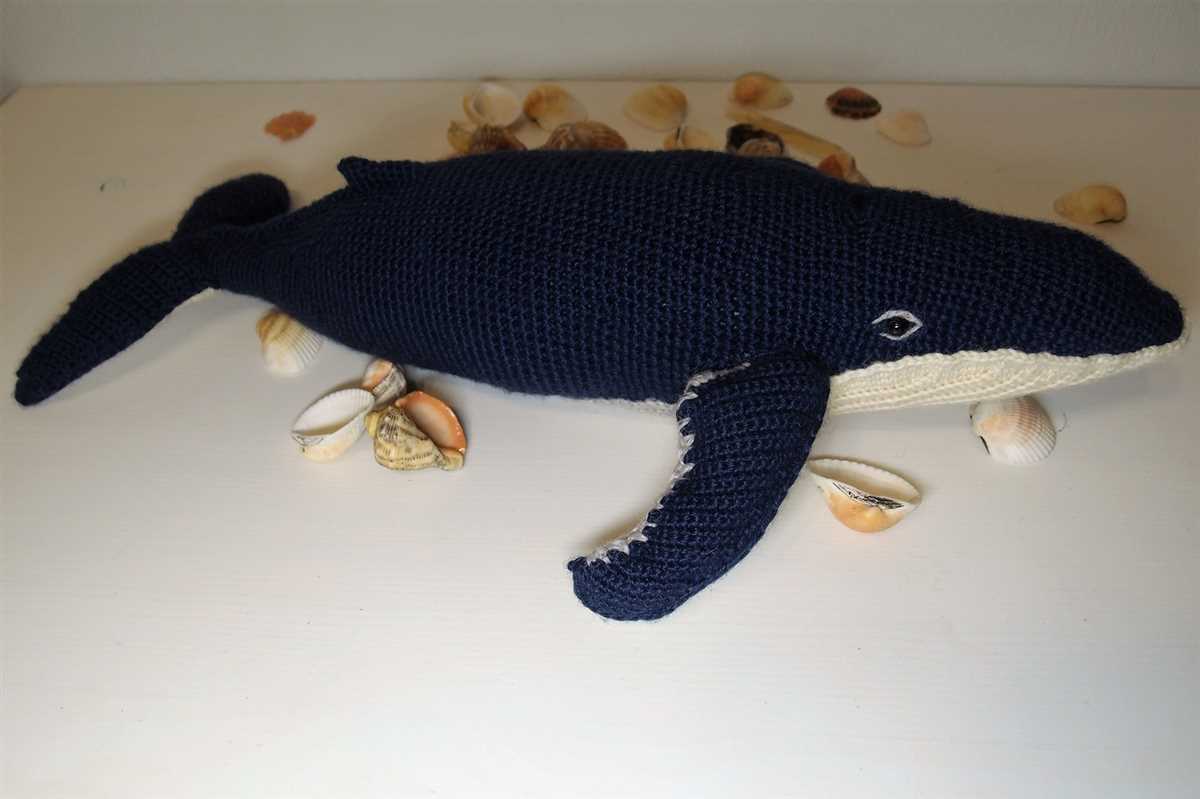
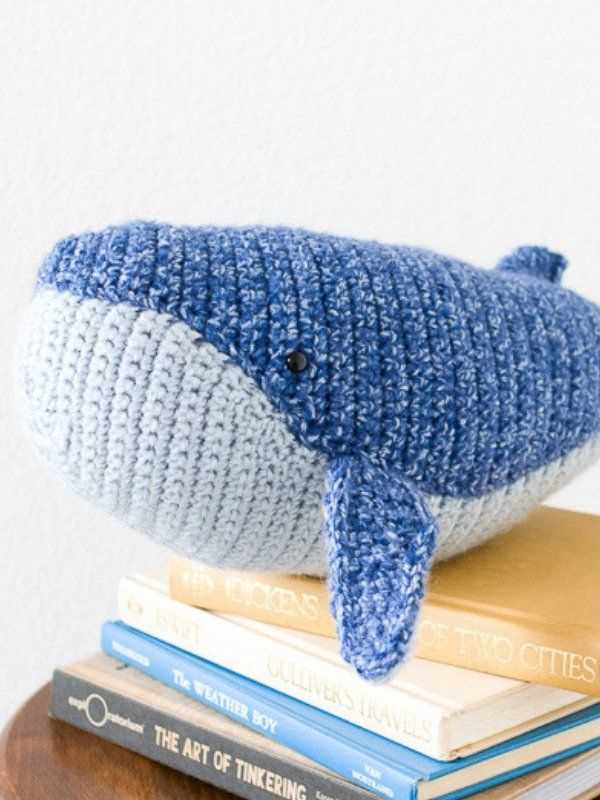
The humpback whale knitting pattern typically includes detailed instructions for creating the body, tail, fins, and even the iconic hump on the whale’s back. It may also include tips for different knitting techniques and stitches to ensure the finished product looks as realistic as possible. Some patterns even include variations for different sizes or color combinations, allowing knitters to customize their whale to their liking.
To knit a humpback whale, you will need basic knitting skills and materials such as knitting needles, yarn, and stuffing. The pattern will guide you through each step, from casting on to binding off, and may include helpful illustrations or photos to assist with the more complex parts. Knitting a humpback whale can be a fun and rewarding project, whether you’re an experienced knitter or just starting out.
Creating a Humpback Whale Knitting Pattern: Tips and Tricks
- Start by choosing a humpback whale knitting pattern that suits your skill level. If you’re a beginner, look for patterns labeled “easy” or “beginner-friendly” to ensure you can follow along easily.
- Take your time to read through the entire pattern before starting. This will give you an overview of the project and help you understand any abbreviations or techniques used in the instructions.
- Make a gauge swatch to ensure your knitting tension matches the pattern’s requirements. This will help you achieve the correct size and proportions for your humpback whale.
- Don’t be afraid to ask for help or clarification if you get stuck. Online knitting communities or forums can be a great resource for getting answers to your questions or finding extra tips and tricks.
- After finishing the knitting part, carefully sew the different pieces together using a yarn needle. Pay attention to symmetry and placement to create a lifelike humpback whale.
- Consider adding some finishing touches, such as embroidering the eyes or adding a cute little bow, to give your humpback whale even more personality.
With a humpback whale knitting pattern, you can embark on a creative journey and bring these majestic creatures to life with your knitting skills. Whether you choose to keep your whale as a cherished decoration or gift it to someone special, it’s sure to be a treasured piece that showcases the beauty of both knitting and nature.
Popular Knitting Patterns
Knitting has become an incredibly popular hobby in recent years, with more and more people taking up the craft. One of the reasons for this surge in popularity is the wide range of knitting patterns available. From cozy sweaters to adorable baby booties, there is a knitting pattern to suit everyone’s taste and skill level.
Hats: One of the most popular knitting patterns is for hats. Whether you’re looking for a basic beanie or a more intricate design, there are endless options available. Knitting a hat is a great way to practice different stitches and techniques, and you can easily customize the pattern to fit your own personal style.
Sweaters and Cardigans
One of the most rewarding knitting projects is a sweater or cardigan. These patterns can be more challenging, but the end result is a cozy and stylish garment that you can wear for years to come. From oversized chunky sweaters to delicate lace cardigans, there is a knitting pattern to suit every style and body shape.
Scarves and Shawls: Another popular knitting pattern is for scarves and shawls. These accessories are not only practical, but they can also add a touch of style to any outfit. From simple garter stitch scarves to intricate lace shawls, there are endless options for creating beautiful and unique accessories.
Amigurumi: For those who are looking for something a little different, amigurumi patterns are a fun and creative option. Amigurumi is the Japanese art of knitting or crocheting small stuffed animals or dolls. These patterns are typically worked in the round and can be customized to create adorable creatures of all shapes and sizes.
These are just a few examples of the many popular knitting patterns available. Whether you’re a beginner or an experienced knitter, there are endless options for creating beautiful and unique projects. So grab your needles and yarn, and start exploring the world of knitting patterns!
- Hats
- Sweaters and Cardigans
- Scarves and Shawls
- Amigurumi
Humpback Whale Knitting Pattern: Overview
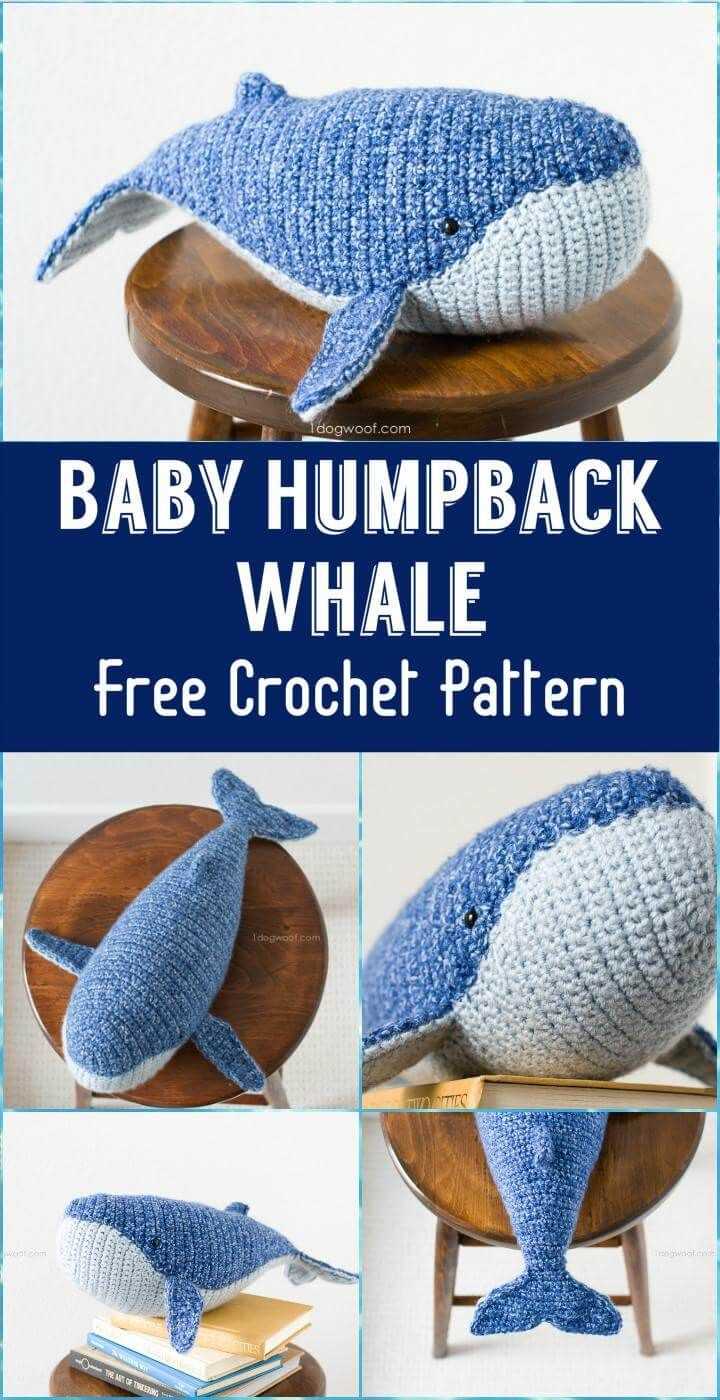
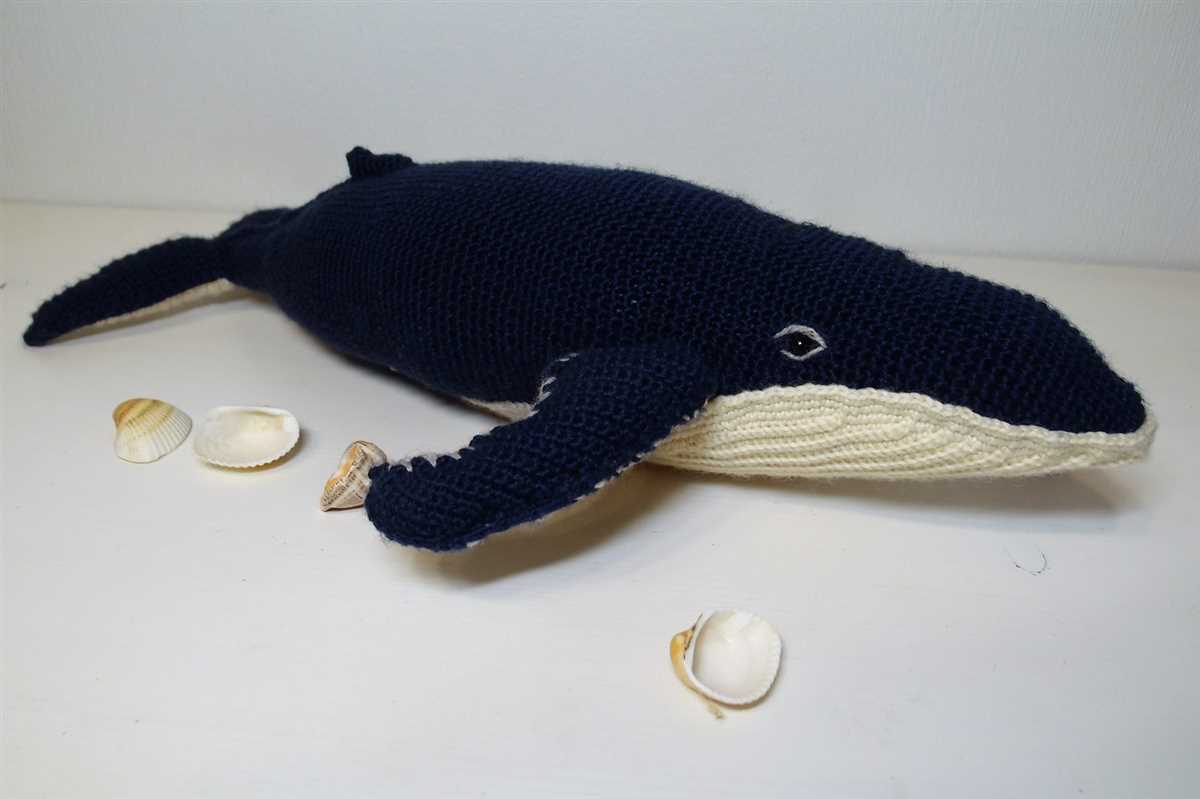
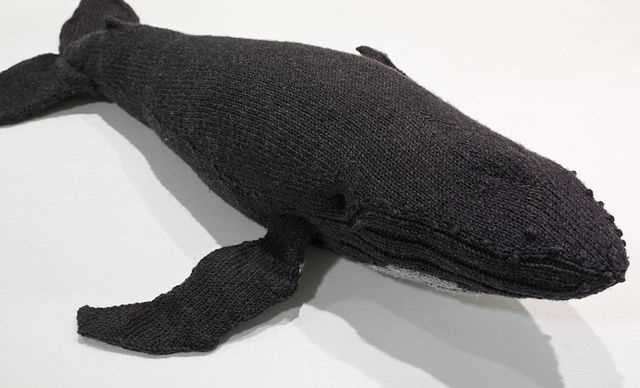
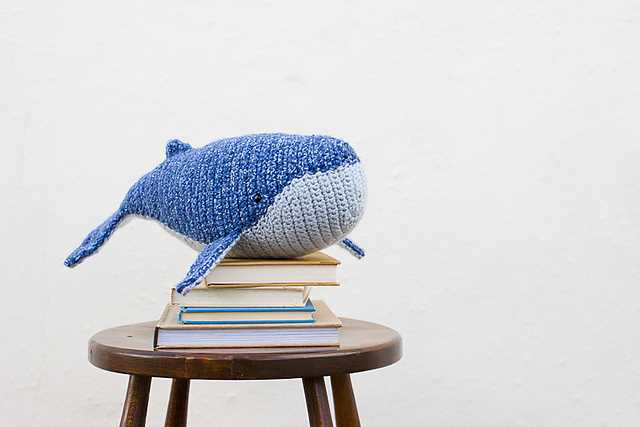
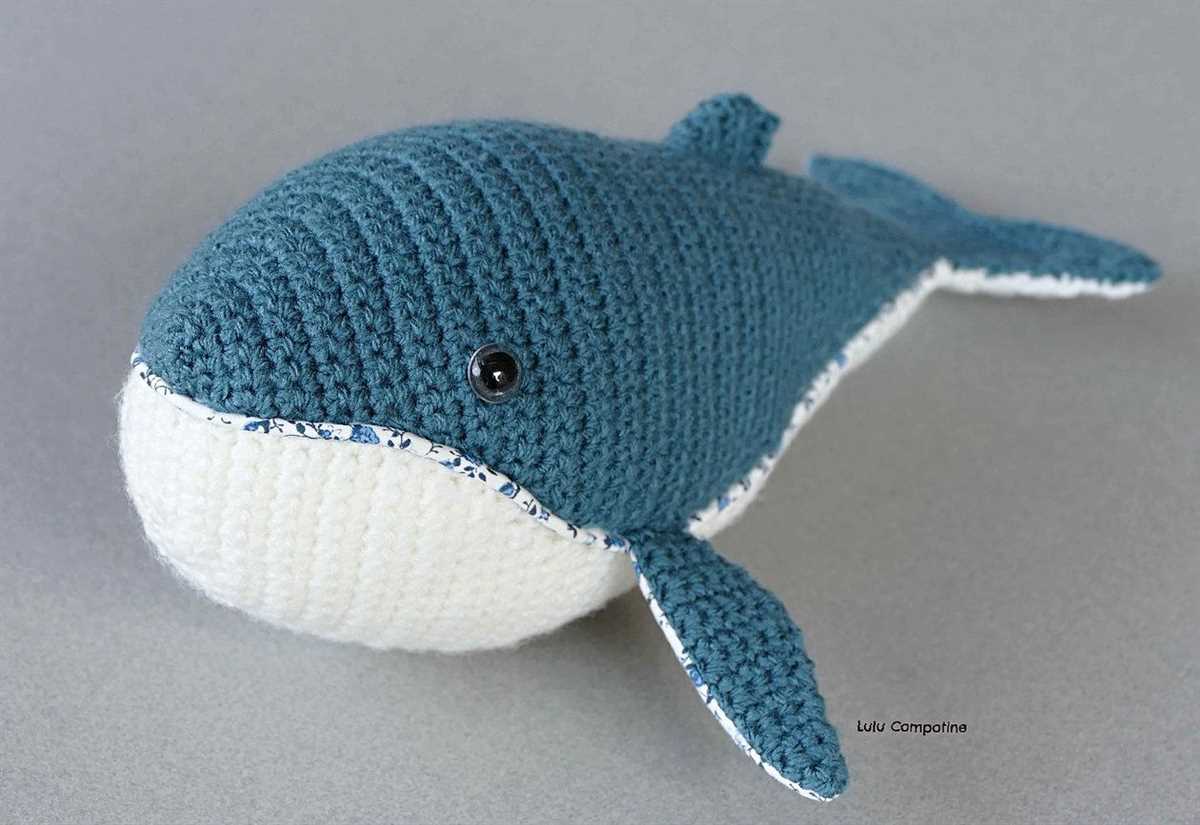
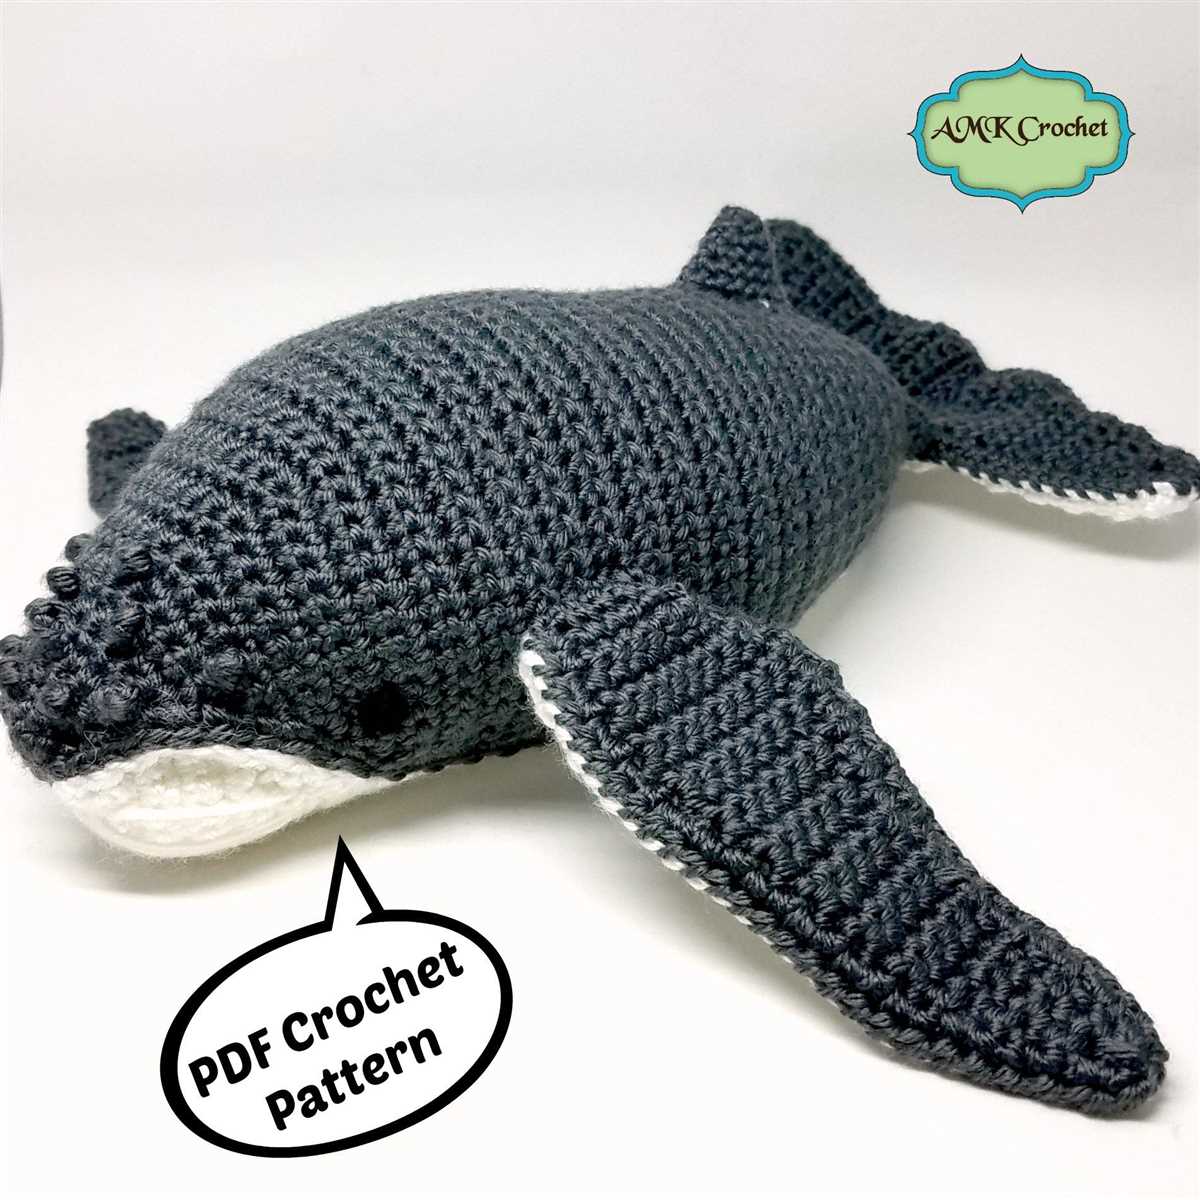
The humpback whale knitting pattern is a popular choice for knitters who want to create a unique and adorable stuffed animal. This pattern allows you to create a lifelike humpback whale toy by using different knitting techniques and stitches.
To successfully knit a humpback whale, it is important to have a clear understanding of the pattern and gather all the necessary materials. The pattern typically includes instructions for knitting the body, tail, flippers, and other details of the whale. It may also include guidance on stuffing and assembling the toy.
When knitting a humpback whale, it is essential to choose the right yarn that will provide the desired texture and appearance. A soft and plush yarn, such as acrylic or merino wool, is commonly used to achieve a cuddly and realistic effect. The yarn should also be in various shades of gray to mimic the coloration of a humpback whale.
- Difficulty Level: The humpback whale knitting pattern is usually suitable for intermediate to advanced knitters. It involves working with different stitches, shaping the body, and incorporating details like flippers and the unique dorsal fin.
- Size: The size of the finished humpback whale toy can vary depending on the yarn thickness and gauge. Most patterns provide instructions to create a toy that is approximately 12 to 18 inches in length.
- Finishing Touches: Once the knitting is complete, the humpback whale can be stuffed and assembled. Safety eyes or embroidery thread can be used to create the whale’s eyes, while embroidery stitches or fabric paint can be used to add fine details like mouth lines or barnacles.
Overall, knitting a humpback whale can be a rewarding project for those who enjoy both knitting and marine life. The finished toy makes a charming gift for children or a delightful addition to any animal lovers’ collection.
Materials Needed for Knitting
When it comes to knitting, having the right materials is essential. Whether you are a beginner or an experienced knitter, there are a few key items that you will need to complete your project.
Here is a list of the materials you will need for knitting:
- Yarn: Yarn is the most important material for knitting. Choose a yarn that is suitable for the project you are working on, considering factors such as weight, fiber content, and color.
- Knitting Needles: Knitting needles come in different sizes and materials. The size of the needles will depend on the gauge or thickness of the yarn you are using. Common materials for knitting needles include metal, bamboo, and plastic.
- Tape Measure: A tape measure is essential for measuring the length and width of your project. This will help you ensure that your knitting is the correct size and fit.
- Scissors: You will need a pair of scissors to cut your yarn at various points during your knitting project. Make sure to choose a pair of scissors that are sharp and comfortable to work with.
- Stitch Markers: Stitch markers are small rings or clips that can be placed on your knitting needles to mark specific stitches or sections of your project. They are especially useful for keeping track of increases, decreases, or pattern repeats.
- Tapestry Needle: A tapestry needle, also known as a yarn needle or darning needle, is used for weaving in loose ends and sewing pieces of your project together.
By having these essential materials on hand, you will be well-equipped to start and complete your knitting project. Remember, knitting is a creative and relaxing hobby, so enjoy the process and have fun with your project!
Step-by-Step Instructions for the Body
The body of the humpback whale is an essential part of creating a realistic and adorable knitted whale. Follow these step-by-step instructions to knit the body of the humpback whale.
Gather the Materials
Before starting, gather all the necessary materials, including knitting needles, yarn in the desired colors, a yarn needle, and fiberfill stuffing. Ensure the knitting needles and yarn are appropriate for your desired size and tension.
Cast On Stitches
To begin the body, start by casting on the required number of stitches onto your knitting needles. The number of stitches will depend on the size of the whale you want to create and the pattern you are following. Make sure to cast on evenly and keep a tight tension.
Knit the Body
Once you have cast on the stitches, begin knitting the body of the humpback whale. Use the specified stitches and techniques mentioned in the knitting pattern. Typically, knitting in the round is recommended for creating a seamless body. Follow the pattern’s instructions for any shaping or increases required to achieve the desired whale shape.
Stuff the Body
As you progress with knitting the body, periodically stuff it with fiberfill stuffing. This will give the whale a three-dimensional shape and make it more cuddly. Use the yarn needle to carefully stuff the whale, ensuring the stuffing is evenly distributed and filling out all the contours of the body.
Finish the Body
Once you have completed knitting the body and are satisfied with its shape and size, it’s time to finish off the knitting. Cut the yarn, leaving a long tail. Thread the yarn through the yarn needle and carefully weave the needle through the remaining stitches, removing them from the knitting needles as you go. Pull the yarn tight to close the opening of the body and secure it with a knot.
Now you have successfully knitted the body of your humpback whale. Proceed with knitting the other parts, such as the flippers and the tail, and then sew them onto the body according to the pattern instructions. With each step, you will be one stitch closer to a charming and lifelike knitted humpback whale.
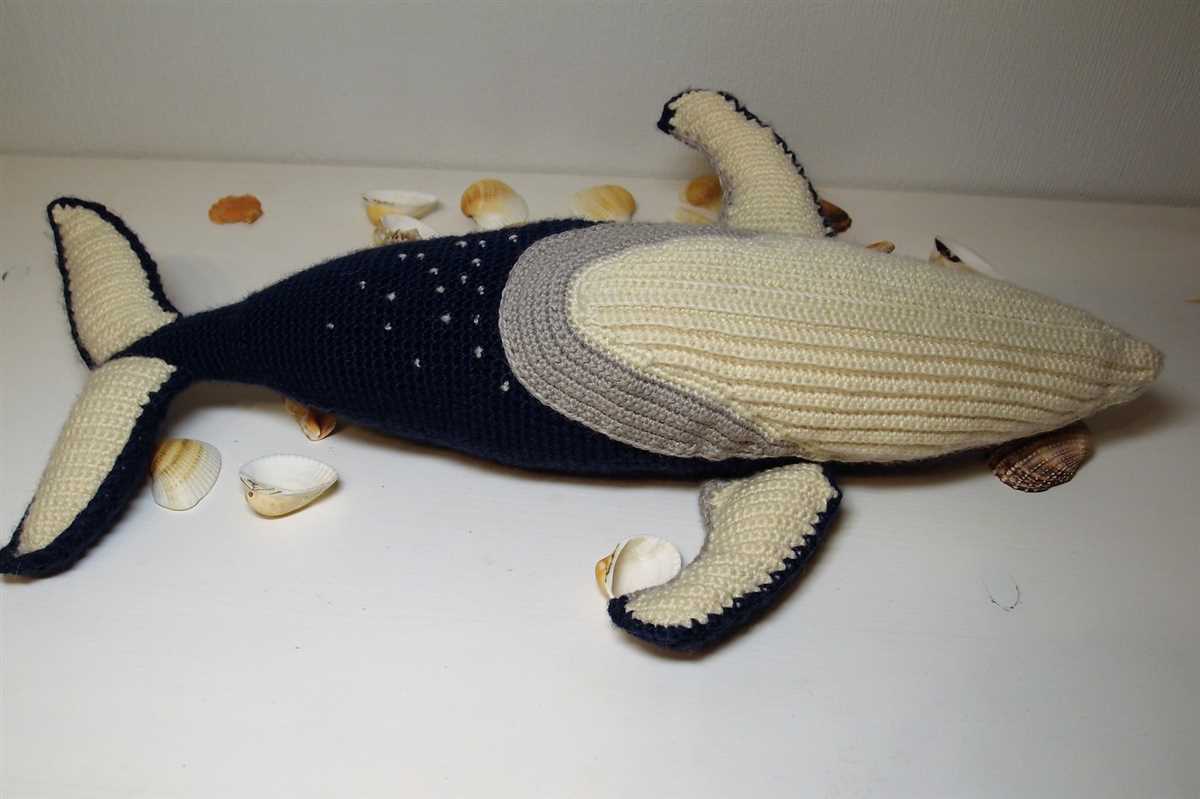
Creating the Tail and Fins
When knitting a humpback whale, one of the most important parts to include is the tail and fins. These are the distinctive features that make the whale recognizable and add to its charm. There are several techniques and patterns available to create these parts in a realistic and visually appealing way.
To start, it is important to choose the right yarn and needle size for the project. A bulky or chunky weight yarn is ideal for creating the tail and fins, as it provides enough structure and thickness to hold their shape. A pair of needles that match the yarn size should also be selected.
Tail
The tail of a humpback whale is known for its large size and wide, fan-like shape. To create this, a pattern that incorporates increases and decreases in a specific arrangement can be used. Knitting from the center outwards, the pattern will gradually shape the tail into its desired form. The use of different stitch patterns, such as ribbing or garter stitch, can add texture and detail to the tail.
Fins
The humpback whale has two types of fins: the pectoral fins and the dorsal fin. The pectoral fins are located on the sides of the whale’s body and are used for steering and maneuvering. The dorsal fin, on the other hand, is located on the whale’s back and is an iconic feature of the species. Different techniques can be used to create these fins, such as knitting them separately and attaching them to the body, or incorporating them into the body as you knit.
Overall, creating the tail and fins of a humpback whale is an important step in knitting a realistic and accurate representation of the animal. With the right yarn, needle size, and pattern, these parts can be crafted to resemble the unique features of a humpback whale and bring the knitted creation to life.
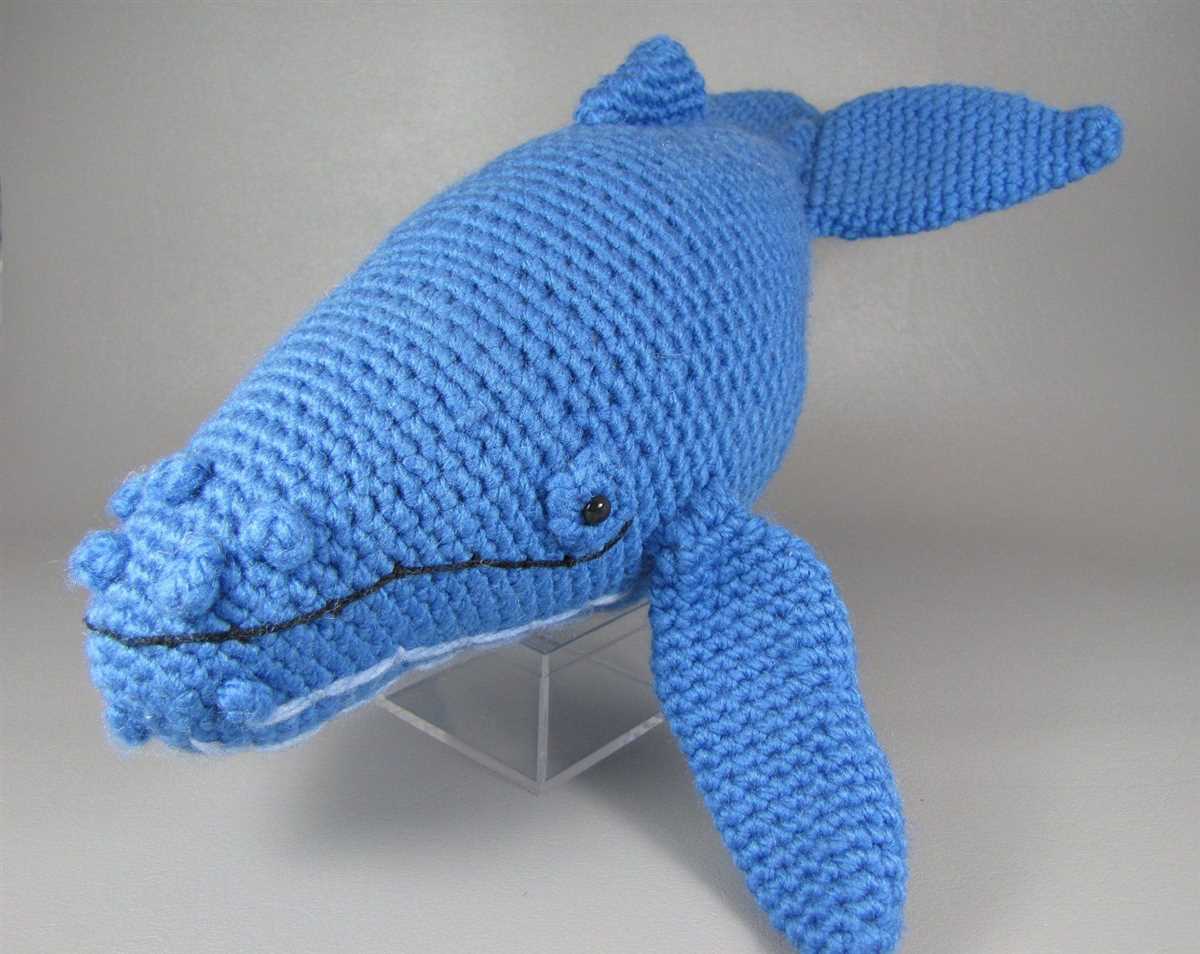
Adding the Eyes and Mouth
Once you have finished knitting the body and fins of your humpback whale, it’s time to add the eyes and mouth to give it a cute and playful expression.
To create the eyes, you can use small black buttons or beads. Sew them onto the head of the whale using black thread. Make sure to position the eyes symmetrically and at an appropriate distance from each other. This will help give your whale a realistic look.
For the mouth, you can knit a small piece in a contrasting color, such as red or pink, and sew it onto the front of the whale’s body. The mouth should be positioned slightly below the eyes and can be any shape you prefer, whether it’s a simple smile or a more detailed expression.
If you want to add more details to the eyes and mouth, you can use embroidery floss or yarn to create eyelashes, eyebrows, or other facial features. This will add an extra touch of personality to your humpback whale knitting project.
Remember to securely sew on the eyes and mouth using tight and even stitches. This will ensure that they stay in place and hold up to play and cuddles. Take your time and enjoy the process of bringing your humpback whale to life with its adorable facial features!
Finishing Touches: Embellishments
When it comes to adding the final touches to your humpback whale knitting project, there are a variety of embellishments you can consider. These little details can really bring your whale to life and make it truly unique. Here are some ideas to get you started:
Felted Eyes:
Using small pieces of felt, you can create adorable eyes for your humpback whale. Cut two circles of different sizes and attach them to the whale’s face with some fabric glue. You can make the eyes playful by adding a small black pupil using embroidery thread or simply glue on googly eyes for a fun and whimsical look.
Embroidered Details:
Add some decorative accents to your whale’s body by using embroidery thread and a needle. You can create intricate patterns such as waves or hearts on the whale’s back using a backstitch or a satin stitch. You could also use embroidery to outline the shape of the whale’s fins or to add small details like tiny barnacles or bubbles.
Sequins and Beads:
Giving your humpback whale some sparkle is another option. Sewing on sequins or beads can add a touch of elegance and shimmer to your finished project. You can arrange the sequins in a pattern, or scatter them randomly across the body of the whale. Similarly, you can use beads to add texture and dimension, either by sewing them directly onto the whale or by stringing them on thread and attaching them like tiny ornaments.
Ribbons and Bows:
Consider adding a decorative ribbon or bow to your whale’s tail or fin. This can be a simple yet charming addition that adds a pop of color and femininity to your project. Choose a ribbon that complements the color of your whale and tie it in a bow or wrap it around the tail or fin for a more sophisticated look.
- Use felted eyes for a realistic or whimsical look.
- Add embroidered details like waves or barnacles.
- Sew on sequins or beads for a touch of sparkle.
- Add a ribbon or bow for a feminine and charming accent.
Tips and Tricks
Knitting a humpback whale may seem like a challenging project, but with the right tips and tricks, you’ll be able to create your very own adorable whale. Here are some helpful techniques to keep in mind:
1. Read and Understand the Pattern
Before you start knitting, take the time to thoroughly read and understand the knitting pattern for the humpback whale. Pay close attention to the abbreviations and instructions provided. It’s also helpful to familiarize yourself with basic knitting techniques, such as knitting and purling, as these will be used in the pattern.
2. Choose the Right Yarn and Needles
When knitting a humpback whale, it’s important to select the right yarn and needles to achieve the desired texture and size. Look for a yarn that is soft, durable, and easy to work with. Choose needles that are suitable for the yarn weight and comfortable for you to hold.
3. Gauge Matters
Before starting your project, make sure to knit a gauge swatch to ensure that your tension matches the pattern. By checking your gauge, you can ensure that your whale will turn out the correct size and shape. If necessary, adjust your needle size to achieve the correct gauge.
4. Take Your Time with Increases and Decreases
The humpback whale pattern may require you to make increases and decreases to shape the body and fins. Take your time with these steps and ensure that you are following the pattern instructions correctly. It’s helpful to use stitch markers to keep track of your stitches and prevent any mistakes.
5. Assemble with Care
Once you have finished knitting all the pieces of your humpback whale, it’s time to assemble them together. Take your time and sew the pieces together neatly, ensuring that the seams are hidden as much as possible. Use a yarn needle and the same yarn used for knitting to sew the pieces together securely.
By following these tips and tricks, you’ll be able to knit a beautiful humpback whale that you can cherish or gift to someone special. Happy knitting!
Variations of the Humpback Whale Pattern
The humpback whale knitting pattern is a versatile design that can be modified and customized to create different looks. Here are some variations of the pattern that you can try:
1. Size Variation
You can adjust the size of the humpback whale by using different weights of yarn and different needle sizes. If you want a smaller whale, use thinner yarn and smaller needles. For a larger whale, use thicker yarn and larger needles.
2. Color Variation

The humpback whale pattern can be knitted in different colors to mimic the markings and variations found in real humpback whales. Experiment with using multiple shades of blue and gray to create a realistic-looking whale, or use bright and vibrant colors for a more playful design.
3. Texture Variation
You can add texture to the humpback whale by using different stitch patterns. For example, you can use a ribbing pattern to create a bumpy texture on the body, or incorporate a lace pattern for a more intricate design. Adding texture can give your whale a unique and interesting look.
4. Accessories Variation
If you want to personalize your humpback whale, you can add accessories such as a scarf, a hat, or even a mini knitted fish in its mouth. These small details can add charm and character to your finished whale.
With these variations, you can create a humpback whale that is unique to your style and preferences. Whether you prefer a realistic or a whimsical design, the humpback whale pattern can be adapted to suit your creative vision.