
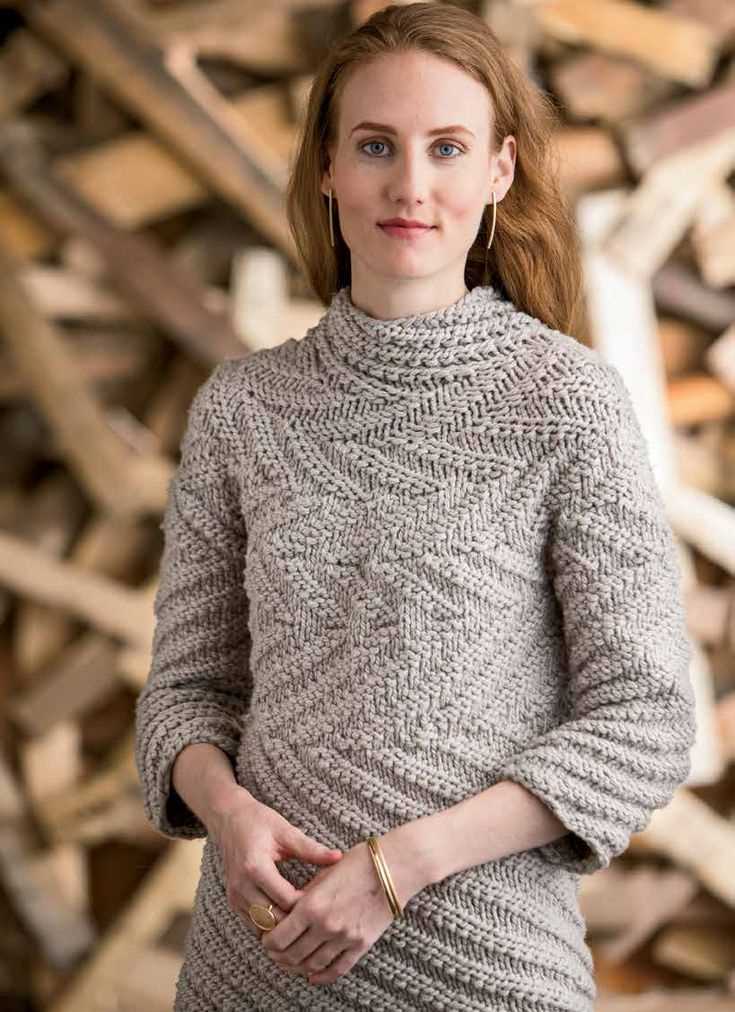
Knitting is a popular craft that allows you to create beautiful and cozy garments. One of the most rewarding knitting projects is making a sweater. Knitting a sweater can seem like a daunting task, but with the right pattern and techniques, you can create a stylish and personalized garment that you’ll love to wear.
When it comes to knitting sweater patterns, there are countless options to choose from. Whether you’re a beginner or an experienced knitter, there’s a pattern out there that will suit your skill level and style preferences. From classic pullovers to trendy cardigans, there’s something for everyone.
Before you start knitting a sweater, it’s important to select the right pattern. Consider factors such as the level of difficulty, the style and fit of the sweater, and the type of yarn you want to use. Many patterns will also provide guidance on needle size and gauge, which will affect the final measurements and fit of the sweater.
Once you’ve chosen a pattern, it’s time to gather your materials and get started. You’ll need the appropriate yarn, knitting needles, and any other supplies specified in the pattern. Take the time to familiarize yourself with the pattern instructions before you begin, as this will help ensure a smooth knitting process.
By following a carefully chosen sweater pattern and using the right techniques, you can create a one-of-a-kind garment that reflects your personal style and knitting skills. So grab your knitting needles and get ready to embark on a rewarding and creative knitting project!
How to Choose the Right Yarn for Knitting a Sweater Pattern
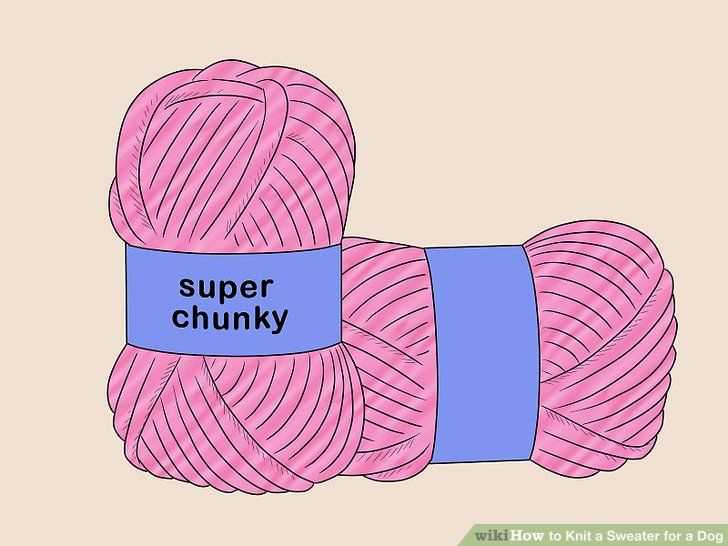
Choosing the right yarn for a sweater pattern is essential to ensure that your finished garment turns out exactly how you envisioned it. With the wide variety of yarns available on the market, it can be overwhelming to make a decision. However, by considering a few key factors, you can narrow down your options and find the perfect yarn for your project.
Fiber Content: The first thing to consider when choosing yarn for a sweater is the fiber content. Different fibers have different characteristics that will affect the drape, warmth, and durability of your sweater. Common choices include wool, cotton, acrylic, and blends. Wool is known for its warmth and elasticity, while cotton is lightweight and breathable. Acrylic is easy to care for and often more affordable. Think about what qualities you want in your finished sweater to guide your fiber choice.
Weight: The weight of the yarn refers to its thickness and determines the gauge or tension of your knitting. The pattern you choose will usually specify the weight of yarn needed. Common weights for sweaters include worsted, aran, and bulky. Be sure to check the gauge of the pattern and choose a yarn that matches it. Using a different weight of yarn can significantly alter the size and fit of your sweater.
- Color: The color of the yarn is another important consideration when knitting a sweater. Think about the overall look you want to achieve and choose a color that complements your style and wardrobe. Consider whether you want a solid color or a variegated yarn with different shades. Remember that colors can appear different when knitted up, so it’s a good idea to see a swatch before committing to a large quantity of yarn.
- Budget: Finally, consider your budget when selecting yarn for a sweater. Yarn prices can vary widely, depending on the fiber content and brand. Set a budget for your project and look for yarns that fit within that range. Keep in mind that investing in higher-quality yarns may result in a more durable and luxurious finished sweater.
In summary, choosing the right yarn for a sweater pattern involves considering factors such as fiber content, weight, color, and budget. By carefully considering these elements, you can ensure that your knitted sweater turns out beautifully and meets your expectations.
Understanding the Different Types of Sweater Patterns
Knitting a sweater is a popular and rewarding project for both beginners and experienced knitters. When selecting a sweater pattern, it’s important to understand the different types available and how they can affect the style and fit of the finished garment. Each pattern has its own unique design elements and construction techniques that can greatly impact the overall look and feel of the sweater.
1. Basic Sweater Patterns
A basic sweater pattern is a great option for beginners or those looking for a simple and timeless design. These patterns typically feature a classic silhouette, such as a crew neck or v-neck, and are worked in a standard stitch pattern, such as stockinette or ribbing. Basic sweater patterns are versatile and can be customized with different yarn weights, colors, or stitch details.
2. Cable Knit Sweater Patterns
Cable knit sweater patterns are known for their intricate and decorative designs created by crossing stitches over one another. These patterns often feature classic cable motifs, such as braids or twists, and can add texture and visual interest to the sweater. Cable knit sweaters are a popular choice for those looking for a more sophisticated and timeless look.
3. Fair Isle Sweater Patterns
Fair Isle sweater patterns, also known as stranded colorwork, incorporate multiple colors to create intricate and colorful designs. These patterns often feature repeating motifs or patterns inspired by traditional Scottish knitting. Fair Isle sweaters can be challenging for beginners due to the need to manage multiple yarn strands, but the end result is a beautiful and unique garment.
4. Lace Sweater Patterns
Lace sweater patterns are characterized by delicate, openwork designs created through a combination of yarn overs and decreases. These patterns often feature intricate stitch patterns inspired by lace knitting traditions. Lace sweaters are lightweight and perfect for layering, making them an ideal choice for transitional seasons or warmer climates.
5. Oversized Sweater Patterns
Oversized sweater patterns have gained popularity in recent years for their cozy and relaxed fit. These patterns are designed to be worn with plenty of ease and can be worked in a variety of stitch patterns, such as chunky cables or textured stitches. Oversized sweaters are perfect for those looking for a comfortable and trendy look.
- Overall, understanding the different types of sweater patterns can help you choose the perfect design for your skill level, style, and preferences.
- Consider the construction techniques, stitch patterns, and yarn requirements when selecting a sweater pattern.
- Don’t be afraid to experiment with different patterns and customize them to create a unique and personalized sweater.
Essential Knitting Techniques for Sweater Patterns
Knitting a sweater can be a challenging but rewarding project for experienced knitters. To successfully complete a sweater pattern, it’s essential to have a solid understanding of several knitting techniques that are commonly used in sweater construction.
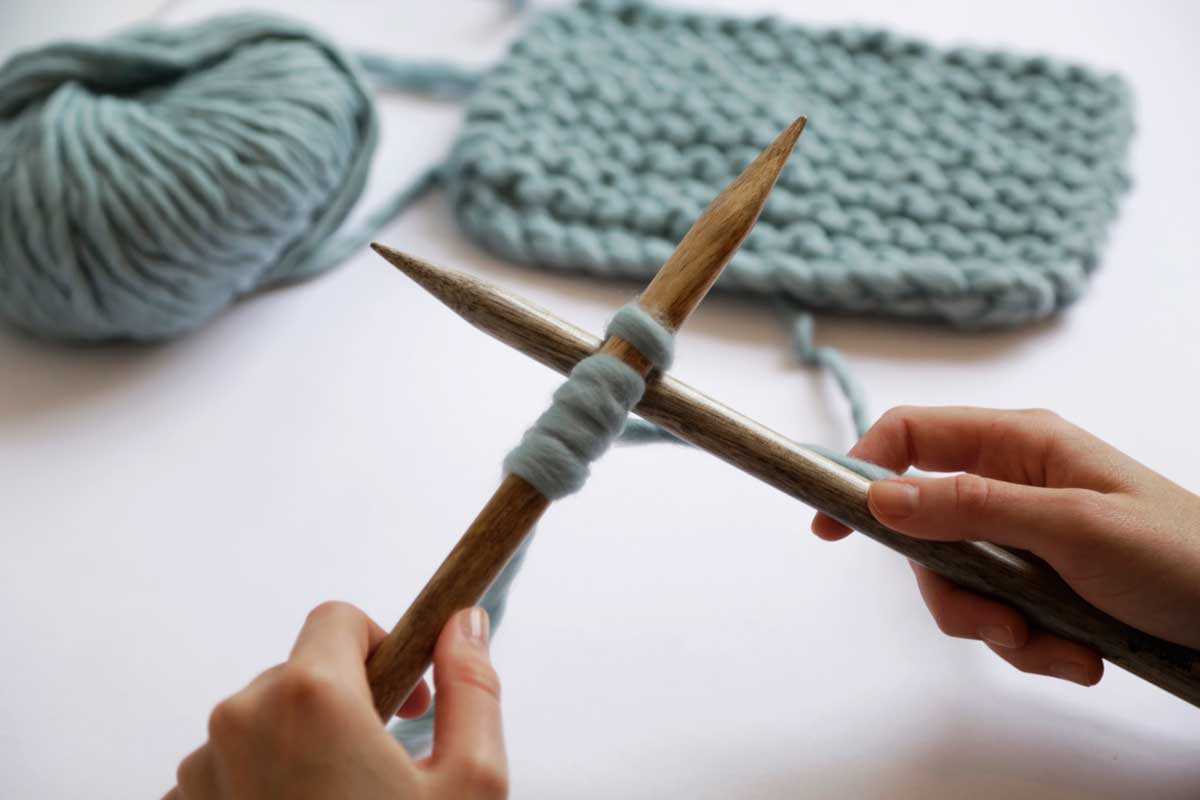
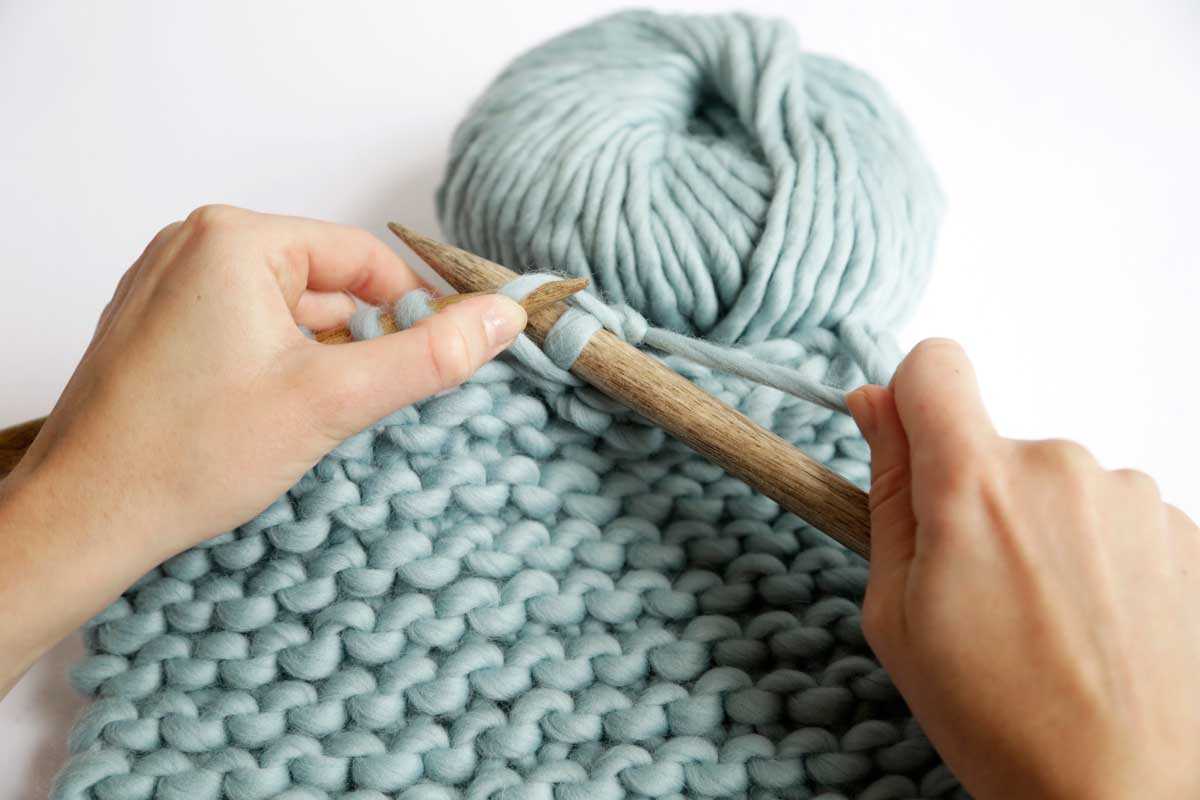
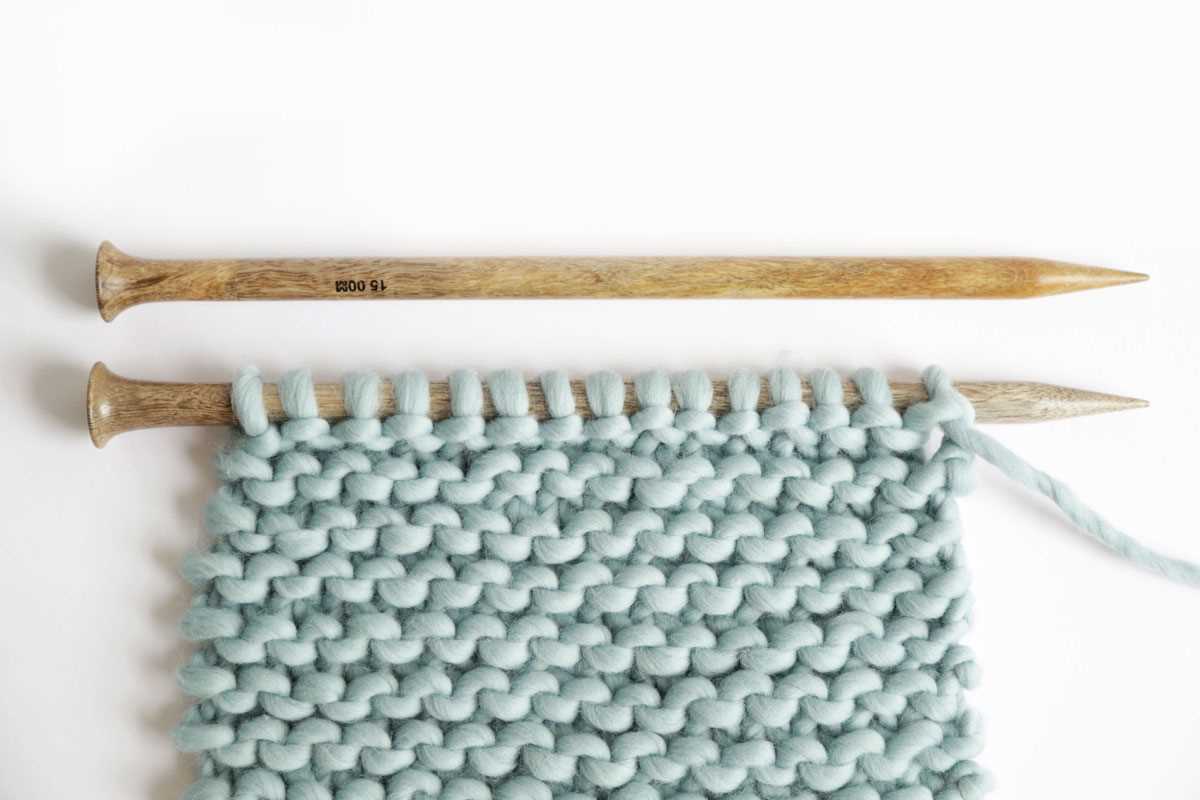
1. Casting On
The first step in any knitting project is casting on. For sweater patterns, the long tail cast on method is often recommended as it creates a sturdy and flexible edge. Make sure to choose a cast on method that complements the type of sweater you are knitting.
2. Knitting and Purling
The basic stitches of knitting and purling are the building blocks of most sweater patterns. Understanding how to knit and purl correctly will allow you to create different stitch patterns, such as ribbing or stockinette stitch, which often appear in sweaters.
3. Increasing and Decreasing
To shape a sweater, you’ll need to know how to increase and decrease stitches. Common increase methods include yarn overs or knitting into the front and back of a stitch, while common decrease methods include knitting two stitches together or slipping stitches.
4. Using Stitch Markers
Stitch markers can be a valuable tool in sweater knitting, especially when working with complex stitch patterns or shaping. They help you keep track of specific sections of your knitting and allow you to easily count stitches or rows.
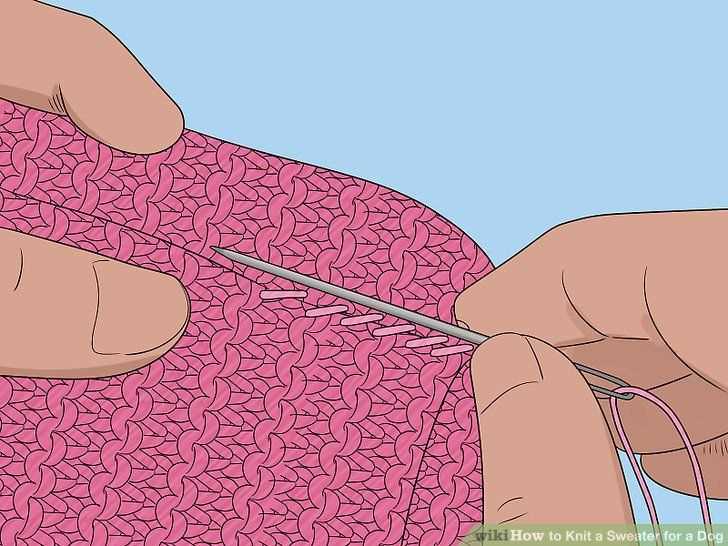
5. Seaming and Finishing
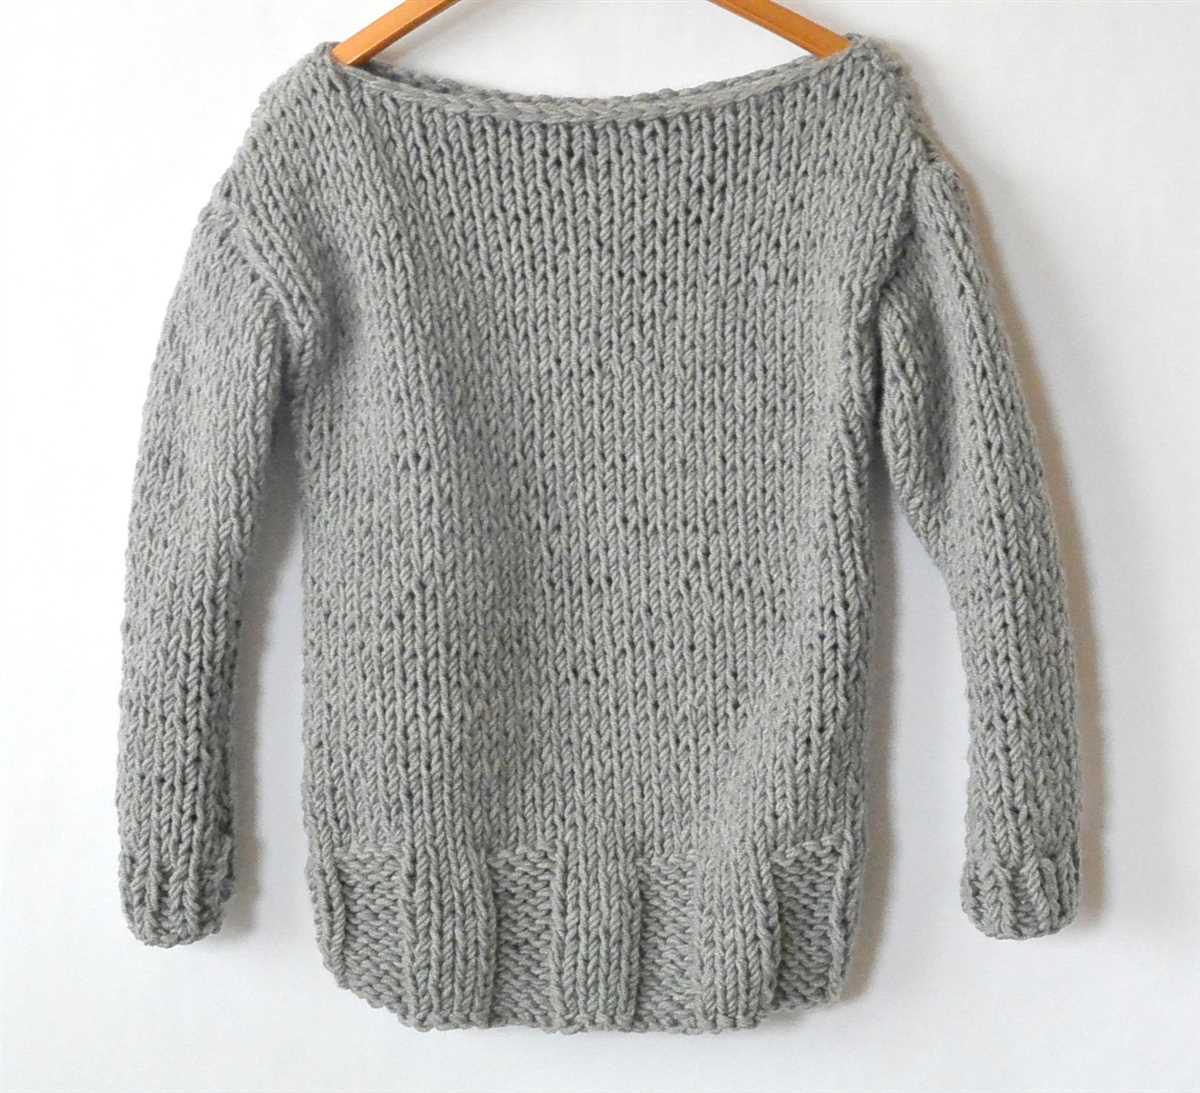
Once you’ve completed all the individual pieces of your sweater, it’s time to seam them together. Techniques such as mattress stitch or whip stitch can be used to join the front and back panels, sleeves, and collar. Additionally, don’t forget to block your finished sweater to give it a professional look.
By mastering these essential knitting techniques, you’ll be well-equipped to tackle sweater patterns with confidence. With practice and patience, you’ll be able to create beautiful and cozy sweaters that are perfect for any weather or occasion.
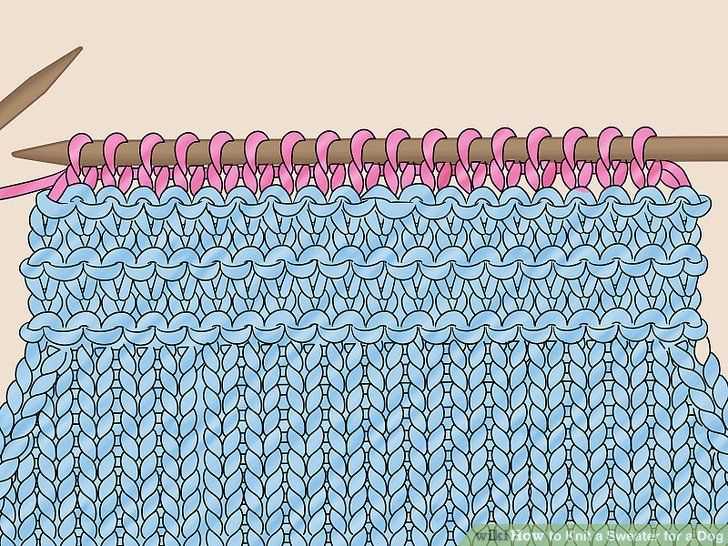
Knitting in the Round
One popular technique for knitting sweaters is knitting in the round. This method involves using circular knitting needles or double-pointed needles to create a seamless garment without the need for seaming. Knitting in the round is often used for sleeves, hats, and the body of a sweater.
When knitting in the round, it’s important to choose the right type of needles and yarn. Circular knitting needles are typically used for larger projects, while double-pointed needles are used for smaller projects with a smaller circumference. The yarn should also be suitable for the project, ensuring that the stitches will hold their shape and provide the desired level of warmth.
A key advantage of knitting in the round is that it allows for continuous knitting without the need for turning the work. This means that there are fewer purl rows and the knitting process can be faster. Additionally, knitting in the round creates a seamless garment, reducing the need for sewing and finishing. However, it’s important to be familiar with techniques such as joining in the round, knitting in the round with multiple colors, and working with stitch markers to ensure a successful outcome.
Joining in the Round
To join in the round, simply cast on the required number of stitches onto the circular needles or double-pointed needles. Make sure that the stitches are not twisted and that the working yarn is positioned correctly. Then, bring the first stitch up to meet the last stitch, holding the needles parallel. Begin knitting in the round, being careful not to twist the stitches, and place a stitch marker to mark the beginning of each round.
Working with Stitch Markers
Stitch markers are incredibly useful when knitting in the round, as they help to keep track of the beginning of each round and mark any pattern repeats. Simply slide the stitch marker onto the needle after knitting the specified number of stitches or at the designated point in the pattern. This will help ensure accuracy and prevent mistakes.
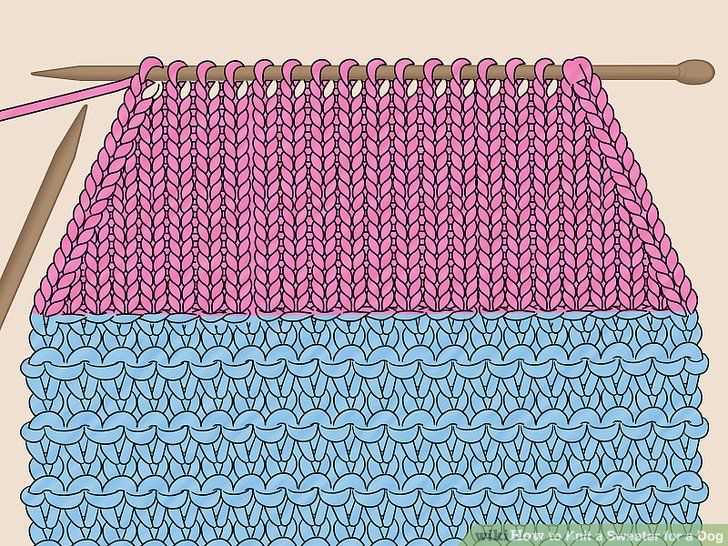
Knitting in the Round with Multiple Colors
If a sweater pattern requires knitting in the round with multiple colors, it’s important to be mindful of color changes and tension. When changing colors, simply drop the old color and pick up the new color, twisting the strands together to avoid any gaps. It’s also important to maintain even tension when switching between colors to ensure a neat and professional finish.
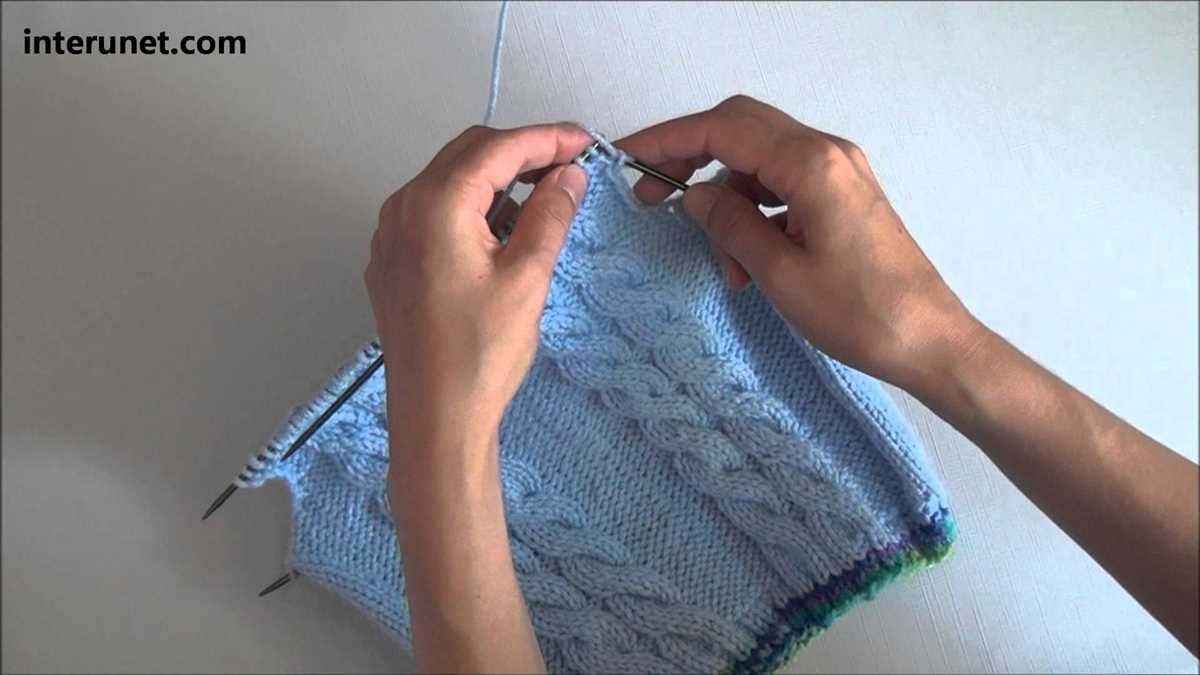
Cable Knitting
Cable knitting is a technique that creates a raised pattern on knitted fabric by crossing stitches over each other. It adds texture and depth to your sweater, making it stand out and adding an interesting design element. Cable knitting can seem intimidating at first, but with some practice and following the pattern, you can easily create beautiful cables on your sweater.
To start cable knitting, you will need a cable needle, which is a short, double-pointed knitting needle. When you come across a cable stitch in your pattern, you will transfer a set number of stitches onto the cable needle and hold it in the front or back of your work, depending on the instructions. Then, you will knit the next set of stitches from your main needle, and finally, you will knit the stitches from the cable needle.
Tips for cable knitting:
- Make sure to read the cable pattern carefully and keep track of the number of stitches involved in each cable.
- Use a cable needle that is the same size or slightly smaller than your main knitting needles to ensure that the cable stitches are not too loose.
- Practice slipping stitches onto the cable needle and holding it in the correct position before attempting to knit the cable stitches.
- Consider using a cable needle holder or a safety pin to prevent the cable needle from slipping out of the stitches while you work.
Cable knitting can be a fun and rewarding technique to master, and it can add an extra touch of elegance to your sweater. With practice and attention to detail, you can create intricate cable patterns that will impress everyone who sees your finished garment.
Lace Knitting
Lace knitting is a beautiful technique that creates intricate patterns and delicate designs in knitted fabric. It involves creating patterns by using a combination of increases, decreases, and yarn overs to create holes and decorative motifs. The result is a lightweight and airy fabric that is perfect for shawls, scarves, and even sweaters. Lace knitting can be challenging, but with practice and patience, anyone can master this technique.
Lace patterns: Lace knitting offers an endless variety of patterns and designs. Some popular lace patterns include leaf motifs, floral designs, and geometric shapes. These patterns can be simple and repetitive or complex and intricate, depending on your skill level and the desired outcome. Lace patterns are typically charted, meaning they are represented visually with symbols and grids that guide the knitter through the stitches and rows. Following the chart carefully is crucial to creating the correct design.
Materials and tools:
- Yarn: Fine and lightweight yarns are typically used for lace knitting, such as lace weight or fingering weight yarn.
- Needles: Lace knitting is often done on smaller needles, such as US 0-4 (2-3.5 mm) to achieve a tight stitch and crisp definition.
- Stitch markers: These are useful for marking specific stitches or sections in the lace pattern.
- Tapestry needle: Needed for weaving in ends and finishing the project.
Techniques:

- Increase stitches: Common increases in lace knitting include yarn overs (YO), make ones (M1), and knit front and back (KFB).
- Decrease stitches: Common decreases in lace knitting include knit two together (K2tog), slip-slip-knit (ssk), and slip-slip-purl (ssp).
- Yarn overs: Yarn overs are used to create the decorative holes in lace knitting. They are made by simply wrapping the yarn around the needle.
- Reading charts: Lace patterns are typically charted, and it’s essential to learn how to read and follow these charts accurately. Each symbol represents a specific stitch or action, and the chart guides you through the pattern row by row.
With the right materials, tools, and techniques, lace knitting can be a rewarding and enjoyable craft. Whether you’re a beginner or an experienced knitter, exploring lace knitting opens up a world of creativity and beauty in your projects.
Colorwork Techniques
In knitting, colorwork techniques involve using multiple colors of yarn to create patterns and designs within a project. These techniques can add visual interest, texture, and dimension to your knitwear, making it stand out. Whether you’re a beginner or an experienced knitter, exploring colorwork techniques can open up a whole new world of possibilities for your knitting projects.
Fair Isle: Fair Isle is a popular colorwork technique that originated in the Shetland Islands. It involves using two or more colors in each row to create intricate patterns. This technique typically uses stranded knitting, where both the main color and the contrasting color are carried along the back of the work. Fair Isle can be used to create geometric designs, floral motifs, or even whimsical characters.
Intarsia:
Intarsia: Intarsia is another colorwork technique that involves knitting blocks of color separately, rather than carrying the unused yarn across the back. This allows for large, bold designs and crisp color changes. With intarsia, you can create pictures or graphic patterns within your knitting. It’s important to use bobbins or separate balls of yarn for each color block to avoid tangling and ensure clean color transitions.
- Stranded knitting: This is a technique used in Fair Isle knitting and involves carrying the contrasting color(s) along the back of the work.
- Intarsia: This colorwork technique involves knitting blocks of color separately, allowing for large, distinct designs.
- Duplicate stitch: This technique is often used to add small, detailed designs after the knitting is complete. It involves embroidering over existing stitches to mimic a colorwork pattern.
- Slip stitch colorwork: With this technique, you only work with one color per row, but slip stitches in the previous row create the appearance of colorwork.
Experimenting with colorwork techniques can be a fun way to enhance your knitting projects. From traditional Fair Isle to bold intarsia designs, there’s a colorwork technique for every style and skill level. Just remember to practice your tension and take your time as you combine multiple colors to create beautiful patterns.
Tips for Reading and Following Sweater Patterns
If you are new to knitting or just starting with sweater patterns, it can be overwhelming to read and follow the instructions. However, with a few tips and some practice, you can easily navigate through the pattern and create a beautiful sweater. Here are some tips to help you read and follow sweater patterns:
1. Read the pattern in its entirety
Before you start knitting, take some time to read the entire pattern from start to finish. This will give you an overview of the construction, stitch patterns, and any special techniques used. It will also help you understand the size and fit of the finished sweater.
2. Pay attention to gauge
Gauge is crucial when knitting a garment, as it determines the size and fit. Before you begin, make sure to knit a gauge swatch using the recommended needle size and yarn. Measure the gauge and adjust your needle size if necessary to match the pattern gauge. This will ensure that your sweater turns out the correct size and fit.
3. Understand the abbreviations
Sweater patterns often use abbreviations to save space. Familiarize yourself with common knitting abbreviations, such as k (knit), p (purl), st (stitch), and inc (increase). The pattern should provide a key or glossary of abbreviations used. Keep it handy so you can easily refer to it while knitting.
4. Follow the chart or written instructions
Sweater patterns may include a chart or written instructions for stitch patterns or colorwork. If a chart is provided, it will have symbols representing different stitches and rows. If you are more comfortable with written instructions, look for the pattern to be written out row by row. Choose the format that you find easier to follow and stick with it throughout the pattern.
5. Take notes as you go
As you work through the pattern, it can be helpful to take notes. This could be anything from tracking the number of rows or stitches to noting any modifications you make. These notes can be invaluable if you need to refer back to the pattern in the future or if you plan on making the same sweater again.
Following sweater patterns can be a rewarding experience, and with a little practice, you’ll be able to create beautiful sweaters. Remember to take your time and enjoy the process, and don’t be afraid to ask for help if needed. Happy knitting!
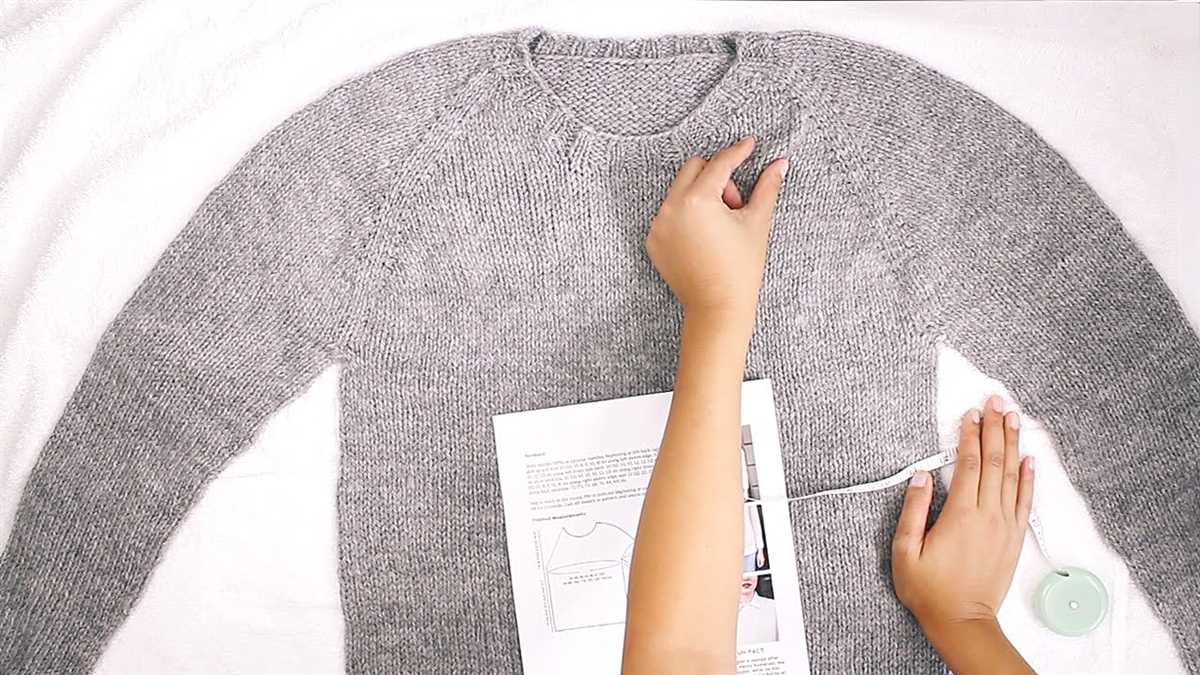
How to Properly Measure for a Sweater Pattern
Before you start knitting a sweater, it is crucial to take accurate measurements to ensure a perfect fit. Here are the key measurements you need to take:
1. Bust Size: Measure around the fullest part of your bust, ensuring that the measuring tape is straight and not too tight or loose.
2. Waist Size: Measure around your natural waistline, which is usually the smallest part of your torso. This measurement will determine the waist shaping in the pattern.
3. Hip Size: Measure around the fullest part of your hips, ensuring that the measuring tape is parallel to the floor. This measurement is important for determining the ease and fit of the sweater around the hips.
4. Sleeve Length: Measure from the shoulder point to the wrist bone with your arm slightly bent. This measurement will determine the length of the sleeves in the pattern.
5. Back Length: Measure from the base of your neck to the desired length of the sweater. This measurement is crucial for determining the overall length of the sweater.
Once you have taken these measurements, refer to the sweater pattern you are planning to knit and select the appropriate size based on your measurements. It is usually best to select a size that matches your bust measurement and make adjustments for other areas if necessary. By taking accurate measurements and selecting the right size, you can ensure that the sweater will fit you perfectly and look great when completed.
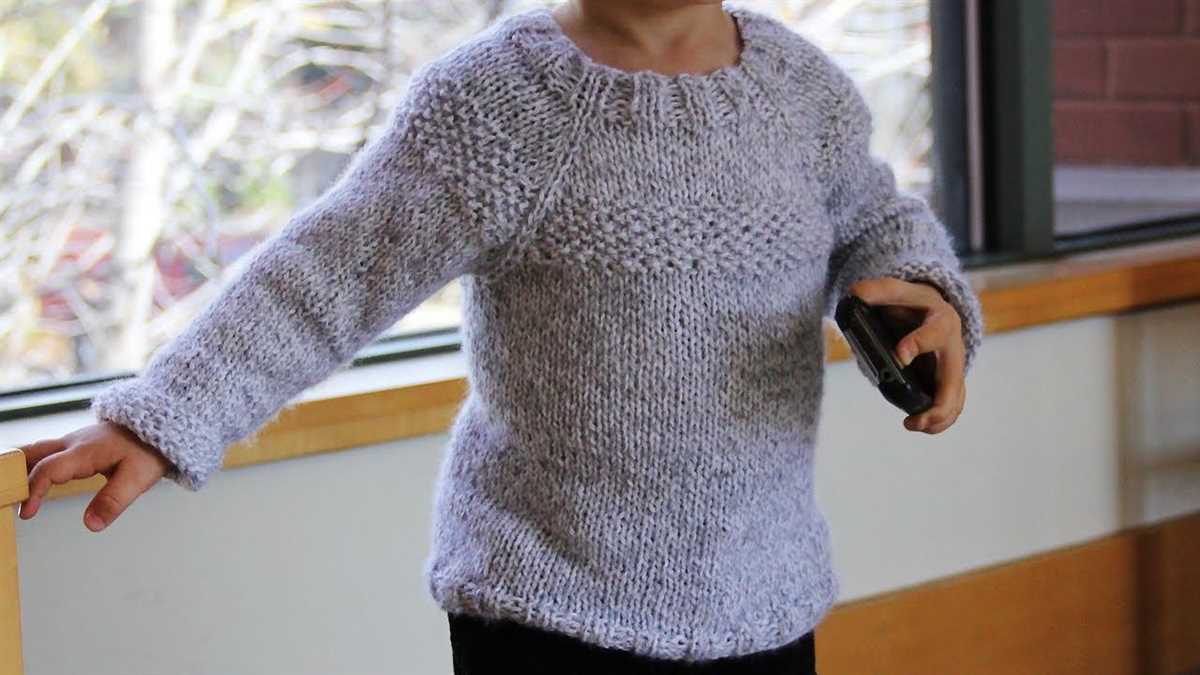
Choosing the Right Sweater Size for Your Body
When it comes to knitting a sweater, choosing the right size for your body is crucial to ensure a perfect fit. However, finding the right size can sometimes be a challenge, especially if you are new to knitting. But fear not, because with a few simple steps, you can determine the perfect size for your sweater pattern.
1. Take accurate measurements
The first step in choosing the right sweater size is to take accurate measurements of your body. Use a measuring tape to measure your bust, waist, and hip circumference. Keep in mind that sweater patterns often have specific guidelines for each size, so make sure to follow these measurements closely.
2. Consider ease
When selecting a size, it’s important to consider the amount of ease you want in your sweater. Ease refers to the difference between your body measurements and the finished measurements of the sweater. Different styles of sweaters require different amounts of ease. For a fitted look, choose a size that closely matches your body measurements. For a more relaxed, oversized fit, go up a size or two.
3. Check the pattern gauge
Before deciding on a size, it’s crucial to check the pattern gauge. The gauge refers to the number of stitches and rows per inch in the knitting pattern. By knitting a gauge swatch using the recommended yarn and needle size, you can ensure that your finished sweater will match the measurements provided in the pattern. If your gauge doesn’t match, you may need to adjust your needle size or choose a different size altogether.
4. Consider your personal style
In addition to measurements and gauge, it’s also important to consider your personal style when choosing the right sweater size. Sweaters come in various lengths, sleeve styles, and necklines, so take into account what looks and feels best on your body. Experiment with different sizes and styles to find the perfect fit that reflects your personal taste.
By following these steps and considering your body measurements, ease, pattern gauge, and personal style, you can confidently choose the right sweater size for your body. Remember, a well-fitting sweater will not only be comfortable but also enhance your overall look. Happy knitting!
How to Adjust a Sweater Pattern for a Perfect Fit
Knitting a sweater can be a rewarding and fulfilling project, but getting the fit just right can be a challenge. However, with a few adjustments, you can ensure that your sweater fits perfectly and flatters your body shape.
To begin, you’ll need to take accurate measurements of your body. This includes bust, waist, and hip measurements, as well as your arm length and shoulder width. With these measurements in hand, you can compare them to the sizing chart provided in the sweater pattern. If your measurements don’t align perfectly with a specific size, don’t worry! You can make adjustments to the pattern to accommodate your unique measurements.
1. Altering the Length
If the sweater you’re knitting is too short or too long, you can easily adjust the length by adding or subtracting rows. Simply count the number of rows in the pattern and divide it by the gauge to determine the length in inches. From there, you can add or subtract rows to achieve your desired length. Remember to make adjustments to both the body and the sleeves if necessary.
2. Modifying the Bust
If the sweater pattern doesn’t provide enough ease in the bust area, you can adjust it by increasing the number of stitches. This can be done by either adding extra stitches at the sides or by increasing the number of rows between increases if applicable. On the other hand, if there is too much ease, you can decrease the number of stitches in the same manner. Remember to consider the stitch pattern and any repeating patterns when making these adjustments.
3. Adjusting the Sleeves
If the sleeves of your sweater pattern are too tight or too loose, you can modify the width by increasing or decreasing the number of stitches. Pay attention to the sleeve’s armhole shaping and make adjustments accordingly. Additionally, if the sleeve length doesn’t match your arm length, you can add or subtract rows to achieve the desired length.
By making these adjustments to your sweater pattern, you can ensure a perfect fit that flatters your body shape and showcases your knitting skills. Don’t be afraid to experiment and make alterations as needed to create a sweater that you’ll love to wear.
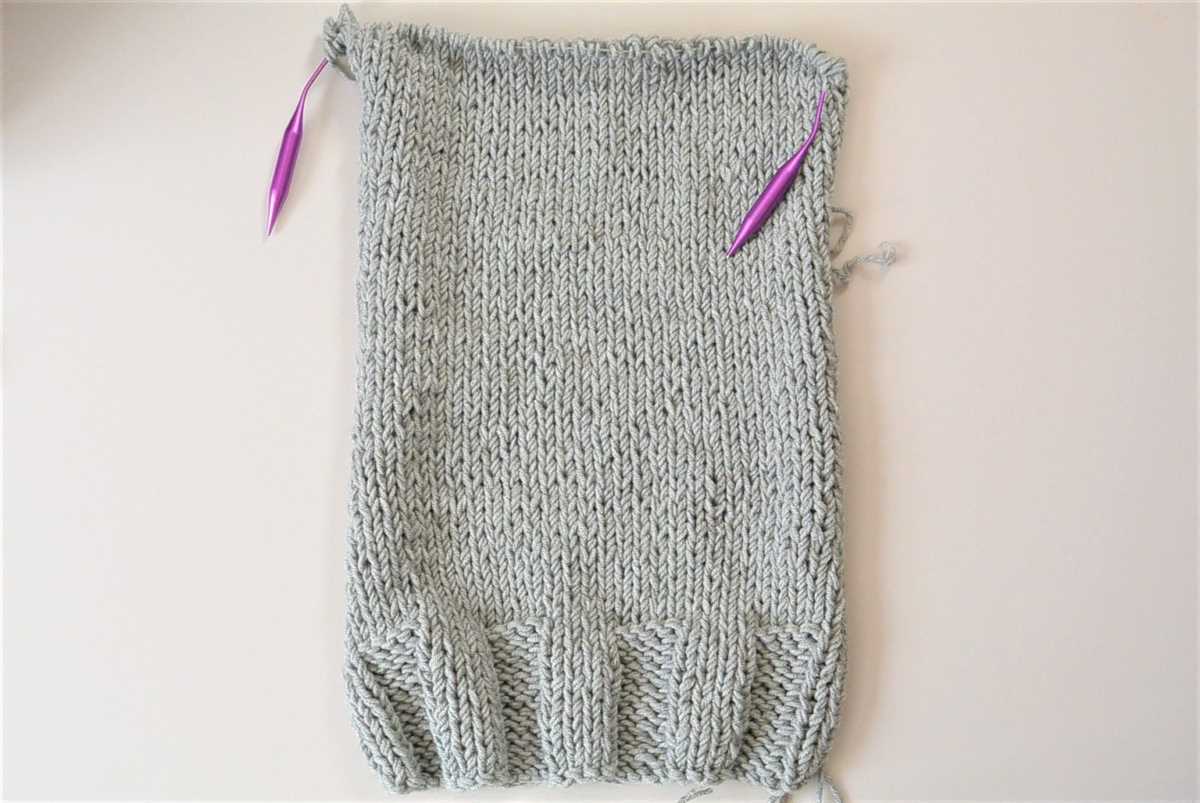
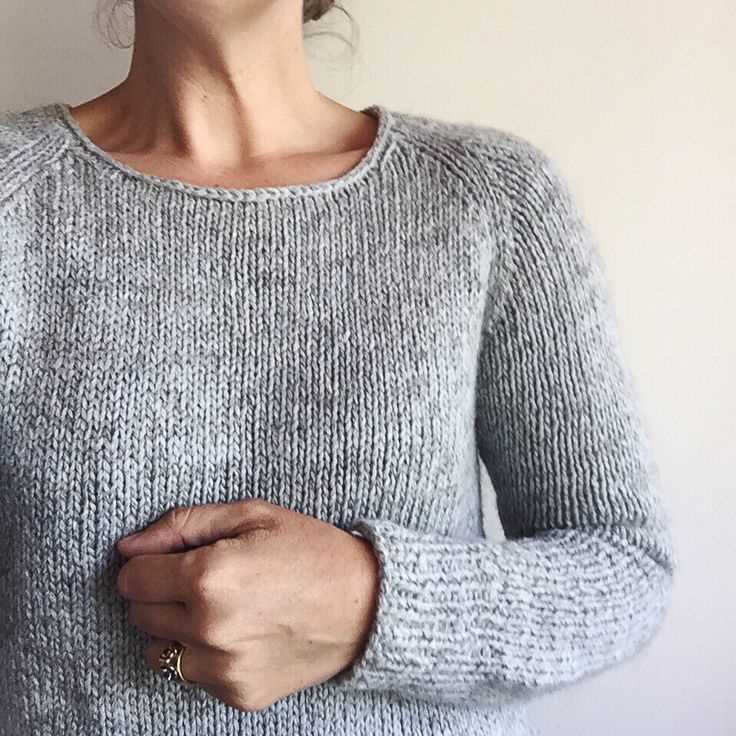
Blocking and Finishing Techniques for Sweater Patterns
Blocking and finishing are important steps in the knitting process that can greatly enhance the final look and fit of a sweater. These techniques help to shape and smooth the garment, ensuring that it looks polished and professional. Here are some key techniques to consider when blocking and finishing your sweater pattern.
1. Blocking:
Blocking is the process of shaping and sizing a knitted garment to achieve the desired measurements and fit. It involves wetting the knitted piece, gently stretching it to the correct dimensions, and then allowing it to dry in that shape. This helps to even out any irregularities in the stitch tension and gives the garment a more uniform appearance.
There are different blocking methods you can use, depending on the fiber content of your sweater. For natural fibers like wool or cotton, wet blocking is typically recommended. This involves soaking the garment in lukewarm water with a gentle detergent, then carefully pressing out the excess water. Next, lay the sweater flat on a clean towel, shape it to the desired dimensions, and allow it to dry completely.
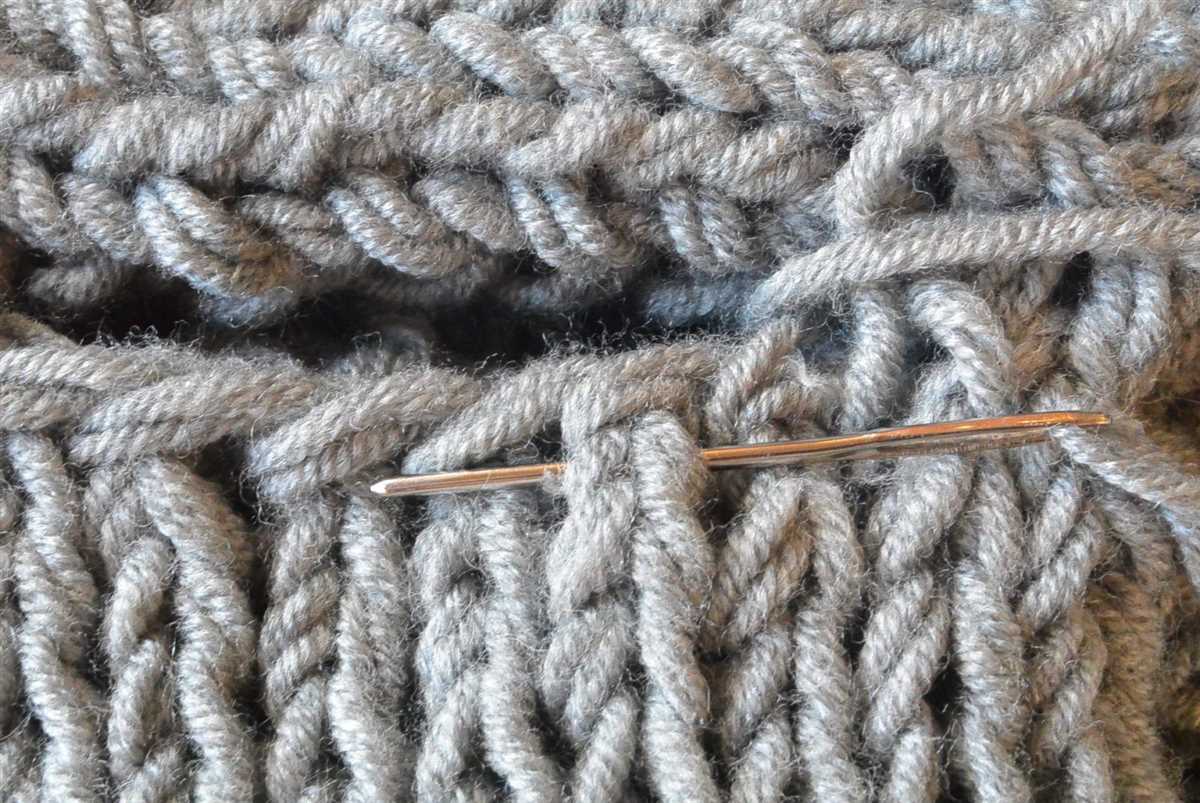
2. Finishing:
Finishing refers to the final touches you add to your sweater once it is blocked and dry. This includes tasks such as sewing seams, weaving in loose ends, and adding any desired embellishments or closures. The goal is to create a clean and polished look that showcases the beauty of your knitting.
When sewing seams, it’s important to use a technique that creates an invisible join. This can be done with mattress stitch, which involves using a tapestry needle to sew up the sides of the garment in a way that mimics the knitted stitches. This creates a seamless and professional-looking finish.
Additionally, be sure to weave in any loose ends of yarn securely to prevent them from unraveling over time. This can be done by threading the yarn onto a tapestry needle and weaving it through the stitches on the wrong side of the fabric, following the direction of the stitches for a neat and hidden finish.
In conclusion, blocking and finishing techniques are essential for creating a well-finished and professional-looking sweater. By taking the time to properly block and finish your garment, you can ensure that it fits well, looks polished, and will be enjoyed for years to come.
Care Tips for Knitted Sweaters
Knitted sweaters require special care to ensure they stay looking their best and last for a long time. Here are some care tips to help you properly care for your knitted sweaters:
1. Read and follow the care instructions
Before washing your knitted sweater, always check the care label for specific instructions from the manufacturer. Different types of yarn and patterns may require different care methods, so make sure to follow these instructions to avoid damaging the sweater.
2. Hand wash or use the delicate cycle
It is generally recommended to hand wash knitted sweaters to ensure they don’t lose their shape or get damaged. Fill a sink or basin with lukewarm water and a gentle detergent specifically made for delicate fabrics. Gently agitate the sweater in the water, being careful not to stretch or twist it. Rinse the sweater thoroughly with clean water, then gently squeeze out the excess water without wringing. Lay the sweater flat on a clean towel and reshape it to its original size and dimensions. Allow it to air dry away from direct heat or sunlight.
3. Avoid hanging knitted sweaters
Due to their weight, hanging knitted sweaters can cause them to stretch and lose their shape over time. Instead, fold them and store them in a drawer or on a shelf, preferably with some acid-free tissue paper to help maintain their shape.
4. Beware of moths and other pests
Moths and other pests are attracted to natural fibers, so it’s important to protect your knitted sweaters from these potential threats. Keep your sweaters clean and store them in airtight containers or garment bags. Additionally, you can place moth repellents, such as cedar balls or lavender sachets, in the storage area to deter these pests.
5. Repair any damage promptly
If you notice any loose threads, snags, or small holes in your knitted sweater, it’s important to repair them promptly to prevent them from getting worse. Use a small needle and matching yarn to stitch up any loose threads or holes. If the damage is extensive, consider taking the sweater to a professional knitter or tailor for repairs.
By following these care tips, you can ensure that your knitted sweaters stay in great condition and continue to be cozy and stylish for many seasons to come.
Q&A:
What kind of yarn should I use for knitting a sweater?
You can use various types of yarn for knitting a sweater, such as wool, cotton, acrylic, or a blend of different fibers. It depends on your preferences and the desired properties of the finished sweater.
Do I need to use a specific needle size for knitting a sweater?
The needle size you should use for knitting a sweater depends on the thickness of your yarn and the desired gauge. Check the pattern instructions for the recommended needle size, and make sure to swatch and adjust your needle size if needed to achieve the correct gauge.
How do I choose the right sweater pattern?
Choosing the right sweater pattern depends on your skill level, style preferences, and the features you want in your sweater. Consider factors like the complexity of the pattern, the fit and shape of the sweater, as well as any specific techniques or designs you are interested in trying.
Can I modify a sweater pattern to fit my size?
Yes, you can modify a sweater pattern to fit your size by adjusting the stitch count, adding or removing rows, or modifying the shaping details. However, it’s important to keep in mind the overall structure and proportions of the sweater to ensure a good fit.
What are some common knitting stitches used in sweater patterns?
Some common knitting stitches used in sweater patterns include stockinette stitch, ribbing stitch, garter stitch, moss stitch, and cable stitches. These stitches can be combined in various ways to create different textures, patterns, and designs in the sweater.
What materials do I need to knit a sweater?
To knit a sweater, you typically need knitting needles, yarn, a tape measure, stitch markers, and a yarn needle for seaming.
How can I choose the right knitting pattern for a sweater?
When choosing a knitting pattern for a sweater, consider your skill level, the desired fit and style, and the type of yarn you prefer to work with. Online knitting pattern databases and magazines can provide a wide range of options.