
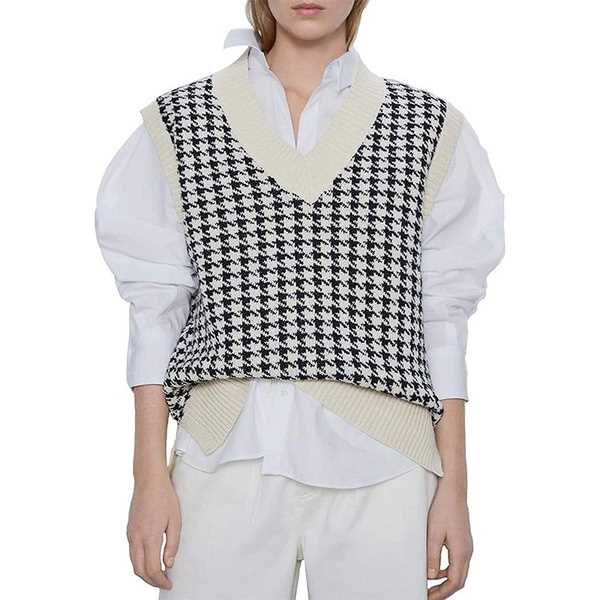
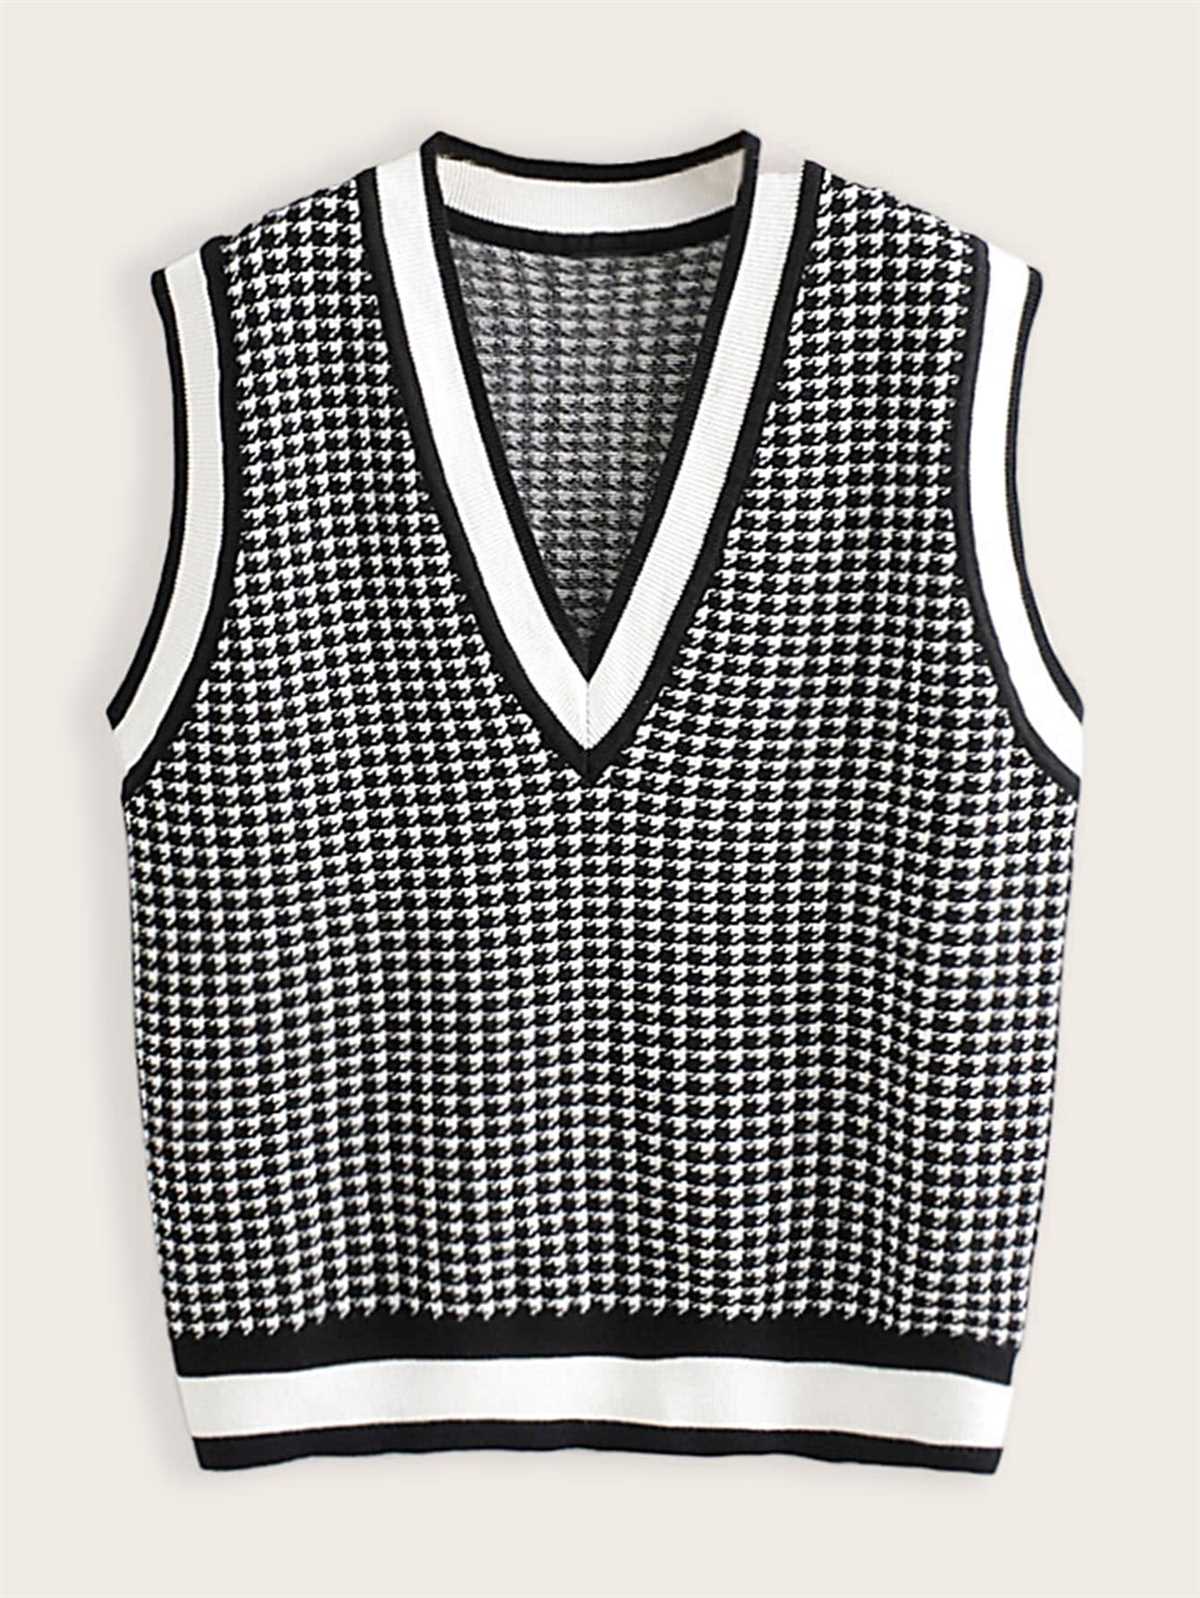
Knitting is a wonderful hobby that allows you to create beautiful and unique pieces of clothing and accessories. One popular knitting pattern that has stood the test of time is the houndstooth pattern. The houndstooth pattern is a classic design that is often associated with elegant and sophisticated fashion. It consists of a repeating pattern of small, abstract shapes resembling a dog’s tooth or a broken checkered pattern. This pattern can be used to create a variety of garments, one of which is the houndstooth vest.
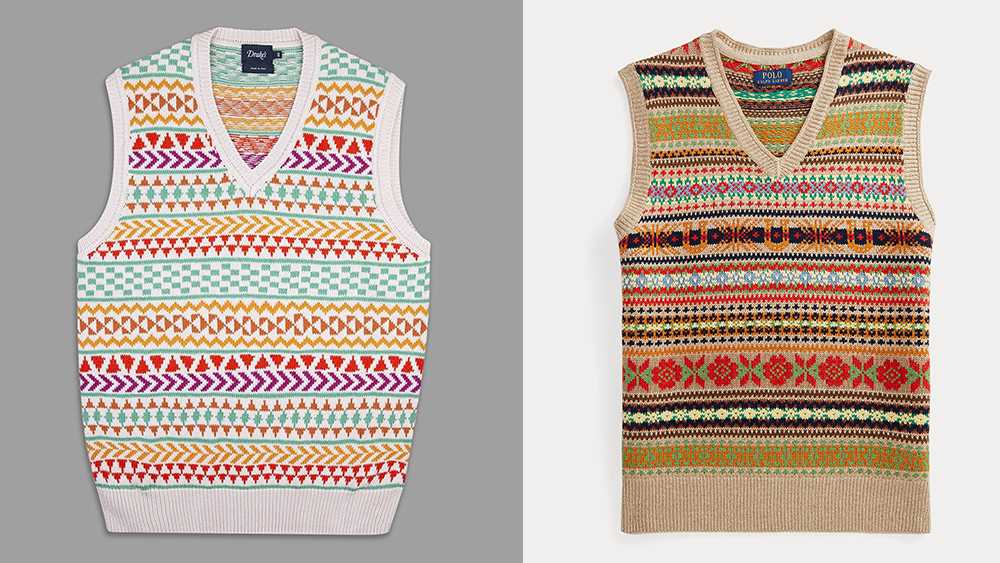
A houndstooth vest is a stylish and versatile piece that can be worn in both casual and formal settings. It can be paired with a dress for a more dressed-up look, or with jeans and a t-shirt for a more relaxed and casual outfit. The houndstooth pattern adds a touch of elegance and sophistication to any ensemble, making it a perfect addition to your wardrobe.
Knitting a houndstooth vest may seem like a daunting task, but with the right pattern and some basic knitting skills, it can be a fun and rewarding project. This article will provide you with a step-by-step guide on how to knit a houndstooth vest, including the materials you’ll need, the stitch pattern, and instructions on how to assemble and finish the vest. So grab your knitting needles and let’s get started on creating a stunning houndstooth vest that you’ll be proud to wear!
Houndstooth Vest Knitting Pattern
If you are looking for a versatile and stylish garment to add to your wardrobe, look no further than the houndstooth vest. This classic pattern features a bold and eye-catching design that is sure to turn heads. Whether you want to dress it up for a night out or wear it casually with jeans, this vest is a must-have item.
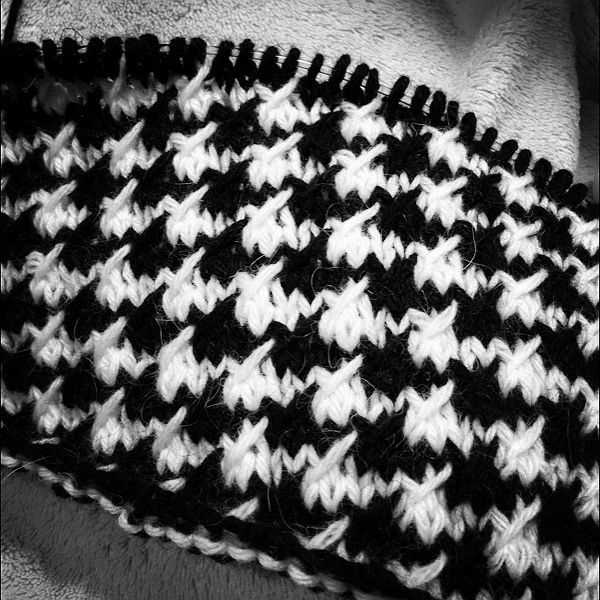
The houndstooth pattern is achieved through a combination of knit and purl stitches, creating a textured fabric that is both soft and warm. The contrasting black and white colors add to the visual appeal, making it a standout piece in any outfit.
To knit the houndstooth vest, you will need a set of knitting needles, two colors of yarn, a tape measure, and a yarn needle for weaving in ends. The pattern typically involves working in rows and using basic knitting techniques such as casting on, knitting, purling, and decreasing stitches.
One popular houndstooth vest knitting pattern is as follows:
- Using the smaller knitting needles and the main color yarn, cast on the desired number of stitches to fit your size.
- Work in a rib stitch pattern for the desired length, alternating between knit and purl stitches.
- Switch to the contrasting color yarn and continue with the rib stitch pattern.
- After a few rows, start incorporating the houndstooth pattern by following the chart or written instructions provided in the pattern.
- Continue knitting in the houndstooth pattern until the vest reaches the desired length.
- Finish off the edges with a border or rib stitch pattern using the main color yarn.
- Bind off all stitches and weave in any loose ends.
Once you have completed the houndstooth vest, you can enjoy the satisfaction of wearing a handmade, stylish garment that is sure to be a conversation starter. Whether you are new to knitting or an experienced knitter, this pattern is a great way to showcase your skills and create a timeless piece that you will treasure for years to come.
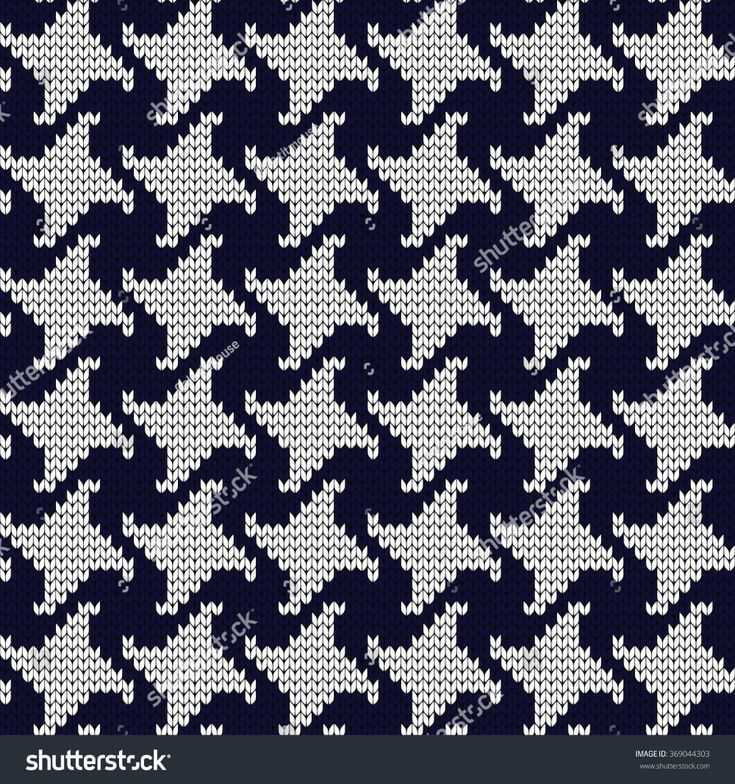
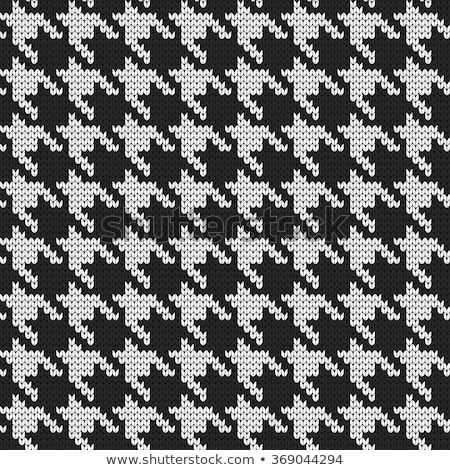
What is a Houndstooth Pattern?
The houndstooth pattern is a classic design that originated in Scotland. It is characterized by a geometric checkered pattern, typically in black and white, although it can also be found in other color combinations. The pattern consists of small, abstract shapes that resemble the teeth of a houndstooth, hence its name.
The houndstooth pattern can be used in various ways, from clothing and accessories to home decor. It is commonly seen in garments like jackets, coats, skirts, and vests. It adds a touch of sophistication and elegance to any outfit or interior.
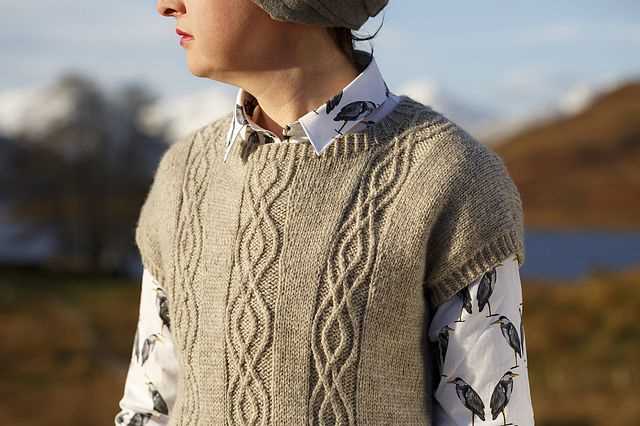
The houndstooth pattern is highly versatile and can be adapted to different styles and materials. It can be knitted, woven, or printed onto fabric. One popular use of the houndstooth pattern is in knitting, where it can be incorporated into various knitting projects, such as scarves, hats, and sweaters.
The houndstooth pattern is a timeless design that has stood the test of time. Its classic aesthetic and versatility make it a popular choice for both traditional and modern fashion and design. Whether used in small accents or as the main focal point, the houndstooth pattern adds a touch of sophistication and style to any project.
If you are interested in knitting a houndstooth pattern, a houndstooth vest knitting pattern can be a great project to start with. It allows you to create a stylish and versatile garment that can be worn in different seasons and occasions.
History of Houndstooth Pattern
The houndstooth pattern is a classic and timeless design that has been used in various forms of art and fashion for centuries. Its distinctive checkered appearance, characterized by pointed shapes resembling the teeth of a hound, gives it a sophisticated and elegant look.
The origins of the houndstooth pattern can be traced back to ancient Rome, where it was used in the design of mosaic floors. However, it was not until the 19th century that the pattern gained popularity in the textile industry. It was commonly used in the production of woolen fabrics, particularly in Scotland and the Scottish Highlands.
The houndstooth pattern soon became associated with traditional Scottish textiles and was often used in the production of tartan fabrics. Its popularity continued to grow throughout the 20th century, with the pattern being used in a wide range of garments, including skirts, jackets, and accessories.
Today, the houndstooth pattern is still widely used in both fashion and interior design. It is often seen in the form of woven fabrics, but it can also be found in printed designs. The pattern’s versatility and timeless appeal make it a favorite among designers and fashion enthusiasts alike.
Choosing the Right Yarn and Needles
When knitting a houndstooth vest, it is important to choose the right yarn and needles to achieve the desired result. The yarn you select will greatly impact the overall look, feel, and drape of the finished garment. Consider the texture, weight, and fiber content of the yarn when making your choice.
Yarn
Texture: For a houndstooth pattern, it is best to choose a yarn with a smooth texture. This will allow the pattern to stand out and create clean, defined lines. Avoid yarns with a lot of fuzziness or halo, as this can obscure the pattern.
Weight: The weight of the yarn will determine the size and weight of the final vest. Consider the season in which you plan to wear the vest and choose a yarn weight accordingly. A lighter weight yarn will result in a more lightweight and breathable garment, while a heavier weight yarn will create a warmer and more substantial vest.
Fiber Content: Consider the fiber content of the yarn for both practical and aesthetic reasons. Wool yarns are known for their warmth, durability, and ability to hold stitch definition. However, if you have any sensitivities or allergies to wool, you may opt for a different fiber such as cotton or acrylic. Experiment with different fiber blends to find one that suits your preferences.
Needles
Type: The type of needles you choose will depend on your personal knitting preferences. Straight needles are commonly used for flat knitting, while circular needles are preferred for knitting in the round. Choose the type of needles that you find most comfortable and enjoyable to work with.
Size: The size of the needles will determine the gauge and tension of your knitting. Refer to the pattern for the recommended needle size and adjust accordingly if necessary. It is always a good idea to knit a gauge swatch before starting your project to ensure accuracy.
Length: If you choose to use circular needles, consider the length of the cable. A longer cable will allow you to comfortably accommodate a larger number of stitches, whereas a shorter cable may be more suitable for smaller projects.
By carefully selecting the right yarn and needles, you can ensure that your houndstooth vest turns out just the way you envisioned it, with a fabric that is both visually appealing and comfortable to wear.
Casting On and Knitting the Ribbing
When starting to knit the houndstooth vest, the first step is to cast on the required number of stitches. The pattern will specify the number of stitches needed for the ribbing section, which is usually a smaller number compared to the main body of the vest. It’s important to cast on the right number of stitches to ensure the ribbing fits snugly and creates a nice stretchy edge.
Once the stitches are cast on, the next step is to begin knitting the ribbing. The ribbing is usually worked in a combination of knit and purl stitches to create a textured pattern. The most common ribbing pattern is the 1×1 rib, where one stitch is knit and the next stitch is purled. This creates a stretchy, flexible fabric that lays flat and has a nice drape.
To work the ribbing, follow the pattern instructions and alternate between knitting and purling the stitches across each row. It’s important to pay attention to the pattern and count your stitches to ensure you are working the correct number of stitches in each row. This will help maintain the proper shape and tension of the ribbing.
Continue knitting the ribbing for the specified number of rows or until the desired length is reached. The ribbing section is usually shorter than the body of the vest and serves as a decorative edge that adds structure to the garment. Once the ribbing is complete, you can then move on to the next section of the houndstooth vest pattern.
Creating the Houndstooth Design
Understanding the Houndstooth Pattern
The Houndstooth design is a classic pattern that adds a touch of elegance and sophistication to any knitting project. This pattern consists of small checks or diamonds in contrasting colors, typically black and white. The design is achieved through a combination of knit and purl stitches, creating an illusion of texture and depth.
Choosing the Right Yarn
The success of any knitting project starts with choosing the right yarn. When creating a Houndstooth design, it’s important to select two colors that contrast well with each other. Traditionally, black and white are used, but you can experiment with different color combinations to personalize your project. Worsted weight yarn works best for this pattern, as it provides the right amount of structure and definition.
Planning the Design
Before starting your Houndstooth vest, it’s essential to plan the design. Determine the size and shape of the checks or diamonds you want to create. This will depend on your gauge and the number of stitches and rows you cast on. Make a chart or sketch to visualize the pattern and ensure consistency throughout your knitting.
Knitting the Houndstooth Pattern
The Houndstooth pattern is created by alternating between two colors and knitting or purling stitches in a specific sequence. The traditional method involves knitting with one color for two rows and then switching to the other color. Different techniques can be used to create the checks or diamonds, such as stranded colorwork or slip stitches.
Adding the finishing touches
Once you have completed the Houndstooth pattern, it’s time to add the finishing touches to your vest. Bind off your stitches and weave in any loose ends. Consider adding a ribbed collar and edges to give the vest a polished look. Blocking your project is also essential to even out the stitches and enhance the overall appearance of the Houndstooth design.
Changing Colors and Intarsia Technique
One of the key elements in knitting the houndstooth vest pattern is learning how to change colors and use the intarsia technique effectively. Changing colors allows you to create the distinct houndstooth pattern, while the intarsia technique helps to keep the back of the vest looking clean and seamless.
When changing colors, it is important to carry the unused yarn loosely along the back of the work to prevent puckering. Start by knitting to the point where you want to change colors, then drop the current color and pick up the new color, leaving a tail of several inches. Hold the new color below the old color and continue knitting with the new color. To switch back to the previous color, drop the new color and pick up the old color, again leaving a tail of several inches.
This vest pattern also utilizes the intarsia technique, which involves working with separate balls or bobbins of yarn for each color section. When working with multiple colors, twist the yarns together at the back of the work when changing from one color section to another to ensure a clean transition and prevent holes. It is important to keep the tension consistent when using the intarsia technique to maintain an even and smooth fabric.
The houndstooth pattern requires careful attention to detail when changing colors and using the intarsia technique. By following the instructions and practicing these techniques, you can create a stylish and professional-looking houndstooth vest.
Shaping the Neckline and Armholes
When working on a houndstooth vest knitting pattern, shaping the neckline and armholes is an important step in creating a well-fitted and comfortable garment. The neckline and armhole shaping can vary depending on the desired style and fit of the vest, but there are some common techniques that can be used.
Neckline Shaping:
To shape the neckline, you will typically begin by dividing the stitches for the front and back of the vest. This can be done by placing stitch markers or working with separate balls of yarn for each section.
Next, you will decrease stitches at each end of the rows or on specific rows to create the desired shaping. This is usually done by working a decrease stitch, such as a knit 2 together (k2tog) or a slip, slip, knit (ssk), at the beginning and end of the rows. The number of decreases and the frequency of decreases will depend on the desired depth and width of the neckline.
Armhole Shaping:
To shape the armholes, you will typically begin by decreasing stitches at the sides of the work. This can be done by working the desired decrease stitch at the beginning and end of specific rows or every other row. The number of decreases and the frequency of decreases will depend on the desired depth and width of the armholes.
After shaping the armholes, you will usually continue working the remaining stitches straight until the desired length of the vest is reached. It is important to follow the instructions of the specific houndstooth vest knitting pattern you are using to ensure accurate shaping and a well-finished vest.
Adding the Buttonholes
Now that you have completed the main body of the houndstooth vest, it’s time to add the buttonholes. Buttonholes are necessary to secure the vest closed and allow you to easily fasten and unfasten it. Follow the instructions below to add the buttonholes in the specified locations.
Step 1: To determine the placement of the buttonholes, lay the vest flat and mark the desired locations with pins or stitch markers. Typically, buttonholes are evenly spaced vertically along the front edge of the vest.
Step 2: Once you have marked the buttonhole locations, you can start creating the buttonholes. There are various methods for creating buttonholes, but for this pattern, we will use the yarn over method.
Step 3: Begin by knitting to the first marked buttonhole location. To create the buttonhole, bring the yarn to the front of your work as if to purl, then wrap the yarn over the right needle from back to front.
Step 4: Continue knitting the next stitch as usual, pulling the yarn over stitch tight to secure the buttonhole. Repeat this process for each marked buttonhole location, making sure to maintain the established stitch pattern of the houndstooth design.
Step 5: Once all the buttonholes have been created, continue knitting the remaining rows of the pattern until the desired length is reached. Remember to follow the pattern instructions for shaping and finishing the vest, including binding off and weaving in any loose ends.
Finishing the Edges with Ribbing
When knitting a houndstooth vest, finishing the edges with ribbing can add a beautiful and polished look to the garment. Ribbing is a popular choice for edge finishing as it creates a stretchy and flexible fabric that can easily adapt to the shape of the body. It also provides a neat and clean edge, preventing the edges from curling up or looking unfinished.
To finish the edges with ribbing, you will typically start by picking up stitches along the designated edge of the vest. This can be done using a smaller needle size than the one used for the main body of the vest. Picking up stitches evenly is important to ensure that the ribbing is consistent and visually appealing.
Once the stitches are picked up, you can begin knitting the ribbing pattern. The most common ribbing pattern is the 1×1 rib, which alternates between knitting one stitch and purling one stitch. This creates a pattern of raised ribs and recessed valleys, giving the fabric its stretchiness and flexibility.
When knitting the ribbing, it is important to maintain an even tension to ensure that the edge does not become too loose or too tight. This can be achieved by knitting with a consistent motion and keeping the yarn tension steady. Taking breaks and measuring the gauge periodically can also help ensure consistent tension throughout the ribbing.
Once the desired length of ribbing is reached, the final step is to bind off the stitches. This can be done using a standard bind off method or a stretchy bind off method, such as the tubular bind off, to maintain the flexibility of the ribbing. After binding off, the edges can be sewn together if needed or left as is, depending on the construction of the vest.
Blocking and Assembly
After you have finished knitting all the pieces of the houndstooth vest, it is important to block them before assembly. Blocking helps to even out the stitches and gives the finished garment a more professional look. Start by wetting the pieces with lukewarm water and gently squeezing out the excess moisture. Lay each piece flat on a clean towel and arrange them to their final dimensions. Use rust-proof pins to secure the edges in place. Allow the pieces to dry completely before moving on to assembly.
Once the pieces are blocked and dry, it’s time to assemble the vest. Start by carefully sewing the shoulder seams together using a mattress stitch. This stitch creates a nearly invisible seam that ensures a smooth and seamless look. Next, attach the sides of the vest by sewing up the side seams. Make sure to align the stitches perfectly for a seamless appearance.
For the collar, fold it in half lengthwise with the right sides facing each other. Sew the short ends together using a whipstitch or a running stitch. Once the collar is sewn together, pin it to the neckline of the vest and sew it in place. Make sure to evenly distribute the collar around the neckline for a balanced look.
Finally, sew the button bands to the front edges of the vest. You can use the mattress stitch or any other preferred method for attaching the bands. Attach buttons to the button bands, evenly spacing them along the front of the vest.
Once all the pieces are assembled, give the vest a final steam blocking to smooth out any remaining wrinkles and to give the finished garment a polished look. Now your houndstooth vest is ready to be worn and enjoyed!
Tips and Techniques
If you’re planning to knit a houndstooth vest, here are some tips and techniques to help you along the way. Whether you’re a beginner or an experienced knitter, these tips will ensure that your project turns out beautifully.
Choosing the right yarn
When selecting yarn for your houndstooth vest, it’s important to choose a yarn that is suitable for the project. Look for a yarn that has a good stitch definition and is soft to the touch. The weight of the yarn is also important, as it will determine the size and drape of the finished vest. A worsted or DK weight yarn works well for this pattern.
Creating the houndstooth pattern

The houndstooth pattern is created using a combination of knit and purl stitches. To achieve the classic houndstooth look, you’ll need to alternate between dark and light colors. The pattern is typically worked over a multiple of 4 stitches, so make sure to cast on an appropriate number of stitches for your desired size.
To create the houndstooth pattern, you’ll need to work with two colors: one dark and one light. Start by knitting the first row in the dark color, making sure to follow the pattern instructions for the stitch pattern. On the next row, switch to the light color and continue following the pattern. Repeat these two rows until you’ve completed the desired number of houndstooth blocks.
Finishing your vest
Once you’ve completed the houndstooth pattern, it’s time to finish your vest. Follow the pattern instructions for shaping the armholes and neckline, and make sure to carefully sew any seams or join any pieces together. Take your time and pay attention to the finishing details to ensure a professional-looking result.
With these tips and techniques in mind, you’ll be well-equipped to knit your own houndstooth vest. Enjoy the process and take pride in creating a unique and stylish piece of knitwear!
Variations and Customizations

There are many ways to customize the houndstooth vest knitting pattern to make it your own. Here are some ideas to get you started:
- Color variations: Experiment with different color combinations to create unique houndstooth designs. You can use bold contrasting colors or subtle tonal variations for a different look.
- Yarn variations: Try using different types of yarn to achieve different textures and drape. You could use a soft merino wool for a cozy winter vest, or a linen blend for a lightweight summer version.
- Stripes or color blocks: Instead of knitting the entire vest in houndstooth, you could add stripes or color blocks for added visual interest. This can be a great way to use up leftover yarn or create a more playful design.
- Add embellishments: Consider adding buttons, pockets, or embroidery to your vest to make it truly unique. You could even incorporate other knitting techniques, such as cables or lace, to add extra detail.
With these variations and customizations, you can create a houndstooth vest that is completely personalized and reflects your own style. Have fun experimenting and make it your own!