
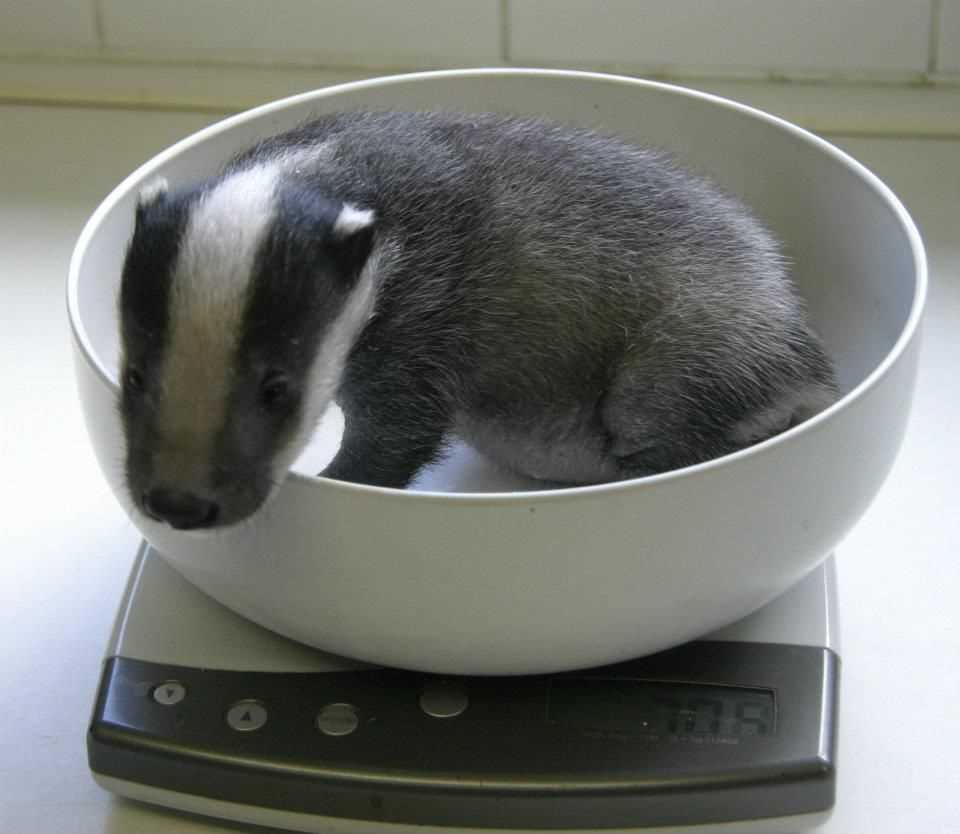
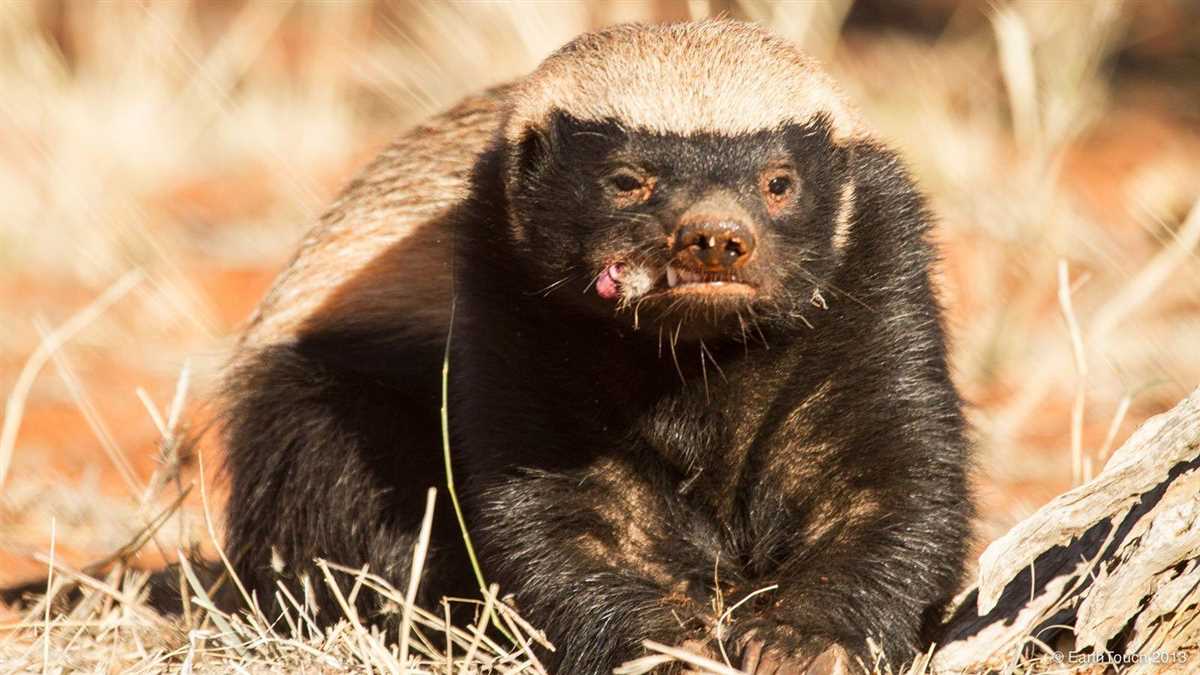
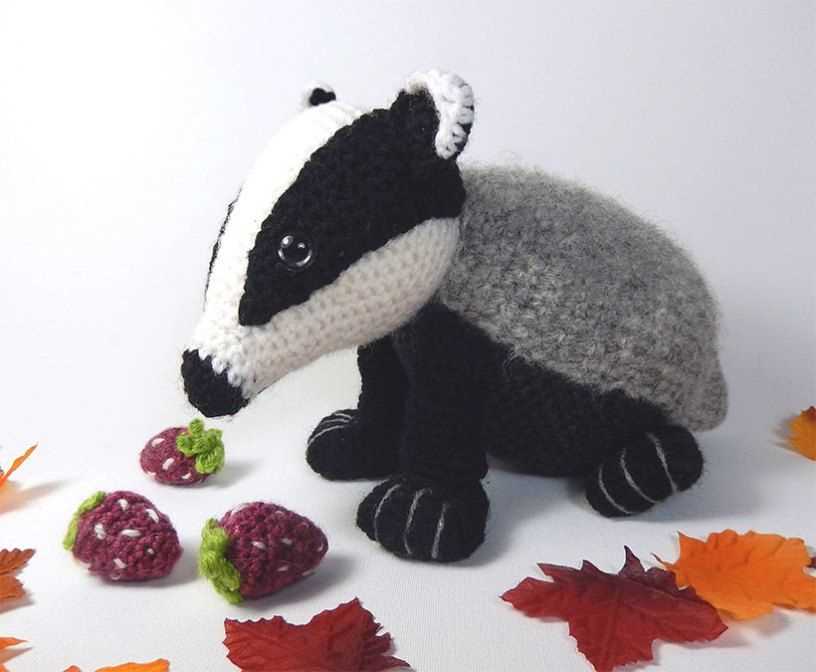
If you’re a fan of knitting and cute animals, then this honey badger knitting pattern is perfect for you! Honey badgers are known for their fearless and tough nature, and now you can knit your very own adorable honey badger to cuddle with.
This knitting pattern is suitable for knitters of all levels, from beginners to advanced. It includes detailed instructions and step-by-step photos to guide you through the knitting process. With a little patience and some basic knitting skills, you’ll have a charming honey badger in no time.
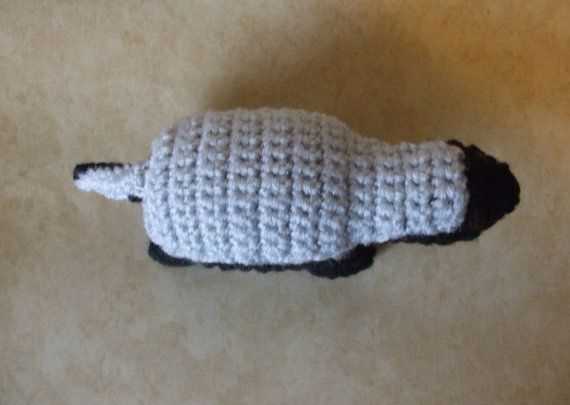
The honey badger knitting pattern is versatile and can be customized to your liking. You can choose different colors of yarn to create a unique honey badger, or add embellishments like buttons or beads for some extra flair. Whether you want to make a small honey badger as a keychain or a larger one as a plush toy, the pattern can be easily adjusted to meet your preferences.
Honey Badger Knitting Pattern
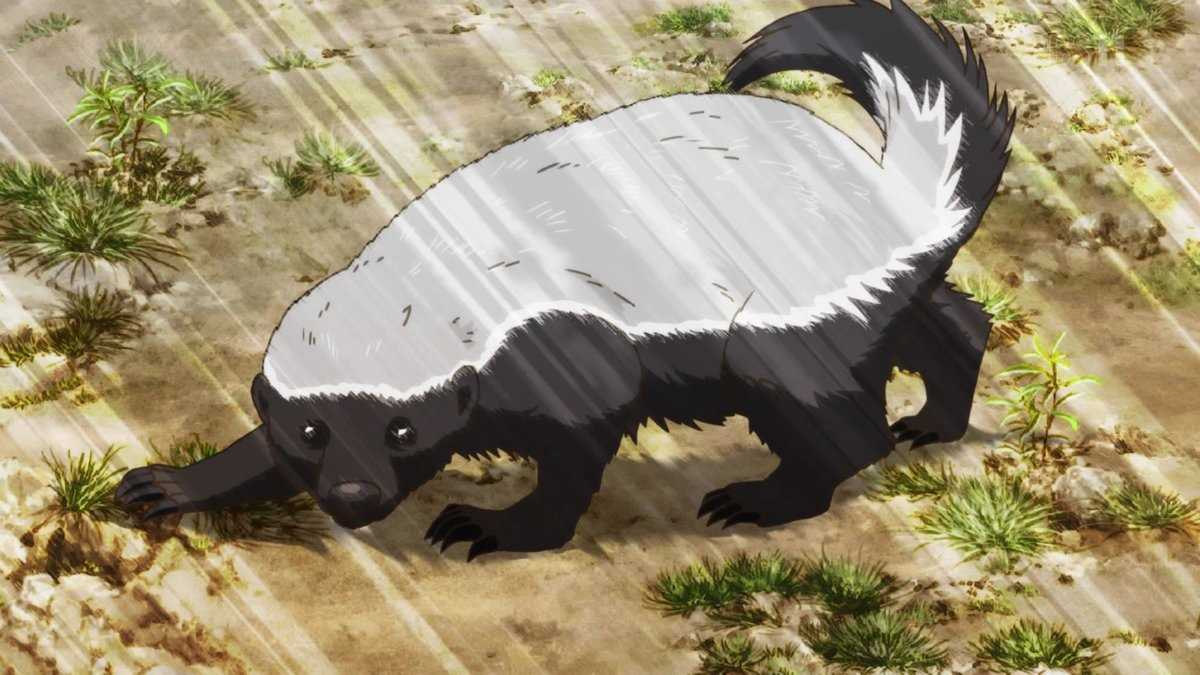
In the world of knitting, there are endless possibilities when it comes to creating unique and adorable items. One such pattern that has gained popularity is the honey badger knitting pattern. This pattern allows knitters to create a cute and cuddly honey badger toy that can be enjoyed by both children and adults alike.
Materials:
- Yarn: The honey badger knitting pattern typically calls for a worsted weight yarn in the colors brown, white, and black.
- Knitting Needles: Size 4mm (US 6) knitting needles or the size needed to obtain gauge.
- Stuffing: Polyester fiberfill for stuffing the honey badger toy.
- Needle: A tapestry needle for sewing up the seams and attaching any additional details.
- Scissors: A pair of scissors for cutting the yarn.
Instructions:
- Body: To start the honey badger knitting pattern, begin by casting on 35 stitches in the brown yarn. Knit in stockinette stitch for 15 rows, then switch to white yarn and knit 8 more rows. Switch back to brown yarn and knit for 10 rows. Bind off all stitches.
- Head: For the honey badger’s head, cast on 20 stitches in brown yarn. Knit in stockinette stitch for 10 rows, then decrease 1 stitch at each end of the next row. Knit 3 more rows in stockinette stitch, then decrease 1 stitch at each end of the next row. Continue this pattern of knitting and decreasing until you have 10 stitches remaining. Bind off all stitches.
- Ears: To create the honey badger’s ears, cast on 8 stitches in brown yarn. Knit in stockinette stitch for 4 rows, then decrease 1 stitch at each end of the next row. Knit 1 row, then decrease 1 stitch at each end again. Bind off all stitches.
- Assembly: Sew the body and head together using the tapestry needle and brown yarn. Attach the ears to the top of the head using the same method. Stuff the honey badger toy with polyester fiberfill, making sure to stuff it firmly but not overly so. Sew up any remaining seams and trim any excess yarn. Optional: embroider a face onto the honey badger toy using black yarn and the tapestry needle.
Conclusion:
With this honey badger knitting pattern, you can create a charming and unique toy that is sure to delight anyone who receives it. Whether you’re an experienced knitter or just starting out, this pattern is a fun and enjoyable project that allows you to showcase your creativity and knitting skills.
Materials needed for the Honey Badger Knitting Pattern
In order to create the adorable Honey Badger Knitting Pattern, you will need a few specific materials. Gathering these items before you begin will ensure a smooth and enjoyable knitting experience.
Yarn: For this pattern, you will need a medium weight yarn in the colors of your choice. It is recommended to use yarn that is soft and durable, as this will create a cuddly finished product. You will need approximately 200-250 yards of yarn.
Needles: To knit the Honey Badger, you will need a pair of knitting needles in the appropriate size for your chosen yarn. The exact size will depend on your personal gauge, so be sure to check the label on your yarn for needle size recommendations. Typically, a set of US size 6 (4mm) or US size 7 (4.5mm) needles will work well.
Stuffing: To give your Honey Badger its shape and make it huggable, you will need some stuffing material. Polyester fiberfill or wool stuffing are both good options for this. Make sure you have enough to adequately fill the body, limbs, and head of the badger.
Yarn Needle: A yarn needle with a large eye is essential for sewing up the seams and attaching any additional elements, such as the badger’s features or tail. Choose a needle that is comfortable to hold and easy to thread.
Scissors: A pair of sharp scissors will be needed for various stages of the knitting process, such as cutting the yarn and trimming any loose ends. Make sure they are handy and easily accessible.
Optional: If desired, you may also include additional accessories for your Honey Badger, such as small buttons for eyes, embroidery thread for facial details, or a small bell for a jingling effect. These items are not necessary, but they can add a special touch to your finished badger.
By gathering all of these materials before you begin, you will be well-prepared to start creating your very own Honey Badger. Enjoy the process and have fun bringing this charming creature to life!
Getting started with the Honey Badger Knitting Pattern
The Honey Badger knitting pattern is a unique and fun project for knitters of all skill levels. Whether you’re a beginner or an experienced knitter, this pattern will guide you through the steps to create your very own honey badger toy.
To start, make sure you have all the necessary materials for the project. You’ll need a set of knitting needles, yarn in various colors (such as brown, black, white, and gray), stuffing, and safety eyes. Gather these supplies and set them out on a clean, well-lit workspace.
Step 1: Cast on
Begin by casting on the required number of stitches for the body of the honey badger. You can find this information in the pattern instructions. Use the specified color of yarn and follow the recommended cast-on method.
Step 2: Knit the body
Once you’ve cast on, you’ll start knitting the body of the honey badger according to the pattern. This will involve using different stitches, such as knit and purl, to create the desired texture and shape. Follow the instructions carefully and make sure to keep track of your rows and stitches.
Step 3: Shape the features
As you knit, the pattern will instruct you on how to shape the honey badger’s head, ears, and other features. Pay close attention to these directions and use markers to indicate where you need to increase or decrease stitches.
Step 4: Add the details
Once you have finished knitting the body and shaping the features, it’s time to add the finishing touches. This may include embroidering the honey badger’s eyes and sewing on other details, such as a mouth or claws. Consult the pattern for specific instructions on how to do this.
Step 5: Stuff and assemble
Finally, stuff the knitted pieces with stuffing to give the honey badger a plush and cuddly feel. Make sure to evenly distribute the stuffing so that the toy is well-shaped. Once you’re satisfied with the stuffing, sew the pieces together using a yarn needle and the specified yarn color.
Following these steps, you’ll be able to create your very own honey badger using the knitting pattern. Feel free to get creative and experiment with different colors and yarn textures to personalize your honey badger to your liking.
Stitch Techniques for the Honey Badger Knitting Pattern

The Honey Badger Knitting Pattern is an adorable and fun project that incorporates various stitch techniques to create a textured and charming honey badger design. Here are some of the key stitch techniques used in this pattern:
1. Garter Stitch

The garter stitch is the foundation stitch used for the body of the honey badger. This stitch is created by knitting every row, resulting in a fabric with a bumpy texture. The garter stitch gives the honey badger a cozy and squishy feel.
2. Stockinette Stitch
The honey badger’s face and legs are knitted using the stockinette stitch. This stitch is created by knitting one row and purling the next row. The stockinette stitch creates a smooth and even fabric, which gives the honey badger’s features a polished look.
3. Intarsia Technique
To achieve the honey badger’s distinct coloring, the intarsia technique is used. This technique involves using separate balls or bobbins of yarn for each color block. By switching between the different colors, you can create the honey badger’s distinctive markings and patterns.
4. Embroidery
To add the finishing touches to the honey badger, embroidery is used for the details such as the eyes, nose, and mouth. This involves using a tapestry needle and yarn to carefully stitch on these small features, bringing the honey badger to life.
These stitch techniques combined create a unique and charming honey badger knitting pattern that is sure to be a delightful project for knitters of all skill levels.
Knitting the main body of the Honey Badger
When it comes to knitting the main body of the Honey Badger, there are a few key steps to follow to ensure that your project turns out just right. First, you’ll want to select the appropriate yarn and needles for the pattern. The Honey Badger knitting pattern typically calls for a medium-weight yarn and size US 8 (5mm) knitting needles.
Once you have your materials ready, you can begin by casting on the required number of stitches for the size of the Honey Badger you are knitting. The pattern will specify the exact number of stitches to cast on, so make sure to double-check before you start. You can use a knitted cast on or any other cast on method that you prefer.
Next, you’ll start working the main body of the Honey Badger in the specified stitch pattern. This pattern will typically involve a combination of knit and purl stitches to create the texture and design of the honey badger. You may need to reference the pattern for any specific stitch instructions or repeats.
As you work on the main body, make sure to periodically check your gauge to ensure that you are knitting to the correct size. This will help ensure that your finished honey badger turns out the right dimensions and fits as desired.
Continue knitting the main body until you reach the desired length specified in the pattern. This will typically be measured in inches or centimeters. You can use stitch markers to help keep track of your progress and to mark any specific sections or increases/decreases as required.
Once you’ve completed the main body, you can finish off your knitting by binding off the stitches. Again, the pattern will specify the exact bind off method to use. After binding off, weave in any loose ends and give your honey badger a gentle blocking to help it retain its shape.
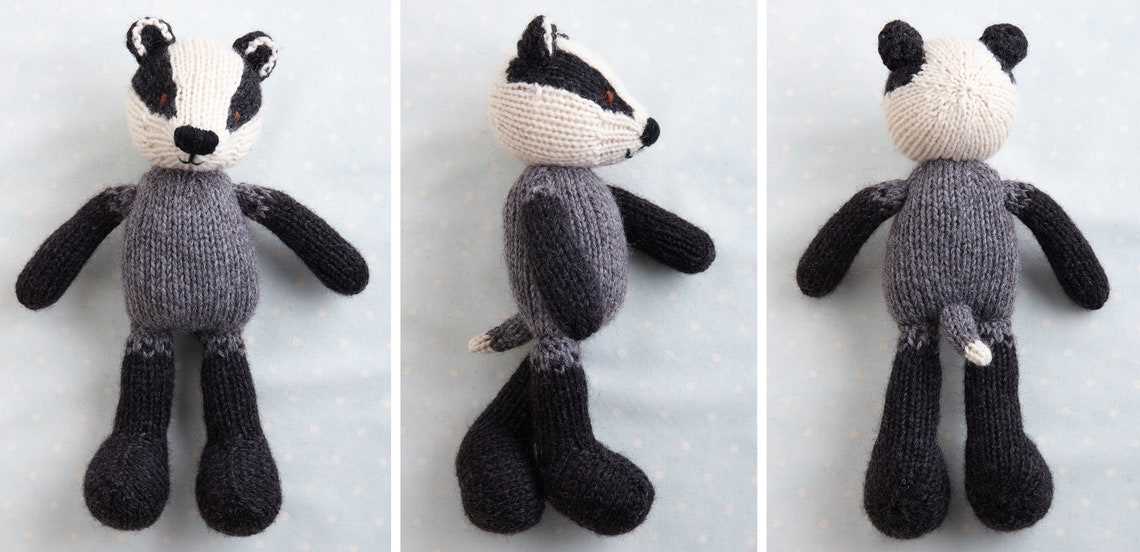
Shaping the head and muzzle of the Honey Badger

The head and muzzle of the Honey Badger are important features to capture when knitting a toy or a stuffed animal. The head should have a round shape, resembling the actual shape of a Honey Badger’s head. To achieve this, start by increasing the number of stitches in the first few rounds. This will create the desired roundness and form the base of the head. Additionally, it is important to use a slightly smaller needle size for the head compared to the body, as this will result in a tighter fabric and a more defined shape.
Once the head is shaped, it is time to focus on the muzzle. The muzzle of a Honey Badger is elongated and pointed, adding to its characteristic appearance. To create this shape, decrease the number of stitches gradually, creating a tapering effect. Start with a few gradual decreases and then continue with more rapid decreases towards the tip of the muzzle. This will give the illusion of a pointed and elongated muzzle, capturing the essence of a Honey Badger’s face.
It is important to pay attention to the placement and size of the eyes and nose as well. These features are crucial in bringing the Honey Badger to life. You can use felt or embroidery to create the eyes, and a small piece of felt or fabric for the nose. Be sure to position them correctly, as they will help create the characteristic expression of the Honey Badger’s face.
Adding details to the Honey Badger
When knitting the Honey Badger pattern, adding details is an important step to make the final product come to life. One way to add details is by incorporating different stitches and techniques. For example, using the duplicate stitch technique can help create realistic facial features, such as the eyes, nose, and mouth. By using a contrasting color of yarn and following a chart or pattern, the duplicate stitch allows you to embroider over the existing knitted fabric to add these small details.
Another way to add details to the Honey Badger is by using textured stitches to mimic the badger’s fur. Knitting stitches such as the seed stitch or the moss stitch can help create a knobbly texture that resembles the coarse hair of a badger. By alternating between knit and purl stitches, these textured stitches can be used to knit sections of the badger’s body or to add accents, such as a stripe down the back.
Using the Honey Badger pattern to guide your details
If you are using a specific Honey Badger knitting pattern, it’s important to carefully follow the instructions for adding details. The pattern may include specific techniques or stitches to achieve the desired effect. For example, the pattern may instruct you to use a specific embroidery stitch to create the badger’s claws or to add contrasting yarn for the iconic stripe on its face. By following the pattern’s instructions, you can ensure that your finished Honey Badger closely resembles the intended design.
Overall, adding details to the Honey Badger is a crucial step in bringing the knitted animal to life. Whether through embroidery or textured stitches, these details contribute to the overall appearance and character of the finished project. By following a pattern or experimenting with different techniques, you can create a unique Honey Badger that captures the essence of this tenacious and fearless creature.
Finishing touches for the Honey Badger
The Honey Badger knitting pattern is a fun and challenging project that requires attention to detail and patience. Once you have completed the main body and completed all the necessary stitches, it’s time to add the finishing touches to give your Honey Badger its unique personality.
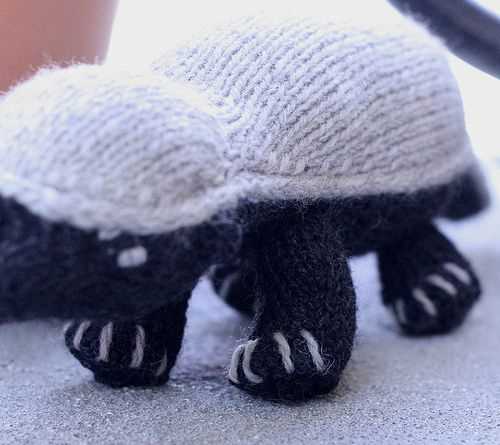
1. Face details: The face is the most expressive part of the Honey Badger, so it’s important to pay attention to the details. Embroider the eyes using black yarn, and use small stitches to create the iris and pupil. For the nose, use pink yarn and embroider a small triangle shape. Lastly, shape the mouth using black yarn, creating a slight curve to give the Honey Badger a mischievous smile.
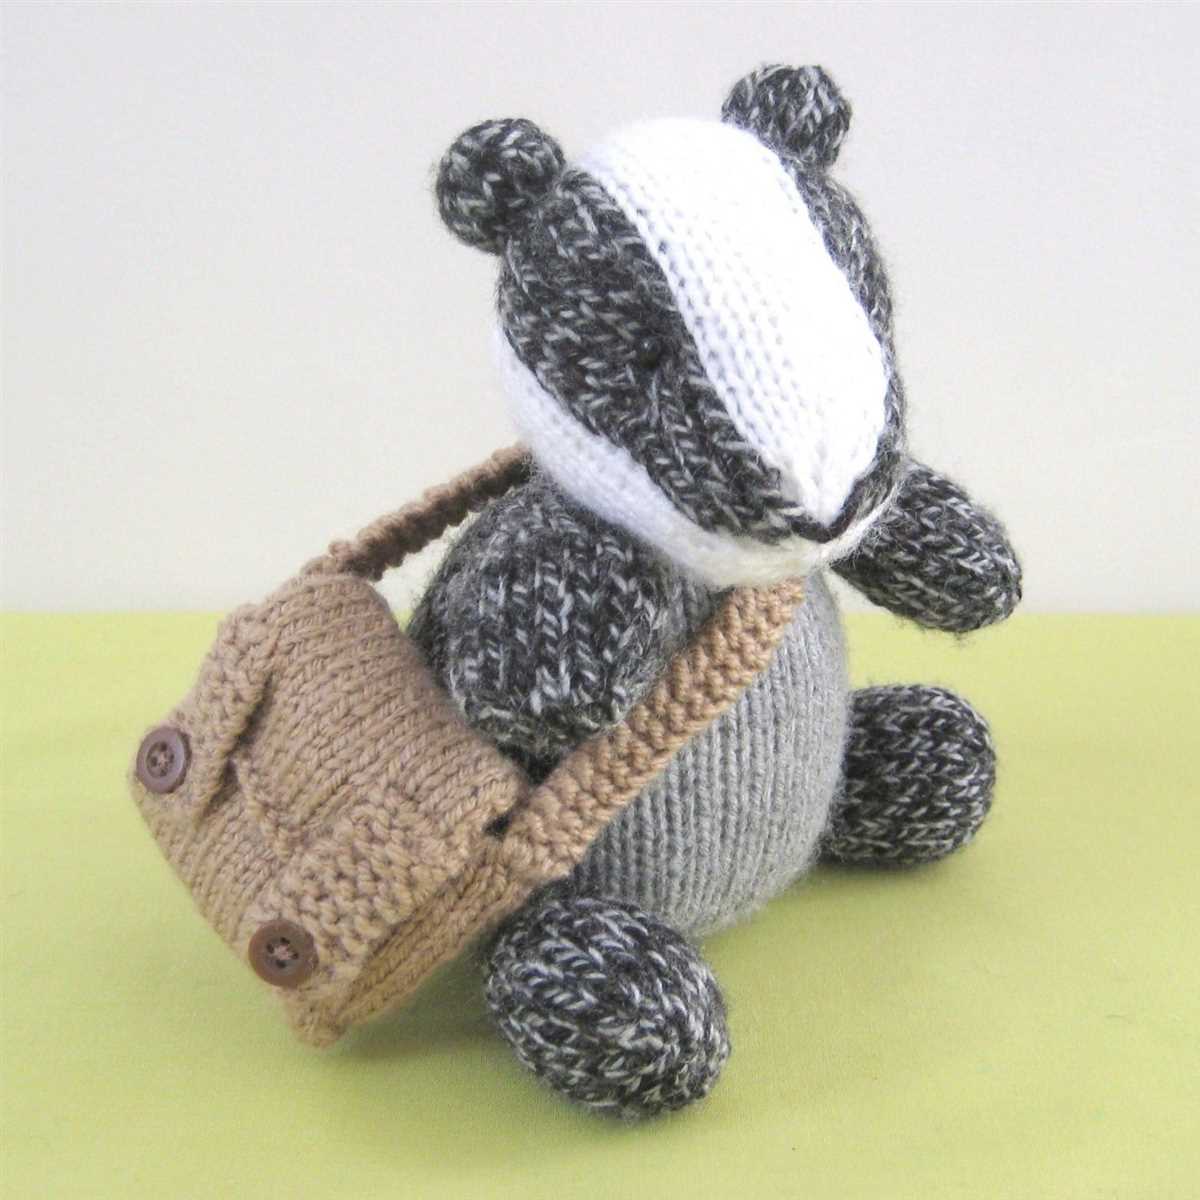
2. Ears and tail: The Honey Badger’s ears are a defining feature, so make sure they stand out. Use the same color yarn as the main body and sew them securely in place, making sure they are evenly positioned. The tail can be made using a long piece of yarn, which can be braided or twisted to give it a unique texture. Attach the tail firmly to the back of the Honey Badger, ensuring it’s centered and balanced.
3. Finishing touches: To give your Honey Badger that extra touch of realism, you can add some felt or fabric details. Cut out small pieces of brown felt and sew them on as patches or spots, just like a real Honey Badger. You can also use a scrap of fabric to make a little scarf or bandana, which can be tied around the neck for a cute and stylish touch.
4. Final inspection: Once you have completed all the finishing touches, it’s important to give your Honey Badger a thorough inspection. Make sure all the parts are securely attached and the stitches are tight. Check for any loose threads or uneven stitches and fix them as necessary. Give your Honey Badger a gentle squeeze to make sure it’s firm and well-stuffed. Finally, take a step back and admire your creation – you’ve made your very own adorable Honey Badger!
Tips and Tricks for Knitting the Honey Badger Pattern
If you’re looking for a challenging and unique knitting project, the Honey Badger pattern is the perfect choice. With its intricate design and detailed instructions, this pattern will test your knitting skills and leave you with a beautiful finished product. Here are some tips and tricks to help you along the way:
1. Take your time with the color work
The Honey Badger pattern features a stunning color work design that really brings the animal to life. To ensure that your color work looks its best, take your time and pay attention to the tension of your yarn. Use stitch markers to keep track of your progress and be sure to carry your yarn correctly to avoid loose or tight stitches. By being patient and meticulous with your color work, you’ll achieve a professional and polished finish.
2. Use a lifeline

With its complex pattern and intricate details, it’s easy to make a mistake when knitting the Honey Badger. To avoid having to rip out rows and start over, use a lifeline. A lifeline is a piece of waste yarn that you thread through your stitches after completing a section or row. If you make a mistake, you can simply rip back to the lifeline and start again from there, rather than having to start from the beginning. This will save you time and frustration.
3. Block your finished project

Once you’ve completed the Honey Badger pattern, it’s essential to block your finished project. Blocking involves wetting and shaping your knitting to even out the stitches and create a professional-looking final product. Follow the blocking instructions provided in the pattern and use blocking tools such as blocking mats and pins to achieve the desired shape and size. Blocking will enhance the stitch definition and overall appearance of your Honey Badger, making all your hard work truly shine.
4. Enjoy the process
Knitting the Honey Badger pattern is not an easy task, but it’s also an opportunity to challenge yourself and learn new techniques. Embrace the process and take pleasure in each stitch and row. Remember to take breaks when needed and not rush through the project. By enjoying the process, you’ll have a greater sense of accomplishment when you complete this unique and eye-catching knitting project.
Showcase and Variations of the Honey Badger Knitting Pattern
The Honey Badger Knitting Pattern has gained popularity among knitting enthusiasts for its cute and unique design. Here are some showcases and variations of this pattern that you can try out:
1. Classic Honey Badger
The classic honey badger design features the honey badger’s head and body, with details like the eyes, nose, and ears. It is perfect for creating adorable honey badger knitted toys or adding a honey badger motif to your knitting projects.
2. Honey Badger Scarf
If you want to incorporate the honey badger design into your accessories, try knitting a honey badger scarf. You can create a repeating honey badger pattern along the length of the scarf or add a few honey badger motifs as accents. This unique scarf is sure to turn heads and add a touch of whimsy to your outfit.
3. Honey Badger Baby Blanket
For a cute and cozy baby blanket, consider incorporating the honey badger design. Knit honey badger motifs in different colors and arrange them across the blanket, or create a large honey badger motif in the center. This baby blanket will make a perfect gift that is both practical and adorable.
4. Honey Badger Mittens
If you’re looking for a fun and playful accessory for the colder months, try knitting honey badger mittens. Incorporate the honey badger design onto the back of the mittens, or create a honey badger motif on the cuffs. These mittens will not only keep your hands warm but also showcase your love for honey badgers.
5. Honey Badger Hat
Add some personality to your winter wardrobe with a honey badger hat. Knit the honey badger design onto the brim or the body of the hat for a playful twist. You can even add yarn “ears” for an extra touch of cuteness. This hat will keep you warm while making a statement.
These are just a few examples of how you can showcase and play around with the Honey Badger Knitting Pattern. Let your creativity run wild and experiment with different colors, sizes, and placements to create unique and personalized projects that feature this adorable creature.
Q&A:
What is a honey badger knitting pattern?
A honey badger knitting pattern is a set of instructions that allows you to knit a honey badger-themed item, such as a toy or a piece of clothing.
Where can I find a honey badger knitting pattern?
You can find honey badger knitting patterns online on various knitting websites, in knitting books, or even on craft forums. Some websites offer free patterns, while others may charge a fee.
Are honey badger knitting patterns suitable for beginners?
It depends on the complexity of the pattern. Some honey badger knitting patterns may be more advanced and require intermediate or advanced knitting skills. However, there are also simpler patterns available that beginners can try.
What kind of items can I make using a honey badger knitting pattern?
You can make a variety of items using a honey badger knitting pattern, such as stuffed animals, hats, scarves, or even mittens. The specific item will depend on the pattern you choose.
Can I customize a honey badger knitting pattern?
Yes, you can customize a honey badger knitting pattern to suit your preferences. You can choose different yarn colors, add embellishments, or modify certain aspects of the pattern to make it your own.
Is there a knitting pattern for honey badgers?
Yes, there are honey badger knitting patterns available online. You can find them on various knitting websites and platforms.
Where can I find a honey badger knitting pattern?
You can find honey badger knitting patterns on websites such as Ravelry, Etsy, and LoveCrafts. These websites have a wide range of knitting patterns, including ones for honey badgers.