
Knitting your own hair scrunchies can be a fun and rewarding project for knitters of all skill levels. These cute accessories not only add a stylish touch to any outfit, but they also make great gifts for friends and family. Whether you’re a beginner looking for a simple pattern or an experienced knitter searching for a more challenging design, there are countless options available to suit your needs.
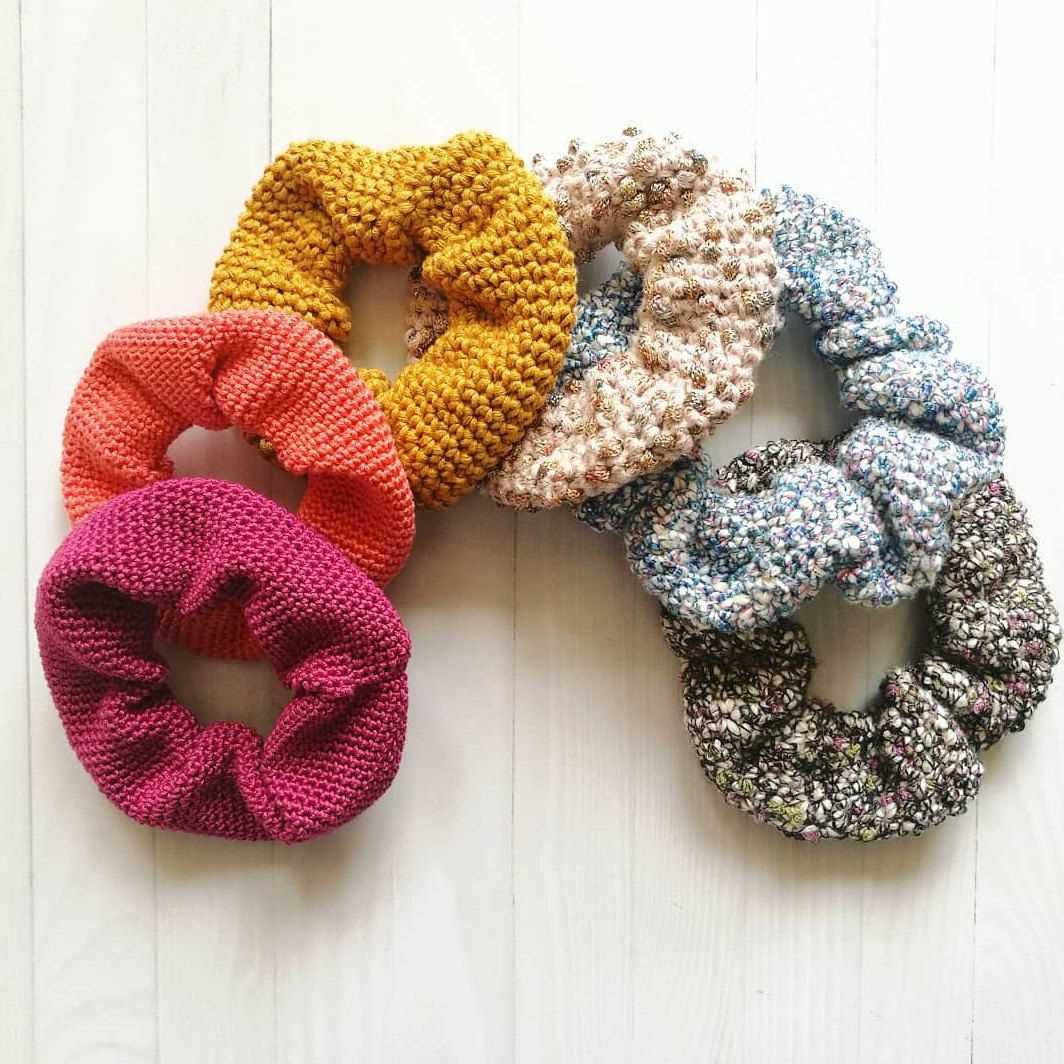
One of the great things about knitting hair scrunchies is that they can be made using a wide variety of yarns and techniques. From simple garter stitch designs to more intricate cables or lace patterns, you can customize your scrunchie to create a unique and special accessory. Additionally, knitting your own scrunchies allows you to choose from a vast array of colors and textures, so you can match them to any outfit or mood.
In this article, we will explore some popular hair scrunchie knitting patterns and provide step-by-step instructions to help you create your own. Whether you’re looking for a basic pattern that can be completed in just a few hours or a more complex design that will challenge your skills, we’ve got you covered. So grab your knitting needles and get ready to add a touch of style to your hair with these fun and fashionable accessories!
Materials needed
When making a hair scrunchie, you will need a few materials to get started. Here is a list of the basic items you will need:
- Knitting needles: You will need a pair of knitting needles, preferably in a size suitable for your chosen yarn. This could be anywhere from US size 6 to 10, depending on the thickness of your yarn.
- Yarn: Choose a yarn that is both soft and durable, as it needs to stand up to regular use. You can choose any color or texture that you prefer for your scrunchie.
- Elastic: To give your scrunchie its stretchy nature, you will need some elastic. Look for thin elastic bands that are around a quarter inch in width.
- Tape measure: Having a tape measure on hand will help you accurately measure the length of your elastic and the circumference of your finished scrunchie.
- Scissors: You will need a pair of sharp scissors to cut your yarn and elastic to the desired lengths.
- Sewing needle: A sewing needle will be used to attach the ends of the elastic together and sew up the scrunchie.
With these materials ready, you will be well-equipped to begin knitting your own hair scrunchie. Make sure to have everything organized and within reach before you start, so you can focus on the knitting process without any interruptions.
Choosing the perfect yarn
When it comes to knitting a hair scrunchie, choosing the right yarn is crucial for achieving the desired result. The yarn you choose will determine the texture, elasticity, and overall look of the finished scrunchie. It’s important to consider factors such as the fiber content, weight, and color of the yarn.
Fiber content: The fiber content of the yarn plays a significant role in the final outcome of the hair scrunchie. You can choose from a variety of options such as cotton, acrylic, or even a blend of different fibers. Cotton yarn is often preferred for its breathability and softness, while acrylic yarn is known for its durability and affordability. It’s recommended to choose a yarn that is comfortable to wear and suits your preferences.
Weight: The weight of the yarn determines the thickness of the hair scrunchie. For a lightweight scrunchie, you can opt for a fingering or sport weight yarn. These yarns are great for creating delicate and airy scrunchies. On the other hand, if you want a chunkier and more substantial scrunchie, consider using a bulky or super bulky weight yarn. It’s important to choose a weight that aligns with your desired level of thickness and volume.
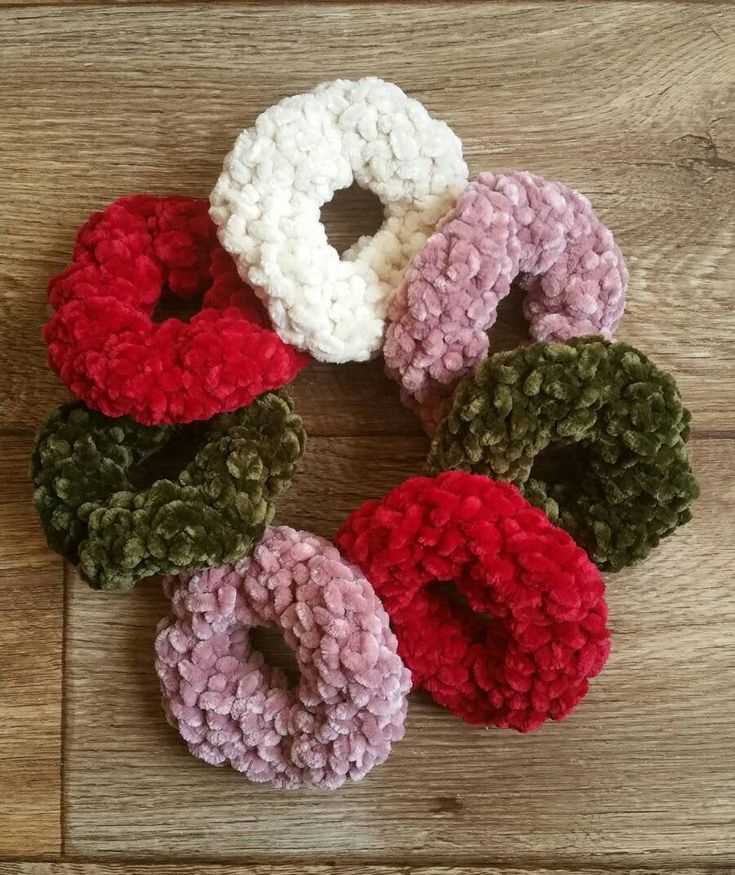
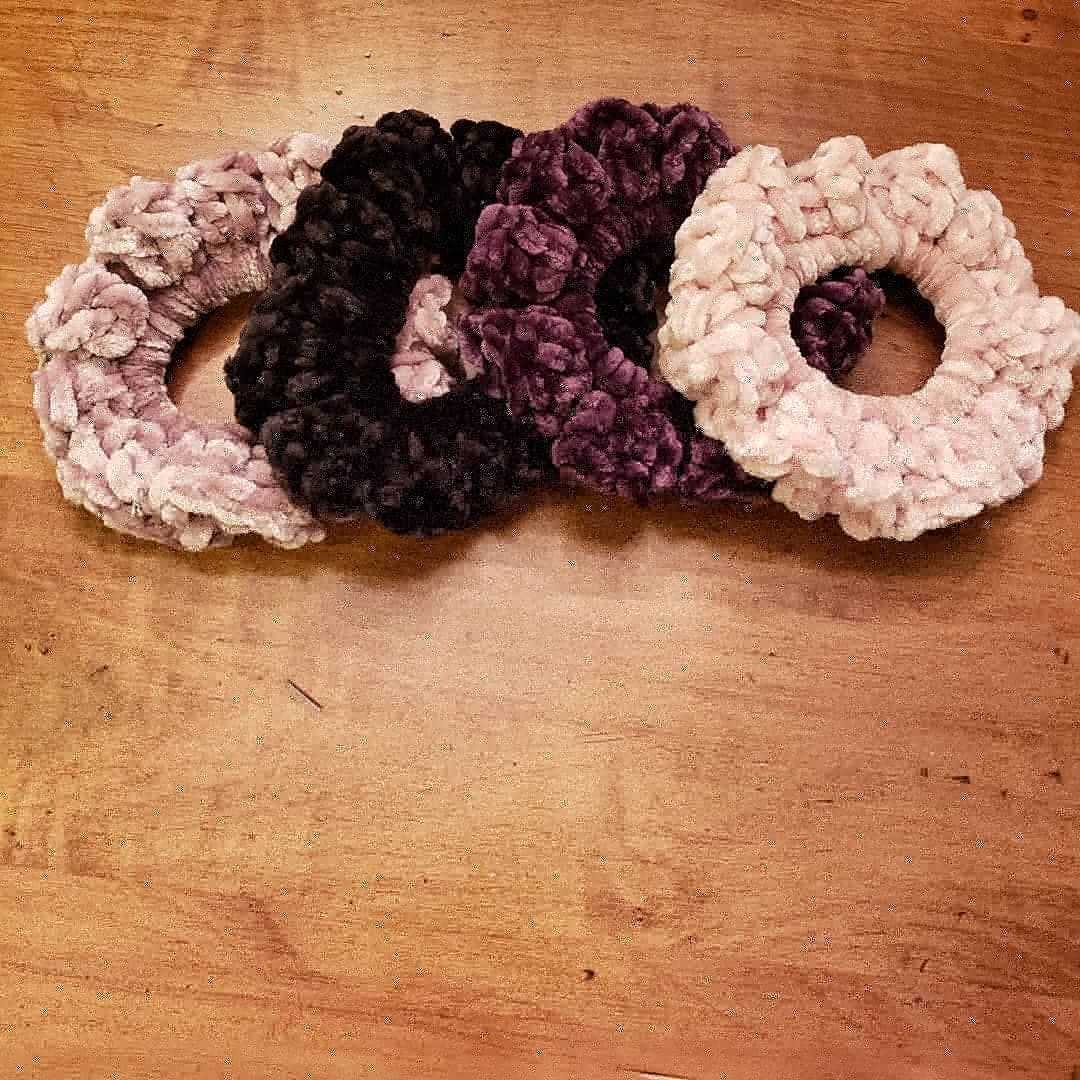
Color: The color of the yarn is another important aspect to consider. You can choose a yarn in a solid color for a classic and timeless look, or experiment with variegated or self-striping yarns for a more unique and colorful scrunchie. It’s essential to select a color that complements your hair color and personal style. Additionally, consider the occasion or outfit you plan to wear the scrunchie with, as this can influence your color choice as well.
Overall, when choosing the perfect yarn for your hair scrunchie, consider the fiber content, weight, and color to ensure that it not only looks great but also feels comfortable to wear. Experimenting with different yarns can be an exciting way to add variety to your collection of hair accessories.
Needles and gauge
When knitting a hair scrunchie, the choice of needles is an important factor to consider. The size and type of needles used will determine the final look and feel of the scrunchie. Generally, a set of circular knitting needles is recommended for this project. These needles are great for knitting in the round and create a seamless finished product. The size of the needles will depend on the desired gauge and tension.
The gauge refers to the number of stitches and rows per inch when knitting. This can vary depending on the thickness of the yarn and the desired result. For a hair scrunchie, a medium to thick yarn is typically used, so a larger needle size may be required to achieve the desired gauge. It is important to check the gauge before starting the project to ensure that the scrunchie will fit properly and have the desired elasticity.
To determine the gauge, it is recommended to knit a small swatch using the desired yarn and needles. This swatch should measure at least 4 inches by 4 inches and should be knitted in the stitch pattern that will be used for the scrunchie. Once the swatch is complete, it can be measured to determine if the gauge is accurate. Adjustments can be made as necessary by changing the needle size or tension.
Some key phrases to consider:
- Needle size
- Circular knitting needles
- Seamless finished product
- Gauge
- Stitches per inch
- Rows per inch
- Medium to thick yarn
- Larger needle size
- Elasticity
- Swatch
- Adjustments
- Needle tension
Creating the base
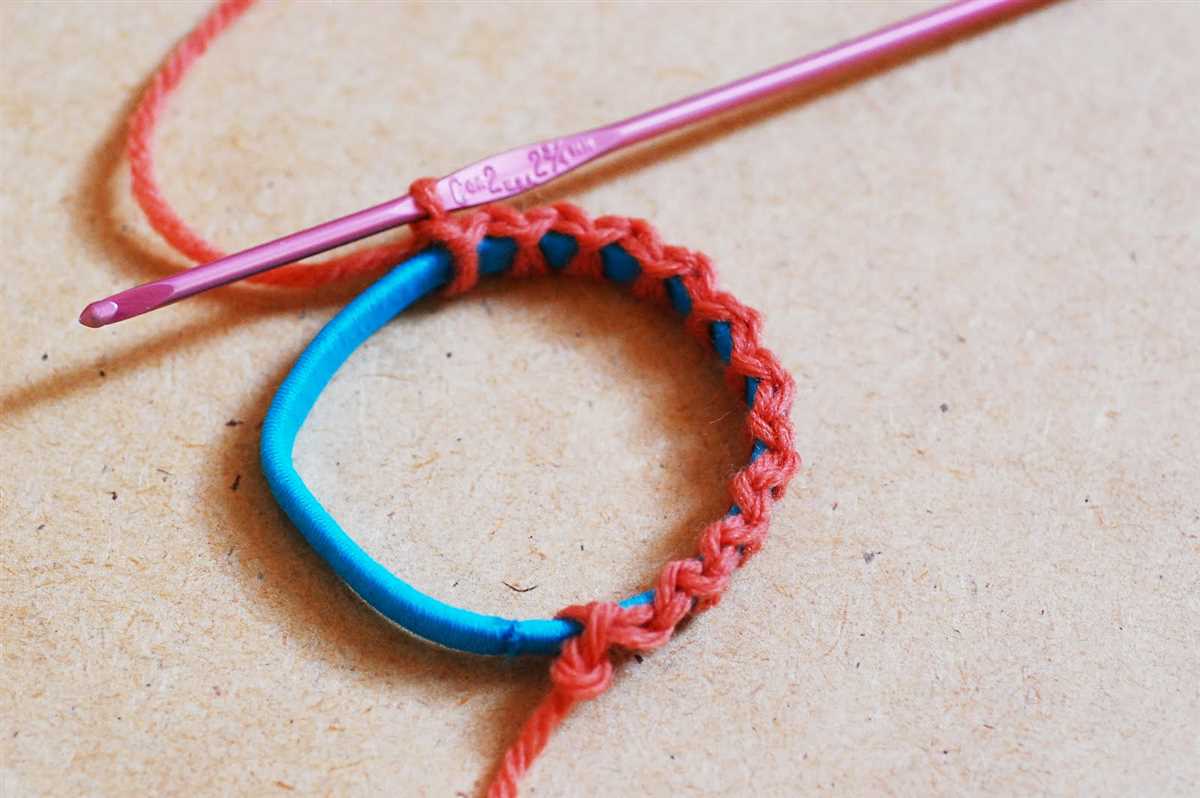
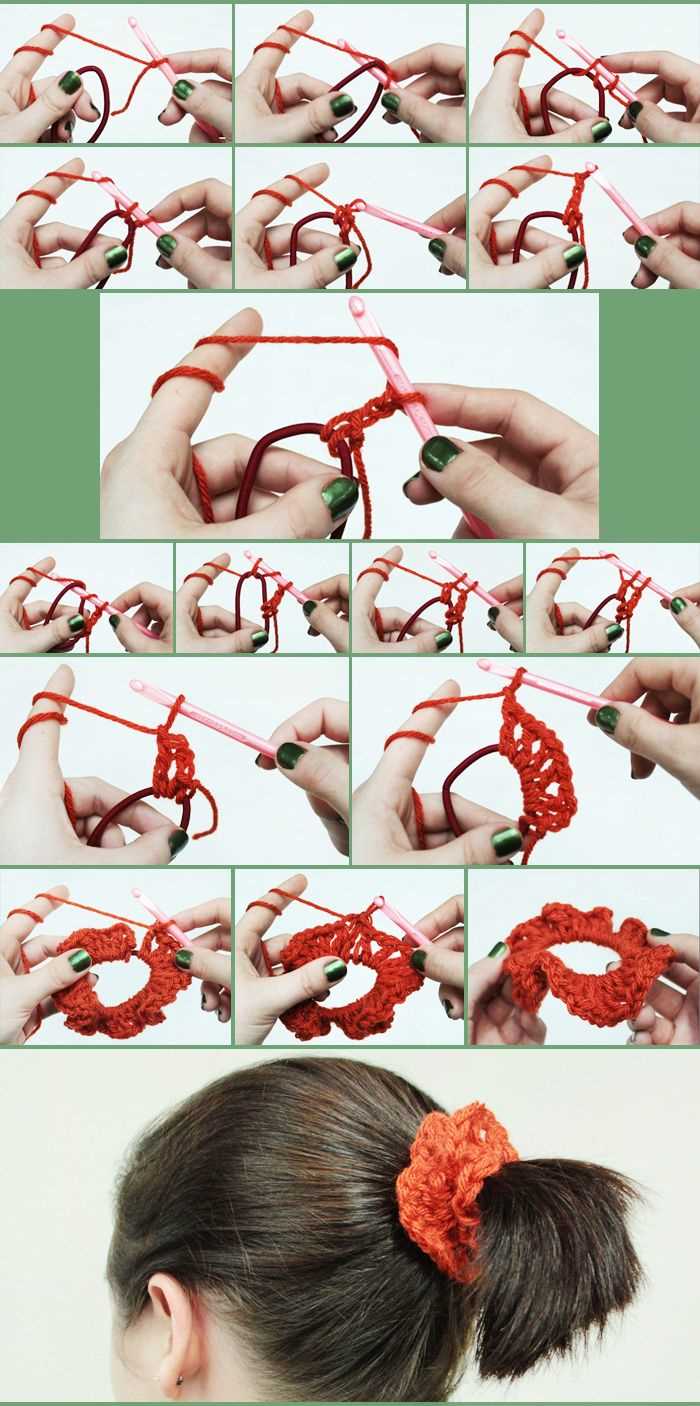
Crocheting a hair scrunchie is a fun and easy project that can be completed in just a few hours. To start, you will need yarn in your chosen color, crochet hook, and a small hair elastic. The first step is to create the base of the scrunchie.
Step 1: Begin by creating a slip knot with your yarn and placing it on your crochet hook. This will serve as your first stitch.
Step 2: Hold the hair elastic in your non-dominant hand and insert your crochet hook through the center of the elastic. Pull the yarn through the elastic, creating a loop around the elastic.
Step 3: Continue to crochet around the elastic, making single crochet stitches. Insert your hook into the next stitch, yarn over, and pull through to create a loop. Yarn over again and pull through both loops on your hook. Repeat this process all the way around the elastic.
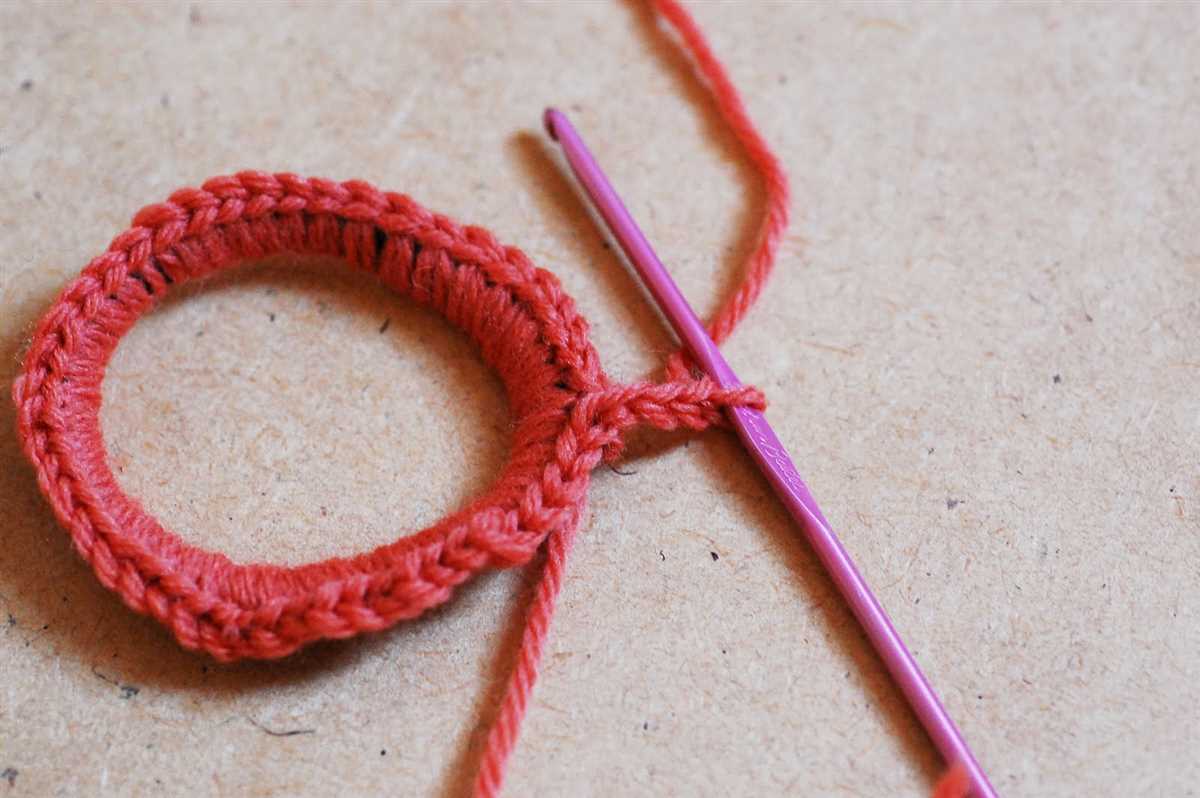
Step 4: Once you have crocheted all the way around the elastic, join the first and last stitches together with a slip stitch. This will create a circular shape for the scrunchie.
Step 5: To ensure that the base is secure, weave in the loose ends of the yarn using a tapestry needle. This will prevent the scrunchie from unraveling.
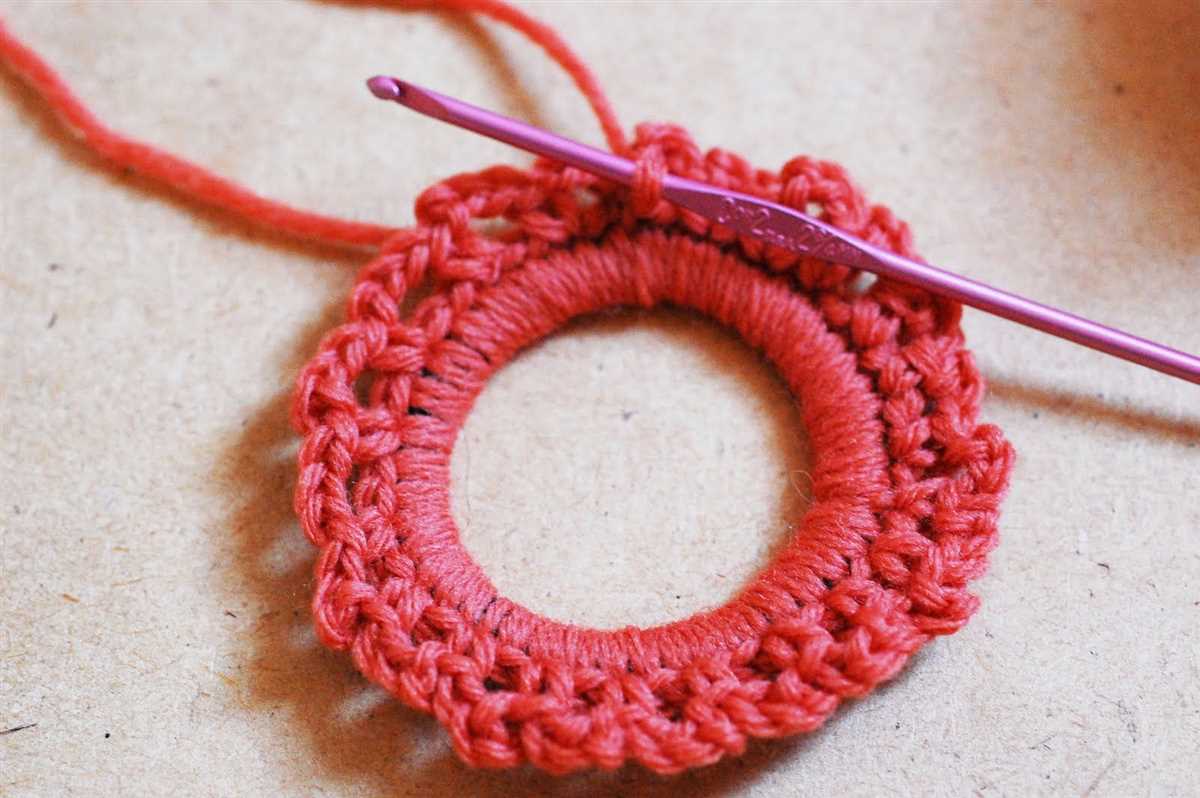
Once you have completed these steps, you will have the base of your hair scrunchie. Now it’s time to move on to the next step and add the decorative stitches to create a beautiful and unique accessory for your hair.
Knitting the body
When knitting a hair scrunchie, the body is the main part of the accessory that wraps around the hair. It is where you can get creative and experiment with different patterns and textures.
Start by casting on the desired number of stitches, making sure it is a multiple of the pattern repeat. You can use a stretchy cast on method to ensure a comfortable fit. Once you have the stitches on your needle, join them in the round by knitting the first stitch of the cast on row together with the last stitch. This creates a seamless circle, perfect for a hair scrunchie.
Next, you can start working on the body of the hair scrunchie using your chosen stitch pattern. Whether you prefer a simple stockinette stitch, a ribbed pattern, or something more intricate like cables or lace, the choice is yours. Make sure to follow the pattern instructions carefully, knitting or purling each stitch as indicated.
As you knit the body, it’s important to keep track of your progress and measure the circumference of the scrunchie. This will help ensure that it will fit comfortably around your hair. Remember that the fabric will stretch when worn, so it’s better to have a slightly smaller circumference than too loose.
If you are incorporating a color change or different stitch pattern, make sure to carry the unused yarn along the inside of the scrunchie. This will help prevent any loose strands from getting tangled in your hair. You can also experiment with different yarn weights and textures to achieve the desired look and feel.
Once you have completed the desired length of the body, it’s time to finish off the hair scrunchie. You can do this by binding off all stitches in pattern, making sure not to bind off too tightly to maintain the stretchiness. Finally, weave in any loose ends and give your hair scrunchie a gentle blocking to even out the stitches and improve its appearance.
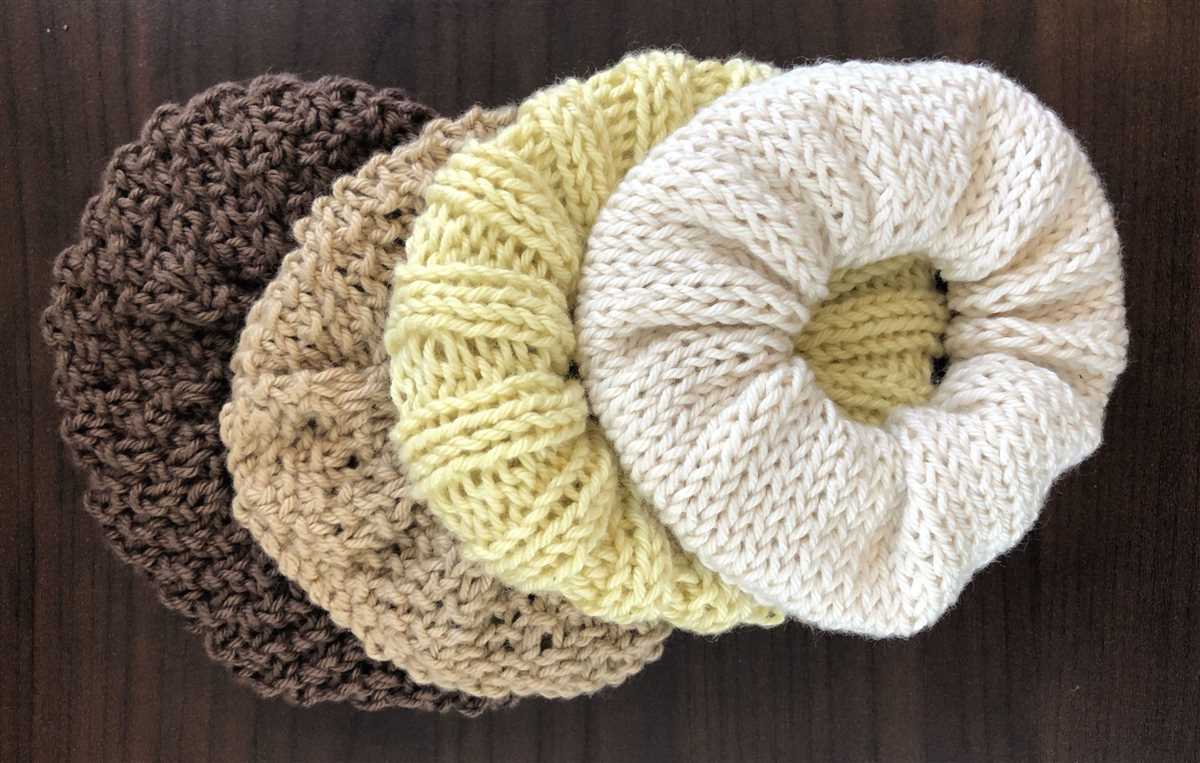
Adding texture with different stitches
When it comes to knitting a hair scrunchie, adding texture through different stitches can make the accessory more visually interesting and unique. By incorporating various stitch patterns, you can create a scrunchie that stands out and adds a stylish touch to any hairstyle.
One popular stitch pattern that works well for hair scrunchies is the seed stitch. This stitch creates a textured fabric that is both stretchy and dense, making it perfect for holding hair in place. To achieve the seed stitch, alternate between knitting and purling stitches in a pattern, resulting in a subtle, raised texture.
Another stitch pattern to consider is the rib stitch. The rib stitch creates a series of vertical columns that make the scrunchie more elastic and snug-fitting. By alternating between knitting and purling stitches in a specific sequence, you can achieve the ribbed effect. This stitch pattern is great for adding a classic and timeless look to your hair accessory.
- Cable stitches are another way to add texture to a hair scrunchie. By creating intricate twists and braids using cable stitches, you can create a visually striking design that will catch the eye. Cable stitches can be a bit more advanced, but they can add a beautiful dimension to your scrunchie.
- Lace stitches can also be incorporated for a delicate and feminine touch. Lace patterns usually involve yarn overs and decreases to create openwork designs. By using lace stitches, you can add an elegant and airy texture to your hair scrunchie.
- Bobble or popcorn stitches can create a playful and fun texture. These stitches involve creating small bobbles or popcorn-like bumps on the fabric, adding a unique texture and visual interest to the scrunchie.
By experimenting with different stitch patterns, you can create a hair scrunchie that not only serves its practical purpose but also stands out as a stylish accessory. Whether you choose to incorporate seed stitch, rib stitch, cable stitches, lace stitches, or bobbles, the added texture will make your hair scrunchie one-of-a-kind.
Adjusting the size
If you want to adjust the size of your hair scrunchie, you can easily do so by changing the number of stitches you cast on. Typically, a hair scrunchie is knit in the round using a circular needle or double-pointed needles. The number of stitches you cast on will determine the circumference of the scrunchie.
To make a smaller scrunchie, simply cast on fewer stitches. This will result in a tighter, more compact scrunchie that is perfect for those with thinner hair or for creating a more subtle look. You can experiment with different stitch counts to find the perfect fit for your hair.
If you want to make a larger scrunchie, cast on more stitches. This will create a looser, larger scrunchie that is great for those with thicker hair or for making a bold statement. You may need to adjust the number of rows you knit to achieve the desired length, depending on how much extra fabric you want in your scrunchie.
Remember, adjusting the size of your hair scrunchie is all about finding the right balance of stitches and rows. Don’t be afraid to experiment and try different combinations to create the perfect scrunchie for your hair type and personal style.
Joining the ends
To create a hair scrunchie, you will need to join the ends of your knitting project together. There are different methods you can use for joining the ends, depending on your preference and the look you want to achieve. Here are a few options:
- Seaming: One method is to use a yarn and a tapestry needle to seam the ends together. Thread the needle with your yarn and insert it through the stitches on one end, then through the stitches on the other end. Repeat this back-and-forth motion until the seam is secure. This method creates a clean, nearly invisible finish.
- Kitchener stitch: Another option is to use the Kitchener stitch, also known as grafting, to join the ends together seamlessly. This technique involves working with a tapestry needle and yarn, and it mimics the look of the knitted fabric. A specific sequence of steps is followed to create an invisible join that is highly durable.
- Three-needle bind off: If you prefer a more visible join, you can consider using the three-needle bind off method. This method involves knitting the stitches of one end together with the live stitches of the other end using a third needle. It creates a decorative seam that adds texture and interest to your hair scrunchie.
Whichever method you choose, remember to secure the yarn ends by weaving them in or tying them off to prevent unraveling. Once the ends are joined and secured, you can continue with the rest of the hair scrunchie pattern to complete your project.
Finishing touches
Once you have completed knitting your hair scrunchie, there are a few finishing touches you can add to give it that extra polished look. These small details will make your scrunchie stand out and give it a professional finish.
1. Weaving in the ends: Start by weaving in all the loose ends of yarn that you have from casting on and off. Use a tapestry needle to thread the ends through the stitches on the back of your work, and trim any excess yarn. This will ensure that your scrunchie looks neat and tidy.
2. Blocking: Blocking is a process where you gently shape and dampen your knitted item to help even out the stitches and give it a smooth finish. For a hair scrunchie, you can fill a spray bottle with water and lightly mist the knitted fabric. Then gently stretch the scrunchie to your desired length and let it air dry. This will help the stitches relax and give your scrunchie a more professional look.
Additional finishing touches:
- Adding a decorative button: To add some flair to your hair scrunchie, you can sew a decorative button to the center of the scrunchie. Choose a button that complements the color and style of your scrunchie.
- Attaching a label: If you plan on giving your hair scrunchie as a gift or selling it, consider attaching a small label with your name or brand logo. This adds a personal touch and makes it clear that your scrunchie is handmade.
- Creating a matching set: If you have extra yarn leftover, you can use it to knit a matching headband or wrist cuff. This creates a coordinated look and allows you to use up any leftover materials.
By taking the time to add these finishing touches, you can elevate your hair scrunchie from a simple accessory to a fashionable and professional-looking item.
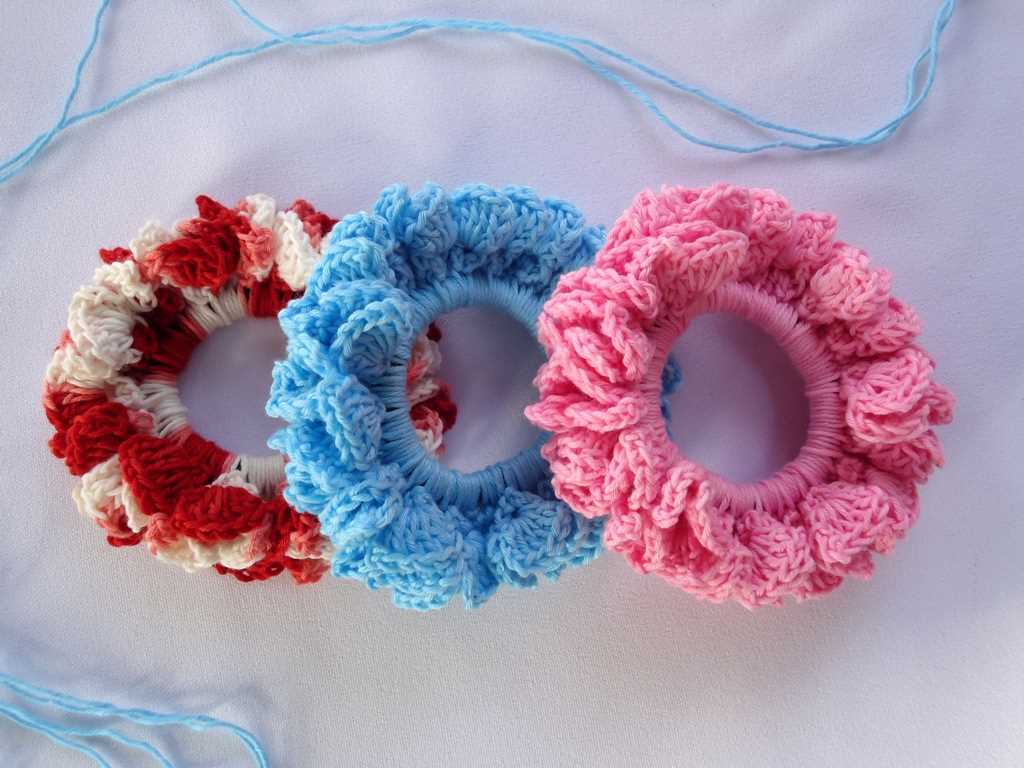
Decorating your scrunchie
Once you’ve finished knitting your hair scrunchie, it’s time to add some personal touches to make it unique and fashionable. There are a variety of ways you can decorate your scrunchie to match your style.
1. Embroidery: One option is to embroider your scrunchie. You can choose to add simple designs or intricate patterns using colorful thread. This will give your scrunchie a handmade and personalized feel.
2. Beads: Another way to decorate your scrunchie is by adding beads. You can string beads onto the yarn before knitting the scrunchie, or sew them onto the finished product. Beads can add sparkle and a touch of glamour to your scrunchie.
3. Ribbons and bows: Adding ribbons or bows to your scrunchie can make it look more feminine and cute. You can sew a ribbon or a bow onto the center of the scrunchie or attach multiple ribbons to different sections of the scrunchie.
4. Buttons: Sewing buttons onto your scrunchie can add an interesting and unique design element. You can choose buttons in different shapes, sizes, and colors to create a visually appealing pattern on your scrunchie.
5. Charms: Attach small charms to your scrunchie for a fun and whimsical touch. You can use charms that represent your hobbies, interests, or simply ones that you find stylish. Charms can be easily attached using jump rings or sewing thread.
6. Tassels: If you want to add some movement and flair to your scrunchie, consider attaching tassels. You can make tassels using colorful threads and then sew them onto the edges of your scrunchie. Tassels can add an extra dimension to your scrunchie’s appearance.
Remember, the possibilities are endless when it comes to decorating your scrunchie. Let your creativity run wild and have fun experimenting with different embellishments to make your scrunchie truly unique.
Caring for your knitted scrunchie
Once you’ve finished knitting your scrunchie, you’ll want to make sure it stays in great condition for as long as possible. Here are some tips on how to care for your knitted scrunchie:
- Hand wash only: It’s best to avoid machine washing your knitted scrunchie, as it can be quite delicate. Instead, fill a basin or sink with lukewarm water and a mild detergent. Gently knead the scrunchie in the soapy water, being careful not to stretch or twist it too much. Rinse it thoroughly with cool water and gently squeeze out the excess water.
- Avoid excessive stretching: While scrunchies are meant to stretch to accommodate different hair thicknesses, it’s important not to overstretch them. This can cause the elastic inside the scrunchie to lose its elasticity over time. When wearing or storing your scrunchie, be mindful not to pull or stretch it excessively.
- Avoid contact with sharp objects: Knitted fabric is more prone to snagging, so it’s important to keep your scrunchie away from sharp objects that could potentially damage or pull on the yarn. Be cautious when wearing your scrunchie around jewelry, zippers, or rough surfaces.
- Store it properly: To keep your scrunchie in top shape, consider storing it in a clean and dry place. You can use a small pouch or drawer to protect it from dust and dirt. Avoid storing it in direct sunlight, as prolonged exposure to sunlight can cause the colors to fade.
- Occasional blocking: If your knitted scrunchie loses its shape or becomes stretched out over time, you can give it a gentle blocking. To do this, wet the scrunchie with water, squeeze out the excess, and then pin it into shape on a blocking board or a towel. Let it dry completely before removing the pins.
By following these care tips, you’ll be able to enjoy your knitted scrunchie for a long time and keep it looking beautiful. Remember to take care when wearing, washing, and storing your scrunchie to ensure it lasts and retains its shape.
Alternative patterns and styles
While the basic hair scrunchie knitting pattern is simple and versatile, there are also alternative patterns and styles that you can explore to add variety to your collection. Here are a few ideas:
- Ribbed scrunchies: Instead of using a plain stitch, you can create a ribbed texture by alternating between knit and purl stitches in each row. This adds a subtle pattern to the scrunchie and can make it even more stretchy.
- Cable scrunchies: If you’re looking for a more intricate design, you can try knitting cables on your scrunchie. This creates a braided or twisted effect that adds visual interest and depth to the accessory.
- Colorful scrunchies: Don’t be afraid to experiment with different colors! You can knit scrunchies using variegated yarn or create color-blocked patterns by switching between different colors in each row. This allows you to match your scrunchie to different outfits or create a fun and playful look.
- Lace scrunchies: For a delicate and feminine touch, you can incorporate lace patterns into your scrunchies. This can be achieved by knitting lace motifs or using lace-weight yarn for a more intricate and airy feel.
These are just a few ideas to get you started, but the possibilities are endless. Feel free to mix and match different patterns, stitches, and yarns to create unique and personalized hair scrunchies that suit your style.
So why not give knitting hair scrunchies a try? With their simplicity and versatility, they make for a great knitting project for beginners and experienced knitters alike. Plus, they make wonderful gifts or stylish accessories for yourself. So grab your knitting needles and start creating your own collection of hair scrunchies!