
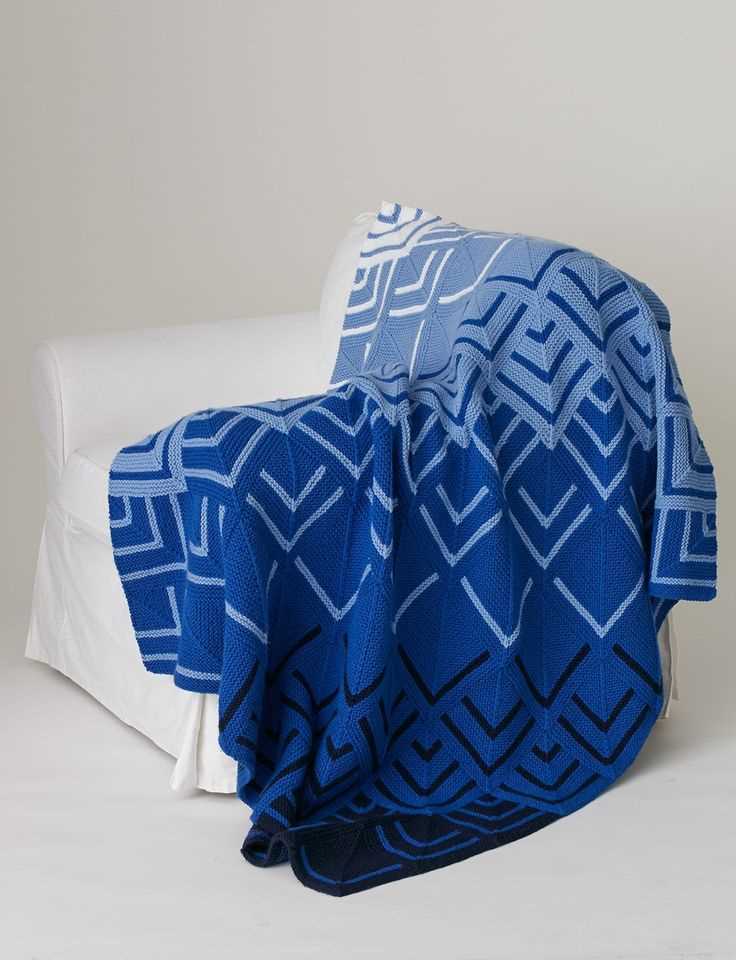
If you’re a fan of knitting, a geometric blanket could be your next exciting project. Geometric patterns are not only visually appealing, but they can also be a fun challenge to create. Whether you’re an experienced knitter or just starting out, this pattern can be adapted to your skill level.
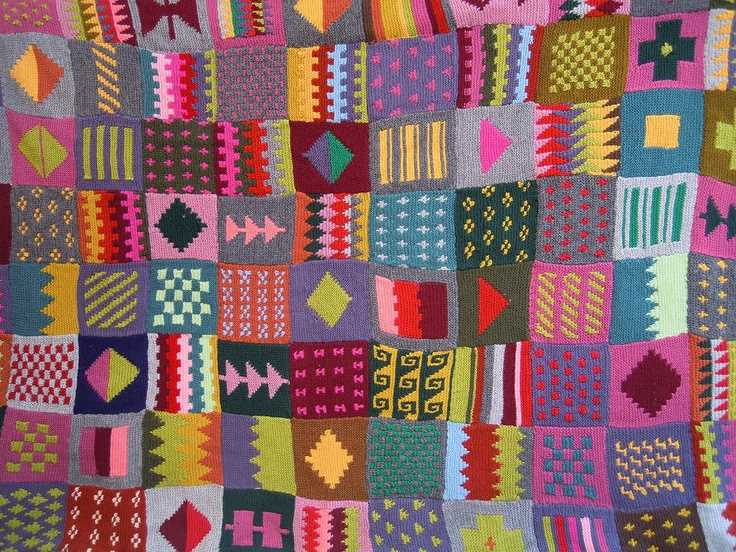
One of the great things about knitting a blanket with geometric patterns is that you can choose from various shapes and designs. From squares and triangles to diamonds and hexagons, the possibilities are endless. You can even combine different shapes to create a unique pattern.
To get started, you’ll need a set of knitting needles and yarn in your desired colors. The gauge will depend on the yarn you choose, so make sure to check the label for recommendations. You can also experiment with different yarn weights to achieve different textures and looks.
Once you have your materials ready, the next step is to choose a geometric pattern that you want to knit. There are plenty of resources available online that offer free patterns, or you can create your own. If you’re feeling adventurous, you can even design your own unique pattern!
Geometric Blanket Knitting Pattern
Are you looking for a fun and stylish knitting project? Look no further than the geometric blanket knitting pattern! This pattern is perfect for knitters of all skill levels and offers endless possibilities for customization.
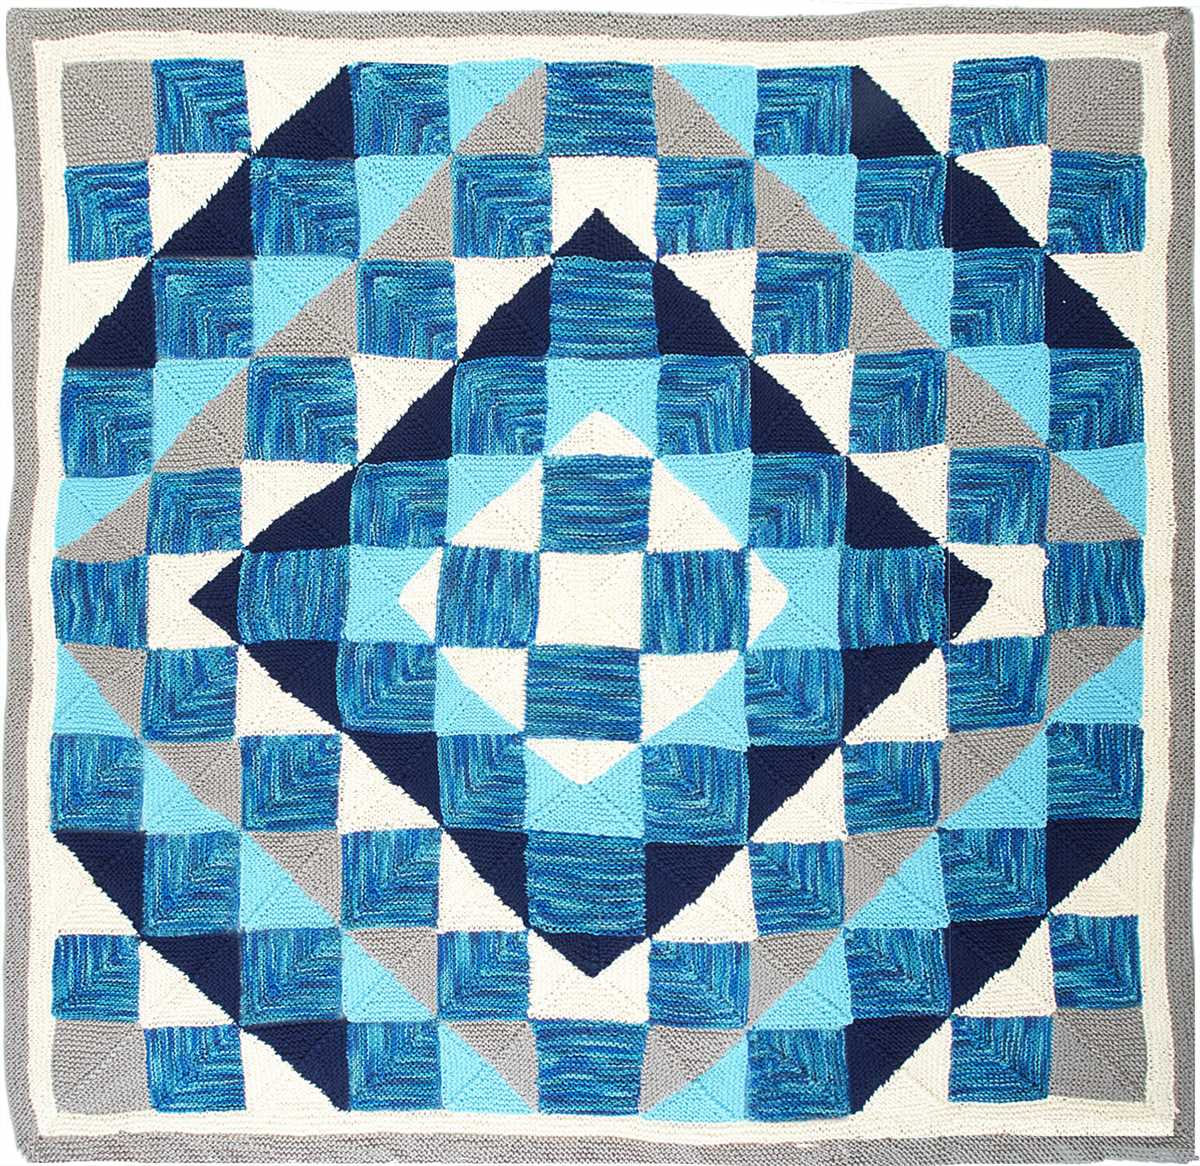
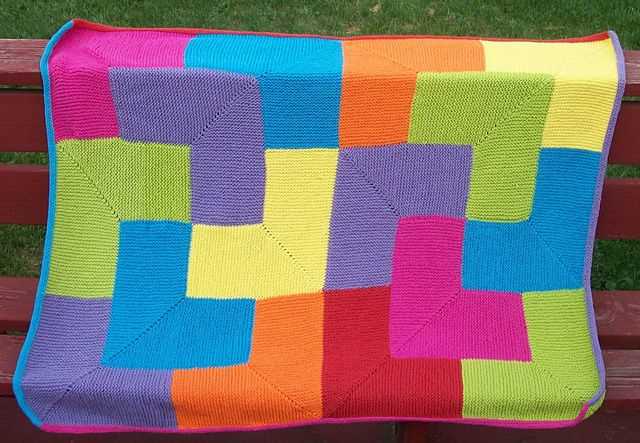
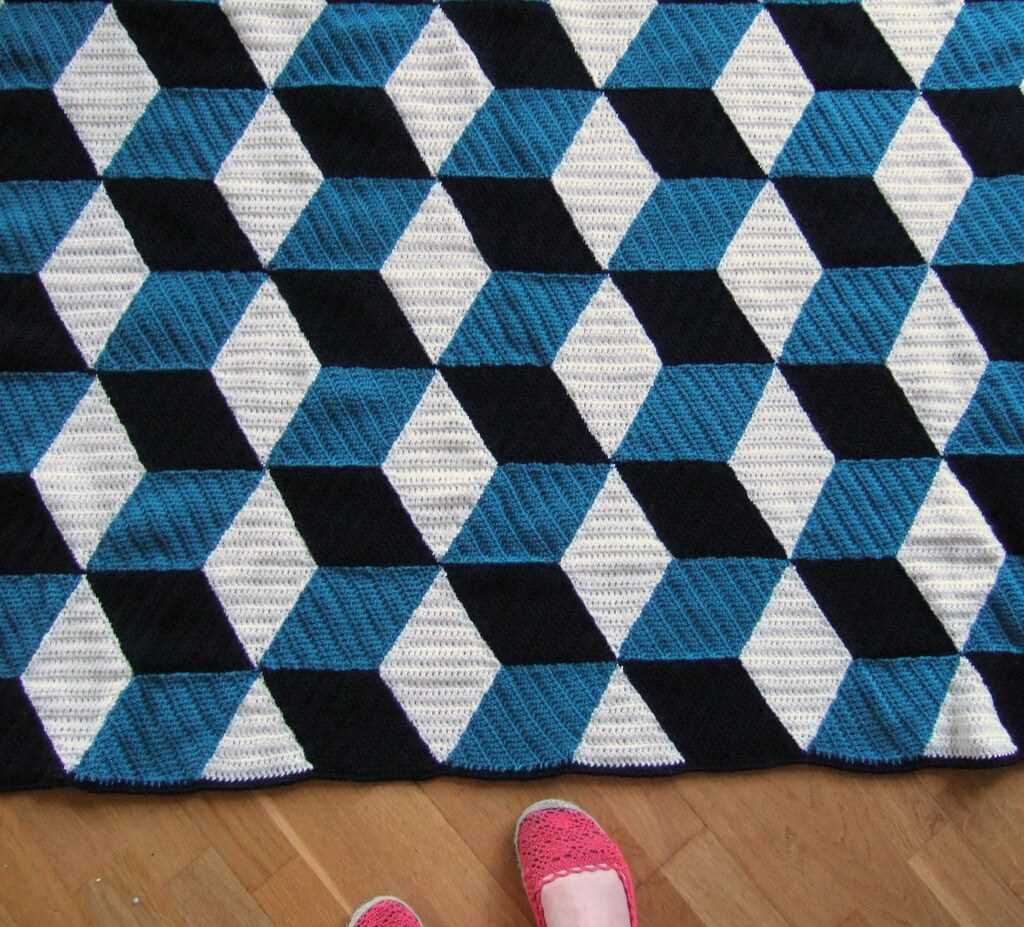
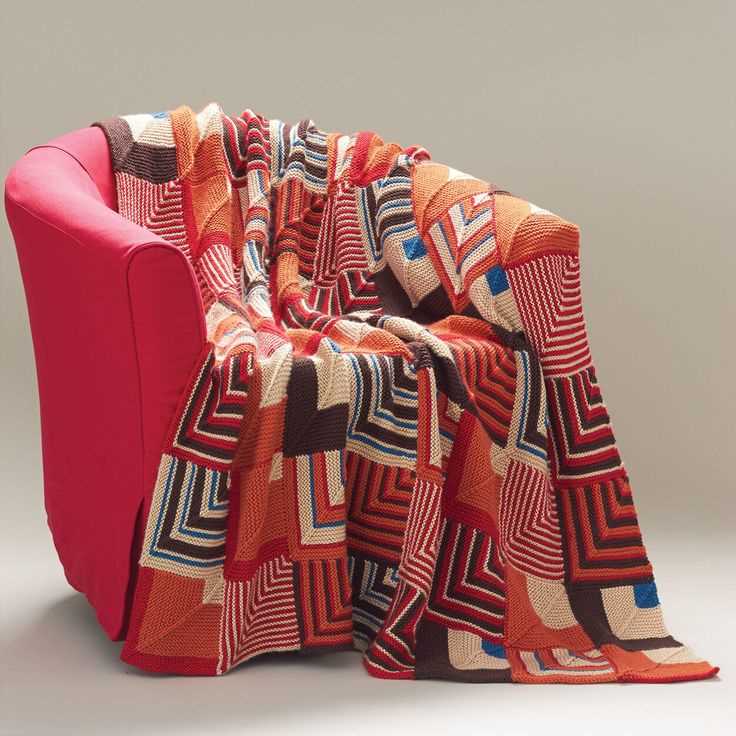
To get started, gather your knitting needles and choose your favorite yarn colors. The geometric blanket pattern consists of simple geometric shapes, such as squares, triangles, and diamonds, that are knitted together to create a beautiful and modern design. You can choose to knit each shape in a different color or use a combination of colors to achieve a stunning color-block effect.
To knit the squares, simply cast on the desired number of stitches and knit in garter stitch (knitting every row) until the square reaches the desired size. To knit the triangles and diamonds, you will need to follow a specific pattern that involves increasing and decreasing stitches to create the desired shape.
Once you have knitted all the geometric shapes, it’s time to assemble the blanket. Lay out the shapes in a pattern that you like, whether it’s a random arrangement or a specific design. Use a tapestry needle to sew the shapes together, making sure to secure the edges tightly to prevent unraveling.
The geometric blanket knitting pattern is not only a fun project to work on, but it also creates a stylish and modern blanket that will add a touch of sophistication to any room. Whether you’re knitting this blanket for yourself or as a gift for someone else, it’s sure to be a cherished and treasured item for years to come.
Materials and Tools
When embarking on a project to knit a geometric blanket, it’s essential to gather all the necessary materials and tools before getting started. The following list outlines the items you’ll need to successfully complete this knitting pattern.
Materials:
- Yarn: Selecting the right yarn is crucial for achieving the desired look and feel of your geometric blanket. Opt for a soft and warm yarn that is suitable for the weather and the purpose of the blanket. Consider the color scheme you want to incorporate and choose yarns that complement each other.
- Knitting Needles: Depending on the yarn weight and your personal knitting style, you’ll need a suitable pair of knitting needles. Make sure to check the recommended needle size for the yarn you’ve chosen.
Tools:
- Tape Measure: A tape measure will help you take accurate measurements, whether it’s to determine the gauge of your knitting or to measure the length and width of the finished blanket.
- Yarn Needle: A yarn needle, also known as a darning needle, is essential for weaving in loose ends and sewing pieces of your blanket together. Make sure to choose a needle with a large enough eye to accommodate the yarn thickness.
- Scissors: A sturdy pair of scissors will come in handy for cutting yarn and trimming any excess.
- Stitch Markers: Stitch markers can be useful for keeping track of specific stitch patterns or marking important sections of your blanket.
Gathering all the necessary materials and tools upfront will ensure a smooth and enjoyable knitting experience. Once you have everything you need, you’ll be ready to dive into the pattern and create your own beautiful geometric blanket.
Choosing the Yarn
When it comes to knitting a geometric blanket, one of the most important decisions you need to make is choosing the right yarn. The yarn you select will not only determine the overall look and feel of the blanket, but it will also impact how easy or difficult it is to work with. Here are some factors to consider when choosing the yarn for your geometric blanket knitting project:
1. Fiber
The first thing to consider is the type of fiber you want your blanket to be made of. There are various options available, including wool, acrylic, cotton, and blends of different fibers. Each fiber has its own unique characteristics, so think about what you want the finished blanket to feel like. Do you want it to be warm and cozy? If so, wool might be a good choice. Do you want it to be lightweight and breathable? Then cotton or acrylic might be better options.
2. Weight
Another important factor to consider is the weight of the yarn. The weight of the yarn will determine the thickness of the finished blanket, as well as the amount of time and effort it will take to knit. Geometric blankets typically require a weight that is not too bulky or too thin. DK (Double Knitting) or Worsted weight yarns are generally good options for geometric blanket patterns.
3. Color
The color of the yarn is also an important consideration when knitting a geometric blanket. You may choose a single color for a monochromatic look, or you may opt for multiple colors to create a more vibrant and eye-catching design. Think about the colors that will complement your home decor or the aesthetic you want to achieve.
Overall, choosing the right yarn for your geometric blanket knitting project requires careful consideration of the fiber, weight, and color. Take your time to find the perfect yarn that will not only be visually appealing but also enjoyable to work with.
Gauge and Swatch
When creating a geometric blanket using a knitting pattern, it is essential to pay attention to gauge and create a swatch before starting the project. Gauge refers to the number of stitches and rows per inch in a knitted piece, and it determines the size of the finished item. By knitting a swatch, you can determine if your tension matches the pattern’s instructions.
To start, you will need the recommended yarn and knitting needles specified in the pattern. Begin by casting on a sufficient number of stitches and knitting a small section of the pattern, following the instructions for stitch type and knitting tension. Measure the swatch using a ruler or gauge measuring tool to determine the number of stitches and rows per inch.
Why is gauge important?
Gauge is crucial because it ensures that the finished blanket will be the correct size. If your tension differs from the pattern’s gauge, the final project may be too small or too large. Additionally, gauge affects the overall appearance of the blanket. If the stitches are too tight, the fabric may be stiff, while loose stitches can result in a lacy and less structured finish.
How to adjust gauge
If your swatch does not match the pattern’s gauge, you may need to make adjustments to achieve the correct tension. To make your stitches tighter, you can switch to smaller needles or adjust your knitting tension. Conversely, if your stitches are too tight, using larger needles or adjusting your tension can help achieve the desired gauge.
Tip: Remember that adjusting needle size can also affect the drape and feel of the finished blanket. So, it is essential to consider how the changes in gauge may impact the overall look and texture of the project.
Using the swatch
Once you have achieved the correct gauge, you can use your swatch as a reference throughout the knitting process. Measure the size of your swatch to confirm the correct stitch and row count for each section of the pattern. This ensures that the blanket is consistent in size and appearance, as well as helps prevent any surprises or discrepancies in the finished project.
In conclusion, gauge and swatch are crucial elements when knitting a geometric blanket pattern. They help determine the correct size, ensure consistency, and allow for adjustments to achieve the desired outcome. Taking the time to create a swatch and match the pattern’s gauge will ultimately result in a beautifully knitted geometric blanket.
Getting Started
If you’re looking to knit a geometric blanket, you’re in the right place! This pattern is perfect for those who enjoy working with geometric designs and want to create a cozy blanket. Before you start, make sure you have all the necessary supplies, including yarn, knitting needles, and any additional tools you may need. Once you have everything ready, you can begin knitting your geometric blanket.
Choosing the right yarn: The first step in starting your geometric blanket is choosing the right yarn. Consider the size and weight of the blanket you want to make and select a yarn that will be suitable for your project. You can choose from a variety of colors and textures to achieve the desired look for your blanket.
Getting familiar with the pattern: Before you start knitting, it’s essential to familiarize yourself with the pattern. Read through the instructions carefully and make sure you understand each step. Take note of any special stitches or techniques that may be required for the geometric design. This will help you follow the pattern smoothly and avoid any mistakes along the way.
Once you have chosen your yarn and familiarized yourself with the pattern, you’re ready to begin knitting your geometric blanket. Take your time and enjoy the process, and soon you’ll have a beautiful and cozy blanket that showcases your knitting skills and love for geometric designs.
Basic Knitting Stitches
When it comes to knitting, there are several basic stitches that every knitter should know. These stitches form the foundation of many knitting patterns and can be combined and manipulated to create a wide variety of textures and designs.
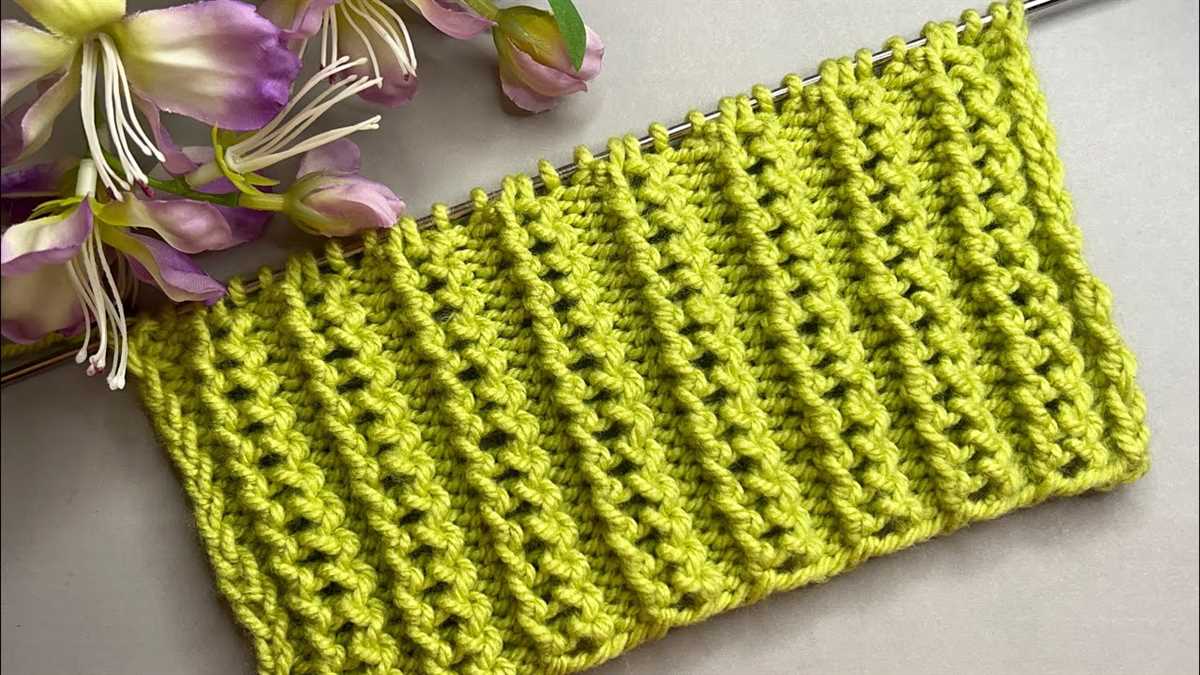
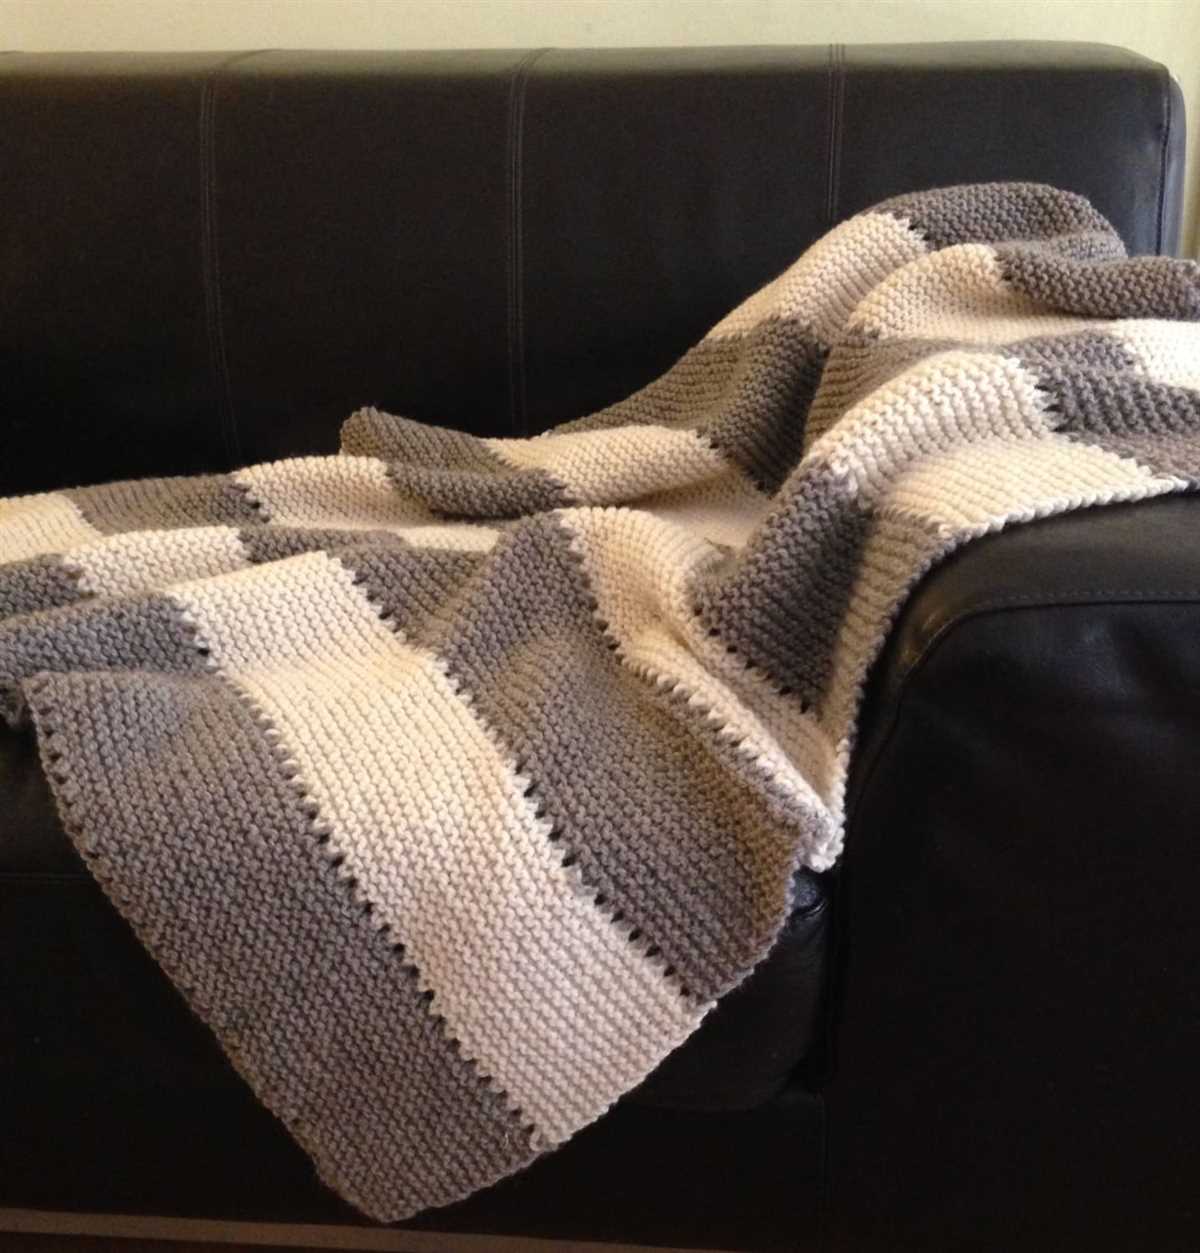
Garter stitch: The garter stitch is one of the most basic knitting stitches. It is created by knitting every row, resulting in a fabric with ridges on both sides. Garter stitch is reversible and has a squishy and textured appearance.
Stockinette stitch: The stockinette stitch is another essential stitch in knitting. It is formed by knitting one row and purling the next, creating a smooth and flat fabric with “V” shapes on the right side and bumps on the wrong side. Stockinette stitch is commonly used for garments and accessories.
Rib stitch: The rib stitch is a versatile stitch pattern that is often used for cuffs, hems, and borders. It is created by alternating knit and purl stitches in a specific sequence, such as knitting two stitches and purling two stitches. Rib stitch creates a stretchy and elastic fabric.
Seed stitch: The seed stitch is a textured stitch pattern that is created by alternating knit and purl stitches in a specific sequence, such as knitting one stitch and purling one stitch. It forms a dense and bumpy fabric that is often used for scarves and blankets.
Cable stitch: The cable stitch is a more advanced knitting technique that creates decorative twists and braids in the fabric. It involves crossing a set of stitches over another set, usually using a cable needle. Cable stitches add depth and interest to knitting projects.
- Other basic stitches:
- – Moss stitch: Created by alternating knit and purl stitches in a specific sequence, resulting in a textured fabric.
- – Lace stitch: Involves yarn overs and decreases to create open and delicate patterns.
- – Basketweave stitch: Combines knit and purl stitches in a specific arrangement, resembling a woven basket.
Mastering these basic knitting stitches will provide a solid foundation for tackling more complex patterns and projects. With practice and experimentation, knitters can create beautiful and unique pieces using these versatile stitches.
Knitting the Geometric Patterns
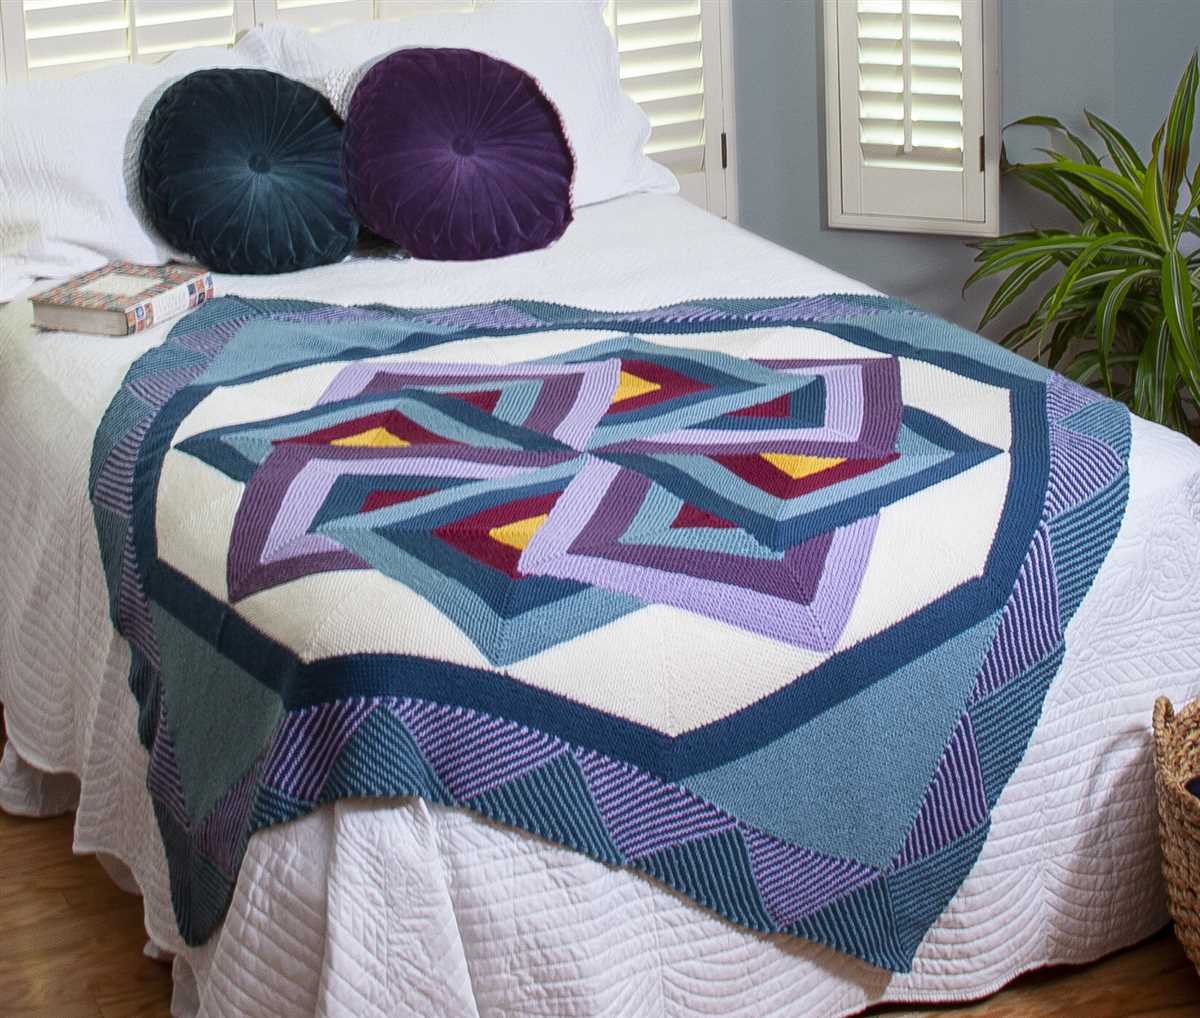
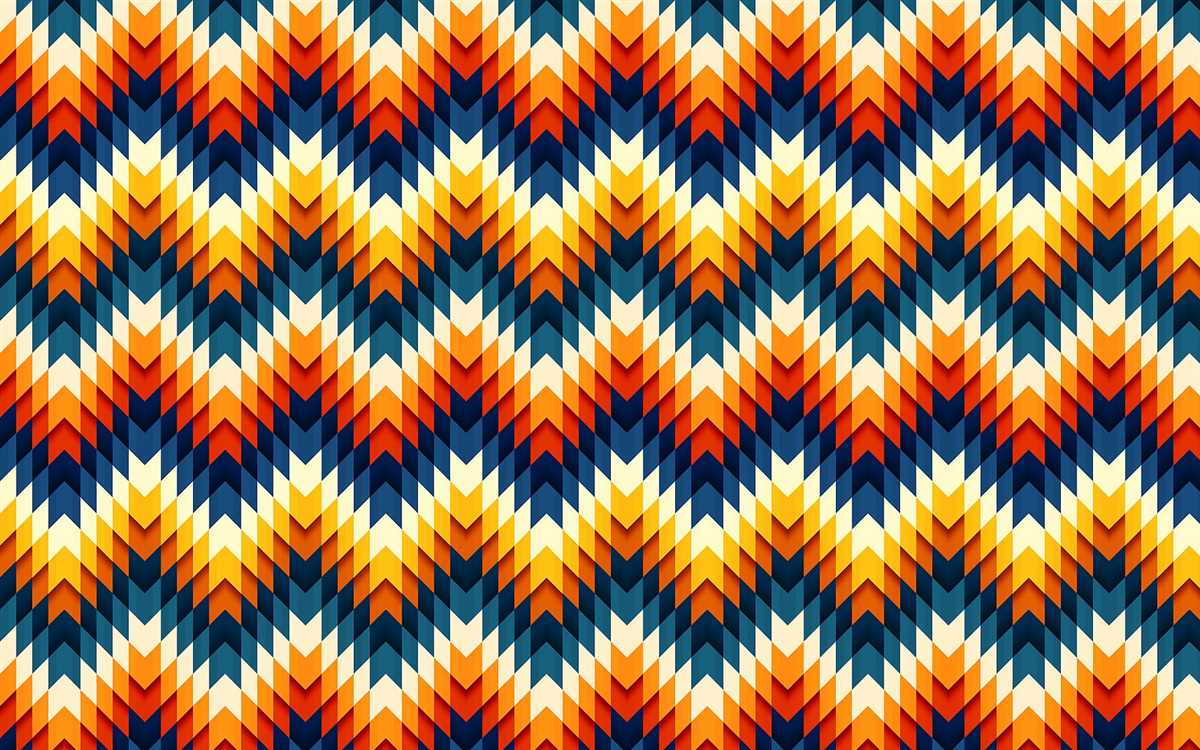
If you’re looking for a fun and challenging knitting project, a geometric blanket with its intricate patterns might be just what you need. These patterns feature various geometric shapes such as squares, triangles, diamonds, and more, creating a visually appealing design. Whether you’re an experienced knitter or a beginner looking to take on a new challenge, knitting a geometric blanket can be a rewarding and enjoyable endeavor.
One of the key aspects of knitting a geometric blanket is understanding the pattern. Geometric patterns often involve repeating motifs, which can be quite complex. It’s important to carefully read and follow the instructions, keeping track of the stitch counts and pattern repeats. Many patterns also include charts that visually represent the design, making it easier to visualize the final product and keep track of your progress.
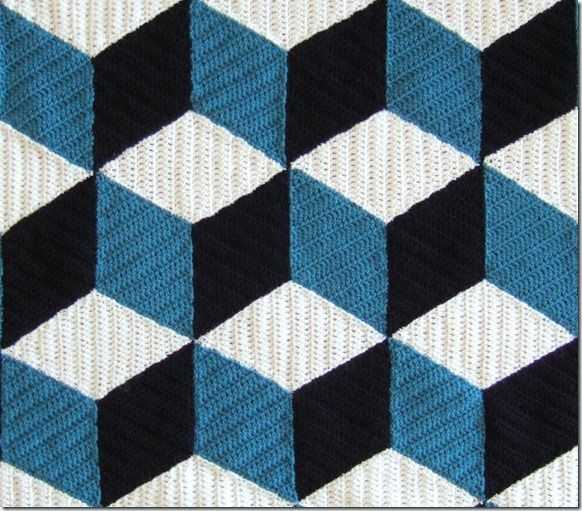
When knitting a geometric blanket, choosing the right yarn and colors is crucial. Opt for a yarn that is soft and durable, as you want the blanket to be comfortable and long-lasting. Consider using yarn in contrasting or complementary colors to highlight the geometric shapes and make them stand out. This will create a visually striking blanket that will catch the eye and add a touch of modernity to your home.
As you begin knitting the geometric patterns, take your time and pay attention to detail. The key to achieving clean lines and well-defined shapes is to maintain consistent tension throughout your work. Make sure to count your stitches regularly to ensure you’re on track and fix any mistakes as you go. Don’t be afraid to use stitch markers or highlighter tape to help you keep track of where you are in the pattern and to guide you through complex stitch sequences.
In summary, knitting a geometric blanket can be a challenging yet rewarding project. By carefully following the pattern, choosing the right yarn and colors, and paying attention to detail, you can create a stunning blanket that showcases your knitting skills and adds a unique touch to your home decor.
Changing Colors
One of the most exciting aspects of knitting a geometric blanket is the opportunity to play with colors. By changing colors throughout the pattern, you can create beautiful and unique designs that showcase the geometric shapes in different ways.
When it comes to choosing colors for your blanket, the possibilities are endless. You can opt for a monochromatic look by using different shades of the same color, or you can choose contrasting colors to make the geometric patterns pop. Experimenting with different color combinations can be a fun and creative process that allows you to personalize your blanket.
To change colors in your knitting, you will typically need to work with multiple balls of yarn. At the end of each section or row, you can simply drop one color and pick up the next one, making sure to leave a long enough tail to weave in later. Alternatively, you can carry the unused color along the back of your work, catching it every few stitches to prevent long floats.
To create a smooth transition between colors, it is important to pay attention to your tension and stitches. When changing colors, make sure to tighten the first stitch of the new color to prevent any gaps or loose stitches. You can also use a technique called “knitting in the round” to seamlessly change colors without any visible seams.
Whether you choose to use bold and vibrant colors or opt for a more subtle and muted palette, changing colors in your geometric blanket knitting pattern can add depth and visual interest to your finished project. So don’t be afraid to get creative and experiment with different color combinations to make your blanket truly one-of-a-kind.
Adding Borders
Adding borders to your geometric blanket can not only enhance its overall design, but also provide a clean and polished finish. There are several options for borders that you can choose from, depending on the style and theme of your blanket.
Solid Color Border: One simple and effective option is to add a solid color border around the entire edge of your blanket. This can create a bold contrast with the colorful geometric patterns and bring a sense of cohesion to the overall design. You can choose a color that complements the colors used in the blanket, or opt for a contrasting shade to make the patterns stand out even more.
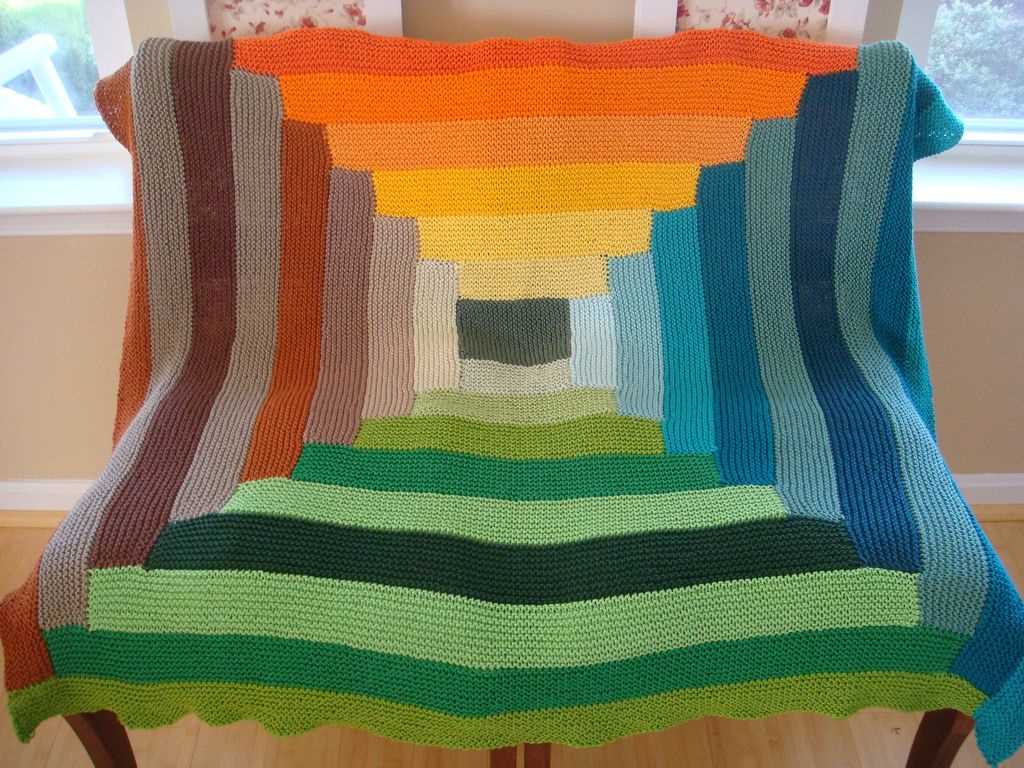
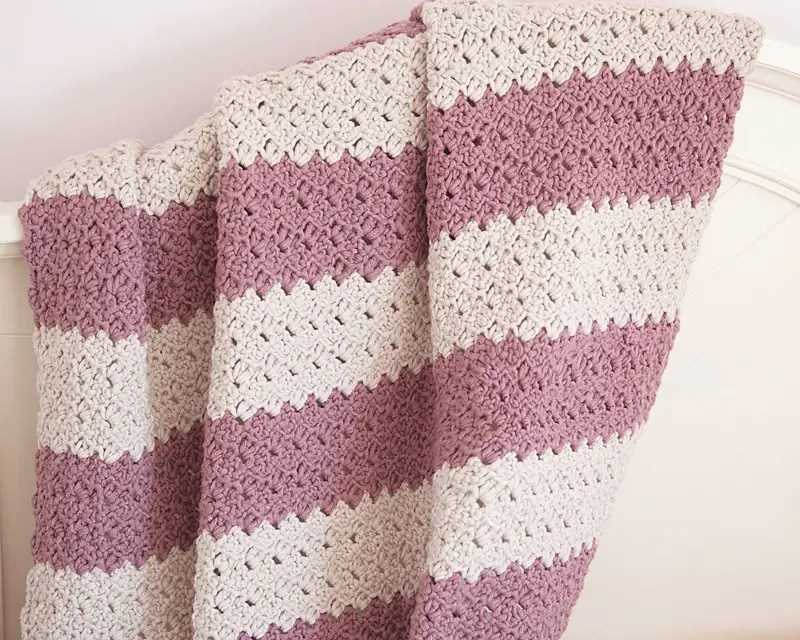
Striped Border: Another popular choice is to add a striped border to your geometric blanket. This can create a playful and dynamic look, especially if you use colors that are already present in the patterns of the blanket. You can choose to add just one or multiple stripes, and vary the width and color combinations to suit your preferences.
Patterned Border: If you want to take your geometric blanket to the next level, consider adding a patterned border. This can be achieved by incorporating a different knitting stitch or pattern along the edges. For example, you can add a lace border for an elegant and feminine touch, or a cable stitch border for a more textured and cozy feel.
Regardless of the type of border you choose, make sure to properly measure and plan before starting. You want to ensure that the border matches the size and shape of your blanket, and is proportionate to the geometric patterns. Additionally, take your time when knitting the border to ensure a neat and consistent result. Adding borders to your geometric blanket is a great way to personalize your creation and add a finishing touch that ties all the elements together.
Blocking and Finishing
After completing the knitting portion of your geometric blanket, it’s important to block and finish the project to achieve a polished and professional look. Blocking involves shaping and stretching the blanket to ensure even stitches and dimensions. This step is especially crucial for a geometric pattern, as it helps to define the crisp lines and angles.
To block your blanket, start by gently soaking it in lukewarm water with a mild detergent. Squeeze out the excess water without wringing or twisting the fabric. Lay the blanket on a clean towel and roll it up, pressing to remove any remaining moisture. Unroll the blanket and lay it flat on a blocking board or a clean, dry surface.
Using T-pins or blocking wires, carefully stretch and shape the blanket to the desired measurements. Pay attention to the geometric motifs, ensuring the lines are straight and the angles are sharp. Pin the edges and corners securely, making sure not to distort the pattern. Allow the blanket to dry completely, which may take several days depending on the yarn and humidity.
Once the blanket is dry, remove the pins or wires and inspect the finished piece. If needed, use a tapestry needle to weave in any loose ends and secure them to the back of the work. Check for any imperfections or areas that may require further blocking or shaping. Give the blanket a final press with a steam iron on a low setting if desired, taking care to avoid direct contact with the knitting.
With proper blocking and finishing, your geometric blanket will be transformed from an assortment of knitted pieces into a cohesive and visually striking creation. The time and effort put into blocking will enhance the overall appearance and ensure that your blanket remains in its best condition for years to come.
Tips and Troubleshooting
When knitting a geometric blanket, it’s important to pay attention to certain tips and be prepared to troubleshoot any issues that may arise. Here are some helpful tips to keep in mind:
1. Gauge Swatch:

Before starting your blanket, it’s essential to knit a gauge swatch using the same yarn and needles you plan to use for the project. This will help you determine if your tension matches the pattern’s gauge. Adjust your needle size as necessary to ensure your stitches are neither too loose nor too tight.
2. Tracking Your Progress:
As you work on the blanket, it can be helpful to keep track of your progress. Use stitch markers or highlighter tape to mark off completed sections or specific patterns within the blanket. This will help you stay organized and avoid mistakes.
3. Joining Yarn:
When joining a new ball of yarn, it’s important to do so in a way that minimizes the appearance of knots and loose ends. The Russian join or Russian join with magic knot methods are great ways to join yarn seamlessly, ensuring a smooth transition without any unsightly knots.
4. Fixing Mistakes:
If you make a mistake while knitting a complex geometric pattern, don’t panic. Take a deep breath and carefully analyze the mistake. You may need to frog (rip out) a few rows or even a section to fix the error. Use a lifeline – a piece of contrasting waste yarn threaded through a row of stitches – to help you easily pick up the stitches if needed.
5. Blocking:
Blocking your finished blanket is crucial to ensure that the geometric patterns open up and look their best. Follow the blocking instructions provided in the pattern, which may involve wetting the blanket and then pinning it into shape before allowing it to dry completely. Blocking will give your blanket a polished and professional finish.
With these tips and troubleshooting techniques in your knitting toolkit, you’ll be well-prepared to tackle a geometric blanket knitting pattern with confidence and produce a beautiful finished piece.
Inspiration and Customization
Now that you have learned how to knit a geometric blanket using the pattern provided, it’s time to get creative and add your own personal touch to the design. The pattern serves as a great starting point, but there are numerous ways you can customize the blanket to make it truly unique. Here are a few ideas to inspire you:
1. Color Combinations:
Experiment with different color combinations to create a visually striking blanket. You can stick to a monochromatic palette for a minimalist look, or play with contrasting colors for a bold and vibrant design. Consider using shades that match your home decor or the recipient’s favorite colors.
2. Stitch Variations:
While the pattern suggests using simple knit and purl stitches, don’t be afraid to explore other stitch variations. Incorporating cables, lace, or textured stitches can add depth and interest to your blanket. Be sure to practice any new stitches before starting on your final project.
3. Size Adjustments:
The pattern provided gives instructions for a standard-sized blanket, but you can easily customize the dimensions to suit your needs. If you want a smaller blanket for a baby or a larger one for a queen-size bed, simply adjust the number of stitches and rows accordingly.
4. Embellishments:
Add embellishments such as tassels, pom-poms, or fringe to give your blanket a playful and whimsical touch. These can be easily attached to the edges of the blanket or strategically placed within the pattern for a unique look.
Remember, knitting is a creative and personal endeavor, so feel free to experiment and make the pattern your own. Whether you’re creating a blanket for yourself or as a gift, the end result will be a cherished item that showcases your unique style and craftsmanship.