
If you’re looking for a fun and festive knitting project, look no further than this free snowman hat knitting pattern. Whether you want to stay warm during the winter months or you’re planning to dress up for a holiday party, this adorable snowman hat is the perfect accessory.
Made with soft and cozy yarn, this hat will not only keep you warm, but it will also add a touch of whimsy to any outfit. The pattern is suitable for knitters of all skill levels, from beginners to advanced, and can be customized with different colors and embellishments to suit your personal style.
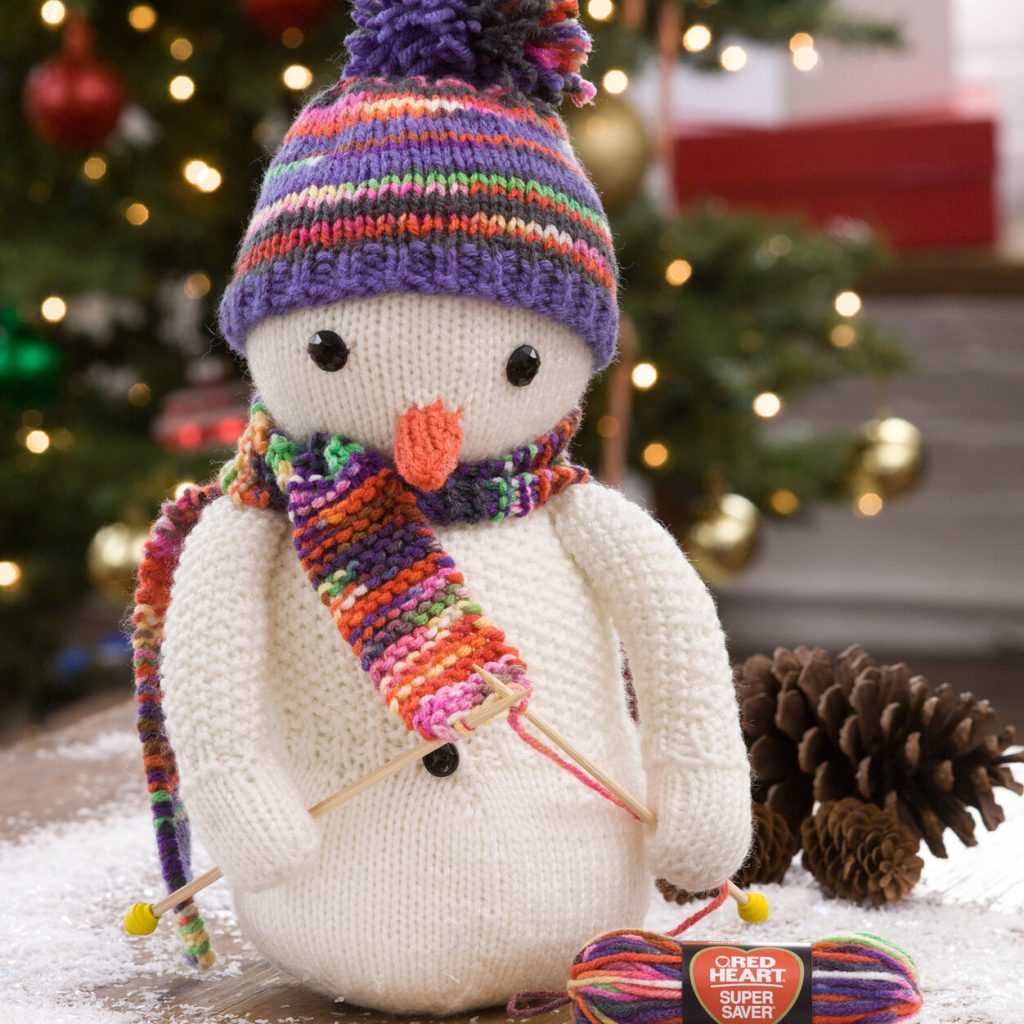
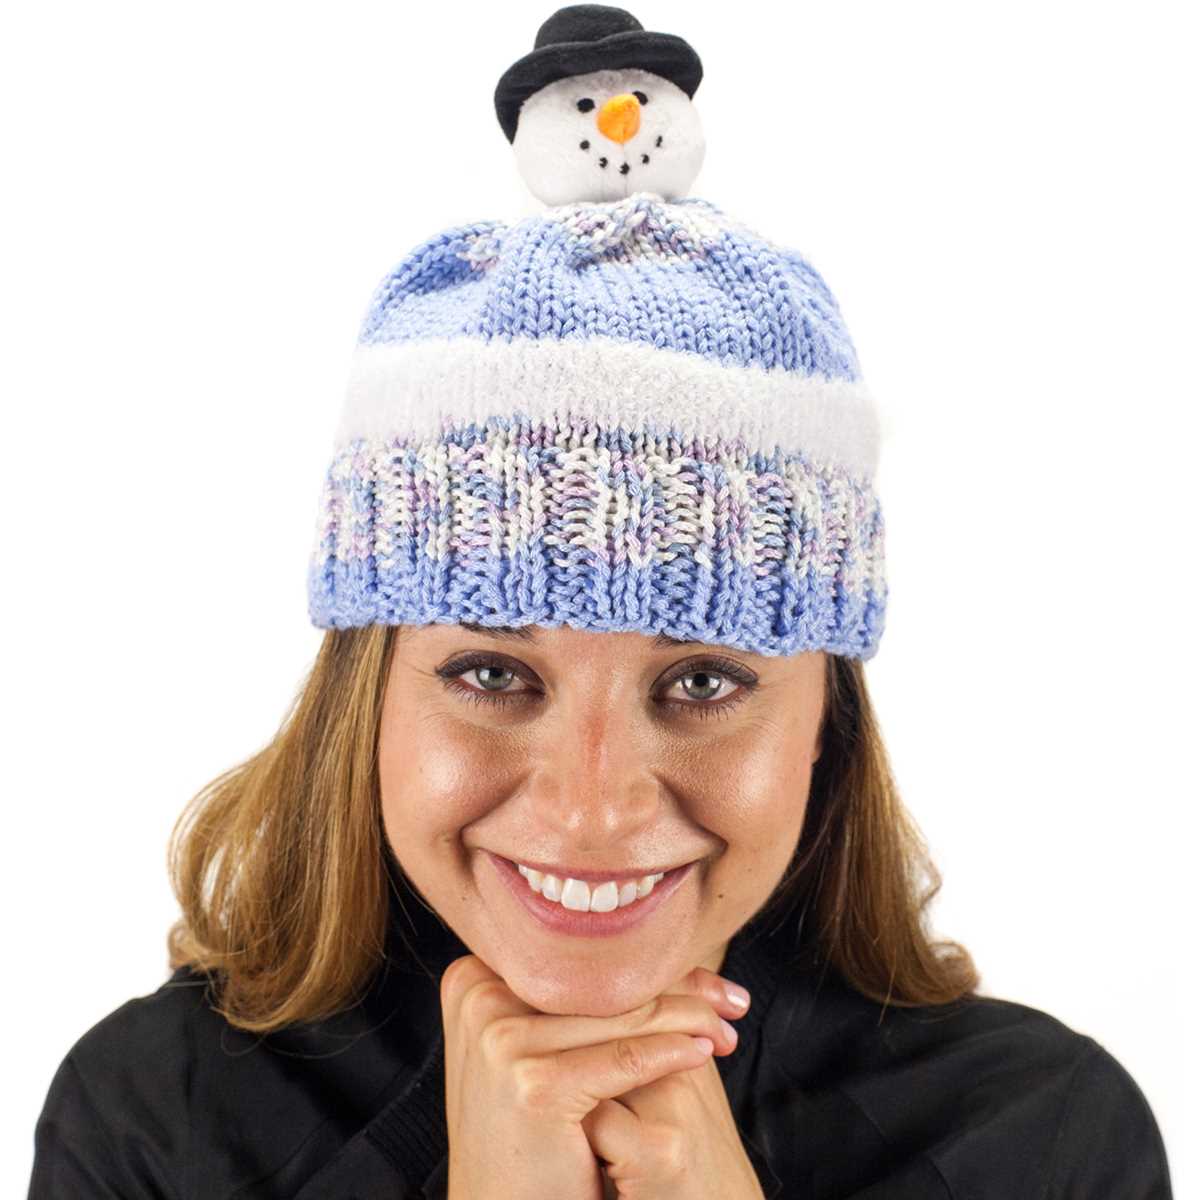
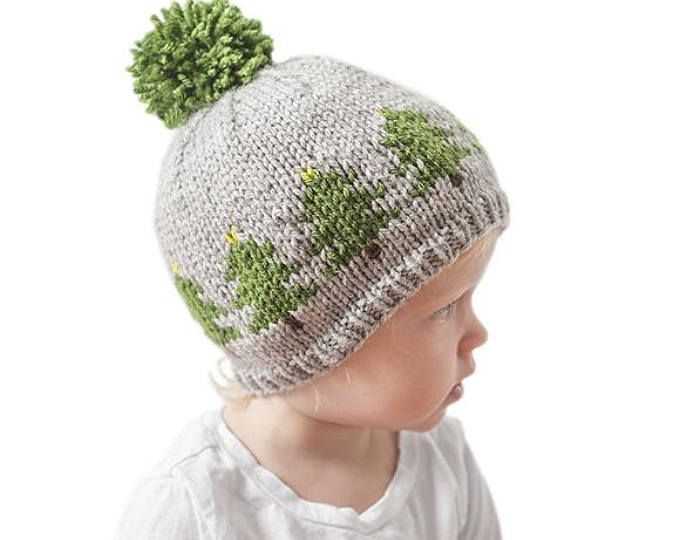
This snowman hat pattern features a classic beanie style with a folded brim and a cute pom-pom at the top. The hat is worked in the round using circular needles, making it seamless and comfortable to wear. The ribbed brim adds extra warmth and ensures a snug fit.
With detailed instructions and step-by-step photos, this free snowman hat knitting pattern is easy to follow and perfect for those looking to expand their knitting skills. Whether you’re knitting for yourself or making a handmade gift for a loved one, this snowman hat is sure to bring a smile to everyone’s face.
Free Snowman Hat Knitting Pattern
If you’re looking for a fun and festive knitting project, why not try making a snowman hat? This free knitting pattern is perfect for beginners and will keep you cozy all winter long. Whether you want to make a hat for yourself or give it as a gift, this pattern is sure to impress.
To get started, you’ll need some basic knitting skills and materials. Gather your knitting needles, a ball of white yarn, and a small amount of black and orange yarn for the details. You’ll also need a tapestry needle for sewing the hat together.
Materials:
- Size 8 knitting needles
- 1 ball of white yarn
- Small amount of black and orange yarn
- Tapestry needle
Instructions:
- Cast on 80 stitches with the white yarn.
- Knit 2, purl 2 ribbing for 1 inch.
- Switch to stockinette stitch and knit every row for 6 inches.
- Decrease one stitch at each end of every other row until you have 10 stitches remaining.
- Cut the yarn, leaving a long tail. Thread the tail through the tapestry needle and slip the remaining stitches onto the needle. Pull tight to close the top of the hat and sew the seam together.
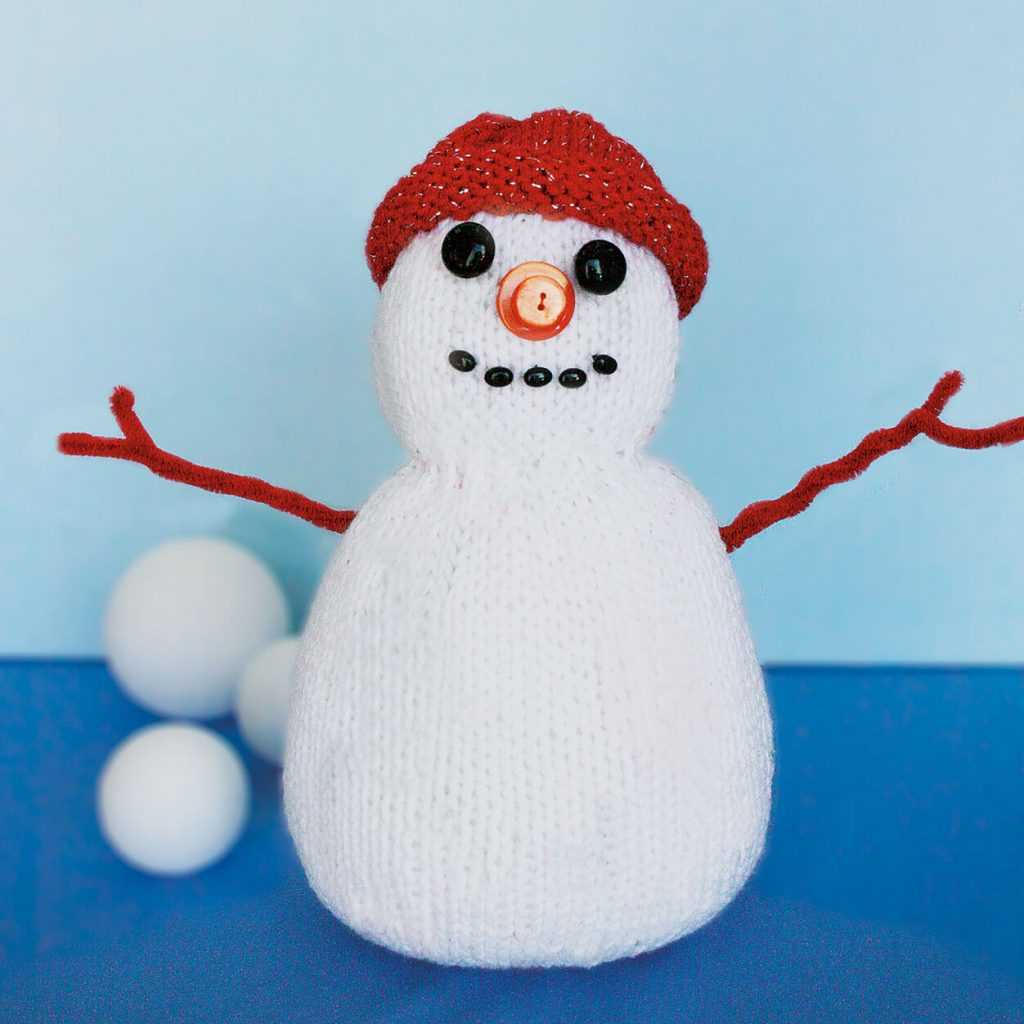
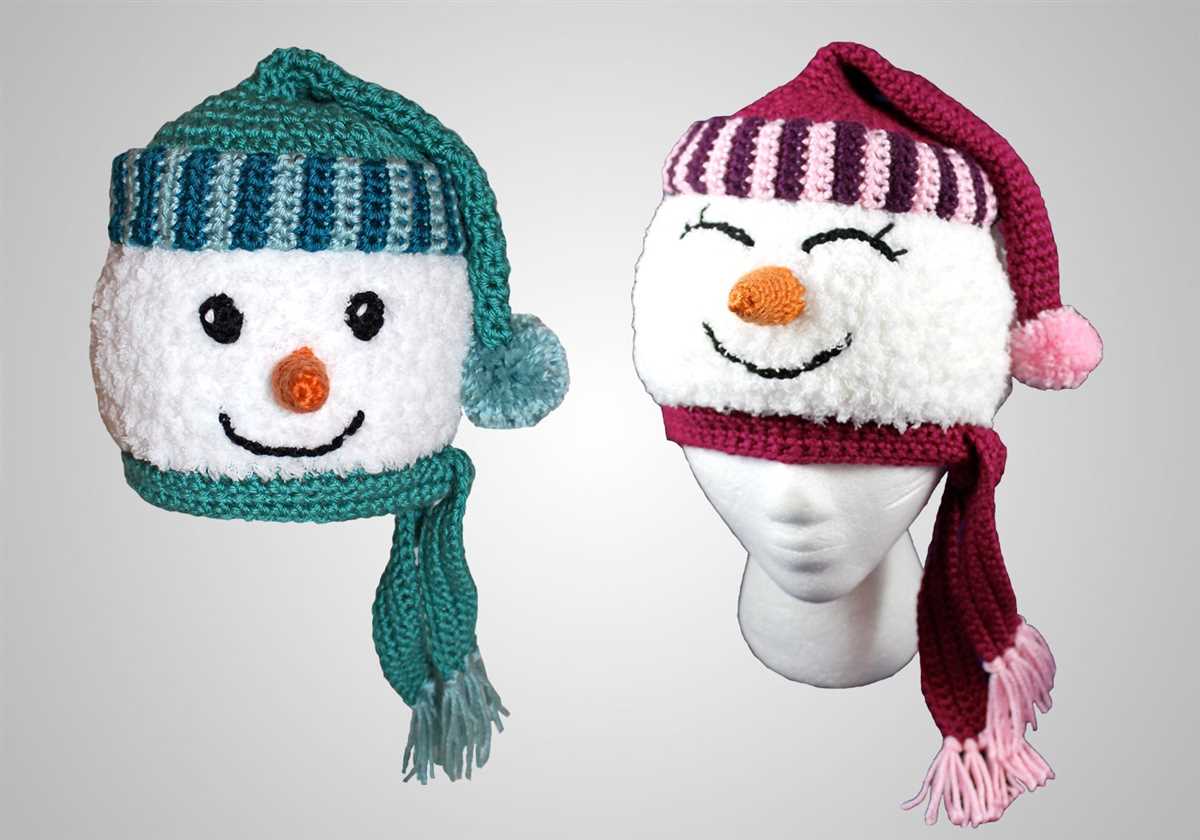
- To create the snowman’s face, use black yarn to embroider two eyes and a mouth onto the front of the hat.
- For the snowman’s carrot nose, use orange yarn to sew a small triangle shape onto the hat, just below the eyes.
- Weave in any loose ends and your snowman hat is complete!
This snowman hat knitting pattern is a great way to get into the holiday spirit and stay warm at the same time. With just a few basic knitting techniques, you can create a whimsical and adorable accessory that will be the envy of all your friends. So grab your supplies and start knitting – you’ll have a cozy new hat in no time!
Materials Needed
When it comes to knitting your own snowman hat, you’ll need a few key materials to get started. Here’s a list of everything you’ll need:
- Yarn: Choose a soft and warm yarn in the color of your choice. The recommended yarn weight for this snowman hat is medium (worsted) weight.
- Knitting Needles: You’ll need a pair of knitting needles in the appropriate size for your chosen yarn. Check the yarn label for the recommended needle size.
- Tape Measure: To ensure the correct sizing for your snowman hat, it’s important to have a tape measure on hand.
- Stitch Markers: Stitch markers are helpful in marking key points in your knitting project, such as the beginning of a round.
- Scissors: A good pair of scissors is necessary for cutting the yarn and tidying up any loose ends.
- Darning Needle: A darning needle or yarn needle is essential for weaving in loose ends and finishing off your snowman hat.
- Pom-pom Maker (optional): If you want to add a pom-pom to the top of your snowman hat, a pom-pom maker can make the process easier and more efficient.
With these materials in hand, you’ll be ready to start knitting your own snowman hat and stay warm and cozy all winter long!
Getting Started
Creating a snowman hat for yourself or a loved one is a fun and rewarding knitting project. With this free snowman hat knitting pattern, you’ll be able to make a cozy and festive accessory that will keep you warm during the winter months. Whether you’re an experienced knitter or just starting out, this pattern is suitable for all skill levels.
Materials:
- Size US 8 (5 mm) circular knitting needles
- Size US 8 (5 mm) double-pointed knitting needles
- Approximately 200 yards of worsted weight yarn in white
- Small amount of worsted weight yarn in black for the snowman’s face
- Small amount of worsted weight yarn in orange for the snowman’s carrot nose
- Tapestry needle
- Stitch marker
- Scissors
Instructions:
- Cast on 88 stitches with the white yarn using the circular needles.
- Join in the round, being careful not to twist the stitches, and place a stitch marker to mark the beginning of the round.
- Knit in a 2×2 ribbing pattern (knit 2 stitches, purl 2 stitches) for 2 inches.
- Switch to stockinette stitch (knit all stitches) and continue knitting until the hat measures 6 inches from the cast-on edge.
- Decrease round: *Knit 4 stitches, knit 2 stitches together; repeat from * to the end of the round (72 stitches remain).
- Knit 1 round.
- Decrease round: *Knit 3 stitches, knit 2 stitches together; repeat from * to the end of the round (60 stitches remain).
- Knit 1 round.
- Decrease round: *Knit 2 stitches, knit 2 stitches together; repeat from * to the end of the round (48 stitches remain).
- Knit 1 round.
- Continue decreasing in this pattern until you have 8 stitches remaining.
- Cut the yarn, leaving a long tail. Thread the tail through the tapestry needle and slip the remaining stitches onto the needle. Pull tight to close the top of the hat.
- Using the black yarn, embroider the snowman’s eyes and mouth onto the front of the hat.
- Using the orange yarn, embroider the snowman’s carrot nose just below the eyes.
- Weave in any loose ends and your snowman hat is ready to wear!
Casting On

When starting a knitting project, the first step is to cast on. This is the process of creating the first row of stitches on the needle. There are different methods for casting on, but for this free snowman hat knitting pattern, we will use the long-tail cast-on method.
The long-tail cast-on method is a versatile and commonly used technique in knitting. It creates a neat and flexible edge that is perfect for various projects, including hats. To start, you will need a long tail of yarn, approximately three times the width of the project.
To perform the long-tail cast-on, hold the needle in your right hand and make a slipknot with the tail of the yarn. Insert the needle through the loop of the slipknot and tighten it slightly. Extend your thumb and index finger to create a V-shape with the working yarn and the tail.
With the needle, reach under the strand of yarn that is connected to the ball of yarn and pull it through the loop on your thumb, letting the loop slide onto the needle. Repeat this process, alternating between pulling the yarn from under your thumb and under your index finger. Continue casting on until you have the desired number of stitches for your project.
Knitting the Ribbing
When knitting the ribbing for your snowman hat, you will first need to cast on the required number of stitches. This will typically be a multiple of the ribbing pattern you have chosen, such as 2×2 or 1×1. The ribbing pattern creates a stretchy and snug band at the bottom of the hat, providing a comfortable and secure fit.
Next, you will need to work in the ribbing pattern for the desired length. This can be anywhere from a few inches to several inches, depending on the style and fit you prefer. Remember to keep the tension consistent throughout the ribbing to ensure an even and professional-looking finish.
There are different ribbing patterns you can choose from, such as the classic 2×2 rib or the simpler 1×1 rib. In a 2×2 rib, you will alternate between knitting 2 stitches and purling 2 stitches, creating a ribbed texture. In a 1×1 rib, you will alternate between knitting 1 stitch and purling 1 stitch. The choice of ribbing pattern can add visual interest to the hat and can also affect the stretchiness and elasticity of the ribbing.
Once you have completed the desired length of ribbing, you will be ready to move on to the main body of the snowman hat. The ribbing provides a stable foundation for the rest of the hat and helps to keep it securely in place on the wearer’s head.
Knitting the Body of the Hat
Once you have finished knitting the ribbed brim of the snowman hat, it’s time to move on to the body. This is where the hat really starts to take shape and become recognizable as a snowman hat.
To begin knitting the body, you will need to switch to your main color yarn. Start by knitting one round in your main color, making sure to join the round and continue knitting in the round. This will create a seamless look for the body of the hat.
Continue knitting in the round, using the main color yarn, until the body of the hat measures the desired length. You can measure this by trying the hat on periodically or by referring to the pattern for specific measurements. As you knit, you may want to add some colorwork or pattern stitches to make the hat more decorative. For example, you could add a row of snowflakes or stripes of different colors.
Once you have reached the desired length for the body of the hat, it’s time to start shaping the crown. This is done by gradually decreasing the number of stitches as you continue knitting in the round. You can follow a specific pattern for the crown shaping, or you can create your own design. Be sure to keep track of your decreases and any pattern stitches you are using to ensure a symmetrical and visually pleasing crown.
Continue decreasing until you have a small number of stitches left on your needles. At this point, you will need to cut the yarn, leaving a long tail. Thread the tail through a tapestry needle and carefully remove the stitches from the knitting needles, pulling the tail tight to close the top of the hat. Weave in any loose ends and your snowman hat is complete!
Shaping the Crown
When knitting a snowman hat, shaping the crown is an important step to create the desired shape and fit. The crown of the hat is the top part that sits on the head, and by shaping it correctly, you can ensure a comfortable and stylish hat.
To shape the crown, follow the instructions provided in the free snowman hat knitting pattern. The pattern may suggest using decrease stitches, such as knit two together (k2tog) or slip, slip, knit (ssk), to reduce the number of stitches evenly across the row. These decrease stitches create a tapered shape that fits the head snugly.
Start shaping the crown by knitting a few decrease rounds at regular intervals, following the pattern instructions. This will result in a smaller circumference at the top of the hat. As you continue knitting, the decrease rounds will create a gentle slope towards the crown.
Pay attention to the pattern instructions for the number of decrease rounds and the specific decrease stitches to use. It’s important to count your stitches after each decrease round to ensure you are following the pattern correctly and maintaining the desired stitch count.
Once you have completed the shaping of the crown, the hat should have a tapered and rounded top that fits snugly on the head. The crown shaping gives the hat a professional finish and ensures a comfortable fit for the wearer. Now you can continue with the remaining instructions in the pattern to complete your snowman hat.
Adding the Snowman Design
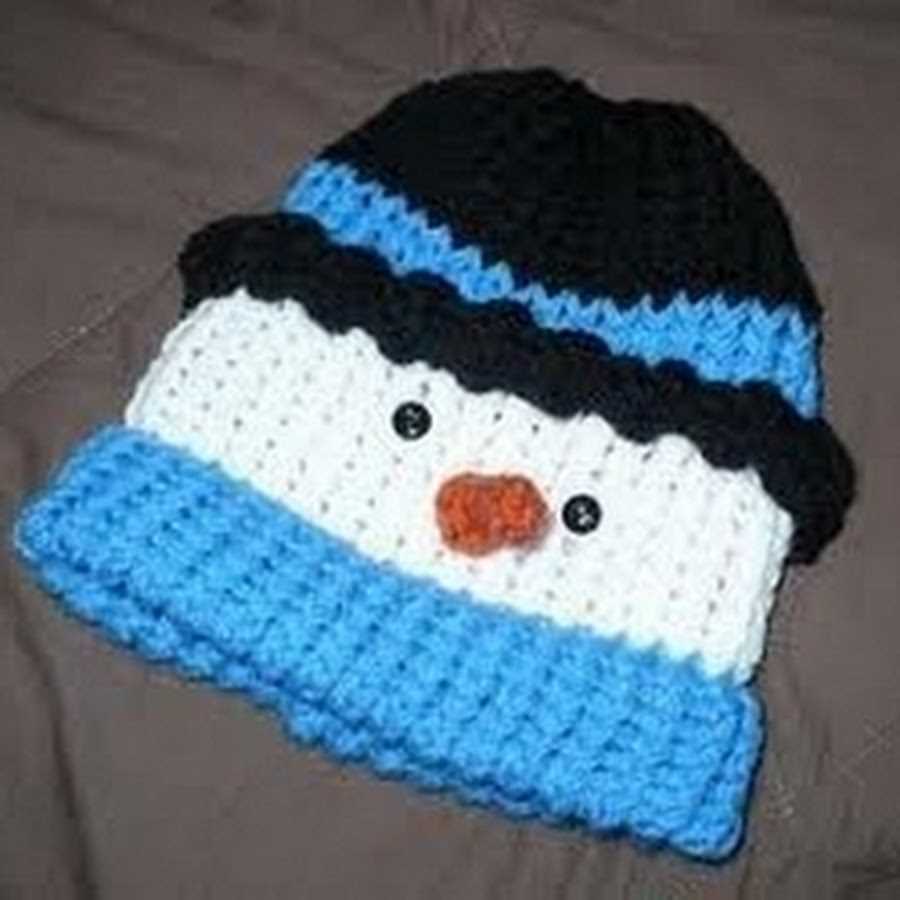
Once you have finished knitting the main body of the snowman hat, it’s time to add the adorable snowman design. This design will really bring the hat to life and make it stand out.
First, you will need to gather your materials. You will need some black yarn for the eyes, mouth, and buttons, as well as orange yarn for the carrot nose. You can use a tapestry needle to sew these pieces onto the hat. It’s important to have a clear vision of how you want your snowman to look before you begin.
Start with the eyes. Take your black yarn and thread it onto the tapestry needle. Make two small stitches for the eyes, placing them evenly on the front of the hat. You can make them round or oval-shaped, depending on the look you prefer.
Next, move on to the mouth. Using the black yarn, create a series of small stitches to form a smile. You can make it as wide or narrow as you like, and you can even add a couple of small stitches to create a dimple on one side of the mouth.
For the buttons, use the black yarn to create three small stitches in a row down the front of the hat. Space them out evenly, and make sure they are aligned with the center of the hat. This will give the appearance of buttons on a snowman’s body.
Finally, it’s time to tackle the carrot nose. Thread the orange yarn onto the tapestry needle and create a triangular shape for the nose. Start with a small stitch at the top of the nose and gradually increase the size as you move towards the base. Make sure to secure the yarn at the base of the nose so it doesn’t come loose.
Once you have finished sewing on all the pieces, take a step back and admire your work. Your snowman hat is now complete and ready to keep you warm and stylish during the winter months!
Finishing the Hat
After knitting the snowman hat following the free knitting pattern, it’s time to put the finishing touches on it. The final steps involve completing the crown of the hat, adding any desired embellishments, and ensuring that the hat is stitched closed securely.
1. Completing the Crown
To complete the crown of the snowman hat, carefully bind off the remaining stitches. This can be done using a standard bind off method, such as the traditional bind off or the stretchy bind off. Make sure to maintain an even tension while binding off to create a neat and uniform edge. Once all the stitches are bound off, weave in any loose ends using a tapestry needle to ensure they are secure.
2. Adding Embellishments
Next, it’s time to add some festive embellishments to the hat. This can include items like a pom-pom, a knitted snowflake, or even a miniature snowman made from yarn. You can sew these embellishments onto the hat using a tapestry needle and coordinating yarn. Be creative and customize the hat to your liking!
3. Stitching the Hat Closed
To ensure that the snowman hat stays securely on the wearer’s head, it’s important to stitch the bottom of the hat closed. Start by folding the bottom edge of the hat inside, creating a clean and finished look. Use a tapestry needle and yarn to stitch the folded edge closed. Make sure to space the stitches evenly and pull them tight enough to secure the edge but not too tight to affect the fit. Once the bottom edge is stitched closed, weave in any remaining loose ends to complete the hat.
With these final steps, your snowman hat is now complete and ready to be worn or gifted. This adorable and cozy accessory will keep you warm and stylish during the winter season. Enjoy the satisfaction of creating a unique handmade hat!
Additional Variations
There are many ways to customize your snowman hat to make it truly unique. Here are some ideas to get you started:
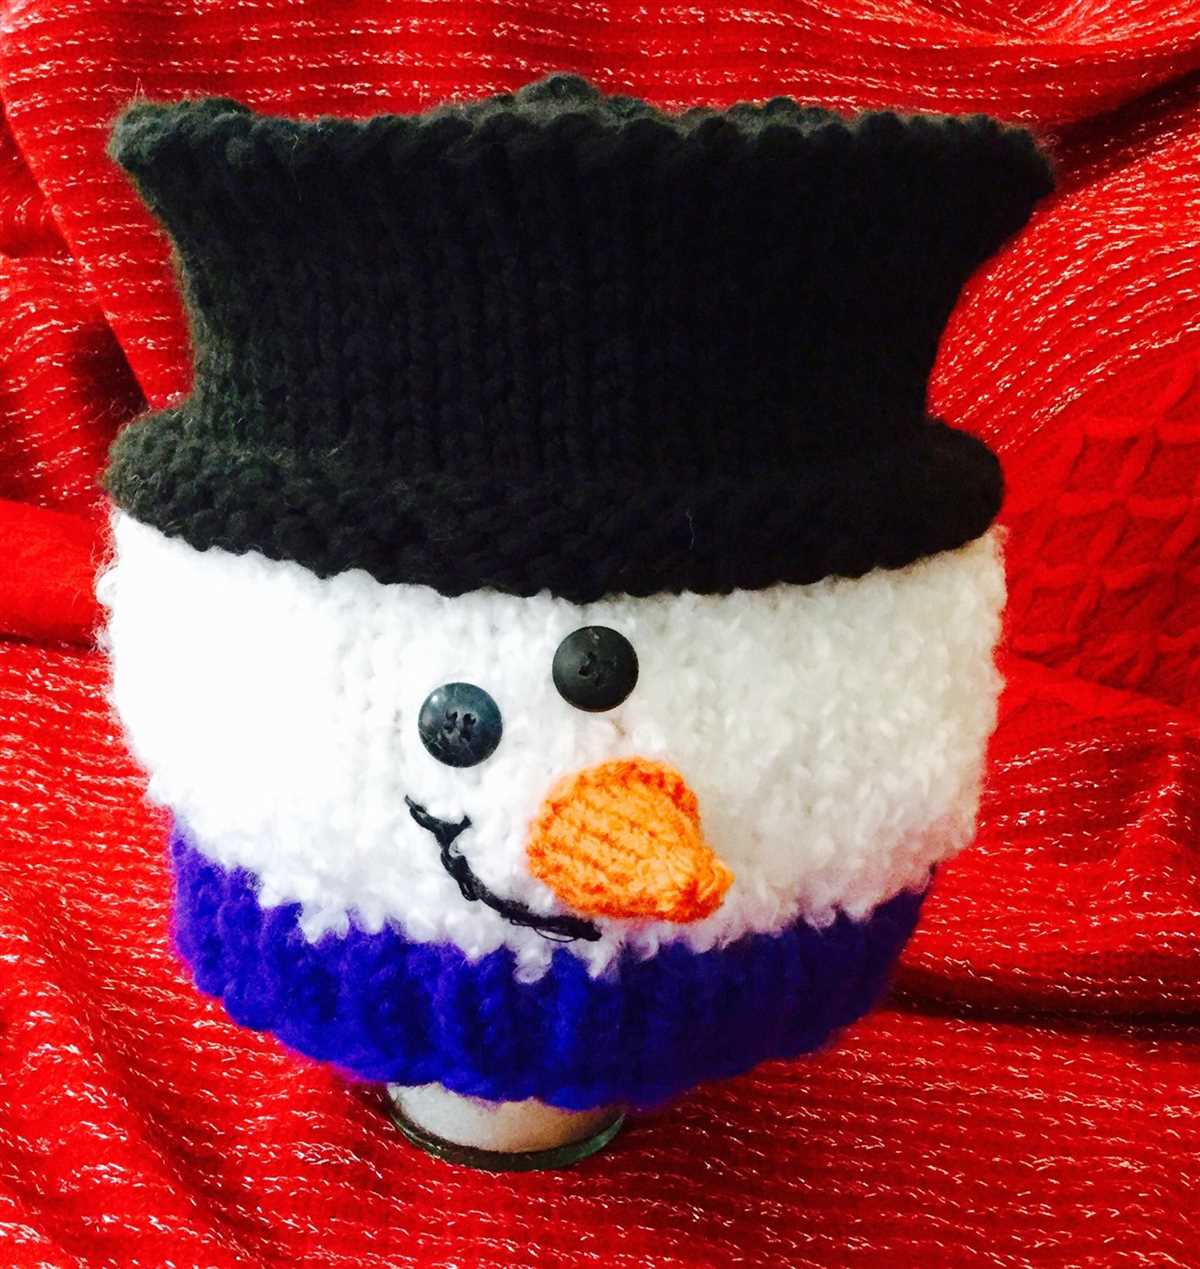
Color Options
Instead of using traditional colors like white and black, you can experiment with different color combinations. Consider using pastel colors for a softer look or bright, bold colors for a fun and playful hat. You can also create a rainbow effect by incorporating multiple colors into the design.
Pattern Designs
In addition to the standard striped pattern, you can try different pattern designs to add visual interest to your snowman hat. Some popular options include polka dots, snowflakes, or even a cable knit pattern. Get creative and experiment with different stitches and textures to create a unique look.
Embellishments
Adding embellishments is a great way to personalize your snowman hat. You can attach buttons, pom-poms, or even small accessories like scarves or mittens. Consider using different materials such as felt or fabric to create unique embellishments that stand out.
Size Variations
While the pattern may provide a specific size, you can easily adjust it to fit different head sizes. If you want a smaller hat, try using a smaller needle size or reducing the number of stitches. For a larger hat, you can use a larger needle or increase the number of stitches. Remember to check your gauge to ensure the hat will fit properly.
- Experiment with color options, such as pastel or bright colors
- Create unique pattern designs, like polka dots or snowflakes
- Add embellishments like buttons or pom-poms
- Adjust the size of the hat to fit different head sizes
Tips and Tricks
Knitting a snowman hat can be a fun and rewarding project. Here are some tips and tricks to help you along the way:
- Choose the right yarn: Opt for a bulky or chunky weight yarn to create a warm and cozy hat.
- Use circular needles: Circular needles make it easier to knit in the round and eliminate the need for seams.
- Check your gauge: Make sure to check your gauge before starting to ensure your hat will fit correctly.
- Follow the pattern carefully: Read through the pattern thoroughly before beginning and follow the instructions step by step.
- Try different color options: Experiment with different colors to create unique and personalized snowman hats.
- Add embellishments: Consider adding buttons, pom-poms, or other decorations to enhance the look of your hat.
- Use stitch markers: Stitch markers can help you keep track of your rounds and any pattern repeats.
- Practice your decreases: The crown of the hat usually involves decreases, so practice this technique to ensure a neat and even finish.
- Don’t be afraid to make modifications: If you’re feeling adventurous, feel free to modify the pattern to suit your preferences and style.
In conclusion, knitting a snowman hat can be a fun and enjoyable project. By following the pattern and utilizing these tips and tricks, you can create a beautiful and festive hat that will keep you warm all winter long.
Q&A:
What are the materials needed to knit a snowman hat?
The materials needed to knit a snowman hat include yarn in white and other desired colors, knitting needles in appropriate size, a yarn needle, and a pom-pom maker (optional).
What are the basic knitting stitches required for this pattern?
The basic knitting stitches required for this pattern are knit stitch, purl stitch, and basic decreasing stitches such as knit two together (k2tog) and slip, slip, knit (ssk).
Is this pattern suitable for beginners?
This pattern is suitable for beginners who have basic knowledge of knitting stitches and techniques. However, some experience in knitting in the round may be helpful.
Can I modify the size of the snowman hat?
Yes, you can modify the size of the snowman hat by either using larger or smaller knitting needles or adjusting the number of cast-on stitches. Just make sure to maintain the stitch count and gauge mentioned in the pattern to achieve the desired size.
How can I customize the snowman hat with my own design?
You can customize the snowman hat with your own design by adding additional colors, patterns, or embellishments such as buttons, ribbons, or appliques. Let your creativity shine and make it uniquely yours!
Where can I find free snowman hat knitting patterns?
There are many websites and online platforms where you can find free snowman hat knitting patterns. Some popular options include Knitting Pattern Central, Ravelry, and LoveKnitting. These websites offer a wide range of patterns for different skill levels and styles. You can browse through their collections and download the patterns for free. Additionally, many independent knitting bloggers and designers also offer free snowman hat knitting patterns on their websites.