
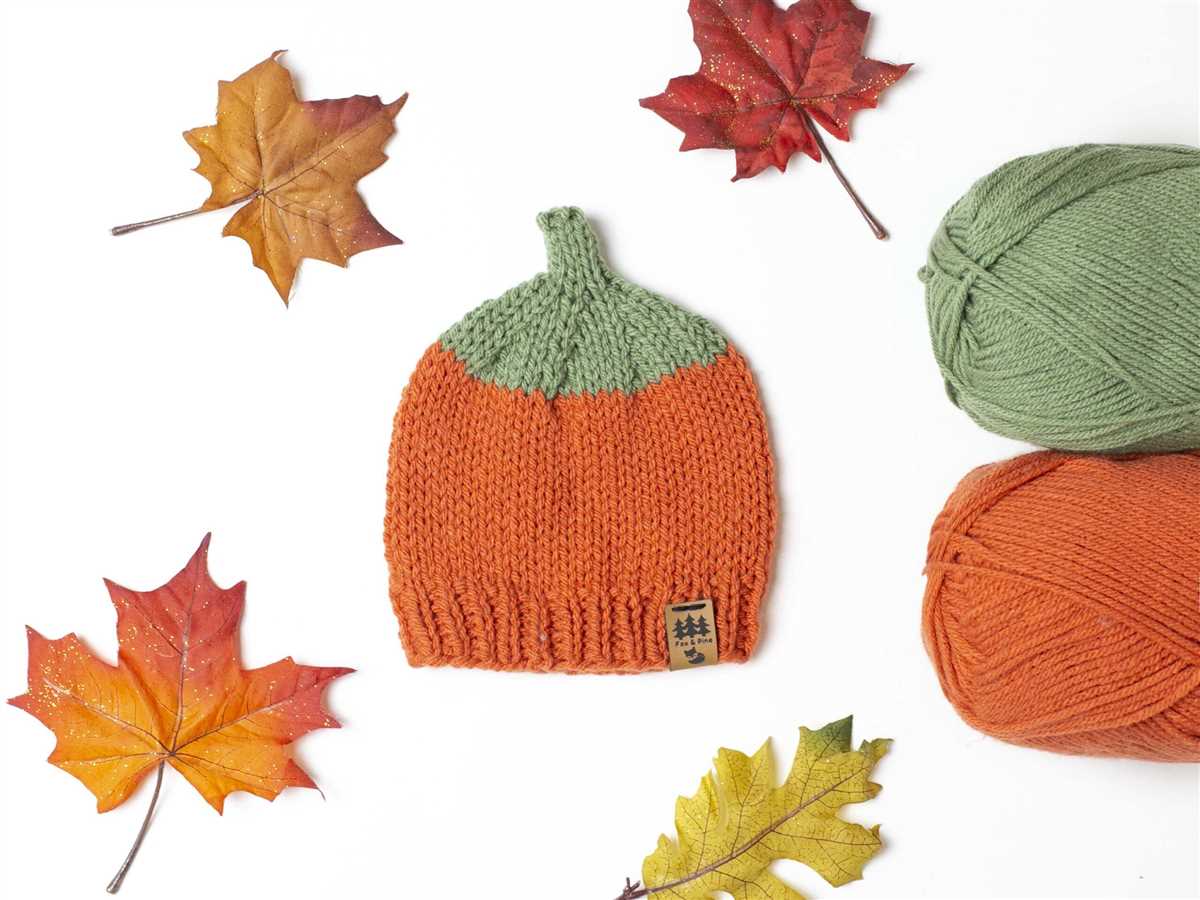
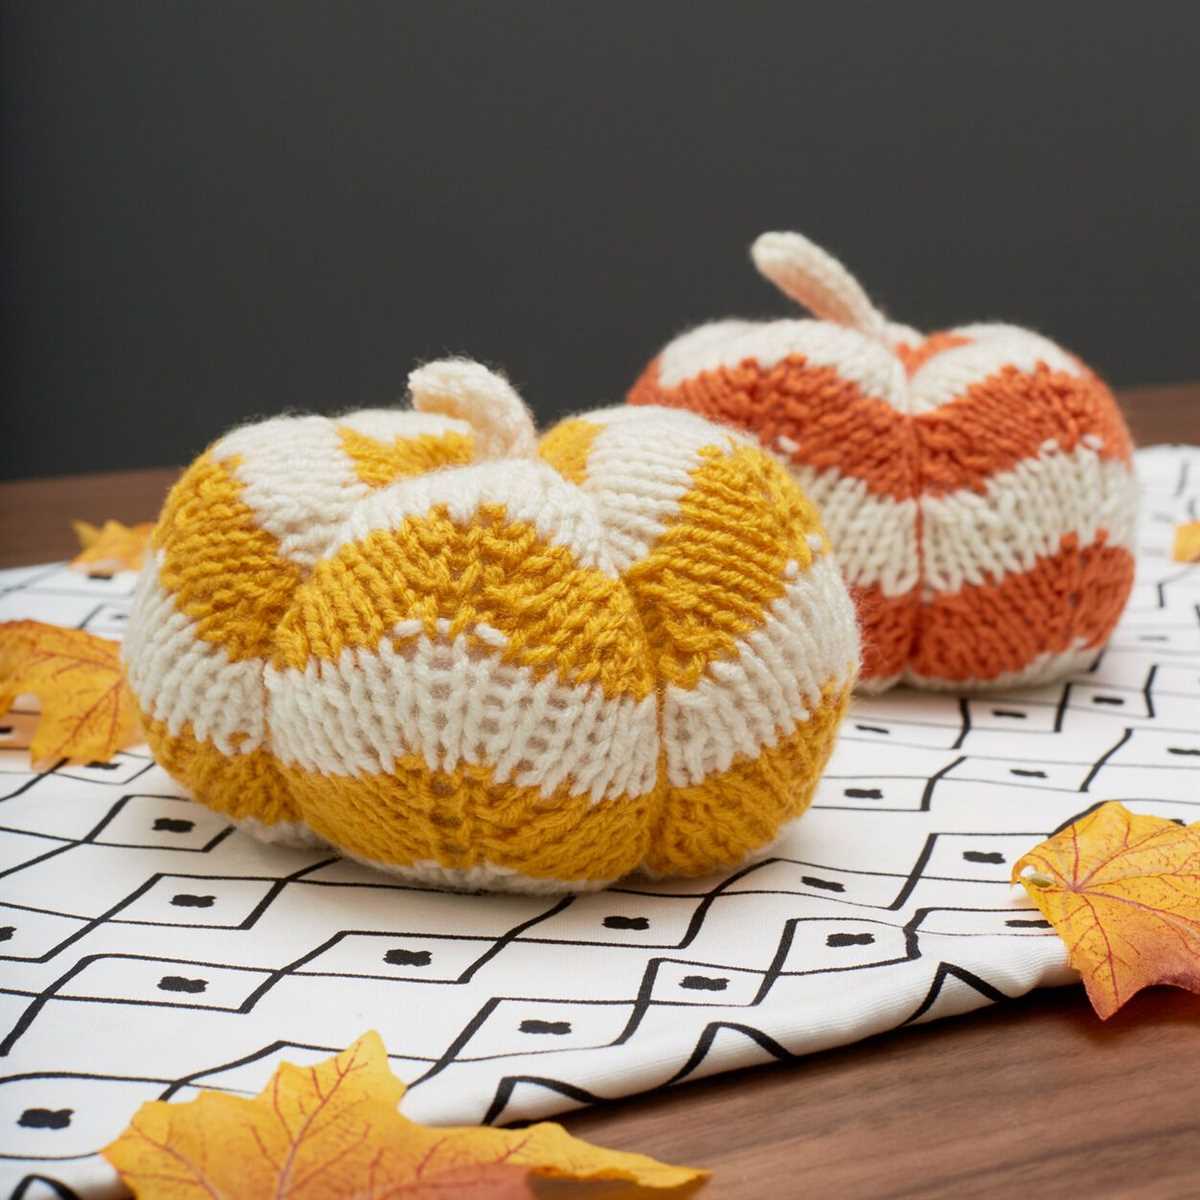
Are you ready to get into the autumn spirit? What better way than with a cute and cozy pumpkin hat? This free knitting pattern is perfect for beginners and experienced knitters alike.
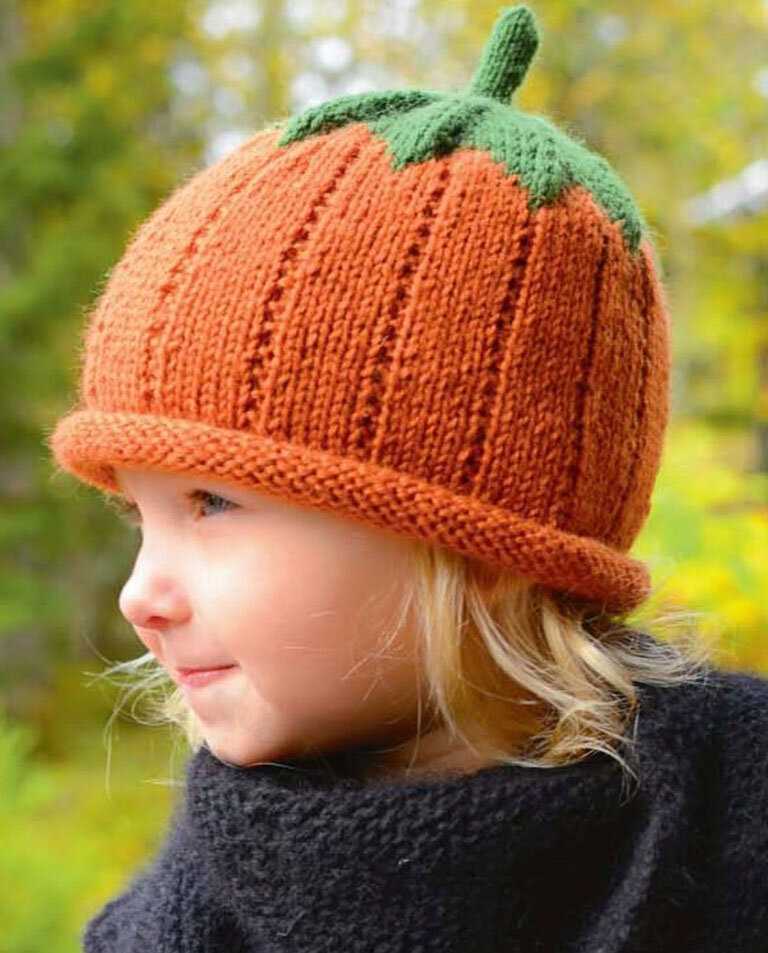
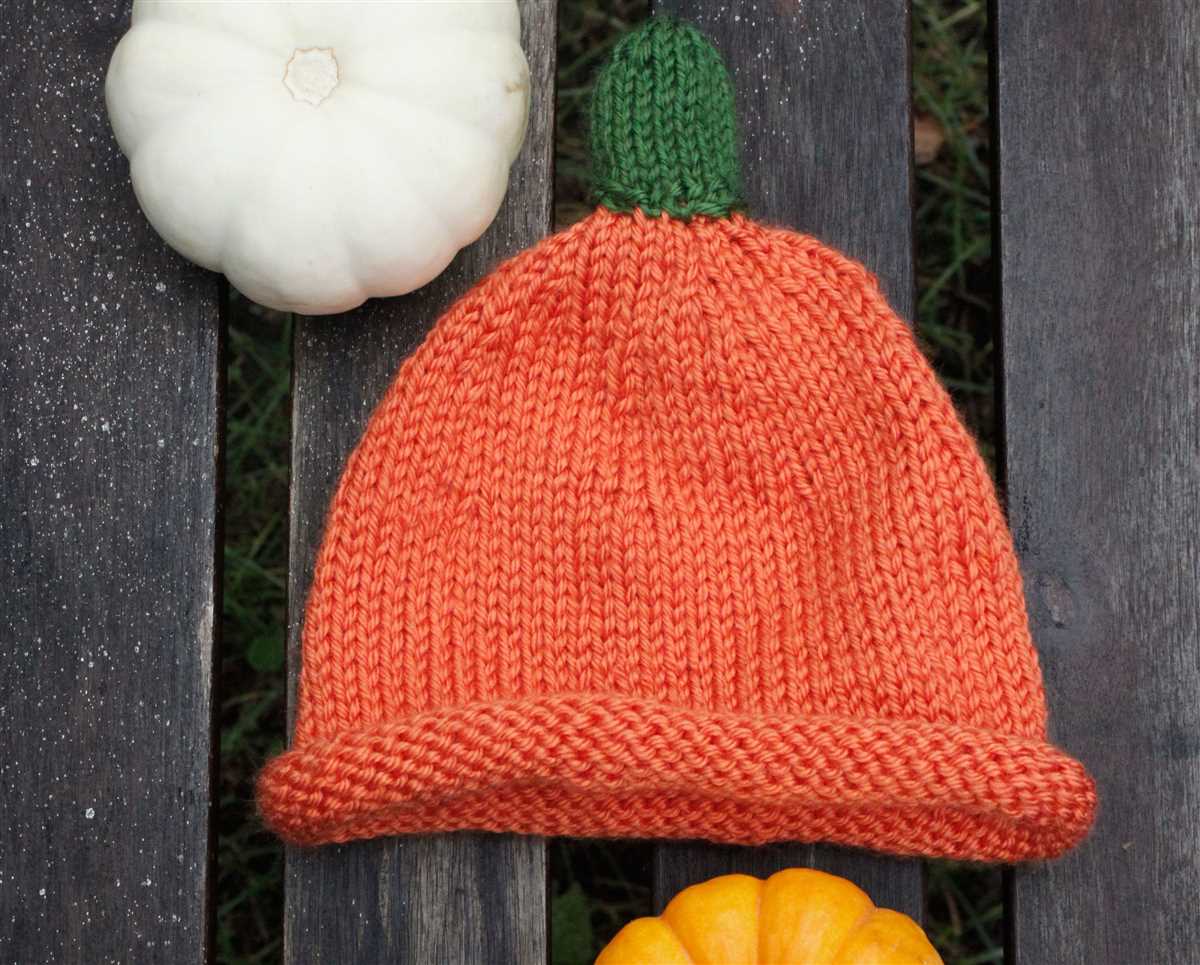
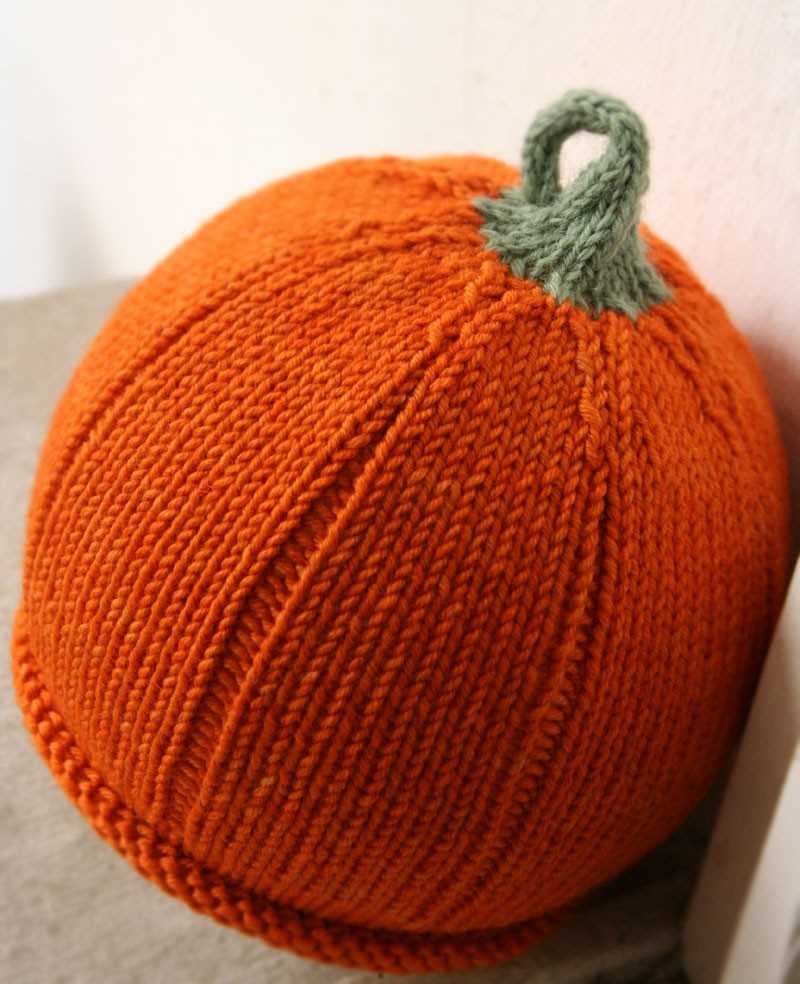
Knitted in the round, this hat features a ribbed brim and a fun pumpkin shape on top. It’s the perfect accessory for Halloween parties, pumpkin patch visits, or just to add a touch of fall flair to your everyday outfits.
The pattern calls for worsted weight yarn and circular needles, making it easy to customize the size to fit anyone from babies to adults. And with step-by-step instructions and helpful tips, even if you’re new to knitting, you’ll be able to create this adorable pumpkin hat in no time.
So grab your needles, pick out your favorite fall-colored yarn, and let’s get started on this festive and fun knitting project. Soon, you’ll have a pumpkin hat that will keep you cozy and stylish all season long.
Free Pumpkin Hat Knitting Pattern: A Perfect Halloween Accessory
Halloween is just around the corner, and it’s the perfect time to start knitting some spooky accessories! One of the most popular Halloween motifs is the pumpkin, and what better way to celebrate the season than knitting a festive pumpkin hat? With this free pumpkin hat knitting pattern, you can create a fun and unique accessory that will be the perfect addition to any Halloween costume.
This pumpkin hat knitting pattern is suitable for knitters of all skill levels. Whether you’re a beginner or an experienced knitter, you’ll be able to follow this pattern and create a hat that’s sure to impress. The pattern includes detailed instructions and a list of materials, making it easy for you to get started right away.
The pumpkin hat is knit in the round, starting from the bottom and working up to the stem. The body of the hat is knit using a simple ribbing pattern, which gives it a snug and comfortable fit. The stem is knit separately and sewn onto the top of the hat after it’s complete.
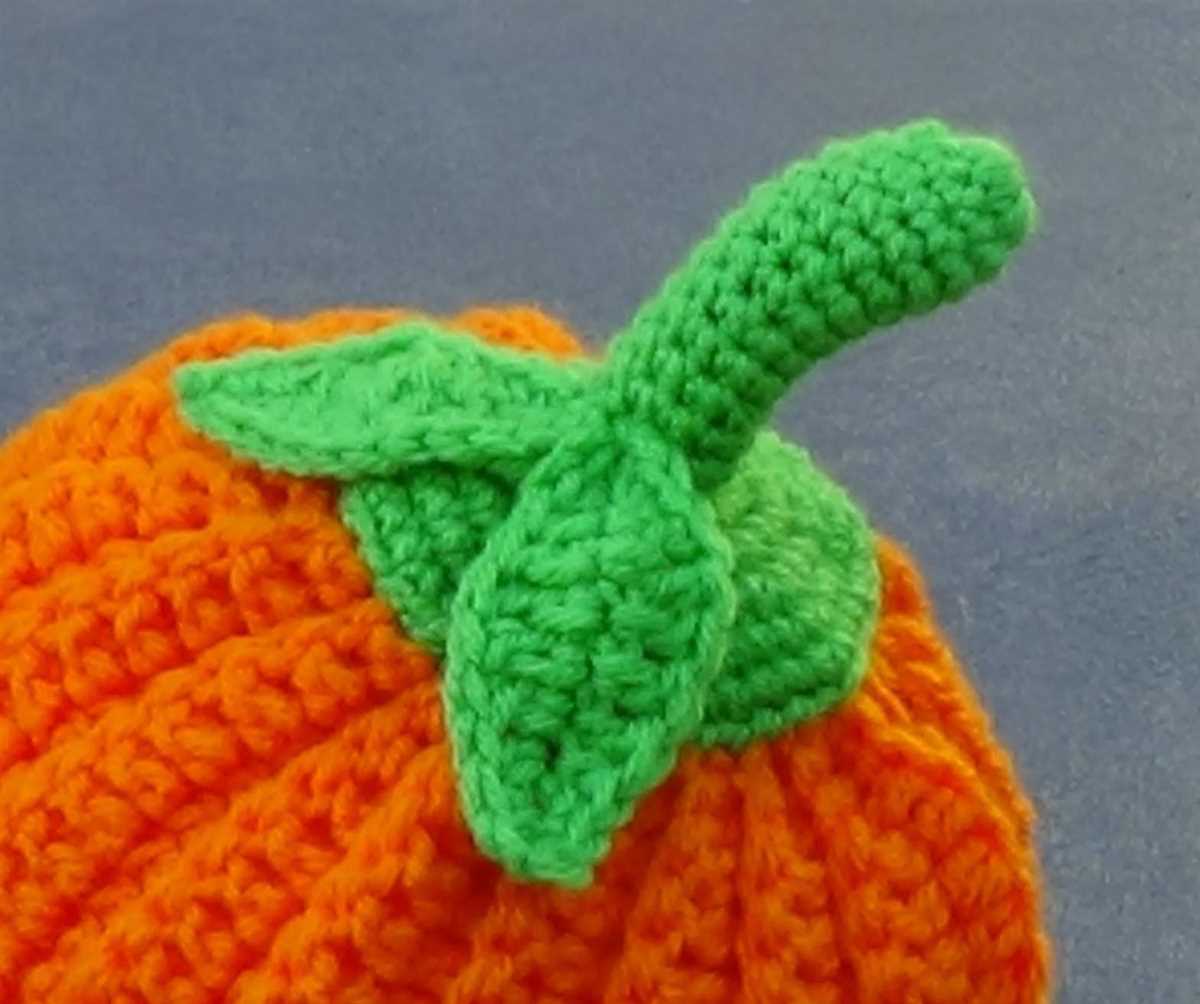
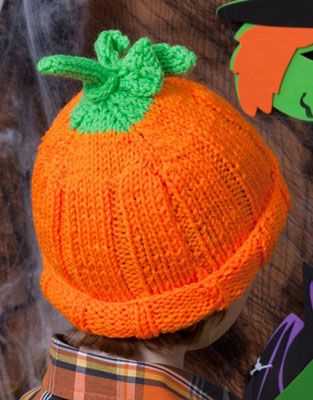
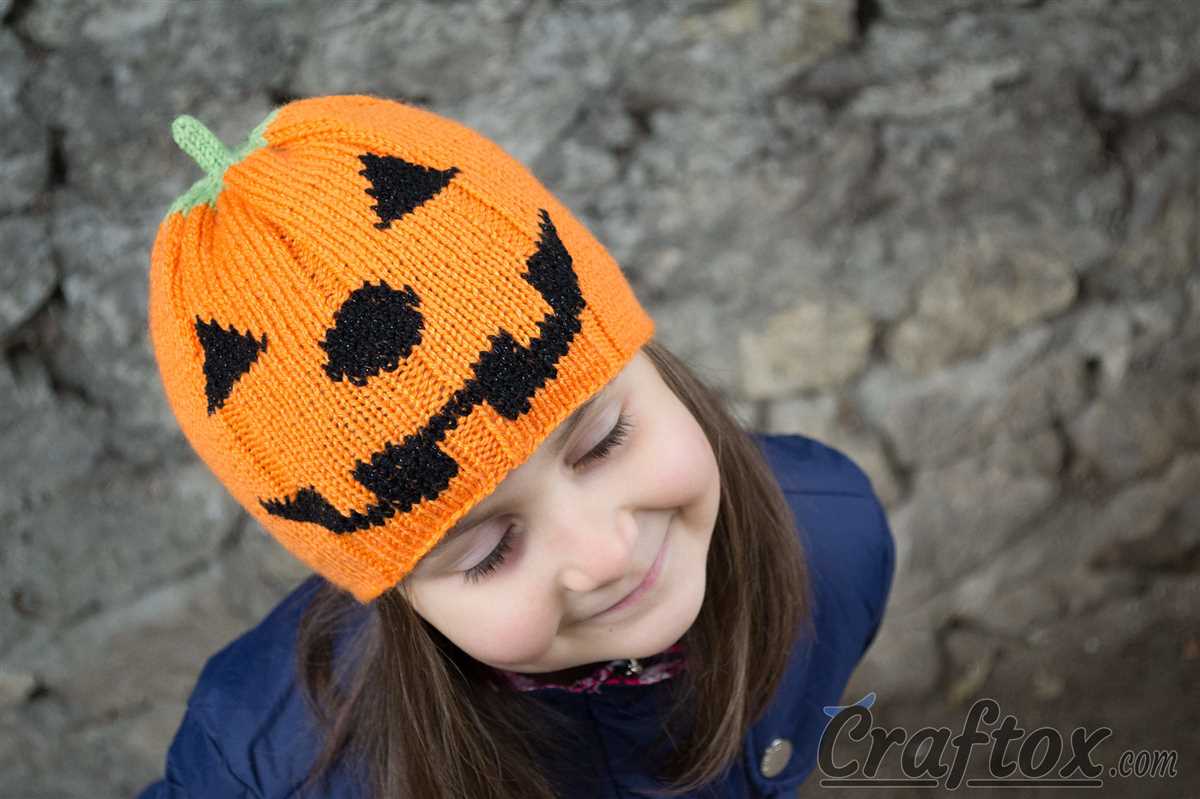
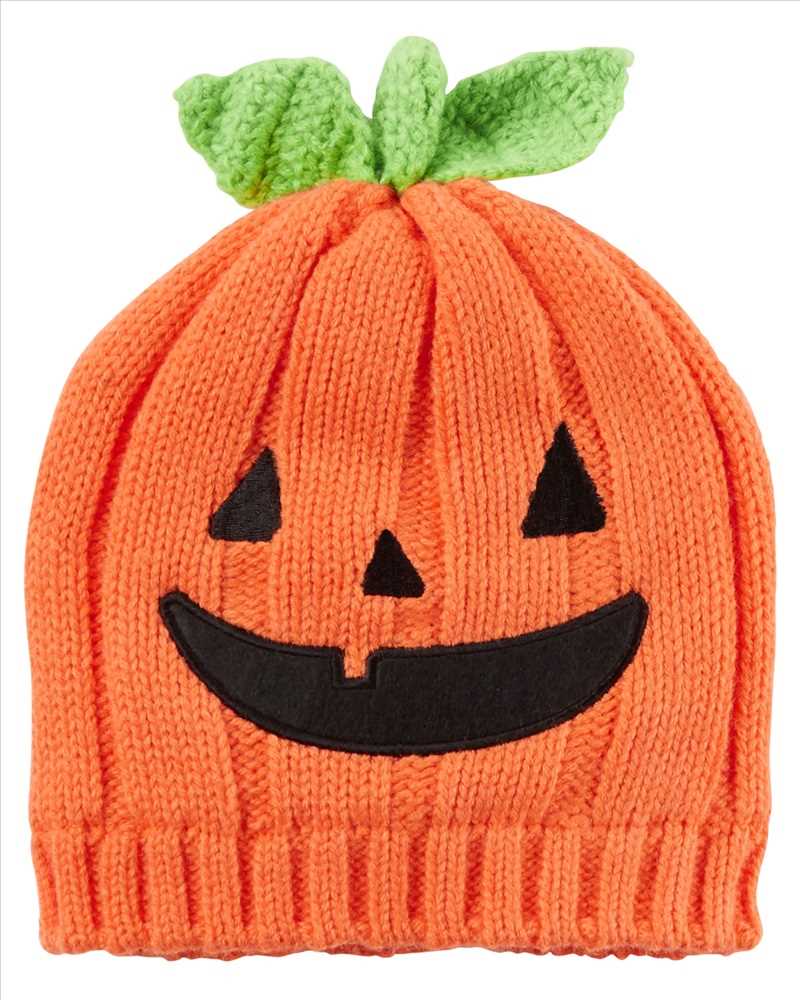
To make your pumpkin hat even more festive, you can add some embellishments such as knitted leaves or a face. You can get creative and customize your hat to suit your own style and preferences. Whether you want a cute and friendly pumpkin or a spooky and eerie one, the choice is yours!
So why not grab your knitting needles and start working on this free pumpkin hat knitting pattern? With Halloween just around the corner, now is the perfect time to get in the spirit and create a fun and unique accessory that will make you stand out at any Halloween party or event.
Materials and Tools You’ll Need to Knit a Pumpkin Hat

Knitting a pumpkin hat can be a fun and festive project for the fall season. To get started, you will need a few materials and tools. Here is a list of what you will need:
Materials

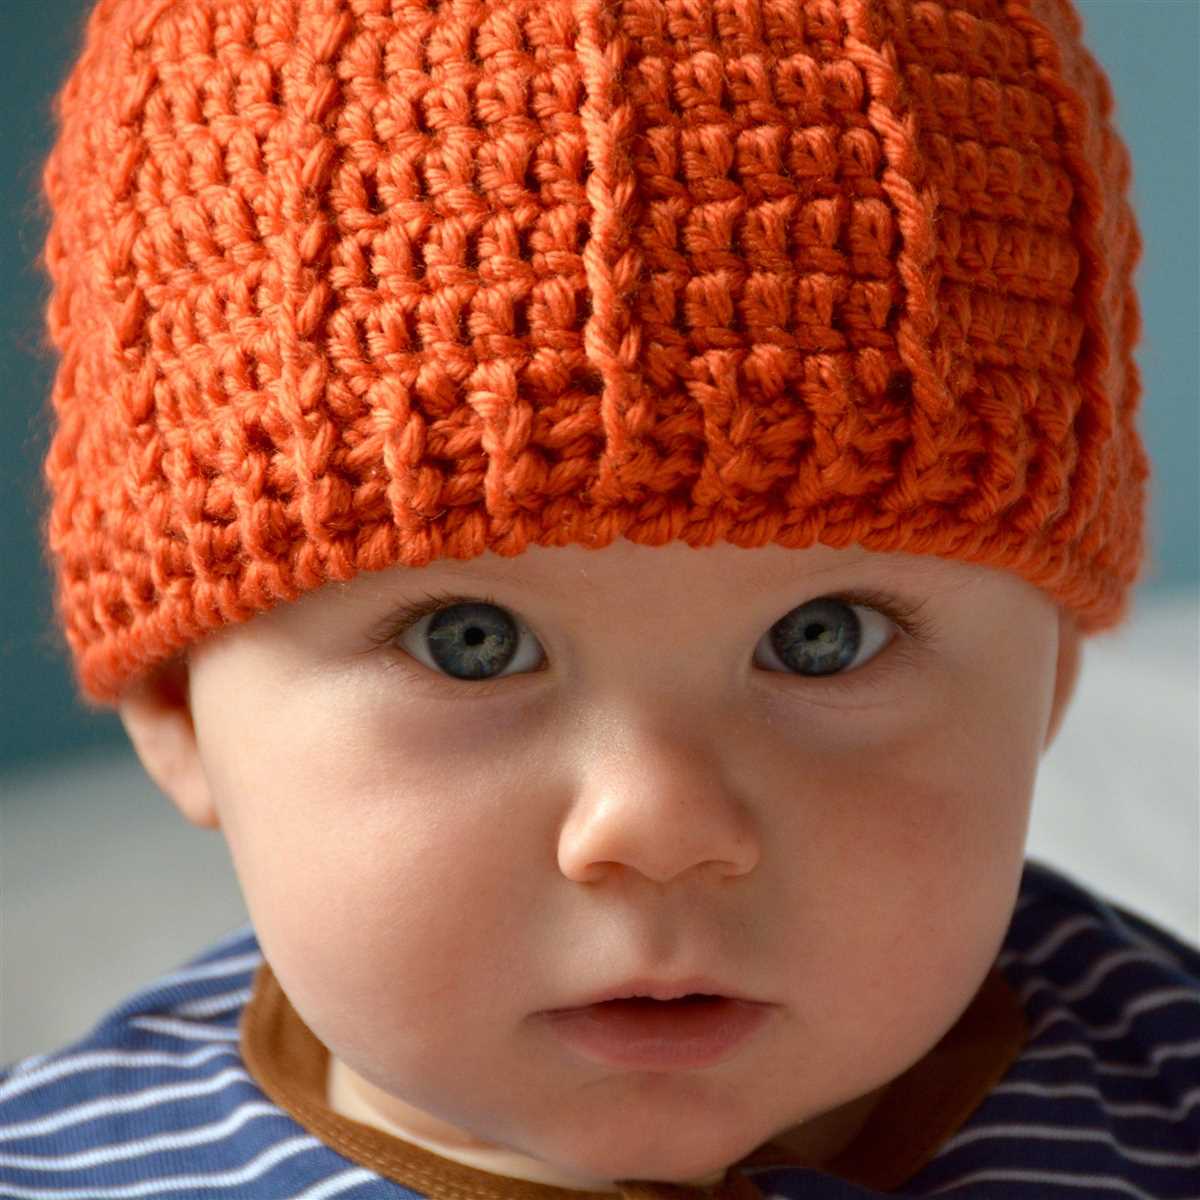
- Yarn: You will need orange yarn to create the pumpkin color. Choose a medium-weight yarn that is soft and comfortable to wear.
- Green Yarn: To create the stem of the pumpkin hat, you will need a small amount of green yarn.
- Knitting Needles: You will need a pair of knitting needles in the appropriate size for your yarn. Check the yarn label for the recommended needle size.
- Tapestry Needle: This needle will be used to weave in the loose ends of yarn and sew on any additional decorations.
- Stitch Marker: It is helpful to have a stitch marker to keep track of the beginning of your rounds.
Tools
- Scissors: You will need a pair of scissors to cut the yarn.
- Tape Measure: A tape measure will be useful for measuring the circumference and length of the hat.
- Row Counter: If you prefer, you can use a row counter to keep track of the number of rows you have completed.
- Stitch Holder: A stitch holder can be used to hold stitches when you are shaping the hat.
- Pom Pom Maker (optional): If you want to add a decorative pom pom to the top of the hat, a pom pom maker can make the process easier.
Once you have gathered all the necessary materials and tools, you will be ready to start knitting your pumpkin hat. Choose a cozy spot, put on your favorite fall playlist, and enjoy the process of creating a festive accessory for the season.
Yarn

In the world of knitting and crochet, yarn is one of the most important elements. It is the medium that allows creators to bring their ideas to life and transform them into beautiful garments and accessories. Yarn is made from fibers, which can come from a variety of sources including animals, plants, and synthetic materials. Each type of fiber has its own unique properties, such as softness, durability, and elasticity, which determine how the final project will look and feel.
When choosing yarn for a project, it is important to consider the weight or thickness of the yarn. Yarn weights range from lace or super fine to jumbo or super bulky, and each weight is suited for different types of projects. Thicker yarns are great for cozy winter sweaters or blankets, while finer yarns are perfect for delicate lacework or lightweight garments. Additionally, the color and texture of the yarn can greatly affect the appearance of the finished piece, so it is important to choose yarn that matches the desired aesthetic.
There are many different types of yarn available, each with its own unique characteristics. Some popular types of yarn include:
- Wool: Wool yarn is made from the fleece of sheep and is known for its warmth and durability. It comes in a variety of weights and can be dyed in many different colors.
- Cotton: Cotton yarn is made from the natural fibers of the cotton plant. It is lightweight and breathable, making it perfect for warm weather projects.
- Acrylic: Acrylic yarn is a synthetic yarn that is affordable and easy to care for. It is available in a wide range of colors and is great for beginners.
- Alpaca: Alpaca yarn is made from the fibers of alpacas, which are native to South America. It is soft, warm, and hypoallergenic.
No matter what type of yarn you choose, one of the most important things is to have fun and enjoy the process of creating something beautiful with your own hands.
Knitting Needles
When it comes to knitting, one of the most essential tools you will need is a pair of knitting needles. These long, slender rods are used to hold the stitches of your project and manipulate the yarn as you create your masterpiece.
Knitting needles come in various sizes, materials, and styles, allowing you to choose the ones that best suit your knitting style and project requirements. The most common materials for knitting needles are bamboo, metal, and plastic. Bamboo needles are lightweight and provide a warm feel, while metal needles are durable and smooth. Plastic needles, on the other hand, are great for beginners as they are lightweight and less slippery.
Sizes and Types
Kinitting needles are available in different sizes, ranging from very small to very large. The size of the needles affects the size of the stitches and the overall tension of your project. The smaller the size, the tighter the stitches will be.
There are also different types of knitting needles to choose from. Straight needles are the most common type and are used for flat knitting projects. They consist of two straight rods with a pointy end and a stopper at the other end. Circular needles, on the other hand, have a flexible cord connecting two needle points. They are perfect for knitting in the round or large projects. Double-pointed needles are shorter in length and have points at both ends, making them ideal for small circular knitting projects like socks or hats.
Caring for Your Needles
Proper care and storage of your knitting needles are important to ensure their longevity and performance. After each project, it is recommended to clean your needles with a soft cloth or gentle soap to remove any dirt or oils. Store them in a knitting needle case or roll to protect them from dust and accidental damage. It’s also a good idea to check your needles regularly for any signs of wear or damage and replace them if necessary.
In conclusion, knitting needles are an essential tool for any knitter. By choosing the right size, material, and type of needle, you can enhance your knitting experience and create beautiful projects with ease.
Stitch Markers
In knitting, stitch markers are essential tools that help to keep track of specific stitches or pattern repeats. These small rings, often made of plastic or metal, can be easily inserted into the knitting needle to mark a particular stitch or section of the pattern. Stitch markers come in various shapes and sizes, but the most common ones are round or split rings.
Stitch markers can be used in a variety of ways. They can be used to mark the beginning of a round in circular knitting, to indicate the center of a garment, or to mark a certain number of stitches for shaping. They are especially useful when working complex patterns with multiple stitch counts or repeats, as they help to prevent mistakes and keep the knitter on track.
When using stitch markers, it’s important to choose markers that are appropriate for the project. For example, lightweight and removable markers are ideal for lace knitting, as they won’t add too much bulk or interfere with the delicate stitches. On the other hand, more substantial markers may be necessary for heavier yarns or projects with larger needles.
Stitch markers can be purchased at craft stores or online, but they can also be easily improvised. Common household items like safety pins, paper clips, or small pieces of contrasting yarn can be used as makeshift markers in a pinch. However, it is important to ensure that the markers are secure and won’t accidentally slide off the needle while working.
Tapestry Needle
A tapestry needle is an essential tool for any knitter. It is a small, blunt needle with a large eye, designed specifically for sewing up and finishing knitted projects. The tapestry needle is used to weave in loose ends of yarn, sew seams together, and add any decorative touches to a knitting project.
When knitting a pumpkin hat, a tapestry needle is especially useful for adding the stem and leaves to the top. The pattern may instruct you to cut a length of yarn and thread it through the tapestry needle. You can then use the needle to carefully sew the stem and leaves onto the hat, making sure to secure them firmly in place.
When choosing a tapestry needle, it’s important to consider the size of the needle and the weight of the yarn you’re using. A needle that is too small may not be able to accommodate the thickness of the yarn, while a needle that is too large may leave visible holes in the fabric. It’s also important to choose a needle with a large enough eye to easily thread the yarn through.
Overall, a tapestry needle is an indispensable tool for any knitter, whether you’re working on a pumpkin hat or any other knitting project. It allows you to finish your project with neat and tidy seams, securely weave in loose ends, and add any final embellishments. Invest in a good quality tapestry needle, and it will become a staple in your knitting toolkit.
Getting Started: Casting On and Joining in the Round
When beginning to knit a pumpkin hat, the first step is to cast on the required number of stitches. In this pattern, we will use a long tail cast on method to create a neat and stretchy edge. To cast on, hold the knitting needle in your right hand and make a slipknot. Place the slipknot onto the needle and tighten it. Next, hold the working yarn in your left hand and create a loop around your thumb and index finger. Insert the needle through the loop from front to back, catching the yarn that is wrapped around your finger, and pull it through to create a new stitch. Repeat this process until you have cast on the desired number of stitches.
After casting on, it’s time to join the stitches in the round. To do this, you will need to use a set of double-pointed needles or a circular needle, depending on your preference. Start by ensuring that all the stitches are facing the same direction on the needles. Take the last stitch you cast on and place it onto the needle in your left hand. Hold the working yarn behind the needle and use your right hand to knit the first stitch. This will create a small gap between the first and last stitches. To close the gap, you can either knit the first stitch on the left needle together with the last stitch on the right needle, or you can simply pull the working yarn tight to close the gap. Whichever method you choose, make sure the stitches are not twisted and that the working yarn is behind the needles.
Once you have joined the stitches in the round, you can continue knitting in the desired stitch pattern for the pumpkin hat. It’s important to keep track of your rounds using stitch markers or a piece of contrasting yarn, especially if the pattern requires shaping or color changes. With a solid foundation of casting on and joining in the round, you are now ready to begin creating your very own pumpkin hat!
Knitting the Body of the Pumpkin Hat
Once you have completed the ribbing and have the desired circumference for your pumpkin hat, it’s time to move on to knitting the body. You will continue knitting in the round, using the main color yarn.
Row 1: Knit all stitches.
Row 2: Purl all stitches.
Repeat these two rows for the desired length of the body, usually around 4-5 inches. Make sure to measure the hat on your head as you go to ensure the perfect fit.
Row 3: Knit all stitches.
Row 4: Purl all stitches.
Continue repeating Rows 3 and 4 until you reach the desired length of the hat. Remember to try it on periodically to ensure the fit is just right.
Once you have reached the desired length, it’s time to start decreasing for the crown of the hat. This will give it its signature pumpkin shape. Follow the instructions for decreasing stitches in the pattern to shape the crown.
After completing the crown shaping, bind off all stitches and weave in any loose ends. Your pumpkin hat is now ready to be worn and enjoyed! Remember, you can always customize your hat by adding embellishments such as leaves or a stem to make it even more festive.
Ribbing Section
The ribbing section is an important part of a pumpkin hat knitting pattern as it helps to create a snug and comfortable fit. The ribbing is typically knitted in a 1×1 or 2×2 rib stitch pattern, which alternates knits and purls.
To start the ribbing section, cast on the required number of stitches. This will depend on the size of the hat and the desired width of the ribbing. For example, if you are knitting a child-sized hat with a 2×2 ribbing, you might cast on 80 stitches.
Tip: Using smaller needles for the ribbing section can help create a tighter and more stretchy fabric.
Once you have cast on the stitches, begin knitting the ribbing pattern. For a 1×1 rib, you will alternate knitting one stitch and purling one stitch across the row. For a 2×2 rib, you will alternate knitting two stitches and purling two stitches.
Example:
- Row 1: *K1, p1; repeat from * to the end of the row.
- Row 2: *P1, k1; repeat from * to the end of the row.
Note: The number of rows you knit for the ribbing section will depend on the desired length of the ribbing. Typically, knitting 1-2 inches of ribbing is sufficient.
Continue knitting the ribbing pattern for the specified number of rows, until you have reached the desired length. Once the ribbing section is complete, you can then move on to the main body of the pumpkin hat knitting pattern.
Pumpkin Pattern
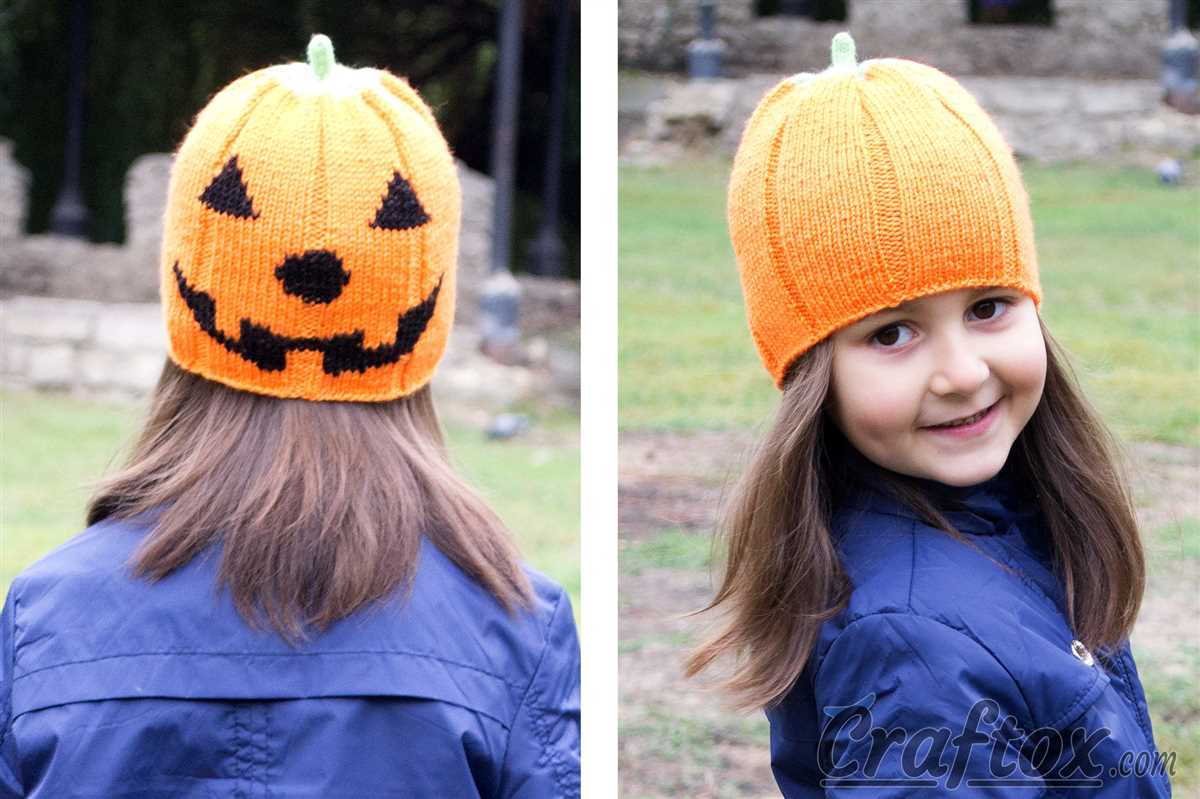
Are you feeling crafty? Looking for a fun and festive knitting project? Look no further than this free pumpkin hat knitting pattern. Whether you’re getting ready for Halloween or just want to add some autumnal flair to your wardrobe, this pattern is perfect for you.
The pumpkin hat pattern features a classic pumpkin shape, complete with a stem and leaf. The hat is knitted in the round using a small circular needle and double-pointed needles. The pattern includes instructions for three sizes: child, teen/adult small, and adult large. You can also easily customize the pattern to fit your desired size.
Materials:
- Worsted weight yarn in orange and green
- Size 8 (5mm) circular needles, 16-inch length
- Set of size 8 (5mm) double-pointed needles
- Stitch markers
- Tapestry needle
- Scissors
Instructions:
- Cast on the desired number of stitches for your size using the circular needles.
- Join in the round and place a stitch marker to mark the beginning of the round.
- Knit in a 2×2 rib pattern for the brim of the hat.
- Switch to the orange yarn and knit in stockinette stitch until the hat measures the desired length.
- Decrease for the crown of the hat by knitting two stitches together every few rounds. Continue decreasing until you have a small number of stitches remaining.
- Cut the yarn, leaving a long tail. Thread the tail through the remaining stitches and pull tight to close the top of the hat.
- Use the green yarn to embroider a stem and leaf onto the top of the hat.
- Weave in any loose ends and trim excess yarn.
That’s it! You’ve made your very own pumpkin hat. Show off your knitting skills and keep your head warm with this adorable and festive accessory. Happy knitting!
Increasing Stitches for Crown Shaping
When knitting a pumpkin hat, it is important to increase stitches for crown shaping in order to create the rounded top of the hat. There are several methods that can be used to increase stitches, depending on the desired outcome and the knitter’s preference.
One common method for increasing stitches is the knit front and back (kfb) technique. To use this method, the knitter would knit into the front of a stitch as usual, but before slipping the stitch off the left-hand needle, they would then knit into the back of the same stitch. This creates two stitches out of one, effectively increasing the stitch count.
Another method that can be used is the make one (M1) increase. This method involves knitting into the bar between two stitches, either from the front or the back, depending on the desired result. The knitter would then twist the new stitch to prevent a hole from forming.
It is important to evenly distribute the increased stitches around the crown of the hat to maintain a balanced and symmetrical shape. This can be achieved by spacing out the increases evenly or using a specific stitch pattern for crown shaping. Following a pattern or chart can also help guide the knitter in increasing stitches at the correct intervals.
Overall, increasing stitches for crown shaping is an essential step in creating a well-fitted and visually appealing pumpkin hat. With the right methods and attention to detail, knitters can achieve a beautifully shaped crown that complements the rest of the hat design.
Finishing Touches: Decreasing Stitches and Binding Off
Once you have completed the main body of your pumpkin hat, it’s time to add the finishing touches. This involves decreasing stitches and binding off to create a neat and polished look.
To decrease stitches, you will need to follow the pattern instructions carefully. This may involve knitting two stitches together or slipping stitches over one another to create a decrease. Decreasing stitches helps to shape the hat and give it a snug fit. Make sure to count your stitches as you go to ensure you are following the pattern correctly.
After you have completed the necessary decreases, it’s time to bind off. This is the process of securing your stitches and finishing off your knitting project. To bind off, knit the first two stitches as usual, then take the first stitch on your right needle and pass it over the second stitch and off the needle. Continue this process until you have reached the last stitch, then cut your yarn leaving a tail and pull it through the last stitch to secure it.
The binding off process can vary depending on the pattern instructions, so it’s important to read and follow them closely. Once you have finished binding off, you can weave in any loose ends or trim them neatly. Your pumpkin hat is now complete and ready to be worn!
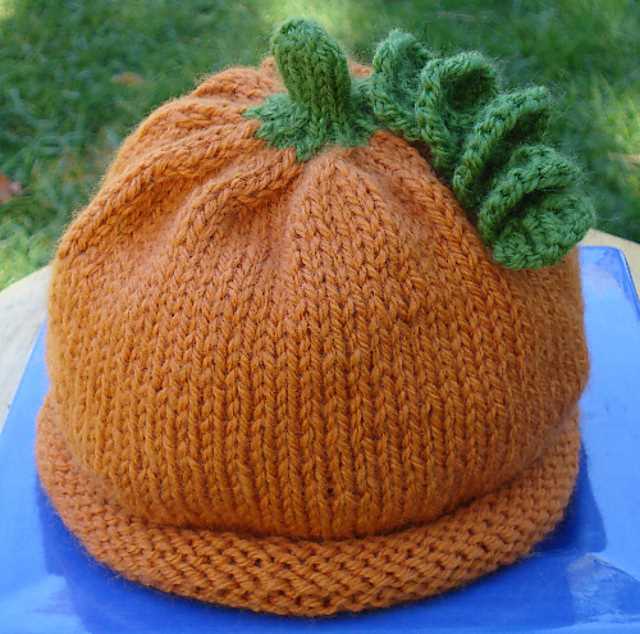
Adding a Stem: Knitting a Green Top
After completing the main body of the pumpkin hat, you can add a stem to make it look more realistic. Knitting a green top for the hat will give it a nice finishing touch. Here’s how you can do it:
- Choose a shade of green yarn that matches or complements the orange yarn you used for the rest of the hat. You can also opt for a different shade of green for a more playful look.
- Using the same needle size you used for the main body of the hat, cast on 6 stitches.
- Row 1: Knit all stitches.
- Row 2: Purl all stitches.
- Repeat Rows 1 and 2 until your green top measures approximately 4 inches.
- Bind off all stitches loosely.
- Using a tapestry needle, sew the two short sides of the green top together to form a tube.
- Position the green top at the top of the pumpkin hat, slightly towards one side, and sew it in place. Make sure to stitch it securely to prevent it from coming loose.
Tip: If you want your stem to stand upright, you can insert a pipe cleaner or a small piece of wire into the center of the green top before sewing it to the hat.
Adding a stem to your pumpkin hat is a fun way to make it look more realistic and playful. With this step-by-step guide, you can easily knit a green top and attach it securely to complete your pumpkin hat. Happy knitting!