
Knitting is a wonderful craft that allows us to create beautiful and functional items with just a pair of needles and some yarn. If you’re looking to create a thoughtful handmade gift for the men in your life, knitting a pair of gloves is a great option. In this article, we will explore some free knitting patterns specifically designed for men’s gloves, and the best part is that all these patterns can be knitted with just two needles.
Knitting gloves may seem like a daunting task, but with these free patterns and some basic knitting skills, you’ll be able to knit a pair of cozy gloves in no time. Whether you’re an experienced knitter looking for a new project or a beginner eager to learn, these patterns will guide you through the process step by step. From classic and understated designs to more intricate patterns featuring cables and textures, there’s something for every man’s taste.
Not only are these patterns free and versatile, but they also provide an opportunity to customize the gloves to your liking. You can choose different yarn colors to match the recipient’s style or even experiment with different stitch patterns to add a personal touch. Knitting gloves for the men in your life is not only a practical gift but also a way to show them how much you care.
Basic Knitting Stitches for Gloves
When knitting gloves, it’s important to have a good understanding of basic knitting stitches. These stitches form the foundation of any knitting project and will help create a sturdy and comfortable pair of gloves. Here are some essential knitting stitches you should know:
1. Knit Stitch
The knit stitch is the most basic and common knitting stitch. It creates a smooth and even fabric. To knit, insert the right needle into the front of the loop on the left needle, wrap the yarn around the right needle from back to front, and then pull the right needle through the loop, slipping the old stitch off the left needle.
2. Purl Stitch
The purl stitch creates a textured fabric with bumps on the front side. To purl, insert the right needle into the front of the loop on the left needle, wrap the yarn around the right needle from front to back, and then pull the right needle through the loop, slipping the old stitch off the left needle.
3. Ribbing
Ribbing is a common stitch pattern often used for cuffs on gloves. It creates a stretchy and flexible fabric. Ribbing is formed by alternating knit and purl stitches in a specific pattern. For example, a 2×2 ribbing would be knit 2 stitches, purl 2 stitches, and repeat this pattern across the row.
By mastering these basic knitting stitches, you’ll be able to create a variety of patterns and textures for your gloves. Practice these stitches and experiment with different stitch patterns to create unique and personalized gloves for men. Happy knitting!
Knit stitch
The knit stitch is one of the most basic and fundamental stitches in knitting. It is commonly used in many knitting patterns, including those for men’s gloves. The knit stitch creates a smooth and sturdy fabric, making it perfect for creating warm and durable gloves.
To knit the stitch, you will need a pair of knitting needles and a ball of yarn. Start by casting on the desired number of stitches onto the needles. Hold one needle in your right hand and the other in your left hand. Insert the right-hand needle into the first stitch on the left-hand needle, from left to right. Wrap the yarn around the right-hand needle, bringing it from back to front.
Next, use the right-hand needle to pull the wrapped yarn through the stitch, creating a new stitch on the right-hand needle. Slide the old stitch off the left-hand needle. Repeat this process for each stitch on the left-hand needle until all stitches have been transferred to the right-hand needle.
When knitting gloves on two needles, you will typically alternate between knitting rows and purling rows to create different textures and patterns. The knit stitch is used for the knitting rows, while the purl stitch is used for the purling rows. By combining these two basic stitches, you can create a wide variety of designs for men’s gloves.
Purl Stitch
The purl stitch is one of the basic stitches in knitting and is commonly used to create a textured or ribbed pattern. It is the reverse of the knit stitch and is formed by bringing the yarn to the front of the work, inserting the right needle from right to left through the stitch on the left needle, and bringing the yarn over the right needle and through the stitch. This creates a loop on the right needle, which is then pulled through the stitch on the left needle. The purl stitch is often abbreviated as “p” in knitting patterns.
One of the advantages of the purl stitch is that it creates a fabric with a different appearance and texture than the knit stitch. This can be particularly useful when knitting gloves, as it can add extra warmth and insulation. Additionally, the purl stitch can be combined with the knit stitch to create a variety of patterns and designs, such as ribbing or cables.
When working with two needles, such as in the case of knitting gloves, the purl stitch can be easily mastered. By alternating rows of purl and knit stitches, you can create a ribbed pattern that is stretchy and form-fitting. This is especially important when knitting gloves for men, as a good fit is essential for comfort and functionality.
Overall, the purl stitch is an essential tool in knitting men’s gloves on two needles. It allows for the creation of different textures and patterns, adding warmth and style to the finished product. With a little practice, you can quickly master the purl stitch and use it to create beautiful and functional gloves for the men in your life.
Ribbing Stitch

The ribbing stitch is a common knitting stitch pattern often used for cuffs, collars, and hems. It creates a stretchy and elastic fabric with vertical ridges that give the finished piece a textured and decorative look.
To create the ribbing stitch, you will need to alternate between knit and purl stitches. This is typically done over a multiple of stitches, such as knitting two stitches and purling two stitches, to create the distinctive ribbed effect. The number of stitches in each rib can vary depending on the desired width and stretch of the ribbing.
The ribbing stitch is popular because it has great stretch and elasticity, making it ideal for projects that require a snug fit, such as gloves, socks, and headbands. It can also be used as a decorative detail in larger projects, like sweaters and scarves.
When working with the ribbing stitch, it’s important to maintain an even tension to ensure that the finished piece retains its stretchiness. Additionally, using a smaller needle size compared to the body of the project can help create a tighter and more defined ribbing.
Overall, the ribbing stitch is a versatile and essential technique in knitting. It adds both functionality and visual appeal to a variety of projects, making it a valuable skill for any knitter to learn.
Choosing the right yarn for men’s gloves
When knitting men’s gloves, it is important to choose the right yarn to ensure the gloves are not only comfortable but also durable. Men typically prefer gloves that are warm and practical, so selecting the appropriate yarn is crucial.
1. Consider the fiber: When choosing yarn for men’s gloves, it is important to consider the fiber content. Wool is an excellent choice as it is naturally warm, insulating, and breathable. It also has the added benefit of being water-resistant. Acrylic yarn can be a good alternative for those who are allergic to wool or prefer a vegan option. It is lightweight, soft, and easy to care for.
2. Gauge and weight: The gauge and weight of the yarn are important factors to consider when knitting gloves. Thicker yarns, such as worsted weight or bulky, will result in warmer gloves. However, keep in mind that the gloves may feel bulkier and less flexible. Lighter weight yarns, such as sport or fingering, will give a more delicate and flexible glove, but may not provide as much warmth.
3. Durability: Men’s gloves need to be able to withstand regular wear and tear. Look for yarns that are durable and will hold up well over time. Stronger fibers such as wool or acrylic blends can provide the necessary durability. Additionally, yarns with nylon or polyester blended in can add extra strength and resilience.
4. Color and texture: Consider the color and texture of the yarn when knitting men’s gloves. Men often prefer neutral or darker colors, so selecting yarn in shades of gray, brown, or navy can be a good choice. In terms of texture, smooth yarns can be more practical as they allow for ease of movement and grip. However, if the gloves are intended for special occasions or fashion purposes, a textured or patterned yarn can add visual interest.
By carefully considering the fiber, gauge, durability, color, and texture of the yarn, you can select the perfect yarn for knitting men’s gloves. Remember to take into account the preferences of the recipient and the intended purpose of the gloves to ensure a successful and enjoyable knitting project.
Measuring hand size for a perfect fit
When knitting gloves for men, it is important to measure their hand size accurately to ensure a perfect fit. This will help to create gloves that are comfortable and functional, allowing for ease of movement and flexibility. To measure hand size, there are several key measurements to consider.
1. Hand circumference: To measure hand circumference, use a flexible tape measure and wrap it around the palm of the hand just below the knuckles. Make sure not to pull the tape measure too tightly, as this can result in a glove that is too snug.
2. Hand length: Hand length is measured from the base of the palm to the tip of the middle finger. This measurement is important to ensure that the fingers of the gloves are the right length, allowing for proper dexterity and a comfortable fit.
Once these measurements have been taken, it is important to consult a sizing chart or pattern to determine the appropriate size to knit. Keep in mind that knitting patterns may vary slightly in their sizing recommendations, so it is always best to check the specific pattern instructions.
By taking accurate measurements and following a well-fitting pattern, you can create men’s gloves that are tailored to their hand size, providing warmth and comfort throughout the colder months.
Getting started with the glove pattern
When starting a new knitting project, it’s essential to gather all the necessary materials and familiarize yourself with the pattern. The same goes for knitting men’s gloves. Before diving into the project, make sure you have the right yarn, needles, and other tools to complete the task.
The first step is to select the appropriate yarn for the gloves. Look for a yarn that is warm and durable, such as wool or a wool blend. Consider the color and thickness of the yarn as well, as these factors can affect the final look and feel of the gloves.
Once you have the yarn, you will need to choose the correct needle size. The pattern should indicate the recommended needle size, but it’s always a good idea to make a swatch to check your gauge. This will ensure that the gloves will fit properly.
After gathering the materials, it’s time to read through the pattern instructions. Pay close attention to any abbreviations or special stitches that may be used in the pattern. It’s helpful to make a note of these so you can refer back to them while knitting.
Once you have a good understanding of the pattern, you can begin casting on and working the stitches. Take your time and double-check your work regularly to avoid any mistakes. Remember to follow the pattern instructions carefully, as even small deviations can affect the final outcome of the gloves.
As you progress with the pattern, you may need to make adjustments based on your personal preferences or hand size. Feel free to modify the pattern as needed to ensure the gloves fit comfortably.
With these tips in mind, you are now ready to start knitting your own pair of men’s gloves. Enjoy the process and take pride in the finished product!
Cuff design options
The cuff of a knitted glove is an essential part of the design, as it not only adds style but also helps to keep the glove in place on the hand. There are several different cuff design options that can be used when knitting men’s gloves on two needles.
Ribbed cuff: One common option is a ribbed cuff, which is created by alternating knit and purl stitches. This creates a stretchy and textured cuff that fits snugly around the wrist. Ribbing is a versatile design choice that can be used for both casual and formal glove styles.
Seed stitch cuff: Another option is a seed stitch cuff, which is created by alternating knit and purl stitches in a specific pattern. The resulting cuff has a slightly bumpy texture and adds a touch of visual interest to the gloves. Seed stitch cuffs can be used for both casual and dressy glove styles.
Cable knit cuff: For a more intricate and decorative cuff, cable knitting can be used. Cables are created by crossing stitches over each other, creating a braided or twisted appearance. A cable knit cuff adds a classic and timeless touch to men’s gloves and is often seen in traditional or formal glove designs.
Rolled cuff: A simple yet stylish option is a rolled cuff, where the edge of the cuff is folded over and secured in place. This gives the gloves a relaxed and casual look, perfect for everyday wear. Rolled cuffs work well with both plain and textured stitches.
These are just a few examples of the cuff design options available for men’s gloves knitted on two needles. Each design choice can be customized with different stitch patterns, colors, and yarn weights to create unique and personalized gloves.
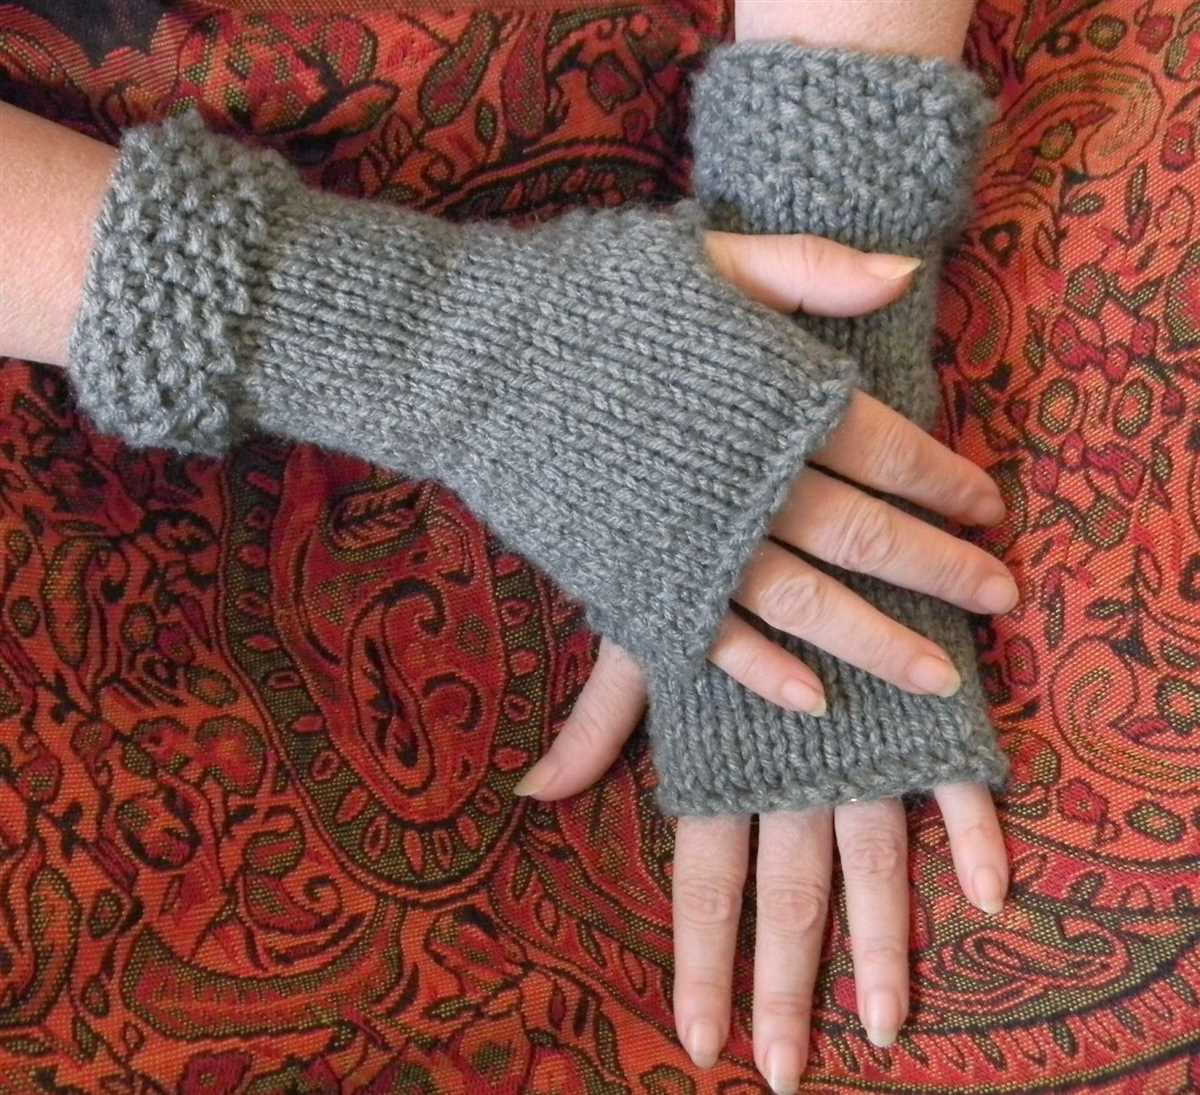
Simple Ribbed Cuff
When knitting gloves for men, a simple ribbed cuff is a classic and versatile choice. The ribbed cuff not only adds a nice touch of texture, but it also helps to provide a snug and comfortable fit. Knitting a ribbed cuff is easy and can be done using basic knitting skills.
To start, cast on the desired number of stitches for the cuff using the long-tail cast-on method. A popular ribbed cuff pattern is the 2×2 rib, which alternates between knit (K) and purl (P) stitches. For the 2×2 rib, knit two stitches and purl two stitches, repeating this pattern across the row.
Continue knitting in the 2×2 rib pattern for the desired length of the cuff. Depending on the length of the gloves, you may want to knit the cuff for about 2-3 inches. Remember to keep track of your stitch count to ensure an even rib pattern.
Once you have reached the desired length, bind off the stitches in pattern. For the 2×2 rib, bind off in knit and purl stitches to maintain the ribbed pattern. You can use a basic knit bind-off or a stretchy bind-off method, such as the suspended bind-off, to create a comfortable and flexible edge.
A simple ribbed cuff is a great starting point for knitting men’s gloves on two needles. It adds a professional and polished look to the gloves and allows for easy customization with different yarns and colors. Whether you’re knitting gloves for yourself or as a gift, a ribbed cuff adds a touch of style and functionality to any pair of men’s gloves.
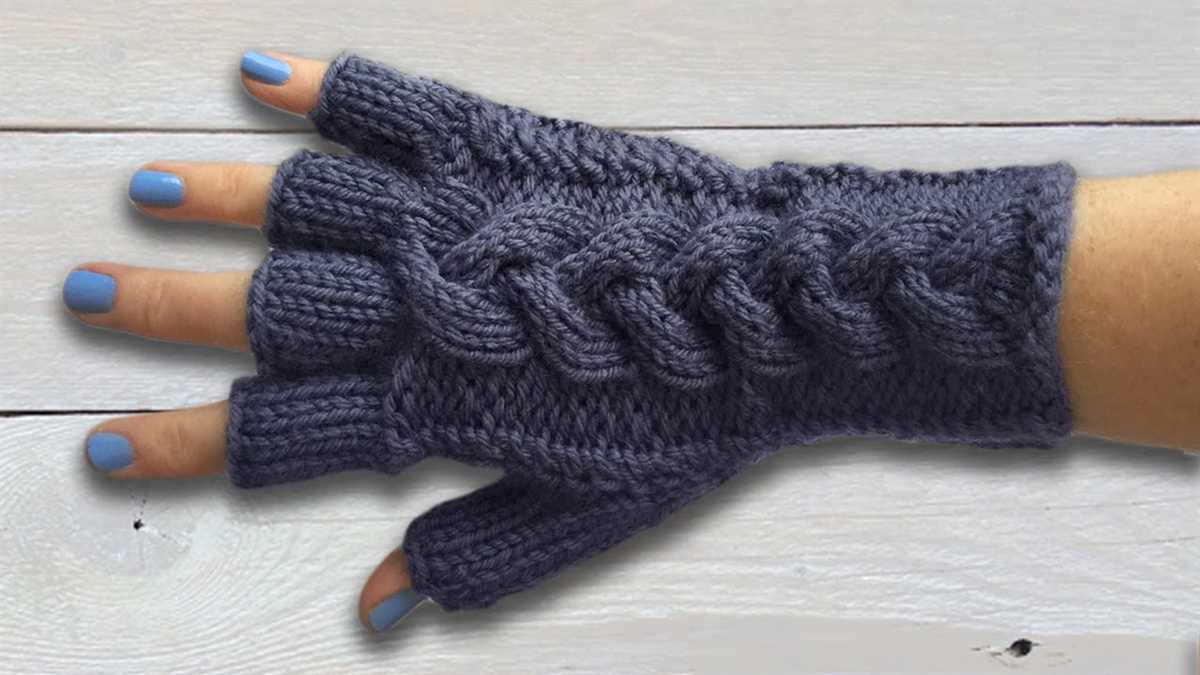
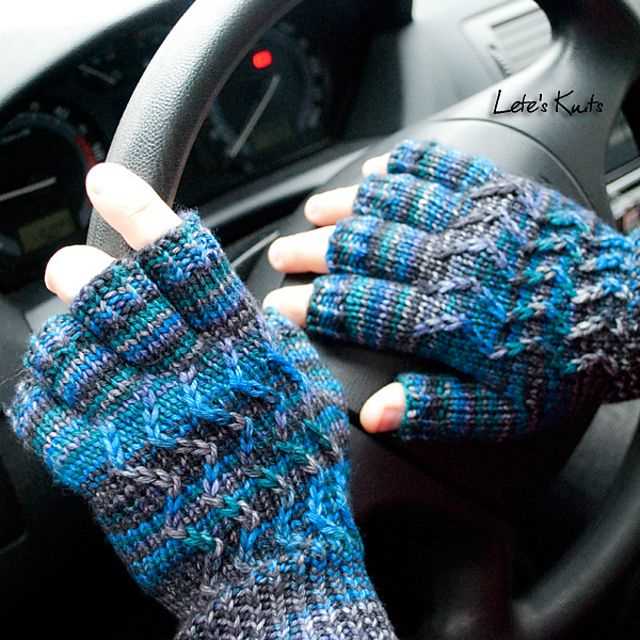
Cable Knit Cuff
The cable knit cuff is a popular design element in men’s gloves. It adds an extra touch of style and sophistication to the overall look of the gloves. The cable knit pattern is achieved by crossing stitches over each other to create a twisted effect, which gives the cuff a unique texture and visual appeal.
The cable knit cuff can be incorporated into various glove patterns, including fingerless gloves, mittens, and full-fingered gloves. It can be knitted using two needles, making it a suitable choice for those who prefer working with this method rather than using double-pointed needles or circular needles.
To knit the cable knit cuff, you will need to follow a specific cable stitch pattern. This pattern typically involves a combination of knit and purl stitches, as well as crossing stitches over each other. The cable stitch pattern is repeated across the desired width of the cuff, creating a series of intertwining cables. This pattern can be adjusted to create different widths and designs, allowing for customization based on individual preferences and style.
When knitting the cable knit cuff, it is important to pay attention to tension and gauge to ensure a proper fit. It is also essential to follow the pattern instructions carefully, as cable knitting can be more complex than basic knitting stitches. However, with practice and patience, knitters can master the cable stitch technique and create stunning cable knit cuffs for their men’s gloves.
In conclusion, the cable knit cuff is an attractive and stylish design element that can enhance the look of men’s gloves. Whether knitted on two needles, it adds a touch of elegance and visual interest to the cuff area. With its unique texture and intricate pattern, the cable knit cuff is a popular choice among knitters. By following the appropriate cable stitch pattern and paying attention to tension and gauge, knitters can successfully incorporate the cable knit cuff into their glove projects.
Rolled edge cuff
The rolled edge cuff is a popular and stylish choice for men’s gloves. It adds a clean and polished finish to the gloves, while also providing a comfortable and snug fit around the wrist. Knitting a cuff with a rolled edge is relatively simple and can be easily done using two needles.
To create a rolled edge cuff, start by casting on the desired number of stitches for the cuff. It’s important to use a stretchy cast-on method, such as the long-tail cast-on, to ensure that the cuff has enough elasticity to fit comfortably around the wrist. Once the stitches are cast on, work in the desired ribbing pattern for a few rounds to create the cuff’s structure.
The rolled edge is created by folding the cuff’s edge inward and stitching the folded edge to the main part of the glove. This can be done either by using a tapestry needle to sew the folded edge in place, or by knitting the folded edge together with the live stitches on the needles. Whichever method you choose, make sure to secure the rolled edge firmly to prevent it from unraveling.
One of the advantages of the rolled edge cuff is that it allows for customization. You can adjust the length of the cuff to your preference, making it shorter or longer depending on the desired style or functionality of the gloves. Additionally, you can experiment with different ribbing patterns, such as 1×1 or 2×2 rib, to achieve different looks for the cuff.
Overall, the rolled edge cuff is a versatile and attractive option for men’s gloves. Whether you’re a beginner or an experienced knitter, this cuff style can be easily mastered and incorporated into your knitting projects. So grab your needles and yarn, and start knitting a pair of gloves with a stylish rolled edge cuff today!
Knitting the hand section
After completing the cuff section, you can move on to knitting the hand section of the men’s gloves. This is where you will create the main body of the gloves, which will cover the fingers and palm.
To start, continue knitting in the pattern that you established for the cuff. If you are using a ribbed pattern, continue knitting in the rib stitch. If you are using a textured or cable pattern, continue following the pattern instructions.
If the pattern calls for decreasing or increasing stitches to shape the glove, make sure to follow the instructions carefully. These shaping techniques will ensure a comfortable and snug fit for the wearer.
Thumb gusset: In some glove patterns, you may encounter a thumb gusset. This is an additional section of stitches that are gradually increased to accommodate the thumb. Follow the pattern instructions to create the thumb gusset, making sure to keep the rest of the hand stitches on hold.
Finger separation: As you continue knitting the hand section, you may reach a point where the pattern instructs you to separate the stitches for the individual fingers. This is usually done by placing some stitches on hold with stitch markers or waste yarn. Follow the pattern instructions to separate the stitches and continue knitting each finger section separately.
- Continue knitting the hand section, following the pattern instructions for any shaping or stitch pattern changes.
- If the pattern specifies a certain length for the hand section, make sure to measure your work as you go to ensure it matches the desired length.
- Once you have completed the hand section, you can move on to knitting the fingers and finishing the gloves.
Adding Thumb Gussets
Adding thumb gussets to your knitted gloves will provide additional comfort and flexibility for the wearer. This section will guide you through the process of incorporating thumb gussets into your gloves.
To begin, you will need to determine the number of stitches to be used for the thumb gusset. This will depend on the size of the glove and the desired width of the thumb. Typically, 6-8 stitches are used for the thumb gusset.
- Step 1: Before starting the thumb gusset, put the stitches for the thumb on a separate stitch holder or spare yarn. This will create an opening for the thumb.
- Step 2: Begin the thumb gusset by increasing one stitch at the beginning and end of the next row. This will increase the stitch count by two.
- Step 3: Continue knitting the thumb gusset by increasing one stitch at each end on every other row, until the desired number of thumb gusset stitches is reached.
- Step 4: Once the thumb gusset stitches are established, you can continue knitting the main glove section as usual.
By adding thumb gussets, you are creating a wider section to accommodate the thumb, allowing for better movement and comfort. Take your time and follow the instructions carefully to ensure a smooth transition from the glove body to the thumb gusset.
Remember, practice makes perfect! Don’t be afraid to try different techniques and make adjustments to suit your personal preferences. With these instructions and a little bit of patience, you’ll soon be knitting stylish and comfortable gloves for men with thumb gussets.