
Knitting socks for children can be a fun and rewarding experience. Not only are you able to create custom, one-of-a-kind pieces for your little ones, but you can also use this opportunity to improve your knitting skills. If you’re new to knitting or want to try out a new technique, knitting socks on two needles is a great place to start.
In this article, we’ll explore a collection of free knitting patterns specifically designed for children’s socks on two needles. Whether you’re a beginner or an experienced knitter, you’ll find patterns that cater to different skill levels and styles. From simple and basic designs to more intricate and decorative ones, there’s something for everyone.
Knitting socks on two needles, also known as flat knitting, is a technique that allows you to knit socks without the need for circular needles or double-pointed needles. This method is ideal for those who prefer the familiarity and ease of working with two needles. Plus, it eliminates the fear of dropping stitches or struggling with multiple needles.
So, if you’re ready to embark on a delightful knitting journey and create adorable socks for your little ones, let’s explore these free knitting patterns for children’s socks on two needles. Get your yarn, needles, and imagination ready, and let’s get started!
Free Knitting Patterns for Children’s Socks on Two Needles
Knitting socks for children can be a fun and rewarding project. Not only are they quick to make, but they also serve as practical and cozy accessories for little ones. If you are looking for free knitting patterns for children’s socks that are worked on two needles, you’re in luck! We have compiled a list of patterns that are beginner-friendly and perfect for gifting or adding to your child’s wardrobe.
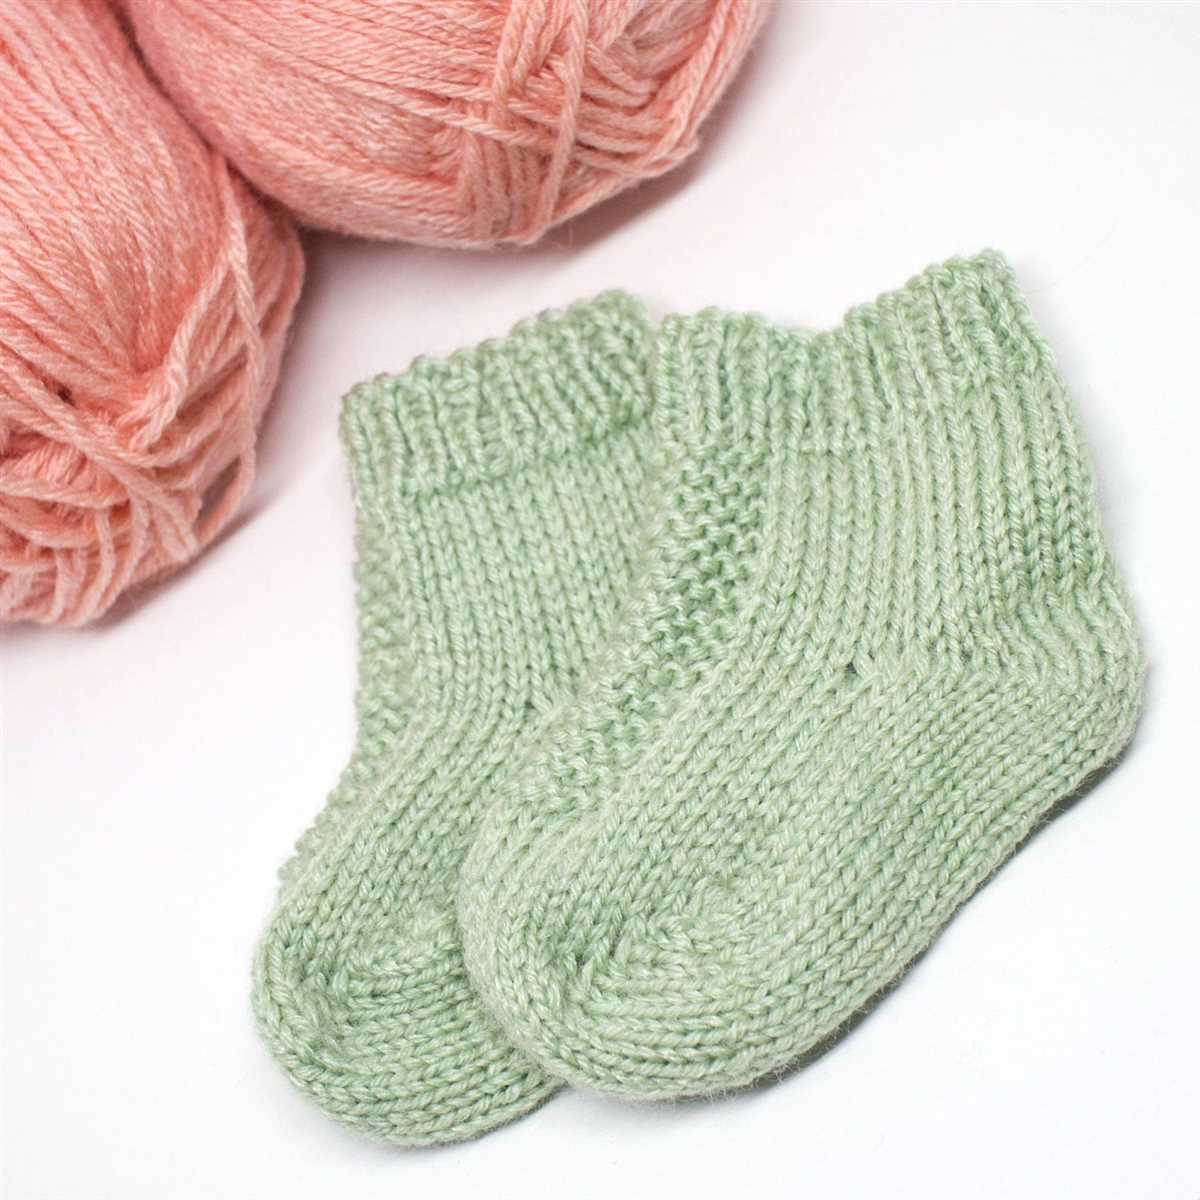
“Cozy Toes” is a delightful pattern that features a ribbed cuff and a classic stockinette stitch body. It is designed with comfort and warmth in mind, making it a great option for colder months. The pattern includes instructions for multiple sizes, allowing you to customize the fit for your child’s feet. Whether you choose to use colorful yarn or opt for a neutral shade, these socks are sure to become a favorite.
Materials needed:
- Yarn: Worsted weight
- Needles: Size US 6 (4.0mm)
- Stitch markers
- Tapestry needle
Another popular pattern is “Sweet Stripes”. These socks incorporate a simple striped design that adds a playful touch to any outfit. The pattern includes instructions for both ankle and knee-high socks, giving you the option to create different styles. They are worked from the top down, and the stretchy ribbed cuff ensures a comfortable fit for active little ones.
Materials needed:
- Yarn: Fingering weight
- Needles: Size US 2 (2.75mm)
- Stitch markers
- Tapestry needle
If you are new to knitting socks, these patterns are a great way to get started. With clear instructions and basic techniques, you’ll be able to create adorable socks for the children in your life. So grab your needles and some yarn, and get ready to knit up some cozy and cute socks for little feet!
Why knit socks for children?
Knitting socks for children is not only a practical and useful task, but it can also be a rewarding and enjoyable experience. There are several reasons why knitting socks for children can be a great idea.
Warmth and comfort:
- Children’s feet can get cold easily, especially during the colder months or when playing outside.
- Hand-knit socks provide an extra layer of warmth and insulation, keeping their feet cozy and comfortable.
- By using soft and warm yarns, you can ensure that the socks feel comfortable against their skin.
Customization and personalization:
- Knitting socks allows you to customize and personalize them according to the child’s preferences.
- You can choose their favorite colors, incorporate fun patterns or motifs, and even add embellishments like buttons or embroidery.
- This personal touch can make the socks more special and unique, adding a sense of love and care to the garment.
Quality and durability:
- Hand-knit socks are often made with high-quality yarns, ensuring their durability and longevity.
- Commercially produced socks may wear out quickly, but hand-knit ones tend to be more durable and can withstand the wear and tear of active children.
- By investing time and effort in knitting socks, you can create a long-lasting and cherished item that can be passed down through generations.
In conclusion, knitting socks for children is a wonderful way to provide warmth, comfort, and customization. It allows you to create personalized and durable items that can be treasured for years to come. So pick up those knitting needles and start crafting beautiful socks for the little ones!
Choosing the right yarn
When it comes to knitting children’s socks on two needles, choosing the right yarn is essential. The yarn you select will determine the overall feel, durability, and appearance of the finished socks. Here are a few factors to consider when choosing yarn for your project:
Fiber content:
The fiber content of the yarn plays a significant role in the comfort and functionality of the socks. For children’s socks, it is important to select a yarn that is soft and gentle against their sensitive skin. Natural fibers like merino wool, cotton, or bamboo are popular choices as they provide excellent breathability and moisture-wicking properties. These fibers also tend to be hypoallergenic, making them safe for children with sensitive skin or allergies.
Weight:
The weight of the yarn refers to its thickness and determines the size of the stitches. For children’s socks on two needles, it is recommended to use a lightweight or fingering weight yarn. These yarns create fine, delicate stitches that are comfortable to wear and fit well on small feet. Additionally, lightweight yarns are easier to work with when knitting intricate patterns or stitch designs.
Durability:
Children can be rough on their socks, so selecting a yarn that is durable and long-lasting is important. Look for yarns that have a blend of sturdy synthetic fibers, such as nylon or acrylic, alongside the natural fibers. These synthetic fibers add strength and durability to the yarn, making the socks more resistant to wear and tear. Additionally, choosing a yarn with good stitch definition will help the socks maintain their shape and structure, even after multiple washes.
Color and pattern:
Lastly, consider the color and pattern options available in the yarn. Children often enjoy vibrant and fun colors, so selecting yarns with a wide range of hues can help create exciting and visually appealing socks. Additionally, some yarns come in self-striping or variegated patterns, which can add extra interest and detail to the finished socks without requiring complex stitch patterns.
By taking these factors into consideration, you can ensure that you select the perfect yarn for your children’s socks on two needles project, resulting in cozy, comfortable, and stylish socks that your little ones will love to wear.
Getting started: essential knitting techniques
Before diving into knitting children’s socks on two needles, it’s important to familiarize yourself with some essential knitting techniques. These techniques will help you create clean and professional-looking socks that are both comfortable and stylish for the little ones.
1. Cast on
The first step in any knitting project is casting on. This is the process of creating the first row of stitches on your knitting needle. There are several ways to cast on, but for children’s socks, you’ll likely want to use the long-tail cast on method. This method creates an elastic and sturdy edge that is perfect for socks.
2. Knit and purl stitches
Knit and purl stitches are the building blocks of knitting. The knit stitch creates a smooth and flat fabric, while the purl stitch creates a textured pattern. These two stitches will be used throughout your sock knitting project to create the desired design and fit.
3. Decreases and increases
Decreases and increases are essential techniques for shaping your socks. Decreases help shape the toe and heel of the sock, while increases are used to widen the foot and leg sections. Common decrease techniques include knit two together (k2tog) and slip, slip, knit (ssk), while common increase techniques include yarn over (yo) and make one (M1).
4. Joining and binding off
When you’ve finished knitting your socks, you’ll need to join the front and back sections together and bind off your stitches. Joining can be done using a technique called grafting or kitchener stitch, which creates an invisible seam. Binding off is the process of securing your stitches and creating a finished edge.
By mastering these essential knitting techniques, you’ll be well-equipped to tackle the challenge of knitting children’s socks on two needles. Don’t be discouraged if it takes some practice to get the hang of these techniques – knitting is a skill that improves with time and patience.
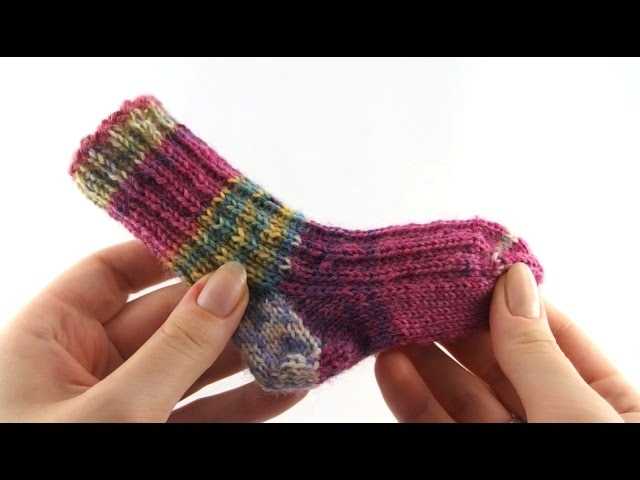
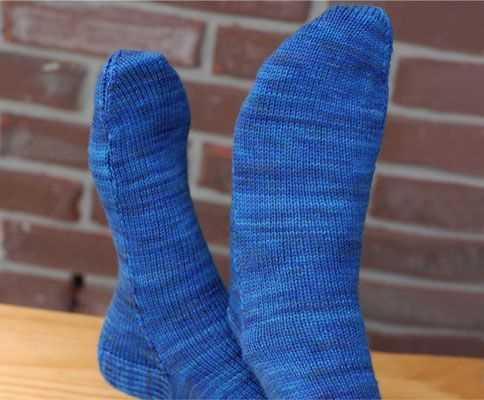
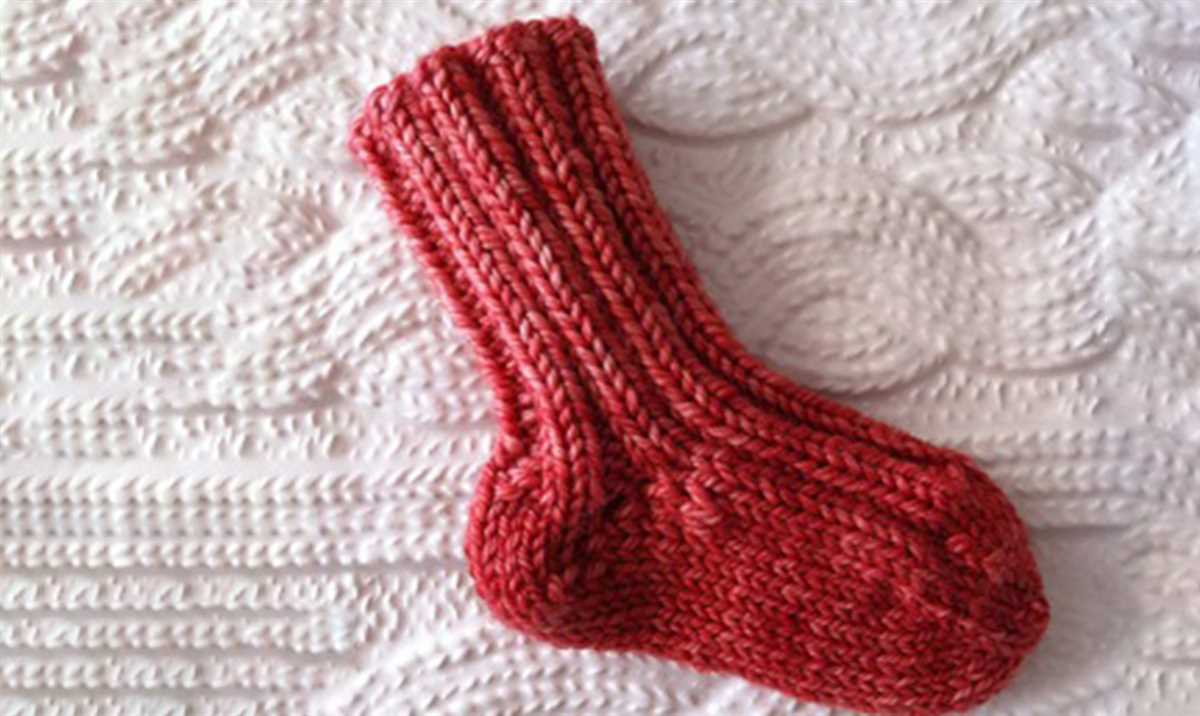
Pattern 1: Basic ribbed socks

The basic ribbed socks pattern is a great starting point for beginners. These socks feature a classic ribbed design, which provides a snug and comfortable fit. They are knitted using two needles, making them perfect for those who are not yet comfortable with circular knitting.
Materials needed:
- Yarn in a suitable weight for socks
- Knitting needles in the recommended size for your chosen yarn
- Tapestry needle for weaving in ends
Instructions:
- Cast on the desired number of stitches. You can use the long-tail cast-on method or any other stretchy cast-on method.
- Start by knitting 1 stitch, then purling 1 stitch. Repeat this ribbing pattern until the desired length for the cuff is reached.
- For the leg section of the sock, continue knitting the ribbing pattern for a few inches or until the desired length is achieved.
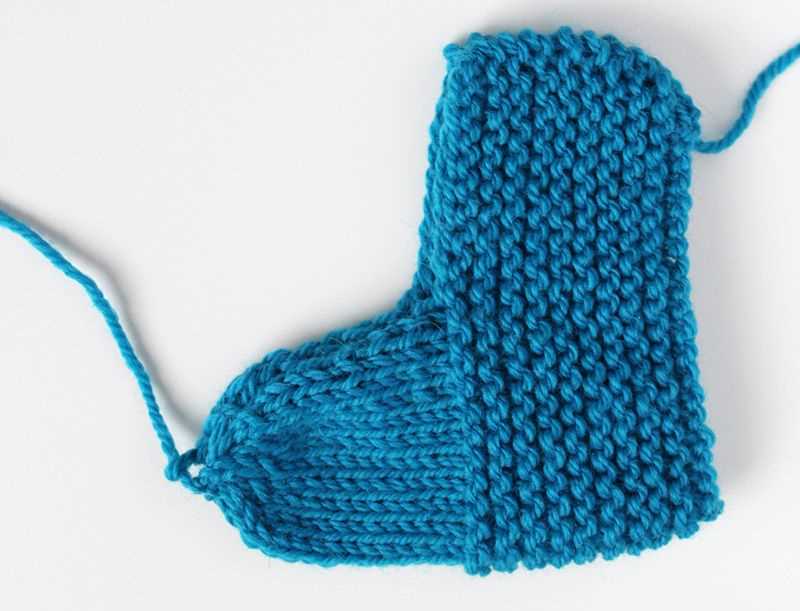
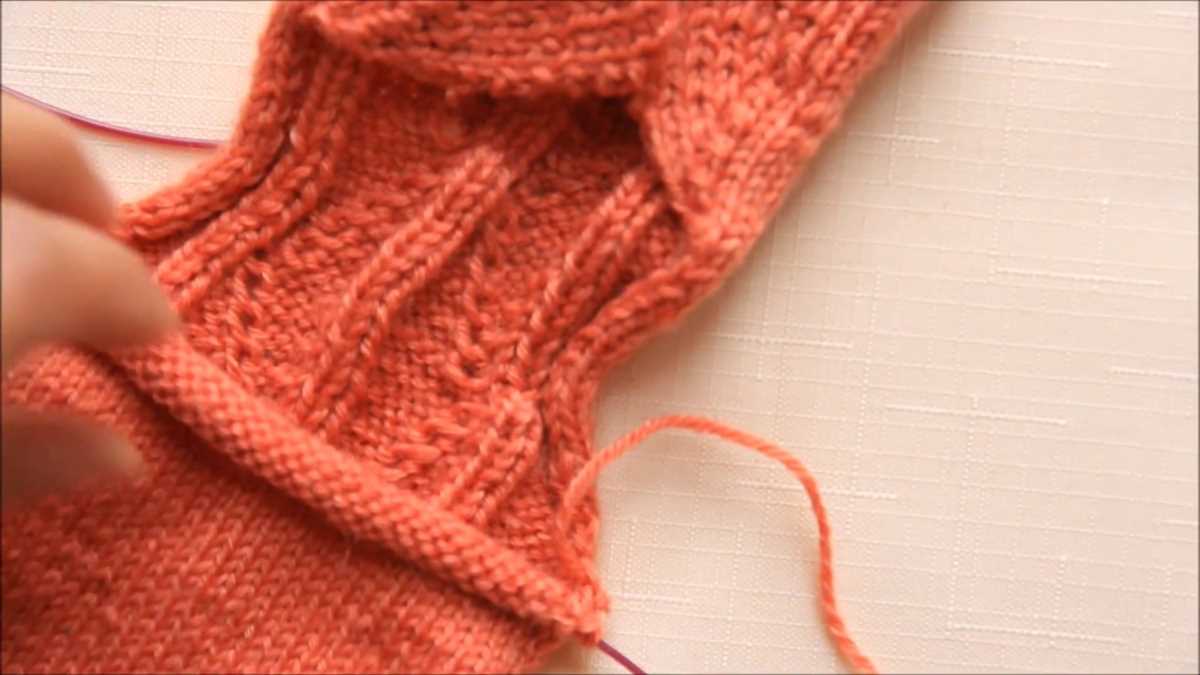
- Next, begin shaping the heel. You can choose from different heel construction methods, such as the traditional heel flap or a short row heel.
- After shaping the heel, continue knitting the ribbing pattern for the foot section until the desired length is reached.
- Finally, finish off the sock by knitting the toe section. You can use a standard toe decrease method or try a different toe shaping technique.
- Once you have completed the first sock, repeat the steps to make the second sock.
Tips:
- Don’t forget to check your gauge before starting the project to ensure the socks will fit correctly.
- If you are new to knitting socks, it may be helpful to follow a tutorial or watch instructional videos to understand the techniques used.
- Experiment with different yarn colors and patterns to create unique socks for your little ones.
With this basic ribbed socks pattern, you can create comfortable and stylish socks for children. Whether you are a beginner or an experienced knitter, these socks are a great project to work on. Enjoy the process of creating handmade items, and see the joy on your child’s face when they wear their new cozy socks!
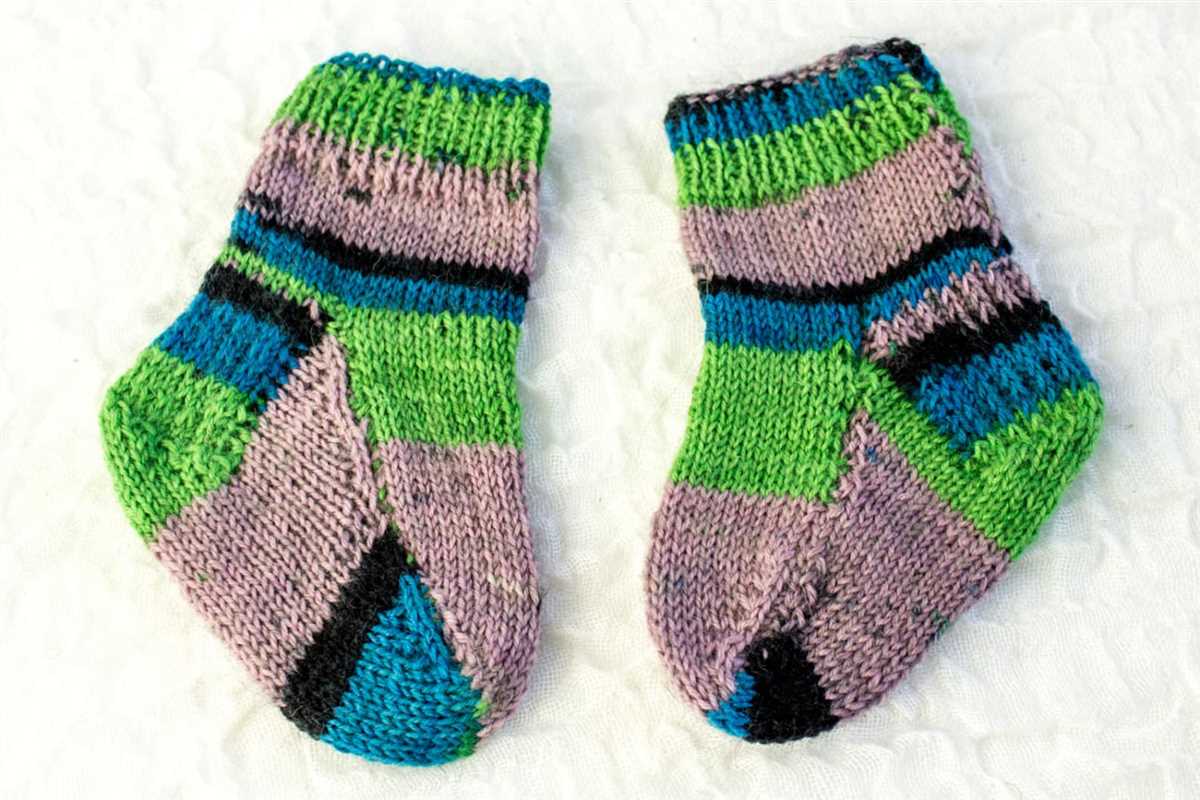
Pattern 2: Colorful striped socks
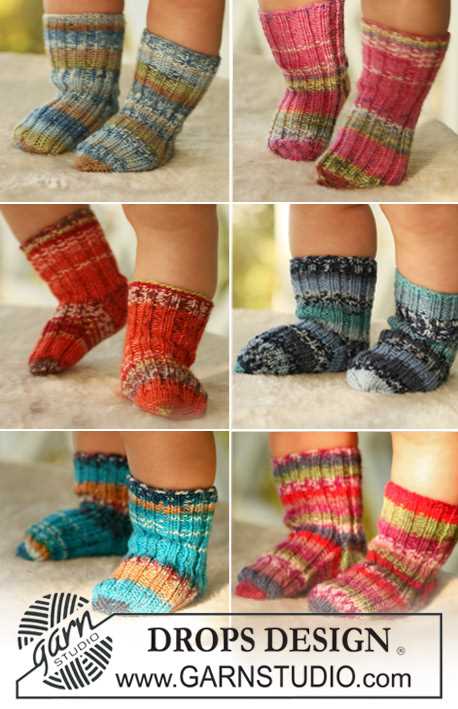
Bring some cheer to your little one’s feet with these colorful striped socks! This pattern is perfect for adding a playful touch to any outfit. Knitted on two needles, these socks are beginner-friendly and can be customized to your child’s favorite colors.
Materials:
- Yarn in various colors of your choice
- Size 4mm knitting needles
- Tapestry needle
Instructions:
- Begin by casting on 40 stitches using the first color of yarn.
- Knit 2, purl 2 ribbing for 1 inch.
- Start the color stripes by knitting 2 rows with the first color, then switch to the next color and knit 2 rows. Repeat this pattern for the desired number of stripes.
- Next, continue knitting in the main color for the foot section until the sock reaches the desired length.
- To shape the toe, decrease 1 stitch at each end of every row until there are 20 stitches left.
- Finally, graft the toe stitches together using the Kitchener stitch method.
These colorful striped socks will keep your little ones’ feet warm and stylish. They make a great gift and can be easily customized to match any outfit. So grab your yarn and needles, and get ready to create a fun pair of socks that your child will love!
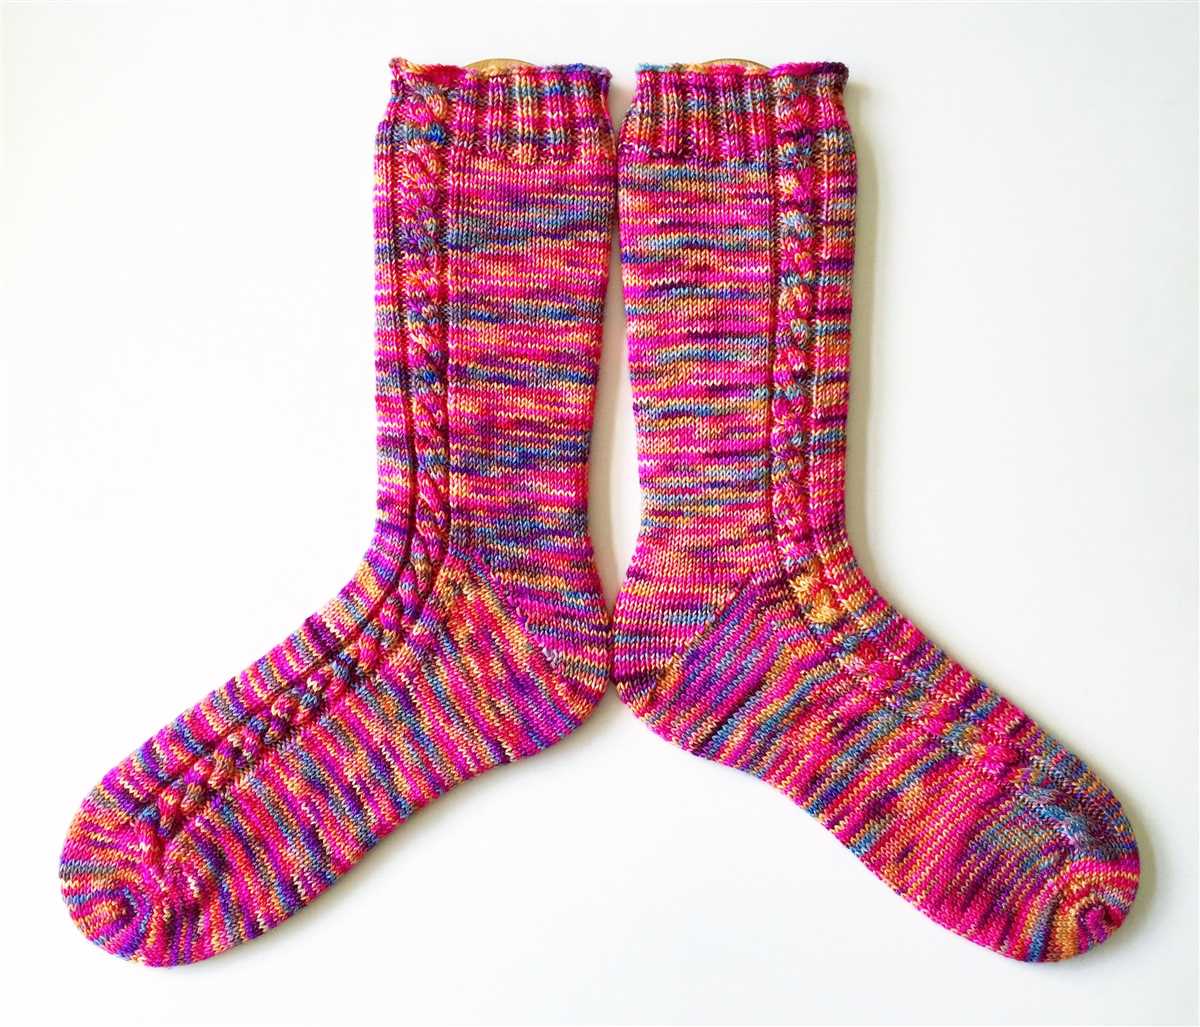
Pattern 3: Cable knit socks
If you’re looking for a pattern that adds a touch of sophistication to your child’s socks, the cable knit socks pattern is a great choice. These socks feature a classic cable pattern that runs along the leg and foot, giving them a stylish and cozy look.
To get started with this pattern, you’ll need to be comfortable with basic cable knitting techniques. The pattern calls for two colors of yarn and is worked on two needles. The cable pattern is worked over a set number of stitches, so be sure to check the gauge before starting to ensure the right fit.
Materials needed:
- Size US 7 (4.5mm) knitting needles
- Worsted weight yarn in two colors
- Cable needle
- Tapestry needle
Instructions:
- Cast on 48 stitches using color A.
- Work in a k1, p1 ribbing for 2 inches.
- Switch to color B and begin the cable pattern:
- Row 1: *P2, slip 2 stitches onto cable needle and hold in back, k2, k2 from cable needle; repeat from * to end of row.
- Row 2: *K2, p2; repeat from * to end of row.
- Repeat these two rows until the leg measures desired length, ending with a Row 2.
- Switch back to color A and work in stockinette stitch for the foot, working even until foot measures desired length.
- Shape the toe as follows:
- Decrease Row: *K1, k2tog, k to 3 stitches before marker, ssk, k1, slip marker, k1, k2tog, k to 3 stitches before marker, ssk, k1; repeat from * to end of row.
- Knit 1 row.
- Repeat these two rows until 16 stitches remain.
- Work a kitchener stitch or grafting to close the toe.
- Weave in any loose ends and block the socks to ensure a professional finish.
These cable knit socks are sure to be a hit with your child. The classic design and cozy texture make them perfect for colder weather. Plus, the cable pattern adds a touch of elegance that sets them apart from basic knit socks. Give this pattern a try and watch your child’s feet stay warm and stylish all season long!
Tips for sizing and fitting
When knitting socks for children, it is important to ensure they fit properly in order to maximize comfort and wearability. Here are some tips for sizing and fitting children’s socks.
1. Measure the child’s foot size
Before starting a sock project, it’s essential to accurately measure the child’s foot to determine the correct size. Use a tape measure to measure the length of the foot from the heel to the longest toe. Take note of the measurements and refer to a size chart to find the appropriate size for the child’s age.
2. Consider ease and stretch
Children’s feet grow quickly, so it’s a good idea to allow some ease in the sock’s fit. Choose a pattern that provides some stretch, such as using ribbing or a stretchy stitch pattern. This ensures that the socks will fit comfortably and accommodate growth without being too tight.
3. Check gauge
Gauge is crucial when it comes to knitting socks that fit properly. Take the time to knit a gauge swatch using the chosen yarn and needles. Measure the gauge to ensure it matches the pattern’s recommended gauge. If the gauge doesn’t match, adjust the needle size accordingly to achieve the correct gauge and sizing.
4. Consider the child’s preferences
Children may have specific preferences when it comes to the fit of their socks. Some may like a snug fit, while others prefer a looser fit. Take these preferences into account when choosing or adapting a pattern. It’s also a good idea to involve the child in the selection of yarn and color to make the finished socks even more appealing.
5. Try on as you go
When knitting socks, it can be helpful to try the sock on the child’s foot during the knitting process. This allows for adjustments to be made if necessary, ensuring a better fit. It’s also a good way to check the length and make sure the sock is not too long or too short.
By following these tips for sizing and fitting, you can create comfortable and well-fitting socks for children to enjoy.
Adding fun details: buttons, bows, and more
When knitting children’s socks, adding fun details can make them even more special and appealing. Buttons, bows, and other embellishments can be easily incorporated into the design to add an extra touch of charm.
Buttons: Sewing small buttons onto the cuffs or sides of the socks can create a playful and colorful effect. Choose buttons that match the yarn or go for contrasting colors to make them stand out. You can also use buttons of different shapes and sizes to add variety and interest.
Bows: Adding bows to the front or side of the socks can give them a cute and feminine look. Knit or crochet the bows separately and attach them securely to the socks using yarn or thread. You can experiment with different sizes and colors to create different styles.
Other embellishments: Think outside the box and consider other embellishments you can add to the socks. You could sew on small felt shapes, use fabric paint to create fun designs, or even incorporate small charms or beads into the knitting itself. Just remember to keep the safety of the child in mind and avoid using any small parts that could be a choking hazard.
By adding these fun details, you can personalize the children’s socks and make them truly unique. It’s a great way to showcase your creativity and give the socks that extra special touch. Whether you’re making them for your own children or as a gift, these customizations are sure to delight both the knitter and the wearer.
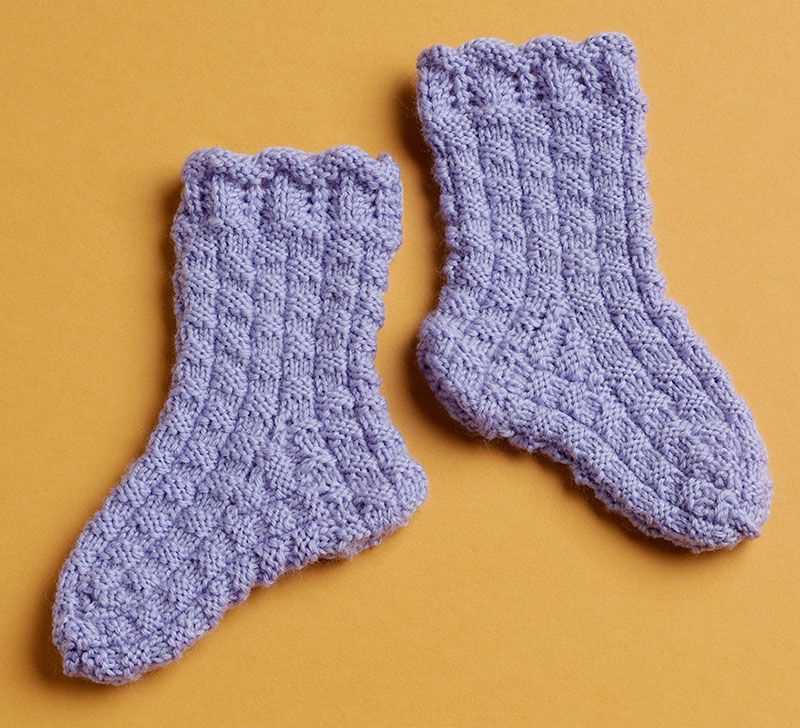
Pattern 4: Lace pattern socks
These lace pattern socks are perfect for adding a touch of elegance to your child’s outfit. The lace pattern adds a delicate and feminine touch to these socks, making them a great choice for special occasions or dressing up.
To knit these lace pattern socks, you’ll need basic knitting skills and knowledge of lace knitting techniques. The pattern is worked on two needles and can be easily adjusted to fit different sizes. The lace pattern creates a beautiful flowery design that is sure to stand out.
Materials:
- Yarn: Choose a soft and lightweight yarn in a color of your choice. Approximately 100 grams should be enough for a pair of socks.
- Needles: Use a set of size 3.25mm (US 3) knitting needles.
- Stitch markers
- Tapestry needle
Instructions:
- Cast on 40 stitches.
- Divide the stitches evenly onto two needles.
- Row 1: *Knit 2, yarn over, knit 2 together, repeat from * to end of row.
- Row 2: Purl all stitches.
- Repeat rows 1 and 2 until the desired length is reached, ending with a purl row.
- Next row: Knit all stitches.
- Continue knitting in stockinette stitch (knit one row, purl one row) until the sock measures approximately 4 inches from the heel.
- Shape the heel:
| Row 1 (right side): | Knit 18, turn. |
|---|---|
| Row 2 (wrong side): | Purl 9, turn. |
| Row 3: | Knit to 1 stitch before the gap, knit 2 together, turn. |
| Row 4: | Purl to 1 stitch before the gap, purl 2 together, turn. |
| Repeat rows 3 and 4 until all stitches have been worked. |
Continue knitting the sock in stockinette stitch until it measures approximately 2 inches from the heel. Then, shape the toe using standard decreasing methods. Finally, bind off all stitches and weave in any loose ends.
These lace pattern socks are a beautiful addition to any child’s wardrobe. They can be worn with dresses, skirts, or even shorts for a stylish and sophisticated look. Knit a pair or two in different colors to match different outfits and occasions!
Pattern 5: Fair Isle socks
Looking for a fun and colorful knitting project for your children? Try making these adorable Fair Isle socks! Fair Isle is a popular knitting technique that involves using multiple colors in a repetitive pattern. These socks feature a traditional Fair Isle design, making them both stylish and cozy for little feet.
Materials needed:
- 2.75mm knitting needles
- Fingering weight yarn in various colors (approximately 50g of each color)
- Tapestry needle for weaving in ends
Instructions:
- Cast on 48 stitches using the main color yarn. Divide the stitches evenly onto three needles (16 stitches on each needle).
- Join the yarn in a contrasting color and knit the first round, making sure to carry the unused yarn along the inside of the sock.
- Continue knitting in the Fair Isle pattern, following the chart provided. You can choose to knit the entire sock in the Fair Isle pattern or knit the foot in plain stockinette stitch.
- Once you reach the desired length, shape the toe by decreasing stitches. You can use a standard toe decrease or choose a different method, such as a star toe or a rounded toe.
- Bind off the remaining stitches and weave in any loose ends.
- Repeat the above steps to make the second sock.
These Fair Isle socks are sure to keep your children’s feet warm and stylish all winter long. The pattern allows for endless color combinations, so let your imagination run wild and create a unique pair of socks for your little one.
Finishing touches: weaving in ends and blocking
Once you have finished knitting the socks for your little ones, there are a few final steps to complete before they are ready to be worn. These include weaving in the loose ends and blocking the socks.
Weaving in ends is an important step in knitting as it ensures that the finished project looks neat and professional. To weave in the ends, simply thread them onto a yarn needle and carefully sew them into the back of the fabric. Make sure to secure the ends properly to prevent unraveling.
Blocking is another important step in the finishing process. It helps to even out the stitches and shape the socks for a better fit. To block the socks, start by soaking them in lukewarm water and then gently squeeze out the excess water. Lay the socks flat on a towel and gently shape them to the desired size. Allow the socks to dry completely before wearing.
By following these final steps of weaving in ends and blocking, you will ensure that your children’s socks are not only comfortable to wear but also look great. So go ahead and give these free knitting patterns a try and enjoy creating adorable socks for your little ones!