
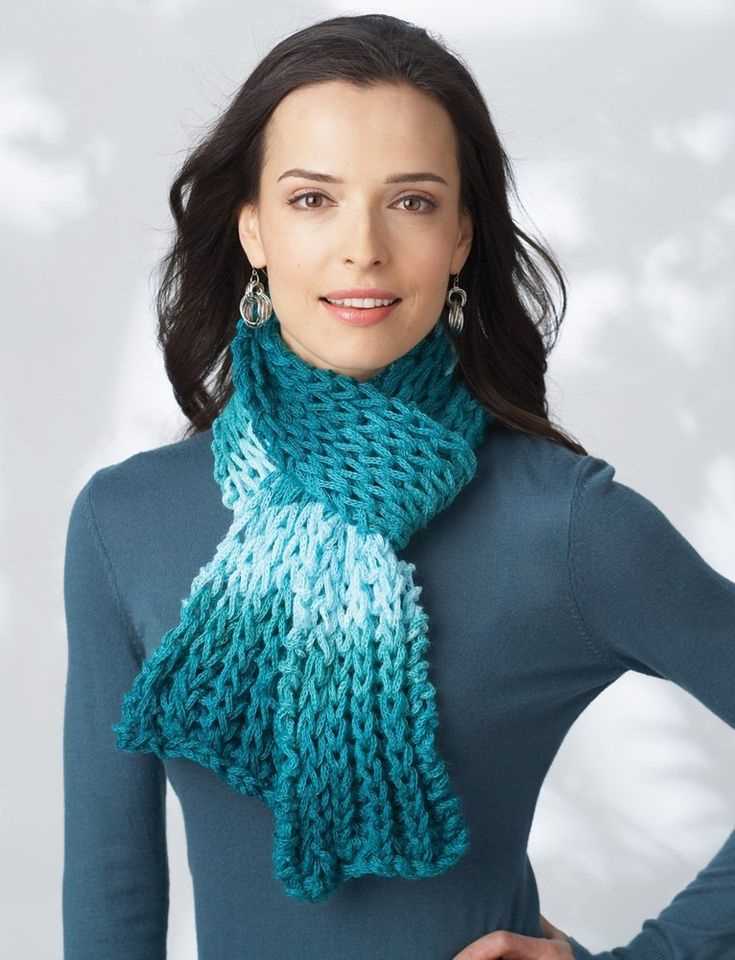
Knitting is a popular hobby that brings both relaxation and creativity. One of the most common and versatile projects for knitters is a scarf. Scarves are not only functional in keeping us warm during the colder months, but they also make great accessories to enhance any outfit. If you’re a beginner or an experienced knitter looking for a new project, this article provides a free knitting pattern for a scarf.
Creating your own scarf allows you to personalize it with your choice of colors, textures, and patterns. This free knitting pattern will guide you through the steps to make a classic scarf using simple stitches. It’s the perfect project to tackle if you’re new to knitting or want to practice the basics. Knitting a scarf is a great way to build your skills and gain confidence in your abilities.
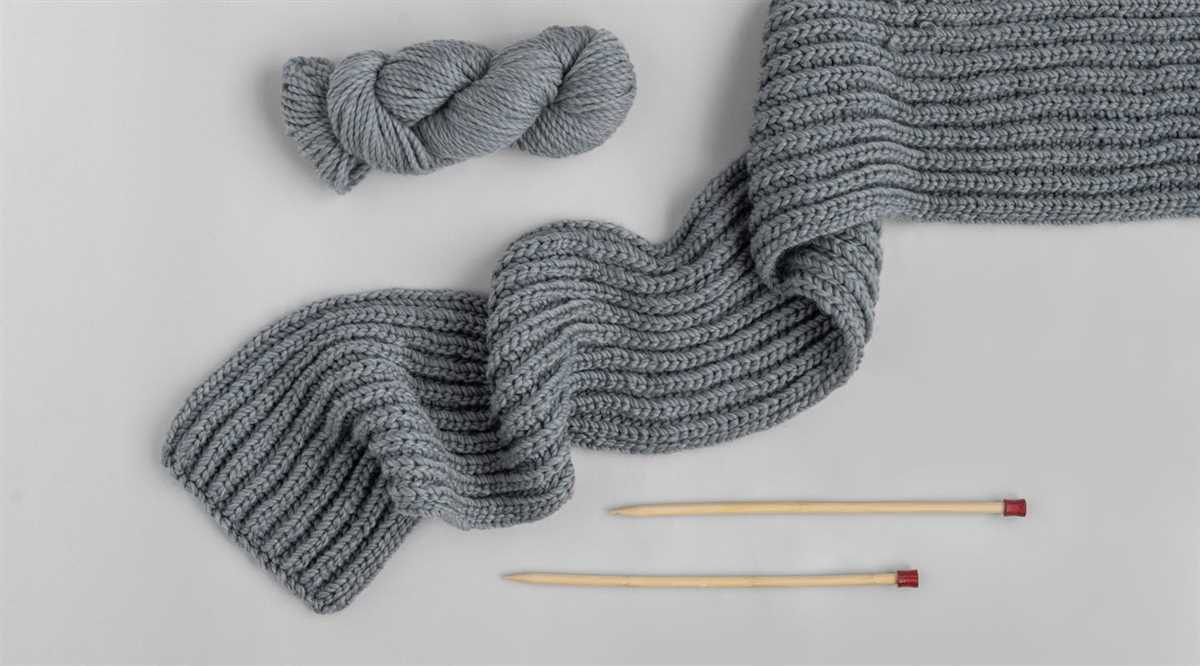
To get started on this free knitting pattern, you’ll need some basic knitting supplies such as yarn and knitting needles. The pattern includes detailed instructions and step-by-step illustrations to help you along the way. Whether you choose a chunky yarn for a cozy winter scarf or a lightweight yarn for a stylish accessory, this pattern can be easily adapted to suit your preferences.
Free Knitting Pattern Scarf
Knitting a scarf is a popular and rewarding project for knitters of all skill levels. Whether you’re a beginner looking for a simple pattern or an experienced knitter wanting to try something new, there are many free knitting patterns available online for scarves. These patterns provide detailed instructions, stitch diagrams, and even video tutorials to help you create a beautiful and cozy scarf.
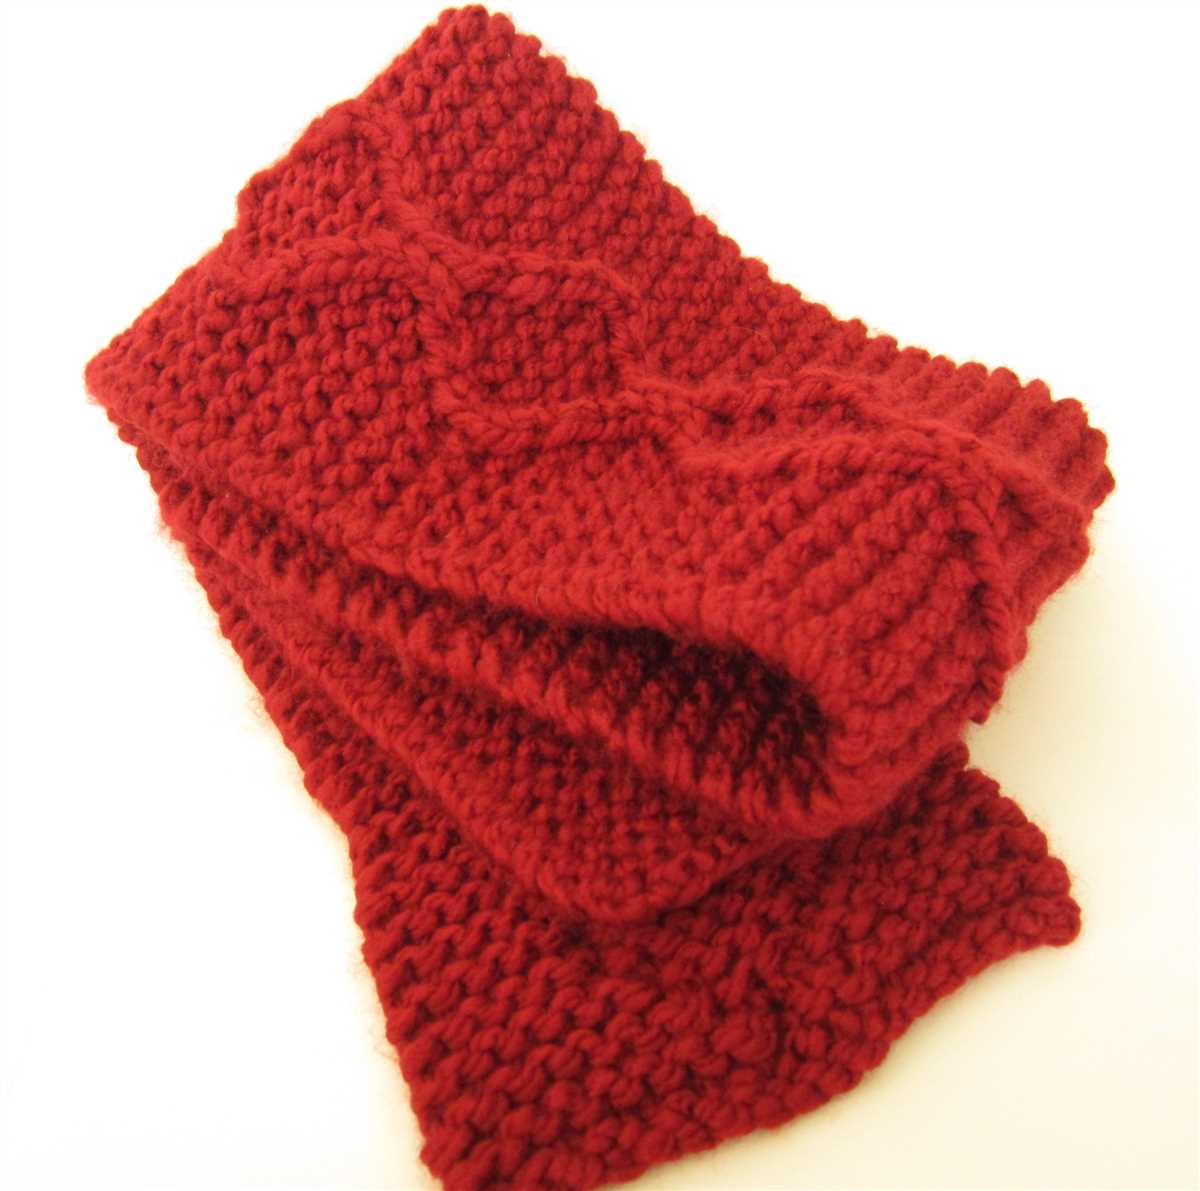
One popular free knitting pattern for a scarf is the “Garter Stitch Scarf”. This pattern is perfect for beginners as it only requires the basic knit stitch. The garter stitch creates a textured fabric with ridges, making it a great choice for showcasing the color and texture of the yarn. With this pattern, you can easily customize the scarf’s length and width to your liking.
Materials:
- Size 8 knitting needles
- Worsted weight yarn
- Scissors
- Darning needle for weaving in ends
Instructions:
- Cast on 30 stitches.
- Knit every row until the scarf reaches your desired length, leaving enough yarn to bind off.
- Bind off all stitches.
- Weave in any loose ends.
This pattern is just one example of the many free knitting patterns available for scarves. Whether you prefer simple stitches or intricate lacework, there is a pattern out there for you. Knitting a scarf not only provides a cozy accessory to keep you warm, but it also allows you to explore different yarns, colors, and techniques. So grab your needles and yarn, and start knitting your own unique scarf today!
Basic Materials

When it comes to knitting a scarf, having the right materials is essential. You will need a pair of knitting needles, preferably in a size that matches the yarn you plan to use. For a basic scarf, medium to bulky weight yarn is recommended as it will create a warm and cozy accessory. You can choose any color or texture that you like, but keep in mind that certain patterns may work better with specific types of yarn.
Aside from the needles and yarn, you will also need a pair of scissors for cutting the yarn, a yarn needle for weaving in the ends, and stitch markers to help you keep track of your progress. Optional materials that can be helpful include a row counter to keep track of the number of rows you’ve completed, and a measuring tape to ensure your scarf is the desired length.
It’s important to note that the materials you choose can greatly impact the look and feel of your finished scarf. Experiment with different yarns and needle sizes to achieve the desired effect. Remember to always read the pattern carefully and check the gauge before starting your project to ensure that your finished scarf turns out just right.
Choosing Yarn
When choosing yarn for your knitting project, there are several factors to consider. The first is the fiber content. Different fibers have different qualities and will produce different results in your finished scarf. Some popular fiber choices for scarves include wool, alpaca, cotton, and acrylic. Wool and alpaca are known for their warmth and softness, while cotton and acrylic are more lightweight and easy to care for.
Another important consideration is the weight of the yarn. The weight refers to the thickness of the yarn and is usually indicated by a number on the packaging. It’s important to choose a yarn weight that is suitable for the pattern you will be using. For a scarf, a medium weight yarn, also known as worsted weight or aran weight, is usually a good choice. This weight is versatile and works well for a variety of stitch patterns.
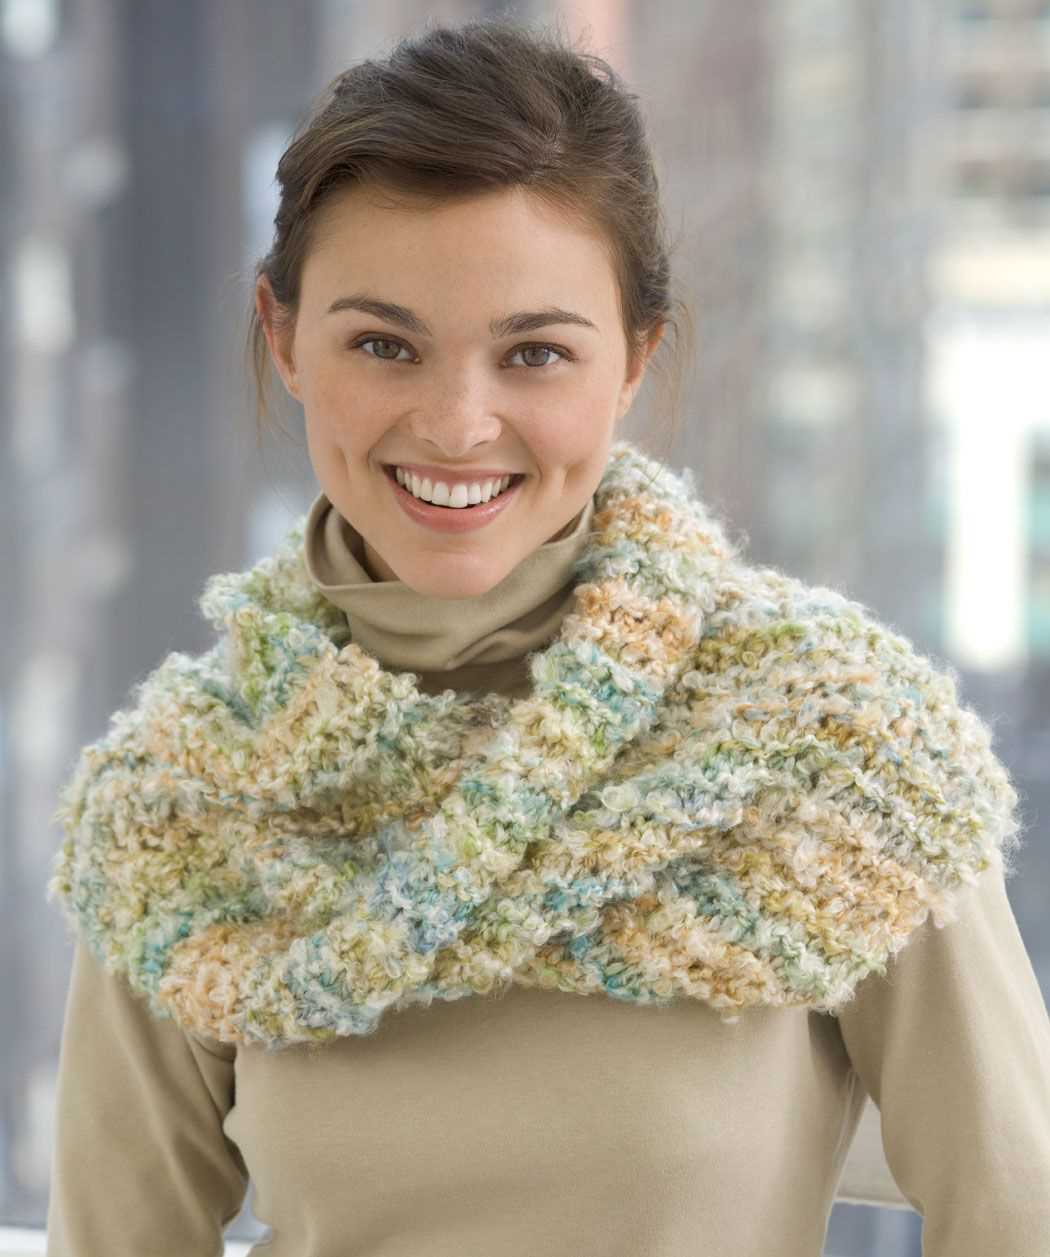
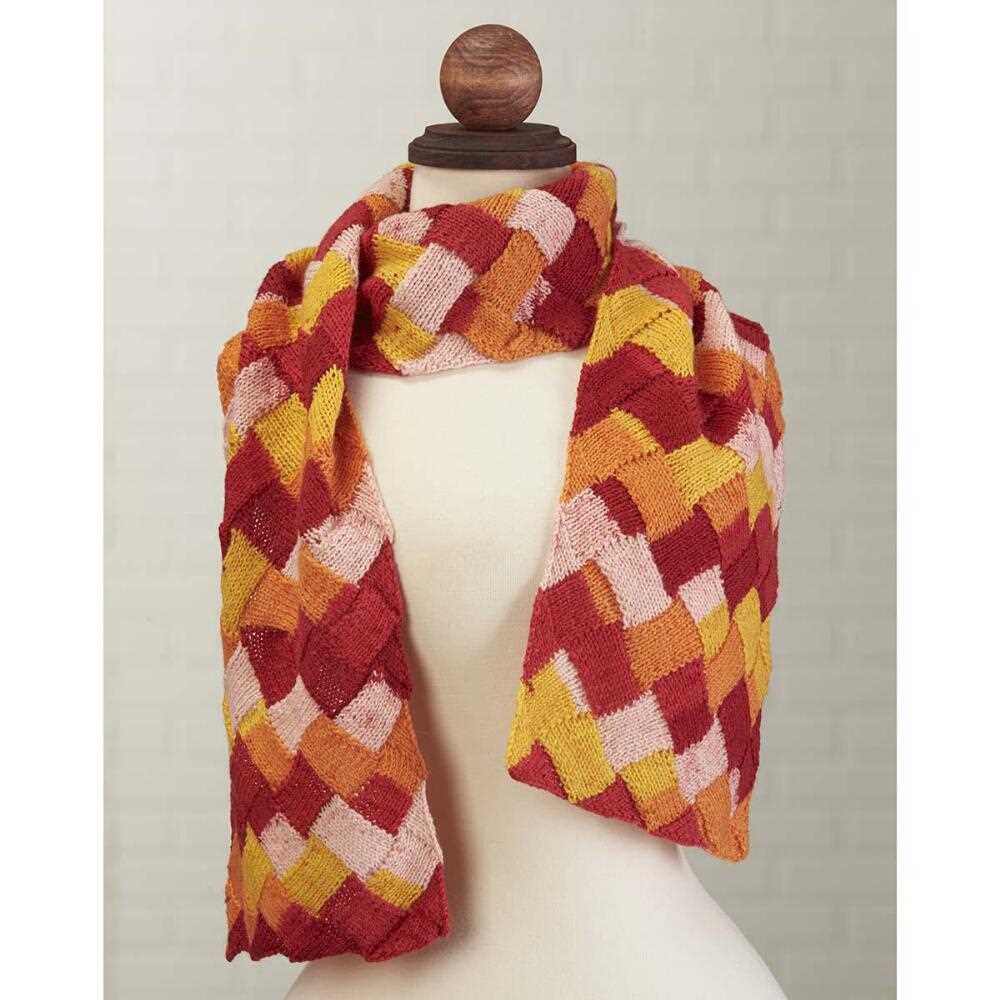
Once you have decided on the fiber content and weight, you can start thinking about the color and texture of the yarn. The color of the yarn will depend on your personal preferences and the overall look you want to achieve. You can choose a single color yarn for a classic look, or opt for a variegated yarn for a more interesting and colorful scarf. The texture of the yarn will also affect the look and feel of the finished scarf. Smooth, plied yarns will give a clean and polished look, while textured or boucle yarns can add depth and interest.
When in doubt, it’s always a good idea to consult the pattern you will be using for your scarf. The pattern may recommend a specific type of yarn or provide suggestions for suitable alternatives. It’s also helpful to read reviews or ask for advice from other knitters who have completed similar projects. By considering all these factors, you can choose the perfect yarn for your free knitting pattern scarf and create a beautiful and cozy accessory to keep you warm during the colder months.
Selecting Needles
When it comes to knitting, choosing the right needles is essential for a successful project. There are various factors to consider when selecting needles, such as the type of yarn, the desired stitch pattern, and the comfort level of the knitter. With such a wide range of options available, it’s important to understand the different types of needles and their characteristics to make an informed decision.
Straight Needles: Straight needles, also known as single-pointed needles, are the traditional choice for knitting. They come in pairs and have a pointed end and a knob or stopper at the other end to prevent the stitches from sliding off. Straight needles are ideal for beginners as they provide stability and control while knitting.
- Size: Straight needles come in various sizes, ranging from small to large, and are typically labeled with a number corresponding to the needle size.
- Material: Straight needles can be made from a variety of materials, including bamboo, wood, metal, and plastic. Each material has its own unique characteristics, such as flexibility, weight, and durability.
Circular Needles: Circular needles consist of two pointed needles connected by a flexible cable. They are versatile and can be used for both flat and circular knitting. Circular needles are particularly useful for knitting large or heavy projects, as the weight of the project is distributed along the cable, reducing strain on the wrists and hands.
- Length: Circular needles come in different lengths, ranging from as short as 9 inches to as long as 60 inches. The length of the circular needle should be selected based on the width of the project.
- Material: Circular needles can also be made from various materials, such as metal, bamboo, or plastic. The choice of material depends on personal preference and the type of yarn being used.
- Cable: The cable of a circular needle can be either fixed or interchangeable. Interchangeable cables allow knitters to change the length of the cable to accommodate different project sizes. They also make it easier to store and travel with multiple sets of needles.
Double Pointed Needles: Double pointed needles, also known as DPNs, are shorter needles with points on both ends. They are typically used for knitting small circumferences, such as socks, gloves, and hats. DPNs are also commonly used for certain stitch patterns, such as cables or lace, that require the use of multiple needles.
Gauge Swatch
In knitting, a gauge swatch is an essential tool for ensuring that your finished project will be the correct size and fit. It is a small sample of knitting that you create before starting the actual project, using the same yarn and needles that you plan to use for the project. This allows you to measure your knitting tension and adjust your knitting needle size if needed.
The gauge swatch is typically worked in the stitch pattern specified in the knitting pattern. It is important to follow the knitting pattern instructions for the gauge swatch, as different stitch patterns can affect the gauge. For example, if the pattern specifies a stockinette stitch gauge, you should knit the swatch in stockinette stitch.
To create a gauge swatch:
- Choose the yarn and knitting needles specified in the knitting pattern.
- Cast on a sufficient number of stitches to create a square or rectangle swatch. The pattern will indicate the desired dimensions of the swatch.
- Work the specified stitch pattern for a few inches, ensuring that your tension is consistent throughout.
- Measure the number of stitches and rows in your swatch using a ruler or tape measure. The pattern will indicate the desired gauge in stitches and rows per inch.
- If your gauge does not match the pattern gauge, you may need to adjust your knitting needle size. If your swatch has too few stitches per inch, try using smaller needles. If your swatch has too many stitches per inch, try using larger needles.
- Once you have achieved the correct gauge, you can confidently begin knitting your project, knowing that it will turn out the correct size.
A gauge swatch may seem like an extra step in the knitting process, but it can save you a lot of frustration and disappointment in the long run. Taking the time to create a gauge swatch ensures that your finished project will fit as intended and look the way you envision.
Casting On
Before you can start knitting your scarf, you need to cast on. Casting on is the process of creating the first row of stitches on your knitting needle. There are several different methods for casting on, but one of the most common methods is the long-tail cast on.
To do the long-tail cast on, you’ll need to estimate how much yarn you’ll need for your cast on row. Measure out a length of yarn that is about three times the width of your finished scarf. Hold the end of the yarn in your right hand and create a slipknot by making a loop and pulling the tail through the loop. Slip this loop onto your left knitting needle, with the tail end of the yarn pointing towards you.
Now you’re ready to start casting on. Hold the knitting needle with the slipknot loop in your left hand, and with your right hand, bring the working yarn (the end attached to the yarn ball) up and over the top of the needle, creating a loop. Take the needle in your right hand and insert it into the loop from front to back. Use your right hand to make a loop with the working yarn and pull it through the loop on the needle. Slip the new loop onto the left needle, and you’ve just cast on your first stitch.
Continue this process until you have cast on the desired number of stitches for your scarf. Remember to keep the working yarn taut, but not too tight, between each stitch. Once you’ve cast on all your stitches, you’re ready to start knitting the first row of your scarf.
Knit Stitch
The knit stitch is one of the basic stitches in knitting. It is often the first stitch that beginners learn and is used to create a variety of patterns and textures in knitting projects. The knit stitch is characterized by its “v” shape and smooth appearance, making it a versatile stitch for both beginner and advanced knitters.
To knit a stitch, insert the right-hand needle into the front loop of the stitch on the left-hand needle. Wrap the working yarn around the right-hand needle from back to front and pull it through the front loop of the stitch. Slide the stitch off the left-hand needle, transferring it to the right-hand needle. Repeat this process until all stitches have been knit.
The knit stitch can be used to create a wide range of patterns and textures in knitting. It can be used alone to create a simple and basic fabric, or combined with other stitches to create more complex patterns such as cables, ribs, and lace. The knit stitch is also commonly used in combination with the purl stitch to create stockinette stitch, which is a smooth and even fabric with a subtle texture.
When working with the knit stitch, it is important to maintain an even tension to ensure that all stitches are of uniform size. This can be achieved by keeping the working yarn taut but not too tight. Additionally, practicing the knit stitch regularly can help improve speed and efficiency, making it easier to complete knitting projects.
Benefits of the Knit Stitch
- The knit stitch is easy to learn and master, making it perfect for beginners.
- It is a versatile stitch that can be used to create a variety of patterns and textures.
- The resulting fabric is smooth, stretchy, and comfortable to wear.
- The knit stitch is an essential foundation for many knitting projects.
Purl Stitch
The purl stitch is one of the basic knitting stitches that every knitter should know. It is often used in knitting patterns to create a textured or ribbed fabric. The purl stitch is the reverse of the knit stitch, creating a raised loop on the front of the fabric instead of the back. This stitch is commonly abbreviated as “p” in knitting patterns.
To work the purl stitch, insert the right needle into the front of the next stitch on the left needle from right to left. Bring the yarn to the front of the work, crossing it over the right needle. With the right needle, wrap the yarn around and behind the right needle, and then pull it through the stitch on the left needle, creating a new stitch on the right needle. Slide the old stitch off the left needle and onto the right needle.
The purl stitch can be used to create a wide variety of patterns and textures in knitting. When combined with the knit stitch in a pattern, it can produce ribbing, which is often used for cuffs, collars, and edges of garments. It can also be used to create seed stitch, moss stitch, and basketweave patterns, among others.
In addition to its decorative uses, the purl stitch can also be used to create stockinette stitch, which is a commonly used fabric in knitting. Stockinette stitch is achieved by alternating rows of knit stitches and purl stitches, with the knit stitches on the right side of the fabric and the purl stitches on the wrong side.
Whether you’re a beginner or an experienced knitter, mastering the purl stitch is an essential skill that will open up a world of knitting possibilities. From simple scarves to intricate sweaters, the purl stitch can be used to create beautiful and unique projects.
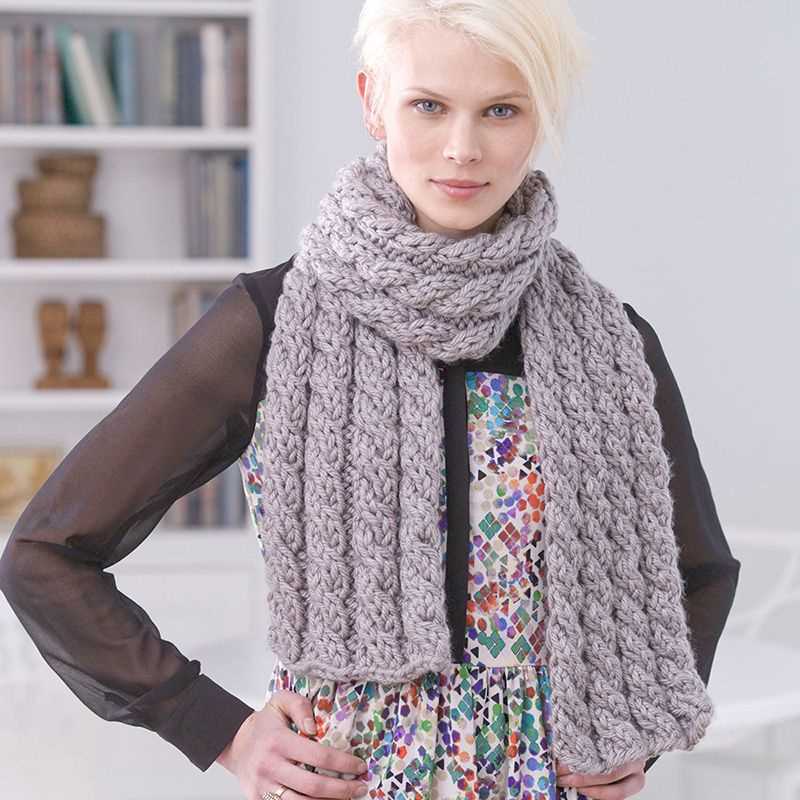
Ribbing

When it comes to knitting patterns, ribbing is a commonly used technique that adds both texture and elasticity to a knitted piece. Ribbing is typically used on the edges of garments, such as cuffs, collars, and hems, as well as on items like scarves, hats, and socks. It consists of alternating knit and purl stitches in a specific pattern, creating a stretchy and flexible fabric.
The most common type of ribbing is a 1×1 rib, which is created by alternating one knit stitch with one purl stitch. This creates columns of raised knit stitches separated by valleys of purl stitches. Another popular variation is the 2×2 rib, where two knit stitches are followed by two purl stitches, creating a wider ribbing pattern. The choice of ribbing pattern can depend on personal preference and the desired outcome of the finished project.
One of the advantages of ribbing is its ability to provide structure and prevent curling in knitted fabrics. The alternating knit and purl stitches create tension in the fabric, helping to keep it in shape and avoiding any unwanted rolling or folding. This makes ribbing a popular choice for projects that require stability, such as sweaters and cardigans.
When working with ribbing, it’s important to maintain an even tension to ensure the stitches are balanced and consistent. It’s also helpful to use smaller needles than the main body of the project to create a tighter fabric. Additionally, ribbing can be worked in different lengths and widths depending on the desired effect, whether it be a small detail on a garment or the entire length of a scarf.
In conclusion, ribbing is a versatile and practical knitting technique that adds both functionality and visual interest to knitted pieces. Whether you’re a beginner or an advanced knitter, incorporating ribbing into your projects can elevate the overall look and feel of the finished item.
Increasing and Decreasing
When knitting a scarf, it’s important to know how to increase and decrease stitches to create different shapes and patterns. Increasing stitches allows you to add width and volume to your scarf, while decreasing stitches helps create tapered ends, shaping, or decorative patterns.
There are several methods to increase stitches in knitting. One common method is the knit front and back (kfb), where you knit into both the front and back of a stitch to create two new stitches. Another method is the yarn over (yo), which involves simply wrapping the working yarn around the needle to create an extra stitch. You can also use the make one (M1) method, where you create a new stitch by picking up the horizontal strand of yarn between stitches and knitting into it.
When it comes to decreasing stitches, one common method is the knit two together (k2tog), where you knit two stitches together as if they were one stitch. This decreases the total number of stitches by one. Another method is the slip, slip, knit (ssk), where you slip two stitches individually as if to knit, and then knit them together through the back loops. This also decreases the total number of stitches by one. Additionally, you can use the slip, slip, purl (ssp) method, which is similar to ssk but creates a left-leaning decrease on the purl side of the fabric.
When following a knitting pattern for a scarf, pay close attention to the instructions for increasing and decreasing stitches. The pattern may provide specific instructions or abbreviations for the desired shaping or pattern. By practicing and mastering these techniques, you’ll be able to create beautifully textured and shaped scarves with ease.
Binding Off
Binding off is the final step in the process of knitting a scarf. It is the process of closing up the stitches and securing the edges of your work. There are several different methods for binding off, but the most common method is the basic bind off. This method creates a clean, finished edge and is suitable for most knitting projects.
To bind off, begin by knitting two stitches. Then, using your left needle, lift the first stitch over the second stitch and off the right needle. You have now bound off one stitch. Continue in this manner, knitting one stitch, lifting the previous stitch over, and off the needle until you have reached the end of your row. Cut the yarn, leaving a long tail, and pull it through the last stitch to secure. You can then weave in the loose ends to finish off your scarf.
Another method for binding off is the stretchy bind off. This method is especially useful for projects that require a bit of stretch, such as hats or socks. To perform the stretchy bind off, follow the same steps as the basic bind off, but instead of lifting the previous stitch over and off the needle, slip the stitch back onto your left needle and knit it again. This will create a slightly looser bind off that allows for more stretch.
When binding off, it’s important to maintain an even tension and not bind off too tightly. If you bind off too tightly, your scarf may have a gathered or puckered edge. If you find that your bind off is too tight, you can use a larger needle or simply loosen your tension as you work. Practice your binding off technique on a scrap piece of knitting before attempting it on your actual scarf to ensure a clean and professional finish.
Blocking the Scarf
Blocking is an essential step in finishing a knitted scarf. It helps to give the finished piece a polished, professional look. The process involves shaping and stretching the scarf to its intended size and shape, allowing the stitches to relax and the fabric to even out.
Before blocking, it is important to check the care instructions for the yarn used in the scarf. Some yarns may have specific blocking requirements, such as using a specific temperature of water or steam. It is also a good idea to wash the scarf before blocking to ensure any dirt or oils are removed.
1. Wet Blocking
Wet blocking is the most common method for blocking a scarf. To begin, fill a sink or basin with lukewarm water and add a small amount of mild detergent. Gently submerge the scarf in the water and let it soak for about 15 minutes.
After soaking, carefully remove the scarf from the water and gently squeeze out excess moisture. Lay a clean, dry towel on a flat surface and place the scarf on top. Roll the towel up with the scarf inside and gently press to remove more moisture.
Next, lay the damp scarf on a blocking mat or towel, shaping it to the desired dimensions. Use pins or blocking wires to hold the edges and corners in place. Allow the scarf to dry completely before removing the pins or wires.
2. Steam Blocking
Steam blocking is an alternative method that works well for delicate or heat-sensitive yarns. It is important to use a steam iron on the appropriate setting, avoiding direct contact with the fabric.
To steam block, hover the iron over the scarf and allow the steam to penetrate the fibers, gently shaping the fabric with your hands as you go. Be careful not to press down on the fabric with the iron, as this can flatten the stitches.
Continue steaming and shaping until the scarf reaches its desired dimensions. Allow it to cool and dry before handling.
Blocking the scarf may take some time and patience, but it is well worth the effort. The finished piece will not only look better but also drape and hang more beautifully when worn. Whether you choose wet blocking or steam blocking, following these steps will ensure your knitted scarf looks its best.
Finishing Touches
Once you have finished knitting your scarf using the free pattern provided, it’s time to add some finishing touches to make it truly special.
First, you can block your scarf to give it a professional finish. Blocking involves lightly wetting the scarf, gently stretching it into shape, and then allowing it to dry flat. This will help even out any uneven stitches and give your scarf a neat appearance.
Adding Fringe
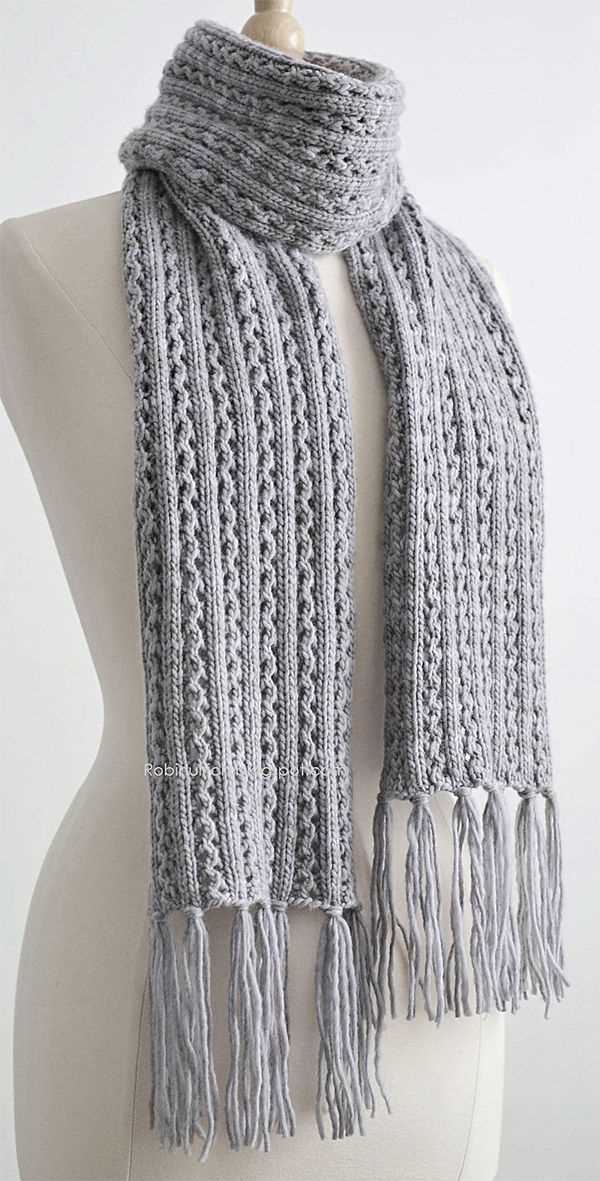
If you want to add some extra flair to your scarf, consider adding fringe. Fringe not only adds visual interest but can also provide some weight at the ends, helping your scarf stay in place when worn. To add fringe, cut several strands of yarn twice the desired length of the fringe. Fold each strand in half and pull the loop through a stitch at the edge of the scarf. Then, pull the ends of the strands through the loop and tighten to secure. Repeat this process along both edges of the scarf.
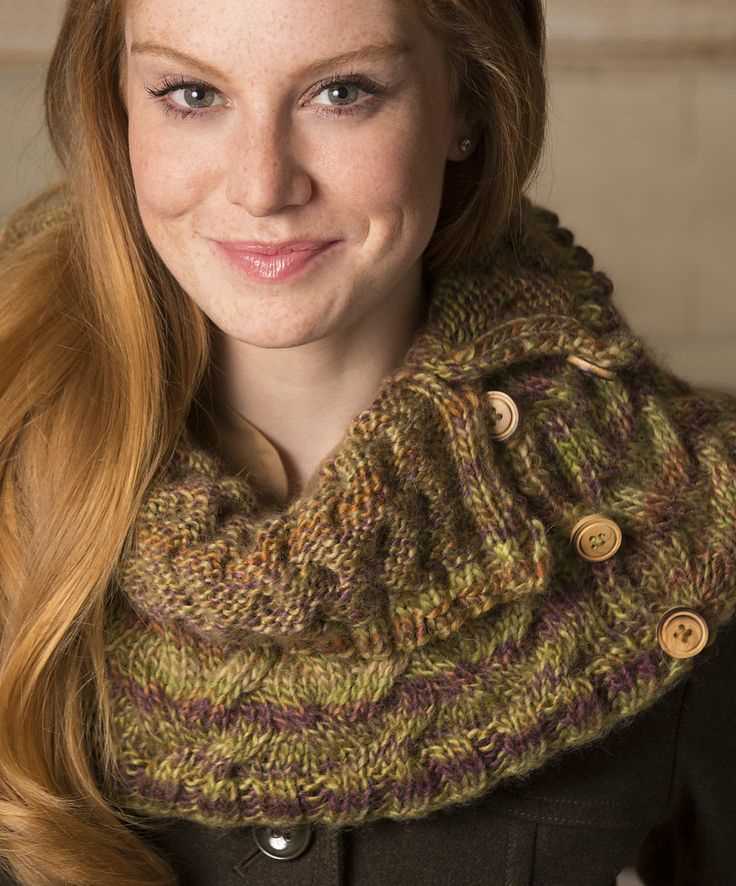
Embellishments and Embroidery
If you’re feeling creative, you can add embellishments or embroidery to your scarf to make it truly unique. Consider adding buttons, beads, or sequins for a touch of sparkle. You can also use embroidery techniques to add intricate designs or patterns to your scarf. The possibilities are endless, so let your creativity run wild!
Once you have completed these finishing touches, your free knitting pattern scarf will be ready to wear or gift to someone special. Remember to take pride in your creation and enjoy the cozy warmth it will bring during the colder months.