
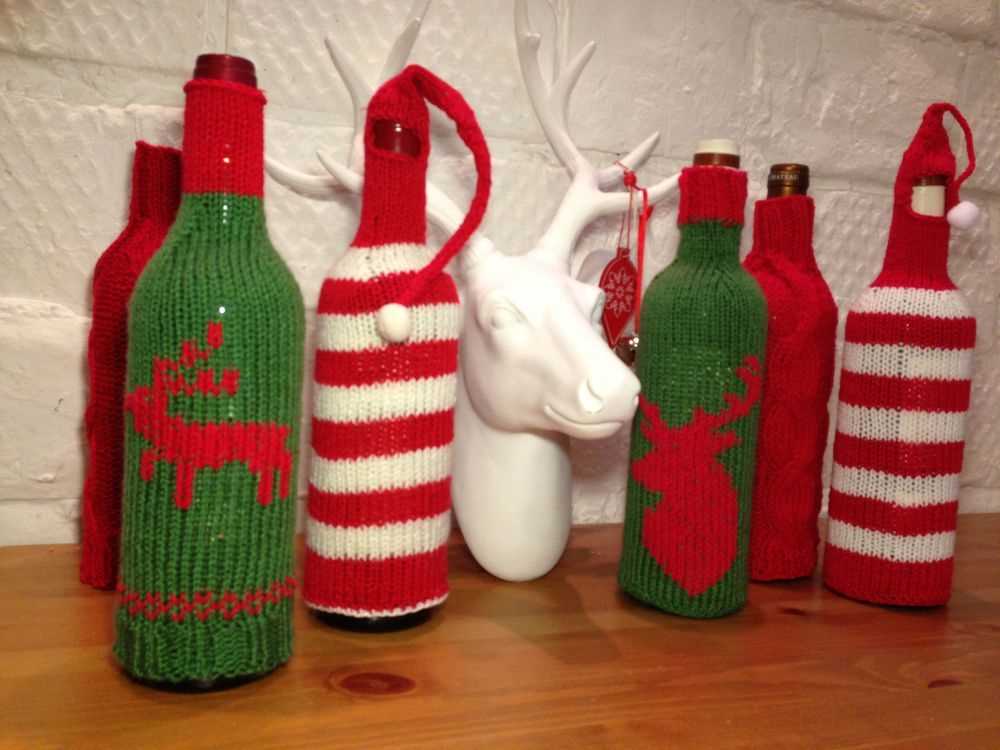
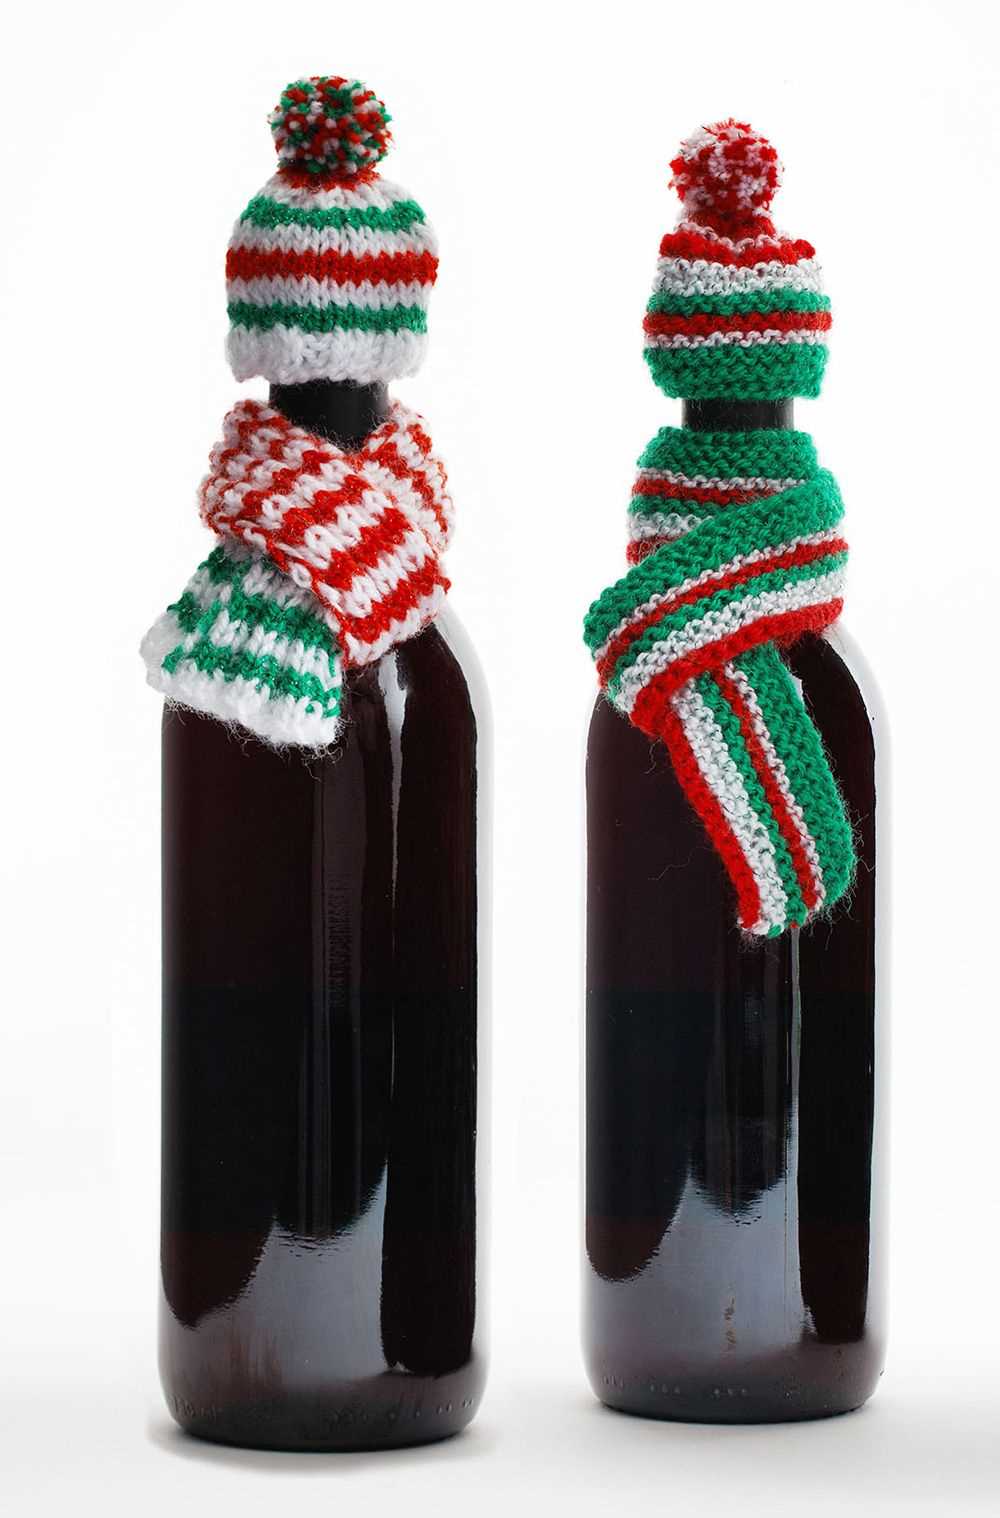
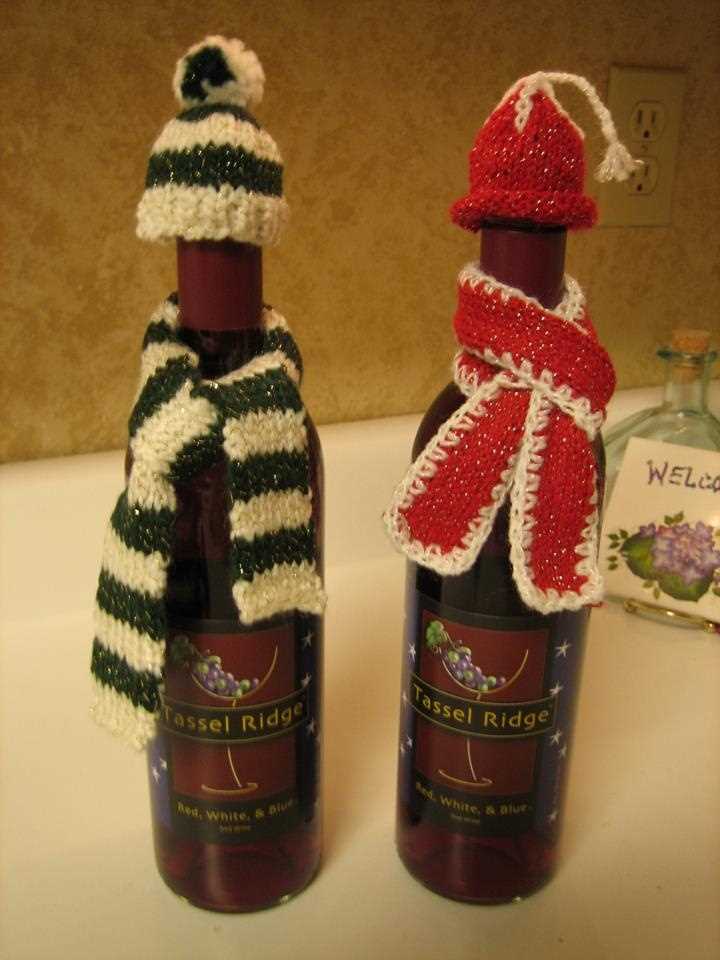
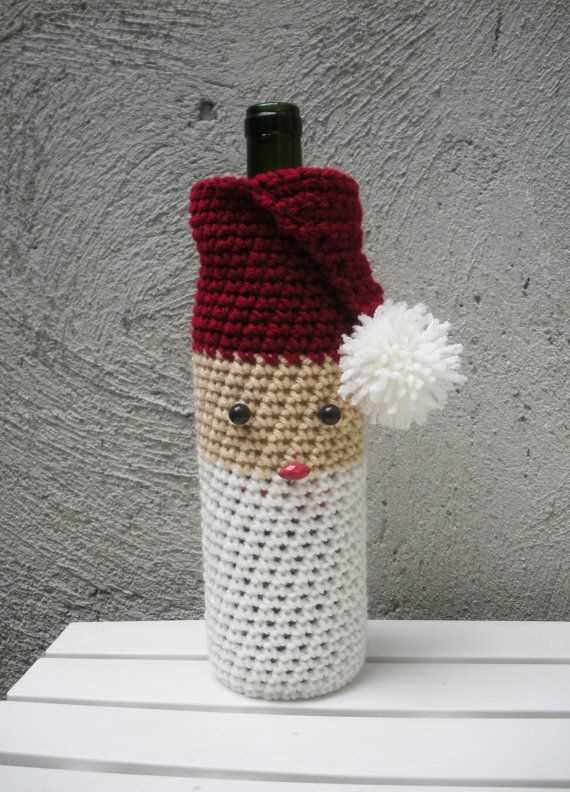
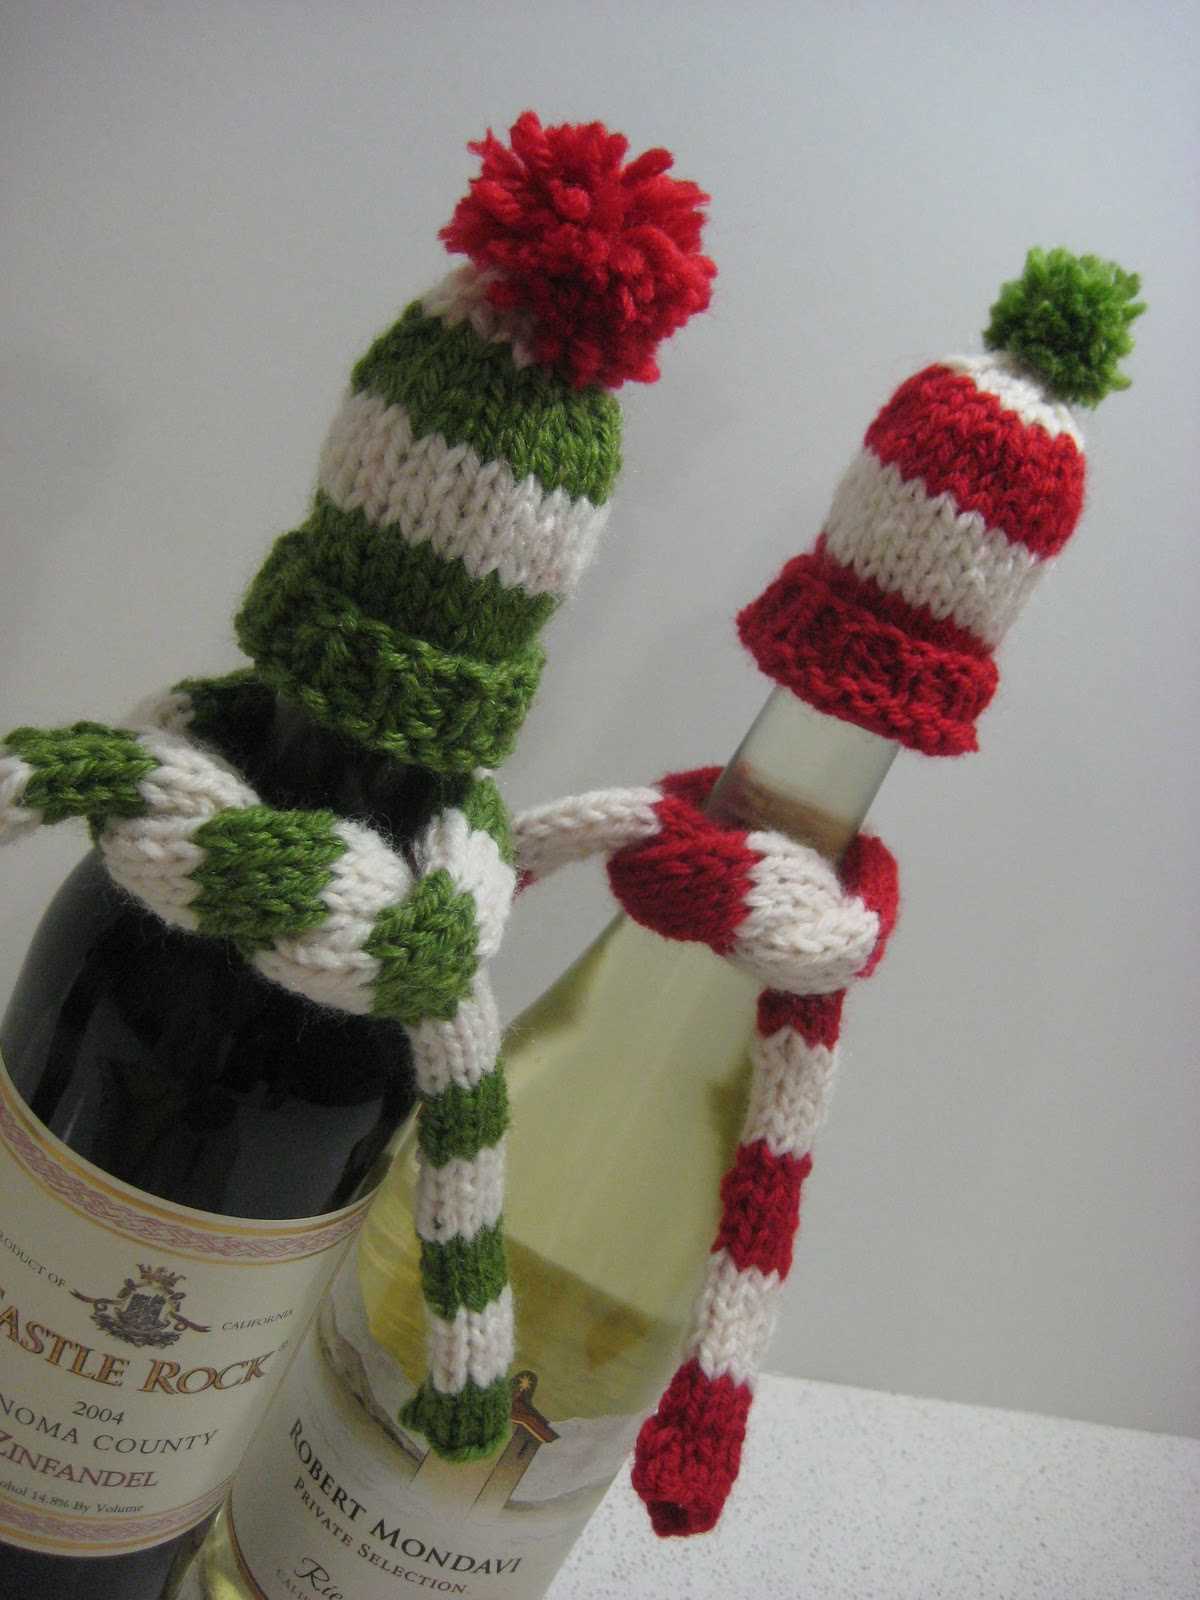
Are you looking for a fun and unique way to dress up your wine bottle this holiday season? Look no further! We have the perfect knitting pattern for you. With just a few simple stitches, you can create an adorable hat and scarf set for your favorite bottle of wine. Not only will your bottle look festive, but it will also stay cozy and warm.
This free knitting pattern is perfect for both beginners and experienced knitters. All you need is some yarn, knitting needles, and a little bit of time. The pattern includes step-by-step instructions and helpful tips, so you can easily create a hat and scarf that fit your wine bottle perfectly.
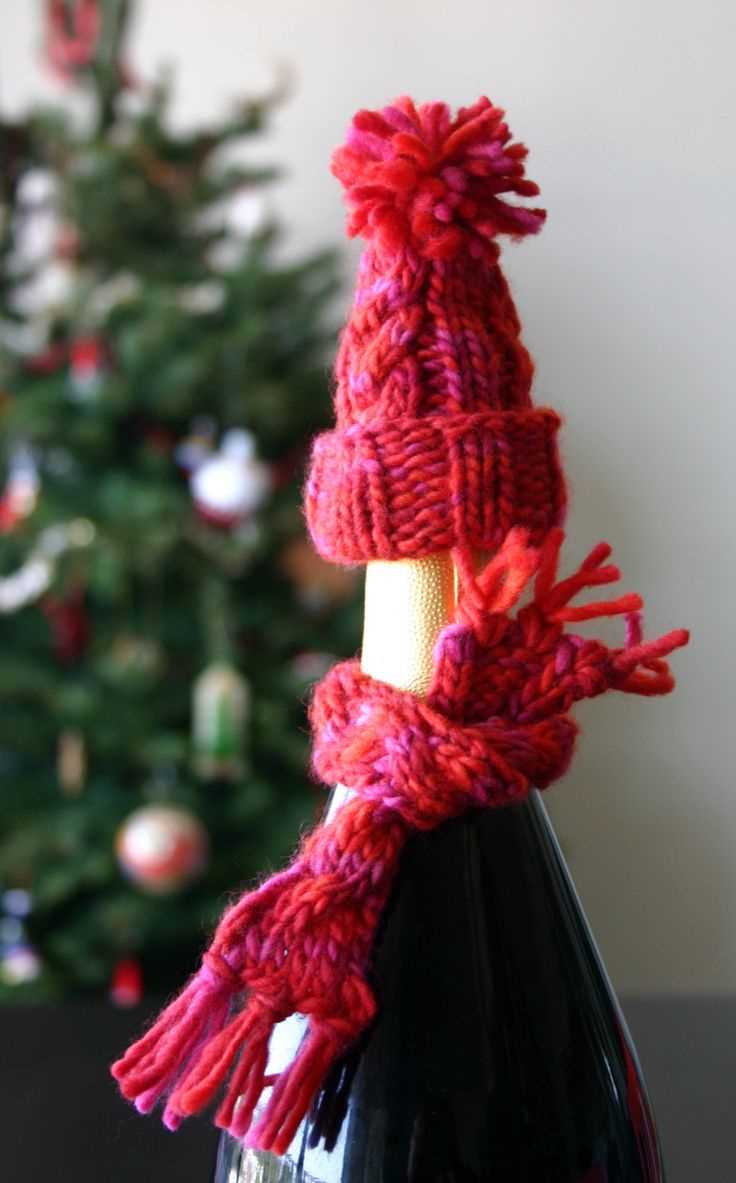
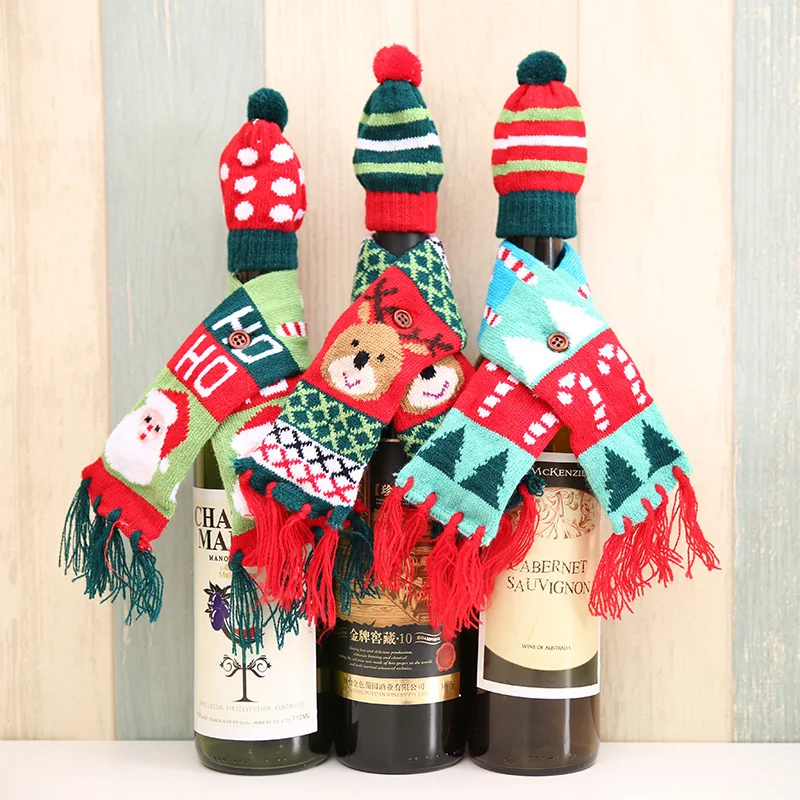
Once you’ve finished knitting your wine bottle hat and scarf, the possibilities for customization are endless. You can choose from a wide variety of yarn colors to match your holiday decor, or even add your own embellishments like pom-poms or buttons. This project is a great way to get creative and add a personal touch to your gift-giving this season.
Choosing the Right Yarn and Needles
When knitting a wine bottle hat and scarf, it is important to choose the right yarn and needles to ensure the best result. The yarn you choose will determine the overall look and feel of the finished project, while the needles will affect the gauge and size.
Yarn: For this project, it is recommended to use a medium-weight yarn, such as a worsted weight. This type of yarn will be sturdy enough to hold its shape and provide good insulation for the wine bottle. Acrylic or wool blends are popular choices, as they are both affordable and versatile. Choose a yarn color that complements the occasion or the wine bottle itself.
Needles: The size of the needles you use will depend on the gauge you want to achieve. It is suggested to use a pair of US size 8 (5mm) straight needles for the hat and US size 7 (4.5mm) double-pointed needles for the scarf. Straight needles are ideal for flat knitting, while double-pointed needles are used for knitting in the round. Make sure to use the appropriate type of needles for each part of the project.
Before starting the project, it is a good idea to do a gauge swatch to ensure that you are knitting to the correct size. This can be done by knitting a small square using the chosen yarn and needles, and measuring the number of stitches and rows per inch. Adjust your needle size if necessary to achieve the desired gauge.
By carefully selecting the right yarn and needles for your wine bottle hat and scarf, you can create a beautiful and functional accessory that will surely impress your guests or make a thoughtful gift. Happy knitting!
Types of yarn for wine bottle hat and scarf

When choosing yarn for a wine bottle hat and scarf, it’s important to consider the texture, weight, and color of the yarn. The right yarn can enhance the overall aesthetics of the project and ensure that the hat and scarf fit securely around the bottle.
1. Acrylic yarn: Acrylic yarn is a popular choice for wine bottle hats and scarves because of its affordability, durability, and wide range of colors. It’s easy to work with and provides good stitch definition, making it ideal for showcasing intricate patterns.
2. Wool yarn: Wool yarn is another excellent option for wine bottle hats and scarves. It has natural insulating properties and can keep the bottle at an optimal temperature. Wool yarn also has a soft and warm feel, making it perfect for cozy wine bottle accessories.
3. Cotton yarn: If you prefer a lightweight and breathable option, cotton yarn is a great choice for wine bottle hats and scarves. It’s soft, easy to care for, and comes in a variety of vibrant colors. Cotton yarn is ideal for warmer climates or if you want a more casual and relaxed look.
4. Sparkly yarn: For a festive and glamorous touch, consider using sparkly yarn for your wine bottle hat and scarf. This type of yarn contains metallic or glittery strands that add a bit of sparkle to the project. It’s perfect for special occasions or as a gift for someone who enjoys a touch of glamour.
5. Novelty yarn: If you’re looking for a unique and eye-catching wine bottle hat and scarf, consider using novelty yarn. This type of yarn comes in various textures and colors, such as eyelash, boucle, or ribbon yarn. It can add an interesting and whimsical element to your project.
Remember to choose a yarn that not only meets your aesthetic preferences but also suits the purpose and environment in which the wine bottle hat and scarf will be used. By selecting the right yarn, you can create beautiful and functional accessories for your wine bottles.
Selecting the appropriate needle size
In order to create a wine bottle hat and scarf that fit properly, it is important to select the appropriate needle size for your knitting project. The size of the needle will determine the gauge and tension of your knitted fabric, as well as the overall size of the finished hat and scarf.
When choosing a needle size, it is important to consider the weight and thickness of your yarn. If you are using a bulky or chunky yarn, you will generally need a larger needle size to achieve the desired tension and fabric density. On the other hand, if you are using a fine or lightweight yarn, you will likely need a smaller needle size to create a tighter fabric.
- Yarn weight: Lighter weight yarns, such as fingering or lace weight, will require smaller needle sizes, typically ranging from US 0 to US 3. Medium weight yarns, such as worsted or aran weight, generally require needle sizes ranging from US 4 to US 8. Bulky and super bulky weight yarns will require larger needle sizes, such as US 9 and above.
- Gauge and tension: The pattern you are following will usually specify the gauge and tension required for the wine bottle hat and scarf. Follow the recommended gauge and tension instructions, and adjust your needle size accordingly to achieve the correct gauge. Use a gauge swatch to test your tension before starting your project.
- Needle material: The material of the needle can also affect the tension and fabric density of your knitting. Metal needles tend to produce a tighter fabric, while wooden or bamboo needles can create a looser fabric. Consider your personal preference and the desired outcome of your project when choosing the needle material.
Basic knitting techniques
Knitting is a popular craft that involves creating fabric by interlacing yarn with a set of needles. It is a versatile skill that allows you to create a wide range of garments and accessories. To get started with knitting, it is important to learn some basic techniques.
Casting on: This is the first step in starting a knitting project. It is the process of creating loops on the needles to begin the fabric. There are several methods of casting on, including the long-tail cast on and the knit cast on. Each method creates a different edge for the fabric.
Knit stitch: The knit stitch is the most basic stitch in knitting. It is created by inserting the right needle into the stitch on the left needle, wrapping the yarn around the right needle, and pulling it through the stitch. This creates a new stitch on the right needle while the old stitch is slipped off the left needle.
Purl stitch: The purl stitch is the reverse of the knit stitch. It is created by inserting the right needle into the stitch on the left needle from right to left, wrapping the yarn around the right needle, and pulling it through the stitch from left to right. This creates a new stitch on the right needle while the old stitch is slipped off the left needle.
Increasing: Increasing is the process of adding stitches to the fabric. There are several methods of increasing, including knitting into the front and back of a stitch, yarn overs, and make one increases. These methods create additional stitches and can be used to shape the fabric.
Decreasing: Decreasing is the process of removing stitches from the fabric. There are several methods of decreasing, including knit two together, slip slip knit, and purl two together. These methods create a decrease in the number of stitches and can be used to shape the fabric.
- Binding off: Binding off is the process of finishing the fabric by creating an edge that prevents the stitches from unraveling. It is done by knitting two stitches, then passing the first stitch over the second stitch and off the needle. This process is repeated until only one stitch remains, which is then cut and the tail is pulled through the last stitch.
| Basic knitting techniques | Description |
|---|---|
| Casting on | The first step in starting a knitting project, creating loops on the needles to begin the fabric |
| Knit stitch | The most basic stitch in knitting, created by pulling the yarn through a stitch |
| Purl stitch | The reverse of the knit stitch, created by pulling the yarn through a stitch in the opposite direction |
| Increasing | The process of adding stitches to the fabric |
| Decreasing | The process of removing stitches from the fabric |
| Binding off | The process of finishing the fabric by creating an edge that prevents unraveling |
Casting on Stitches
When starting a knitting project, the first step is to cast on stitches. This process creates the foundation row of the project and determines the initial width of the knitting. There are various methods of casting on stitches, with the most common ones being the long-tail cast on, the knit cast on, and the cable cast on.
The long-tail cast on is widely used and versatile. To do this, you need to estimate the amount of yarn needed to cast on the desired number of stitches. You then make a slipknot at the end of the yarn, place it on the needle, and begin casting on by wrapping the yarn around your thumb and index finger. This creates a loop, which is then transferred to the needle to form a stitch. Repeat this process until the desired number of stitches is achieved.
The knit cast on is another commonly-used method. To begin, make a slipknot and place it on the needle. Then, insert the right-hand needle into the slipknot as if to knit a stitch. Wrap the yarn around the right-hand needle and pull it through the slipknot, creating a new stitch. Continue this process until the desired number of stitches is cast on.
Note: The cable cast on is a slightly more advanced technique, often used for projects that require a neat and firm edge. It involves using two knitting needles to create new stitches by intertwining the yarn between the needles.
- The chosen cast on method will depend on the project and personal preference. It’s a good idea to practice different casting on techniques to find the one that works best for you.
- If unsure of how many stitches to cast on, it’s helpful to refer to the knitting pattern or to make a gauge swatch beforehand to determine the correct number.
Once the stitches are cast on, you are ready to begin knitting the first row of your project and bring your knitting vision to life!
Knitting and Purling Stitches
When it comes to knitting, there are two basic stitches that form the foundation of most patterns: the knit stitch and the purl stitch. Understanding how these stitches work is essential for any knitter, whether you’re a beginner or an experienced crafter.
The knit stitch is the most commonly used stitch in knitting. It creates a smooth, v-shaped pattern on the right side of the fabric, and a bumpy, purl-like pattern on the wrong side. To create a knit stitch, you simply insert the right-hand needle into the front of the stitch on the left-hand needle, from left to right, and wrap the yarn around the right-hand needle. Then pull the right-hand needle through the stitch, allowing the old stitch to slide off the left-hand needle. It’s important to keep a consistent tension on the yarn to ensure even stitches.
The purl stitch creates a bumpy, purl-like pattern on the right side of the fabric and a smooth, v-shaped pattern on the wrong side. It is the reverse of the knit stitch, and is created by inserting the right-hand needle into the front of the stitch on the left-hand needle, from right to left. The yarn is then wrapped around the right-hand needle in the opposite direction as the knit stitch. Finally, the right-hand needle is pulled through the stitch, allowing the old stitch to slide off the left-hand needle.
To create a textured pattern or add variety to your knitting, you can combine knit and purl stitches in various ways. For example, knitting several rows of knit stitches followed by several rows of purl stitches creates a ribbed pattern. By experimenting with different combinations of knit and purl stitches, you can create a wide range of beautiful and unique fabric textures.
If you’re new to knitting, it’s a good idea to practice these basic stitches before moving on to more complex patterns. Once you’ve mastered the knit and purl stitches, you’ll be ready to tackle a wide variety of knitting projects, from simple scarves to intricate sweaters and everything in between.
Increasing and Decreasing Stitches
When knitting a wine bottle hat and scarf, it is important to know how to increase and decrease stitches. These techniques are essential for shaping the hat and scarf to fit the wine bottle perfectly. Here are some tips on how to increase and decrease stitches in your knitting project.
Increasing Stitches
To increase stitches, you can use various methods such as yarn overs, make 1 (m1), or knit front and back (kfb). A yarn over creates an eyelet and is commonly used for decorative purposes. Make 1 is an easy method where you pick up the horizontal strand between stitches and knit into it. Knit front and back involves knitting into the front and back loops of a stitch, resulting in two stitches from one. Choose the method that best suits your project and follow the pattern instructions for when and how to increase stitches.
Decreasing Stitches
When it comes to decreasing stitches, there are also several techniques you can use. The most common methods include knit two together (k2tog), slip slip knit (ssk), and slip slip purl (ssp). K2tog involves knitting two stitches together, decreasing one stitch. Ssk is a left-leaning decrease where you slip two stitches individually as if to knit, then insert the left needle into the front loops of the slipped stitches and knit them together. Ssp is a left-leaning decrease for purl stitches, where you slip two stitches individually as if to purl, then insert the left needle into the front loops of the slipped stitches and purl them together. Again, refer to the pattern instructions for the specific decreases required and follow them accordingly.
By mastering the techniques of increasing and decreasing stitches, you will be able to shape your wine bottle hat and scarf beautifully. Remember to count your stitches and check your work regularly to ensure accuracy. Happy knitting!
Knitting the wine bottle hat

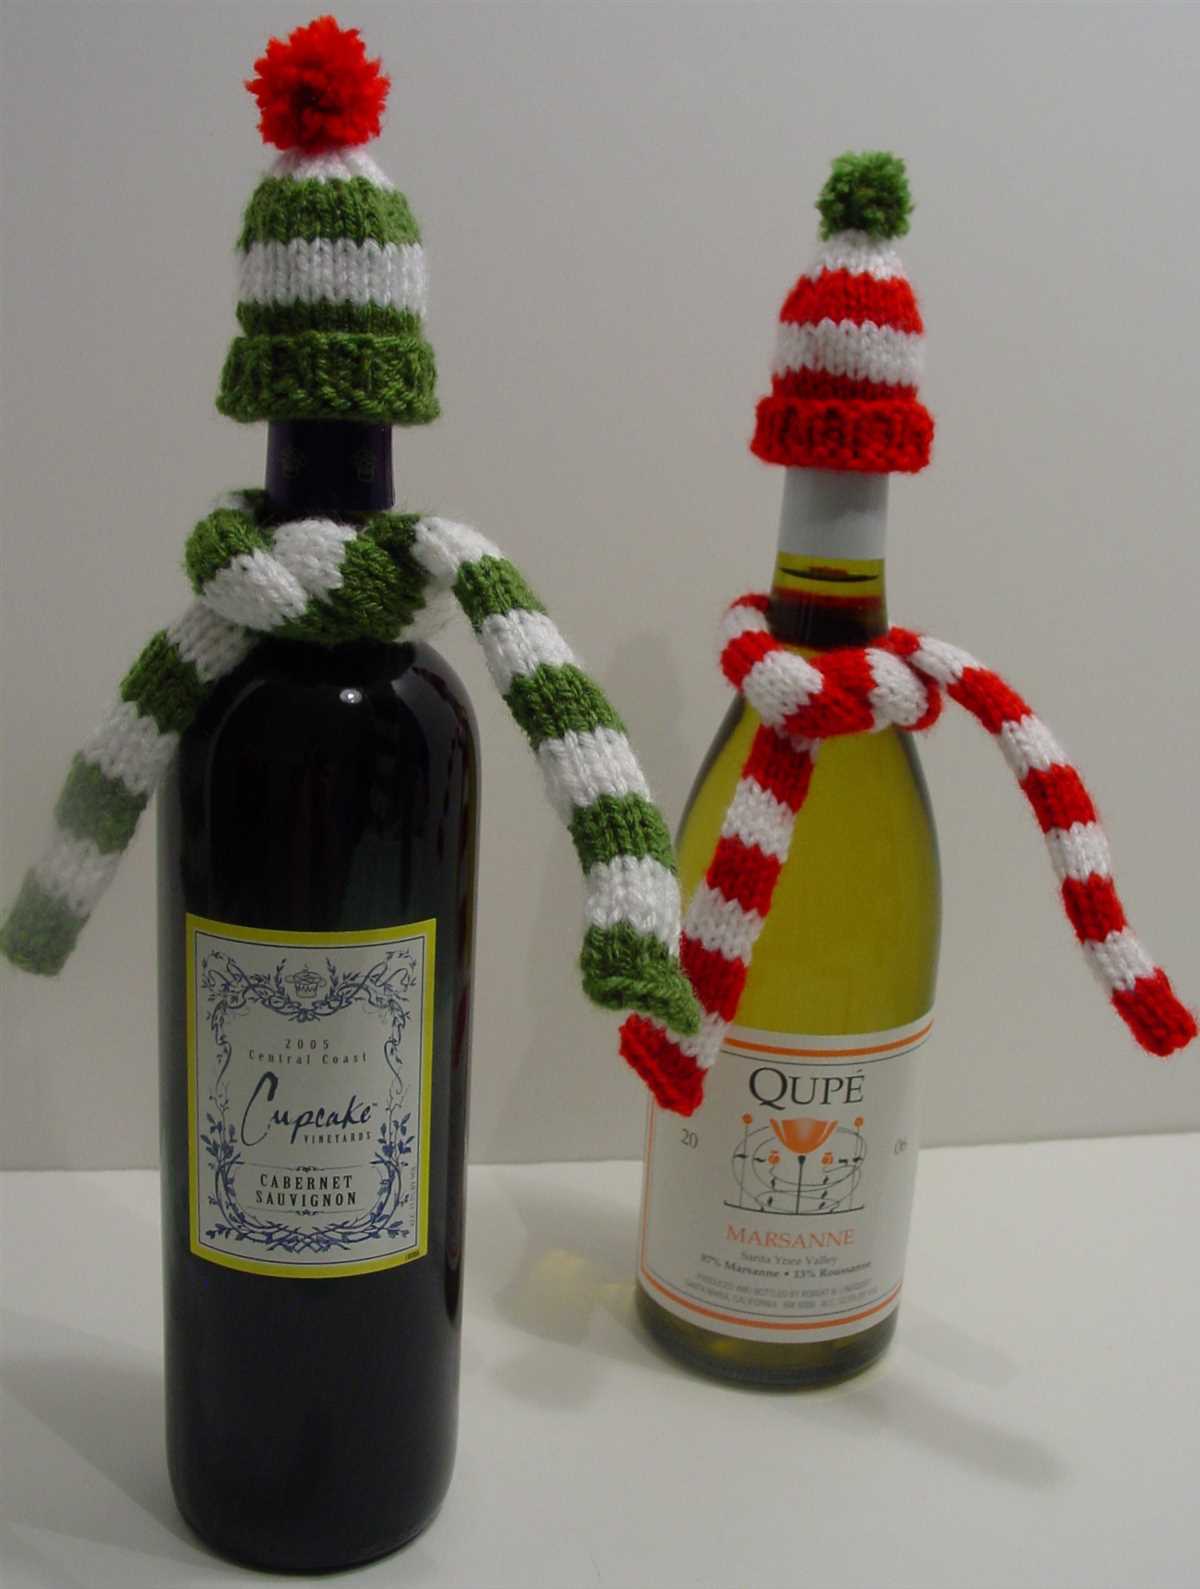
If you’re looking to add a touch of charm to your wine bottle gift, knitting a hat for the bottle is the perfect way to do so. This free knitting pattern for a wine bottle hat and scarf is easy to follow and will make your gift stand out from the rest. Whether you’re giving a bottle of wine as a hostess gift or for a special occasion, this wine bottle hat adds an extra touch of personality.
To start knitting the wine bottle hat, you will need a few basic supplies. You’ll need knitting needles, yarn, and a tapestry needle. The pattern calls for worsted weight yarn, but you can easily adjust the pattern to use the yarn of your choice. Once you have your materials ready, it’s time to cast on.
The pattern begins with a simple rib stitch, which gives the hat a snug fit. You will knit the rib stitch for a few rows before moving on to the main body of the hat. The pattern provides instructions for shaping the crown of the hat, and concludes with instructions for binding off. Once you’ve finished knitting the hat, simply sew up the back seam using the tapestry needle, and your wine bottle hat is ready to go.
Not only is knitting the wine bottle hat a fun and creative way to personalize your gift, but it also adds an extra layer of protection to the bottle. The hat will help to keep the bottle cool and prevent any condensation from forming on the outside. Plus, the hat can be reused for future gifts, making it a sustainable option.
So why not give knitting a wine bottle hat a try? With this free pattern, you can create a unique and charming gift that is sure to impress. Whether you’re a seasoned knitter or just starting out, this project is perfect for all skill levels. So grab your knitting supplies and get ready to create a one-of-a-kind wine bottle accessory.
Creating the brim
The brim of the wine bottle hat is an essential part of the pattern as it helps to keep the hat securely on the bottle. To create the brim, you will need to work a few rows of ribbing.
Step 1: With your preferred yarn and needle size, cast on the desired number of stitches for the brim. The number of stitches will depend on the size of your wine bottle and the desired fit of the hat. You can start with around 10-20 stitches.
Step 2: Work in a rib stitch pattern, alternating knit and purl stitches, for a few rows. The ribbing will create a stretchy and flexible brim that will easily fit around the bottle’s neck.
- Row 1: *K1, p1* repeat to the end of the row
- Row 2: *P1, k1* repeat to the end of the row
- Repeat rows 1 and 2 until you reach the desired length of the brim
Step 3: Once you have completed the desired number of rows for the brim, you can continue with the main body of the wine bottle hat. The brim will provide a snug fit and keep the hat in place on the bottle, while also adding an attractive texture to the design.
Shaping the crown
Once you have completed the body of the wine bottle hat, it is time to shape the crown. This is where the hat begins to take its final form and fit snugly over the top of the wine bottle.
To begin shaping the crown, you will need to decrease the number of stitches gradually. This can be done by knitting two stitches together, or by executing a slip-slip knit (ssk) decrease. The specific decrease method will depend on the pattern you are using. The decrease rows should be evenly distributed throughout the crown section.
In some patterns, you may also need to work a few plain or knit rows in between the decrease rows to maintain the pattern or texture of the hat. These rows help to create a smooth transition from the body to the crown of the hat.
In addition to decreasing stitches, you may also need to shape the crown by working short rows. Short rows are used to create a curved or slanted shape, and are typically worked on one section of the hat at a time. This can add interesting dimension and structure to the crown of the wine bottle hat.
Once you have completed the shaping of the crown, you can finish off the hat by binding off the remaining stitches. Make sure to leave a long tail for sewing or attaching any additional embellishments, such as pom-poms or tassels.
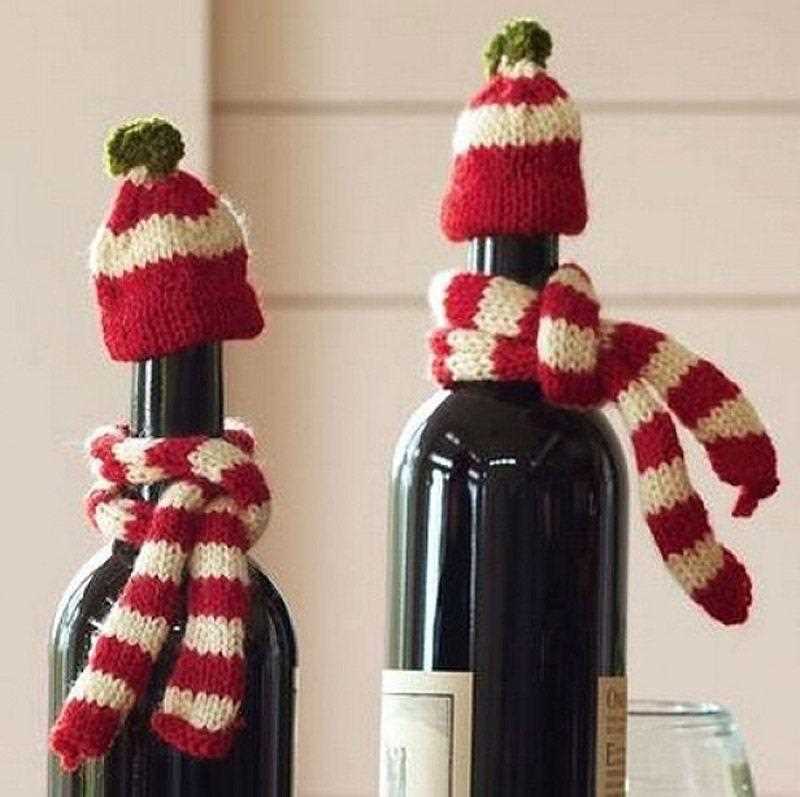
Knitting the wine bottle scarf

Knitting a wine bottle scarf is a fun and creative project that will add a personal touch to any bottle of wine. Whether you want to dress up a gift or simply add a festive touch to your own home, this scarf pattern is perfect. With just a few basic knitting stitches, you can create a beautiful and functional accessory that will keep your wine bottle cozy.
To start knitting the wine bottle scarf, you will need a set of knitting needles and some yarn. Choose a color that matches the occasion or your personal style. You can opt for a traditional holiday color like red or green, or get creative with a bold and vibrant shade. Once you have your materials ready, you can begin casting on stitches to create the base of the scarf.
Once you have cast on the desired number of stitches, you can start knitting the scarf using a simple knit stitch. Knit each row until the piece measures the desired length for your wine bottle. You can customize the length based on the size of the bottle you plan to use. For a standard 750ml wine bottle, a scarf that is about 6 inches long should be sufficient.
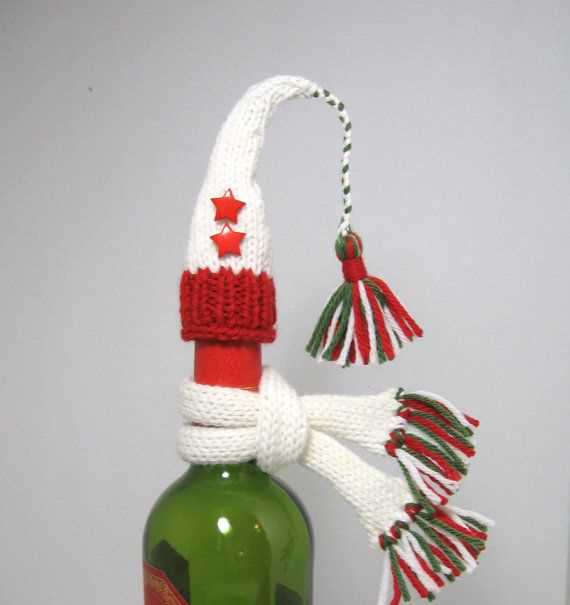
After completing the main body of the scarf, you can add some decorative touches like fringe or tassels. These can be made by cutting lengths of yarn and attaching them to the ends of the scarf. You can also experiment with different stitch patterns or stitch markers to create unique designs. The possibilities are endless when it comes to personalizing your wine bottle scarf.
Once you are finished knitting the wine bottle scarf, you can slide it onto a wine bottle and secure it in place with a tie or ribbon. This will not only keep the bottle warm, but also add a touch of charm to your gift or festive table setting. Knitting a wine bottle scarf is a great way to showcase your knitting skills and make your wine gift extra special.
Knitting the first row

When starting to knit the first row of your wine bottle hat and scarf, it is important to first gather all the necessary materials. You will need the knitting needles, the chosen yarn, and a stitch marker if desired. Make sure the needles are the appropriate size for the yarn you are using, as indicated on the yarn label.
Begin by casting on the required number of stitches, as specified in the knitting pattern. This can be done using the long-tail cast on method or any other preferred cast on technique. Make sure to leave a long tail when casting on, as it will be used to sew the ends of the hat and scarf together later.
Once the stitches are cast on, it is time to start knitting the first row. Hold the needle with the cast on stitches in your non-dominant hand and the empty needle in your dominant hand. Insert the empty needle into the first stitch on the left-hand needle, going from left to right.
Note: The pattern may specify a specific stitch to start with, such as a knit or purl stitch. Follow the instructions accordingly.
Wrap the yarn around the back of the right-hand needle, from right to left, creating a loop. With the right-hand needle, pull this loop through the first stitch on the left-hand needle, bringing the new stitch onto the right-hand needle. Slide the original stitch off the left-hand needle, completing the first stitch of the row.
Repeat this process for each stitch until you reach the end of the row. Count the stitches as you go to ensure you have the correct number. The first row sets the foundation for the rest of the knitting project, so it is important to take your time and ensure the stitches are even. Once the first row is complete, you can proceed with the following rows as instructed in the knitting pattern.
Creating the pattern
Now that you have all the necessary materials and measurements, it’s time to create the knitting pattern for your wine bottle hat and scarf set. Follow the steps below to create a unique and festive design:
- Start by casting on the required number of stitches for the wine bottle hat. This number will vary depending on the size of your wine bottle, so make sure to refer to the measurements you took earlier.
- Once you have cast on the stitches, begin knitting in the round. You can use any stitch pattern you like, such as ribbing, seed stitch, or even a simple stockinette stitch. Feel free to get creative and experiment with different stitch patterns to achieve the desired look.
- Continue knitting until the wine bottle hat reaches the desired length. This will typically be a few inches shorter than the height of your wine bottle, allowing for a snug fit.
- Once the hat is complete, it’s time to move on to the scarf. Again, start by casting on the required number of stitches. The number of stitches will depend on the desired width of your scarf and the stitch pattern you choose.
- Knit the scarf using your chosen stitch pattern until it reaches the desired length. This can be as long or as short as you like, depending on personal preference.
- When both the hat and scarf are complete, carefully remove them from the knitting needles and weave in any loose ends.
- To add a festive touch, you can also embellish the wine bottle hat and scarf with decorations such as pom-poms, ribbon, or even miniature ornaments. Get creative and have fun with it!
With these simple steps, you can create a beautiful wine bottle hat and scarf set that will add a festive touch to any holiday gathering. Whether you choose to keep them for yourself or give them as a gift, these cozy accessories are sure to be a hit!
Q&A:
Where can I find a free knitting pattern for a wine bottle hat and scarf?
You can find a free knitting pattern for a wine bottle hat and scarf on various knitting websites and blogs. Some popular ones include Ravelry, Knitting Pattern Central, and LoveKnitting. These sites offer a wide range of knitting patterns that you can search for using keywords like “wine bottle hat” or “wine bottle scarf.”
What materials do I need to knit a wine bottle hat and scarf?
To knit a wine bottle hat and scarf, you will need a set of knitting needles, yarn in your desired colors, a tapestry needle for sewing, and a pair of scissors. You may also want to use stitch markers or a row counter to help keep track of your progress as you knit.
What skill level is required to knit a wine bottle hat and scarf?
A wine bottle hat and scarf pattern is typically considered an intermediate level knitting project. This means that it may be suitable for knitters who have some experience with intermediate techniques such as knitting in the round, decreasing stitches, and following a pattern. However, with clear instructions and some practice, even a beginner knitter could try their hand at this project.
Can I customize the size of the wine bottle hat and scarf?
Yes, you can customize the size of the wine bottle hat and scarf to fit your specific wine bottle. The knitting pattern should provide instructions on how to adjust the size by changing the number of stitches or using a different yarn weight. Additionally, you can always modify the pattern by adding or subtracting rows or stitches to achieve the desired size.