
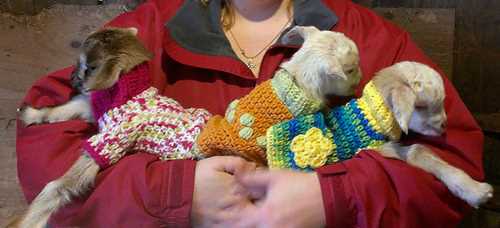
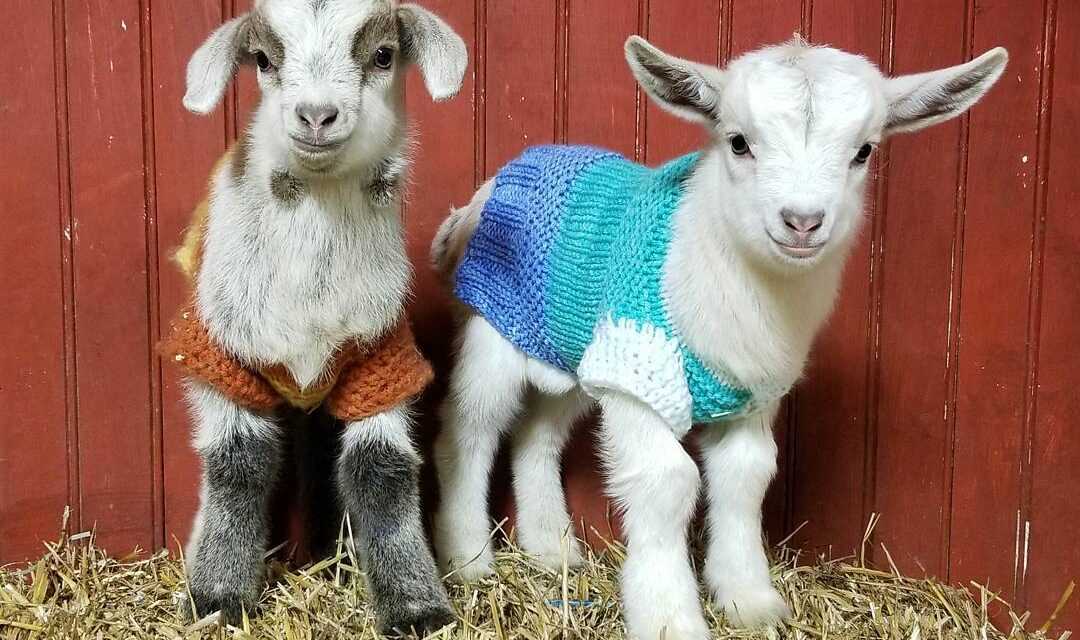
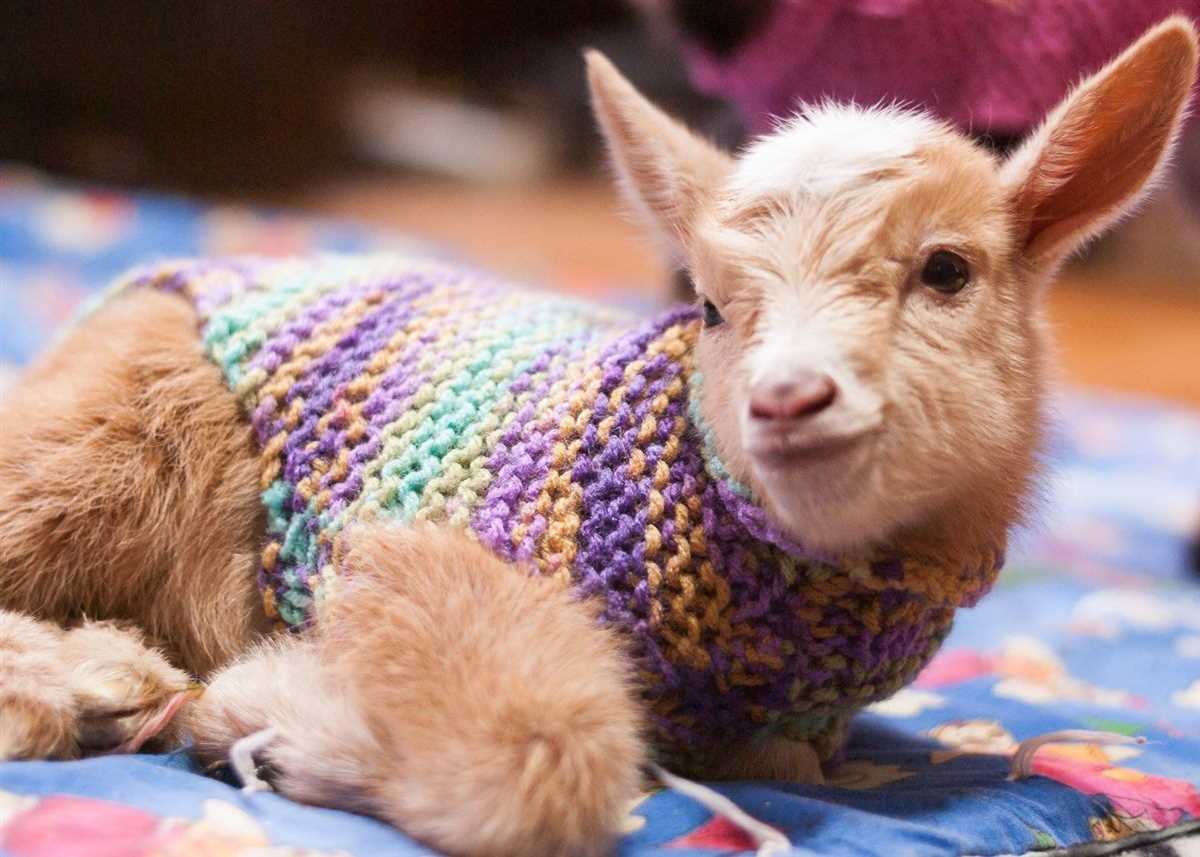
Knitting is a popular and rewarding hobby that allows you to create beautiful and functional garments. And if you’re looking for a unique project, why not try knitting a sweater for your goat? This free knitting pattern will guide you through the process of creating a cozy sweater that will keep your goat warm and stylish all winter long.
Goats are known for their ability to withstand cold temperatures, but sometimes they need a little extra warmth, especially if they are elderly or have health issues. A sweater can provide that extra layer of insulation and help keep your goat comfortable during the colder months.
This knitting pattern is designed for goats of all sizes, so whether you have a small pygmy goat or a larger dairy goat, you can easily adjust the pattern to fit. The pattern uses basic knitting stitches and techniques, making it suitable for beginners and more experienced knitters alike. All you need is some soft and warm yarn, knitting needles, and a few hours of your time.
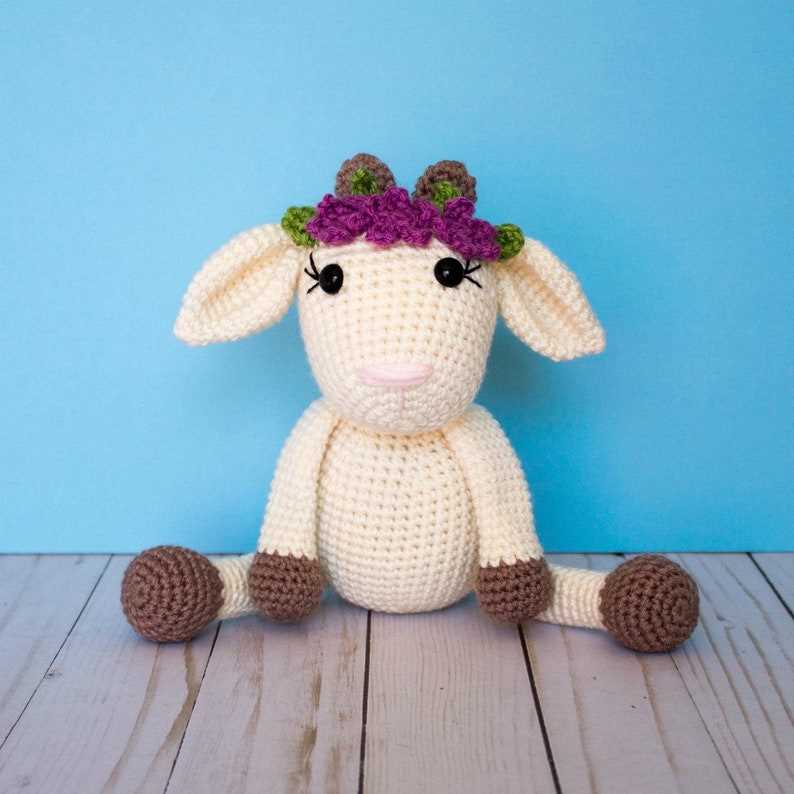
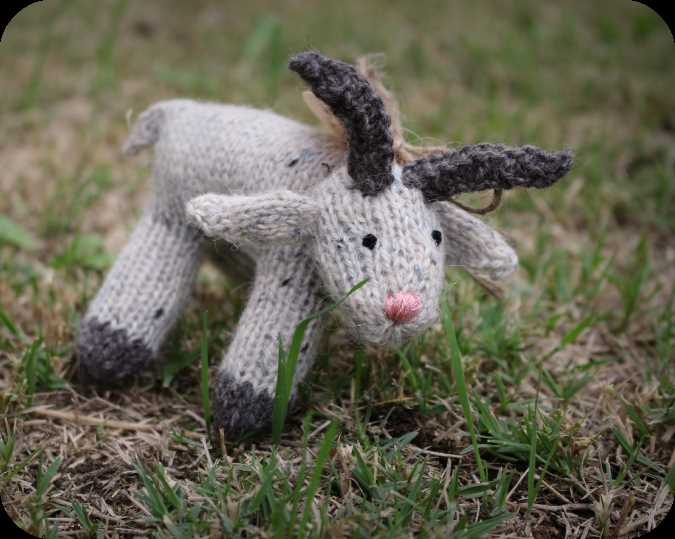
Free Knitting Pattern for Goat Sweater
If you have a goat and want to keep them warm during the winter months, why not make them a cozy sweater? This free knitting pattern is perfect for goat owners who want to give their furry friends some extra warmth and comfort. The pattern is easy to follow, even for beginners, and can be customized to fit any size goat.
To make the goat sweater, you will need basic knitting skills and some supplies. Here is a list of what you will need:
- Knitting needles (size may vary depending on the yarn used)
- Yarn (choose a soft and warm yarn that is suitable for goats)
- Measuring tape (to ensure the sweater fits properly)
- Scissors (to cut the yarn)
Once you have gathered your supplies, you can start knitting the sweater. The pattern consists of several steps, including measuring your goat, casting on stitches, knitting the body and sleeves, and finishing the sweater with ribbing.
To make the process easier, the pattern includes detailed instructions and helpful tips. You can also personalize the sweater by adding decorative elements or using different colors of yarn.
Remember, the key to a well-fitting sweater is accurate measurements, so make sure to measure your goat carefully before starting. With this free knitting pattern, you can create a warm and stylish sweater for your beloved goat.
Why Knit a Sweater for Your Goat
If you are a proud owner of a goat, you may have noticed that they can be quite sensitive to cold weather. Just like any other animal, goats can benefit from wearing an extra layer of warmth during chilly days. Knitting a sweater for your goat not only keeps them cozy, but it also adds a touch of style to their wardrobe!
One of the main reasons to knit a sweater for your goat is to provide them with insulation during colder months. Goats have a thin layer of fur that may not be enough to keep them warm in low temperatures. By knitting a sweater, you can ensure that your goat stays snug and comfortable even in the coldest weather.
A personalized touch: Knitting a sweater for your goat allows you to add a personalized touch to their attire. You can choose different colors and patterns to suit their individual style and personality. Whether you prefer a classic design or something more whimsical, the possibilities are endless when it comes to creating a one-of-a-kind sweater for your goat.
Veterinary benefits: A sweater can also provide veterinary benefits to your goat. For example, if your goat has a skin condition or a wound that needs protection, a sweater can serve as a barrier from external elements. Additionally, a sweater can help prevent your goat from scratching or biting at a wound, promoting faster healing and reducing the risk of infection.
Goat fashion trend: In recent years, the trend of dressing up goats has gained popularity among goat owners. Social media platforms are filled with adorable pictures of goats sporting fashionable sweaters and accessories. By joining the goat fashion trend, you not only provide warmth and protection to your goat but also become part of a fun and creative community of goat enthusiasts.
In conclusion, knitting a sweater for your goat can offer multiple benefits, including insulation, a personalized touch, veterinary advantages, and the opportunity to join a fashionable goat community. So, why not grab your knitting needles and start creating a stylish and functional sweater for your beloved goat?
Choosing the Right Yarn for Your Goat Sweater
When it comes to knitting a sweater for your beloved goat, choosing the right yarn is crucial. Not only does it need to be comfortable and warm, but it should also be durable and easy to care for. Here are some factors to consider when selecting the yarn for your goat sweater:
1. Fiber Content
When it comes to goat sweaters, natural fibers such as wool and alpaca are often great choices. These fibers are known for their warmth, breathability, and softness, making them perfect for keeping your goat cozy. Additionally, natural fibers are usually more durable and less likely to cause skin irritation.
2. Weight
Choosing the right weight of yarn is important to ensure that the sweater fits your goat properly. A bulky yarn might be too heavy and uncomfortable, while a lace or fingering weight yarn might not provide enough warmth. Consider the size and body type of your goat and choose a yarn weight that will result in a comfortable and well-fitting sweater.
3. Gauge
Pay attention to the recommended gauge for the pattern you’ll be using. Gauge refers to the number of stitches and rows per inch, and it can significantly affect the final size and fit of the sweater. Make sure to swatch and adjust your needle size as needed to achieve the correct gauge.
4. Color
While the color of the yarn is mostly a matter of personal preference, it’s worth considering how it will look on your goat. Lighter colors tend to show dirt and stains more easily, so you might opt for darker shades if your goat spends a lot of time outdoors. Additionally, consider choosing a color that complements your goat’s natural coat color to create a harmonious and stylish look.
Remember, every goat is unique, so take their specific needs and preferences into account when selecting the yarn for their sweater. With the right yarn, you can create a comfortable and fashionable sweater that your goat will love to wear.
Key Measurements for Your Goat Sweater
Before you start knitting your goat sweater, it is important to take accurate measurements of your goat to ensure the perfect fit. Here are the key measurements that you will need:
1. Chest Circumference:
The chest circumference is a crucial measurement for the sweater as it determines the width of the garment. Measure around the widest part of your goat’s chest, just behind the front legs, and make note of the measurement.
2. Back Length:
The back length is the measurement from the base of the neck to the base of the tail. It is important to take this measurement accurately to ensure the sweater covers the goat’s back fully. Measure along the spine of your goat, from the base of the neck to the base of the tail, and record the measurement.
3. Neck Circumference:
The neck circumference is essential for determining the size of the neck opening in the sweater. Measure around the neck at the base, just above the shoulders, and make note of the measurement.
4. Leg Openings:
You will also need to measure the circumference of each leg opening to make sure the sweater fits comfortably and does not restrict movement. Measure around each leg, just above the hoof, and record the measurements.
Once you have these key measurements, you will be ready to start knitting your goat sweater. Use these measurements as a guide to choose the appropriate size and adjust the knitting pattern accordingly for the perfect fit.
Getting Started: Casting On
Casting on is the first step in any knitting project, and it is especially important for creating a goat sweater. To begin, you will need a set of knitting needles and the yarn of your choice. Make sure to select a yarn that is appropriate for your goat’s size and fur type. You may also want to consider using a circular needle if you prefer to knit in the round.
There are several methods for casting on, but the long tail cast on is one of the most common. To start, measure out a length of yarn that is approximately three times the width of your goat’s chest. This will give you enough yarn to work with while casting on. Fold the yarn in half, creating a loop at one end.
Step 1: Hold the loop in your left hand, with the tail end of the yarn behind your thumb and the working yarn in front of your thumb.
Step 2: Insert the needle from top to bottom through the loop, catching the working yarn with the needle.
Step 3: With your right hand, bring the needle under the tail end of the yarn, and then over the working yarn, creating a loop around the needle.
Step 4: Pull the loop through the first loop on the needle, and then pull the tail end of the yarn to tighten the stitch. Repeat these steps until you have cast on the desired number of stitches.
Once you have completed the cast on, you are ready to begin knitting your goat sweater. Remember to consult the pattern for any specific instructions on stitch counts or pattern repeats. Happy knitting!
Knitting the Body of the Goat Sweater
Once you have completed the ribbing for the goat sweater, it’s time to move on to knitting the body. This is where the sweater really takes shape and starts to resemble a cozy garment for your goat.
First, you will need to determine the desired length of the sweater. Measure your goat from the base of the neck to the desired hemline, and add a few extra inches for a comfortable fit. This measurement will help you decide how many rows to knit for the body.
Step 1: With your main color yarn, knit each row in stockinette stitch for the determined number of rows. This will create a smooth and even fabric for the body of the sweater. Remember to knit one row, then purl the next row to create the stockinette stitch pattern.
Step 2: Once you have completed the body of the sweater, it’s time to start decreasing for the neck opening. To do this, you will need to divide your stitches evenly across multiple needles. Using the same main color yarn, work in rib stitch for a few rows to create a neat and stretchy finish.
Step 3: Next, it’s time to cast off the stitches for each side of the neck opening. This will create a V-neck shape for the sweater. Follow the instructions provided in the pattern for the specific number of stitches to cast off.
Step 4: Finally, finish off the body of the sweater by working a few more rows in rib stitch to create a snug hemline. This will help keep the sweater in place and prevent it from slipping off your goat’s body.
Now that you have completed the body of the goat sweater, you can move on to knitting the sleeves and adding any additional embellishments or details to personalize the garment. Stay tuned for the next steps in the knitting process!
Knitting the Sleeves
Now that you have completed the body of the goat sweater, it’s time to move on to the sleeves. The sleeves are knit separately and then attached to the body. Follow the instructions below to knit the sleeves for your goat sweater.
Materials: For the sleeves, you will need the same yarn and knitting needles that you used for the body of the sweater. Make sure you have enough yarn to complete both sleeves.
Instructions:
- Cast on stitches: Using your knitting needles, cast on the required number of stitches for the sleeve. The number of stitches will depend on the size of your goat and the desired sleeve length. Refer to the pattern for the specific number of stitches.
- Knit the ribbing: Begin knitting the ribbing for the sleeve. This is usually done in a knit 1, purl 1 rib stitch. Continue knitting the ribbing until it reaches the desired length, typically 1-2 inches.
- Switch to stockinette stitch: Once the ribbing is complete, switch to stockinette stitch by knitting all rows. Continue knitting in stockinette stitch until the sleeve reaches the desired length, usually 8-10 inches.
- Bind off: When the sleeve has reached the desired length, bind off all stitches. Cut the yarn, leaving a long tail for seaming.
- Repeat for the second sleeve: Follow the same steps to knit the second sleeve for your goat sweater.
Once both sleeves are complete, you can proceed to attach them to the body of the sweater. Refer to the pattern for specific instructions on how to seam the sleeves to the body. With a little patience and attention to detail, you’ll have a beautifully knitted goat sweater ready to keep your furry friend warm and stylish!
Creating the Neck Opening
When knitting a goat sweater, one of the crucial steps is creating the neck opening. This is where the goat’s head will go through, so it needs to be the right size and shape to fit comfortably. Here is a step-by-step guide on how to create the neck opening:
1. Determine the placement of the neck opening:
Start by measuring the circumference of the goat’s neck, using a flexible measuring tape. Use this measurement to determine the width of the neck opening. Mark the center of the back of the sweater with a stitch marker, and then use the measurement to determine how many stitches to cast off on either side of the marker.
2. Cast off stitches:
To create the neck opening, you will need to cast off a certain number of stitches on each side of the marker. This can be done using a basic knit cast-off method. Work your way to the marker, then slip the stitch marker and cast off the required number of stitches on each side. This will create the gap for the neck opening.
3. Shape the neck opening:
Once the stitches are cast off, you can start shaping the neck opening. This is done by working decreases on each side of the neck opening. Follow the knitting pattern instructions to determine the number of decreases, and the rate at which they should be done. Typically, decreases are done on every other row until the desired size and shape of the neck opening is achieved.
Following these steps will ensure that you create a well-fitting and comfortable neck opening for your goat’s sweater. Remember to refer to the knitting pattern for specific instructions and measurements to ensure the perfect fit.
Finishing Touches: Sewing in Ends and Blocking
Once you have completed knitting your goat sweater, there are a few important finishing touches to add before your project is complete. These include sewing in ends and blocking the sweater to give it a polished and professional finish.
Sewing in Ends: When you finish knitting the sweater, you will likely have several loose ends of yarn that need to be secured. It is important to sew in these ends to ensure that they do not come unraveled over time. To do this, thread a tapestry needle with one end of the yarn and weave it through the stitches on the wrong side of the sweater, following the direction of the stitches. Repeat this process with all the loose ends, making sure to secure them tightly.
Blocking: Blocking is a process used to shape and smooth out knitted garments. To block your goat sweater, you will need to soak it in lukewarm water for about 20 minutes. Gently squeeze out the excess water and lay the sweater flat on a clean towel. Use pins or blocking wires to stretch the sweater to the desired measurements and shape. Allow it to dry completely before removing the pins or wires.
By sewing in the loose ends and blocking the sweater, you are adding the final touches that will make your goat sweater look neat and professional. Don’t skip these important finishing steps to ensure your sweater looks its best.
Adding Decorative Elements
When knitting a sweater for your goat, you may want to add some decorative elements to make it more unique and attractive. Here are a few ideas to consider:
Colorwork
One way to add visual interest to your goat’s sweater is by incorporating colorwork. You can use different colored yarns to create patterns or motifs on the sweater. Fair Isle knitting, for example, is a popular technique that involves alternating between two colors in a single row to create intricate designs. You can also experiment with intarsia or stranded knitting to achieve different color effects.
Embroidery
Another way to embellish your goat’s sweater is by adding embroidery. You can use a contrasting color of yarn or embroidery floss to stitch decorative patterns or motifs onto the fabric. This could be anything from simple geometric shapes to more elaborate designs. Embroidery can add texture and dimension to the sweater, making it stand out even more.
Buttons and Ribbons
Accessorizing your goat’s sweater with buttons or ribbons can also enhance its appearance. You can sew on decorative buttons in various shapes and colors to add a playful touch. Alternatively, you can attach ribbons or bows to the sweater to give it a more feminine or festive look. Just make sure the buttons and ribbons are securely fastened to prevent them from being swallowed or causing any discomfort to your goat.
Lace or Eyelet Patterns
If you prefer a more delicate and elegant look, consider incorporating lace or eyelet patterns into your goat’s sweater. Lace knitting involves creating intricate openwork patterns using yarn overs and decreases. The result is a lightweight and airy fabric that can be quite stunning. Eyelet patterns, on the other hand, are simpler and feature a series of small holes or perforations. Both lace and eyelet patterns can add a touch of femininity and sophistication to your goat’s wardrobe.
Additional Tips and Tricks
When knitting a goat sweater, there are a few additional tips and tricks that can help you create a cozy and comfortable garment for your furry friend. Here are some things to keep in mind:
1. Measure your goat carefully
Before starting the project, it’s important to measure your goat accurately. This will ensure that the sweater fits properly and provides enough warmth. Measure the length of your goat’s back, the circumference of its chest, and the size of its neck. Use these measurements to determine the size of the sweater pattern you need to follow.
2. Choose the right yarn
When selecting yarn for your goat sweater, it’s best to choose a soft and warm material. Natural fibers, such as wool or alpaca, are great options as they provide insulation and breathability. Avoid using yarns that are too scratchy or heavy, as they may cause discomfort for your goat.
3. Consider adding buttons or fasteners
In some cases, adding buttons or fasteners to your goat sweater can make it easier to put on and take off. This is especially useful if your goat is not accustomed to wearing clothing. However, be sure to use buttons or fasteners that are secure and won’t easily come undone, as goats can be quite active.
4. Pay attention to the fit
When knitting the sweater, pay close attention to the fit. Make sure it is snug enough to provide warmth, but not too tight that it restricts your goat’s movements or causes discomfort. Try the sweater on your goat periodically as you knit to ensure that it is the right size and shape.
- 5. Add embellishments
For a personalized touch, consider adding embellishments to your goat sweater. You can use contrasting yarn colors to create stripes or patterns, or even add some small decorative elements, such as pom-poms or embroidery. Just be mindful of any embellishments that could pose a choking hazard for your goat.
Following these additional tips and tricks will help you create a well-fitting and stylish sweater for your goat. Remember to have fun with the project and enjoy the unique opportunity to knit for your four-legged friend!
Sharing Your Finished Goat Sweater
Once you have completed knitting your goat sweater, you’ll likely want to share your finished project with others. Whether you want to show off your knitting skills or inspire others to take up knitting, sharing your finished goat sweater is a great way to connect with fellow knitters and goat enthusiasts. Here are some tips for sharing your finished goat sweater:
1. Take Photos: Before sharing your finished goat sweater, make sure to take high-quality photos of the sweater. Capture different angles and details of your knitting, as well as any cute goat models that might be wearing the sweater. Good photos will make your finished project more visually appealing and increase the likelihood of getting positive feedback.
2. Share on Social Media: The easiest way to share your finished goat sweater is by posting it on social media platforms like Instagram, Facebook, or Twitter. Write a caption explaining your inspiration for the sweater, the pattern you used, and any interesting details or challenges you encountered while knitting. Use hashtags like #knitting, #goatsweater, and #handmade to reach a wider audience of fellow knitters.
3. Join Knitting Communities: There are many online knitting communities where you can share your finished goat sweater and connect with other knitters. Websites like Ravelry and Knitting Paradise have forums and groups dedicated to various knitting projects, including patterns for animal-themed sweaters. Join these communities, share your work, and engage in discussions with fellow knitters to learn from their experiences and get feedback on your project.
4. Submit to Knitting Magazines or Websites: If you’re particularly proud of your finished goat sweater and think it’s an exceptional piece of knitting, consider submitting it to knitting magazines or websites. Many publications have a section where they feature readers’ projects, and seeing your work in print or online can be a rewarding experience. Follow the submission guidelines provided by the magazine or website and include a brief description of the sweater and your contact information.
Conclusion
Sharing your finished goat sweater is an exciting step in the knitting process. Through photographs, social media, knitting communities, and submissions to knitting publications, you can showcase your hard work and creativity while also inspiring and connecting with other knitting enthusiasts. So don’t be shy, embrace the opportunity to share your love for knitting and goats by sharing your finished goat sweater with the world!
Q&A:
Where can I find a free knitting pattern for a goat sweater?
You can find free knitting patterns for goat sweaters on various websites and online knitting communities. Some popular websites to check for patterns include Ravelry, Knitty, and LoveCrafts.
What materials are needed to knit a goat sweater?
To knit a goat sweater, you will need yarn, knitting needles, and a pattern. The specific materials required may vary depending on the pattern you choose. It is recommended to use a soft and durable yarn, such as wool or acrylic, to ensure warmth and comfort for the goat.
Are there different sizes available for goat sweaters?
Yes, there are typically different sizes available for goat sweaters. Most knitting patterns will provide instructions for multiple sizes, allowing you to choose the size that best fits your goat. It is important to measure your goat accurately to ensure the sweater will fit properly.
Can I customize the design of the goat sweater?
Yes, you can typically customize the design of the goat sweater to your liking. Many knitting patterns will provide instructions for different stitch patterns and embellishments, allowing you to add your personal touch to the sweater. However, be sure to choose a design that is safe and comfortable for the goat.
Is knitting a goat sweater suitable for beginners?
Knitting a goat sweater may not be the best project for absolute beginners. It requires some intermediate-level knitting skills and knowledge of reading knitting patterns. However, if you are a beginner who is willing to learn and practice, you can still give it a try with the help of online tutorials and guidance from experienced knitters.
Where can I find a free knitting pattern for a goat sweater?
You can find a free knitting pattern for a goat sweater on various knitting websites or online communities. Some popular websites for free knitting patterns include Ravelry, Lion Brand Yarn, and Knitty. Additionally, you can also try browsing through knitting forums or social media groups dedicated to knitting and ask for recommendations or patterns.