
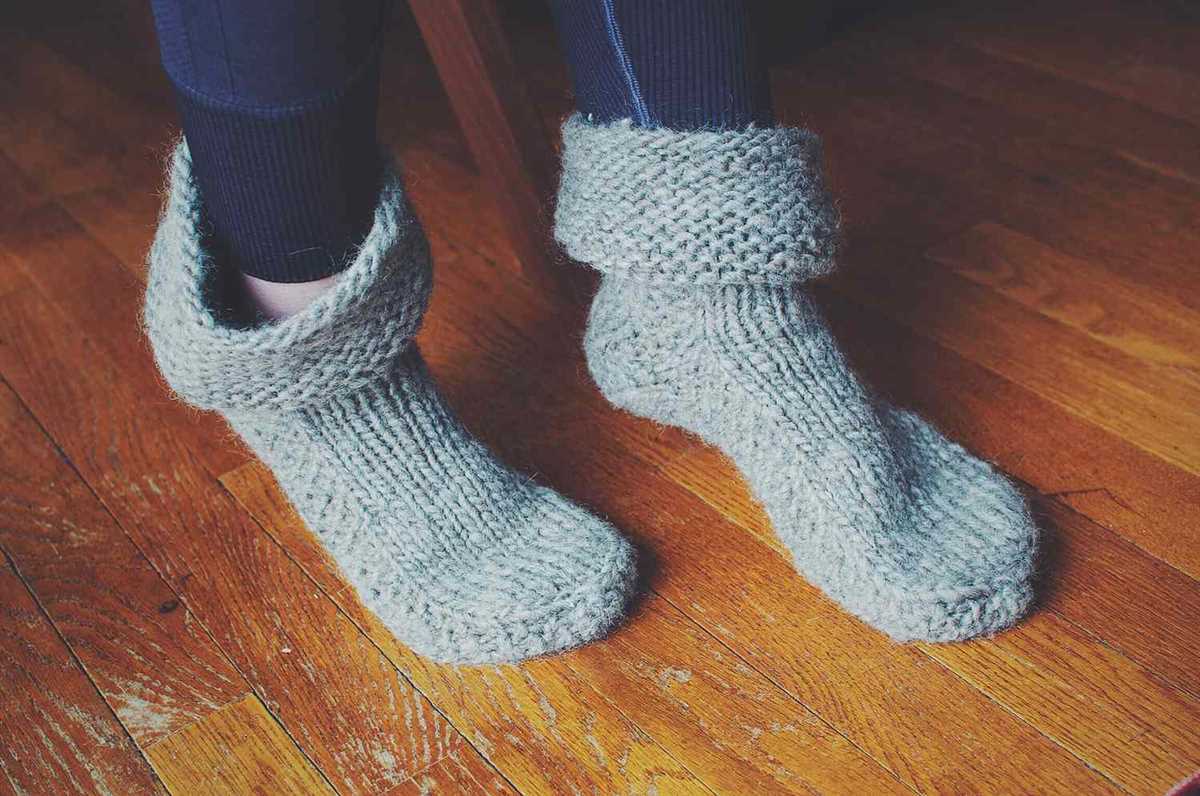
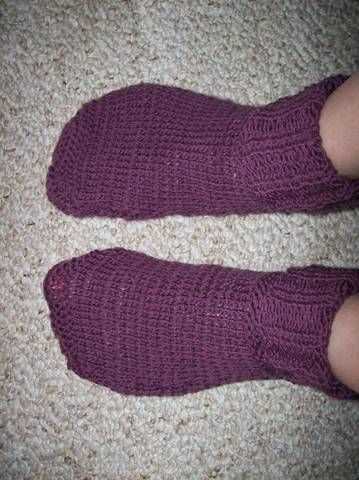
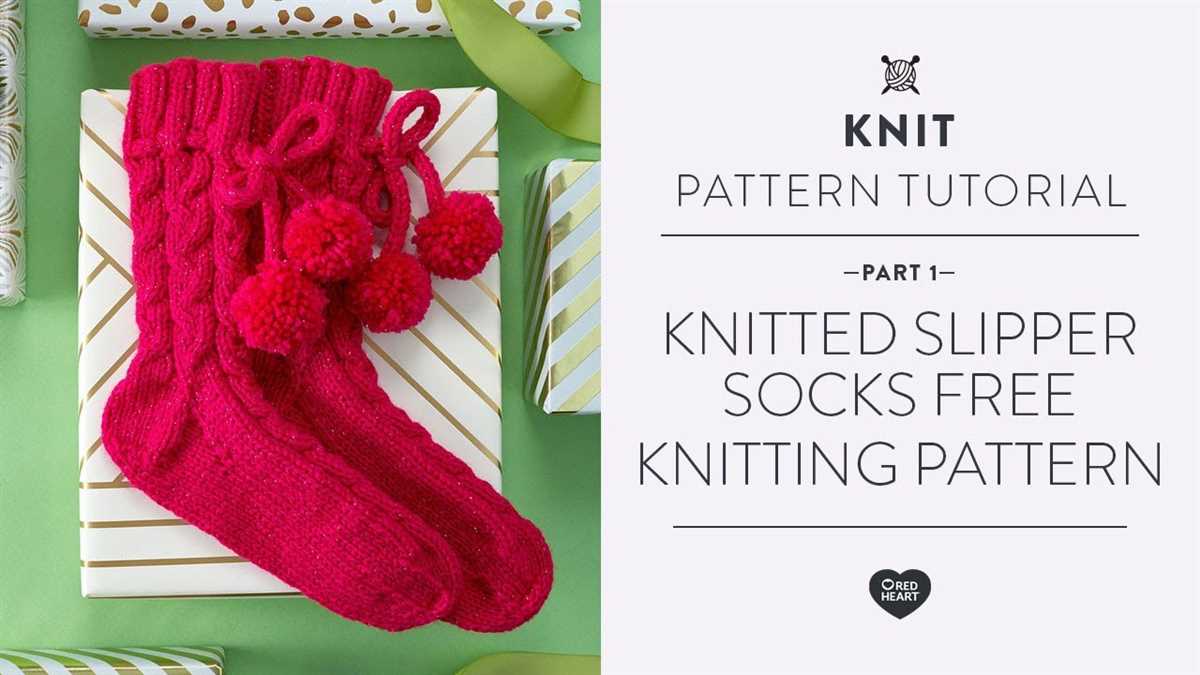
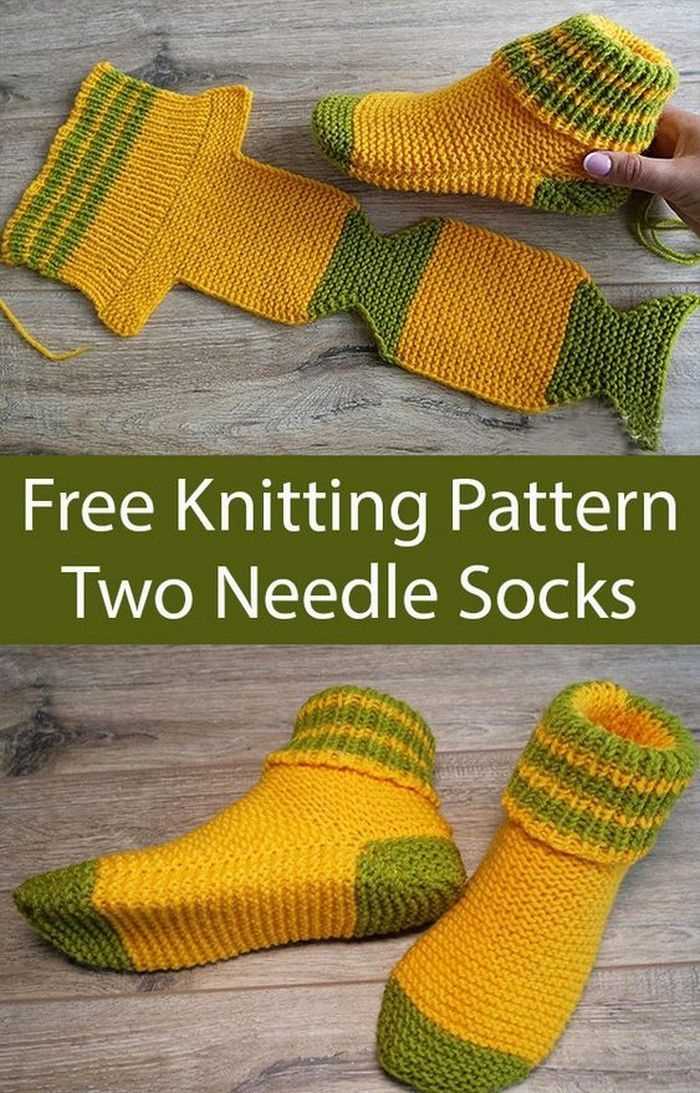
If you’re a knitting enthusiast and are looking for a new project to tackle, why not try your hand at knitting some comfy slippers? Knitting your own slippers can be a rewarding and relaxing way to create something useful and beautiful. Plus, with this free pattern, you can make a pair of knitted slippers using just two needles.
This pattern is perfect for those who prefer to work with two needles instead of double-pointed needles or circular needles. With just basic knitting techniques, you’ll be able to create a cozy pair of slippers that are perfect for wearing around the house or giving as a thoughtful gift.
Whether you’re a seasoned knitter or just starting out, this pattern is designed to be easy to follow and customizable. You can choose your favorite yarn and color to match your personal style, and adjust the size of the slippers to fit any foot. So, grab your knitting needles and get ready to create a cozy pair of knitted slippers!
How to Knit Slippers with Two Needles: A Step-by-Step Guide
Knitting slippers with two needles is a great project for beginners and experienced knitters alike. With just a few basic knitting techniques, you can create cozy and comfortable slippers to keep your feet warm. Follow this step-by-step guide to learn how to knit slippers with two needles.
Materials needed:
- Two knitting needles, size US 8 or as preferred
- Worsted weight yarn in your desired color
- Tapestry needle
- Scissors
Step 1: Cast on stitches
Begin by casting on the desired number of stitches. A good starting point is around 30 stitches for an average-sized adult foot. Adjust the number of stitches as needed to fit your foot.
Step 2: Knit the sole
Using the knit stitch, work back and forth in rows to create the sole of the slipper. Continue knitting until the sole reaches your desired length, typically around 8-10 inches for an adult slipper.
Step 3: Shape the toe
To shape the toe, decrease stitches gradually. You can do this by knitting two stitches together at the beginning and end of each row. Continue decreasing until you have a small number of stitches left, then bind off.
Step 4: Knit the top of the slipper
With right sides facing, sew the sole together along the sides using a tapestry needle and yarn. This will create the top portion of the slipper. Leave a small opening for your foot to slide in.
Step 5: Add finishing touches
Trim any excess yarn and weave in loose ends with a tapestry needle. You can also add optional decorative elements, such as pom-poms or buttons, to personalize your slippers.
With these simple steps, you can knit your own cozy slippers with just two needles. Experiment with different yarn colors and textures to create unique and comfortable slippers that are perfect for lounging around the house.
Knitting supplies you will need to make knitted slippers
To make knitted slippers, you will need a few essential knitting supplies. These supplies will help you create a comfortable and cozy pair of slippers that you can enjoy wearing indoors.
1. Knitting Needles: The most important supply you will need is a pair of knitting needles. For this pattern, you will need two straight needles, preferably with a size that is comfortable for you to work with. Choose a needle size that matches the yarn you will be using.
2. Yarn: Select a soft and warm yarn for your slippers. You can choose any color or texture that you like. Make sure to check the yarn label for the recommended needle size and tension information. This will help you determine the right yarn to use for your slippers.
3. Stitch markers: Stitch markers can be helpful for keeping track of your stitches and marking important points in your pattern. You can use small rings or even pieces of contrasting yarn to serve as your stitch markers.
4. Tapestry needle: A tapestry needle is used for sewing up seams and weaving in loose ends. Make sure to choose a needle with a large enough eye to accommodate your yarn thickness.
5. Scissors: Scissors are essential for cutting yarn and snipping any loose ends. Choose a pair of small, sharp scissors that are comfortable to work with.
6. Measuring tape: A measuring tape is useful for checking your gauge and ensuring your slippers are the correct size. You can also use a ruler or any other measuring tool that you have available.
With these knitting supplies, you will have everything you need to start creating your own pair of knitted slippers. Gather all your materials before you begin, and soon you’ll have cozy slippers to keep your feet warm and comfortable.
Choosing the right yarn for your knitted slippers
When it comes to knitting slippers, choosing the right yarn is essential to ensure both comfort and durability. The yarn you choose will determine the overall feel and warmth of your slippers, as well as how well they hold up with regular use. Here are some factors to consider when selecting yarn for your knitted slippers.
Fiber Content
The fiber content of the yarn will play a big role in the comfort and durability of your knitted slippers. Wool is a popular choice for slippers due to its natural insulating properties, breathability, and ability to regulate temperature. It is also moisture-wicking, which helps to keep your feet dry and comfortable. For those with wool allergies, there are also many synthetic options available that offer similar benefits.
Another factor to consider is the blend of fibers in the yarn. Some yarns may combine wool with other fibers such as acrylic or nylon to enhance durability and softness. This blend can provide the best of both worlds, with the warmth and breathability of wool combined with the durability and easy care of synthetic fibers.
Weight
The weight of the yarn is another important consideration for knitted slippers. Slippers that are too bulky may feel uncomfortable and make it difficult to move around. On the other hand, slippers made with yarn that is too lightweight may lack the necessary warmth and cushioning. It is recommended to choose a medium weight yarn that provides a good balance between warmth and comfort.
Color and Design
While the color and design of the yarn may not affect the functionality of your slippers, it can certainly add a personal touch. The wide variety of yarn colors and patterns available allows you to get creative and match your slippers to your personal style or the decor of your home. Whether you prefer bold and vibrant colors or more subtle and neutral tones, there is a yarn option that will suit your preferences.
Overall, choosing the right yarn for your knitted slippers is a crucial step in ensuring their comfort and longevity. By considering factors such as fiber content, weight, and design, you can find the perfect yarn that will result in cozy and durable slippers that you’ll love to wear.
Selecting the Perfect Needle Size for Your Knitted Slippers
When it comes to knitting slippers, selecting the right needle size is crucial for achieving the perfect fit and desired texture. The needle size you choose will impact the gauge of your project and determine how tight or loose your stitches will be. Here are some tips to help you select the perfect needle size for your knitted slippers.
1. Know your yarn weight: Before you can choose the correct needle size, you need to know the weight of your yarn. Yarns are typically categorized into different weights, such as fingering, sport, worsted, and bulky. Each weight requires a different needle size to achieve the desired tension and drape. Refer to the yarn label or look up the recommended needle size for the specific yarn weight you are using.
2. Consider your gauge: Gauge refers to the number of stitches and rows in a given measurement. It is important to match the gauge specified in the pattern for your slippers to ensure they fit properly. If your stitches are too tight and your gauge is smaller than the pattern, try using a larger needle size. Conversely, if your stitches are too loose and your gauge is larger than the pattern, go down a needle size.
3. Experiment and swatch: It’s always a good idea to make a swatch before starting your project. Knit a small sample using different needle sizes to see how the yarn and stitches behave. This will help you determine which needle size produces the desired fabric texture and gauge. Keep in mind that different knitters may have slightly different tensions, so it’s important to find the needle size that works best for you.
4. Consider the slipper style: The style of the knitted slippers can also influence your needle size choice. For example, if you want a more snug and dense slipper, you may opt for a smaller needle size. On the other hand, if you prefer a looser and more breathable slipper, using a larger needle size might be more appropriate.
Remember, selecting the perfect needle size for your knitted slippers is a personal preference that can vary depending on the yarn weight, gauge, and desired outcome. Don’t be afraid to experiment and swatch until you find the right needle size that works for you and your project.
Casting on stitches for your knitted slippers
When starting your knitted slippers, one of the first steps is to cast on the stitches. The number of stitches you cast on will depend on the desired size of your slippers and the yarn you are using. It’s important to follow the pattern instructions to ensure the correct number of stitches.
One common method of casting on stitches is called the long tail cast on. To begin, you will need to leave a long tail of yarn before creating a slipknot. Hold the yarn with your dominant hand, with the tail end over your thumb and the working end over your index finger. Insert your needle through the loop on your thumb, then go under the yarn on your index finger and bring the needle back through the loop on your thumb. Slip the loop off your thumb and tighten the stitch.
If you prefer a stretchy cast on, you can use the knitted cast on method. Start by making a slipknot and placing it on your needle. Insert your needle into the slipknot as if to knit, then wrap the working yarn around the needle from back to front. Pull the yarn through the slipknot, creating a new stitch. Slip the stitch onto the left needle, then repeat the process until you have the desired number of stitches.
- Long tail cast on: This method creates a neat and firm edge, perfect for slippers that need structure and stability.
- Knitted cast on: This method creates a stretchier edge, ideal for slippers that need to accommodate different foot sizes.
Remember to take your time when casting on and ensure your stitches are not too tight or too loose. It’s important to maintain an even tension to ensure your slippers fit well and are comfortable to wear. Once you have cast on all the required stitches, you can begin knitting the rest of the slipper pattern, following the instructions step by step.
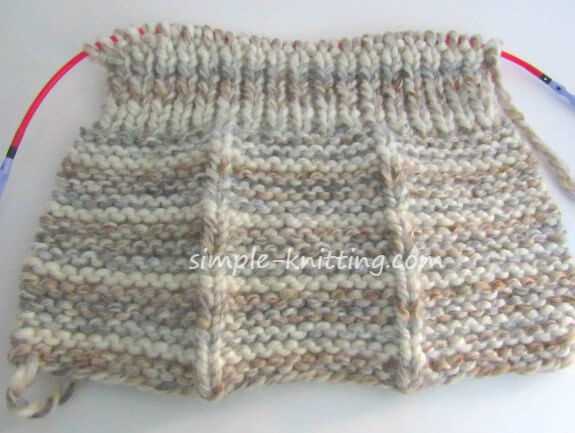
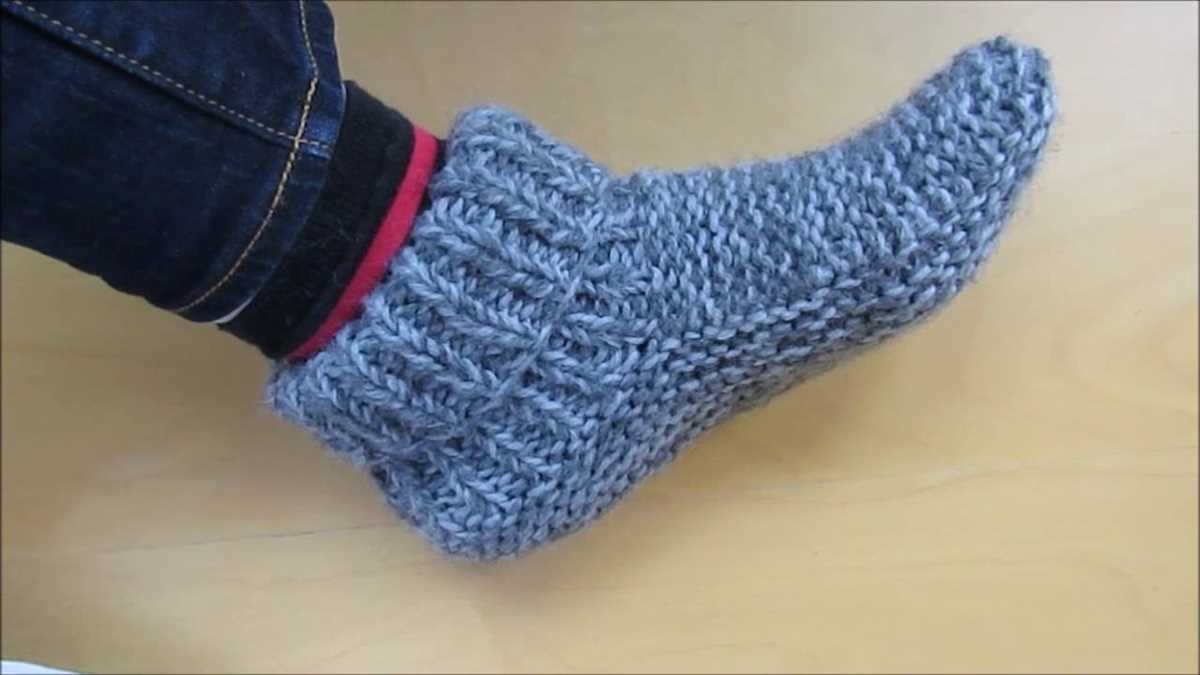
Knitting the sole of your knitted slippers
When knitting a pair of slippers, one of the most important parts is the sole. The sole provides comfort and protection to your feet, so it’s crucial to knit it well. To begin knitting the sole, you will need two needles and your chosen yarn.
Step 1: Start by casting on the desired number of stitches, depending on the size of the slippers. It’s important to have an even number of stitches to make the knitting process easier. You can use a long-tail cast on method for a neat and stretchy edge.
Step 2: Once you have cast on, begin knitting the sole using a basic knit stitch. Knit every row to create a stockinette stitch pattern. This will ensure that the sole is smooth and comfortable.
Step 3: As you knit the sole, make sure to regularly check the length by placing your foot on the knitted fabric. This will help you determine if you need to add or decrease stitches to achieve the perfect fit. It’s better to err on the side of slightly snug, as the yarn will stretch with wear.
Step 4: Continue knitting until the sole reaches the desired length, typically covering the heel and toe areas of your foot. Remember to leave enough room for the top of the slipper, as you will need to join the sides later on.
Step 5: Once you have reached the desired length, bind off your stitches to secure the edge of the sole. You can use a regular bind off method or any other stretchy bind off technique that you prefer.
By following these steps, you can create a well-knit sole for your knitted slippers. Remember to take your time and adjust as necessary to ensure a comfortable fit. Happy knitting!
Creating the heel and instep of your knitted slippers
One of the important steps in creating knitted slippers is shaping the heel and instep. This is where you will start to see the slipper take form and fit comfortably on your foot. Here are some tips and instructions on how to create the heel and instep section of your knitted slippers.
1. Shaping the heel
To create the heel of your knitted slippers, you will need to work on a portion of stitches in the center of your work. This can be done by dividing your stitches evenly on two needles, with half of the stitches on each needle. You will then work back and forth on these stitches, creating a square or rectangular shape.
Tip: To create a snug fit and prevent slipping, you can decrease the number of stitches gradually as you work on the heel. This will create a more tapered shape and ensure a better fit.
2. Shaping the instep
The instep section of your knitted slippers is where your foot will go, so it’s important to create a comfortable and snug fit. To shape the instep, you will need to join the two sides of your work by picking up stitches along the edges of the heel.
Tip: You can use a needle or crochet hook to pick up stitches along the edges of the heel. Make sure to pick up enough stitches to create a smooth transition between the heel and the instep.
Once you have picked up the stitches, you can continue working in the round to create the top part of the slipper and complete the instep section. This may involve working in various stitch patterns or simply continuing in stockinette stitch.
Tip: It’s important to try on your slipper as you go along to ensure a proper fit. Adjust the number of stitches or the length of the heel and instep sections as needed to ensure a comfortable fit.
By following these steps, you can create the heel and instep sections of your knitted slippers with ease. Remember to take your time and make any necessary adjustments to ensure a comfortable and well-fitting pair of slippers.
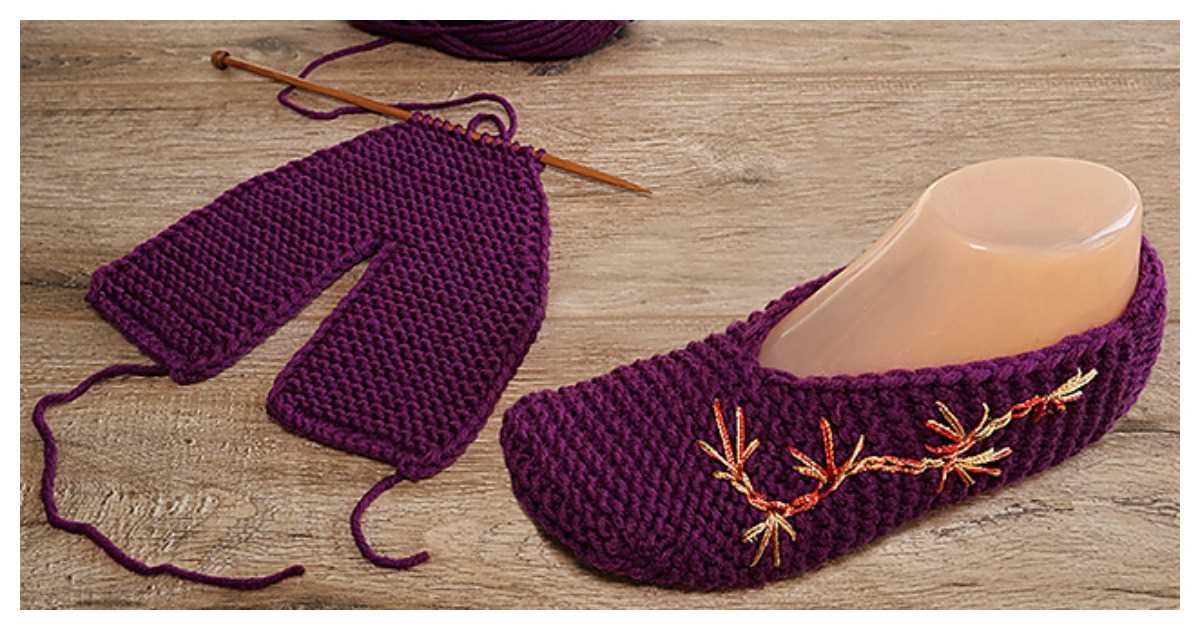
Shaping the toe of your knitted slippers
One important step in knitting your slippers is shaping the toe. This is what gives the slippers their comfortable and snug fit. To shape the toe, you will need to decrease stitches gradually to create a rounded shape.
1. Start decreasing stitches
Begin by placing markers on each side of the center stitches. This will help you keep track of where the decreases need to be made. You can use a contrasting color yarn or stitch markers for this. Then, follow the pattern instructions to decrease stitches evenly on each side of the markers. This can be done by working knit two stitches together (k2tog) or purl two stitches together (p2tog).
2. Repeat the decrease rows
Continue decreasing stitches on each side of the markers every few rows, following the pattern instructions. This will gradually shape the toe of your slippers. Make sure to keep counting your stitches to ensure you are decreasing the correct number of stitches.
3. Shape the toe until desired length
Keep shaping the toe until you have reached the desired length for your slippers. This will depend on the size and fit you prefer. Once you have achieved the desired length, you can finish off the toe by either binding off stitches or grafting the stitches together using the Kitchener stitch.
By following these steps, you will be able to shape the toe of your knitted slippers and create a comfortable and customized fit. Remember to always check the pattern instructions for any specific details or variations. Happy knitting!
Finishing the edges of your knitted slippers
When knitting slippers, one important step is finishing the edges to ensure a neat and professional-looking finish. There are a few different techniques you can use to finish the edges of your knitted slippers, depending on the desired look and durability.
1. Single crochet edge
One popular method is to use single crochet stitches to create an edge along the raw edges of the slippers. This technique helps to reinforce the edges and prevents them from unraveling. To do this, simply insert your hook into the first stitch or loop along the edge, yarn over, and pull through. Then, yarn over again and pull through both loops on your hook. Repeat this process for each stitch along the edge, working either in continuous rounds or rows depending on the pattern.
2. Slip stitch edge
Another option is to use slip stitch stitches to create a clean and simple edge. This technique is ideal for slippers with a more delicate or decorative design. To create a slip stitch edge, insert your hook into the first stitch or loop along the edge, yarn over, and pull through both the stitch and the loop on your hook. Repeat this process for each stitch along the edge. Slip stitch edges can be worked in continuous rounds or rows, depending on the pattern.
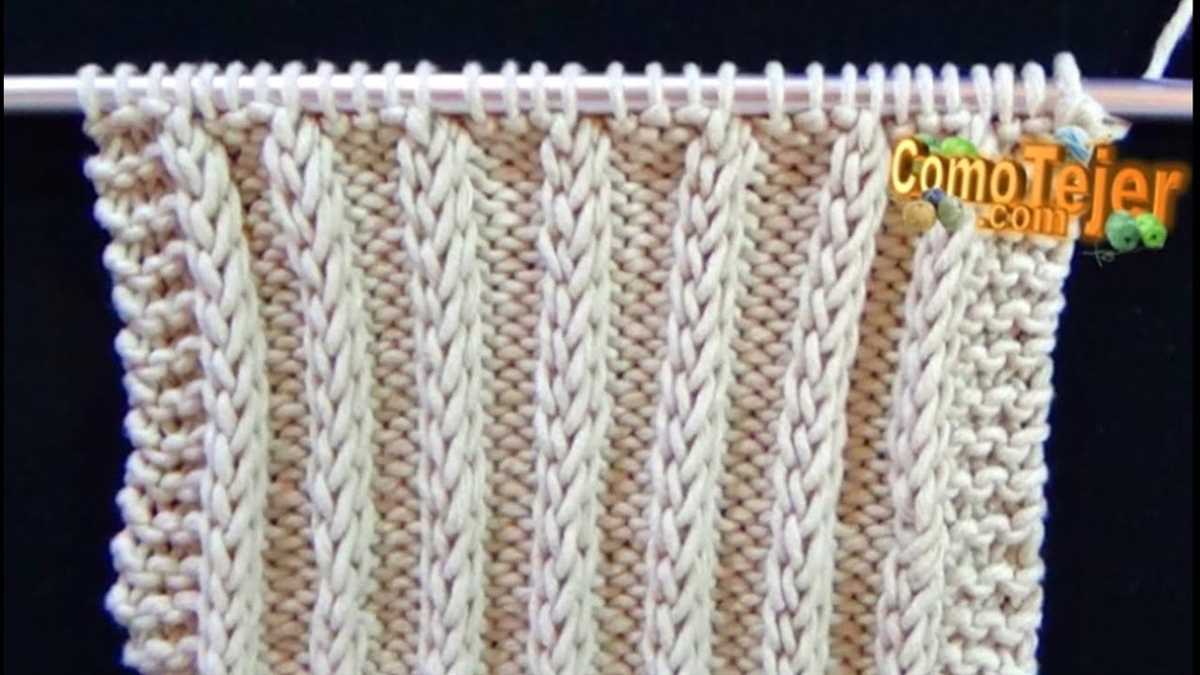
3. Ribbed or garter stitch edge
If you prefer a more textured or decorative edge, you can also consider using ribbed or garter stitch along the edges of your knitted slippers. Ribbed edges are created by alternating knit and purl stitches to create vertical columns of stitches. Garter stitch edges are created by knitting every row or round. These techniques can add a visually appealing finish to your slippers and provide added durability.
In conclusion, finishing the edges of your knitted slippers is an important step in creating a polished and professional-looking finished product. Whether you choose to use single crochet, slip stitch, ribbed, or garter stitch edges, each technique offers its own unique benefits and can help ensure that your slippers look and feel their best.
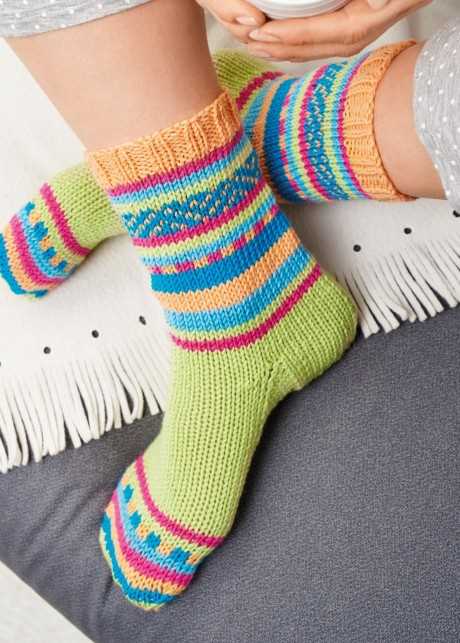
Adding decorative elements to your knitted slippers
Knitted slippers are not only practical and comfortable, but they can also be a stylish and personalized accessory. By adding decorative elements to your slippers, you can make them unique and showcase your creativity. Whether you prefer subtle embellishments or bold designs, there are various ways to add a touch of flair to your knitted slippers.
Colorwork: One of the easiest ways to add decorative elements to your knitted slippers is through colorwork. You can incorporate different colored yarns to create stripes, geometric patterns, or intricate motifs. Fair Isle and intarsia techniques can be used to achieve stunning colorwork designs. Experiment with contrasting or complementary colors to make your slippers visually appealing.
Embroidery: Another way to add decorative elements is through embroidery. You can use embroidery floss or yarn to stitch intricate designs on your slippers. Embroidery allows you to add intricate details, such as flowers, animals, or personalized monograms. You can also use different stitches, such as satin stitch, backstitch, or chain stitch, to create texture and dimension.
Appliques: Appliques are another great option for adding decorative elements to your knitted slippers. You can create or purchase pre-made appliques in various shapes and designs, such as flowers, stars, or animals, and attach them to your slippers using yarn and a needle. This allows you to easily add a focal point or a pop of color to your slippers.
Pom-poms and tassels: For a fun and playful touch, you can add pom-poms or tassels to your knitted slippers. You can make them using yarn in coordinating or contrasting colors and attach them to the back or front of your slippers. Pom-poms and tassels can add a whimsical element to your slippers and make them stand out.
Buttons and beads: If you prefer a more subtle embellishment, you can add buttons or beads to your slippers. You can sew buttons in a decorative pattern or add beads as accents. This can give your slippers a delicate and elegant touch.
With these decorative elements, you can transform your knitted slippers into unique and personalized creations. Don’t be afraid to experiment and let your creativity shine through in your designs.
Tips and Tricks for Perfect Knitted Slippers
Knitting slippers can be a fun and rewarding project, but it can also be a little tricky to get them just right. Here are some tips and tricks to help you create the perfect knitted slippers:
1. Choose the Right Yarn:
When knitting slippers, it’s important to choose a yarn that is durable and comfortable. Look for a yarn that is soft and has a tight twist to help your slippers hold their shape. Consider using a yarn with some stretch to ensure a good fit.
2. Use the Right Needles:
Choose the right size needles for your yarn to achieve the correct gauge. If your slippers are coming out too small, try using larger needles. If they are too large, try smaller needles. Circular needles can be useful for knitting the body of the slipper, while double-pointed needles are great for the toe and heel shaping.
3. Swatch and Gauge:
Before diving into your slipper project, make a swatch to ensure you have the correct gauge. This will help you determine the number of stitches and rows you need for the size you want. Adjust your needle size if necessary to achieve the desired gauge.
4. Pay Attention to Tension:
Be mindful of your tension while knitting to ensure consistent stitch size throughout your slipper. Loose tension can result in a floppy slipper, while tight tension can make the slipper too stiff and uncomfortable. Practice and experimentation will help you find the perfect tension for your knitting style.
5. Proper Finishing:
The finishing touches can make a big difference in the overall look and fit of your knitted slippers. Take the time to properly weave in ends and seam any necessary sections. Blocking your slippers can also help to shape and relax the stitches for a more professional finish.
6. Add Nonslip Soles:
To make your slippers safer to walk in, consider adding nonslip soles. You can purchase pre-made adhesive soles or create your own using materials like latex or puffy paint. Apply the soles to the bottom of your slippers and allow them to dry fully before wearing.
7. Don’t Forget the Personal Touch:
Finally, don’t hesitate to put your own personal touch on your knitted slippers. Add embellishments like buttons, bows, or embroidery to make your slippers unique and special.
By following these tips and tricks, you’ll be well on your way to creating the perfect pair of knitted slippers. Remember, practice makes perfect, so don’t be afraid to experiment and make adjustments along the way. Happy knitting!