
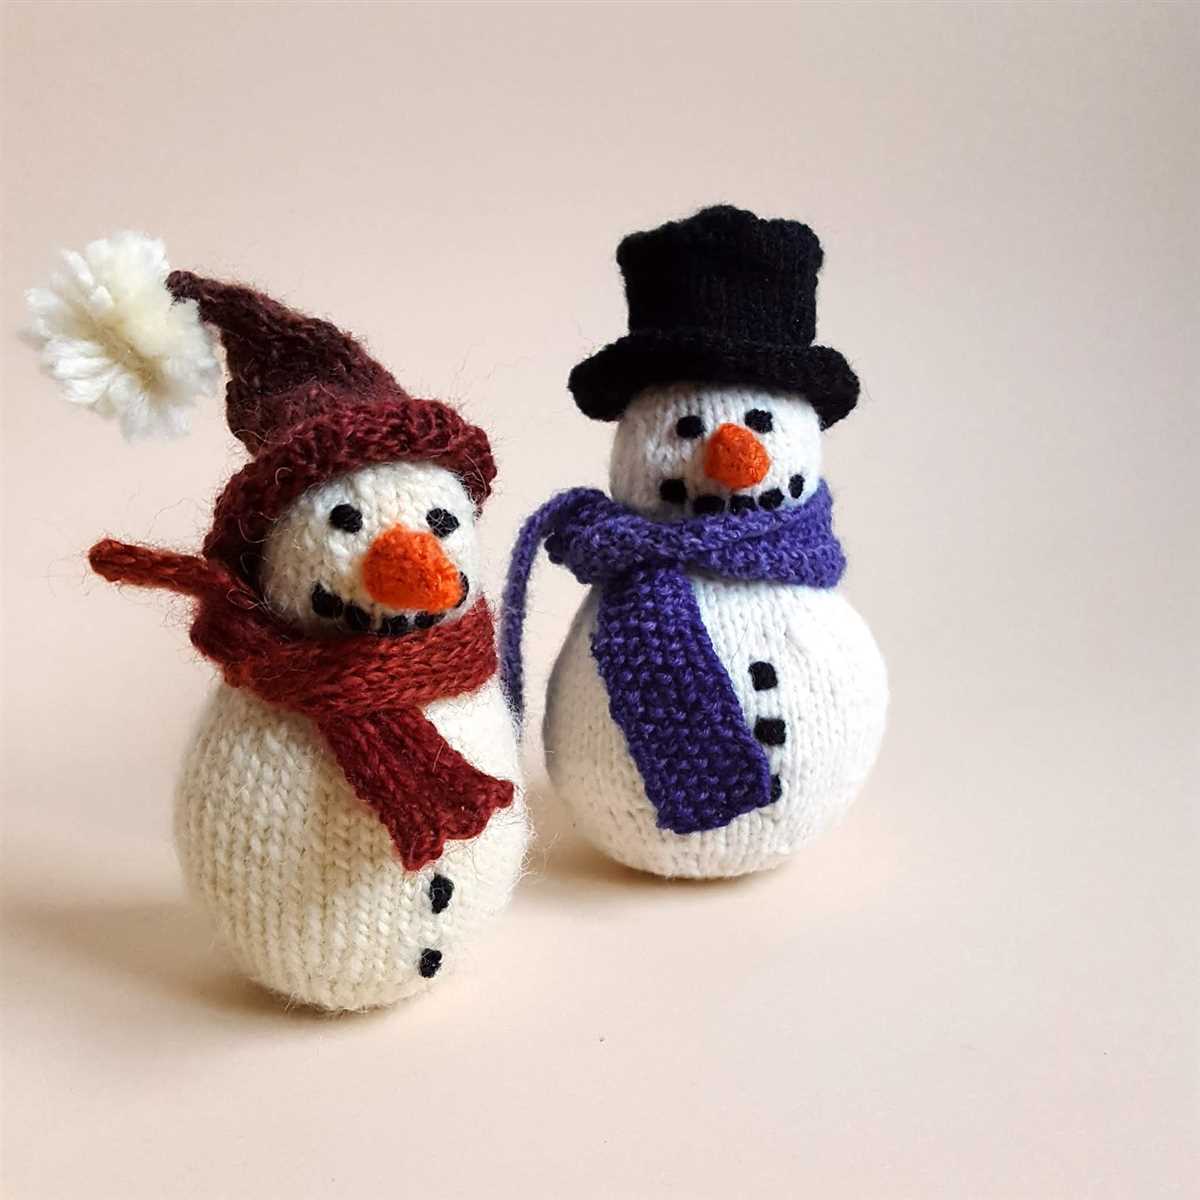
If you’re a knitting enthusiast looking for a fun project to work on during the winter season, then look no further! We have a free knitted snowman pattern that you can download and start working on right away. This adorable snowman will make a great addition to your holiday decorations and can even be given as a gift to loved ones.
This pattern is suitable for knitters of all skill levels, from beginners to more experienced knitters. All you need is some yarn in white, black, and orange, as well as a pair of knitting needles. The finished snowman stands about 10 inches tall, making it the perfect size to display on a mantelpiece or tabletop.
The pattern includes step-by-step instructions, along with clear and easy-to-follow diagrams. It covers all the necessary stitches and techniques, making it a great way to improve your knitting skills while creating something cute and festive. So why not download the pattern today and get started on this fun winter project?
Materials needed for the knitted snowman
When making the knitted snowman, you will need several materials to complete the project. These materials include:
- Yarn: You will need different colors of yarn to create the different parts of the snowman, such as white for the body, black for the eyes and mouth, and orange for the nose. Choose a soft and medium-weight yarn suitable for knitting.
- Knitting needles: Select a pair of knitting needles that are appropriate for the size of yarn you have chosen. The needle size will depend on your personal knitting style and tension.
- Tapestry needle: A tapestry needle is necessary for sewing together the different parts of the snowman, such as attaching the head to the body and adding the details.
- Stuffing: To give the snowman a three-dimensional shape, you will need stuffing material. This can be polyester fiberfill or any other suitable stuffing material.
- Scissors: You will need a pair of scissors to cut the yarn and trim any excess thread.
Having these materials ready before starting the project will ensure a smooth knitting experience and help you create a beautiful knitted snowman. Enjoy the process of bringing this adorable winter character to life!
Step-by-step instructions for knitting the snowman:
Knitting a snowman can be a fun and rewarding project, especially during the winter season. To help you get started, here are step-by-step instructions for knitting your very own snowman:
Materials needed:
- Yarn (white, black, and orange)
- Knitting needles (size determined by your yarn choice)
- Yarn needle
- Scissors
- Stuffing material
- Buttons or other embellishments (optional)
Step 1: Cast on
To begin, cast on the desired number of stitches using your white yarn. This will be the base of your snowman’s body.
Step 2: Knit the body
Continue knitting the body in the round until it reaches the desired height. You can adjust the height to your preference by adding or subtracting rows.
Step 3: Shape the head
To shape the head, decrease the number of stitches gradually. This will create a rounder shape for your snowman’s head.
Step 4: Knit the arms and scarf
Using black yarn, knit two small rectangles for the snowman’s arms. Then, knit a longer rectangle in a different color for the scarf. You can choose any color you like for the scarf.
Step 5: Attach the arms and scarf
Sew the arms onto the snowman’s body using a yarn needle. Then, wrap the scarf around the neck and secure it in place with a few stitches.
Step 6: Create the face
Using black yarn, embroider the snowman’s eyes and mouth onto the face. For the nose, use the orange yarn and create a small triangle shape.
Step 7: Stuff and finish
Once you are satisfied with the appearance of your snowman, stuff it with your chosen stuffing material. Make sure to fill it evenly for a plump and round look. Finally, sew up the bottom of the snowman to close it off.
That’s it! You’ve successfully knitted your very own snowman! Feel free to add any additional embellishments or accessories to make it unique. Enjoy your new winter decoration or gift it to a loved one.
Tips for successful knitting
Knitting is a wonderful hobby that allows you to create beautiful and unique pieces. Whether you’re a beginner or an experienced knitter, here are some tips to help you achieve successful results:
1. Choose the right yarn and needles
When starting a knitting project, it’s essential to select the appropriate yarn and needles for the desired outcome. Consider the pattern’s recommendations and the desired texture, color, and thickness. Using the wrong yarn or needles can affect the gauge and overall appearance of your knitting.
2. Practice proper tension and gauge
Tension and gauge are crucial in knitting. Tension refers to how tightly you hold the yarn, while gauge measures the number of stitches and rows per inch in your knitting. Be consistent in your tension throughout the project to achieve an even and uniform finished piece.
3. Read and understand the pattern
Before starting any knitting project, carefully read and understand the pattern instructions. Pay attention to terminology, abbreviations, and any special techniques required. It’s helpful to highlight or annotate important sections to ensure you follow the pattern accurately.
4. Take breaks and rest your hands
Knitting can be a repetitive and time-consuming activity, so it’s essential to take breaks and rest your hands regularly. Stretching your fingers, wrists, and arms can help prevent cramping and reduce the risk of developing repetitive strain injuries.
5. Count your stitches and rows
Counting your stitches and rows is essential for maintaining accuracy in your knitting. Regularly check your stitch count against the pattern instructions to avoid mistakes and ensure that you’re on the right track.
6. Practice patience and perseverance
Knitting requires patience and perseverance, especially when tackling more complex projects. If you make a mistake, don’t panic. Take the time to fix it or, if necessary, unravel and start again. Remember, even experienced knitters make mistakes, so don’t get discouraged.
7. Block your finished pieces
Blocking is the process of shaping and setting your finished knitted piece. It involves wetting or steaming the item and then laying it flat to dry in the desired shape. Blocking can help even out stitches, improve drape, and give your finished piece a more polished look.
By following these tips, you’ll enhance your knitting skills and increase the likelihood of achieving successful and beautiful knitted creations.
How to Assemble the Knitted Snowman
Assembling the knitted snowman is a fun and rewarding step in completing your winter project. Follow these simple instructions to bring your snowman to life.
Gather your materials
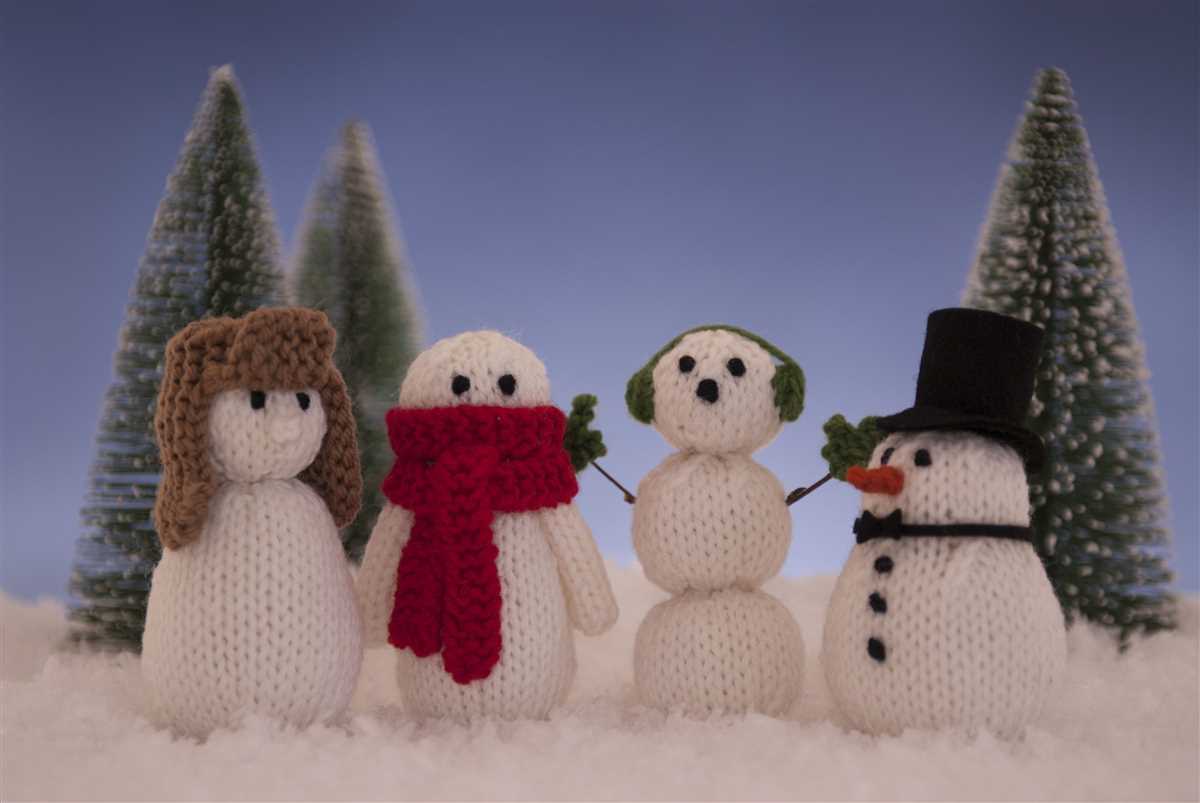
Before you begin assembling, make sure you have all the materials you need. This includes the knitted pieces for the snowman’s body, buttons or beads for the eyes and buttons for the mouth, a carrot for the nose, branches for the arms, and any additional decorations you want to add.
Attach the body pieces
Start by attaching the knitted body pieces together. Place the bottom piece on a flat surface and align the sides of the middle and top pieces. Use a tapestry needle and matching yarn or thread to sew the pieces together, making sure to securely attach them.
Add the facial features
Next, it’s time to add the snowman’s facial features. Sew on the buttons or beads for the eyes, making sure they are evenly spaced and secure. Attach the buttons for the mouth in a smile or any other desired expression. Finally, use a tapestry needle and yarn to sew the carrot nose in place.
Attach the arms
Now it’s time to give your snowman some arms. Take the branches or other materials you have chosen and insert them into the sides of the snowman’s body. Make sure they are securely attached and positioned as desired.
Add final touches
Lastly, you can add any additional decorations or accessories to your knitted snowman. This could include a scarf, hat, or any other winter-themed items you have in mind. Get creative and have fun personalizing your snowman.
Once you have completed all these steps, your knitted snowman is ready to be displayed and enjoyed. It’s a charming winter decoration that will bring joy to any space.
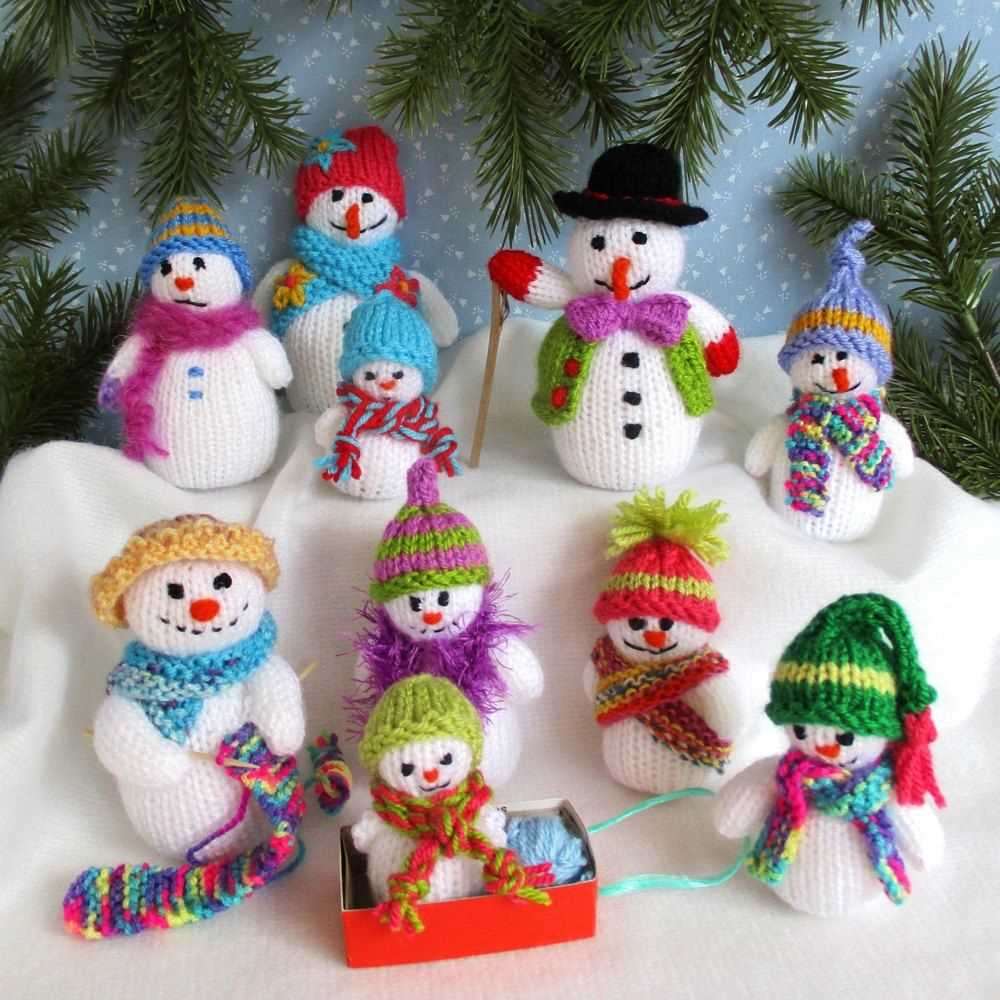
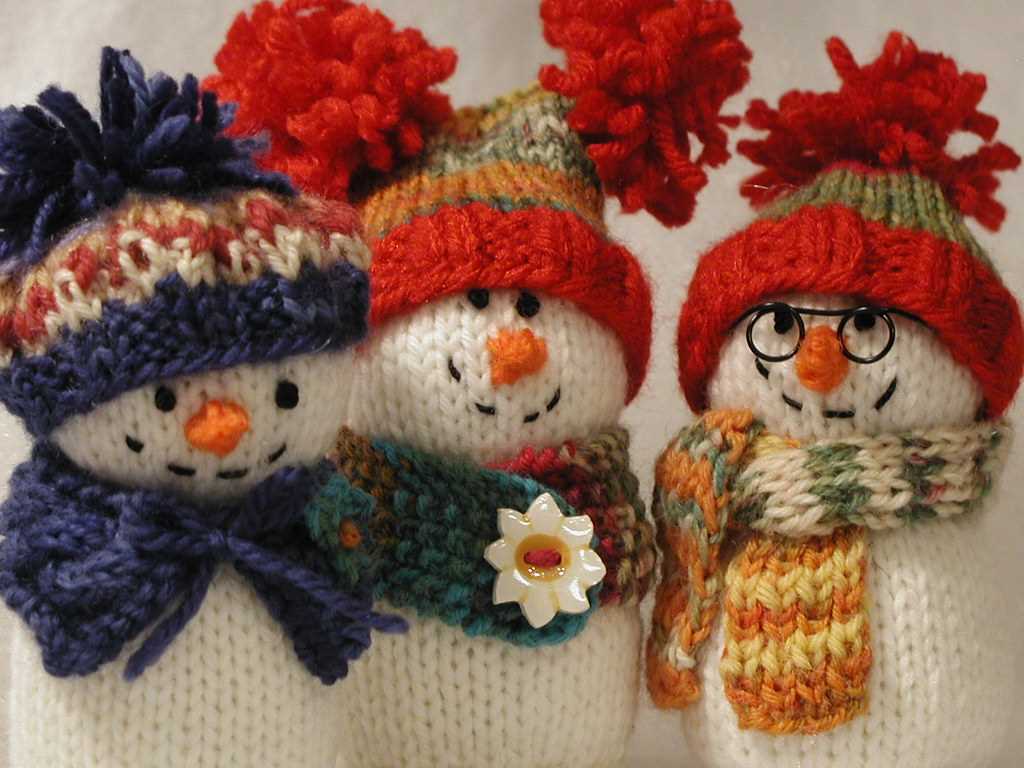
Additional accessories to customize your snowman
If you want to add a personal touch to your knitted snowman, there are many additional accessories you can make or find to customize its appearance. Here are some ideas to get you started:
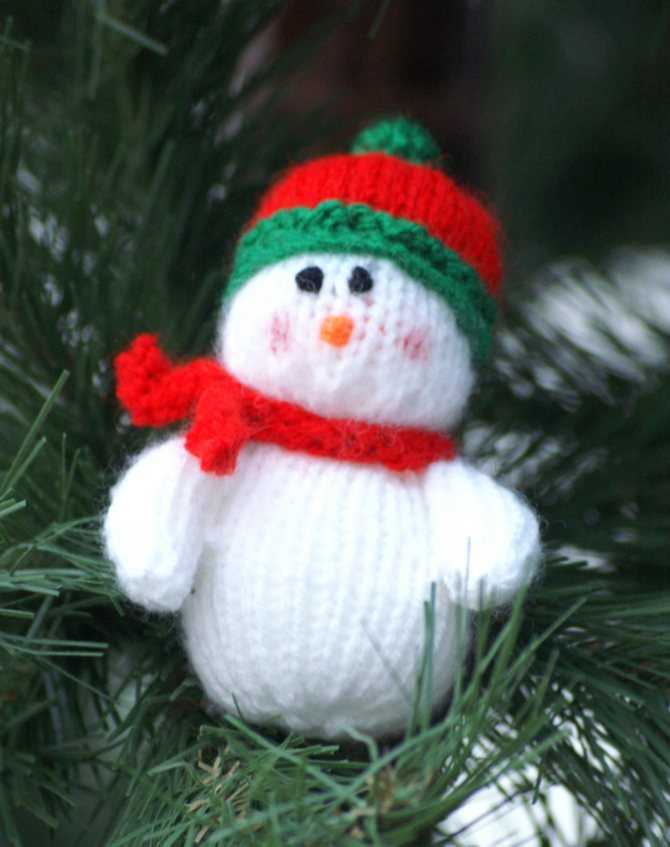
1. Hat:
A hat is a classic accessory for a snowman. You can knit or crochet a small beanie or use a miniature hat from a doll or toy. You can also use a piece of fabric or felt to create a festive winter hat.
Example: You can knit a red and white striped hat using the same yarn you used for the snowman’s body to create a coordinated look.
2. Scarf:
A scarf adds a cozy touch to your snowman. Knit or crochet a small scarf using a complementary color to the snowman’s body. You can also use a piece of fabric or ribbon to create a simple scarf.
Example: A blue scarf with white fringe would create a vibrant contrast against a white snowman.
3. Buttons:
Add some personality to your snowman by adding buttons for eyes, mouth, or even as decoration on its body. You can use small buttons in different colors or shapes to create a unique look.
Example: Sew on two green buttons for eyes and several small red buttons to create a vibrant smile.
4. Broom:
A small broom can give your snowman a whimsical touch. You can make a broom by gathering small twigs and tying them together with string or ribbon.
Example: Attach the broom to the snowman’s hand using yarn or thread for a natural and rustic look.
5. Top hat:
A top hat adds a touch of elegance to your snowman. You can use a small plastic top hat or make one out of black felt or cardboard.
Example: Create a black top hat with a red ribbon around it to add a festive touch.
- Remember to consider the size of your snowman when choosing accessories. Small buttons or a tiny hat might look better on a smaller snowman, while a larger snowman can handle bigger accessories.
- Also, take into account the materials you use for the accessories. Opt for weather-resistant materials if you plan to display your snowman outdoors.
Inspiration for different variations of knitted snowman
Knitting snowmen is a delightful and creative way to celebrate the winter season. With a wide array of knitting patterns available, you can easily create unique and charming snowmen to decorate your home or give as gifts. From classic designs to whimsical characters, the possibilities are endless.
One popular variation is the traditional snowman, featuring a round body, a carrot nose, and a black top hat. You can customize this design by adding different colored scarves, mittens, or even accessories like a broom or a pipe. Knitting multiple snowmen in different sizes and placing them together can create an adorable winter scene.
Whimsical Snowman Characters
- Chef Snowman: Give your snowman a culinary twist by knitting a chef snowman. You can add a chef’s hat, an apron, and even miniature kitchen utensils to complete the look.
- Snowboarding Snowman: For the snow enthusiasts, a snowboarding snowman is a fun option. Knit a snowman in a cool snowboarding pose and add a beanie, goggles, and a mini snowboard.
- Ballerina Snowman: Create an elegant and graceful snowman by knitting a ballerina snowman. Add a tutu, ballet shoes, and even a mini dance studio backdrop.
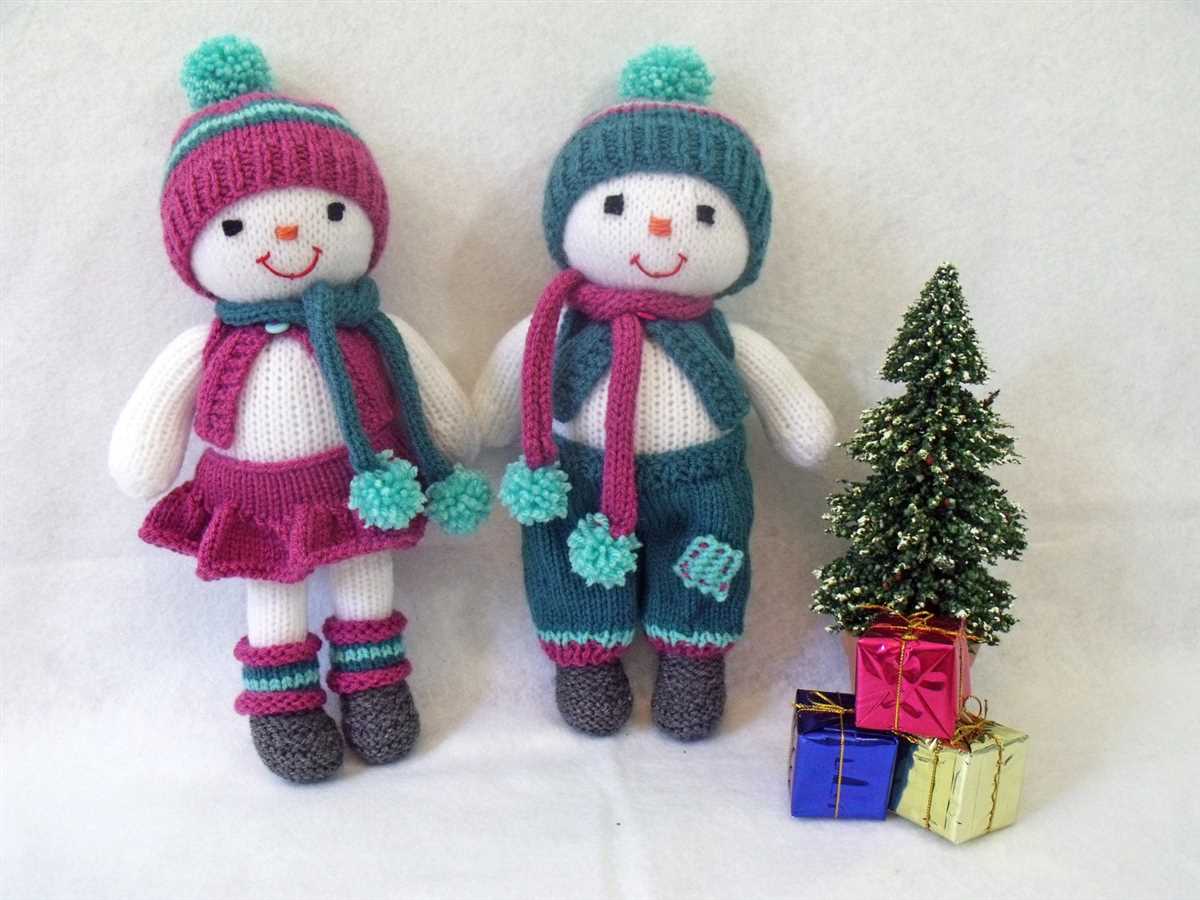
- Snowman Family: You can knit an entire snowman family to create a heartwarming display. Customize each snowman with different colored hats, scarves, and outfits to represent different family members.
These are just a few examples of the many variations you can create with knitted snowmen. Let your imagination run wild and experiment with different designs, colors, and accessories. Whether you prefer classic or whimsical characters, knitted snowmen are a charming addition to any winter decor.
Frequently asked questions about knitting snowmen
Knitting snowmen can be a fun and creative project for the winter season. Whether you are a beginner knitter or an experienced one, you may have some questions about knitting snowmen. Here, we have curated a list of frequently asked questions to help answer any queries you may have.
1. Where can I find a free knitting pattern for a snowman?
If you are looking for a free knitting pattern for a snowman, there are several websites and online knitting communities that offer downloadable patterns. You can search for “free knitted snowman pattern” on search engines and explore the various options available. Additionally, some yarn brands and knitting magazines also provide free patterns on their websites.
2. What kind of yarn should I use to knit a snowman?
When knitting a snowman, you can use any type of yarn that you like. However, using a bulky or super bulky weight yarn can help create a plump and cozy snowman. Acrylic or wool yarns are popular choices for snowman projects as they are soft, easy to work with, and come in a wide range of colors.
3. How long does it take to knit a snowman?
The time it takes to knit a snowman can vary depending on your knitting speed and the complexity of the pattern. A simple snowman pattern with basic stitches can be completed in a few hours or over a couple of days. However, if you choose a more intricate pattern with additional details, it may take longer to finish.
4. Can I customize the snowman’s features and accessories?
Yes, absolutely! One of the great things about knitting snowmen is that you can personalize them by adding your own creative touches. You can play around with different colors for the scarf, hat, and buttons, or even add accessories like a tiny knitted carrot for the nose or miniature mittens. Let your imagination run wild and have fun making your snowman unique!
5. Are there any tips for finishing and assembling the snowman?
When finishing and assembling your knitted snowman, it’s important to pay attention to the details. Use a tapestry needle to securely sew on the features, such as the eyes, mouth, and buttons, making sure they are properly aligned. Additionally, you can stuff the snowman with polyester fiberfill or other stuffing materials to give it a plump and firm shape. Don’t forget to weave in any loose ends and secure them tightly to prevent unraveling.
Knitting snowmen can be a rewarding and enjoyable project that allows you to showcase your knitting skills and creativity. With these frequently asked questions answered, you are ready to embark on your knitting journey and create your very own knitted snowman!
Ideas for using the knitted snowman as decoration
Once you have finished knitting your adorable snowman, there are so many creative ways to use it as a decoration. Here are some ideas to inspire you:
1. Christmas tree ornament: Attach a string or ribbon to the top of your knitted snowman and hang it on your Christmas tree. It will add a playful and cozy touch to your holiday decor.
2. Table centerpiece: Place your knitted snowman in the center of your dining table as a charming centerpiece. You can also add winter-themed accents like pinecones and faux snow to create a scenic winter wonderland.
3. Shelf display: Prop your knitted snowman on a shelf or mantel alongside other decorative items like candles and figurines. It will instantly bring a festive feel to any room.
4. Gift topper: Instead of using traditional bows or ribbons, use your knitted snowman as a unique and whimsical gift topper. The recipient will be delighted by the extra special touch.
5. Classroom decoration: If you’re a teacher or involved in a school setting, the knitted snowman can be used to decorate the classroom during the winter season. Kids will love seeing the handmade snowman and it will add a cheerful touch to the learning environment.
With these ideas, you can make the most of your knitted snowman and enjoy the cozy and festive atmosphere it brings to your home or any other space.