
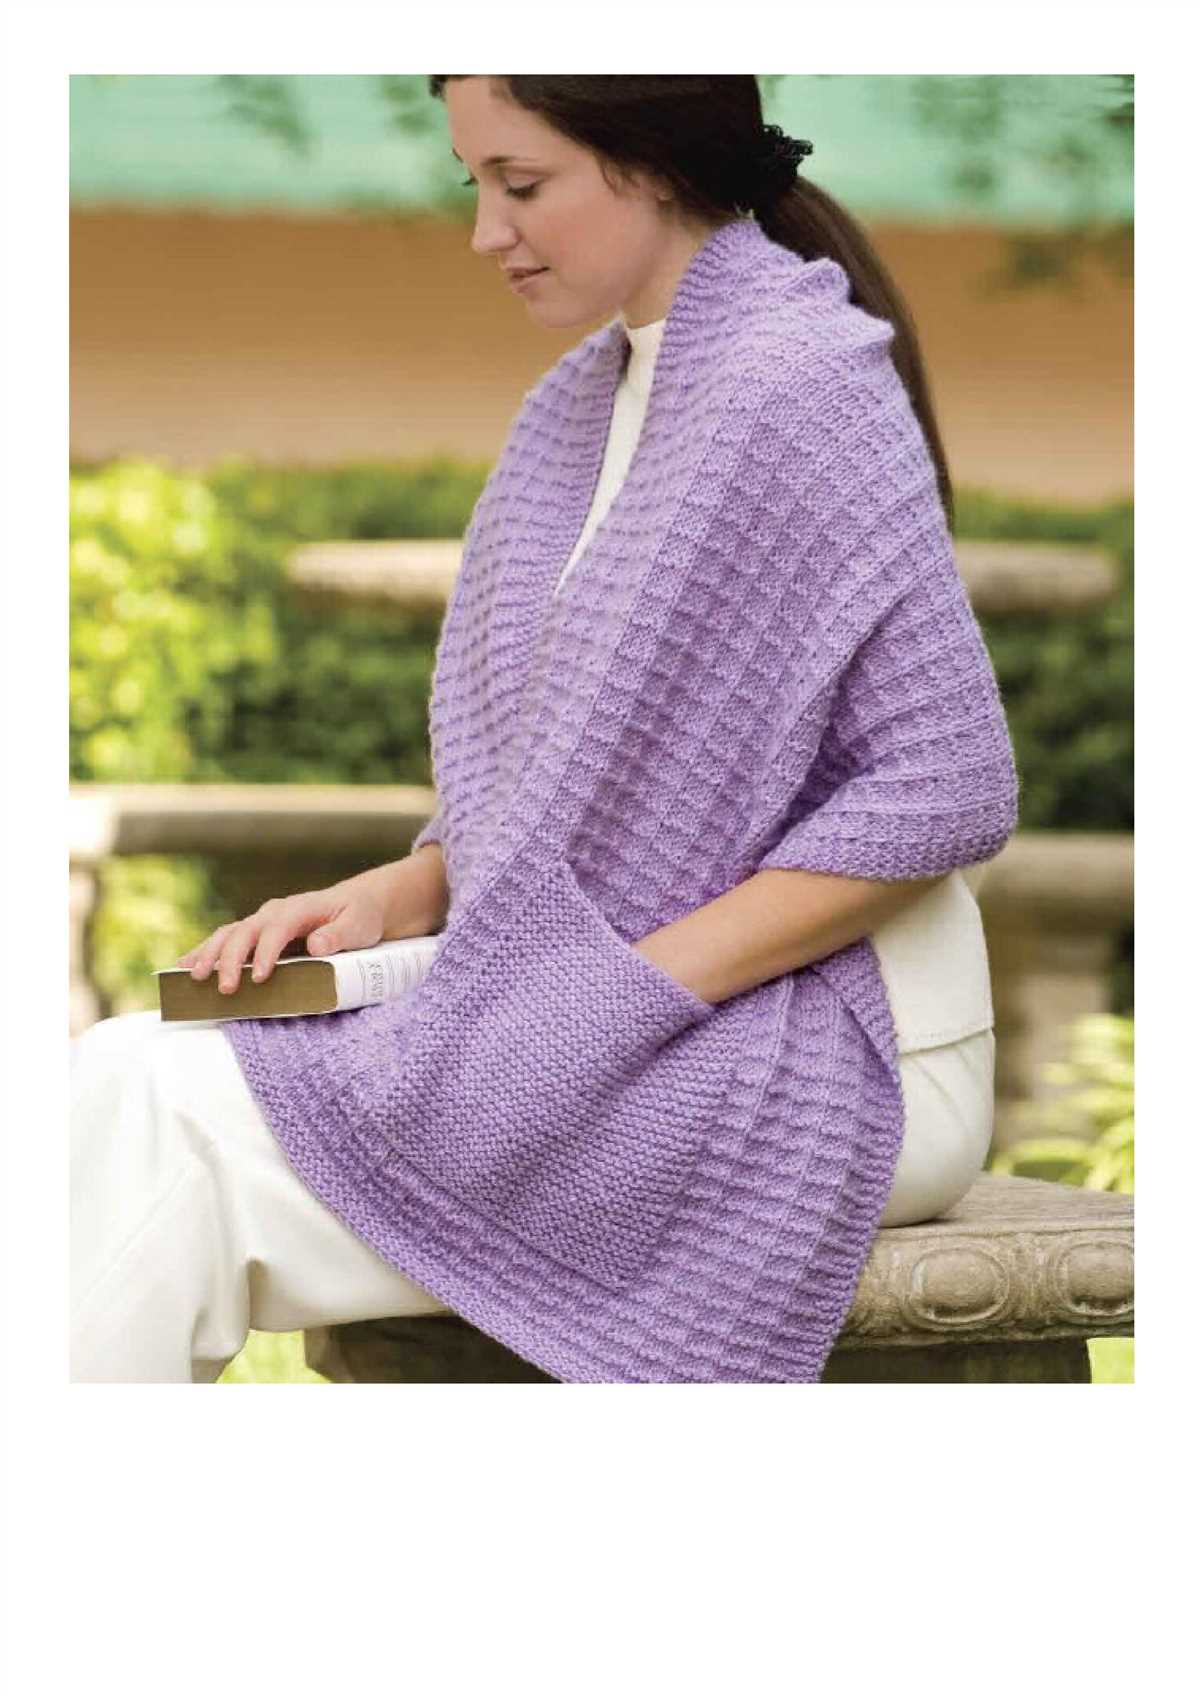
If you’re a fan of cozy knits and practical accessories, then you’re going to love this free knitted pocket shawl pattern!
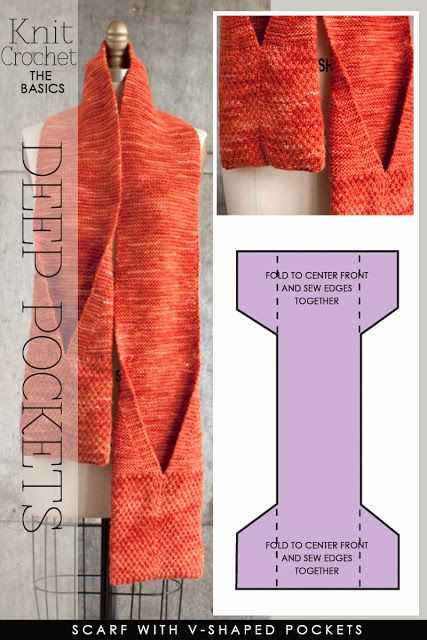
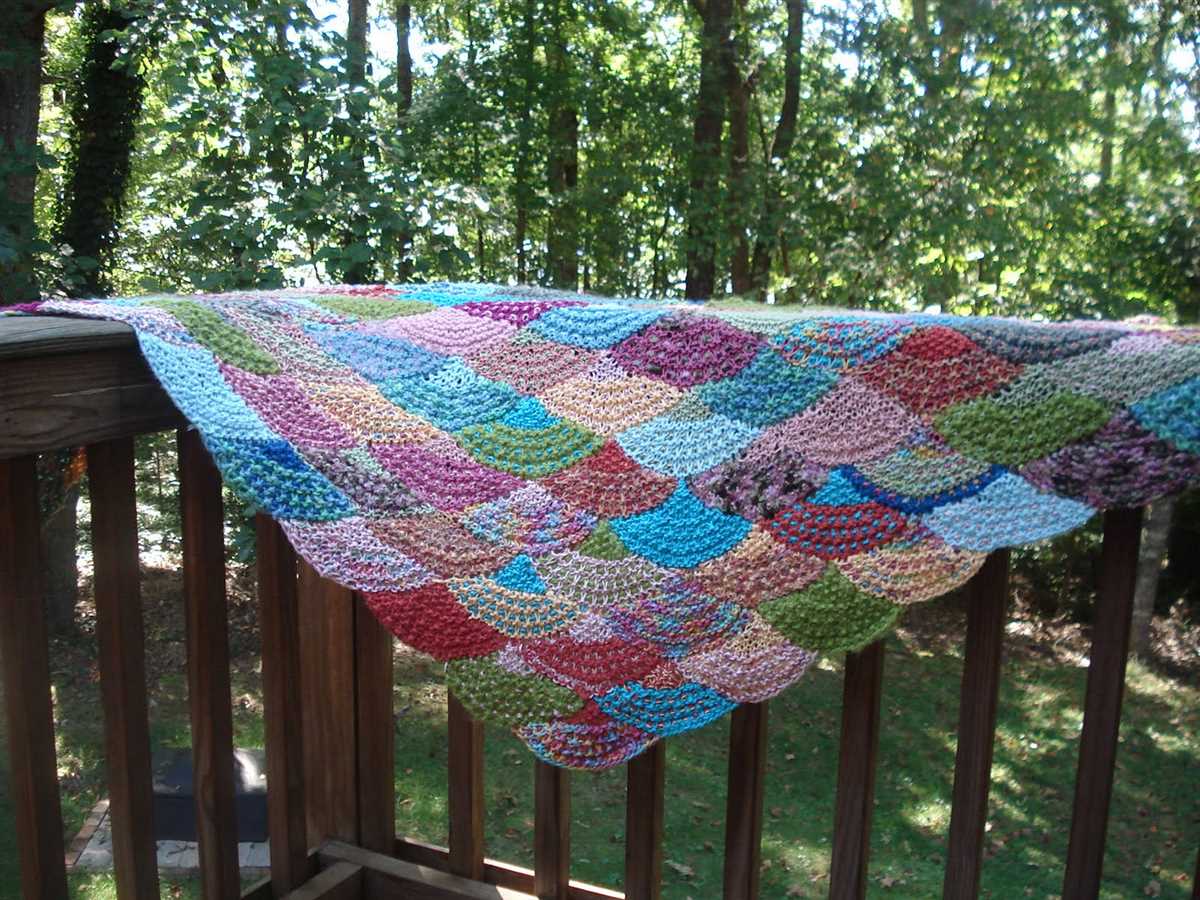
A pocket shawl is a versatile and stylish accessory that can be worn in a variety of ways. It’s essentially a shawl with built-in pockets, making it perfect for keeping your hands warm or storing small essentials like keys or a phone.
This particular pattern is beginner-friendly and requires basic knitting skills. It features a beautiful textured stitch pattern and simple garter stitch edging. The pockets are cleverly integrated into the design, so there’s no need for any extra sewing or assembly.
With just a few skeins of your favorite yarn and a pair of knitting needles, you’ll be able to create a cozy and functional accessory that you can wear all year round. Whether you’re lounging at home, running errands, or going for a walk in the park, this pocket shawl will add a touch of warmth and style to any outfit.
Free Knitted Pocket Shawl Pattern
If you’re looking for a cozy and stylish accessory to add to your wardrobe, look no further than a knitted pocket shawl. With its versatile design and practicality, a pocket shawl is a must-have for the colder months. And the best part? You can easily make your own with this free knitted pocket shawl pattern.
This pattern is suitable for knitters of all skill levels, from beginners to advanced. The pattern features a simple yet beautiful stitch pattern that creates a textured and cozy shawl. The addition of pockets adds both functionality and style, allowing you to keep your hands warm and store small items like keys or a phone.
To get started, you’ll need a set of knitting needles, a ball of yarn in your preferred color, and basic knitting skills. The pattern provides step-by-step instructions, including stitch counts and abbreviations, making it easy to follow along. Whether you prefer a solid color or want to experiment with different yarns, this pattern is customizable to your style.
Once you’ve completed your pocket shawl, you’ll have a trendy and practical accessory that can be worn in various ways. You can drape it over your shoulders for an elegant look, wrap it around your neck as a scarf, or secure it with a brooch for a stylish touch. The options are endless, and the pocket shawl is sure to become a staple in your winter wardrobe.
In conclusion, the free knitted pocket shawl pattern provides a fun and rewarding knitting project for any skill level. With its beautiful stitch pattern and practical pockets, this accessory is both stylish and functional. Don’t miss out on the opportunity to add this versatile piece to your wardrobe!
Materials Needed
Before you begin knitting your pocket shawl, make sure you have all the necessary materials. Here’s what you’ll need:
- Yarn: Choose a yarn that you love and that is suitable for the pattern. The pattern will usually specify the type, weight, and amount of yarn needed. Make sure to check your gauge and adjust the yarn accordingly.
- Knitting Needles: Use the correct size needles recommended in the pattern. This will ensure that your pocket shawl turns out as intended. If you’re unsure, you can always do a gauge swatch to check your needle size.
- Tapestry Needle: This is used for weaving in ends and sewing up any seams.
- Stitch Markers: These are helpful for keeping track of your stitches and marking important sections of the pattern.
- Scissors: A good pair of scissors is essential for cutting yarn and trimming any excess.
- Measuring Tape: This will come in handy for measuring your progress and checking the size of your pocket shawl as you go along.
- Pattern: Make sure to have a copy of the free knitted pocket shawl pattern that you will be using. You can either print it out or have it available on a digital device.
Having all these materials ready before you start knitting will make the process much smoother and ensure that you have everything you need to complete your pocket shawl. Now you’re ready to get started on your knitting project!
Gauge and Measurements
When knitting the free knitted pocket shawl pattern, it is important to pay attention to gauge and measurements to ensure that the finished shawl turns out the right size. Gauge refers to the number of stitches and rows per inch, and it can vary depending on the yarn and needles used. To determine the gauge for this pattern, it is recommended to knit a swatch using the specified yarn and needle size.
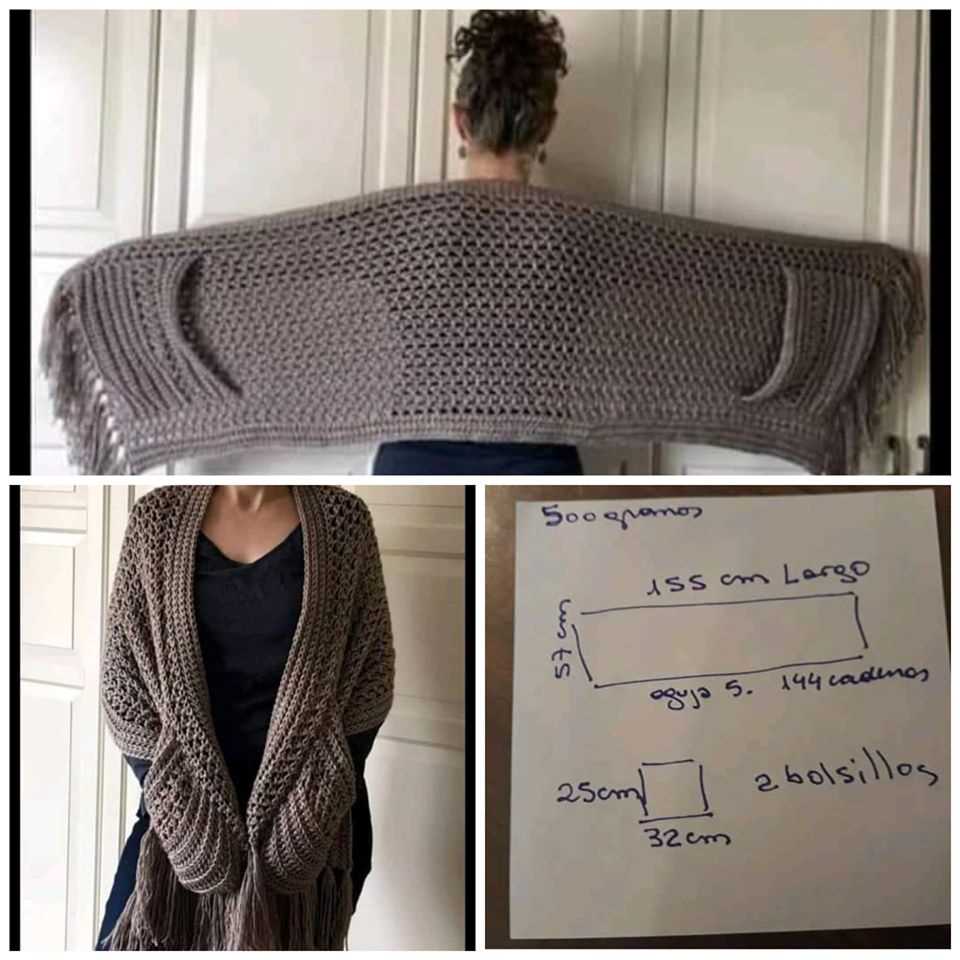
The pattern provides measurements for the finished shawl, including the width and length. It is important to take accurate measurements to ensure that the shawl fits properly and achieves the desired look. The width of the shawl is typically measured when the shawl is laid flat, from one edge to the other. The length is measured from the top edge to the bottom edge, including any additional sections such as pockets or fringe.
It is worth noting that gauge and measurements can vary depending on individual knitting tension and technique. It is always recommended to check gauge before starting the project and to adjust the needle size if necessary. Additionally, blocking the finished shawl can also help to achieve the desired measurements and drape. Taking the time to pay attention to gauge and measurements will result in a beautifully knitted pocket shawl that fits perfectly.
Pattern Instructions
Follow these step-by-step instructions to create your very own free knitted pocket shawl:
Materials:
- Size US 8 (5mm) knitting needles
- Approximately 600 yards of worsted weight yarn
- Tapestry needle
Abbreviations:
- K: Knit
- P: Purl
- K2tog: Knit two stitches together
- P2tog: Purl two stitches together
- M1L: Make one left
- M1R: Make one right
Instructions:
- Cast on 100 stitches.
- Row 1: K1, P1, repeat to end.
- Row 2: P1, K1, repeat to end.
- Repeat Rows 1 and 2 for the seed stitch pattern until the work measures 4 inches from the cast-on edge.
- Next row (RS): K1, *K2tog, M1L, K3, M1R, repeat from * to last stitch, K1.
- Continue in pattern, increasing as established on RS and working Rows 1 and 2 on WS, until there are 140 stitches on the needle.
- Next row (RS): K1, *K2tog, M1L, K5, M1R, repeat from * to last stitch, K1.
- Continue in pattern, increasing as established on RS and working Rows 1 and 2 on WS, until there are 180 stitches on the needle.
- Continue in seed stitch pattern for an additional 6 inches from the last increase row.
- Next row (RS): K1, *K2tog, M1L, K7, M1R, repeat from * to last stitch, K1.
- Continue in pattern, increasing as established on RS and working Rows 1 and 2 on WS, until there are 220 stitches on the needle.
- Continue in seed stitch pattern for an additional 10 inches from the last increase row.
- Next row (RS): K1, *K2tog, M1L, K9, M1R, repeat from * to last stitch, K1.
- Continue in pattern, increasing as established on RS and working Rows 1 and 2 on WS, until there are 260 stitches on the needle.
- Continue in seed stitch pattern for an additional 6 inches from the last increase row.
- Next row (RS): K1, *K2tog, M1L, K11, M1R, repeat from * to last stitch, K1.
- Continue in pattern, increasing as established on RS and working Rows 1 and 2 on WS, until there are 300 stitches on the needle.
- Repeat Rows 1 and 2 of seed stitch pattern for 4 inches.
- Bind off in pattern.
Congratulations! You have now completed the free knitted pocket shawl pattern. We hope you enjoy wearing your cozy creation!
Cast On and Setup Row
Before you start knitting the pocket shawl, you will need to cast on the required number of stitches. The cast on method you choose will depend on your personal preference. You can use a long tail cast on, a cable cast on, or any other cast on method that you are comfortable with. Make sure to leave a long enough tail for weaving in later.
Once you have cast on the stitches, you will need to work the setup row. The setup row is important as it sets the foundation for the rest of the shawl. It is recommended to use a stitch marker to mark the beginning of the row, especially if the pattern involves different stitch patterns or increases and decreases.
Here is how you can work the setup row:
- Knit the first stitch.
- Purl the next stitch.
- Repeat the knit-purl sequence until you reach the end of the row.
This simple knit-purl sequence creates a basic garter stitch edge for the pocket shawl. It provides a neat and sturdy foundation for the rest of the pattern. Once you have completed the setup row, you are ready to continue knitting the main body of the pocket shawl according to the pattern instructions.
Body of the Shawl
Once you have completed the pocket portion of the shawl, you will now move on to the body. This is where the shawl really starts to take shape and become a cozy accessory. The body of the shawl is worked in a pattern that creates a beautiful texture and adds depth to the design.
To begin the body, you will follow the pattern instructions for the stitch pattern. This may include a combination of knit and purl stitches, as well as various increases and decreases to create the desired shape. The pattern may also include rows of garter stitch or other textured stitches to add interest to the fabric.
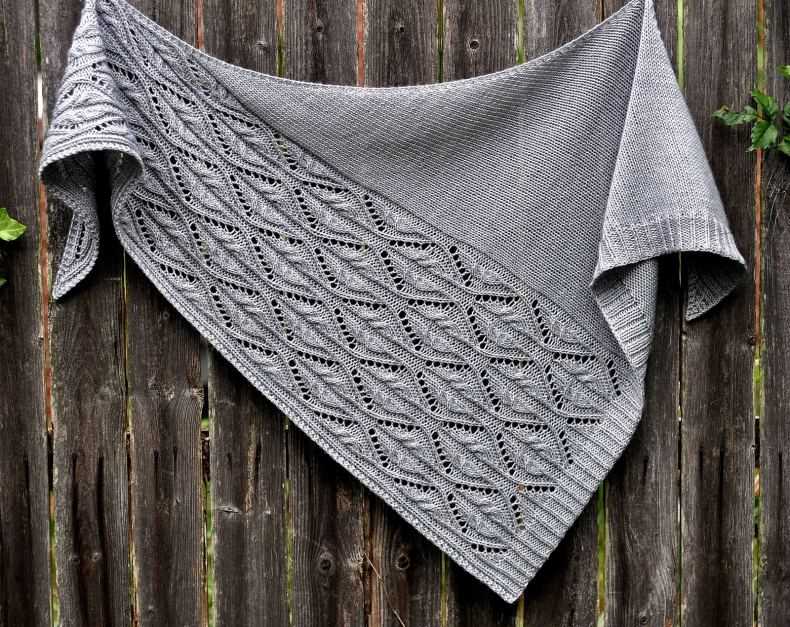
Stitch pattern: The stitch pattern for the body of the shawl is typically a repeat of a specific sequence of stitches. This could be a simple pattern, such as a rib or seed stitch, or a more complex lace or cable pattern. You will repeat this stitch pattern for the specified number of rows to create the desired length of the shawl.
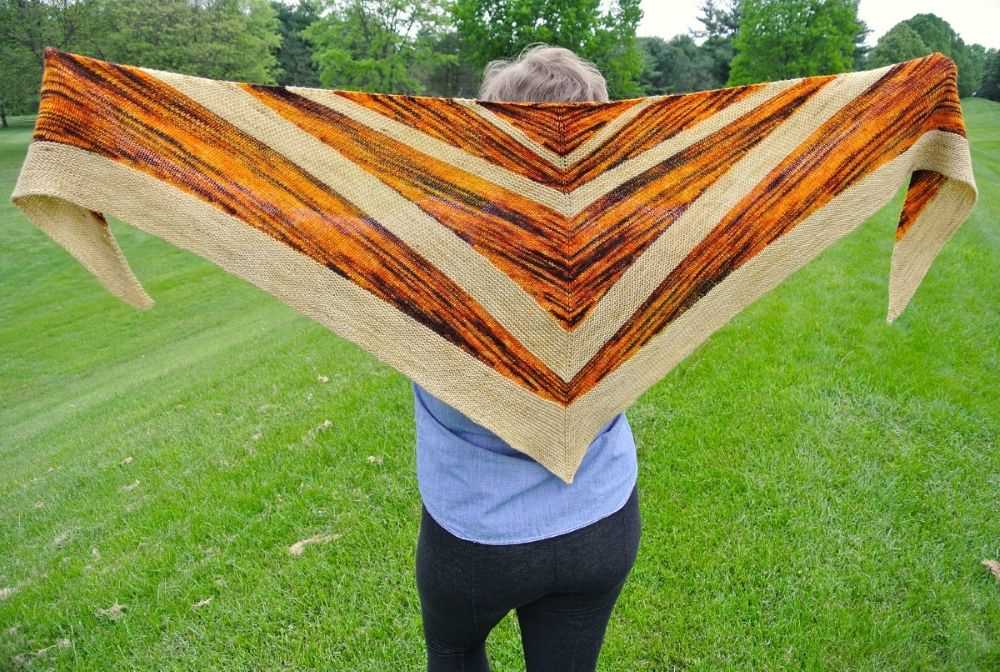
Shaping: As you work the body of the shawl, you may need to make increases or decreases to shape the fabric. These shaping techniques help create the triangular shape of the shawl and ensure that it will drape nicely when worn. The pattern will provide instructions on when and how to make these shaping changes.
Finishing touches: After completing the body of the shawl, you will typically finish off the edges with a border or edging. This could be a simple garter stitch border, or a more decorative lace or cable pattern. The border adds a polished look to the shawl and can help prevent the edges from curling.
In summary, the body of the shawl is where the main portion of the knitting takes place. It is worked in a specific stitch pattern, with shaping techniques used to create the desired shape. Finishing touches, such as a decorative border, complete the overall look of the shawl.
Pocket Instructions
Once you have completed knitting the main body of the pocket shawl, it’s time to add the pockets. The pockets will not only add functionality to your shawl, but also serve as a stylish accessory. Follow these step-by-step instructions to create the pockets for your knitted pocket shawl.
Materials:
- Yarn – Use the same yarn that you used for the main body of the shawl.
- Knitting Needles – Choose the appropriate size needles for your yarn.
- Tapestry needle – For weaving in the ends.
- Scissors – To cut the yarn.
Instructions:
Step 1: Attach the yarn to one side of the shawl, where you want the pocket to be located. Leave a tail of yarn for later weaving in.
Step 2: Cast on the desired number of stitches for the pocket width. You can refer to the pattern for specific instructions on how many stitches to cast on.
Step 3: Knit in the pattern stitch for the desired length of the pocket. You can continue knitting in the same stitch pattern used for the main body of the shawl, or switch to a different stitch pattern for the pockets.
Step 4: Repeat steps 1-3 to create the second pocket on the other side of the shawl. Make sure to position the second pocket symmetrically to the first pocket.
Step 5: Bind off all stitches of the pocket, leaving a tail of yarn for later weaving in.
Step 6: Weave in all ends of the yarn using a tapestry needle. Make sure to secure the ends properly to prevent unraveling.
And that’s it! You have now completed the pockets for your knitted pocket shawl. Enjoy the added functionality and style that the pockets bring to your shawl.
Finishing Touches
Once you have completed knitting your pocket shawl, it’s time to add some finishing touches to make it truly special. Here are a few ideas to consider:
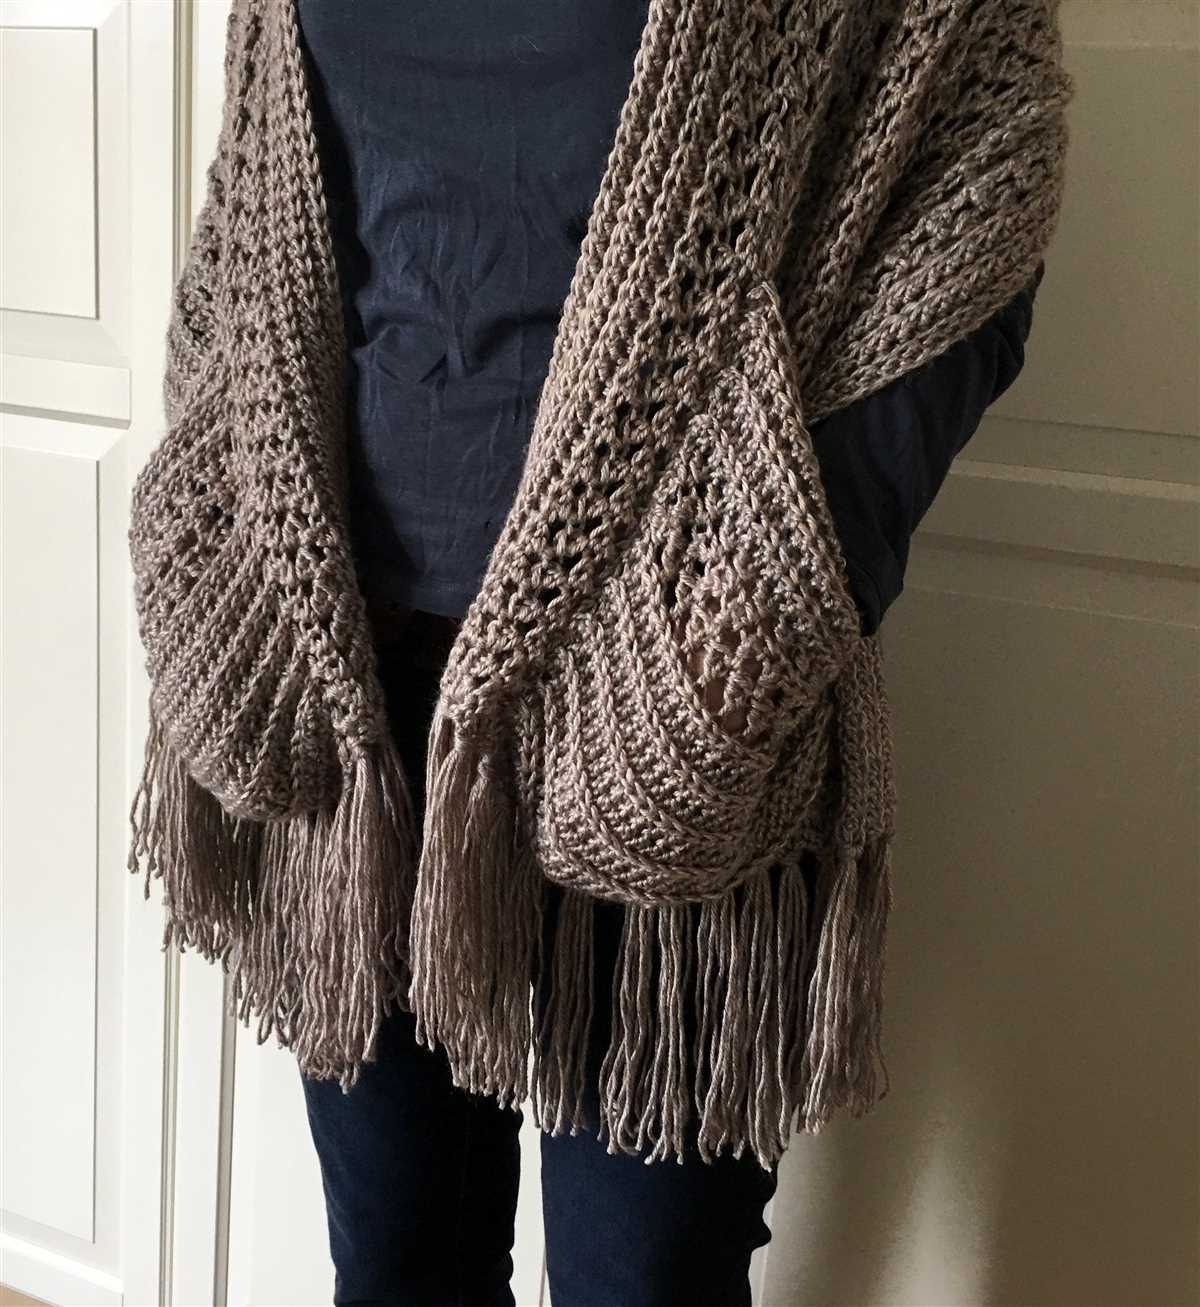
1. Fringe
Add a fringe to the bottom edge of your pocket shawl for a boho-inspired look. You can use matching or contrasting yarn to create a fringe that complements the colors of your shawl. Simply cut several strands of yarn, fold them in half, and attach them to the edge of the shawl using a crochet hook or tapestry needle.
2. Buttons or Toggle Closures
If you want to add some functionality to your pocket shawl, consider adding buttons or toggle closures. Sewing buttons along the edge of the shawl will allow you to fasten it closed, while toggle closures can provide a unique and stylish way to secure your shawl. Choose buttons or toggles that coordinate with the overall aesthetic of your shawl.
3. Embroidery or Appliques
Personalize your pocket shawl by adding embroidery or appliques. You can use embroidery thread to stitch intricate designs onto the fabric, or attach fabric or felt appliques for a creative touch. Consider adding flowers, leaves, or other nature-inspired motifs to enhance the overall look of your shawl.
4. Pom Poms or Tassels
Add some playful flair to your pocket shawl with pom poms or tassels. You can make pom poms using a pom pom maker or by wrapping yarn around your fingers and securing it in the middle. Attach the pom poms or tassels to the corners of your shawl for a fun and whimsical touch.
By adding these finishing touches to your knitted pocket shawl, you can elevate its style and make it truly unique. Get creative and have fun experimenting with different options to find the perfect finishing touches for your shawl.
Tips and Troubleshooting
Knitting a shawl can be a fun and rewarding project, but it may also come with some challenges. Here are some tips to help you along the way:
- Read the Pattern Carefully: Before starting, it’s important to thoroughly read through the pattern to understand the instructions and any special techniques that may be required.
- Check Your Gauge: To ensure that your shawl turns out the correct size, it’s important to check your gauge before you begin. Make a swatch and measure it against the recommended gauge in the pattern.
- Use Lifelines: If you’re working on a more complex stitch pattern, consider using lifelines. Lifelines are threads or yarn that you run through your stitches to help you go back to a specific point if you make a mistake.
- Take Breaks: Knitting for long periods of time can lead to fatigue and tension in your hands, so remember to take regular breaks. This will also give you a chance to rest your eyes and evaluate your work.
- Count Your Stitches: Counting your stitches regularly can help you catch any mistakes early on. It’s much easier to fix a mistake after a few rows than after you’ve completed the entire shawl.
- Keep a Stitch Marker Handy: Using a stitch marker can help you keep track of your progress and identify the beginning of each row.
- Don’t Be Afraid to Frog: If you make a mistake that you can’t fix, don’t be afraid to rip out your stitches and start again. It’s better to fix the mistake now instead of being unhappy with the finished shawl.
Remember, knitting is a craft that requires practice and patience. Don’t get discouraged if you run into difficulties along the way. With time and experience, you’ll become more confident in your knitting skills and be able to tackle more complex projects.
Happy knitting!