
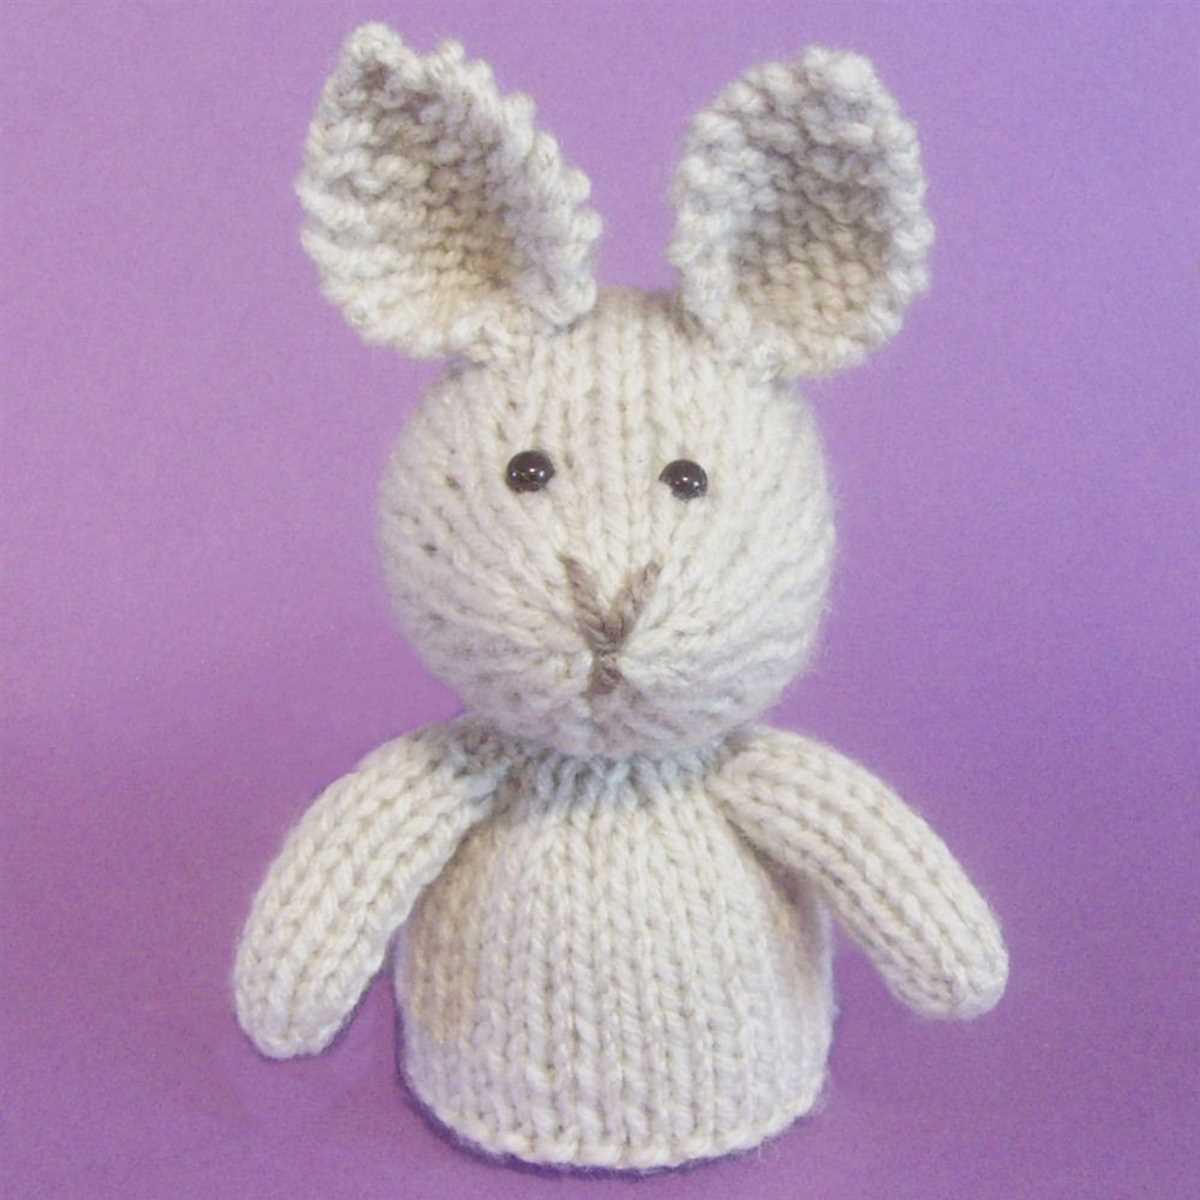
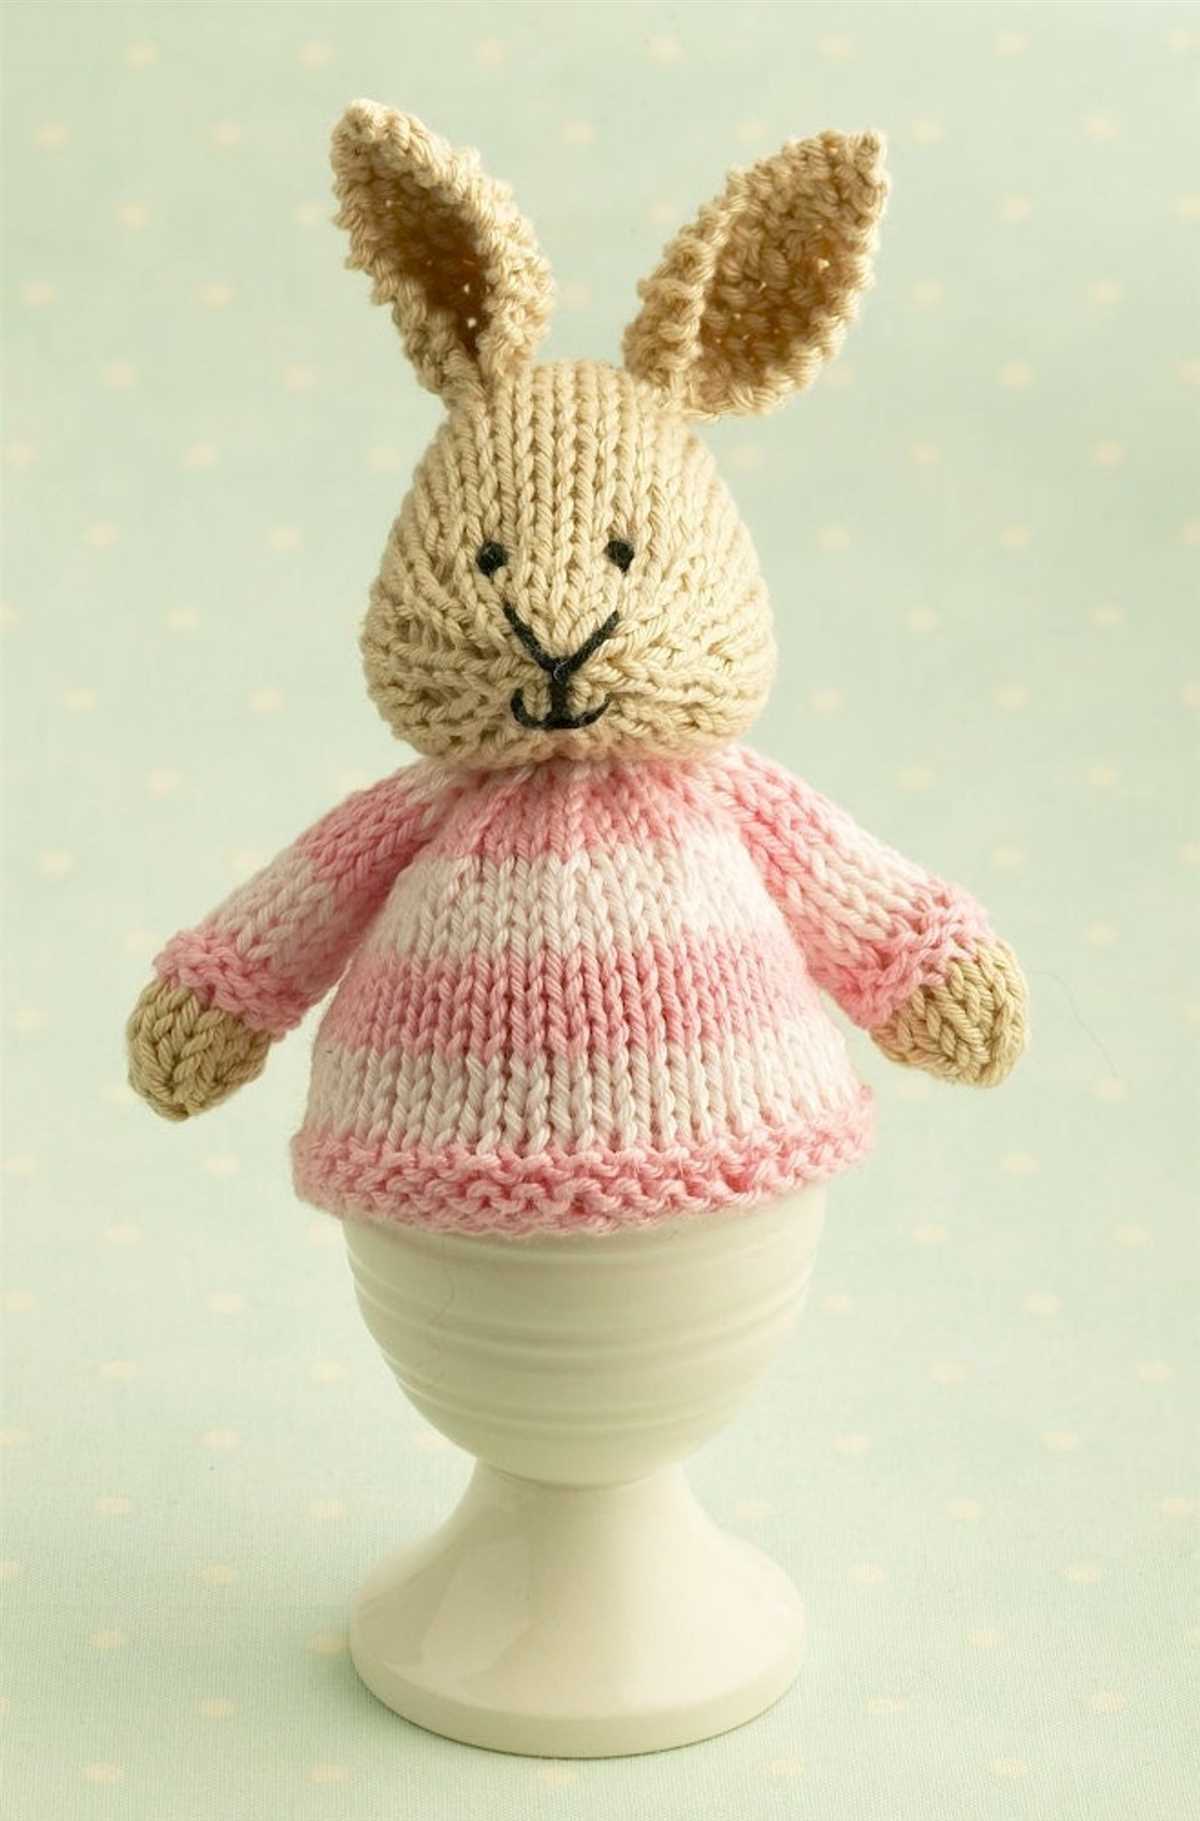
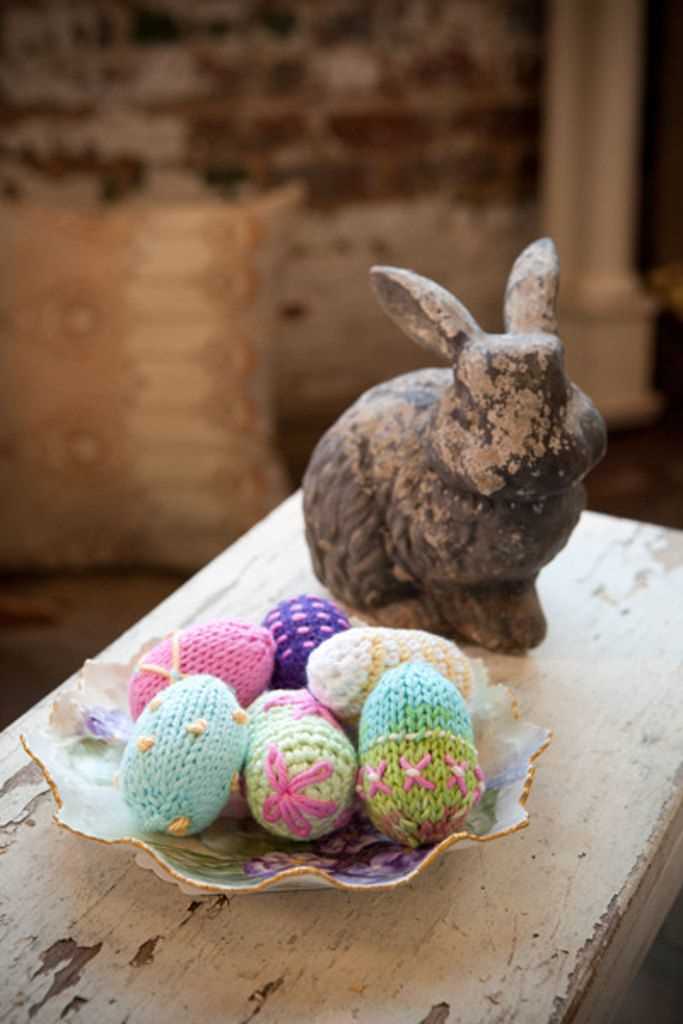
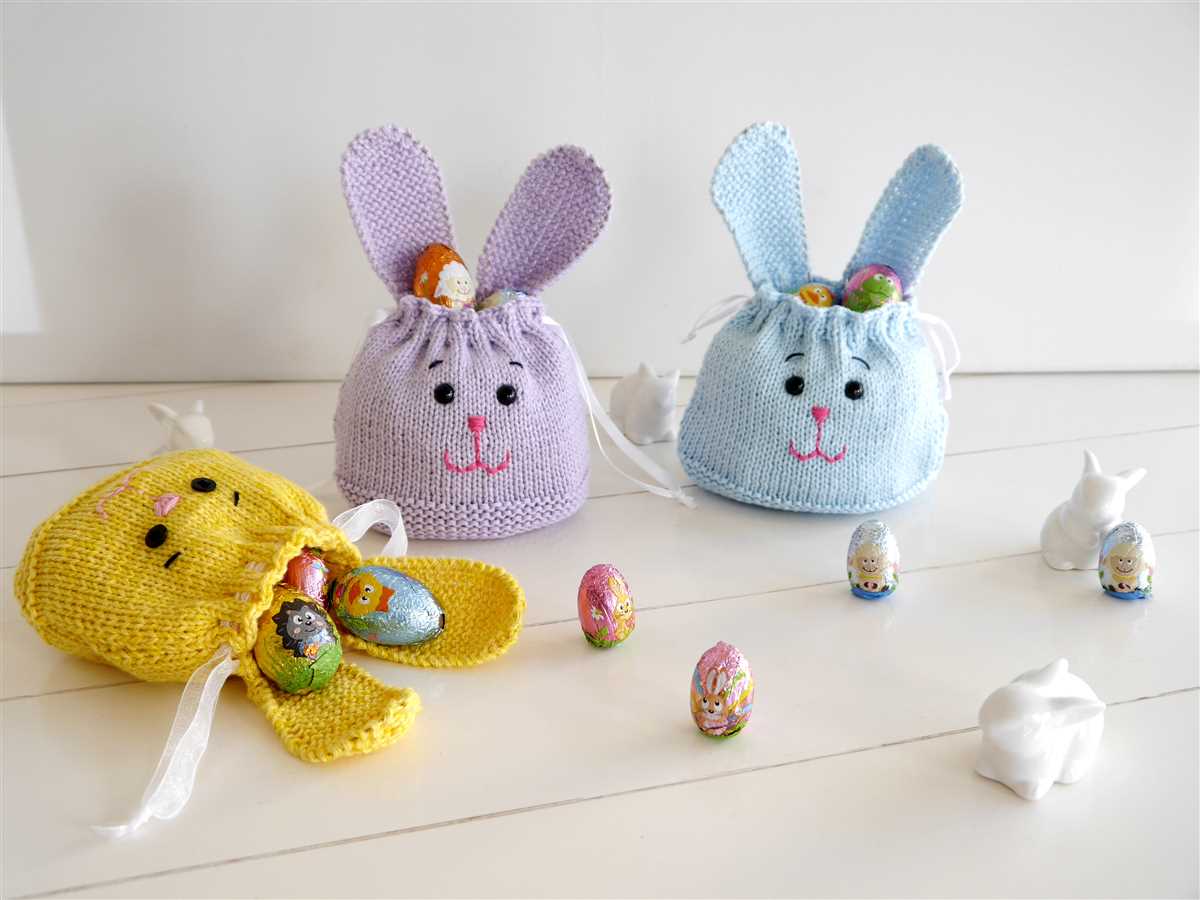
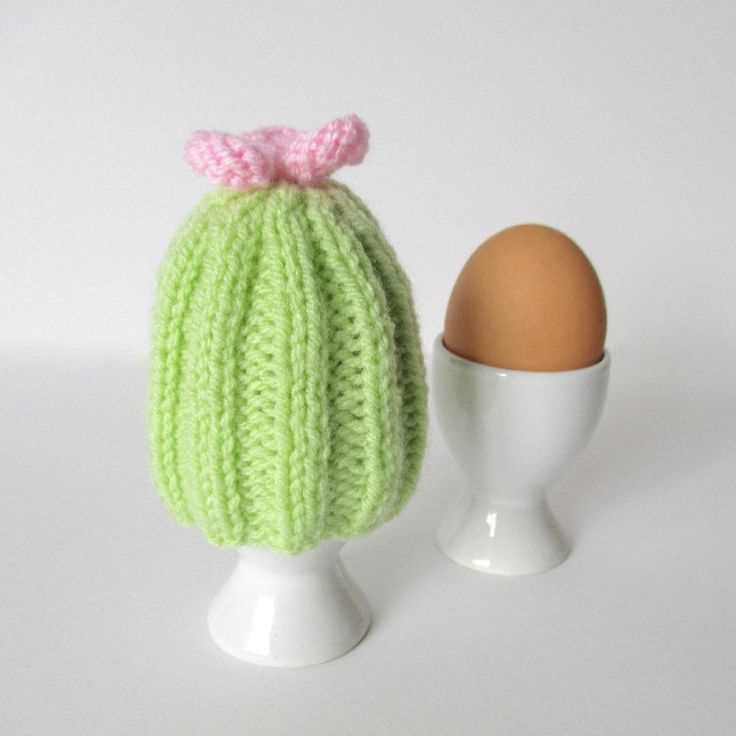
If you’re looking to add a touch of Easter magic to your breakfast table this year, why not try your hand at knitting these adorable bunny egg cosies? These cute and quirky little cosies are a fun and festive way to keep your boiled eggs warm and give your breakfast a festive look. Perfect for Easter morning or any springtime breakfast, these bunny egg cosies are sure to bring a smile to your face.
This free knitted bunny egg cosy pattern is suitable for knitters of all levels, from beginners to more experienced knitters. The pattern includes step-by-step instructions with photos to help you along the way. You’ll need some basic knitting skills and materials, such as yarn and knitting needles, to get started. Once you’ve mastered the pattern, you can personalize your bunny cosies by adding your own touches, such as bows or pom-poms.
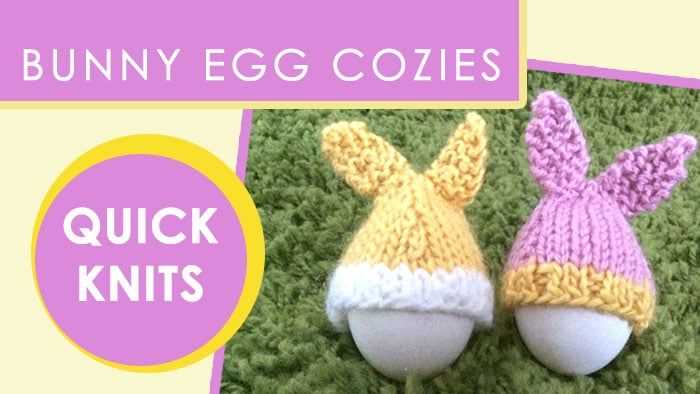
These sweet bunny egg cosies make a delightful addition to your Easter decorations or a charming gift for family and friends. Whether you’re a seasoned knitter or new to the craft, this free pattern is a fun and festive way to celebrate the arrival of spring. So grab your knitting needles and get ready to create some adorable bunny egg cosies!
Free Knitted Bunny Egg Cosy Pattern
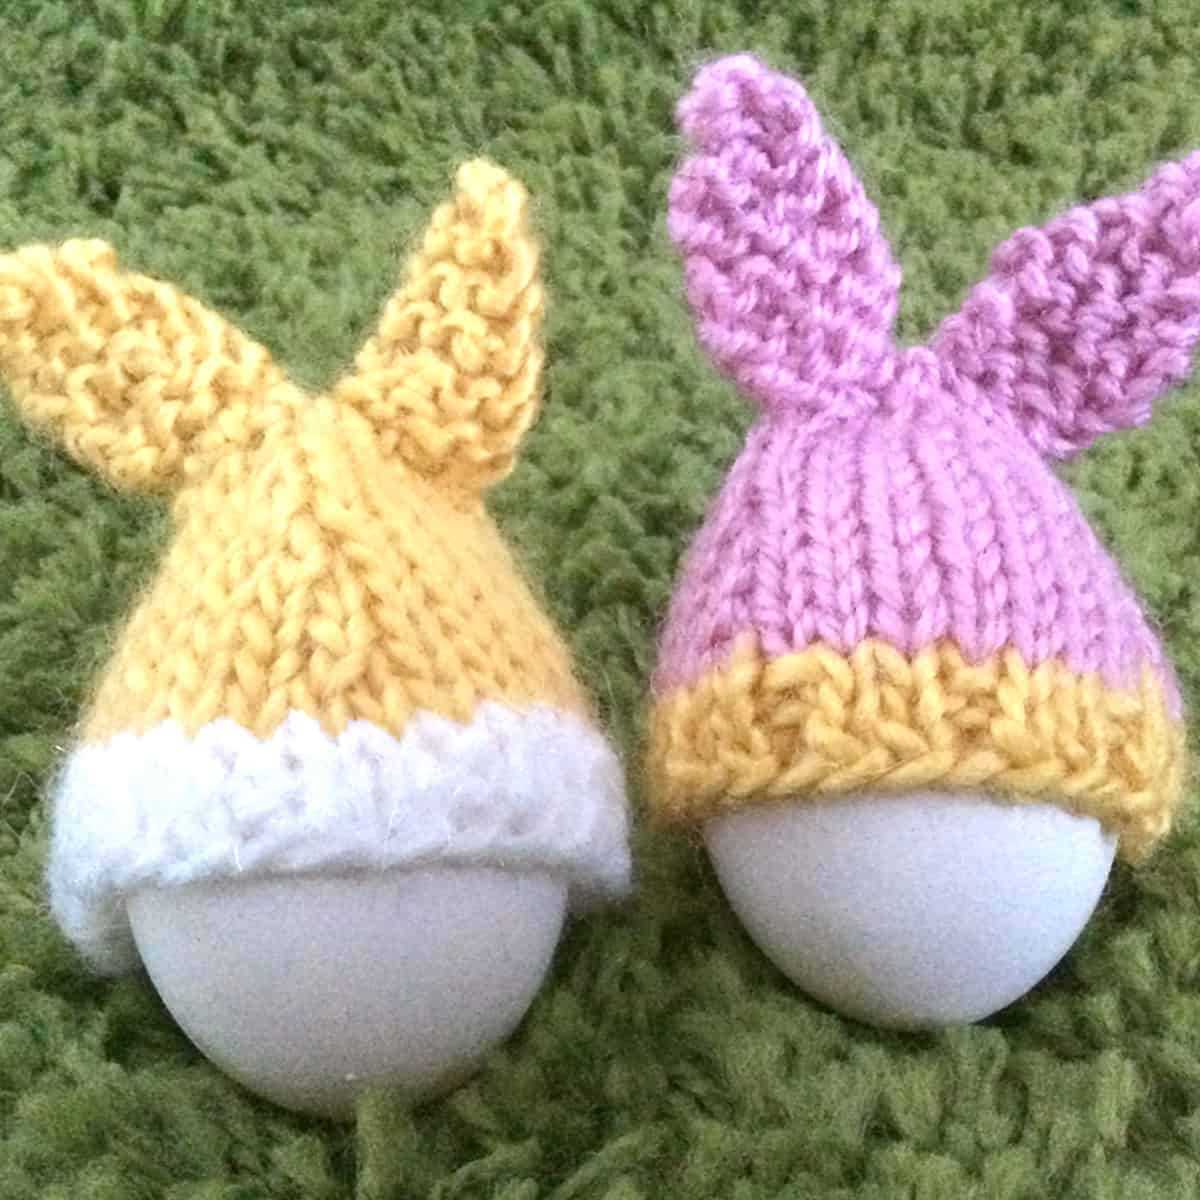
Making your own knitted bunny egg cosy is a fun and creative way to add a touch of whimsy to your Easter brunch table. With this free pattern, you can easily create adorable little bunny ears to fit over your boiled eggs and keep them warm and cozy.
To knit the bunny egg cosy, you will need some basic knitting skills and the following materials:
- Worsted weight yarn in your desired colors
- Size 8 (5mm) knitting needles
- A small amount of pink yarn for the bunny’s nose
- A darning needle
- Scissors
To start, cast on 24 stitches and knit 16 rows in garter stitch. Next, begin shaping the bunny ears by decreasing 1 stitch at the beginning and end of every row for 4 rows. Then, knit 4 rows without decreases. Repeat this pattern three more times so that you have a total of four sets of bunny ears.
Once your bunny ears are complete, use the darning needle to sew up the sides of each ear. Then, sew the ears onto the top of the garter stitch rectangle, leaving enough space in the middle for the egg to fit through. Finally, use a small amount of pink yarn to embroider a bunny nose onto the front of the cosy.
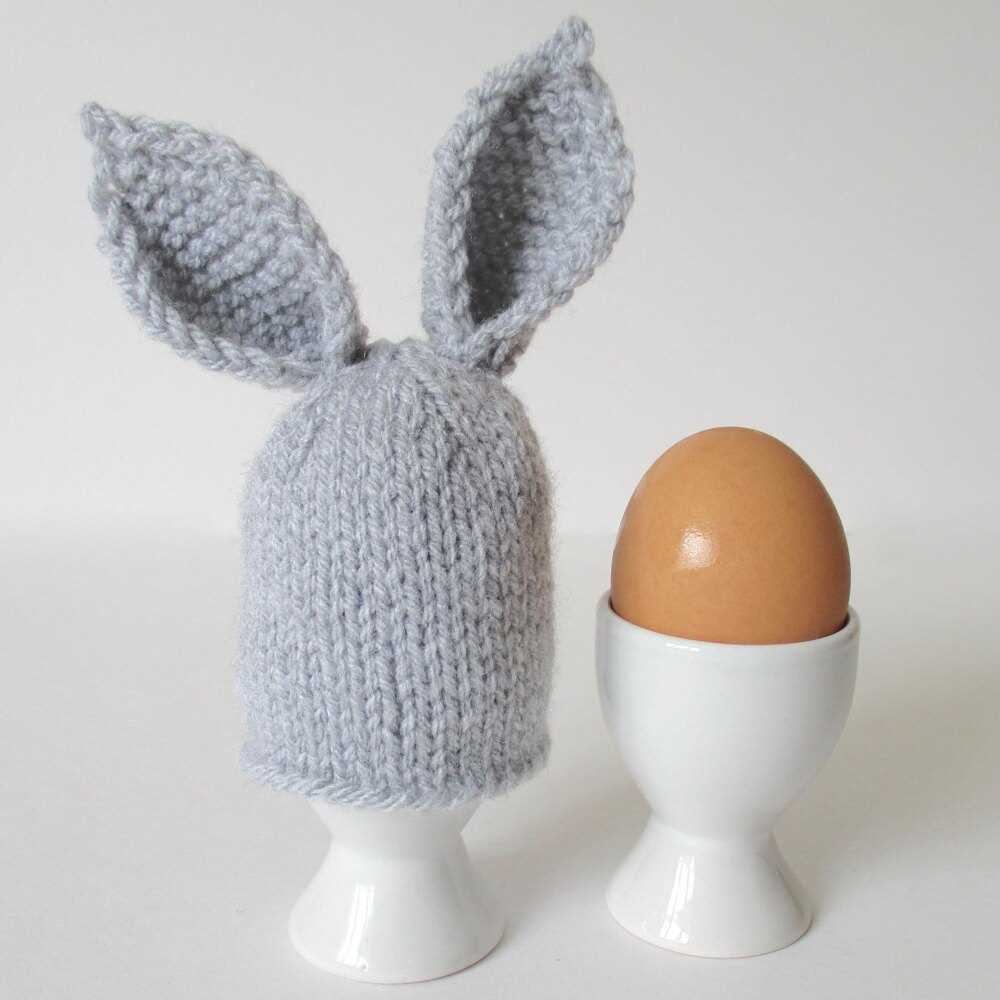
Your knitted bunny egg cosy is now ready to use! Simply slide a boiled egg into the space between the bunny ears and enjoy a whimsical touch to your Easter brunch. This free pattern is a great way to showcase your knitting skills and add some festive fun to your holiday celebration.
Materials Needed
When making a knitted bunny egg cosy, you will need the following materials:
- Yarn: Choose any color you like for your bunny egg cosy. You will need approximately 50 grams of yarn.
- Knitting Needles: Use a pair of 4mm knitting needles for this project.
- Stitch Markers: These will help you keep track of your stitches.
- Tapestry Needle: Use this needle to sew your bunny egg cosy together.
- Scissors: You will need a pair of scissors to cut the yarn.
It’s important to choose a soft yarn for your bunny egg cosy, as it will sit directly on the egg and you want it to be comfortable. Make sure to have all of your materials ready before you begin knitting, so you can enjoy the process without any interruptions.
Step-by-Step Instructions
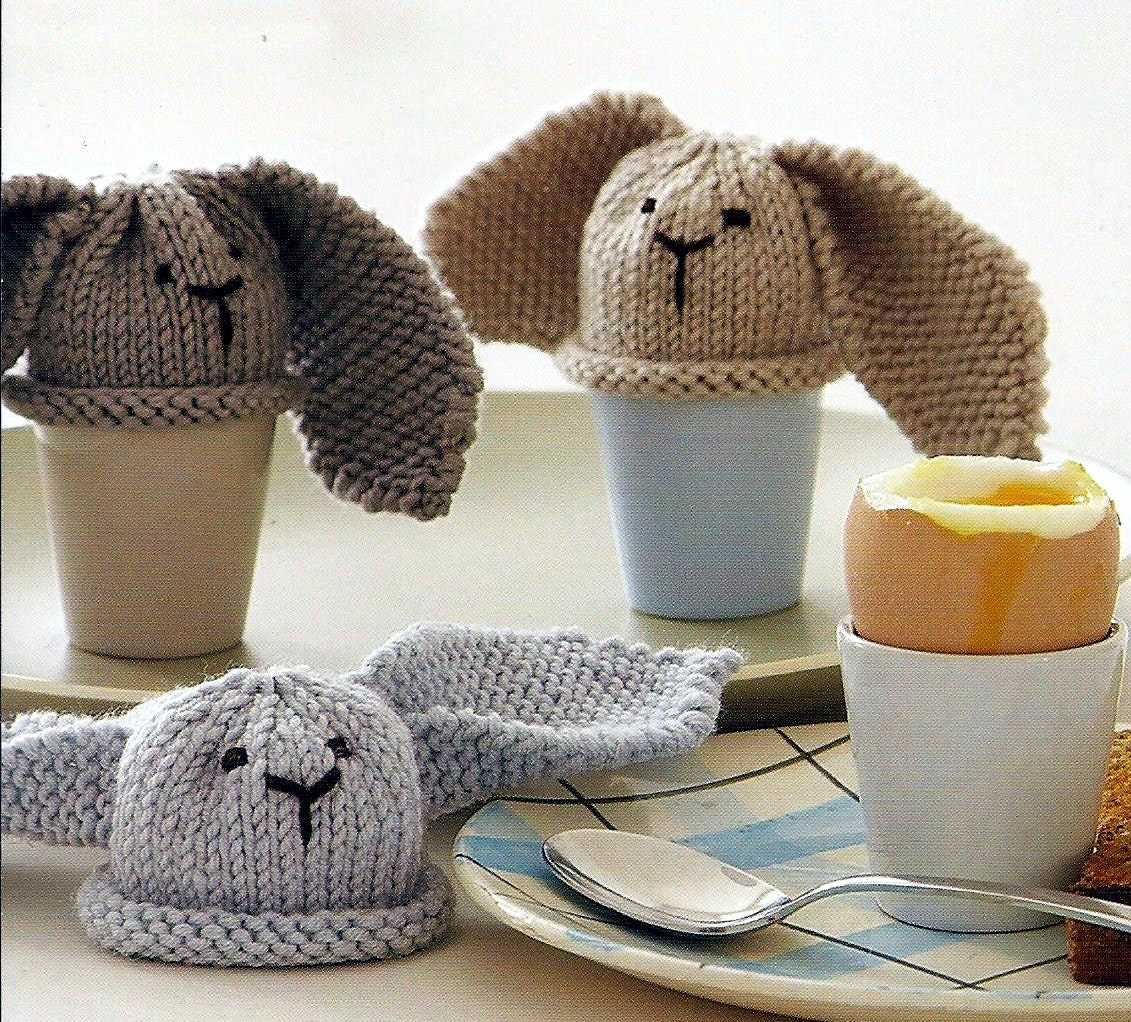
In this tutorial, we will provide you with step-by-step instructions on how to knit a bunny egg cosy. This cute and festive accessory will not only keep your boiled eggs warm during Easter breakfast but also add a touch of charm to your table setting.
Materials:
- Knitting needles (size 4mm)
- Yarn in two colors – one for the bunny body and one for the bunny ears
- Tapestry needle
- Polyester filling or cotton balls
- Scissors
Instructions:
- Start by casting on 20 stitches using the bunny body color yarn.
- Knit the first row.
- Purl the next row.
- Continue alternating between knit and purl rows for the next 10 rows to create the basic body shape.
- Next, knit 8 stitches, then turn the work.
- Purl the next 4 stitches.
- Turn the work again and knit 4 stitches.
- Repeat steps 5-8 a few more times to create the bunny’s head shape.
- Knit 4 stitches, then continue knitting in the round for the next 10 rows.
- Bind off your stitches, leaving a long tail for sewing.
- Using the tapestry needle, fold the knitted piece in half and sew the edges together to create a tube shape for the body.
- Stuff the body with the polyester filling or cotton balls to give it a plump appearance.
- At the top of the body, use the tapestry needle to gather the stitches and secure tightly.
- For the ears, cast on 8 stitches using the bunny ear color yarn.
- Knit 5 rows in garter stitch (knit every row).
- Decrease one stitch at the beginning of each row until you have 2 stitches remaining.
- Bind off the stitches and leave a long tail for sewing.
- Attach the ears to the bunny body, sewing them securely in place.
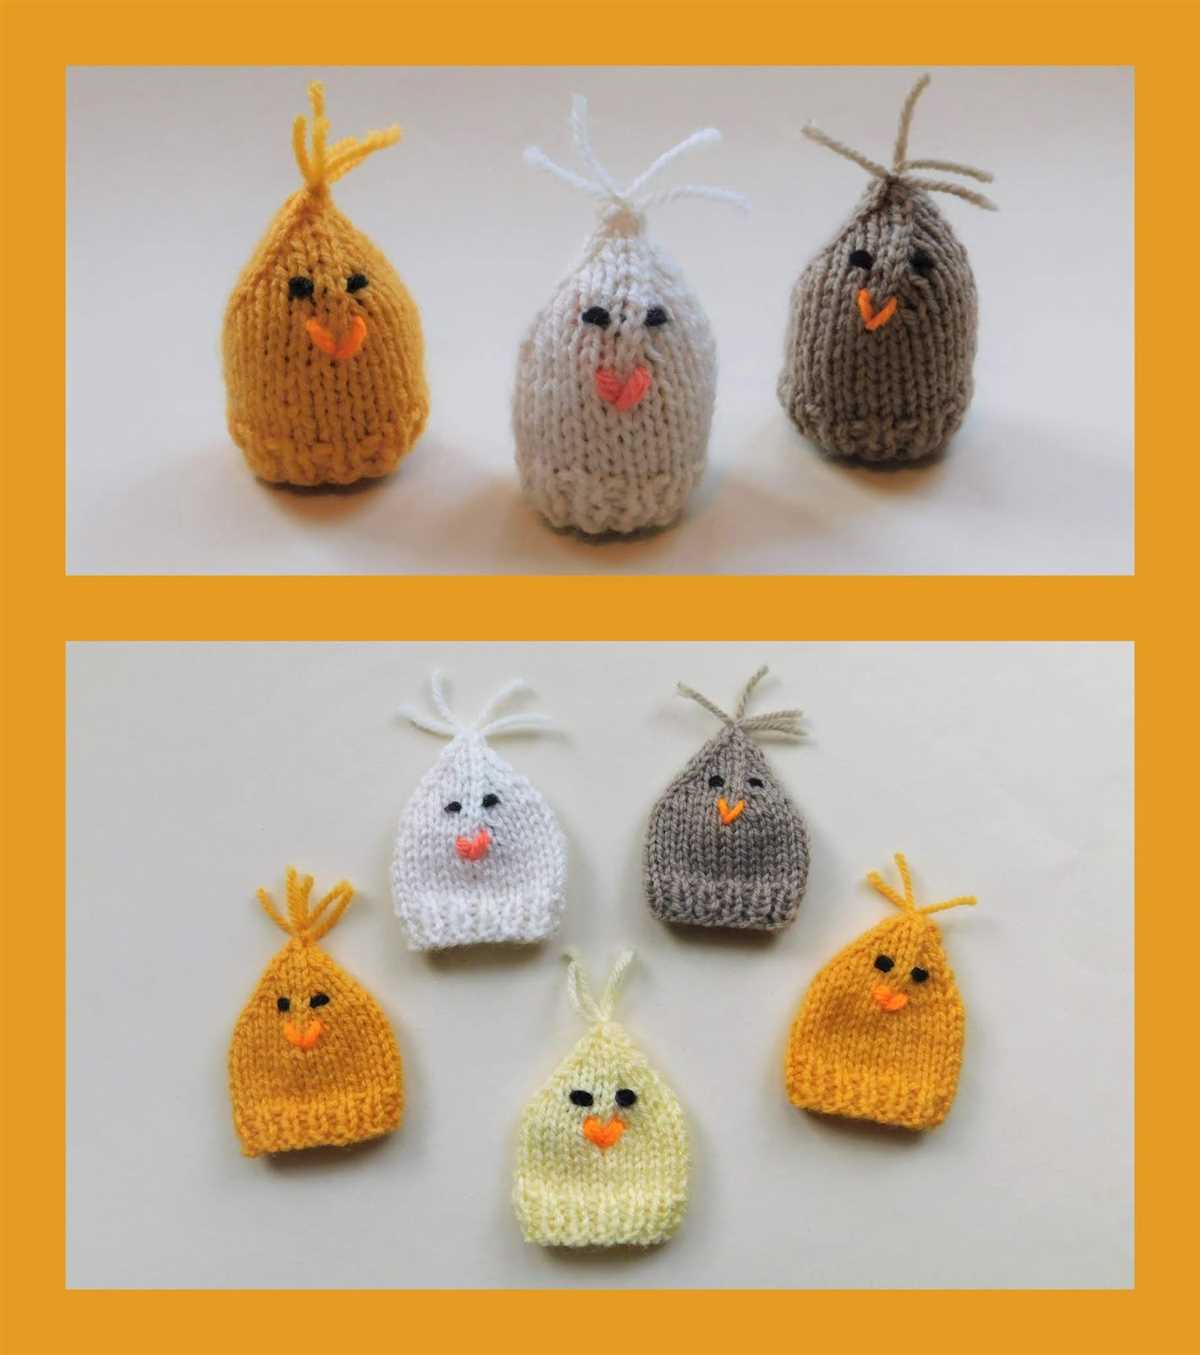
- Using a tapestry needle and contrasting yarn, embroider the bunny’s face, including eyes, nose, and mouth.
- Your knitted bunny egg cosy is now ready to keep your eggs warm and add a touch of cuteness to your Easter breakfast!
Choosing Yarn and Needles
When it comes to knitting a bunny egg cosy, the yarn and needles you choose can greatly affect the final result. It is important to consider the size and weight of the yarn, as well as the type of needles, to ensure that the bunny egg cosy turns out just right.
Yarn: The ideal yarn for a bunny egg cosy is one that is soft, durable, and easy to work with. Acrylic or cotton yarns are great options as they are both easy to care for and come in a wide range of colors. You can choose a solid color or even a variegated yarn to add some extra character to your cosy. It is also important to consider the weight of the yarn. For a bunny egg cosy, a sport or DK weight yarn would be ideal as it will provide a good balance between thickness and flexibility.
Needles: The type of needles you use will depend on your personal preference and the yarn you have chosen. For a bunny egg cosy, it is recommended to use circular needles in a size appropriate for the weight of your yarn. Circular needles are great for working in the round and will allow you to easily knit the cosy without having to seam it later. If you prefer to use straight needles, make sure you have a set of double-pointed needles for shaping the ears. The size of the needles will vary depending on the yarn weight, so be sure to check the gauge on the yarn label and use needles that will give you the desired tension.
In conclusion, choosing the right yarn and needles for your bunny egg cosy project is important to ensure a successful outcome. Consider the yarn weight and type, as well as the type and size of needles, to achieve the desired look and feel of your bunny egg cosy. With the right materials, you can create a cute and cozy accessory that will add a touch of charm to your Easter celebrations.
Gauge and Sizing
Achieving the correct gauge is crucial for this free knitted bunny egg cosy pattern to ensure that the cosy fits your egg snugly. The recommended gauge for this pattern is 22 stitches and 30 rows = 4 inches in stockinette stitch using US size 6 (4mm) needles. It is important to check your gauge before starting the project and adjust your needle size if necessary to match the gauge.
The finished size of the bunny egg cosy is approximately 3.5 inches in height and 3 inches in width. However, please note that the sizing may vary depending on your gauge and the yarn you choose. If you prefer a larger or smaller cosy, you can adjust the gauge by changing the needle size or the yarn weight.
If you are new to knitting or unfamiliar with gauge, it is recommended to make a gauge swatch before starting the project. To make a gauge swatch, cast on a few more stitches than the recommended gauge and knit a square in stockinette stitch using the specified needle size. Measure the gauge in the middle of the swatch, counting the number of stitches and rows within a 4-inch area. If your gauge does not match the recommended gauge, try changing the needle size up or down and make another swatch until you achieve the correct gauge.
Casting On
Casting on is the first step in starting a knitting project. It is the process of creating the first row of stitches on your knitting needle. There are several methods for casting on, but in this pattern, we will use the long-tail cast on method.
To begin, you will need to measure out a length of yarn for casting on. This can be done by wrapping the yarn around the knitting needle ten times and then adding a bit more for good measure. This will give you enough yarn to work with and prevent you from running out mid-row.
- Step 1: Make a slipknot by creating a loop with the yarn and pulling the tail through the loop.
- Step 2: Insert the knitting needle through the loop and tighten the slipknot by pulling on the working yarn.
- Step 3: Hold the knitting needle in your right hand and the tail of the yarn in your left hand.
- Step 4: With your right hand, wrap the yarn around your thumb and index finger, creating a “V” shape.
- Step 5: Insert the knitting needle from left to right through the “V” shape.
- Step 6: With your right hand, bring the knitting needle behind the left-hand needle and then back through the “V” shape.
- Step 7: Drop the loop from your thumb and tighten the stitch by pulling on the tail of the yarn.
- Step 8: Repeat steps 4-7 until you have cast on the desired number of stitches.
Once you have finished casting on, you are ready to begin knitting the first row of your project. The cast-on stitches will serve as the foundation for your knitting and will determine the size and shape of your finished piece.
Knitting the Body
Now that you have completed the head of the bunny egg cosy, it is time to move on to knitting the body. This is where the cosy really starts to take shape and come together. Here are the steps to follow:
1. Cast on stitches
Using the same yarn and needle size as before, cast on the required number of stitches for the body of the cosy. This will vary depending on the size of your egg and the desired fit of the cosy. Make sure to leave a long tail of yarn to use for sewing up the seam later.
2. Knit in the round
Continue knitting in the round, using the stockinette stitch or any other stitch pattern of your choice. This will create a seamless and smooth texture for the body of the cosy. Keep knitting until the body reaches the desired length, taking into account that the cosy will stretch slightly when put on the egg.
3. Decrease stitches
To shape the body of the bunny egg cosy, you will need to decrease stitches gradually. This can be done by knitting two stitches together at regular intervals, or by using any other decrease technique that you prefer. Make sure to evenly distribute the decreases so that the cosy maintains its shape.
4. Bind off
Once you have reached the desired number of stitches for the bottom of the cosy, bind off all the stitches. Cut the yarn, leaving a long tail, and thread it through the remaining stitches to secure them.
With the body of the bunny egg cosy complete, you can now move on to knitting the ears and other decorative elements to give your cosy some extra character.
Shaping the Ears
To create the bunny ears for your egg cosy, you will start by picking up stitches along the side edges of the cosy. This will create a triangular shape that will resemble ears.
First, fold the cosy in half so that the front and back are aligned. Starting at the top corner of the cosy, use a knitting needle to pick up stitches along the side edge, working towards the bottom corner. The number of stitches you pick up will depend on the size of your cosy, but aim for about 10-15 stitches.
Once you have picked up the desired number of stitches, you will begin shaping the ear by working short rows. To do this, knit a few stitches, then turn the work so that the wrong side is facing you. Purl back across the stitches, then turn the work again. Continue this process, knitting fewer stitches each time, until you reach the top of the ear. This will create a triangular shape.
After completing the shaping of the first ear, repeat the process on the other side of the cosy to create the second ear. Once both ears are shaped, you can continue knitting the rest of the cosy as directed in the pattern.
Note:
- Make sure to keep track of your stitch count and the number of rows you knit for each ear.
- You can adjust the size and shape of the ears by varying the number of stitches you pick up and the number of rows you knit.
- Be mindful of any decreases or increases that may be required in the pattern to shape the head and face of the bunny.
Finishing Touches
When it comes to knitting an adorable bunny egg cosy, the finishing touches are what really bring the design to life. From adding the eyes and nose to choosing the perfect color for the ears, these small details can make a big difference in the overall appearance of your creation.
To start, you’ll want to carefully sew on the bunny’s eyes. Using strong black thread or embroidery floss, create small, neat stitches that securely attach the eyes to the cosy. Position them slightly above the middle of the cosy, giving your bunny a cute and endearing expression.
Next, it’s time to add the bunny’s nose. Using pink yarn or embroidery floss, create a small triangular shape by stitching three short lines. This will give your bunny a sweet and playful look. Be sure to secure the nose firmly to the cosy so it doesn’t come loose with use.
For the ears, you have the opportunity to get creative with color. Choose a contrasting shade of yarn that complements the main body of the cosy. Knit or crochet two small ear shapes, making sure they are symmetrical. Sew the ears securely onto the top of the cosy, positioning them slightly towards the back for an adorable floppy look.
Finally, you can add any additional decorative touches you desire. This could include a small bowtie, a miniature flower, or even a tiny knitted carrot. These extra embellishments add a personal touch to your bunny egg cosy and make it truly unique.
With these finishing touches, your knitted bunny egg cosy will be complete and ready to adorn your Easter breakfast table. Whether you’re making one for yourself or as a gift, the attention to detail in these small elements will make your cosy stand out and bring a smile to anyone’s face.
Adding Decorative Elements
Once you have completed the basic pattern for your knitted bunny egg cosy, you can start adding decorative elements to make it even more unique and special. There are several ways to do this, and it all depends on your personal preference and knitting skills.
Embroidery
One of the easiest ways to add decorative elements is through embroidery. You can use colorful yarn or embroidery thread to create different designs on the bunny ears, body, or even the cozy itself. Popular embroidery designs for bunny egg cosies include flowers, hearts, and geometric patterns.
Buttons and Ribbons
If you want to add a touch of cuteness to your bunny egg cosy, you can attach small buttons or ribbons to it. For example, you can sew two small buttons as eyes and use a tiny ribbon as a bowtie. These little details can bring your bunny to life and make it even more adorable.
Pom-poms and Tassels
To give your bunny egg cosy a playful and whimsical touch, you can add pom-poms or tassels. You can attach a small pom-pom to the bunny’s tail or hang tassels from the bunny ears. This will not only make your bunny more visually appealing but also add a fun texture to it.
Colorful Yarns
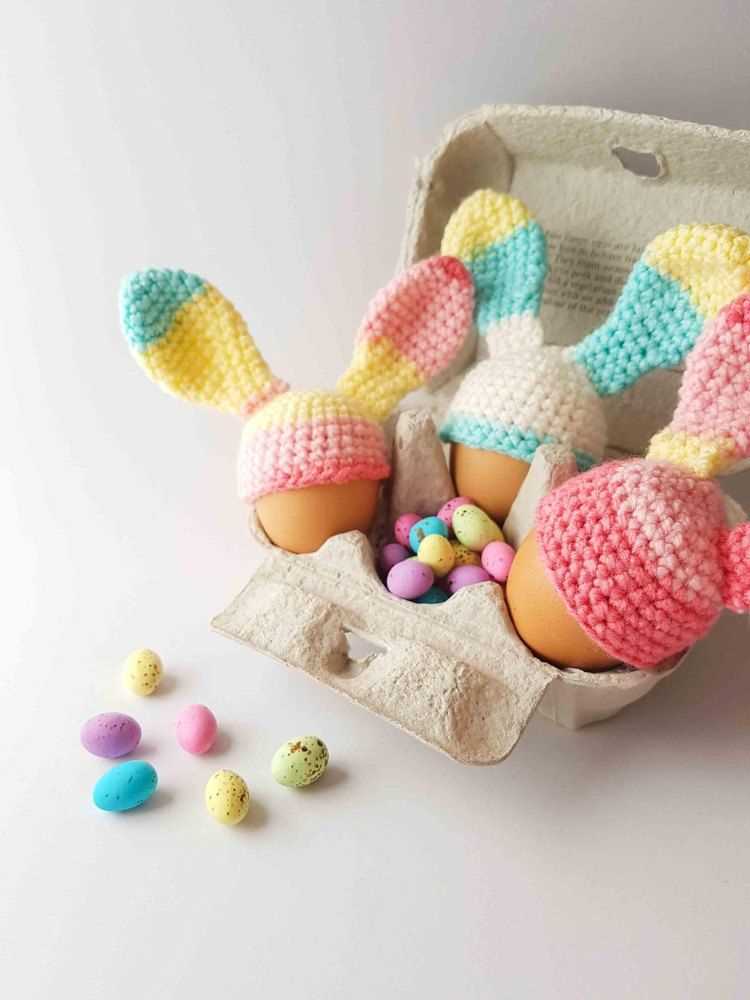
An easy way to add decorative elements without any additional accessories is to use colorful yarns. You can change the color of the bunny’s body, ears, or even create stripes or patterns using different colored yarns. This will give your bunny a vibrant and eye-catching look.
Remember, adding decorative elements to your knitted bunny egg cosy is a great opportunity to let your creativity shine. Don’t be afraid to experiment and try different techniques to make your bunny truly one-of-a-kind.
Tips and Tricks
When knitting a bunny egg cosy, there are a few tips and tricks that can help ensure a successful and cute final product.
Choose the right yarn: Selecting the right yarn is important for achieving the desired texture and appearance of the bunny. Opt for a soft and fluffy yarn that is suitable for knitting small items.
Avoid using too much stuffing: While it may be tempting to stuff the bunny egg cosy to make it extra puffy, it’s important not to overstuff it. Adding too much stuffing can distort the shape and make it look bulky. Use just enough to give it a nice, rounded shape.
- Practice the facial features: One of the cutest parts of the bunny egg cosy is its adorable face. Practice embroidering or stitching the eyes, nose, and mouth to ensure they come out just right. It may be helpful to draw out the design on a piece of paper before stitching it onto the cosy.
- Use stitch markers: To keep track of the number of stitches and rows, use stitch markers. This can help ensure that the dimensions of the bunny egg cosy are consistent and that the shape remains symmetrical.
- Block the bunny egg cosy: Blocking is a technique used to shape and flatten knitting projects. After completing the bunny egg cosy, dampen it with water and pin it into shape. This will help the stitches relax and create a more polished appearance.
By following these tips and tricks, knitters can create adorable and well-crafted bunny egg cosies that make charming gifts or decorations for Easter.
Final Thoughts
In conclusion, the free knitted bunny egg cosy pattern is a delightful project that can add a touch of charm to your Easter celebrations. Whether you are an experienced knitter or a beginner looking for a fun and easy project, this pattern offers a rewarding and enjoyable experience.
The pattern provides clear instructions and includes helpful tips and tricks to ensure your bunny egg cosy turns out just right. It is a great way to practice different knitting techniques and experiment with colors to create unique and personalized egg cosies.
Once you have completed your bunny egg cosies, they can be used to decorate your Easter table, given as gifts, or even sold at craft fairs. They are sure to bring a smile to anyone’s face and add a festive touch to the holiday season.
So, grab your knitting needles and get started on this adorable project. With a little time and effort, you’ll have a collection of cute and cozy bunnies to keep your Easter eggs warm and stylish!