
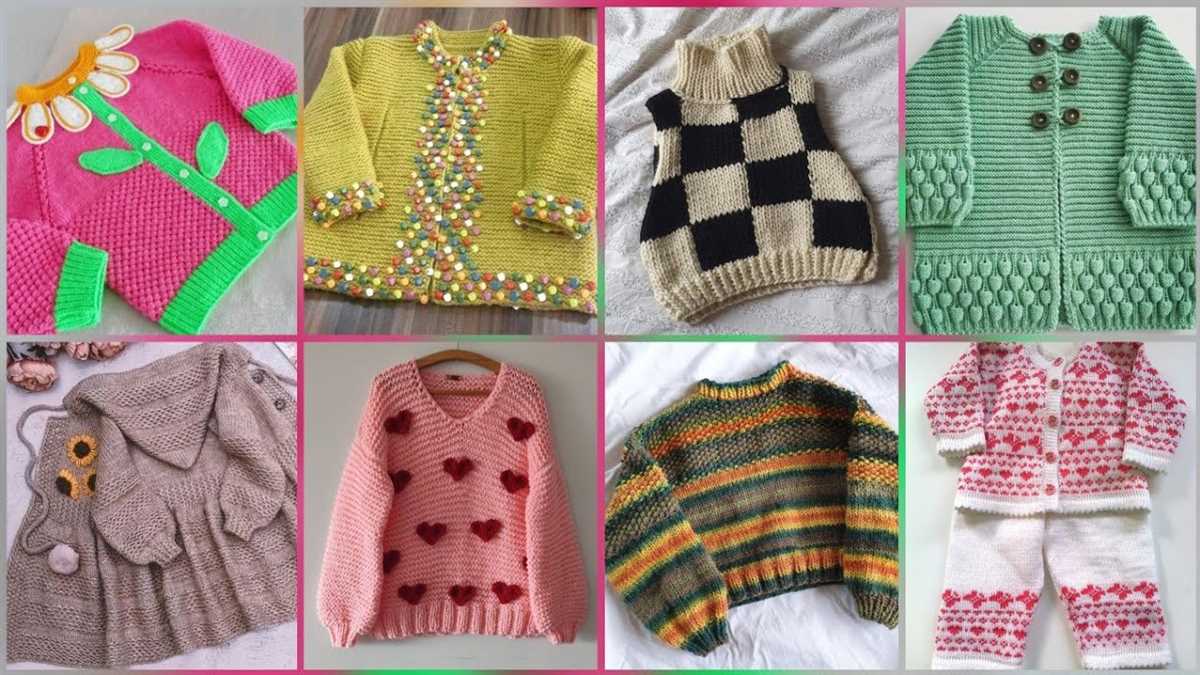
Are you looking for a new knitting project to keep you warm and stylish this winter? Look no further! We have the perfect free knit sweater pattern for you. Whether you’re a beginner or an experienced knitter, this pattern is sure to challenge and inspire you.
Knitting your own sweater is a great way to express your creativity and showcase your personal style. Plus, it’s a rewarding and relaxing activity that you can enjoy during your free time. With this pattern, you’ll be able to create a trendy and cozy sweater that will be the envy of all your friends.
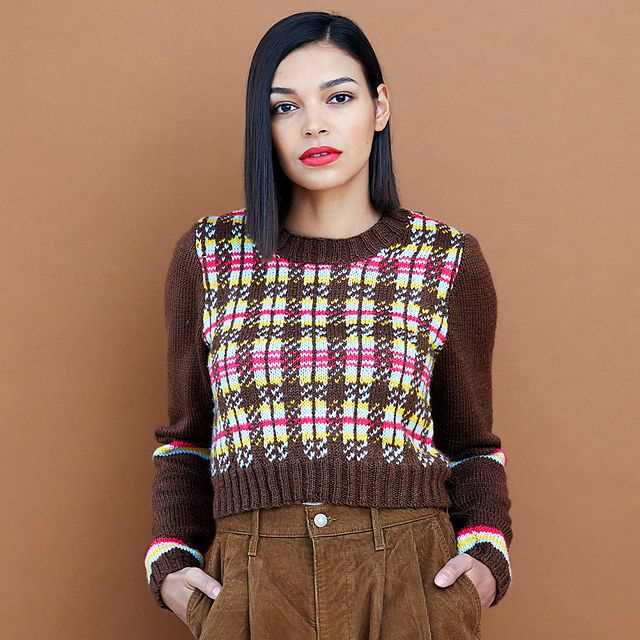
The free knit sweater pattern we’re sharing with you is versatile and can be customized to your preferences. You can choose from a variety of stitches, colors, and sizes to make it uniquely yours. The pattern includes detailed instructions and helpful tips, making it easy to follow and complete even for beginners.
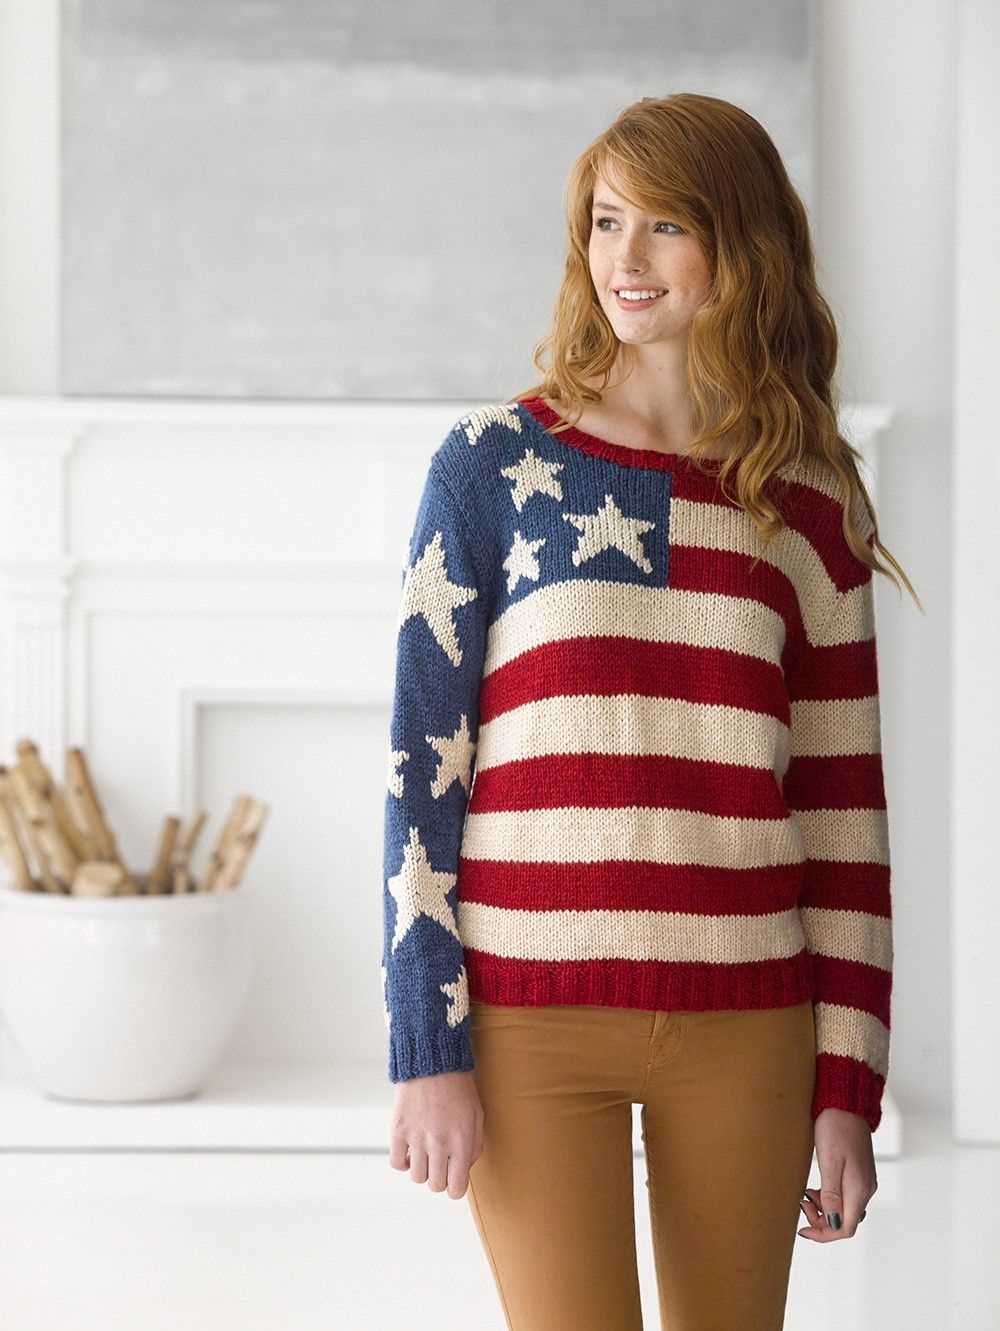
Free Knit Sweater Pattern
Making your own knit sweater is a fun and rewarding project for any knitter. With a free knit sweater pattern, you can create a beautiful and cozy garment that is customized to your style and preferences. Whether you are an experienced knitter or just starting out, there are many free patterns available that cater to all skill levels.
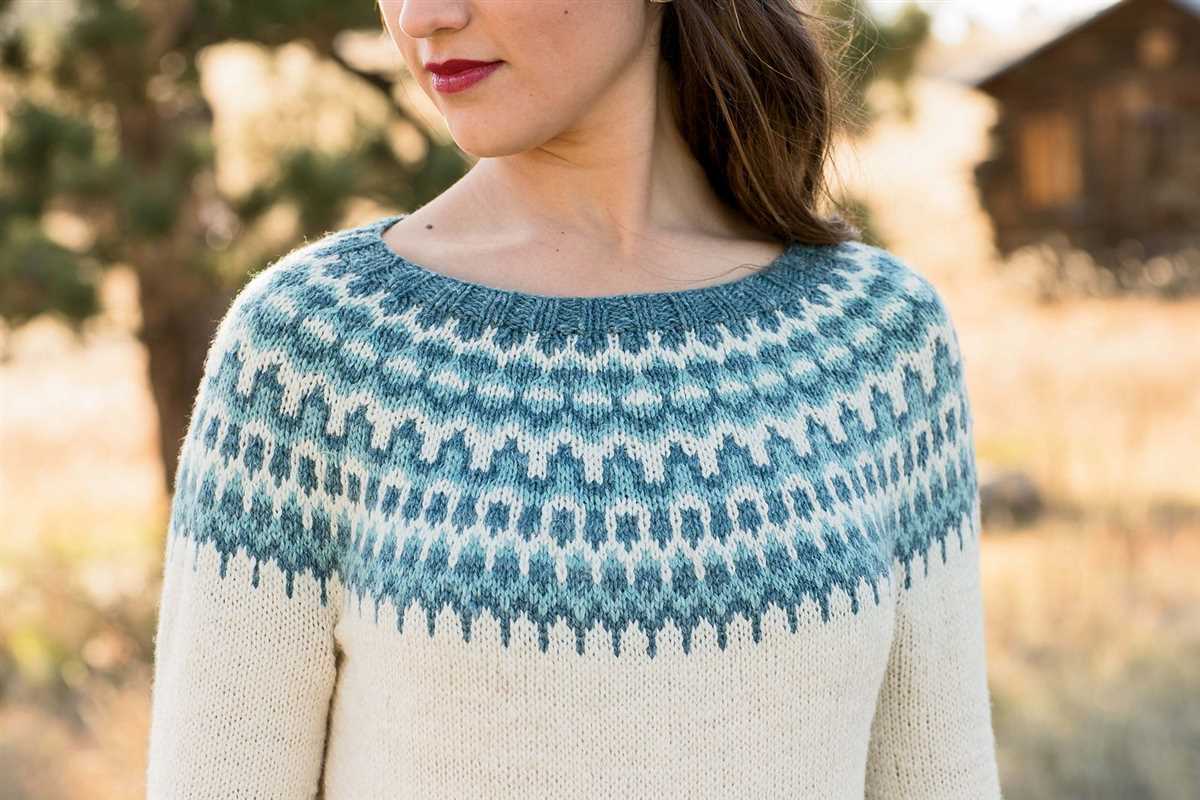
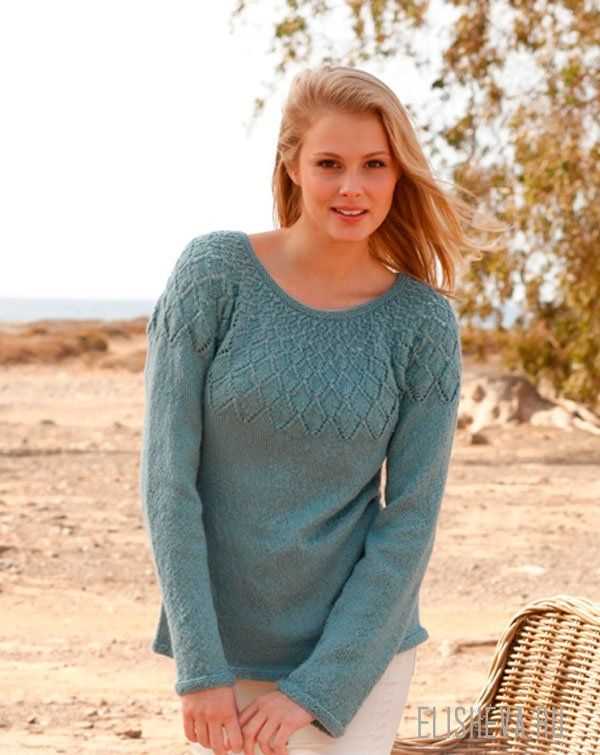
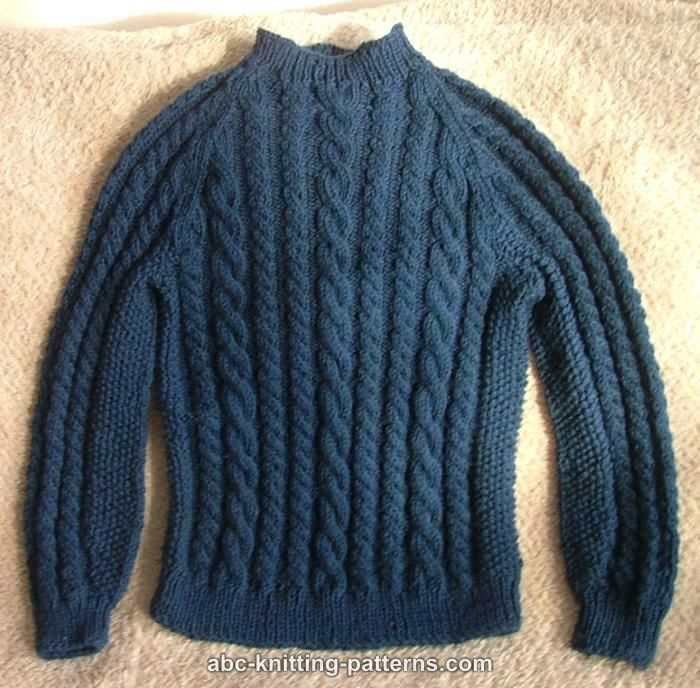
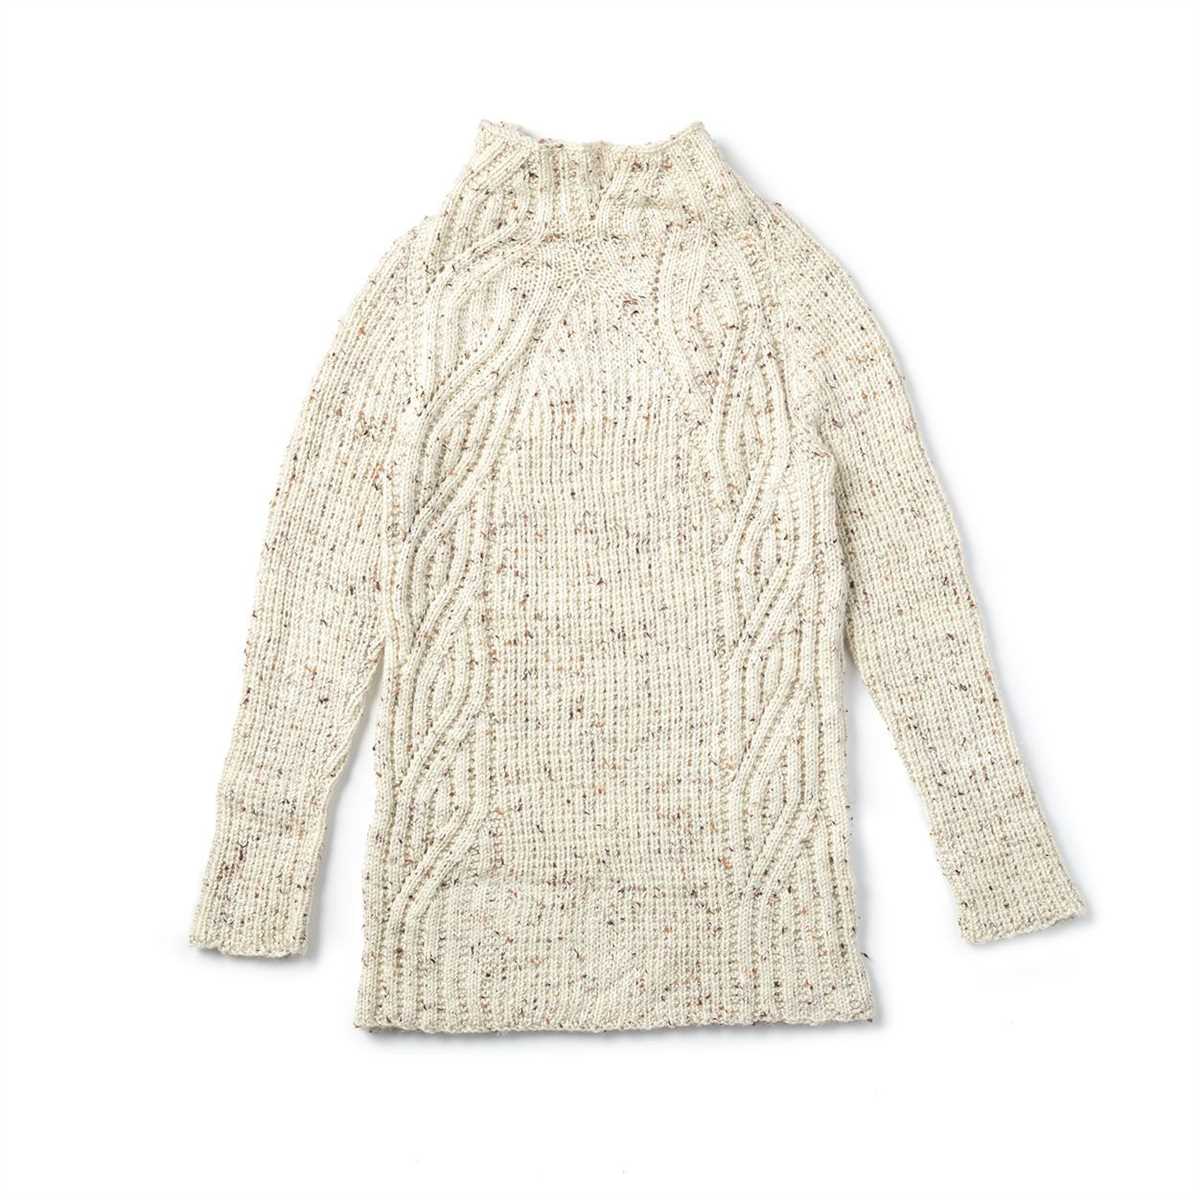
One popular free knit sweater pattern is the “Classic Cable Sweater”. This pattern features a traditional cable design on the front and sleeves, adding a touch of elegance to the garment. The pattern provides detailed instructions on how to create the cables and offers multiple size options, so you can make a sweater that fits you perfectly.
Materials:
- Yarn of your choice (recommended: medium weight)
- Knitting needles (size recommended in pattern)
- Cable needle
- Tapestry needle
- Scissors
Instructions:
- Start by casting on the required number of stitches, as indicated in the pattern.
- Follow the pattern instructions to create the cable design, remembering to use the cable needle when necessary.
- Continue knitting following the pattern steps, shaping the sleeves and neckline as instructed.
- Once you have completed all the required steps, finish off the sweater by binding off the stitches.
- Weave in any loose ends and give the sweater a gentle block to ensure it retains its shape.
Remember to read through the entire pattern before starting to ensure you understand the steps and have all the necessary materials. You can also customize the pattern by adding your own personal touches, such as changing the color of the yarn or modifying the length of the sweater.
With a free knit sweater pattern, you can create a stylish and cozy garment that you will love to wear. So grab your knitting needles and yarn, and start knitting your own unique sweater today!
The Benefits of Knitting
Knitting is a popular hobby that offers numerous benefits to those who engage in it. Not only is it a creative and enjoyable activity, but it also has several positive effects on one’s mental and physical well-being.
Mental Health Benefits:
- Reduced Stress: Knitting has been shown to have a calming effect on the mind. It allows individuals to focus their attention on the repetitive motions and patterns, helping to reduce stress and promote relaxation.
- Mindfulness: Knitting requires concentration and attention to detail, making it an excellent practice for achieving mindfulness. It helps individuals to be fully present in the moment and cultivate a sense of inner calm and peace.
- Improved Cognitive Function: Knitting stimulates the brain and can improve cognitive function. It involves problem-solving skills, pattern recognition, and the coordination of hand-eye movements, all of which help to keep the mind sharp and active.
Physical Health Benefits:
- Hand and Finger Strength: Knitting involves repetitive hand and finger movements, which can help improve strength and dexterity. This can be especially beneficial for individuals with arthritis or other hand-related conditions.
- Stress Relief: Engaging in knitting can have a relaxing and therapeutic effect on the body. The rhythmic motions of knitting can help to lower blood pressure, reduce muscle tension, and promote overall relaxation.
- Sense of Achievement: Completing a knitting project, whether it be a simple scarf or a complex sweater, can provide individuals with a sense of accomplishment and pride. This can boost self-esteem and contribute to an overall sense of well-being.
In conclusion, knitting offers numerous benefits for both mental and physical health. It provides a creative outlet, promotes relaxation, and improves cognitive function. Additionally, it can help strengthen hand and finger muscles and provide individuals with a sense of achievement. Whether you are a beginner or an experienced knitter, the rewards of this craft are worth exploring.
Choosing the right yarn
When it comes to knitting a sweater, choosing the right yarn is crucial. Not only does the yarn determine the overall look and feel of the sweater, but it also affects the durability and comfort of the finished garment. There are several factors to consider when selecting yarn for your knit sweater project.
Fiber Content: One of the most important considerations when choosing yarn is the fiber content. Different fibers have different properties and characteristics. For example, wool is known for its warmth and elasticity, making it a popular choice for sweaters. Cotton, on the other hand, is lightweight and breathable, making it suitable for warmer climates or lightweight sweaters. Mohair and alpaca yarns are known for their softness and fuzzy texture, adding a luxurious touch to your sweater.
Weight: The weight of the yarn determines the thickness and drape of the finished sweater. The weight is usually indicated by a number or a description, such as “bulky” or “sport.” The weight you choose will depend on the pattern and the desired outcome. Thicker yarns create bulkier sweaters, while thinner yarns create lighter and drapier garments. It’s essential to match the yarn weight to the pattern requirements to ensure the right fit and structure of your sweater.
Color and Texture: The color and texture of the yarn can greatly impact the overall appearance of your sweater. Variegated or multi-colored yarns can add visual interest and depth to your knit design. Solid-colored yarns, on the other hand, provide a more classic and timeless look. Similarly, yarns with a smooth texture give a polished and clean finish, while yarns with a textured or tweed effect create a more rustic and cozy feel.
Ultimately, the right yarn for your free knit sweater pattern will depend on your personal preferences, the desired style, and the intended use of the finished garment. By considering factors such as fiber content, weight, color, and texture, you can select the perfect yarn to bring your sweater project to life.
Selecting the Proper Knitting Needles
Choosing the right knitting needles is essential for any knitting project. The needles you select can greatly impact your knitting experience and the final outcome of your project. There are several factors to consider when selecting knitting needles, including the type of yarn you will be using and the pattern you will be working with.
Material: Knitting needles come in a variety of materials, including metal, wood, and plastic. Each material has its own unique properties that can affect the way the needles feel in your hands and how smoothly the yarn slides along the needles. Metal needles are typically very smooth and can be great for faster knitting. Wood needles provide more grip and can be a good choice for slippery yarns. Plastic needles are lightweight and great for taking on the go.
Size: The size of your knitting needles will depend on the weight of the yarn you are using and the desired gauge of your project. The size of knitting needles is measured in millimeters or US sizes. The larger the needle size, the looser the tension and the bigger the stitches. The smaller the needle size, the tighter the tension and the smaller the stitches. Be sure to check the recommended needle size in the pattern you are using or swatch with different needle sizes to achieve the desired gauge.
Type: Knitting needles come in different types, such as straight needles, circular needles, and double-pointed needles. Straight needles are the most traditional and are used for flat knitting. Circular needles have a flexible cord connecting two needle tips and are great for knitting in the round or for larger projects. Double-pointed needles are shorter and usually come in sets of four or five, and are primarily used for small circular knitting projects or knitting in tight spaces.
By considering the material, size, and type of knitting needles that best suit your project and personal preferences, you can ensure a more enjoyable and successful knitting experience.
Understanding knitting patterns
Knitting patterns are an essential part of any knitting project, providing the instructions and guidance needed to create a beautiful and functional piece of clothing. Whether you’re a beginner or an experienced knitter, understanding knitting patterns is key to successfully completing your project.
Components of a knitting pattern: Knitting patterns typically consist of several key components, including the gauge, materials list, abbreviations, stitch pattern, and sizing information. The gauge refers to the number of stitches and rows per inch, which helps ensure that your finished project matches the desired measurements. The materials list specifies the type and amount of yarn, as well as the recommended needle size. Abbreviations are commonly used in knitting patterns to save space and make the instructions easier to read. The stitch pattern describes the specific stitches and techniques used to create the desired design. Lastly, the sizing information provides instructions for creating different sizes of the same garment or accessory.
Interpreting the instructions: Once you’re familiar with the components of a knitting pattern, the next step is to understand how to interpret the instructions. Each line or row of the pattern represents a specific action or stitch, and it’s important to read and follow the instructions carefully. Pay attention to any special symbols or instructions that may be included, as they often indicate unique techniques or variations in the pattern. It’s also helpful to highlight or mark off each completed step to keep track of your progress and avoid making mistakes.
Troubleshooting and modifications: Knitting patterns are not set in stone and can be modified to suit your preferences or needs. If you encounter any difficulties or confusion while following a pattern, don’t hesitate to seek help from an experienced knitter or consult online resources. Additionally, you can make modifications to a pattern by changing the yarn, needle size, stitch pattern, or sizing options to create a garment that better suits your personal style or body shape.
In conclusion, understanding knitting patterns is crucial for any knitter looking to embark on a new project. By familiarizing yourself with the components, interpreting the instructions, and being open to making modifications, you can confidently create beautiful knitwear that you’ll be proud to wear or gift to others.
Getting started with the free knit sweater pattern
Are you ready to take on a new knitting project? The free knit sweater pattern is a great choice for intermediate knitters looking to challenge themselves and create a stylish, cozy sweater. With step-by-step instructions and clear charts, this pattern will guide you through the entire process of knitting your own sweater.
Gather your materials: Before you begin, make sure you have all the necessary materials for the project. You will need yarn in the specified weight and color, knitting needles in the recommended size, stitch markers, and a tapestry needle for weaving in ends and sewing seams. Take the time to gather everything you need before you start to ensure a smooth knitting experience.
Read through the pattern: Once you have your materials ready, take a few minutes to read through the entire pattern. Pay attention to the pattern’s gauge and measurements, as well as any special stitches or techniques that may be required. This will give you a better understanding of the project and help you visualize the finished sweater.
Check your gauge: Before you dive into knitting the sweater, it’s important to check your gauge. Follow the gauge instructions provided in the pattern and knit a swatch using the recommended needle size. Measure your swatch and compare it to the gauge given in the pattern. Adjust your needle size if necessary to ensure that your knitted fabric matches the desired gauge. This step is crucial for achieving the correct fit and size of the finished sweater.
Follow the instructions: With your materials gathered and your gauge checked, it’s time to start knitting! Follow the step-by-step instructions provided in the pattern, referring to the charts and diagrams as needed. Take your time and double-check your work as you go to avoid mistakes and ensure accuracy. Don’t be afraid to reach out for help or clarification if you encounter any difficulties.
Finish and block your sweater: Once you have completed all the knitting and sewing, it’s time to finish your sweater. Weave in any loose ends and sew up any remaining seams using the tapestry needle. Then, give your sweater a gentle blocking to even out the stitches and shape the garment. Follow the blocking instructions in the pattern to achieve a professional-looking finish.
Enjoy your new sweater: Congratulations! You have completed the free knit sweater pattern and now have a cozy, handmade sweater to wear. Try it on, show it off, and enjoy the satisfaction of creating something beautiful with your own two hands. Happy knitting!
Knitting the body of the sweater
Once you have completed the sleeves and joined them to the main body of the sweater, it’s time to start knitting the body. The body of the sweater is typically worked in a single piece, starting from the bottom and working your way up to the armholes.
To begin, you will need to determine the number of stitches you will need for the body. This will depend on your gauge and the desired size of the sweater. It’s recommended to make a gauge swatch before starting the project to ensure an accurate fit.
Step 1: Cast on the required number of stitches for the size you are making. You can use a long tail cast on or any other method you prefer.
Step 2: Work the body of the sweater in the stitch pattern indicated in the pattern. This could be stockinette stitch, garter stitch, or any other stitch pattern you choose. Make sure to follow the pattern instructions for any shaping, such as increases or decreases, as you work your way up.
Step 3: Continue knitting until you reach the desired length for the body of the sweater. This can vary depending on the style and fit you prefer. It’s a good idea to try on the sweater occasionally to ensure it fits the way you want it to.
Step 4: Once you have reached the desired length, you can start working on the armholes. The pattern will provide instructions on how to shape the armholes, usually by binding off a certain number of stitches on each side and then continuing to work the remaining stitches.
Step 5: After completing the armholes, you will continue working the remaining stitches in the stitch pattern until you reach the shoulder length indicated in the pattern.
Step 6: Finally, you will bind off all the stitches to finish the body of the sweater. Make sure to weave in any loose ends and block the sweater to give it a polished look.
Knitting the body of the sweater is an exciting part of the project as you start to see the sweater taking shape. Take your time, follow the pattern instructions, and enjoy the process of creating your own cozy knit sweater.
Creating the sleeves
Once you have finished knitting the body of your sweater, it’s time to move on to creating the sleeves. The sleeves are an essential part of any sweater, as they provide warmth and comfort to the wearer. To begin, you’ll need to cast on the required number of stitches for your sleeve. You can refer to the pattern for the specific number of stitches needed.
Row 1: Start by knitting the first row of the sleeve. This is typically done in a basic knit stitch, but you can also add some variation by using a different stitch pattern if desired. Repeat this row until the desired length for your sleeve is reached. Be sure to follow the pattern instructions for any shaping or decreases that may be required.
Row 2: After completing the desired length for the sleeve, you’ll move on to the second row. This row may involve additional shaping or decreases to achieve the desired fit. It’s important to carefully read and follow the pattern instructions for this row, as it will help ensure that your sleeve fits properly.
- Repeat rows: Continue working the two rows (row 1 and row 2) in the pattern until the sleeve reaches the desired length. This may involve additional shaping or decreases as indicated in the pattern instructions.
- Finishing touches: Once the desired length is achieved, you’ll need to bind off the stitches to finish the sleeve. Again, refer to the pattern instructions for the specific bind off method to use. This will help give your sleeve a clean and polished look.
Remember, creating the sleeves is an important step in completing your knit sweater. Take your time and follow the pattern instructions closely to ensure a well-fitted and comfortable sleeve. With patience and practice, you’ll have a beautiful and cozy sweater to enjoy.
Finishing touches: neckline and hem
When it comes to finishing a knit sweater, attention to detail is key. The neckline and hem are two areas that require special consideration to ensure a polished and professional finish. It is important to choose the right technique for these areas to achieve the desired look.
For the neckline, there are several options to choose from. One popular technique is to bind off the stitches using a smaller needle to create a neat and tidy edge. This method can be used with different stitch patterns, such as ribbing or garter stitch, to create different effects. Another option is to pick up stitches along the edge of the neckline and knit a ribbed or garter stitch band. This technique provides a clean and finished look to the neckline.
The hem of a knit sweater also requires careful attention. One common method is to fold the bottom edge of the sweater inward and sew it in place. This creates a clean and polished look, especially when paired with a ribbed or garter stitch pattern. Alternatively, a picot or scalloped edge can be added to the hem for a more decorative touch.
When finishing the neckline and hem of a knit sweater, it is important to take the time to block and shape the garment. This will help to ensure that the finished sweater lies flat and has a professional appearance. Additionally, weaving in any loose ends and securing any loose stitches is essential for a neat and tidy finished product.
Blocking and caring for your knit sweater
Once you have finished knitting your sweater, it is important to block it to give it a polished and finished look. Blocking is the process of gently shaping and stretching the knitted fabric to its correct dimensions, allowing the stitches to even out and the fibers to relax.
To block your knit sweater, you will need to follow these steps:
- Fill a sink or basin with lukewarm water and add a small amount of mild detergent.
- Submerge the sweater in the water, gently squeezing it to ensure it is fully saturated. Let it soak for about 10-15 minutes.
- Remove the sweater from the water and gently squeeze out any excess water. Do not wring or twist the sweater, as this can damage the fibers.
- Lay a clean towel on a flat surface and place the sweater on top, gently reshaping it to its desired dimensions. You can use pins to hold the shape if necessary.
- Allow the sweater to air dry completely, preferably on a flat surface. Avoid hanging it up, as this can cause the sweater to stretch or lose its shape.
Once your sweater is dry, it is important to properly care for it to keep it looking its best. Here are some tips to help you care for your knit sweater:
- Store your sweater folded, rather than hanging, to prevent stretching.
- Keep your sweater away from sharp objects or rough surfaces that could snag the fabric.
- Hand wash your sweater using a mild detergent and lukewarm water, unless the care instructions specify otherwise.
- Avoid using bleach or harsh chemicals, as they can damage the fibers.
- When drying your sweater, gently squeeze out excess water and reshape it before laying it flat to air dry.
Caring for your knit sweater will help ensure its longevity and keep it looking its best for years to come. By following these blocking and care instructions, you can enjoy your knit sweater for many cozy seasons.