
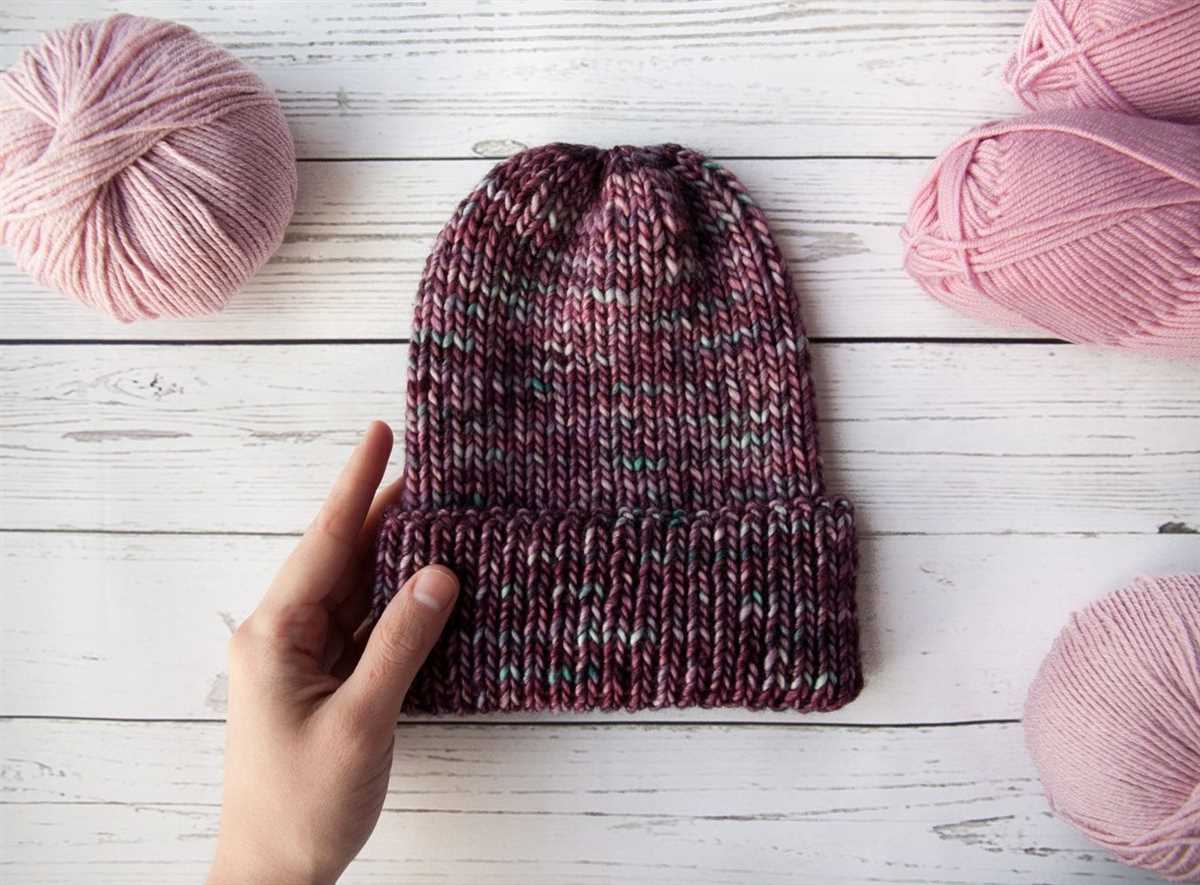
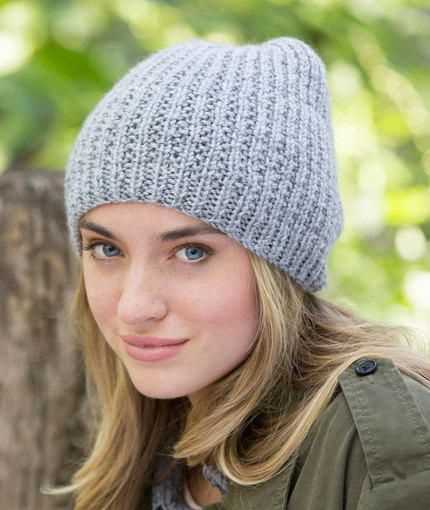
Knitting is a beloved craft for many people who enjoy creating beautiful and practical items with their own hands. Whether you are a beginner or an experienced knitter, making a cozy hat can be a rewarding project. With this free easy knit beanie hat pattern, you can create a stylish and warm accessory for yourself or your loved ones.
This pattern is perfect for knitters of all levels. The straightforward design and simple instructions make it a great choice for beginners who are just starting to explore the world of knitting. And for more experienced knitters, this pattern provides a relaxing and enjoyable knitting experience, allowing you to create a well-fitted and comfortable hat in no time.
The beauty of this pattern lies in its versatility. You can choose any color of yarn that suits your style and create a hat that matches your wardrobe perfectly. The pattern also includes options for different sizes, so you can easily adapt it to fit adults or children. Whether you prefer a solid color or a playful variegated yarn, this pattern allows you to unleash your creativity and make a hat that reflects your personal style.
Free Easy Knit Beanie Hat Pattern
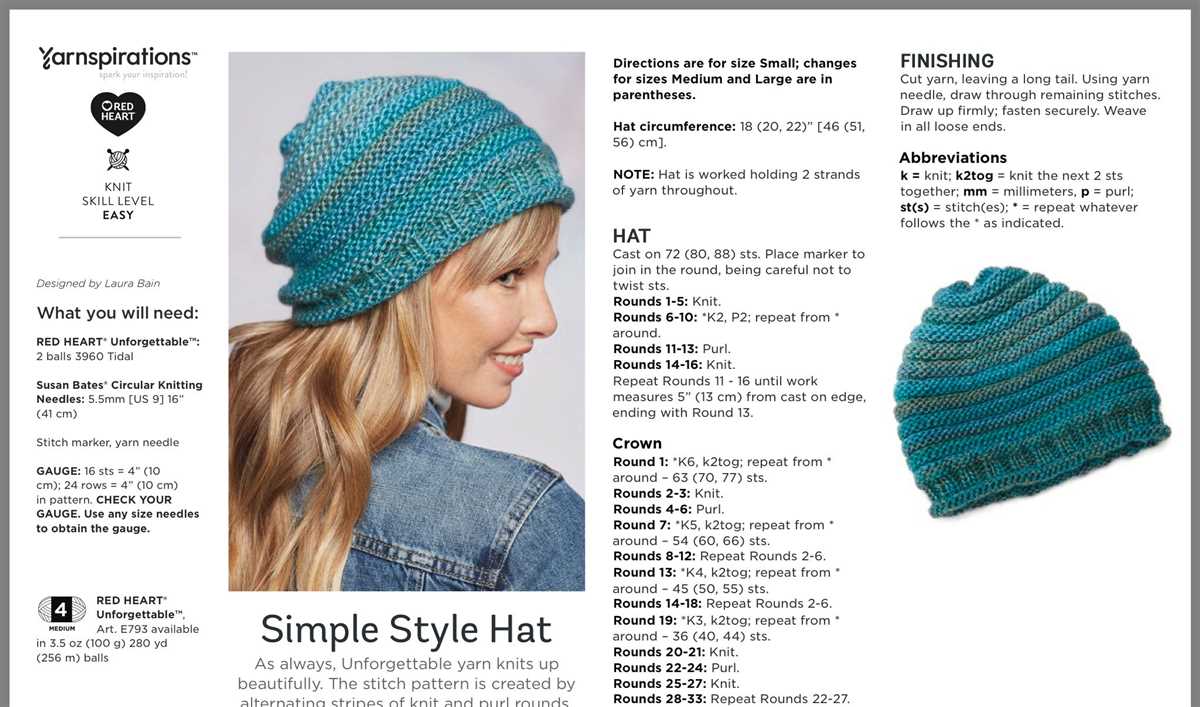
Looking for a simple and quick knitting project? Look no further than this free easy knit beanie hat pattern. Whether you’re a beginner knitter or an experienced one, this pattern is perfect for making a cozy and stylish hat for yourself or as a gift.
This pattern requires basic knitting skills and uses only basic stitches, so even if you’re new to knitting, you can easily follow along. The pattern provides step-by-step instructions and a list of materials needed, making it easy to get started.
Materials Needed:
- 1 skein of medium weight yarn
- Size 8 (5mm) knitting needles
- Scissors
- Tapestry needle
To begin, cast on the desired number of stitches, depending on the size of the hat you want to make. Then, simply follow the pattern and knit in the round until the desired length is reached. The pattern includes options for different sizes, so you can customize it to fit perfectly.
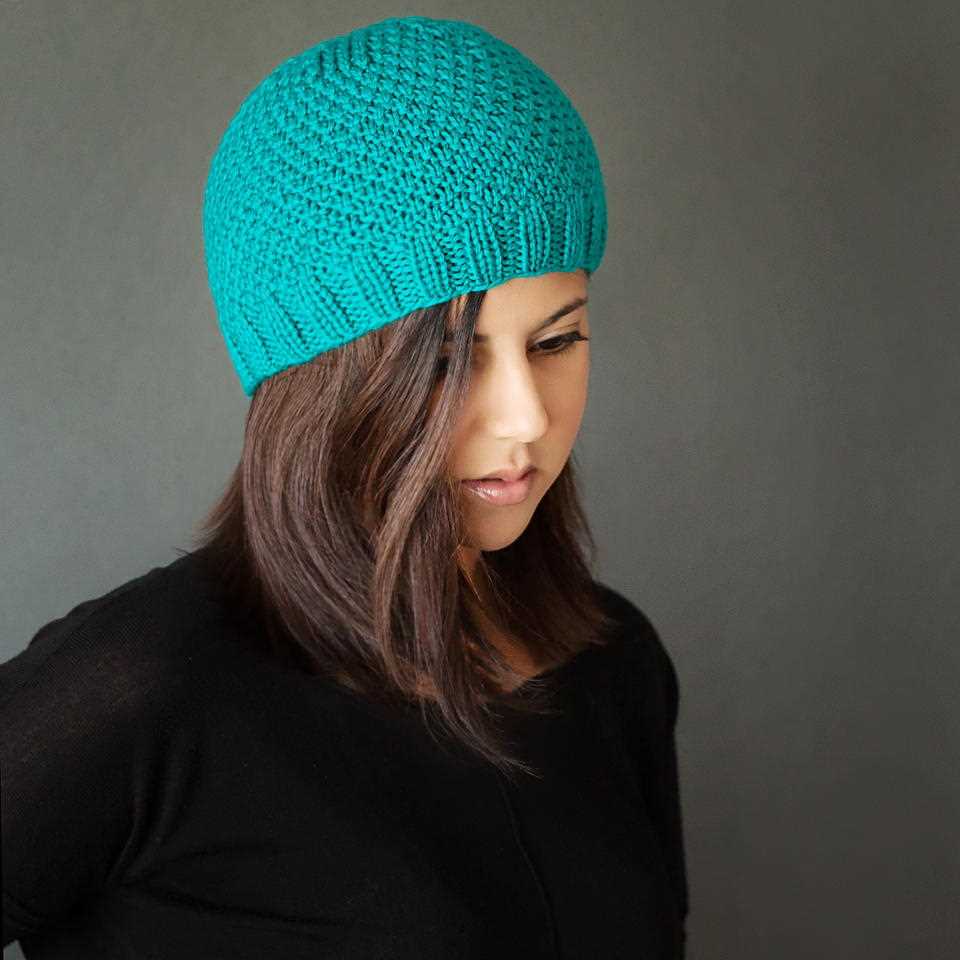
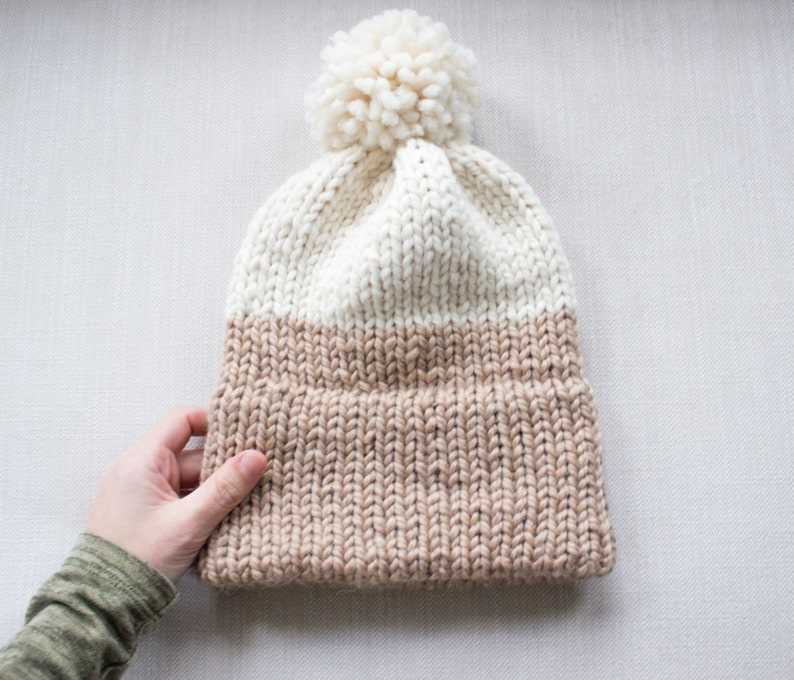
This beanie hat pattern is not only easy to knit, but it also allows for endless creativity. You can choose different colors of yarn to create unique designs or add personalized touches, such as pom-poms or buttons, to make it even more special.
Once you’ve finished knitting the hat, simply weave in any loose ends and it’s ready to wear. Whether you’re heading out for a winter walk or simply want to keep warm indoors, this free easy knit beanie hat pattern is the perfect accessory for any occasion.
Materials Needed
Before you begin knitting your beanie hat, make sure you have all the necessary materials. Here is a list of what you will need:
- Yarn: Choose a soft and warm yarn in the color of your choice. It is recommended to use a medium weight yarn (also known as worsted weight or aran weight).
- Knitting Needles: You will need a pair of circular knitting needles in the appropriate size for your yarn. The size will depend on your tension and desired gauge.
- Circular Needles: In addition to the knitting needles, you will also need a set of double-pointed needles, or DPNs, for the decrease section of the pattern.
- Tapestry Needle: A tapestry needle, or yarn needle, is necessary for weaving in the loose ends of yarn and finishing the hat.
- Stitch Marker: A stitch marker is helpful for marking the beginning of the round and for keeping track of your stitches.
- Measuring Tape: You will need a measuring tape to determine the size of your head and to check your gauge.
Once you have gathered all these materials, you will be ready to start knitting your beanie hat. It is always a good idea to read through the entire pattern before you begin to familiarize yourself with the instructions and ensure you have everything you need.
Choosing the Right Yarn
When it comes to choosing yarn for your knit beanie hat, there are several factors to consider. The type of yarn you choose will greatly impact the final look and feel of your hat, as well as its durability and warmth. Here are some tips to help you make the right choice:
1. Fiber Content
The first thing to consider is the fiber content of the yarn. Different fibers have different properties, so think about what you want your hat to feel like. If you’re looking for warmth, consider using a wool or alpaca yarn. If you want a lightweight and breathable hat, cotton or bamboo yarn may be a better choice. Acrylic yarn is a popular option for beginners, as it is affordable and easy to care for.
2. Weight
The weight of the yarn will also impact the final product. The weight refers to the thickness of the yarn, and it is usually indicated on the yarn label. For a beanie hat, you’ll want to choose a yarn that is labeled as “worsted weight” or “medium weight.” This will ensure that your hat is not too thick or too thin.
3. Color and Texture
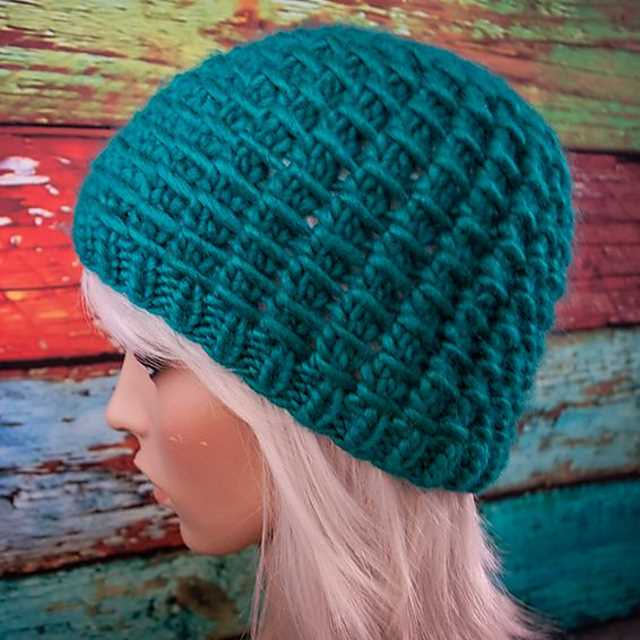
The color and texture of the yarn can also make a big difference in the appearance of your hat. Think about the overall look you want to achieve and choose a yarn that matches your vision. Solid colors are classic and versatile, while variegated or self-striping yarns can add a pop of color and interest. As for texture, you can choose from smooth, fuzzy, or even metallic yarns, depending on the style you’re going for.
4. Price and Availability
Last but not least, consider your budget and the availability of the yarn. Some specialty yarns can be quite expensive, so it’s important to determine how much you’re willing to spend. Additionally, certain yarns may only be available in certain stores or online, so make sure to do your research and plan accordingly.
- Choosing the right yarn for your knit beanie hat is crucial to achieving the desired result.
- Consider the fiber content, weight, color, texture, price, and availability of the yarn.
- Wool, alpaca, cotton, bamboo, and acrylic are common yarn options.
- Worsted weight or medium weight yarn is recommended for beanie hats.
- Think about the overall look you want to achieve and choose a yarn that matches your vision.
- Take into consideration your budget and the availability of the yarn.
Selecting the Right Needles
When it comes to knitting a beanie hat, selecting the right needles is key to achieving the desired finished product. The type and size of needles you choose can greatly impact the look and feel of your hat, as well as how easy or difficult the knitting process will be. Here are some factors to consider when selecting needles for your knitting project.
Type of Needles
There are two main types of knitting needles: straight needles and circular needles. Straight needles are the traditional knitting needles with a pointed end on each side, whereas circular needles have two needle tips connected by a cable. For knitting a beanie hat, circular needles are often the preferred choice as they allow you to knit in the round, eliminating the need for seaming.
Needle Size
The needle size you choose will determine the gauge and tension of your knitting. A smaller needle size will result in tighter stitches and a denser fabric, while a larger needle size will create looser stitches and a more relaxed fabric. It’s important to check the pattern’s gauge recommendation and use needles that will help you achieve that gauge. This can involve swatching and adjusting needle sizes until you reach the correct tension.
Material of Needles
Knitting needles come in various materials, each with its own characteristics. Common options include wood, bamboo, metal, and plastic. The material you choose can affect the feel of the needles in your hands, the slipperiness of the stitches, and the overall weight of the project. Additionally, some materials may be better suited for certain yarn types. For example, slippery yarns may benefit from using wood or bamboo needles, which provide more grip.
By carefully selecting the right needles for your beanie hat project, you can ensure a comfortable knitting experience and create a hat that meets your expectations in terms of gauge, texture, and drape. Experimenting with different needle types, sizes, and materials can also result in unique and personalized finished products.
Casting On
When starting a knitting project, the first step is to cast on. This means creating the initial row of stitches on your knitting needle. The method of casting on will vary depending on the type of stitch pattern you’re using and the desired look of your finished beanie hat.
One common casting on technique is the long-tail cast on, which creates a neat and flexible edge. To start, measure out a length of yarn that is approximately three times the width of your finished beanie hat. Make a slip knot at one end of the yarn, leaving a short tail. Insert your needle through the slip knot and tighten it slightly around the needle. Hold the tail end of the yarn in your left hand and the working yarn in your right hand.
To make a stitch, insert the needle between the two strands of yarn on your left hand and wrap the working yarn around the needle counterclockwise. Bring the needle forward through the loop on your left hand, catching the working yarn with the needle. This creates a new stitch on your right needle. Repeat this process until you have cast on the desired number of stitches for your beanie hat.
Once you have cast on all the stitches, you can start working the pattern for your beanie hat. Remember to keep the tension even as you knit each row to ensure that your stitches are consistent in size. With practice, casting on will become easier and you’ll be able to start your knitting projects with confidence.
Knitting the Body
After casting on the required number of stitches, it’s time to start knitting the body of the beanie hat. This is where the main part of the hat takes shape and the pattern truly comes to life.
Row 1: Begin by knitting all stitches in the round. This will create the base row for the body of the hat. Make sure to keep the tension consistent to ensure an even and neat appearance.
Once the base row is complete, the pattern may call for a certain number of rows of knit stitches or a specific stitch pattern to be repeated. Follow the instructions carefully to achieve the desired look and fit for the beanie.
Example of a stitch pattern:
- Row 2: Purl all stitches.
- Row 3: Knit all stitches.
- Row 4: Purl all stitches.
- Repeat rows 3 and 4: Continue alternating knit and purl rows until the desired length is reached.
Remember to regularly check your gauge as you knit the body to ensure the hat will fit properly. Adjust your tension if necessary to achieve the correct gauge as stated in the pattern.
Continue knitting the body according to the pattern instructions until the desired length is reached. This may vary depending on personal preference or the intended recipient’s head size. Once the body is completed, it’s time to move on to shaping the crown of the beanie hat.
Shaping the Crown
Once you have completed the ribbing and established the main body of your beanie hat, it’s time to start shaping the crown. This is the part of the hat that will give it its signature slouchy or fitted look. The crown is typically shaped using decreases, which decrease the number of stitches as you work your way towards the top of the hat.
To shape the crown, you will need to follow the instructions for the specific pattern you are using. Most hat patterns will indicate how many stitches to decrease and at what intervals. Common decrease methods include knitting two stitches together, slipping stitches, or using a central double decrease. These decreases create a gradual taper that brings the excess fabric of the hat together at the top, creating a nice rounded crown.
Note: It’s important to pay attention to the stitch count as you continue to decrease. Make sure you are following the pattern correctly and keeping track of your stitches to ensure the crown is shaped properly.
As you work through the shaping process, you may need to switch from using circular needles to double-pointed needles or a smaller circular needle to accommodate the decreasing number of stitches. This will allow you to continue working in the round without stretching the stitches too much.
Once you have completed the shaping and reached the desired number of stitches for the crown, you can finish off the hat by cutting the yarn and threading it through the remaining stitches to close the top. Weave in any loose ends, and your beanie hat is complete!
Decreasing Stitches
When knitting a beanie hat, it is important to know how to decrease stitches in order to shape the crown of the hat. Decreasing stitches help to create a tapered effect and give the hat a more fitted look. There are different methods for decreasing stitches, but the most common ones are the knit two together (k2tog) and the slip, slip, knit (ssk) stitches.
The k2tog stitch is used to decrease two stitches into one. To do this, insert the right needle into the next two stitches as if to knit, and then knit them together as one stitch. This creates a single decreased stitch. The ssk stitch is used to decrease one stitch by slipping two stitches knitwise, inserting the left needle into the front of both slipped stitches, and then knitting them together through the back loop. This also creates a single decreased stitch.
When following a pattern for a beanie hat, the instructions will specify the number of stitches to decrease and the rows or rounds on which to do so. It is important to carefully read and understand these instructions in order to create the desired shape of the hat. By decreasing stitches at the specified intervals, you can create a snug and well-fitting beanie hat.
Another method of decreasing stitches is the centered double decrease (cdd). This stitch is used when you want to decrease two stitches in the middle of a row or round, and create a more pronounced decrease. To do the cdd stitch, slip two stitches knitwise, knit the next stitch, and then pass the slipped stitches over the knit stitch on the right needle. This creates a centered double decrease and decreases two stitches into one.
Remember to always practice decreasing stitches on a swatch or scrap piece of fabric before starting your beanie hat. This will help you become familiar with the technique and ensure that you are happy with the way your decreases look. Happy knitting!
Switching to Double Pointed Needles
When knitting a beanie hat, there comes a point where switching to double pointed needles is necessary. Double pointed needles, or DPNs, are used when there are too few stitches to comfortably fit on a regular circular needle. They allow you to continue knitting in the round while still maintaining the correct tension.
To switch to DPNs, start by dividing your stitches evenly onto three or four needles, depending on the pattern. Hold the needle with the first stitch in your right hand and the empty needle in your left hand. Begin knitting as usual, making sure to keep the tension consistent across the needles.
Why use DPNs?
- Tighter stitches: Working with DPNs allows for tighter stitches, which is important for the brim of a hat where you want a snug fit.
- Flexibility: DPNs offer more flexibility and maneuverability compared to a regular circular needle.
- Ease of use: DPNs are relatively easy to use once you get the hang of them. They provide stability and control, making it easier to work with smaller projects like a beanie hat.
Remember: When switching to DPNs, it’s essential to be mindful of knitting tension and to ensure that all stitches are secure on the needles. Using stitch markers can also be helpful to keep track of the beginning and end of rounds.
Overall, switching to double pointed needles is a necessary step in knitting a beanie hat. It allows for tighter stitches, offers flexibility and ease of use, and ensures that your project turns out just as you envision.
Finishing the Hat
Once you have completed knitting the beanie hat, there are a few steps to take to finish it off and make it ready to wear. These final touches will ensure that your hat is not only comfortable but also looks polished and professional.
Weaving in loose ends: After completing the knitting, you may have some loose ends of yarn sticking out. To make sure these don’t unravel or become bothersome, weave them in using a tapestry needle. Thread the loose end through the stitches on the wrong side of the hat, going back and forth a few times to secure it in place. Trim any excess yarn.
Blocking: Blocking is an optional step, but it can help enhance the shape and fit of your hat. To block the hat, you can either wet it and lay it flat to dry or steam it using an iron or garment steamer. Gently shape the hat to the desired size and allow it to dry completely before wearing.
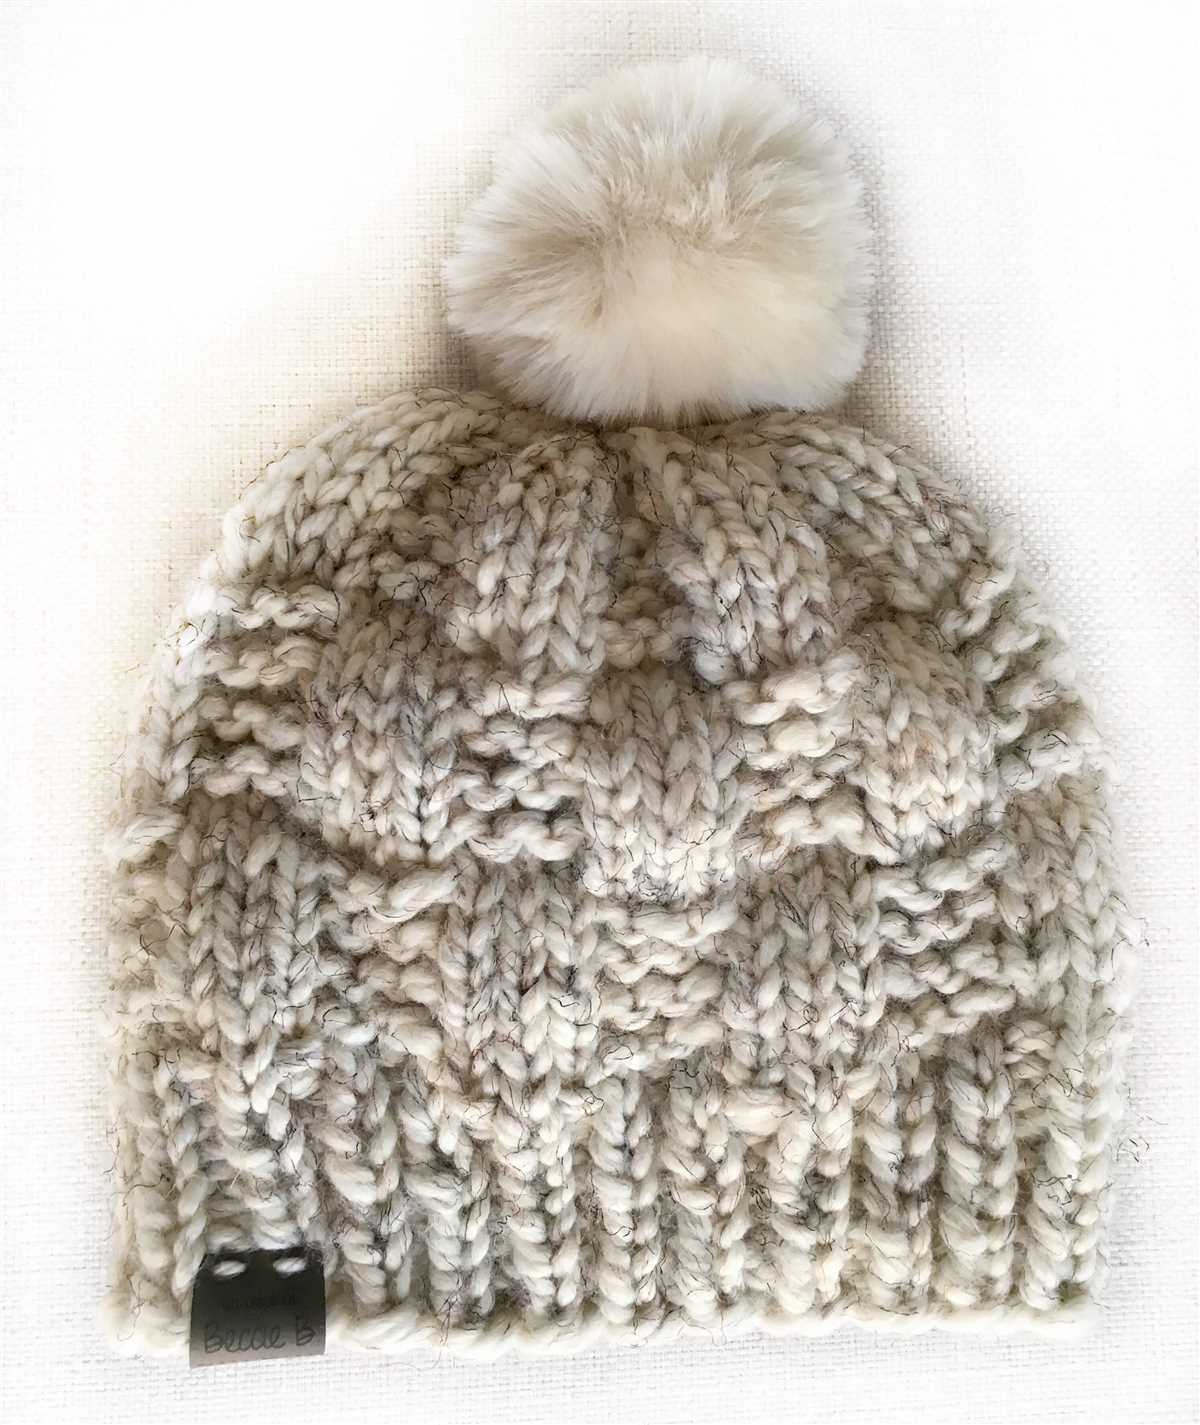
Adding a pom-pom: To give your beanie hat a fun and trendy look, you can attach a pom-pom to the top. You can either purchase a pre-made pom-pom or make your own using yarn. Attach the pom-pom securely by sewing it onto the top of the hat using a tapestry needle and yarn.
Embellishments: If desired, you can also add additional embellishments to your hat, such as buttons, patches, or embroidery. Secure these embellishments in place using a needle and thread or fabric glue, making sure they are firmly attached and won’t come loose during wear.
By following these finishing steps, you can transform your completed knit beanie hat into a stylish and functional accessory that will keep you warm and cozy during the colder months.
Adding Embellishments
Once you have finished knitting your beanie hat, you can add some personal touches and embellishments to make it even more unique. Here are a few ideas:
- Pom-pom: Attach a pom-pom to the top of the hat using a yarn needle. You can make your own pom-pom using a pom-pom maker or buy pre-made ones in different colors.
- Buttons: Sew on buttons of different sizes and colors to add some visual interest to the hat.
- Embroidery: Use colorful yarn or embroidery floss to embroider simple designs, such as flowers or initials, onto the hat.
- Embroidered patches: Sew on small patches of fabric with colorful patterns or designs onto the hat for a playful touch.
Remember to choose embellishments that are suitable for the style and thickness of your knitted hat. Be creative and have fun customizing your beanie hat to reflect your personal style!
Summary
Adding embellishments is a great way to make your beanie hat truly one-of-a-kind. Whether you prefer pom-poms, buttons, embroidery, or patches, there are endless options to choose from. Get creative and have fun personalizing your knit beanie!