
Knitting is a versatile and enjoyable craft that allows you to create a wide range of beautiful and useful items. One such item is a felted knitted hot pad, which is not only practical but also adds a touch of handmade charm to your kitchen decor.
This pattern is suitable for knitters of all skill levels, including beginners. The felted hot pad is knitted in the round using a combination of knit and purl stitches, and then felted to create a thick and durable fabric. The finished hot pad makes a perfect trivet for hot pots and pans, protecting your table or countertop from heat.
For this project, you will need a few basic supplies, including a set of double-pointed or circular knitting needles and worsted weight wool yarn. You can choose any color or combination of colors to suit your personal style and kitchen decor. The pattern can also be easily adjusted to make hot pads in different sizes or shapes.
Whether you’re an experienced knitter looking for a quick and satisfying project or a beginner looking to learn new skills, this felted knitted hot pad pattern is a great choice. With just a few hours of knitting and some simple felting techniques, you’ll have a practical and stylish addition to your kitchen in no time.
Felted Knitted Hot Pad Pattern
If you’re looking for a fun and practical knitting project, then why not try making a felted knitted hot pad? These hot pads are not only functional for protecting your surfaces from hot pots and pans, but they also add a touch of charm to your kitchen. Plus, the felting process gives them extra durability and insulation.
To make a felted knitted hot pad, you’ll need some wool yarn and a set of knitting needles. The pattern itself is quite simple, as it involves a basic square or rectangular shape. You can choose to add some decorative stitches or stripes to make it more interesting, or keep it plain for a clean and minimalist design.
- Materials: Wool yarn, knitting needles
- Step 1: Cast on the desired number of stitches for your hot pad. Remember that the felting process will shrink the size, so make it slightly larger than you want the final result to be.
- Step 2: Knit in garter stitch (knit every row) until your hot pad reaches the desired length.
- Step 3: Bind off all stitches.
- Step 4: Place the hot pad in a mesh laundry bag or pillowcase to protect your washing machine.
- Step 5: Wash the hot pad in hot water with a small amount of detergent. Add a couple of towels or other items to create agitation.
- Step 6: After washing, check the hot pad’s size. If it hasn’t felted enough, repeat the washing process. If it has felted enough, reshape the hot pad to its desired size and let it air dry.
Once your felted knitted hot pad is dry, it’s ready to use! These hot pads make great gifts for friends and family, and you can customize them with different colors and patterns to suit your style. They’re not only practical, but they also add a handmade touch to your kitchen decor. So grab your knitting needles and start creating your own felted knitted hot pads today!
Gathering Supplies
Before you start making your felted knitted hot pad, make sure you have all the necessary supplies. Here is a list of what you’ll need:
- Knitting needles: You’ll need a pair of knitting needles in the size recommended for your chosen yarn. Make sure they are the right size to achieve the desired gauge.
- Yarn: Choose a yarn that is suitable for felting. Wool or a wool blend works best for felting projects. Pick a color or combination of colors that you like.
- Tapestry needle: This needle will be used for seaming and weaving in ends. Make sure it has a large enough eye to accommodate the yarn.
- Scissors: A pair of sharp scissors will be handy for cutting the yarn and any excess fabric.
- Measuring tape: You’ll need a measuring tape to check your gauge and measure the dimensions of your finished hot pad.
- Bowl or sink: You’ll need a container that is large enough to accommodate your hot pad for the felting process. Make sure it can hold water and withstand agitation.
- Hot water: The water you use for felting should be hot, but not boiling. Fill your container with enough hot water.
- Soap or detergent: You’ll need a small amount of soap or detergent to help with the felting process. Choose a gentle, mild option.
- Towel: Have a clean towel ready to use for drying your felted hot pad.
Once you have gathered all these supplies, you’ll be ready to start knitting and felting your hot pad. Make sure you have a comfortable and well-lit work area where you can focus on the project.
Choosing the Right Yarn
When it comes to knitting a felted hot pad, choosing the right yarn is crucial. The yarn you choose will determine the overall look, feel, and durability of the finished product. Here are some key factors to consider when selecting yarn for your project:
Type of Yarn
The type of yarn you choose will depend on your personal preference and the desired outcome of your hot pad. Wool yarn is a popular choice for felting projects due to its ability to shrink and felt easily. Look for 100% wool or a wool blend, as synthetic fibers will not felt properly. Alternatively, you can also use other natural fibers such as alpaca or mohair, which will provide a different texture and appearance to your hot pad.
Weight of Yarn
The weight of the yarn refers to its thickness and can vary from lace weight to bulky weight. For a hot pad, you will want to choose a yarn that is on the heavier side to ensure a sturdy and thick finished product. Worsted weight yarn is a popular choice for hot pads as it provides a good balance between thickness and ease of knitting. However, you can experiment with different weights to achieve different textures and densities in your hot pad.
Color and Pattern
The color and pattern of the yarn can greatly affect the aesthetic appeal of your hot pad. If you want a simple and classic look, consider using a solid color yarn. If you prefer something more vibrant and eye-catching, opt for a variegated or self-striping yarn. Additionally, you can also experiment with different stitch patterns and colorwork techniques to create unique designs and textures in your hot pad.
Skein Size
Consider the size of the skein or ball of yarn that you are purchasing. Depending on the size of your hot pad and the desired thickness, you may need multiple skeins of yarn. It is always a good idea to buy a little more yarn than you think you will need to ensure that you have enough for your project.
By considering these factors and taking the time to choose the right yarn for your felted hot pad, you can ensure that you will create a beautiful and functional piece that will withstand the test of time.
Getting Started with Knitting
Knitting is a fun and rewarding craft that allows you to create beautiful and useful items with just a few simple tools. Whether you’re a beginner or an experienced knitter, getting started with knitting is easy and can be a relaxing and enjoyable hobby.
To begin knitting, you will need a few basic supplies. First and foremost, you will need knitting needles. There are many different types of needles available, including straight needles and circular needles. Straight needles are used for flat knitting, while circular needles can be used for both flat and circular knitting. It’s a good idea to start with a medium-sized pair of needles, around size 8 or 9, and experiment with different sizes as you become more comfortable with knitting.
Next, you will need yarn. Yarn comes in a variety of materials, weights, and colors. It’s a good idea to start with a medium-weight yarn, such as worsted weight, and choose a color that you love. You can also experiment with different yarn textures and fibers, such as wool, cotton, or acrylic. It’s important to choose a yarn that is suitable for your project and matches the gauge recommended in your pattern.
Once you have your needles and yarn, you can start learning the basic knitting stitches. The two most common stitches are the knit stitch and the purl stitch. These stitches form the foundation of many knitting patterns. You can find tutorials and videos online that will walk you through the steps of these stitches, or you can ask a more experienced knitter to show you in person.
As you become more comfortable with the basic stitches, you can start working on more complex patterns and projects. There are countless knitting patterns available, ranging from simple scarves and hats to intricate sweaters and blankets. It’s important to choose a pattern that matches your skill level and interests, and take your time to read through the instructions carefully before starting.
Knitting is a skill that takes time and practice to master, but with dedication and patience, you can create beautiful and unique items that you can be proud of. Don’t be afraid to make mistakes and learn from them. The most important thing is to have fun and enjoy the process of knitting!
Creating the Knitted Pattern
When creating a knitted pattern for a felted hot pad, there are a few key factors to consider. The first is the size of the hot pad. It is important to determine the desired dimensions before starting the pattern, as this will influence the number of stitches and rows needed. Additionally, the pattern should also take into account the desired thickness of the hot pad, as this will affect the number of layers and the type of stitches used.
Once the dimensions and thickness have been determined, it is time to decide on the design of the hot pad. This can be as simple or intricate as desired, and can include various patterns, motifs, or textures. Some popular options include stripes, chevron patterns, or even small knit or purl designs. When selecting a design, it is important to keep in mind the felting process, as certain patterns may be more forgiving than others. It can be helpful to sketch out the design or create a chart to visualize how it will look once knitted.
Materials and Tools
To create the knitted pattern for a felted hot pad, you will need a few materials and tools. Firstly, you will need the desired yarn for the project. Wool yarn is a popular choice for felting, as it is more likely to felt well and create a sturdy fabric. You will also need knitting needles in a suitable size for your yarn and pattern. It can be helpful to use a larger needle size than what is typically recommended for the yarn, as the finished piece will shrink during the felting process.
In addition to the yarn and knitting needles, you will also need a tape measure or ruler to ensure accurate sizing, and a pair of scissors to cut the yarn. If desired, you can also use stitch markers to mark specific sections of the pattern. Finally, a yarn needle or crochet hook may be needed for any finishing touches or joining seams together.
By carefully considering the size, thickness, and design of your felted knitted hot pad, and gathering the necessary materials and tools, you will be ready to create a beautiful and functional addition to your kitchen or dining table.
Shaping the Hot Pad
When knitting a hot pad, the shaping is an important step to ensure that the final product is both functional and visually appealing. Here are some key considerations for shaping a felted knitted hot pad:
1. Decreases: To create a flat, square shape for the hot pad, decreases are typically worked at the corners. This can be done by knitting two stitches together (k2tog) or slip, knit, pass slipped stitch over (skp). By strategically placing these decreases, the hot pad will have clean edges and a uniform shape.
2. Increases: Depending on the desired size and shape of the hot pad, increases may also be necessary. This can be achieved by knitting into the front and back of a stitch (kfb) or by making a yarn over (yo) and then knitting into the back of it on the next row. Increases can be placed in the center or along the sides to achieve the desired shape.
3. Ribbing: Adding ribbing along the edges of the hot pad can help create a neater and more structured look. This can be done by alternating knit and purl stitches in a 1×1 or 2×2 rib pattern. Ribbing also provides a bit of stretch and flexibility to the edges of the hot pad.
4. Blocking: After completing the knitting, it’s important to block the hot pad to ensure it maintains its shape. Blocking can be done by wetting the hot pad and stretching it to the desired dimensions. This will also help the fibers to bind together during the felting process.
5. Felting: Once the hot pad has been shaped and blocked, it can be felted to create a dense and sturdy fabric. This is typically done by agitating the hot pad in hot soapy water and then rinsing and squeezing out the excess water. The hot pad can then be air-dried or reshaped and dried with the help of a blocking mat.
By following these shaping techniques, you can create a beautifully crafted and functional hot pad that will protect your surfaces from heat and add a touch of style to your kitchen or dining area.
Felting the Knitted Hot Pad
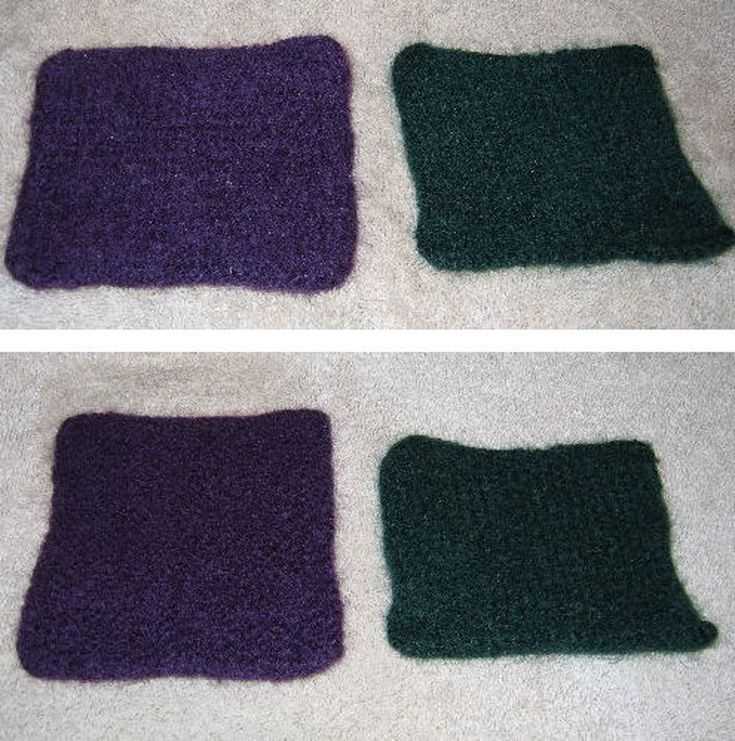
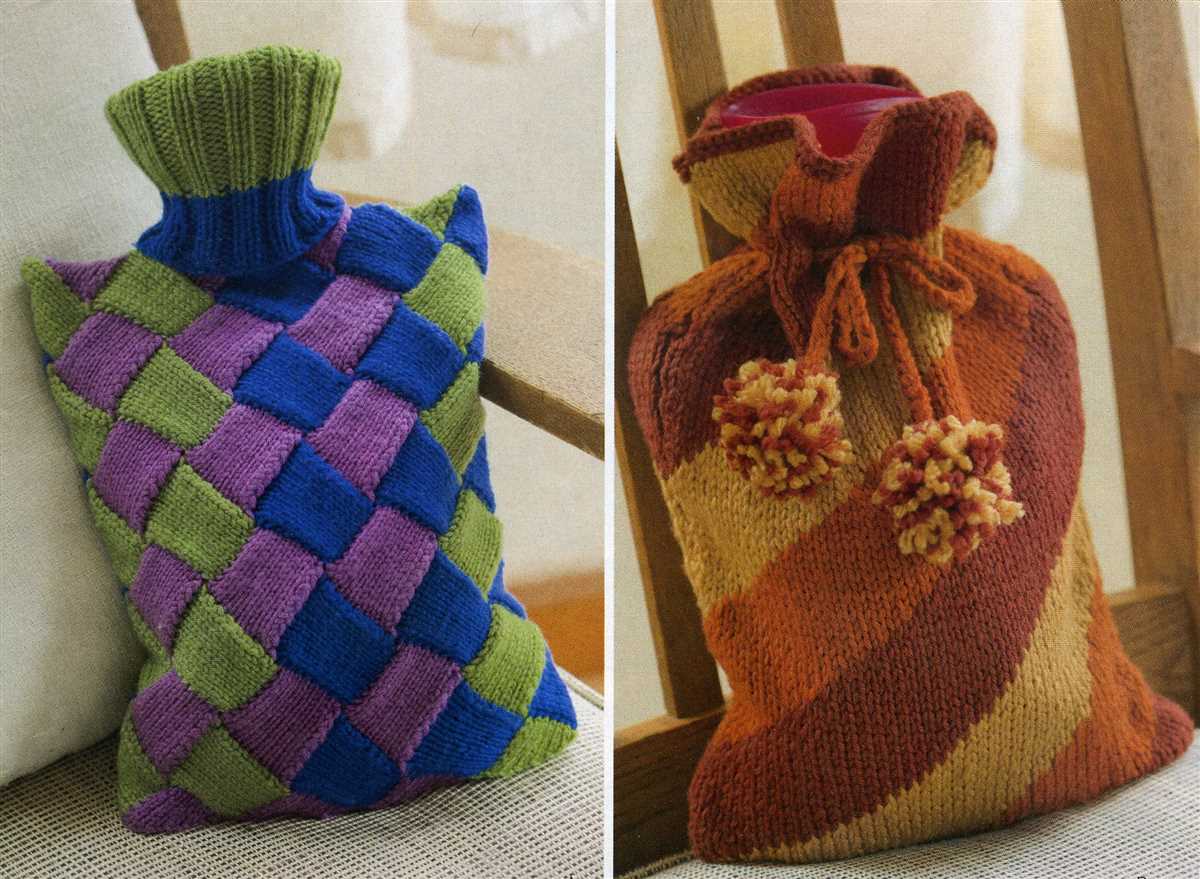
Felting is a process that involves shrinking and matting knitted fabric to create a denser and more durable material. The technique is commonly used in crafting to create items such as bags, hats, and coasters. In the context of the knitted hot pad pattern, felting is an essential step that enhances the functionality and appearance of the finished product.
Once the knitted hot pad has been completed, it is ready for the felting process. The first step is to prepare a container with hot water and a small amount of mild detergent. The hot pad is then submerged in the water and gently agitated to encourage the fibers to shrink and interlock. The agitation can be done by hand or using a washing machine on a delicate or wool cycle.
Key Phrases:
- Felting is a process that involves shrinking and matting knitted fabric
- The technique is commonly used in crafting to create items such as bags, hats, and coasters
- Felting enhances the functionality and appearance of the knitted hot pad
- Hot water and a small amount of mild detergent are used in the felting process
- The hot pad is submerged in the water and gently agitated to encourage shrinkage and interlocking of fibers
- Agitation can be done by hand or using a washing machine on a delicate or wool cycle
Felting should be done with caution, as the process can result in significant shrinkage. It is important to monitor the hot pad closely and periodically check for the desired level of felting. Once the desired texture and size are achieved, the hot pad can be removed from the water and gently squeezed to remove excess moisture.
After felting, the hot pad should be allowed to air dry completely before use or further embellishment. This ensures that the fibers have fully bonded and that the hot pad retains its shape and durability. Once dried, the hot pad is ready to add a decorative border or any additional finishing touches.
Blocking and Drying
Once you have finished knitting your felted hot pad, the next step is to block and dry it. Blocking is the process of shaping and sizing a knitted item to its intended dimensions. It helps to even out any uneven stitches, open up lacework, and give the item a more polished look.
To block your hot pad, you will need a blocking board or a flat surface covered with a towel or blocking mat. Lay the hot pad on the blocking board and gently shape it according to the desired dimensions. Use pins or blocking wires to secure the edges and corners in place. If you want the hot pad to be perfectly square or rectangular, measure the sides to ensure they are equal.
Next, it’s time to wet the hot pad and start the felting process. Fill a basin or sink with lukewarm water and add a small amount of mild soap. Submerge the hot pad in the water and gently squeeze it to ensure that it is fully saturated. Let it soak for about 10 minutes to allow the fibers to loosen and open up.
After soaking, carefully remove the hot pad from the water and gently squeeze out the excess moisture. Do not twist or wring the hot pad, as this can cause it to lose its shape. Lay a clean towel on a flat surface and place the hot pad on top, shaping it again to the desired dimensions. Allow the hot pad to air dry fully, which may take a couple of days. Avoid placing it in direct sunlight or using a heat source to speed up the drying process, as this can cause it to shrink or warp.
Adding Personalized Touches
When it comes to creating a one-of-a-kind felted knitted hot pad, adding personalized touches is a great way to make it truly unique. There are several ways to customize your hot pad, ensuring that it fits your style and preferences.
1. Color Choice: One of the easiest ways to personalize your hot pad is by choosing colors that reflect your personality or match your kitchen decor. Whether you prefer vibrant and bold hues or a more subtle and neutral palette, selecting the right colors can make a big difference in the overall appearance.
2. Embellishments: Adding embellishments to your hot pad can take it to the next level. You can use buttons, beads, or even embroidery to create interesting patterns or designs. These small details can add texture and visual interest to your finished product.
For example, you can sew on small felt flowers in different colors for a whimsical touch, or use contrasting embroidery thread to create intricate designs that showcase your needlework skills. The possibilities are endless when it comes to adding embellishments!
3. Applique: Another way to personalize your hot pad is by adding appliques. Whether you choose to use pre-made appliques or create your own, this technique allows you to incorporate different shapes and motifs into your design.
For instance, if you love animals, you can add an adorable felted animal applique to your hot pad. Or, if you’re a fan of nature, you can add a flower or leaf motif. Appliques can be a fun and creative way to express your interests and passions.
4. Pattern Variation: If you’re an experienced knitter, you can also personalize your hot pad by modifying the pattern itself. This could involve changing the stitch pattern, adding or removing repeats, or even incorporating lace or cable work.
For more advanced knitters, you could experiment with different stitch patterns to create a unique texture or try out different colorwork techniques such as fair isle or intarsia. These modifications can give your hot pad a truly personalized touch.
By adding personalized touches to your felted knitted hot pad, you can turn a simple kitchen accessory into a work of art. Whether it’s through color choice, embellishments, appliques, or pattern variation, the possibilities are endless. Let your creativity shine and create a hot pad that reflects your own personal style.
Conclusion
In conclusion, the felted knitted hot pad is a versatile and practical accessory for any kitchen. Its ability to withstand high heat makes it ideal for use as a trivet or pot holder. The thick felted texture provides a protective barrier for delicate surfaces, preventing scratches and other damage. The knitted pattern adds a touch of style and personalization to your kitchen decor.
Whether you are an experienced knitter or just starting out, the felted knitted hot pad is a fun and rewarding project to tackle. The pattern is easy to follow and can be customized to match your taste and style. With a wide range of yarn colors and textures available, you can create a hot pad that perfectly complements your kitchen.
Not only is the felted knitted hot pad functional, but it also makes a great gift. Handmade gifts are always appreciated, and the hot pad is no exception. Whether for a housewarming, bridal shower, or holiday gift, a felted knitted hot pad is sure to impress.
So why not give the felted knitted hot pad a try? You’ll love the look and feel of this unique kitchen accessory, and you’ll enjoy the satisfaction of creating something useful with your own two hands.