
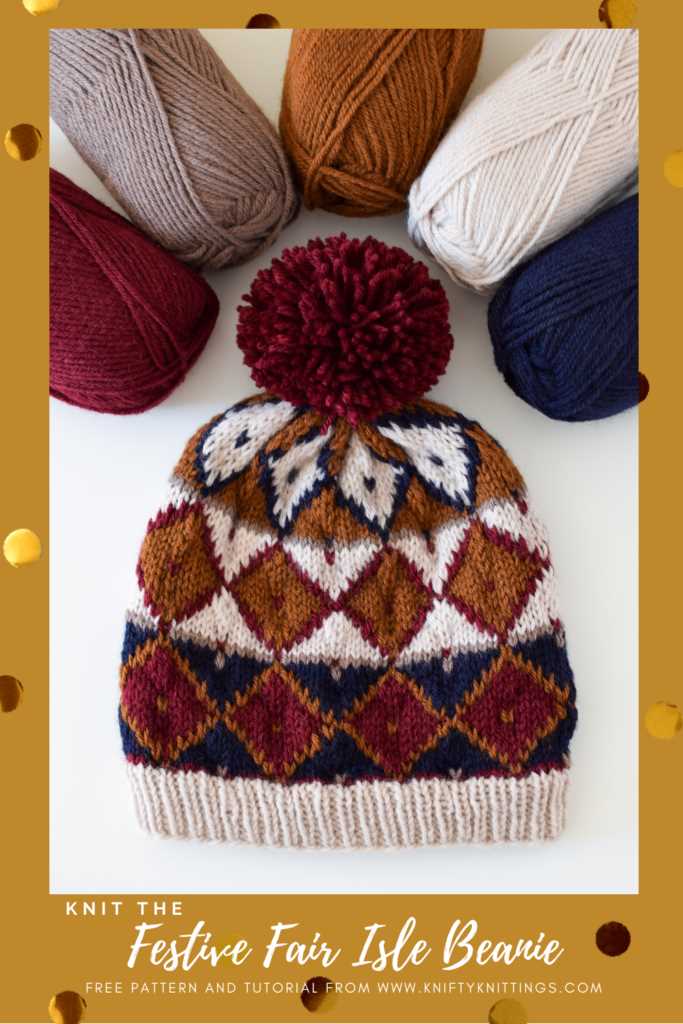
If you’re a knitting enthusiast who loves creating stylish, cozy accessories, then you’ll definitely want to try your hand at knitting a Fair Isle beanie. With its intricate patterns and vibrant colors, Fair Isle knitting is a technique that originated in the Shetland Islands of Scotland. It involves using two or more colors in each row to create beautiful designs. In this article, we’ll provide you with a free Fair Isle beanie knitting pattern to help you get started on your next knitting project.
Knitting a Fair Isle beanie is a great way to challenge yourself and expand your knitting skills. The pattern we’re providing is suitable for intermediate knitters who are comfortable with basic knitting techniques, such as casting on, knitting, purling, and decreasing stitches. The beanie is worked in the round, and the Fair Isle pattern is created by carrying the unused colors across the back of the work.
To create your own Fair Isle beanie, you’ll need a set of knitting needles in the appropriate size and two different colors of yarn. The pattern we’re sharing includes a list of materials, step-by-step instructions, and a color chart to guide you through the Fair Isle design. Whether you choose to make a beanie for yourself or as a gift for a loved one, knitting a Fair Isle beanie is a rewarding and satisfying project that combines both creativity and functionality.
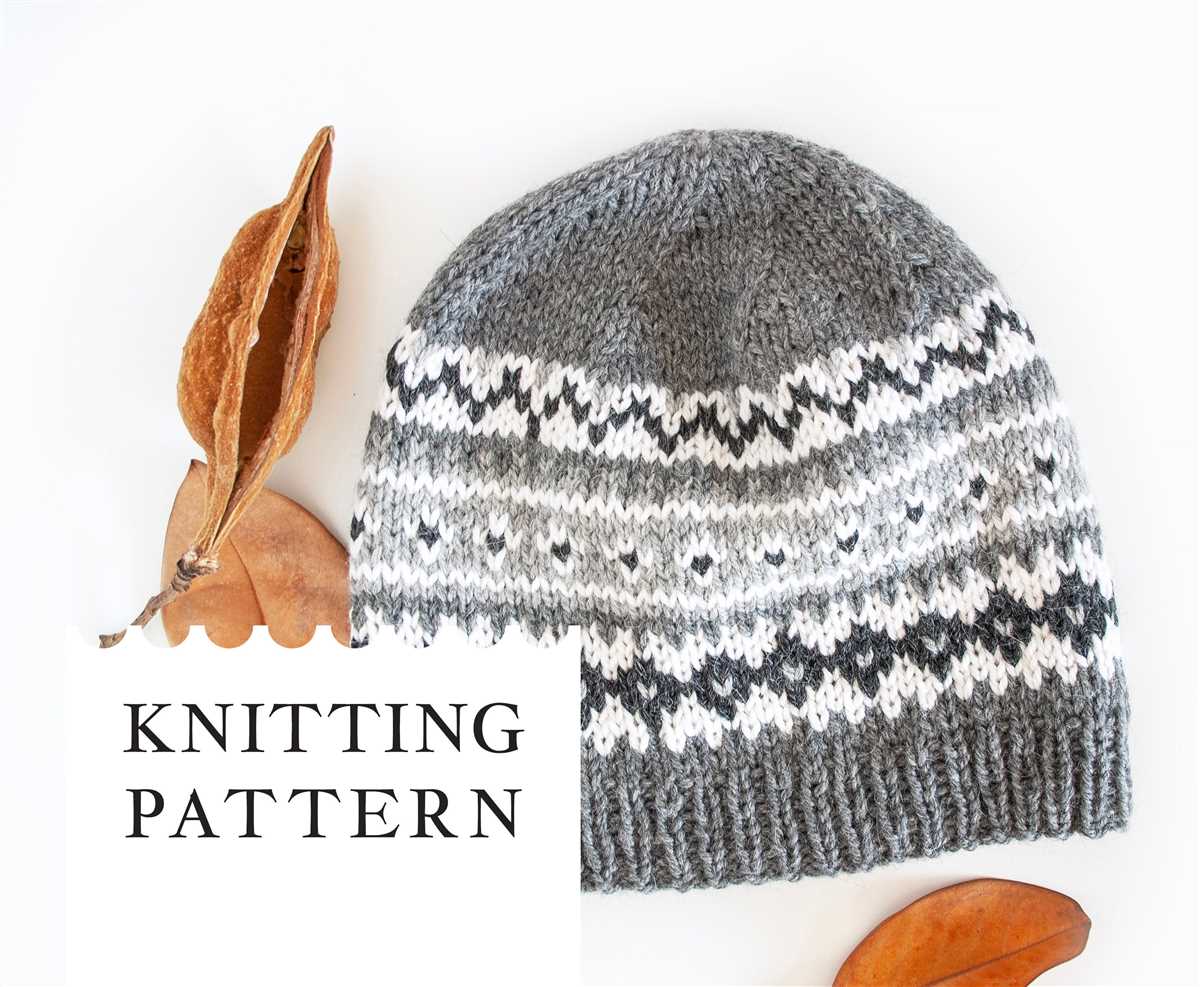
Fair Isle Beanie Knitting Pattern Free
If you’re looking for a stylish and cozy winter accessory, a fair isle beanie is the perfect choice. With its intricate colorwork and traditional patterns, a fair isle beanie adds a touch of classic charm to any outfit. And the best part? You can easily find free knitting patterns online to create your own fair isle beanie.
When searching for a fair isle beanie knitting pattern, you’ll find a wide range of options to suit your skill level and personal style. Whether you’re a beginner or an experienced knitter, there’s a pattern out there for you. Many websites and knitting blogs offer free patterns that include detailed instructions and charts to help you create beautiful fair isle designs.
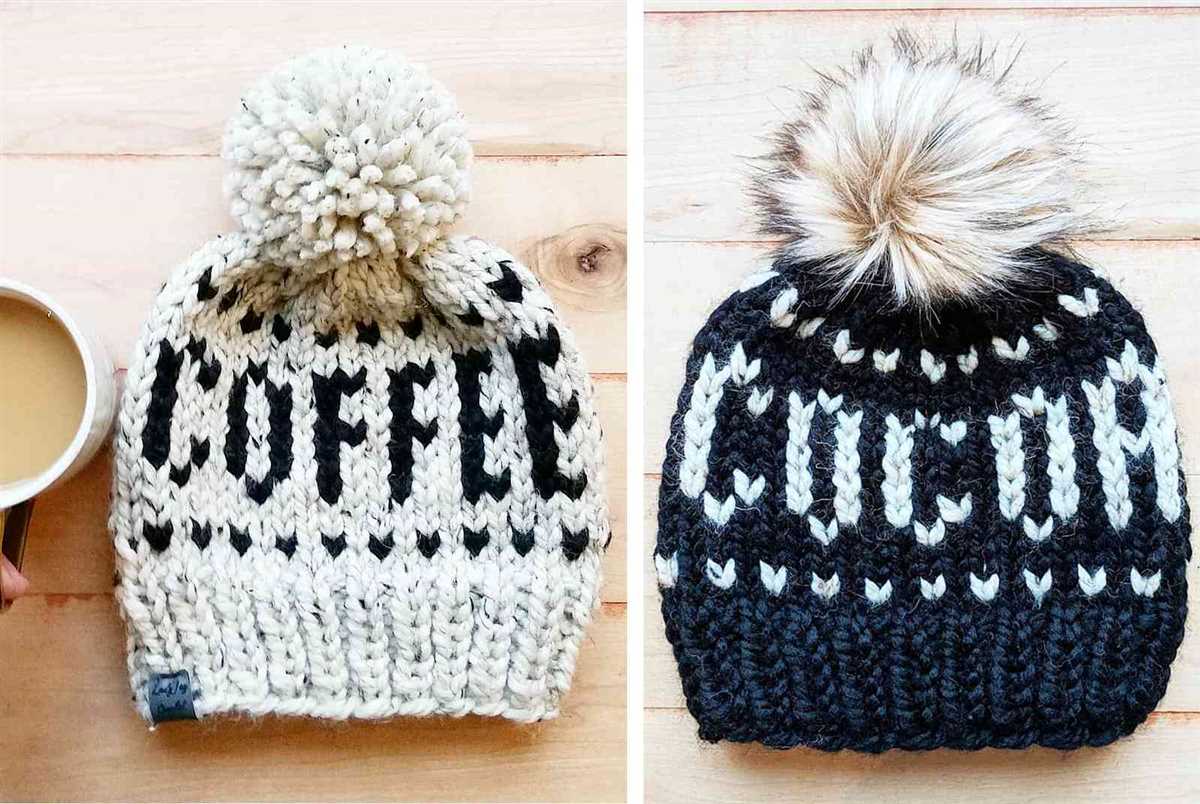
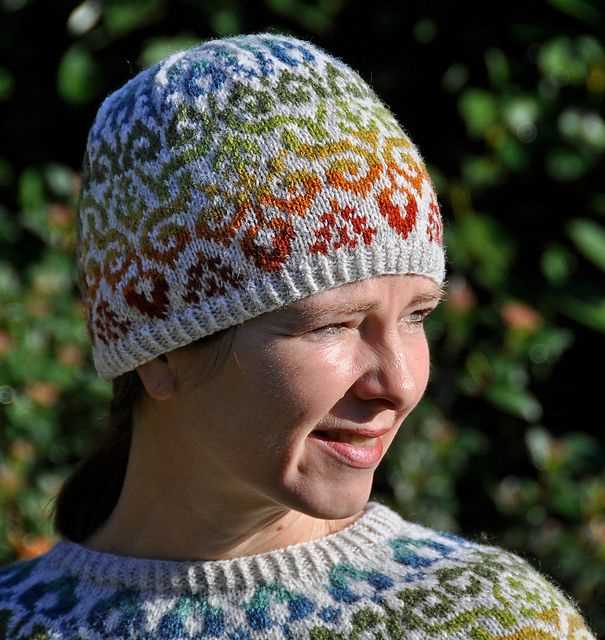
One popular fair isle beanie pattern is the “Classic Fair Isle Hat,” which features a traditional fair isle motif in multiple colors. This pattern typically uses a worsted weight yarn and requires basic knitting skills, making it a great option for beginners who want to try their hand at fair isle knitting.
If you’re an experienced knitter looking for a more challenging project, you might consider the “Fair Isle Snowflake Hat.” This pattern features a delicate snowflake design and requires more advanced knitting techniques, such as stranded colorwork and reading complex charts. The end result is a stunning fair isle beanie that’s sure to impress.
Whether you’re knitting a fair isle beanie for yourself or as a gift, using a free pattern allows you to explore this traditional knitting technique without breaking the bank. So grab your needles and some colorful yarn, and start knitting your own fair isle beanie today!
Supplies Needed

To knit the fair isle beanie, you will need the following supplies:
- Knitting needles: You will need a pair of US size 7 (4.5mm) double pointed needles or circular needles, depending on your preferred method of knitting.
- Yarn: You will need two colors of yarn for the fair isle pattern. Choose a worsted weight yarn in your desired colors. You will need approximately 100 yards of the main color (MC) and 50 yards of the contrasting color (CC).
- Stitch markers: These will help you keep track of your stitches and pattern repeats. You can use commercial stitch markers or make your own from scraps of yarn.
- Tapestry needle: This will be used to weave in your yarn ends and sew up any seams.
- Scissors: You will need a pair of scissors to cut your yarn.
- Measuring tape: This will come in handy for measuring your gauge and checking the size of your finished beanie.
Make sure you have all these supplies before you start knitting your fair isle beanie. Having everything ready will ensure a smooth and enjoyable knitting experience.
Choosing Yarn and Needles
When knitting a Fair Isle beanie, choosing the right yarn and needles is crucial to achieve the desired result. The yarn should be soft and warm, as it will be worn on the head. It’s important to choose a yarn that is comfortable against the skin and won’t cause any irritation. Additionally, the yarn should have good stitch definition, as the Fair Isle technique involves creating intricate color patterns.
Yarn Weight: In general, a medium to bulky weight yarn is suitable for a beanie, as it provides warmth and structure to the finished hat. However, the choice of yarn weight may also depend on personal preference and the intended season of use. For a lighter beanie, a sport or DK weight yarn can be used.
Yarn Fiber: Natural fibers such as wool or wool blends are commonly used for Fair Isle knitting. Wool provides warmth and elasticity, while blends with synthetic fibers can enhance durability and reduce pilling. It’s best to choose a yarn that is soft and not scratchy, especially if the beanie will be worn directly against the skin.
Needle Size: The needle size will depend on the yarn weight and the gauge you want to achieve. Generally, a set of double-pointed needles or a circular needle in the appropriate size will be needed. It’s important to check the yarn label or the pattern instructions for the recommended needle size. The gauge swatch should also be taken into consideration when choosing the needle size.
Tension: When knitting a Fair Isle beanie, tension is important to ensure the colorwork pattern is even and the finished hat fits properly. It’s recommended to knit a gauge swatch before starting the project to ensure the correct tension is achieved. Adjustments to the needle size may be necessary to obtain the desired gauge.
Color Selection: Fair Isle knitting typically involves using multiple colors in a single row or round. Choosing colors that complement each other and create a harmonious pattern is key. It’s important to consider the overall color scheme and the contrast between the colors. A color chart or swatches can be helpful in visualizing the final color combination before starting the project.
Understanding Fair Isle Knitting
Fair Isle knitting is a traditional knitting technique that originated in the Fair Isle, a small island in Scotland. It is characterized by its intricate and colorful stranded knitting patterns, where multiple colors are used in each row to create a beautiful and complex design. The name “Fair Isle” comes from the island where this technique was popularized.
One of the unique aspects of Fair Isle knitting is the use of two or more colors in each row. The patterns are created by carrying the yarn not in use across the back of the work, while knitting with the other color. This technique creates small floats or strands of yarn on the back of the piece, which are then covered by the stitches in the next row. This results in a warm and durable fabric that is perfect for winter accessories like beanies.
In Fair Isle knitting, it is important to maintain an even tension to ensure that the floats are not too tight or too loose. This can be achieved by practicing and becoming familiar with the technique. It is also important to choose the right yarn, preferably one that is lightweight and has good color contrast to showcase the intricate patterns.
Free Fair Isle knitting patterns for beanies are widely available online. These patterns typically include a color chart or written instructions that guide you through the process of creating the Fair Isle design. With a little practice and patience, you can create your own unique and stylish Fair Isle beanie to keep you warm during the winter months.
- Key phrases:
- – Traditional knitting technique
- – Intricate and colorful stranded knitting patterns
- – Multiple colors in each row
- – Carrying the yarn across the back
- – Warm and durable fabric
- – Maintaining even tension
- – Choosing the right yarn
- – Free Fair Isle knitting patterns
Casting On
When beginning your fair isle beanie knitting project, the first step is to cast on your stitches. Casting on creates the foundation row of stitches that you will work with as you knit the beanie. There are several different methods for casting on, but we will discuss one common method here.
To cast on, you will need your knitting needles and the yarn you have chosen for your beanie. Start by making a slipknot at the end of your yarn, leaving a long enough tail to weave in later. Place the slipknot on one of your knitting needles and hold the needle in your right hand.
Insert the tip of your other knitting needle into the slipknot from left to right, going under and through the loop. With your right hand, bring the working yarn over the tip of the needle in your left hand, creating a new loop. This loop will become your first cast-on stitch.
Continue this process, inserting the tip of the right needle into the loop on the left needle, bringing the working yarn over, and creating a new loop, until you have cast on the required number of stitches for your beanie. Remember to keep your stitches loose and even, as tight stitches can make it difficult to work with the yarn later on.
Knitting the Ribbed Brim
One of the key components of knitting a Fair Isle beanie is creating a ribbed brim. The ribbed brim adds both style and functionality to the hat, as it helps to ensure a snug fit and keeps the beanie in place on the wearer’s head. To achieve this ribbed look, you will alternate between knitting and purling stitches in a specific pattern.
To begin the ribbed brim, you will cast on the desired number of stitches using your preferred method. It is recommended to use a smaller needle size for the brim, as this will help create a tighter and more structured ribbing. Once you have cast on the stitches, you will begin the ribbing pattern.
The most common ribbing pattern used for beanies is a 2×2 rib, which means you will alternate between two knit stitches and two purl stitches in each row. To create this pattern, start by knitting the first two stitches, then purling the next two stitches. Repeat this sequence until the end of the row. In the next row, you will continue the pattern by knitting the knit stitches and purling the purl stitches.
Continue working the 2×2 rib pattern for the desired length of the ribbed brim. Typically, a ribbed brim will measure around 1-2 inches in length, but you can adjust the length based on your personal preference. Once the ribbed brim is complete, you can proceed with the rest of the Fair Isle knitting pattern for the body of the beanie.
Creating the Fair Isle Pattern
The Fair Isle pattern is a traditional knitting technique that originated in the Fair Isle, Scotland. It is characterized by its intricate colorwork and geometric designs. Creating a Fair Isle pattern requires careful planning and attention to detail.
To begin, you will need to choose your colors. Traditionally, Fair Isle patterns use a limited color palette, often featuring natural or muted shades. However, you can also experiment with more vibrant colors to create a modern twist. Once you have selected your colors, you will need to decide on the order in which they will be used in the pattern.
To create the Fair Isle pattern, you will need to use two different colors of yarn in each row. This is achieved by carrying the unused color behind the work as you knit. It is important to maintain an even tension while knitting to ensure that the pattern emerges clearly.
When designing your Fair Isle pattern, it is important to consider the repeat of the design. Some patterns will have a small repeat, which will be repeated multiple times across the row, while others will have a larger repeat. It is helpful to sketch out your pattern beforehand to ensure that it will fit onto your desired item, such as a beanie.
Once you have planned your pattern, you can begin knitting. Follow the pattern chart row by row, switching colors as necessary. Remember to always carry the unused color behind the work to maintain a neat appearance on the front. As you progress, the pattern will start to take shape, creating a beautiful and intricate design.
Creating a Fair Isle pattern requires practice and patience, but the end result is well worth the effort. Whether you are knitting a beanie, a sweater, or any other item, incorporating the Fair Isle technique adds a touch of tradition and artistry to your project. So gather your yarn, choose your colors, and get ready to embark on a Fair Isle knitting adventure!
Decreasing Stitches
When knitting a fair isle beanie, decreasing stitches is an essential technique to shape the crown of the hat. Decreasing stitches means reducing the number of stitches on your needles, creating a tapered effect. This is typically done towards the top of the hat to create a snug fit.
To decrease stitches, there are several common methods you can use. One popular method is the knit two together (k2tog) decrease. This involves knitting two stitches together as if they were one. Another common method is the slip, slip, knit (ssk) decrease, which involves slipping two stitches individually, then knitting them together through the back loop.
When decreasing stitches in fair isle knitting, it’s important to maintain the pattern and colorwork. This can be achieved by carefully planning your decreases and ensuring they align with the pattern. For example, if you have a row of colorwork that consists of four stitches, you may need to decrease by two stitches in order to maintain the pattern.
To create a smooth decrease, it’s important to evenly distribute your decreases throughout the crown of the hat. This can be achieved by spacing them out evenly and adjusting the rate of decrease as needed. It’s also helpful to use stitch markers to clearly mark where your decreases will occur.
Overall, decreasing stitches is a crucial step in knitting a fair isle beanie. By using the appropriate decrease methods and carefully planning your decreases, you can shape the crown of the hat while maintaining the integrity of the pattern and colorwork. With practice, you’ll be able to create beautifully tapered beanies that are both stylish and comfortable.
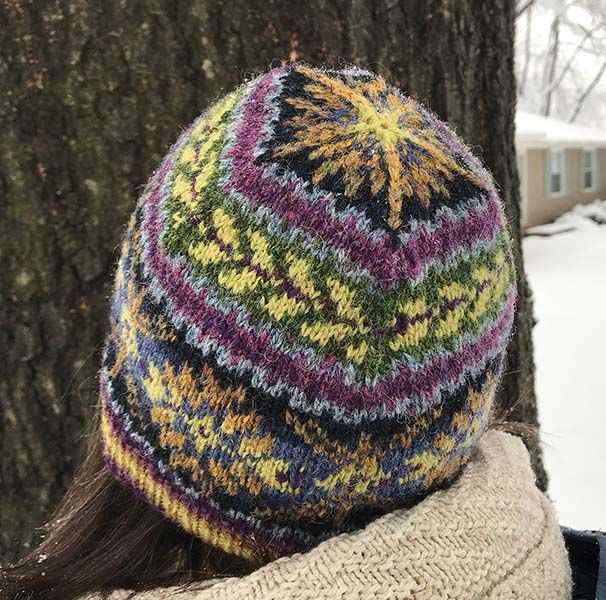
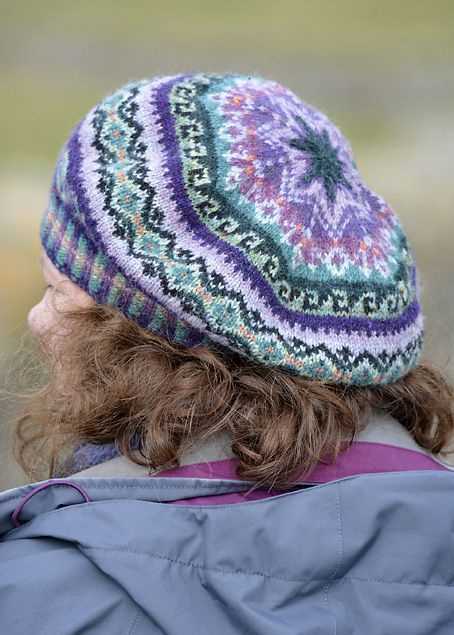
Shaping the Crown
Shaping the crown of a fair isle beanie is an important step in creating a well-fitting and visually appealing hat. The crown is the topmost part of the beanie, where the stitches gradually decrease to create a tapered shape. This shaping is crucial to ensure that the hat fits snugly on the head and doesn’t feel too loose or too tight.
To shape the crown, the pattern typically includes instructions for decreasing stitches at specific intervals. This can be done by knitting two stitches together, known as a knit two together (k2tog) decrease, or by slipping stitches and passing them over others, known as a slip slip knit (ssk) decrease. These decrease stitches are usually evenly spaced around the crown to create a symmetrical shape.
Some common ways to shape the crown of a fair isle beanie include:
- Decreasing stitches every row: This creates a more gradual and rounded crown shape.
- Decreasing stitches every other row: This creates a slightly more pronounced and tapered crown shape.
- Decreasing stitches in a specific pattern: This can create unique crown designs, such as star shapes or swirls.
It’s important to follow the pattern instructions carefully when shaping the crown to ensure that the decreases are done correctly and in the right places. This will help achieve the desired shape and fit of the beanie. After shaping the crown, finishing touches such as weaving in loose ends and blocking the hat may be necessary to give it a polished look.
Finishing Off
After completing the fair isle beanie knitting pattern, it’s time to finish off the project and give it a polished look. Start by securing the remaining loose ends of yarn. Use a tapestry needle to weave the ends into the stitches on the wrong side of the beanie. This will ensure that the ends are hidden and the beanie appears seamless.
Next, it’s time to block the beanie. Blocking helps to even out the stitches and gives the beanie its final shape. Fill a basin or sink with lukewarm water and add a small amount of mild detergent. Gently submerge the beanie in the water, making sure to fully saturate it. Let it soak for about 15 minutes.
After soaking, remove the beanie from the water and gently squeeze out the excess moisture. Lay it flat on a clean towel and roll it up, pressing down to remove even more moisture. Once it’s slightly damp, unfold the towel and place the beanie on a blocking board or another clean, flat surface.
Using pins, shape the beanie to the desired size and smooth out any wrinkles. Pay special attention to the brim, making sure it lays flat. Allow the beanie to air dry completely before unpinning and removing from the blocking surface.
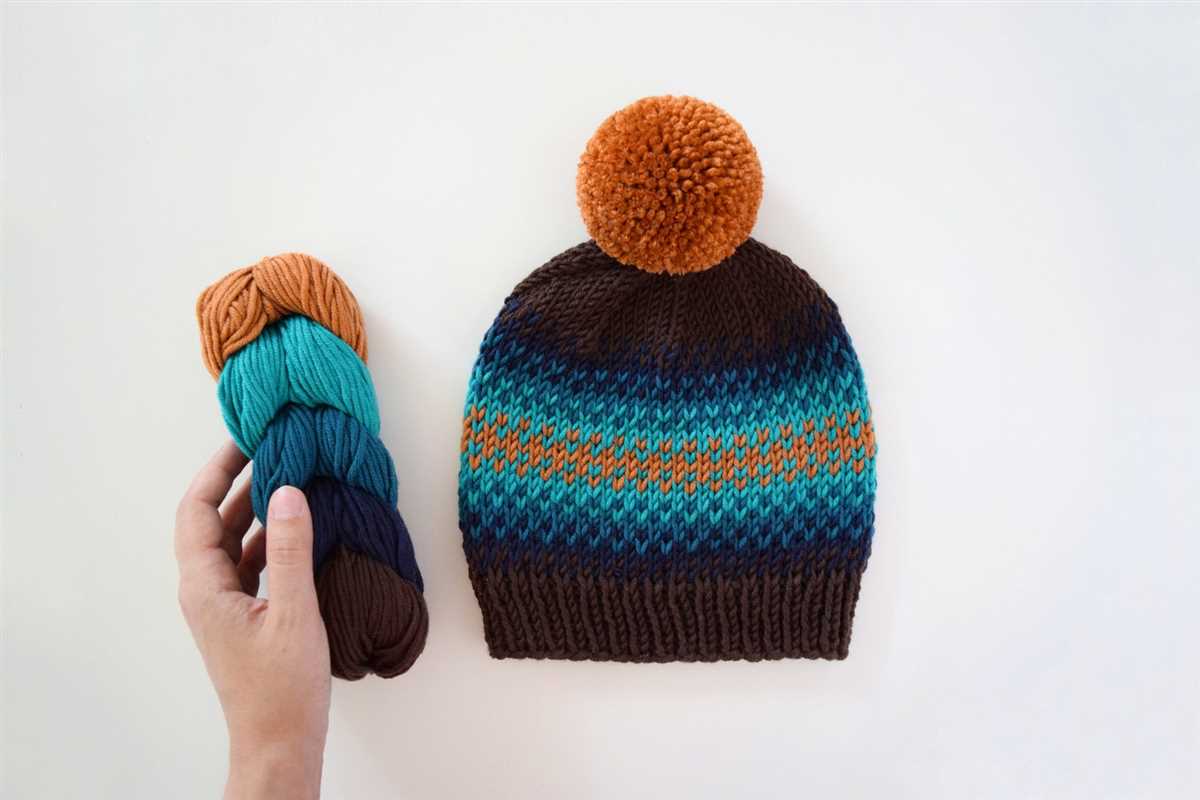
To add an extra touch to the finished beanie, consider attaching a pom pom. There are many different methods for making pom poms, so choose one that suits your style. Attach the pom pom securely to the top of the beanie using a tapestry needle and yarn, making sure it’s centered.
Finally, give the beanie one last inspection to ensure all finishing touches are complete. Check for any loose threads or uneven edges that may need to be addressed. Once everything is in order, your fair isle beanie is ready to be worn or gifted to someone special!
Tips and Tricks
Knitting fair isle beanies can be a fun and rewarding project. Here are some tips and tricks to help you along the way:
- Use a color chart: Fair isle patterns often involve working with multiple colors. Using a color chart can help you keep track of your color changes and ensure that your pattern stays consistent.
- Practice carrying yarn: When working with multiple colors, it’s important to practice carrying the yarn not in use along the back of your work. This will help you avoid tangled yarn and ensure clean color transitions.
- Choose the right yarn: When selecting yarn for your fair isle beanie, choose yarns that have good stitch definition and are not too slippery. This will help to showcase the intricate fair isle pattern and make your stitches more visible.
- Check your gauge: Fair isle patterns often require a specific gauge to ensure the proper fit of your beanie. Take the time to swatch and check your gauge before starting your project. Adjust your needle size if necessary.
- Take breaks: Fair isle knitting can be intense and time-consuming. Take regular breaks to rest your hands and avoid strain. This will not only help prevent injuries but also ensure that you maintain consistent tension throughout your project.
- Block your beanie: Once you’ve finished knitting your fair isle beanie, block it to give it a polished and finished look. Blocking will help even out your stitches, relax the fabric, and enhance the stitch definition.
- Experiment with color: While fair isle patterns often have traditional color combinations, don’t be afraid to experiment and create your own unique color palette. Mix and match colors to make your beanie truly one-of-a-kind.
With these tips and tricks in mind, you’re ready to tackle your fair isle beanie knitting project. Whether you’re a beginner or an experienced knitter, the end result will be a cozy and stylish accessory that you can proudly wear or gift to a loved one.