
Are you looking for a new knitting project to keep you warm and stylish during the chilly months? Look no further! In this article, we’ll introduce you to the entrelac knitting technique and provide a free pattern for an entrelac scarf.
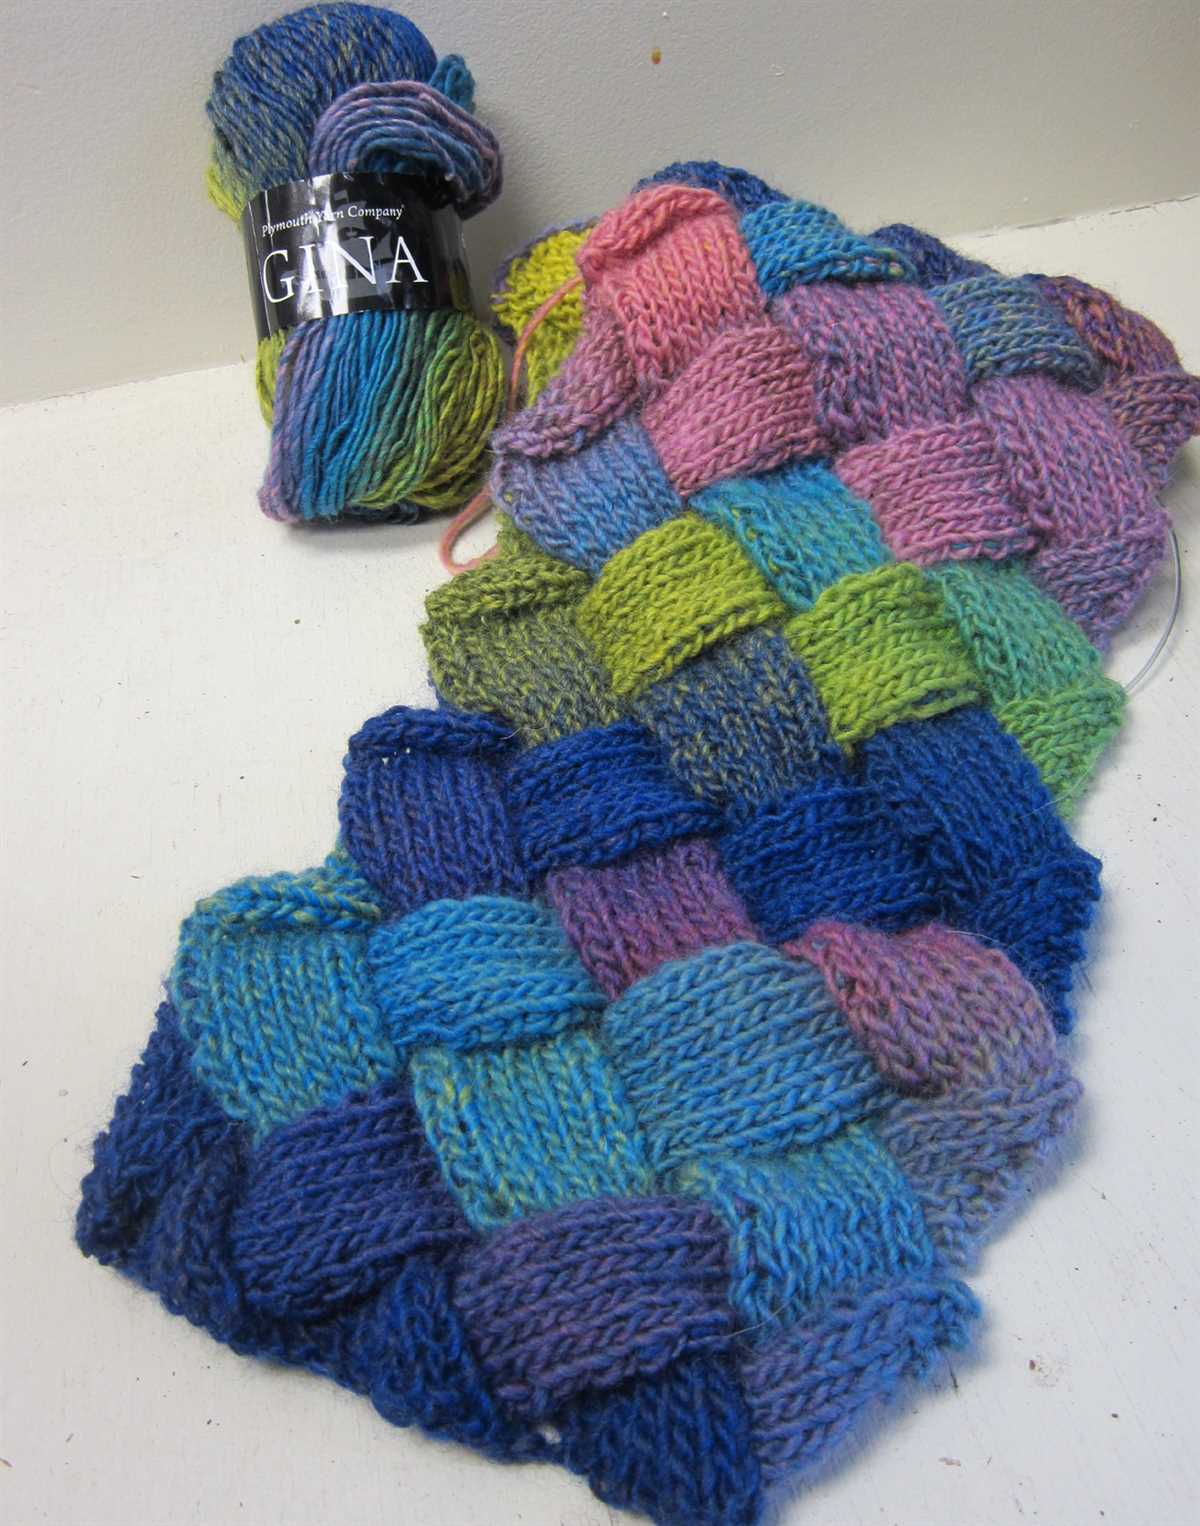
Entrelac knitting is a captivating technique that creates a beautifully textured fabric resembling a woven basket. It may look complex, but with a little practice and patience, you’ll master the technique and be able to create stunning entrelac projects like this scarf.
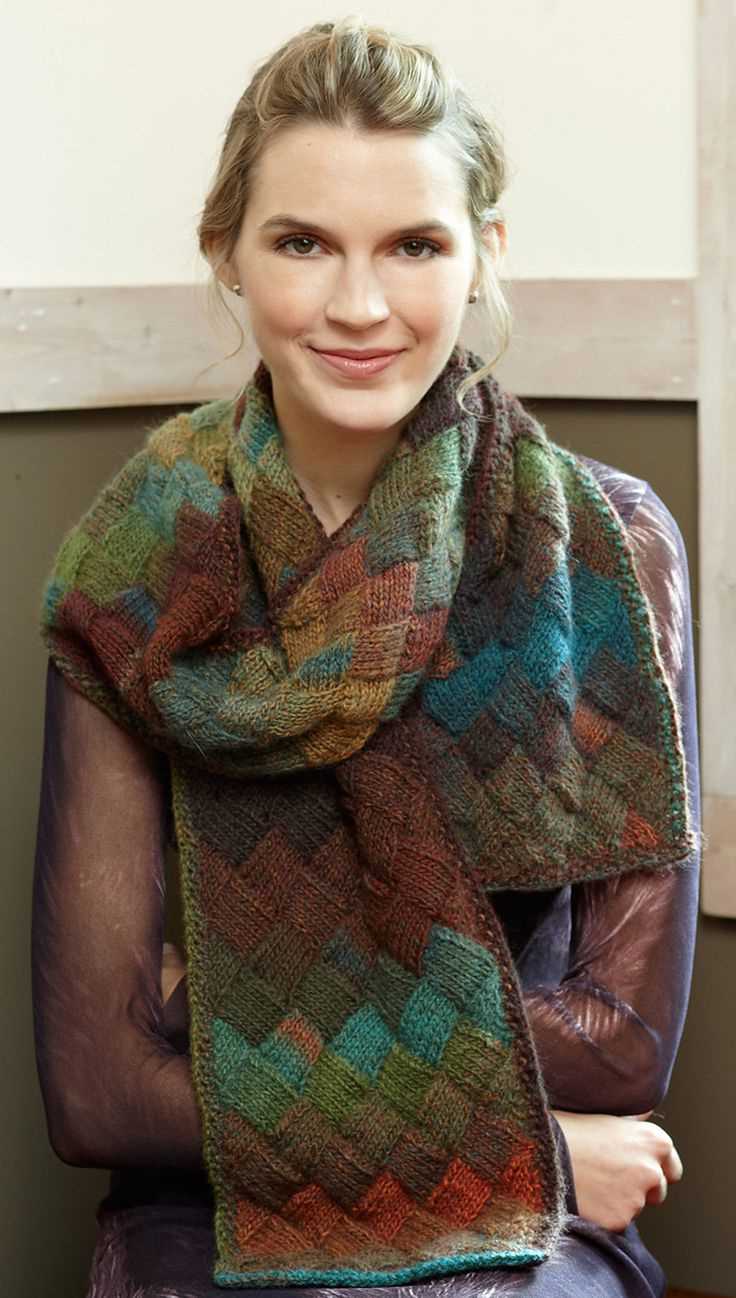
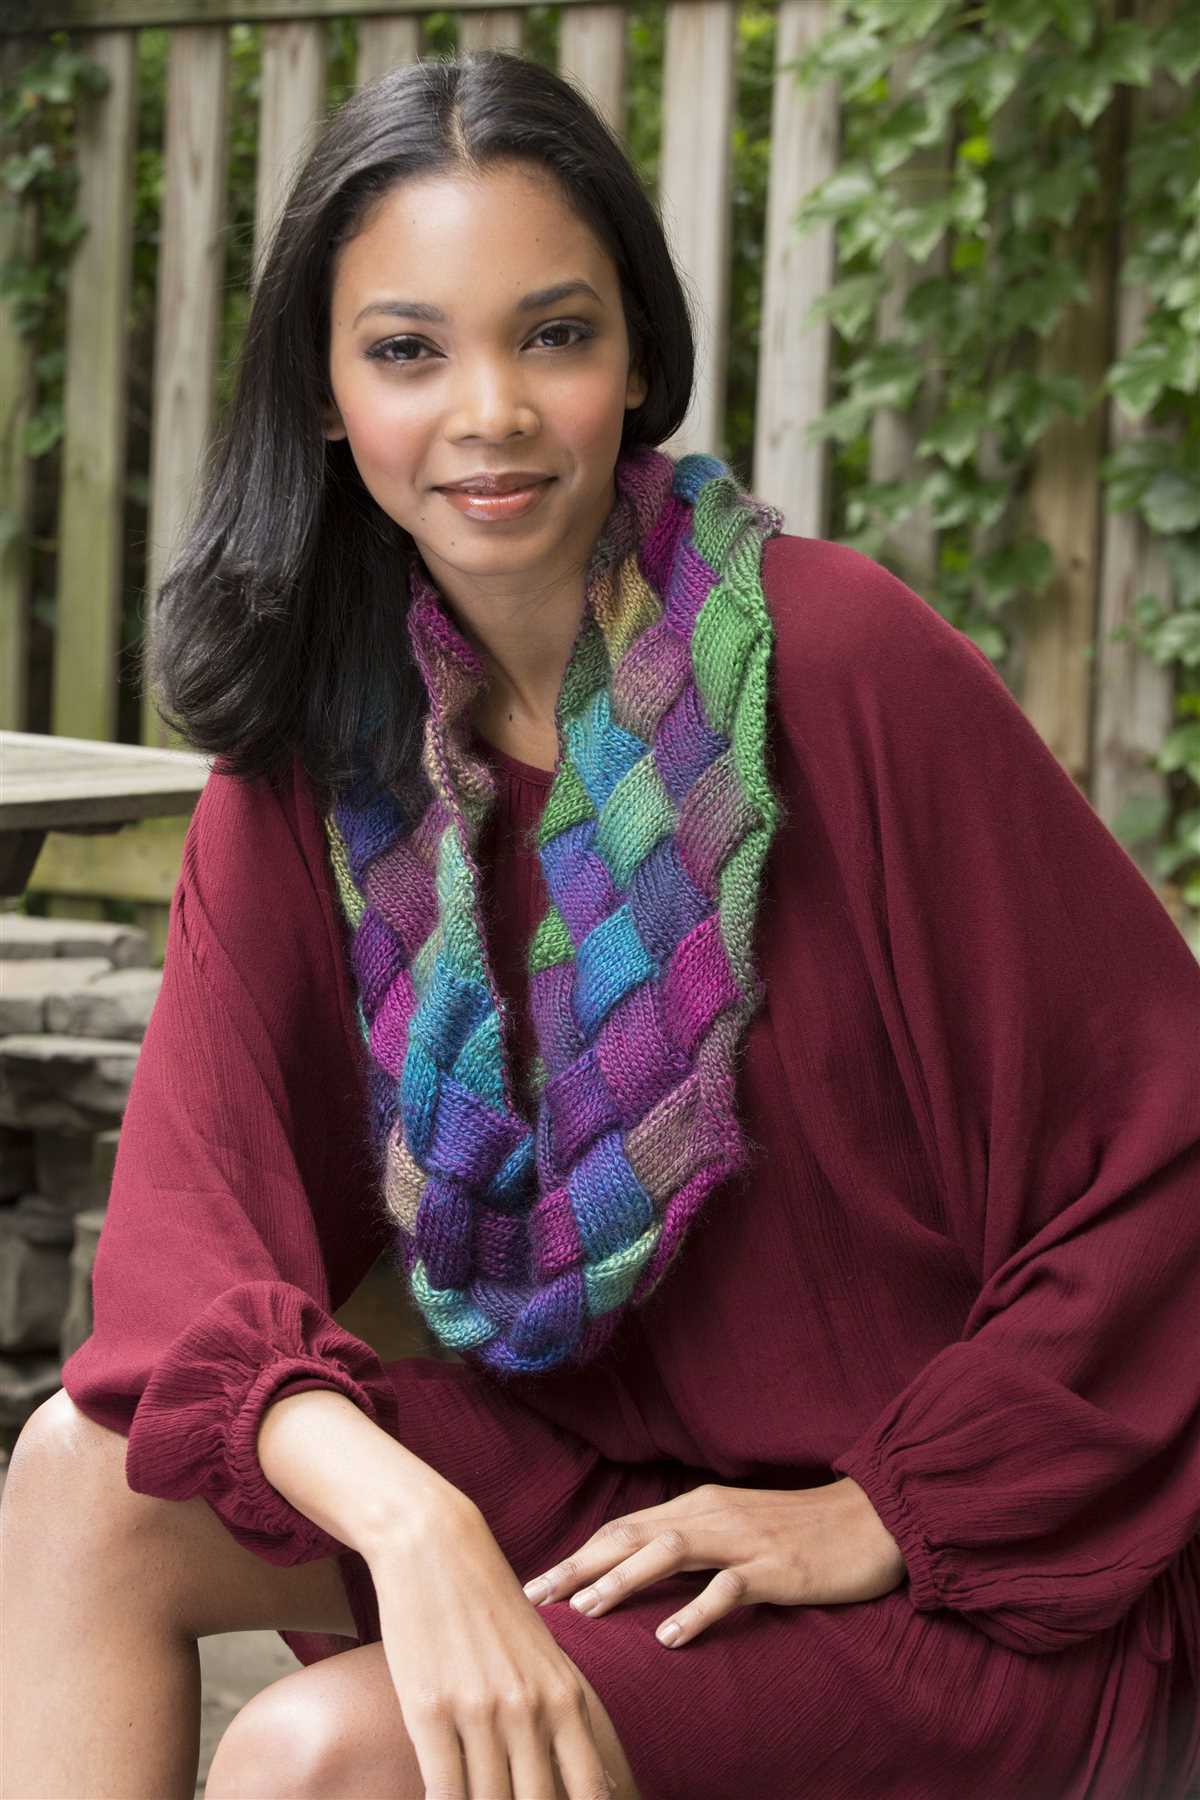
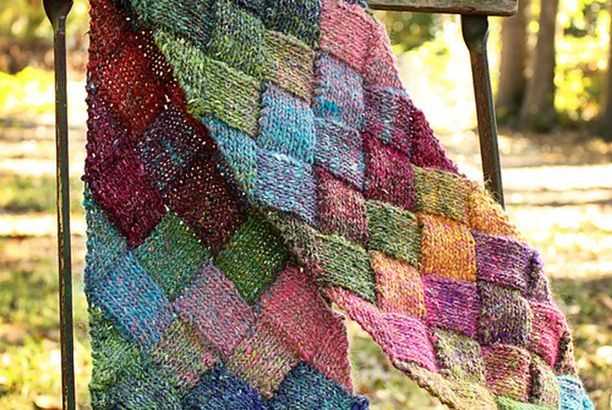
Our free entrelac scarf knitting pattern is perfect for knitters of all skill levels who are looking to explore new techniques and create a unique accessory. The scarf features a blend of bold colors and intricate squares that give it a modern and eye-catching look. Whether you’re dressing up for a special occasion or adding a pop of color to your everyday outfit, this scarf is sure to be a showstopper.
Entrelac Scarf Free Knitting Pattern
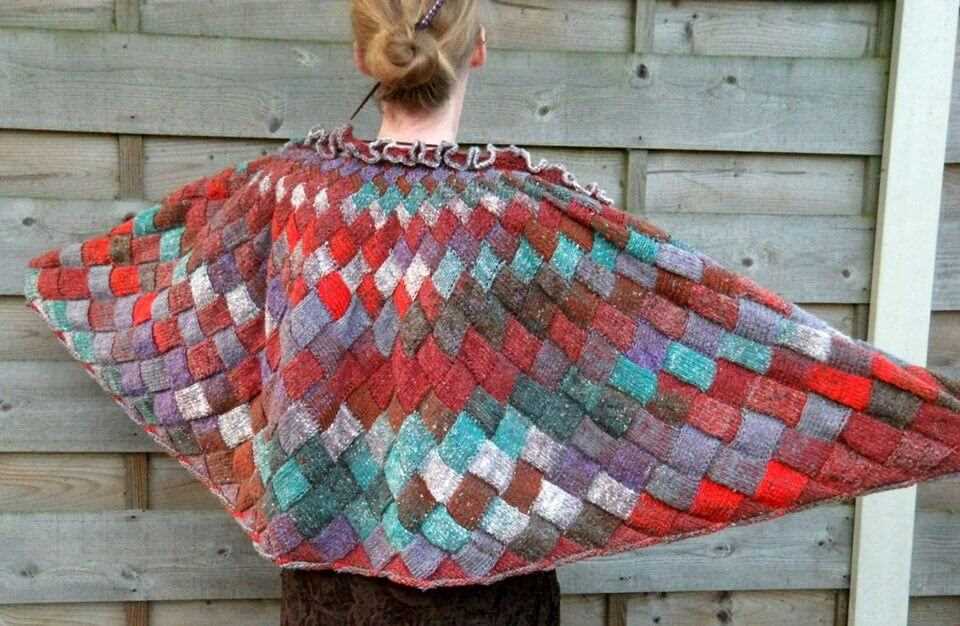
When it comes to knitting patterns, the entrelac technique is a great way to create a unique and eye-catching design. With its intricate diamond pattern, an entrelac scarf is not only warm and cozy but also a stylish accessory that can elevate any outfit.
To knit an entrelac scarf, you will need a basic understanding of knitting techniques such as knitting, purling, and picking up stitches. The pattern is worked in sections, creating a modular construction that is both fun and satisfying to knit.
Materials:
- Yarn: Choose a soft and warm yarn in your preferred color. Worsted weight yarn works well for this pattern.
- Needles: Size 8 or 9 (5 or 5.5 mm) straight or circular knitting needles.
- Tapestry needle for weaving in ends.
Instructions:
- Cast on 48 stitches.
- Work row 1: Knit all stitches.
- Work row 2: Purl all stitches.
- Work row 3: *Knit 3, turn work, purl 3, turn work, knit 3.* Repeat from * to * across the row.
- Work row 4: *Purl 3, turn work, knit 3, turn work, purl 3.* Repeat from * to * across the row.
- Continue alternating rows 3 and 4 until the desired length is reached.
- Bind off all stitches.
- Weave in any loose ends.
This entrelac scarf pattern creates a stunning texture that is sure to impress. You can experiment with different color combinations or even add a fringe for added flair. Whether you’re a beginner or an experienced knitter, this free entrelac scarf pattern is a great project to expand your knitting skills and create a beautiful accessory.
What is Entrelac Knitting?
Entrelac knitting is a technique that creates an intricate basket-weave pattern. It is often used to create scarves, blankets, and other accessories. The word “entrelac” is French and translates to “interlaced” or “interwoven,” which perfectly describes the appearance of this knitting technique.
In entrelac knitting, the fabric is created by knitting a series of small squares or rectangles in a modular fashion. These squares or rectangles are then connected together to form the final piece. Each square or rectangle is worked individually, with the neighboring squares or rectangles picked up and worked directly from the live stitches of the previous square. This creates the interwoven effect, with the squares or rectangles appearing to be woven together.
The entrelac technique can be a bit challenging for beginner knitters, as it requires working with multiple strands of yarn and mastering some unique techniques. However, with practice and patience, anyone can learn to knit entrelac. It is an incredibly rewarding technique that produces stunning results.
To create an entrelac scarf, you will need a set of knitting needles, a few different colors of yarn, and the entrelac knitting pattern. The pattern will guide you through the process of knitting the modular squares or rectangles and assembling them into a scarf. It is important to follow the pattern carefully, as each square or rectangle will have a specific number of stitches and rows.
Entrelac knitting can be a fun and exciting way to add texture and interest to your knitting projects. The interwoven pattern creates a visually stunning effect that is sure to turn heads. So, whether you’re a seasoned knitter looking for a new challenge or a beginner eager to expand your knitting skills, give entrelac a try and see what beautiful creations you can make!
Materials Needed
Before you begin knitting your entrelac scarf, it’s important to gather all the materials you’ll need to complete the project. Here’s a list of the essential items:
- Yarn: Choose a yarn that is suitable for knitting scarves. Opt for a soft and warm yarn with a good drape. The amount of yarn you’ll need will depend on the desired length and width of your scarf.
- Knitting needles: Select knitting needles that are appropriate for the yarn you’ve chosen. The recommended size will usually be indicated on the yarn label.
- Tapestry needle: A tapestry needle will be useful for weaving in ends and joining different sections of the entrelac pattern.
- Scissors: A pair of sharp scissors will be needed for cutting the yarn and trimming any excess.
In addition to these essential materials, you may also find the following tools and accessories helpful:
- Stitch markers: Stitch markers can be used to mark different sections or stitches in the pattern, making it easier to keep track of your progress.
- Row counter: A row counter can be used to keep track of the number of rows or repeats completed, particularly if the pattern requires a specific stitch count.
- Blocking tools: Once your entrelac scarf is complete, you may wish to block it to shape and enhance the overall appearance. This can be done using blocking mats, pins, and a steam iron or spray bottle.
Getting Started with Entrelac
Entrelac is a knitting technique that creates a beautiful woven texture reminiscent of basketweave or patchwork. It may seem intimidating at first, but with a little practice and patience, you’ll be able to create stunning entrelac projects, like an entrelac scarf, in no time.
To get started with entrelac, you’ll need a few basic knitting supplies. These include a pair of knitting needles in the appropriate size for your yarn, a tapestry needle for weaving in ends, and of course, yarn in the colors of your choice. It’s important to choose a yarn that has good stitch definition to showcase the intricate entrelac pattern.
Step 1: Cast On
Begin by casting on the desired number of stitches for the width of your scarf. This will vary depending on the pattern and your personal preference. Make sure to leave a long tail to use for the later steps of the entrelac pattern.
Step 2: Base Triangles
To create the base of the entrelac pattern, you’ll be knitting triangles. Each triangle is worked over a set number of stitches and rows. Follow the pattern instructions to determine the size and number of triangles you need to knit for your scarf.
Start by picking up stitches along one side of the cast-on edge. Then, work the triangle by decreasing stitches at the beginning and end of each row until you have just one stitch left. Repeat this process for each triangle until you reach the end of the row.
Step 3: Side Rectangles
After completing the base triangles, it’s time to work on the side rectangles. These rectangles are worked by picking up stitches along the side of the triangles and knitting rows back and forth. The number of stitches and rows for each rectangle will vary depending on your pattern.
As you work on the side rectangles, you’ll notice that they start to overlap with the base triangles, creating the interwoven look of entrelac. Keep following the pattern instructions to complete the necessary number of side rectangles.
Step 4: Finishing
Once you’ve completed all the triangles and rectangles, it’s time to finish off your entrelac scarf. Weave in any loose ends using a tapestry needle, and block your scarf to give it a polished look. Blocking will help even out the stitches and enhance the overall texture of the entrelac pattern.
Enjoy your beautiful entrelac scarf, and don’t be afraid to experiment with different colors and patterns to create unique designs. With practice, you’ll become more confident in your entrelac knitting skills and be able to take on more complex entrelac projects.
How to Cast On
When starting a knitting project, the first step is to cast on, which creates the foundation row of stitches on your needle. There are a few different methods for casting on, but one common method is the long-tail cast on.
Long-Tail Cast On:
This method of casting on is great for a variety of projects and creates a neat, elastic edge. To start, you’ll need to estimate the amount of yarn you’ll need for your cast on. Take your working yarn and hold it in your left hand, leaving a long tail. With your right hand, make a slipknot by crossing the working yarn over the tail end and pulling a loop through. Place this loop onto your knitting needle, pulling it snug but not too tight.
Next, hold the needle in your right hand, with the slipknot and tail end of your yarn hanging down. Using your left hand, bring the needle under the tail end of the yarn and over the working yarn, creating a loop around the needle. With your right hand, slide the loop onto the needle, again pulling it snug but not too tight. Repeat this process until you have cast on the desired number of stitches.
Once you’ve mastered the long-tail cast on, you’ll be ready to start knitting your entrelac scarf using the free knitting pattern. This unique stitch pattern creates a beautiful textured fabric that is perfect for keeping warm and stylish. Don’t forget to follow the pattern instructions and enjoy the process of creating your own handmade scarf!
Row 1: Foundation Triangles
The first row of the entrelac scarf pattern is called the Foundation Triangles. This row sets the foundation for the rest of the pattern. It creates a series of triangular shapes that will be used to build the entrelac design.
To start the Foundation Triangles, you will need to cast on a multiple of six stitches plus one. For example, if you want to create a narrow scarf, you might cast on 25 stitches. If you want a wider scarf, you could cast on 37 stitches or more.
Once you have the desired number of stitches cast on, you will begin working the row by creating the first triangle. To create the triangle, you will knit three stitches together, then yarn over and knit the same three stitches together again. This creates a double decrease and forms the point of the triangle.
After creating the first triangle, you will repeat the process of knitting three stitches together, yarn over, and knitting the same three stitches together for each additional triangle. You will continue this pattern until you have reached the end of the row.
This row can be a bit tricky at first, as you will be working with multiple stitches and decreasing them to create the triangular shapes. However, once you get the hang of it, this row sets the stage for the beautiful entrelac pattern that will be created throughout the rest of the scarf.
Row 2: Building Base Triangles
In row 2 of the entrelac scarf pattern, we will be building the base triangles. These triangles are the foundation for the diamond shapes that will eventually make up the scarf.
To start, you will need to have completed row 1, which sets up the initial squares for the entrelac pattern. Now, we will be working on creating the triangles that will connect these squares.
Begin row 2 by knitting the first stitch as usual. Then, using the specified stitch pattern, begin working the base triangle. This involves knitting or purling a set number of stitches, and then creating a decrease to form the triangular shape.
Continue along the row, alternating between creating base triangles and knitting or purling the squares. Each base triangle should be created by knitting or purling the specified number of stitches, and then decreasing to form the triangular shape.
Repeat this pattern until you have completed row 2, and you will have successfully built the base triangles for your entrelac scarf. These triangles will form the framework for the rest of the pattern, and will eventually be joined together to create the striking diamond design.
Row 3: Creating Side Triangles
Row 3 is where the side triangles of the entrelac pattern begin to take shape. By adding these triangles, you’ll start to see the unique texture and design emerge in your scarf.
To create the side triangles, you will be working with the stitches that were left on hold in Row 1. Start by knitting the first stitch off the left-hand needle, and then bring the yarn to the front of your work to prepare for the next step.
Step 1: Slip the next stitch purlwise from the left-hand needle to the right-hand needle. This stitch will now be on the right-hand needle.
Step 2: With the yarn still at the front of your work, slip the same stitch from the right-hand needle back to the left-hand needle. This stitch will now be back on the left-hand needle, but the yarn will be in front of it.
Step 3: Bring the yarn to the back of your work, between the two stitches on the left-hand needle.
Repeat steps 1-3 for each stitch that was left on hold in Row 1. These steps create the side triangles that give the entrelac pattern its unique look.
Continue working Row 3 across the row, following the pattern instructions for the specific number of stitches and repeats. Once you have completed Row 3, you can move on to the next row of the pattern and continue to build the entrelac design.
Row 4: Completing the Base Triangles
Row 4 is an important step in creating the base triangles of the entrelac pattern. To start this row, you will need to turn your work and position your yarn in the correct place. Ensure that you are ready to work with your yarn on the right side of your work.
First, you will work on the right side triangle of the base triangle pair. This is done by picking up and knitting stitches along the edge of the previous left side triangle. Insert your needle into the first stitch of the edge, wrap the yarn around, and pull it through to create a new stitch. Repeat this process until you have reached the end of the edge.
Next, you will turn your work and work on the left side triangle of the base triangle pair. This is done by picking up and knitting stitches along the edge of the previous right side triangle. Insert your needle into the first stitch of the edge, wrap the yarn around, and pull it through to create a new stitch. Repeat this process until you have reached the end of the edge.
Continue this process of working on the right side triangle and then the left side triangle until you have completed all the base triangles in your entrelac pattern. Make sure to keep track of the number of stitches you pick up along each edge to ensure consistency throughout your project.
Once you have completed this row, you can move on to the next step in the entrelac pattern, which is typically working on the first tier of rectangles. Take your time and enjoy the process of creating the intricate entrelac pattern in your scarf!
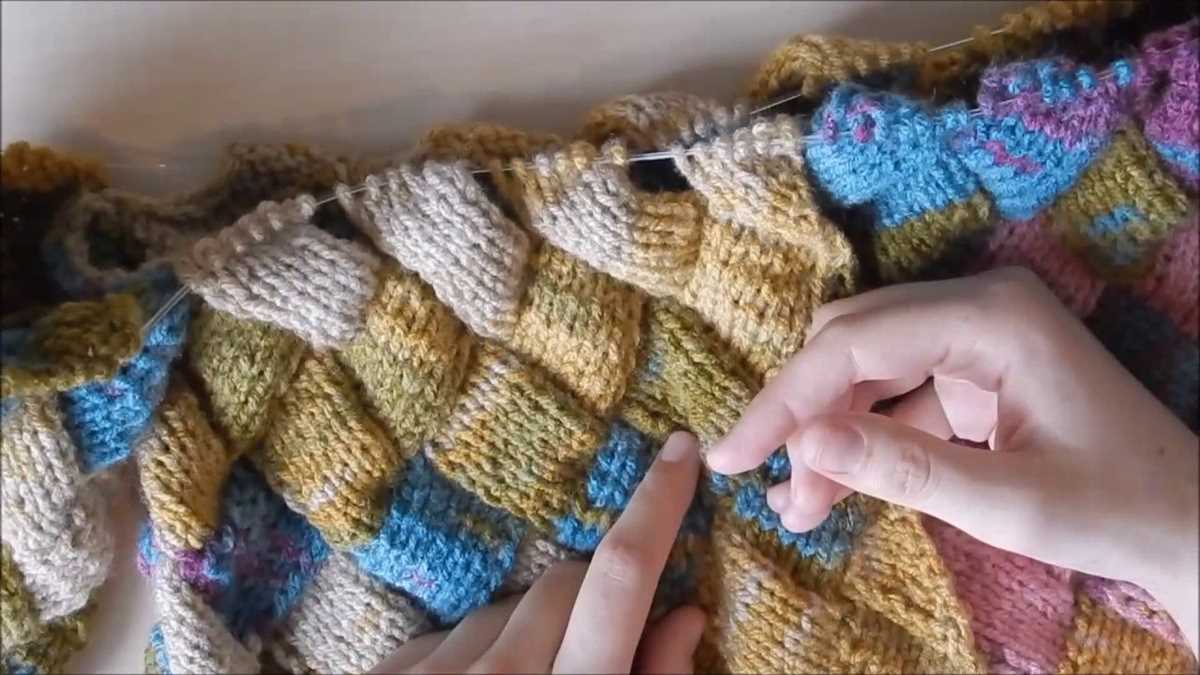
Row 5: Working with Rectangle Blocks
Row 5 of the entrelac scarf brings a new element to the pattern with the introduction of rectangle blocks. These blocks are created by picking up stitches from the previous row, creating a rectangular shape that adds texture and interest to the scarf.
To create the rectangle blocks, start by knitting the first rectangle block as directed in the pattern. Then, on the next rectangle block, pick up stitches from the previous block and work back and forth in rows to create the rectangle shape. Repeat this process for each subsequent rectangle block, making sure to pick up stitches from the appropriate section of the previous block.
It is important to pay attention to the pattern and count the number of stitches required for each rectangle block. This will ensure that the blocks are all the same size and that the pattern is consistent throughout the scarf. Also, be mindful of the direction in which the blocks are knit, as this will determine the placement and orientation of the rectangles.
Tip: To make stitching the rectangle blocks easier, it can be helpful to use stitch markers to mark the corners of each block. This will make it easier to keep track of where to pick up stitches and where to start and end each block.
Continue working with the rectangle blocks as directed in the pattern until the desired length of the scarf is reached. The addition of the rectangle blocks adds a unique and eye-catching element to the scarf, making it a stylish and cozy accessory for the colder months.
Finishing the Scarf
Once you have completed knitting the entrelac sections of the scarf, it’s time to finish it off and make it ready for wearing. Here are some steps to follow to complete your entrelac scarf:
Blocking the Scarf
Before finishing the scarf, it’s recommended to block it to give it a more polished and even look. To block the scarf, follow these steps:
- Gently soak the scarf in lukewarm water with a mild detergent.
- Squeeze out the excess water without wringing or twisting the scarf.
- Lay the scarf flat on a clean towel and roll it up to remove more water.
- Unroll the towel and lay the scarf flat on a blocking mat or any flat surface.
- Shape the scarf by gently pulling and stretching it to the desired dimensions.
- Secure the stretched scarf with pins or blocking wires to hold its shape.
- Leave the scarf to dry completely, which may take a day or two.
Adding Fringe
To add a fringe to your entrelac scarf, follow these steps:
- Decide on the length of your fringe and cut multiple strands of yarn twice that length.
- Fold each strand of yarn in half, forming a loop at one end.
- Insert the looped end of a yarn strand through a stitch at one edge of the scarf.
- Pull the loose ends of the yarn through the looped end and tighten it to secure the fringe.
- Repeat this process along the edge of the scarf, spacing the fringes evenly.
- Trim the fringe to the desired length if necessary, making sure they are all even.
Once you have blocked the scarf and added the fringe, your entrelac scarf is ready to be worn or gifted. Enjoy the beautiful texture and warmth that entrelac knitting provides!
Alternate Pattern Options
While the entrelac scarf free knitting pattern is a great option for creating a beautiful and unique scarf, there are also other pattern options available for those looking to try something different.
1. Seed Stitch Scarf: If you prefer a simpler pattern, the seed stitch scarf is a great choice. This classic stitch pattern creates a textured fabric that is both cozy and visually appealing. To create this scarf, simply alternate between knitting and purling stitches in a specific pattern.
2. Cable Knit Scarf: For those who enjoy the challenge of knitting cables, a cable knit scarf is a wonderful option. This pattern involves twisting stitches in a specific way to create intricate cable designs. The end result is a scarf that is not only warm, but also visually stunning.
3. Lace Scarf: If you prefer a delicate and feminine look, a lace scarf pattern might be just what you’re looking for. Lace knitting involves creating intricate openwork patterns by making strategic yarn overs and decreases. The result is a lightweight and elegant scarf that is perfect for adding a touch of elegance to any outfit.
4. Colorwork Scarf: If you enjoy playing with colors, a colorwork scarf pattern might be your best choice. This pattern involves using multiple colors of yarn to create beautiful designs and patterns. Whether you choose to try fair isle, intarsia, or slip stitch colorwork techniques, the end result is sure to be eye-catching.
5. Garter Stitch Scarf: For beginners or those who prefer a simple and classic look, a garter stitch scarf is a timeless option. This pattern involves knitting every stitch on every row, creating a fabric with ridges. The result is a cozy, stretchy, and versatile scarf that is perfect for everyday wear.
Tips and Tricks for Entrelac Knitting
Entrelac knitting can be a challenging but rewarding technique to master. Here are some tips and tricks to help you along the way:
1. Choose the right yarn and needles
When knitting entrelac, it’s important to choose a yarn and needle size that will result in a fabric with good stitch definition. A smooth, solid-colored yarn works best to showcase the intricacies of the entrelac pattern. Use a needle size that gives you a tight, but not too dense, fabric.
2. Practice your tension
Consistent tension is crucial when knitting entrelac. Make sure your stitches are neither too tight nor too loose, as this can affect the overall look of the pattern. Take your time and practice maintaining an even tension before tackling a larger entrelac project.
3. Use stitch markers
Using stitch markers to indicate the different stages of the entrelac pattern can be a helpful visual aid. It can also make it easier to keep track of where you are in the pattern, especially when working on larger projects.
4. Block your finished project
Blocking is essential for bringing out the true beauty of your entrelac project. It helps to even out the stitches and give the fabric a polished look. Wet blocking is usually recommended for entrelac, but be sure to check the recommended blocking method for the specific yarn you are using.
5. Enjoy the process
Entrelac knitting may require some patience and concentration, but it is an incredibly satisfying technique once you get the hang of it. Take the time to appreciate the intricate patterns as they emerge and enjoy the feeling of accomplishment when you finish your entrelac project.
With these tips and tricks in mind, you’ll be well-equipped to tackle entrelac knitting and create stunning projects.