
Summer is the perfect time to showcase your knitting skills with a lightweight and breezy sweater. Whether you’re looking for a casual pullover or something more dressy, this easy summer sweater knitting pattern is perfect for all skill levels.
With its simple stitches and relaxed fit, this sweater is not only stylish but also comfortable to wear during the warmer months. The pattern uses lightweight yarn and a larger needle size, making the project quick and easy to complete.
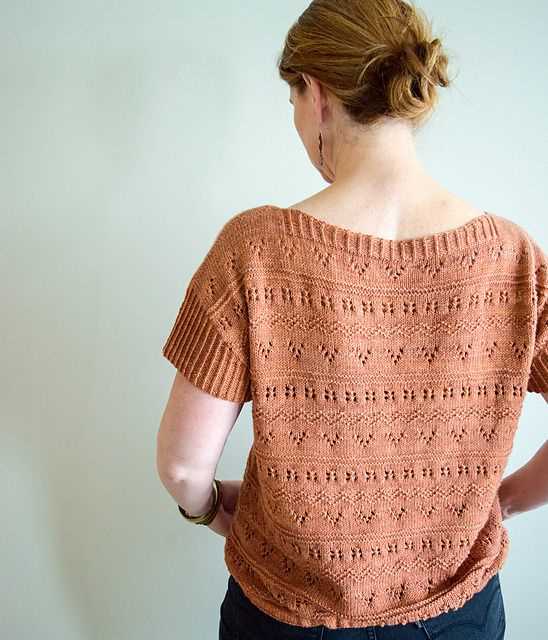
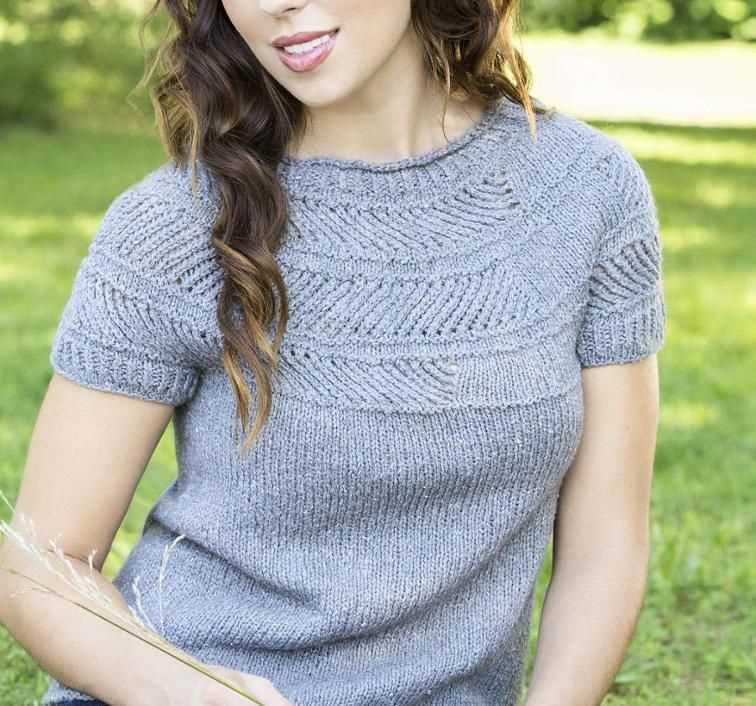
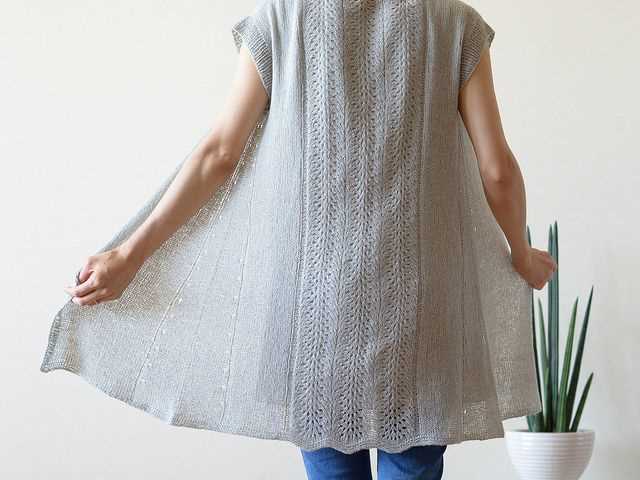
The sweater features a classic crewneck design with ribbing at the cuffs and hem. The pattern provides instructions for both short-sleeved and sleeveless options, allowing you to customize the sweater to your preferences.
Whether you’re a beginner knitter or a seasoned pro, this easy summer sweater knitting pattern will be a fun and rewarding project. So grab your knitting needles and get ready to create the perfect summer wardrobe staple!
Finding the Perfect Summer Sweater Knitting Pattern
With warmer temperatures on the horizon, it’s time to start thinking about knitting projects that are perfect for the summer season. A summer sweater can be a versatile and stylish addition to your wardrobe, but finding the right knitting pattern is key. You want a pattern that is lightweight, breathable, and not too heavy for those hot summer days.
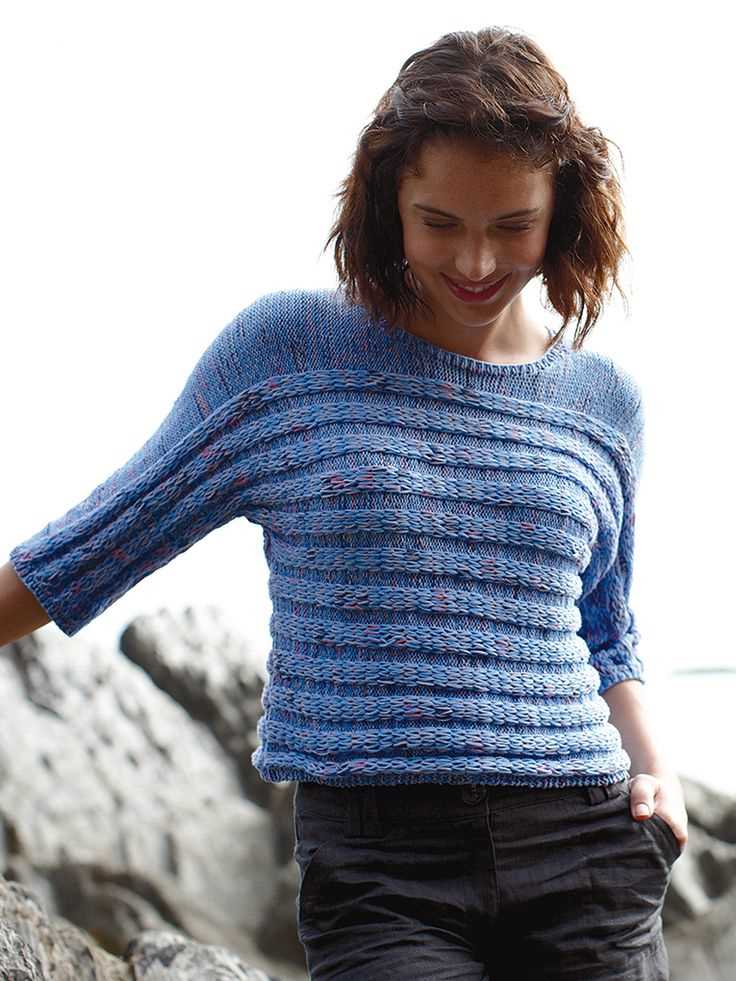
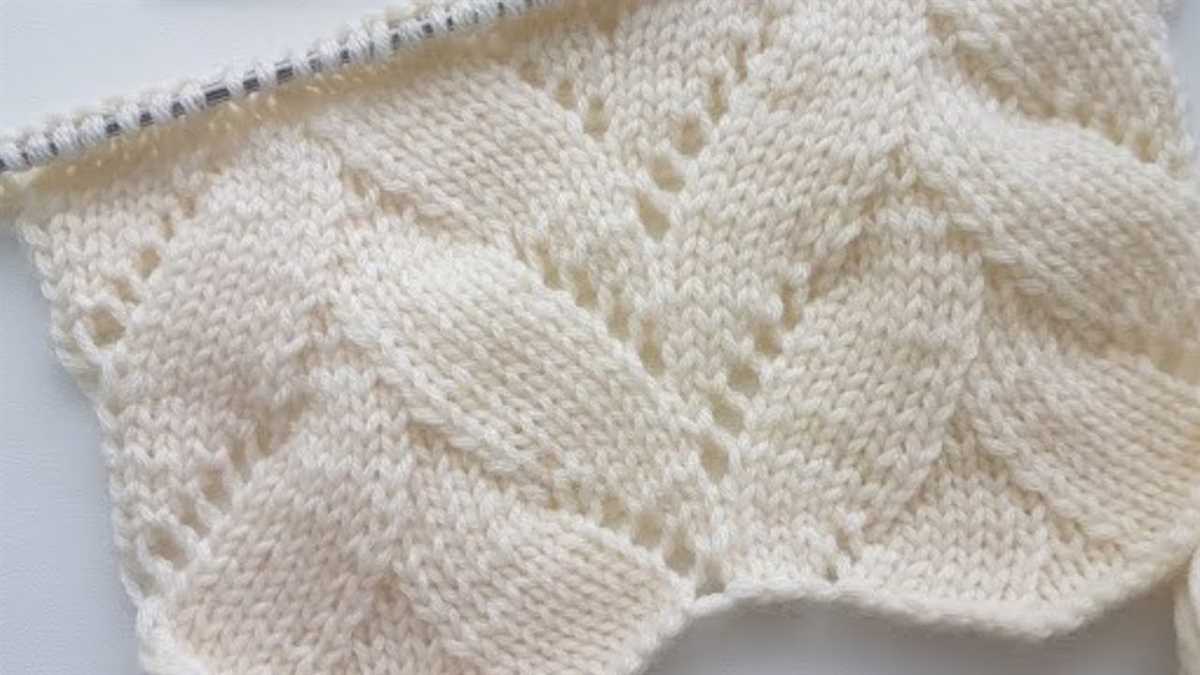
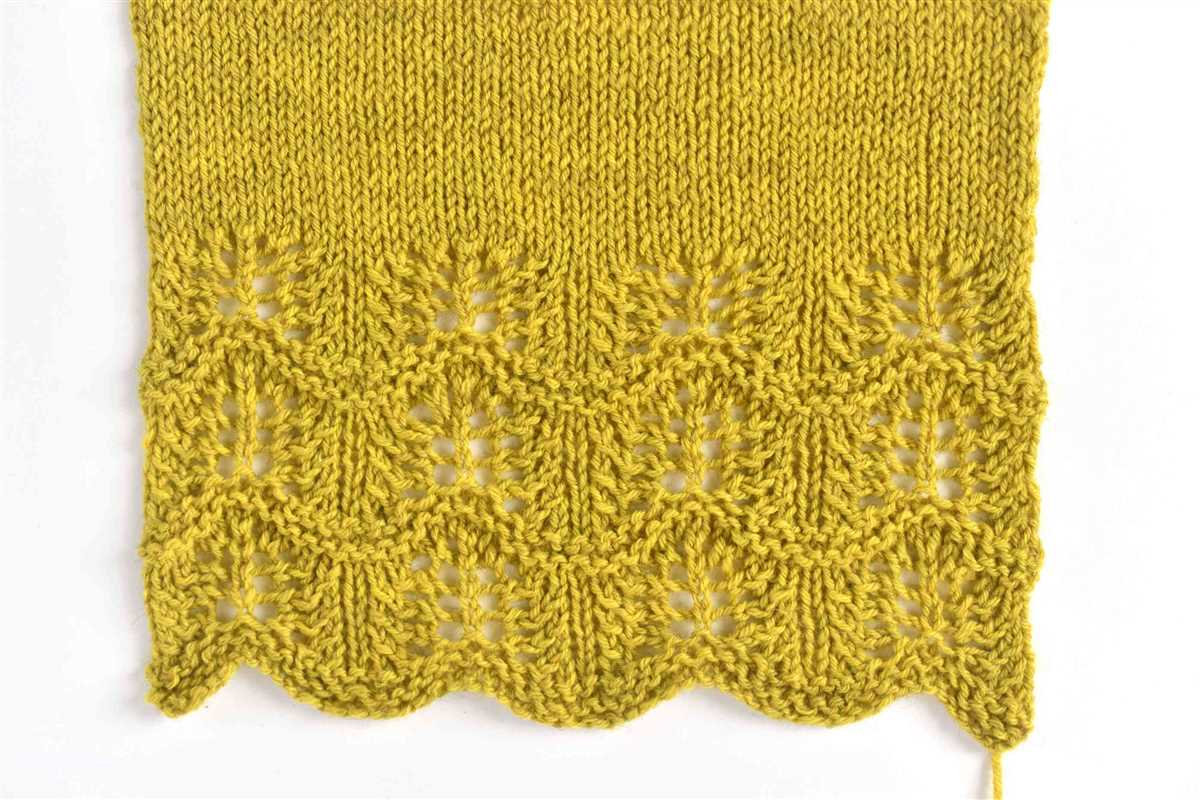
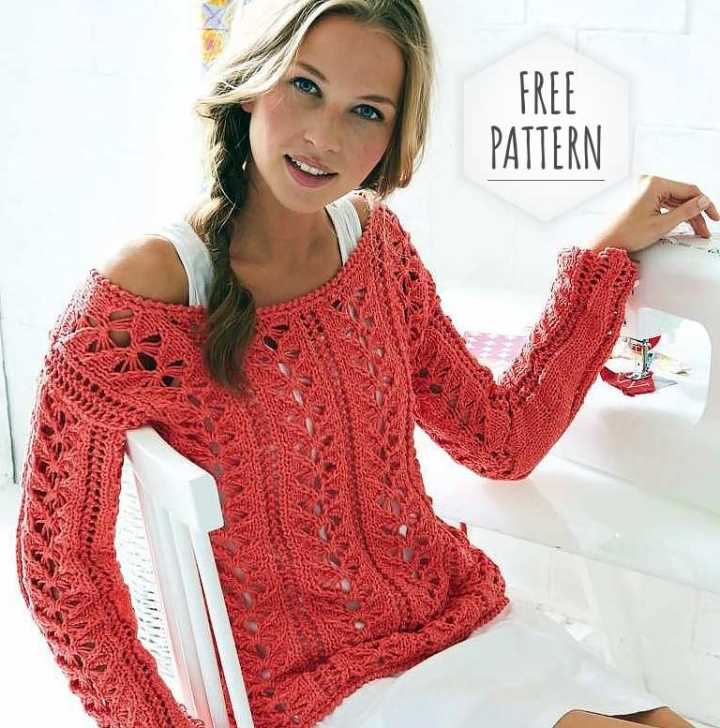
One popular option is a lace or openwork pattern, which allows for airflow and adds a delicate and feminine touch to your sweater. Look for patterns that incorporate lace stitches or have a more open stitch pattern, such as a drop stitch or eyelet design. These types of patterns are perfect for lightweight yarns like cotton or linen, which are ideal for summer knits.
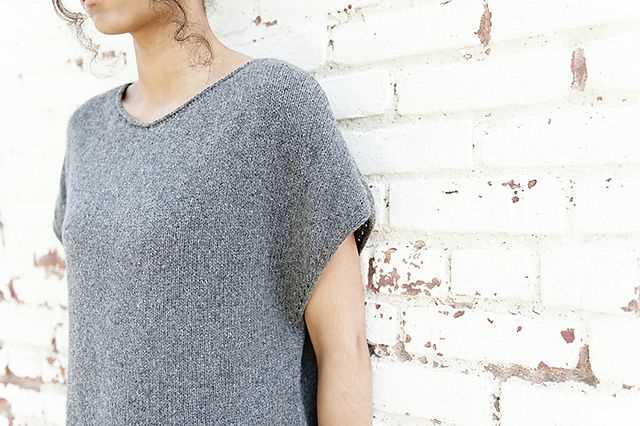
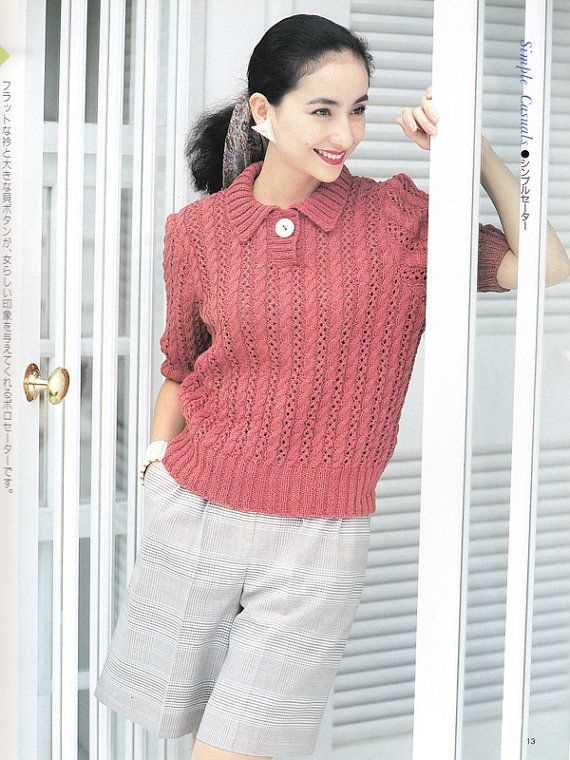
If you prefer a more classic and timeless look, consider a simple stockinette stitch pattern. This type of pattern is easy to knit and creates a smooth and even fabric. Pair it with a lightweight yarn in a vibrant summer color for a modern twist. You can also add some visual interest by incorporating ribbing or other texture details at the hem, cuffs, or neckline.
When choosing a summer sweater knitting pattern, it’s important to consider the fit and silhouette. Opt for designs that are loose and airy, allowing for maximum comfort in the heat. Oversized sweaters with dropped shoulders or dolman sleeves are particularly trendy and offer a relaxed and effortless look.
Don’t be afraid to experiment and customize your summer sweater. Add details like a keyhole back, a cropped length, or a fun fringe trim to make it your own. With the right pattern and yarn choice, you can create a summer sweater that is both stylish and comfortable, perfect for those sunny days and cool summer nights.
Understanding the Different Types of Summer Sweaters
When it comes to summer sweaters, there are several different types that you can choose from to keep you comfortable and stylish during the warmer months. Whether you prefer a lightweight cardigan or a breezy pullover, there is a summer sweater knitting pattern out there that will fit your style and needs.
1. Linen Sweaters: Linen is a popular choice for summer sweaters because it is lightweight and breathable. It has excellent moisture-wicking properties and dries quickly, making it an ideal fabric for staying cool in hot weather. Linen sweaters can be knit in various styles, from loose and airy to more fitted and structured.
2. Cotton Sweaters: Another popular choice for summer sweaters is cotton. Cotton is soft, comfortable, and perfect for warm weather. It is known for its breathability and can help keep you cool even on the hottest days. Cotton sweaters can be knit in a variety of patterns and designs, making them versatile and stylish.
3. Lace Sweaters: Lace sweaters are perfect for adding a touch of elegance to your summer wardrobe. These sweaters feature intricate lace patterns that create a delicate and feminine look. They are usually knit with lightweight yarns, such as bamboo or silk, to create a flowing and airy effect.
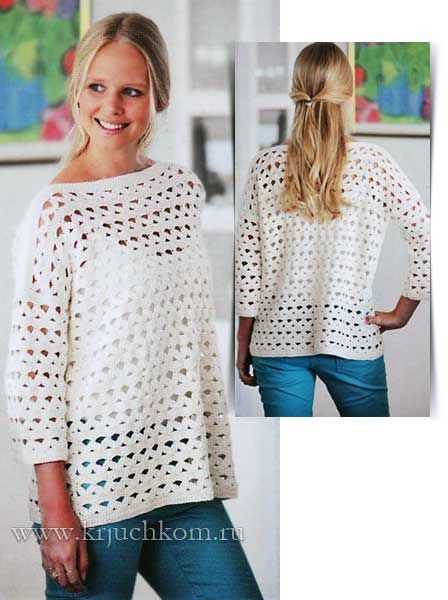
4. Oversized Sweaters: For those who prefer a more relaxed and casual look, oversized sweaters are a great choice for summer. These sweaters are typically knit with a loose gauge and have a relaxed fit, making them comfortable and easy to wear. They can be made with lightweight yarns or even knit with larger needles to create an open and airy texture.
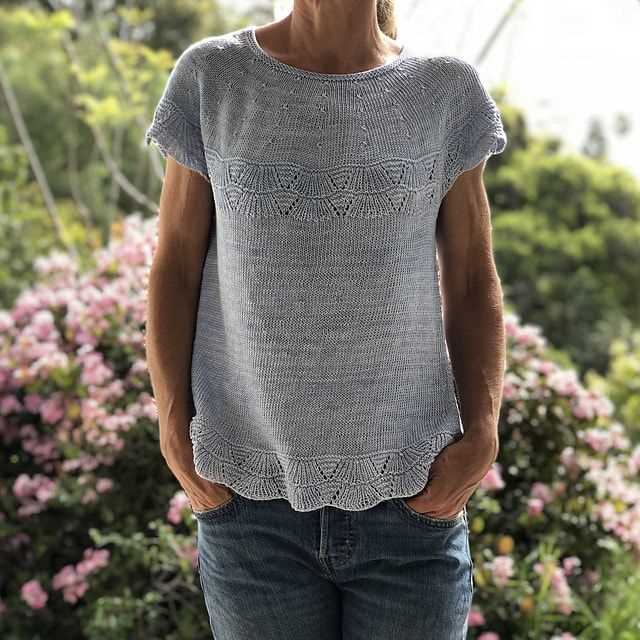
5. Short-Sleeve Sweaters: If you want to show off your arms and stay cool in the summer heat, a short-sleeve sweater is the perfect option. These sweaters are knit with short or cap sleeves, allowing for better airflow and ventilation. They can be knit in various styles, from fitted and cropped to loose and oversized.
Whether you choose a linen, cotton, lace, oversized, or short-sleeve summer sweater, there is a knitting pattern available that will ensure you stay cool and stylish all season long. Experiment with different yarns, colors, and patterns to create unique and personalized summer sweaters that reflect your individual style.
Materials and Tools Needed

Before you start knitting the easy summer sweater, make sure you have all the necessary materials and tools. Here is a list of what you will need:
- Yarn: Choose a lightweight and breathable yarn suitable for summer weather. Cotton and linen blends are ideal options.
- Knitting Needles: Use the needle size recommended on the yarn label. Circular needles are preferred for larger sections of the sweater.
- Tapestry Needle: You will need a large-eyed needle for weaving in the ends of your yarn and seaming.
- Stitch Markers: These are used to mark important stitches or sections in your pattern. They can be either removable or fixed.
- Scissors: A pair of sharp scissors will be necessary for cutting yarn and trimming any excess.
- Measuring Tape: A flexible measuring tape is essential for checking your gauge and measuring the finished dimensions of your sweater.
- Stitch Holder: This tool is used for temporarily holding stitches when working on another part of your project.
- Row Counter: It can be helpful to keep track of your rows and pattern repeats using a row counter.
Optional Tools:
- Blocking Tools: If you plan to block your finished sweater, you may need a blocking mat, pins, and a spray bottle.
- Pattern Holder: If you prefer to work from a printed pattern, a pattern holder or clipboard can keep your pattern visible and secure.
- Stitch Holders: In addition to a stitch holder, you may also need stitch markers to separate different sections of your sweater.
- Buttons or Fastenings: If your sweater has a button or fastening closure, make sure you have the necessary buttons or other fastenings on hand.
With these materials and tools ready, you’ll be well-prepared to start knitting your easy summer sweater pattern!
Choosing the Right Yarn and Needles
When it comes to knitting a summer sweater, choosing the right yarn and needles is crucial. The yarn you choose will determine the weight, drape, and breathability of the sweater, while the needles will affect the gauge and the overall look of the stitches. Here are some factors to consider when making your selection.
Yarn Weight:
For a summer sweater, you’ll want to choose a yarn that is lightweight and breathable. Look for yarns that are made from natural fibers like cotton, linen, bamboo, or silk, as these materials tend to be cooler and more comfortable to wear in warm weather. Avoid yarns that are heavy or overly warm, such as wool or alpaca blends.
Gauge and Needle Size:
Check the pattern for the recommended gauge and needle size, as this will help ensure that your finished sweater has the correct fit. If the pattern doesn’t specify a gauge, you can swatch with your chosen yarn and needles to determine the correct gauge before starting the project. Keep in mind that using a different yarn or needle size may alter the finished measurements and overall look of the sweater.
Texture and Stitch Definition:
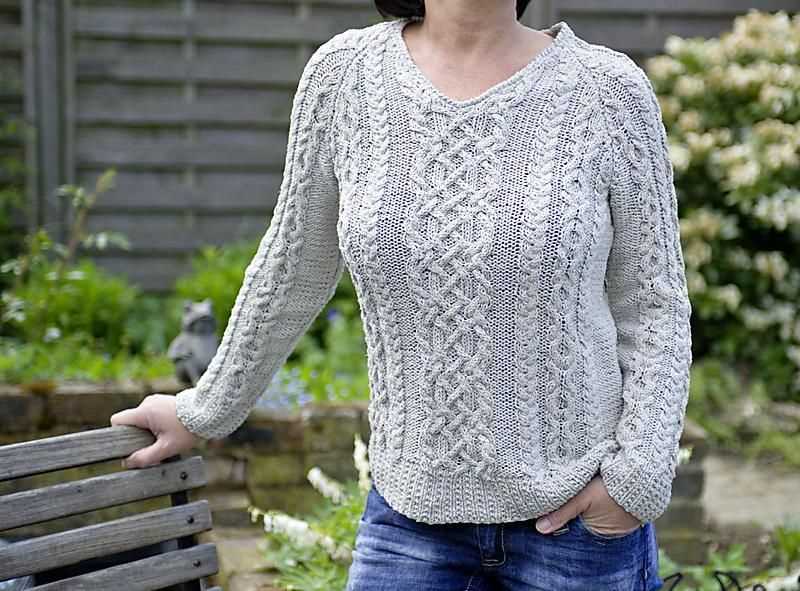
The texture and stitch definition of the yarn will also affect the appearance of the finished sweater. Smooth, plied yarns will show off intricate stitch patterns, while textured or tweed yarns can add depth and interest to simpler designs. Consider the style and aesthetic you want for your sweater and choose a yarn that complements it.
Color and Dye Lot:
Don’t forget to consider the color and dye lot when choosing your yarn. The color should enhance your complexion and personal style, while the dye lot should match to ensure consistent color throughout the sweater. It’s a good idea to purchase enough yarn from the same dye lot to complete your project, as dye lots can vary and result in noticeable color differences.
By carefully selecting the right yarn and needles for your summer sweater, you can ensure that it’s comfortable, stylish, and enjoyable to knit. Take your time to find the perfect combination and get ready to create a beautiful garment for the warmer months ahead.
Gathering Other Essential Knitting Supplies
Once you have chosen your summer sweater knitting pattern and selected the right yarn, it’s time to gather other essential knitting supplies to ensure a successful project. These supplies will not only make your knitting experience more enjoyable but also help you achieve professional-looking results.
Knitting Needles: Choose the appropriate knitting needles based on the recommended gauge and size in your pattern. Consider the material, length, and shape of the needles that you find most comfortable to work with.
Stitch Markers: Stitch markers are invaluable tools that help you keep track of stitch changes, pattern repeats, or any specific sections in your sweater. These small markers can be clipped or slipped onto your knitting needles.
Tape Measure: A tape measure is an essential tool for determining your gauge and measuring your knitting progress. Make sure to use a flexible one that can easily follow the shape of the garment.
Darning Needle: A darning needle, also known as a yarn needle, is used for sewing or weaving in loose ends of yarn to finish your project. Choose a needle with a large eye and a blunt end for easy threading.
Scissors: A pair of sharp, small scissors is necessary for cutting yarn and thread. Keep them handy to trim yarn ends and snip away any tangles or knots.
Row Counter: A row counter is a useful tool for keeping track of the number of rows you have completed. This eliminates the need to constantly refer back to the pattern and allows for stress-free knitting.
Pom Pom Maker (Optional): If you want to add a decorative touch to your summer sweater, a pom pom maker can help you create fluffy and symmetrical pom poms quickly and easily.
By gathering these essential knitting supplies, you’ll be well-equipped to start your summer sweater knitting project. Remember to read through the pattern instructions and familiarize yourself with the techniques before diving in. Happy knitting!
Getting Started with the Easy Summer Sweater Knitting Pattern
If you’re looking for a simple knitting project that is perfect for the summer months, this easy summer sweater pattern is just what you need. Whether you’re a beginner or an experienced knitter, this pattern is straightforward and enjoyable to work on. In this guide, we’ll go through the steps to get started on your knitting journey.
Materials Needed:
- Yarn: Choose a lightweight, breathable yarn in your favorite color. Cotton or linen blends are great options for summer wear. Make sure to check the yarn label for the recommended needle size.
- Knitting Needles: Use the needle size recommended on the yarn label. Circular or straight needles can be used, depending on your preference.
- Tapestry Needle: This will be used for weaving in ends and finishing the sweater.
- Scissors: An essential tool that you’ll need to cut the yarn.
- Stitch Markers: These will help you keep track of your stitches and any pattern repeats.
Gauge Swatch:
Before diving into the sweater pattern, it’s important to knit a gauge swatch. This will ensure that your finished sweater will have the correct measurements. To create a gauge swatch, cast on 20 stitches and knit in the recommended stitch pattern for about 4 inches.
Measure the number of stitches and rows within a 1-inch area and compare it to the gauge listed in the pattern. If your gauge matches, great! You can continue knitting with confidence. If not, you may have to adjust your needle size to achieve the correct gauge.
Pattern Instructions:
Once you have your materials ready and have determined your gauge, it’s time to start knitting the summer sweater. The pattern instructions will guide you through the process, detailing the cast on, stitch pattern, shaping, and finishing techniques.
Note: We recommend reading through the entire pattern before starting to get a full understanding of the construction and techniques involved.
You’re now ready to begin your easy summer sweater knitting project. Enjoy the relaxing process and the satisfaction of creating a beautiful and comfortable garment that you can wear during the warm months. Happy knitting!
Reading and Understanding the Instructions
When you begin a new knitting project, it is important to carefully read and understand the instructions before you start. This will ensure that you have a clear understanding of the pattern and will help you avoid any mistakes or confusion along the way.
1. Read the entire pattern: Start by reading the entire pattern from beginning to end. This will give you an overview of the project and help you understand the different sections and steps involved.
2. Pay attention to the gauge: The gauge is an important measurement that determines the size and fit of your finished project. Take note of the recommended gauge and make sure that your tension matches it. If your tension is different, you may need to adjust your needle size to achieve the correct gauge.
3. Understand the abbreviations: Knitting patterns often use abbreviations to save space. Take the time to familiarize yourself with the commonly used abbreviations so that you can easily follow the instructions. There are many online resources and knitting books that provide a list of abbreviations and their corresponding stitches.
4. Study the charts and diagrams: If the pattern includes charts or diagrams, study them carefully. These visual representations can provide helpful guidance and make it easier to understand complex stitch patterns or construction techniques.
5. Make a list of materials: Take note of the materials required for the project, such as the type and weight of yarn, the recommended needle size, and any additional materials like buttons or closures. Make sure that you have all the necessary supplies before you start knitting.
6. Break down the instructions: Break down the instructions into smaller sections or steps. This will make it easier to follow along and help you keep track of your progress. You can use a highlighter or sticky notes to mark specific sections or steps that you need to pay extra attention to.
7. Follow any additional notes or tips: Some patterns may include additional notes or tips that can be helpful to know before you start. These notes may include alternative stitch options, modifications, or special techniques. Take the time to read and understand these notes to ensure a successful knitting experience.
By taking the time to read and understand the instructions before you start, you will set yourself up for a successful knitting project. Remember to take it one step at a time and don’t hesitate to ask for help if you need clarification on any part of the pattern.
Calculating the Gauge and Making a Swatch
Knitting a summer sweater can be a fun and rewarding project, but it’s important to get the right gauge before you start. The gauge refers to the number of stitches and rows per inch that you achieve with a particular yarn and needle size. Making a swatch helps you determine if your stitches are the right size and allows you to adjust your needle size if needed.
1. Choosing the right yarn and needle size:
Start by reading the pattern to determine the recommended yarn weight and needle size. This information is usually provided in the materials section. Use the same type of yarn and needle size specified in the pattern to achieve the desired results. If you decide to use a different yarn, make sure it has a similar weight and fiber content.
2. Calculating the gauge:
Once you have your yarn and needle size, it’s time to calculate the gauge. The pattern will usually specify the gauge in a stitch pattern, such as stockinette stitch. To calculate the gauge, cast on a few extra stitches than the specified gauge and work in the stitch pattern for a few inches. Use a ruler or measuring tape to measure the number of stitches and rows over a 4-inch square. Divide the number of stitches and rows by 4 to get the gauge per inch.
3. Making a swatch:
With your calculated gauge in mind, cast on a number of stitches that will create a swatch slightly larger than 4 inches. For example, if your gauge is 6 stitches per inch, you can cast on 26 stitches for a 4.5-inch wide swatch. Work in the stitch pattern specified in the pattern for a few inches, making sure to keep track of your rows.
4. Measuring the swatch:
Once your swatch is complete, lay it flat on a table and measure the number of stitches and rows over a 4-inch square. Compare these measurements to the gauge specified in the pattern. If your gauge doesn’t match, you may need to adjust your needle size. If your swatch is too small, try using a larger needle size to achieve a looser tension. If your swatch is too big, try using a smaller needle size to achieve a tighter tension. Repeat the process until your gauge matches the pattern requirements.
5. Washing and blocking the swatch:
Before making any adjustments, it’s important to wash and block your swatch as you would the finished project. This helps relax the stitches and provides a more accurate gauge measurement. If your swatch still doesn’t match after blocking, you may need to consider using a different yarn or adjusting the pattern to fit your gauge.
Knitting the Sweater
Knitting a sweater is a delightful and rewarding project for the summer season. With this easy summer sweater knitting pattern, you can create a stylish and lightweight garment that is perfect for cool summer evenings or breezy days at the beach.
Materials: To begin knitting the sweater, gather the following materials: (insert list of materials here). These materials are readily available at your local craft store or online.
Pattern: Once you have all the necessary materials, you can start working on the sweater using the provided pattern. The pattern includes detailed instructions and stitch diagrams to guide you through every step of the knitting process. Whether you are a beginner or an experienced knitter, this pattern is designed to be easy to follow and enjoyable to work on.
Casting On: The first step in knitting the sweater is to cast on the required number of stitches. Make sure to measure your gauge to ensure that your sweater will fit properly. It’s important to take your time and be precise with your stitches to achieve the best results.
Knitting Techniques: As you progress through the pattern, you will encounter various knitting techniques such as ribbing, stockinette stitch, and shaping. These techniques add texture and structure to the sweater, giving it a polished and professional appearance.
Finishing: Once you have completed all the necessary sections of the pattern, it’s time to finish the sweater. This involves carefully weaving in any loose ends, blocking the finished piece to give it a smooth and even shape, and attaching any buttons or other embellishments.
Enjoy your New Sweater: Once your sweater is finished, you can proudly wear it and show off your knitting skills. Pair it with your favorite summer outfit or use it as a layering piece for those cooler summer nights. Knitting your own sweater allows you to create a unique and personalized garment that you can cherish for years to come.
Casting On and Knitting the Ribbing
Before you begin knitting the easy summer sweater, you will need to cast on your stitches. The number of stitches you cast on will depend on the size of the sweater and the desired width of the ribbing. You can use the long tail cast on method, which is a popular and versatile method for casting on stitches.
To start the long tail cast on, hold the yarn in your right hand and make a slipknot, leaving a long tail. Insert the needle through the slipknot and tighten it. Then, with the needle and yarn in your right hand, position your thumb and index finger of your left hand in the shape of a gun, with the yarn passing over your thumb and under your index finger. Place the needle under the yarn, going over your thumb and under your index finger, and then bring the needle up and through the loop on your thumb. Drop the loop from your thumb and tighten the stitch on the needle. Repeat this process until you have cast on the desired number of stitches.
Once you have cast on your stitches, you can begin knitting the ribbing for the sweater. The ribbing is typically worked in a knit-purl pattern, such as knit 2 stitches, purl 2 stitches, repeat to the end of the row. This creates a stretchy and textured fabric that is perfect for the cuffs, collar, and hem of the sweater. The ribbing also helps to give the sweater structure and prevent it from sagging.
To knit the ribbing, insert the right needle into the first stitch on the left needle as if to knit. Wrap the yarn around the right needle, bringing the yarn to the front if you are going to purl the next stitch. Then, use the right needle to pull the yarn through the stitch, creating a new stitch on the right needle. Continue knitting or purling in the pattern specified until you reach the end of the row. Repeat this pattern for the desired number of rows to create the ribbing.
By casting on and knitting the ribbing for your easy summer sweater, you are creating the foundation for the garment and setting the stage for the rest of the knitting process. Take your time with the cast on and ribbing to ensure that it is done accurately and evenly. Once the ribbing is complete, you can move on to the next steps in the pattern to shape the body of the sweater and add any additional design details.
Working on the Body and Sleeves
Once you have finished the ribbing for the neckline, it’s time to start working on the body of the sweater. This part is where you will see the sweater start to take shape.
To begin, continue knitting in the stitch pattern established in the ribbing. If you are using a simple stockinette stitch, this means knitting all stitches for the right side rows and purling all stitches for the wrong side rows. If you are using a more complex stitch pattern, make sure to follow the instructions provided in the pattern.
Body:
When working on the body, you will generally knit in the round until you reach the desired length. This means that you will be continuously working in a spiral without turning the work or changing the direction of your knitting. This technique ensures a seamless finish and makes for a more comfortable garment.
You will continue to knit in the stitch pattern until the body measures the desired length from the ribbing to the underarm. Make sure to consult the pattern for specific measurements and any shaping instructions that may be required.
Sleeves:
After completing the body, it’s time to start working on the sleeves. The sleeves can be either knit separately and seamed to the body, or knit in the round. Again, consult the pattern for specific instructions.
If you are knitting the sleeves in the round, you will typically pick up stitches around the armholes and then continue knitting in the stitch pattern until the sleeves measure the desired length. Remember to consult the pattern for any shaping instructions or measurements.
Once the body and sleeves are complete, you can move on to finishing touches such as adding ribbing to the bottom hem or cuffs, weaving in any loose ends, and blocking the sweater to give it a polished look.
Shaping the Neckline and Shoulders
In the process of knitting a summer sweater, shaping the neckline and shoulders is an important step to ensure a comfortable and flattering fit. This involves decreasing stitches in specific areas to create the desired shape.
The neckline is typically shaped using a combination of bind off and decreases. This can be done in a variety of ways, depending on the desired look. For a rounded neckline, you could start by binding off a certain number of stitches at the center of the neckline and then decreasing stitches gradually on each side. Alternatively, for a V-neckline, you could bind off stitches in a triangular shape and then continue decreasing along the edges to create a sharper V shape.
- Binding off: To bind off stitches, simply knit stitches as usual, and then pass the previous stitch over the current stitch, dropping it off the needle. Repeat this process for the desired number of stitches.
- Decreasing: Decreasing stitches involves knitting two stitches together, either knitwise or purlwise, depending on the stitch pattern. This can be done at the beginning or end of a row, or within a row.
Shaping the shoulders is also important to create a well-fitting sweater. This is typically done by binding off stitches at the beginning of each row. The number of stitches bound off will depend on the desired shoulder width. It is important to evenly distribute the shoulder shaping over multiple rows to create a smooth transition.
By carefully shaping the neckline and shoulders, you can ensure that your summer sweater fits comfortably and flatters your body shape. Whether you prefer a rounded neckline or a V-neckline, and whether you want narrower or wider shoulders, the shaping process allows you to customize your sweater to your liking.
Adding the Finishing Touches
Once you have completed knitting your easy summer sweater, it’s time to add the finishing touches to make it look polished and professional. Here are a few steps to consider:
1. Blocking
Blocking is an essential step in knitting as it helps to shape and refine your garment. Place your sweater on a flat surface and gently stretch it to the desired size and shape. Secure it with pins or blocking wires, and then mist it with water or use a steam iron to set the shape. Allow it to dry completely before moving on to the next step.
2. Seaming
If your sweater has separate pieces, such as front and back panels or sleeves, you will need to seam them together. Use a tapestry needle and matching yarn to sew the pieces together, following the pattern’s instructions. Take your time and ensure that the seams are neat and secure.
3. Adding Ribbing or Edging
To give your sweater a polished finish, consider adding ribbing or edging in a contrasting color or a complementary stitch pattern. This can be done around the neckline, cuffs, and hem. Follow the pattern’s instructions for the appropriate stitches and dimensions.
4. Finishing Details
Don’t forget the small details that can make a big difference in the overall look of your sweater. This could include adding buttons, a pocket, a decorative stitch pattern, or even embroidery. Let your creativity shine through and add those finishing touches that will make your sweater unique and special.
Once you have completed these steps, your easy summer sweater is ready to be worn or gifted to someone special. Enjoy the process of knitting and take pride in your finished creation!