
If you’re looking for a fun and rewarding knitting project, a throw blanket is the perfect choice. Whether you’re a beginner or an experienced knitter, this easy knitting pattern will guide you through the process of creating a beautiful and cozy throw blanket that you’ll cherish for years to come.
This knitting pattern is designed to be beginner-friendly, with clear instructions and basic stitches. Even if you’ve never picked up a pair of knitting needles before, you’ll be able to follow along and create your own one-of-a-kind throw blanket.
Knitting a throw blanket is a great way to relax and unwind after a long day. The repetitive motions of knitting can be meditative and soothing, while also allowing you to express your creativity. Plus, there’s nothing quite like wrapping yourself in a warm and cozy blanket that you’ve made with your own two hands.
Whether you knit for yourself or as a gift for a loved one, this easy knitting pattern for a throw blanket is sure to bring joy and warmth into your life. So grab your knitting needles and yarn, and let’s get started on this exciting knitting adventure!
Easy Knitting Pattern for Throw Blanket
Are you looking for a fun and easy knitting project? Look no further than this easy knitting pattern for a throw blanket. Whether you’re a beginner or an experienced knitter, this pattern is perfect for you.
Materials:
- Size 10 knitting needles
- 4 skeins of bulky weight yarn
- Tapestry needle
- Scissors
Instructions:
- Cast on 80 stitches.
- Knit every row for the entire length of the blanket.
- When you reach the desired length, bind off all stitches.
- Weave in any loose ends with a tapestry needle.
- Trim any excess yarn with scissors.
This easy knitting pattern for a throw blanket is perfect for cozying up on the couch or adding a pop of color to your bedroom decor. The repetitive knitting pattern makes it a relaxing and enjoyable project to work on.
Whether you choose a bold and vibrant yarn or opt for a more neutral color, this throw blanket will add a touch of warmth and style to any room. It also makes a thoughtful and personalized gift for friends and family.
Materials You’ll Need
Before you start knitting your throw blanket, make sure you have all the necessary materials. Here’s a list of what you’ll need:
- Yarn: Choose a soft and cozy yarn that is suitable for blankets. You will need around 10-12 skeins, depending on the desired size of your blanket.
- Knitting Needles: Use a pair of large knitting needles, preferably in size US 13 or US 15, to create a loose and airy texture.
- Tapestry Needle: This needle will be used for weaving in loose ends and finishing touches.
- Scissors: You’ll need a pair of sharp scissors to cut the yarn and any excess threads.
- Measuring Tape: A measuring tape will come in handy for checking the dimensions of your blanket as you go along.
Once you have gathered all the necessary materials, you’ll be ready to start knitting your throw blanket. Make sure to choose yarn and needles that you feel comfortable working with, as this will greatly affect the final outcome of your project.
Choosing the Right Yarn
When it comes to knitting a throw blanket, choosing the right yarn is essential. The yarn you select will determine the overall look, feel, and durability of your finished blanket. There are a few factors to consider when making your yarn choice.
Fiber: The fiber content of the yarn will greatly affect the characteristics of your blanket. Some popular yarn options for throw blankets include wool, acrylic, cotton, and blends. Wool is known for its warmth and durability, while acrylic is often softer and easier to care for. Cotton is lightweight and breathable, making it ideal for warmer climates. Consider what qualities you value most in a blanket and choose a fiber that aligns with those preferences.
Weight:
- Fingering or sock weight yarn is thin and typically used for delicate projects.
- Sport or DK weight yarn is slightly thicker and a good option for blankets with intricate stitch patterns.
- Worsted weight yarn is a popular choice for blankets as it is versatile and works up relatively quickly.
- Bulky or chunky yarn is thicker and creates a cozy, warm blanket.
Color: The color of your yarn will play a significant role in the overall aesthetic of your blanket. Consider the style and color scheme of the room where the blanket will be used. If you want to make a statement, bold and vibrant colors can add a pop of color to a neutral space. Alternatively, if you prefer a more subtle and classic look, neutral tones or subtle variegated yarns may be the way to go.
Ultimately, the decision of which yarn to use for your throw blanket comes down to personal preference. Experimenting with different fibers, weights, and colors can be an exciting part of the knitting process. So, take your time, explore your options, and enjoy creating a cozy and stylish throw blanket that you’ll love to wrap yourself in for years to come.
Selecting the Right Knitting Needles

When starting a knitting project, one of the most important decisions you’ll have to make is choosing the right knitting needles. The type and size of needles you use can greatly affect the final outcome of your project, so it’s crucial to select the ones that will work best for you and the pattern you’re working on. Here are a few factors to consider when making your selection:
1. Needle material: Knitting needles come in various materials, including wood, metal, and plastic. Each material has its own unique qualities and affects the way the yarn slides on the needle. For example, wood needles provide more grip on the yarn, while metal needles allow for faster knitting. Consider your personal preference and the characteristics of the yarn you’re using when choosing the material.
2. Needle size: The size of the knitting needles you use will determine the gauge of your project. Most patterns will specify a recommended needle size, which will give you an idea of the intended finished dimensions and the tension of the stitches. Be sure to check the gauge swatch before starting your project to ensure the needles you’ve chosen will produce the desired results.
- 3. Circular or straight: Knitting needles come in two main types: circular and straight. Circular needles are versatile and can be used for both flat and circular knitting, while straight needles are typically used for flat knitting. Consider the type of project you’re working on and your personal preference when deciding between circular and straight needles.
- 4. Needle length: Circular needles come in different lengths, and the length you choose will depend on the size of your project and the number of stitches you need to accommodate. Longer needles are better for larger projects, while shorter needles are more suitable for smaller ones.
By considering these factors, you can select the right knitting needles that will make your knitting experience enjoyable and help you achieve the desired results in your throw blanket or any other knitting project.
Getting Started: Casting On
Before you begin your knitting project, you’ll need to cast on, which is the process of creating the first row of stitches on your knitting needle. Casting on is an essential skill in knitting and there are several different methods you can use. In this easy knitting pattern, we’ll be using the long-tail cast on method.
Long-Tail Cast On
To start, you’ll need to determine how much yarn you’ll need for your cast on. Estimate about one inch of yarn per stitch you plan to cast on, plus a little extra for the tail. Measure out a length of yarn that fits this estimate and cut it, leaving a tail about two times the length of your finished cast on.
Next, make a slipknot at the end of your yarn. This will be your first stitch. Insert your knitting needle through the slipknot and tighten it, making sure the tail end of the yarn is on the left side and the working end is on the right.
- Hold the needle with the slipknot in your right hand and the tail end of the yarn in your left hand. Your working yarn should be wrapped around your left thumb.
- With your right hand, bring the needle under the strand of yarn between your left thumb and index finger, then over the strand and under the yarn on your left thumb.
- Now bring the needle back under the strand of yarn between your left thumb and index finger, this time going over the strand and under the yarn on your left index finger.
- With your right hand, pull the needle and loop the working yarn through the loop on your left thumb, creating a new loop on your needle.
- Repeat these steps until you’ve cast on the desired number of stitches.
The long-tail cast on method creates a sturdy and even edge, making it perfect for your throw blanket project. Once you’ve mastered casting on, you’re ready to move on to the next step: the knit stitch. Stay tuned for the next part of this easy knitting pattern!
Knitting the First Row
When starting your throw blanket, the first row is an important step in setting the foundation for your knitting project. Follow these steps to ensure a smooth and successful start:
- Choose your knitting needles: Depending on the thickness and texture of your yarn, select a pair of knitting needles that are appropriate for the project. Check the yarn label for needle size recommendations.
- Cast on stitches: To begin your first row, you will need to cast on the required number of stitches. There are various casting on techniques you can use, such as the long-tail cast on or the knitted cast on. Choose the method that you are most comfortable with.
- Hold the needles and yarn: With your knitting needles in hand, hold one needle in your right hand (if you are right-handed) and the other in your left hand. Hold the yarn in your right hand, with the tail end hanging from your fingers and the working end attached to the ball of yarn.
- Make a slipknot: To secure the yarn to your needle, create a slipknot by looping the yarn over itself and pulling the working end through the loop. Slide the slipknot onto your right-hand needle.
- Start knitting: With the slipknot in place, begin knitting by inserting the right-hand needle into the first stitch on the left-hand needle, from left to right. Hold the working yarn in your right hand and wrap it clockwise around the right-hand needle.
- Complete the stitch: With the yarn wrapped around the right-hand needle, use the tip of the needle to pull the wrapped yarn through the stitch on the left-hand needle. Slide the stitch onto the right-hand needle and let the stitch drop off the left-hand needle.
- Repeat: Continue knitting each stitch in the same manner, one by one, until you have completed the first row. Pay attention to the tension of your stitches and try to keep them consistent.
Once you have finished knitting the first row, you can proceed with the rest of your throw blanket pattern, following the instructions provided. Remember to take breaks and relax your hands and fingers throughout the process to avoid strain or fatigue. Happy knitting!
Continuing the Pattern
Once you have completed the first few rows of your throw blanket, you can continue the pattern by repeating the same sequence of stitches. This will create a cohesive and visually appealing design throughout the entire blanket.
To continue the pattern:
- Refer to your knitting instructions or pattern to determine the stitch sequence.
- Ensure that you have the correct number of stitches on your knitting needles before starting each row.
- Follow the instructions for each row, making sure to maintain the pattern. This may involve knitting, purling, or using different stitch combinations.
- Pay attention to any changes in the stitch sequence as you progress, as some patterns may introduce new stitches or variations.
Throughout the process, it can be helpful to use stitch markers to indicate key points in the pattern, such as the beginning and end of each repeat. This will make it easier to keep track of your progress and ensure that you don’t make any mistakes.
Remember to take breaks and stretch your hands and wrists regularly to prevent any discomfort or strain. Knitting should be an enjoyable and relaxing activity, so take your time and enjoy the process of creating a beautiful throw blanket.
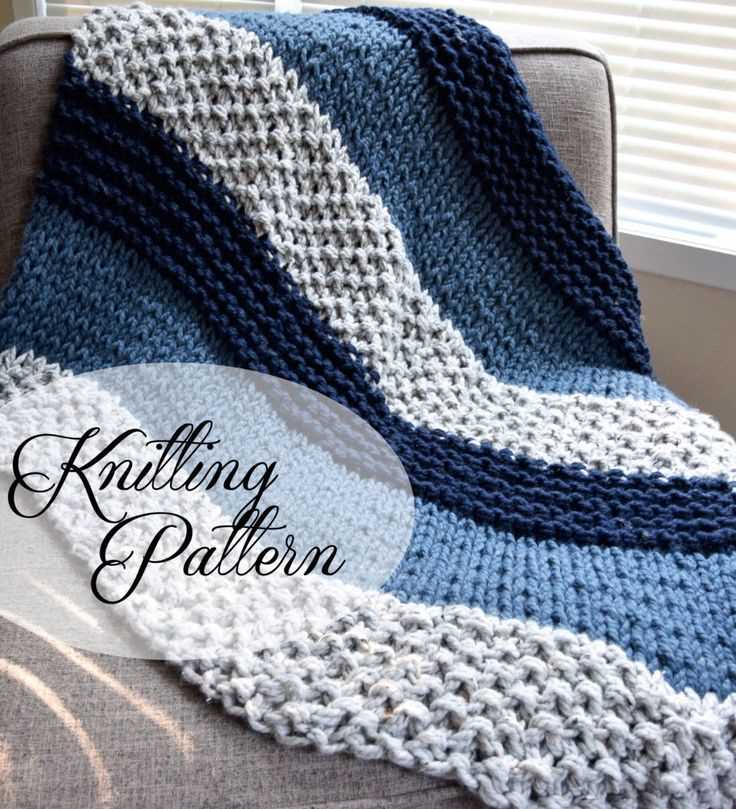
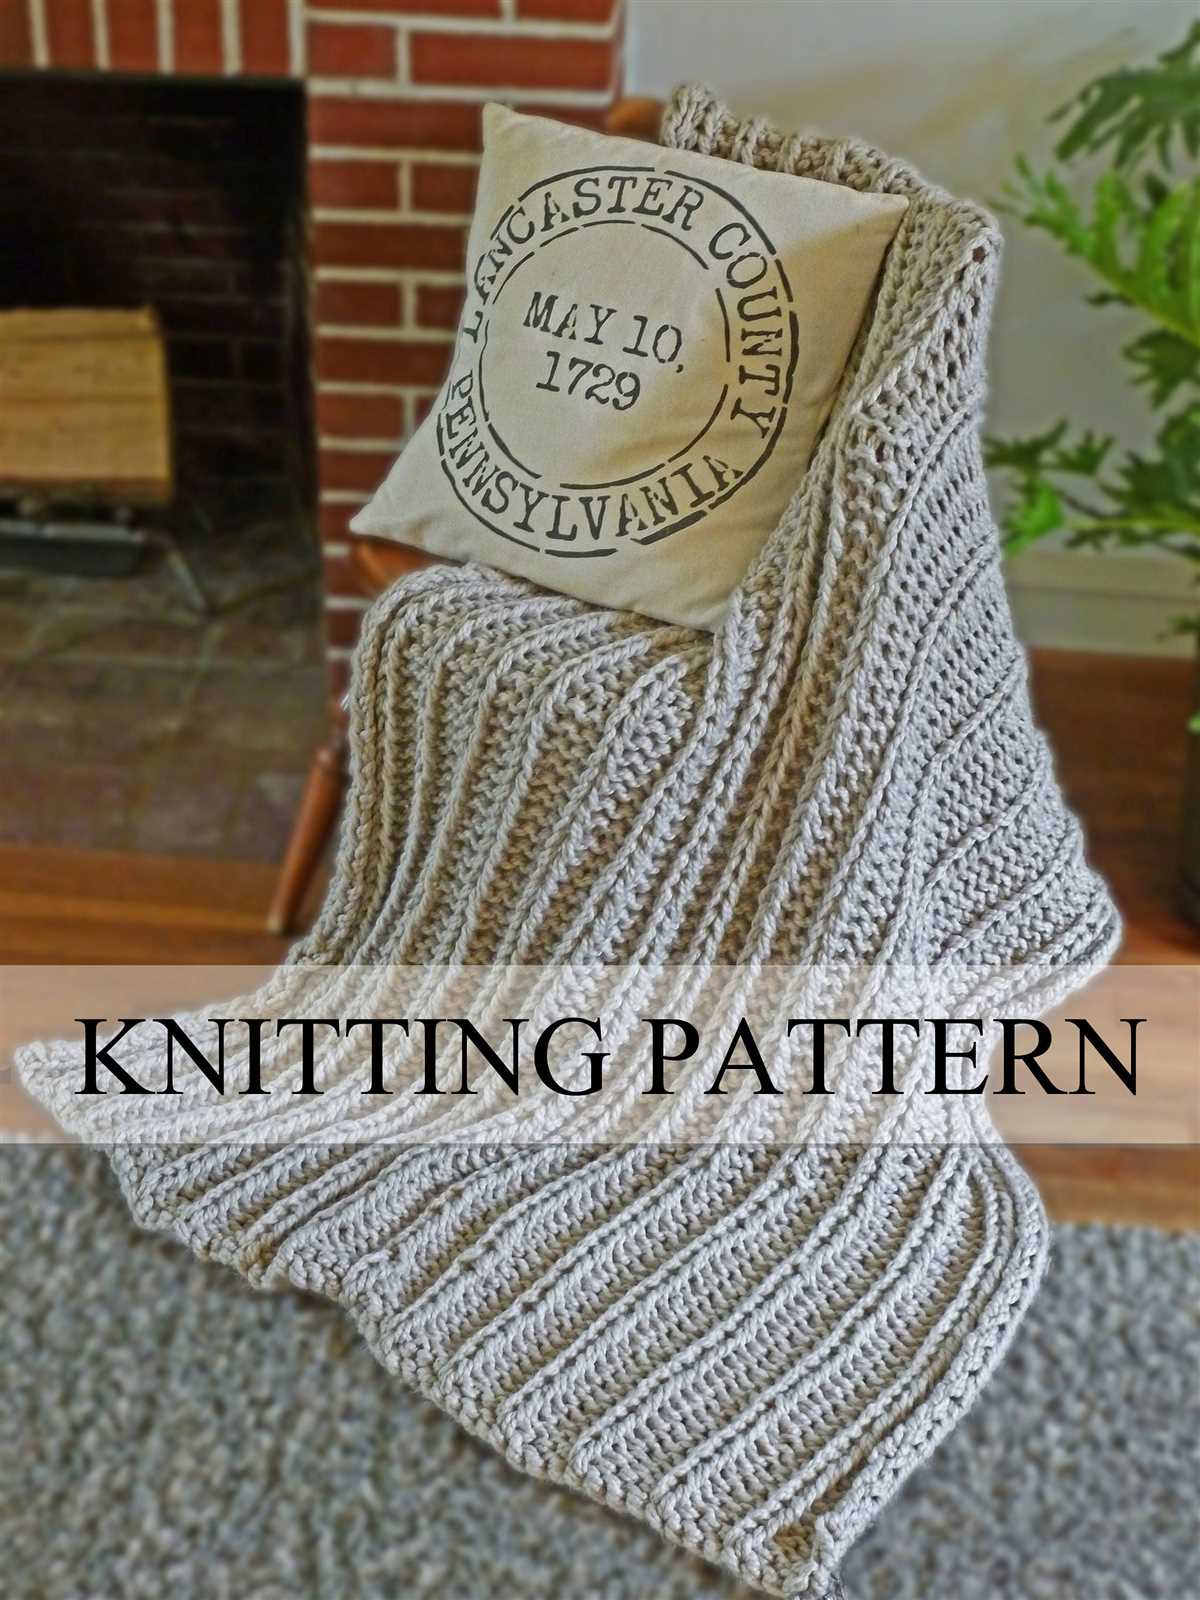
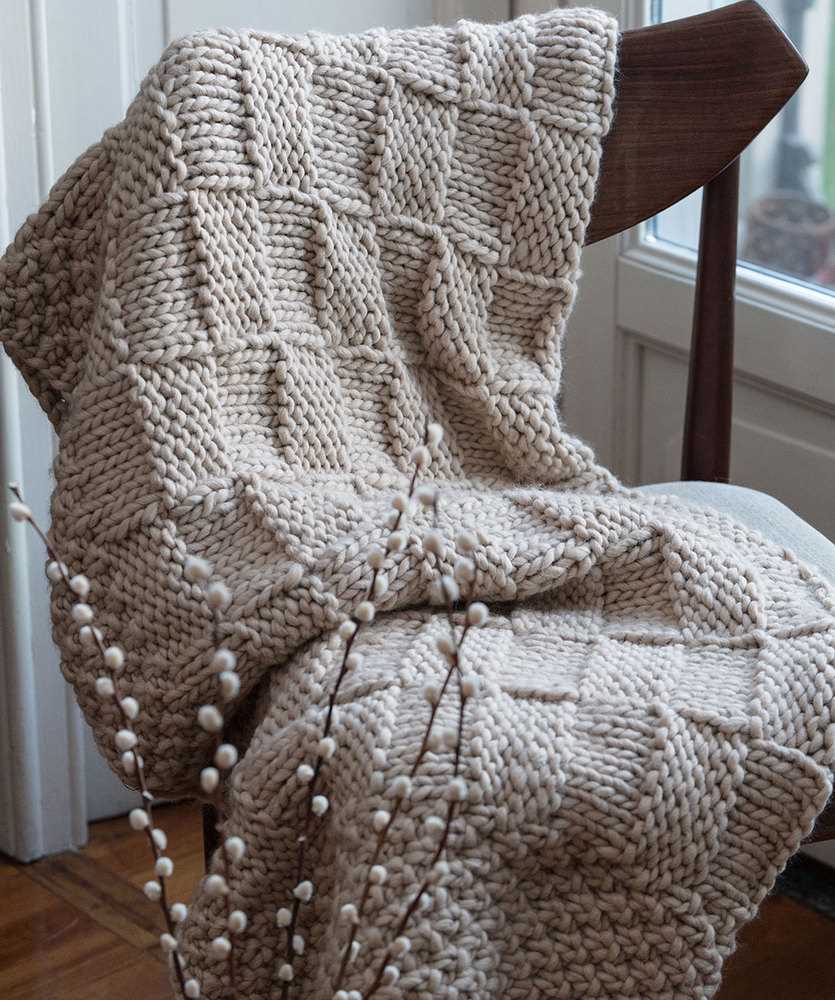
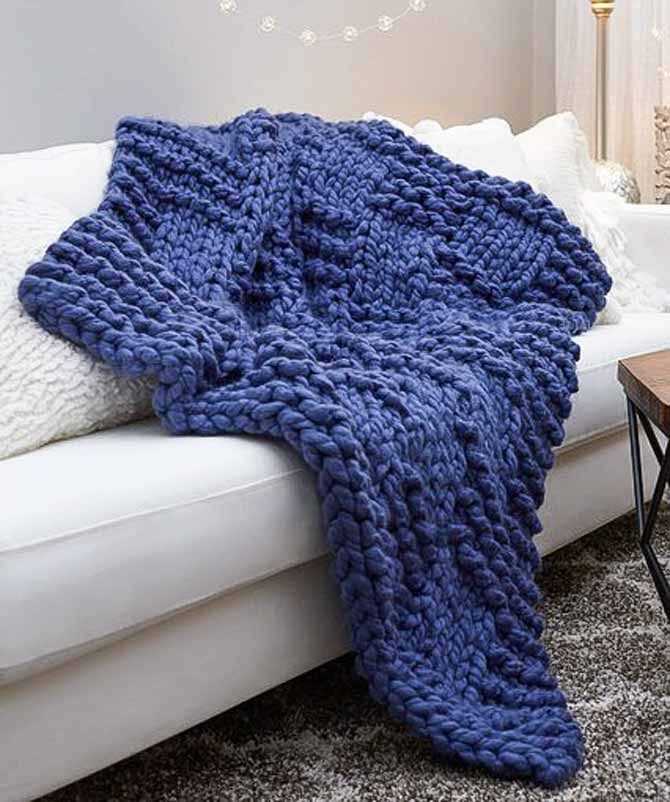
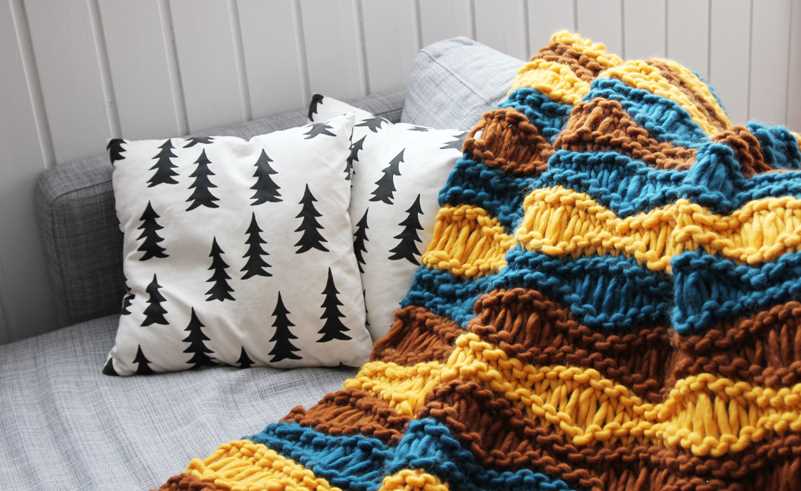
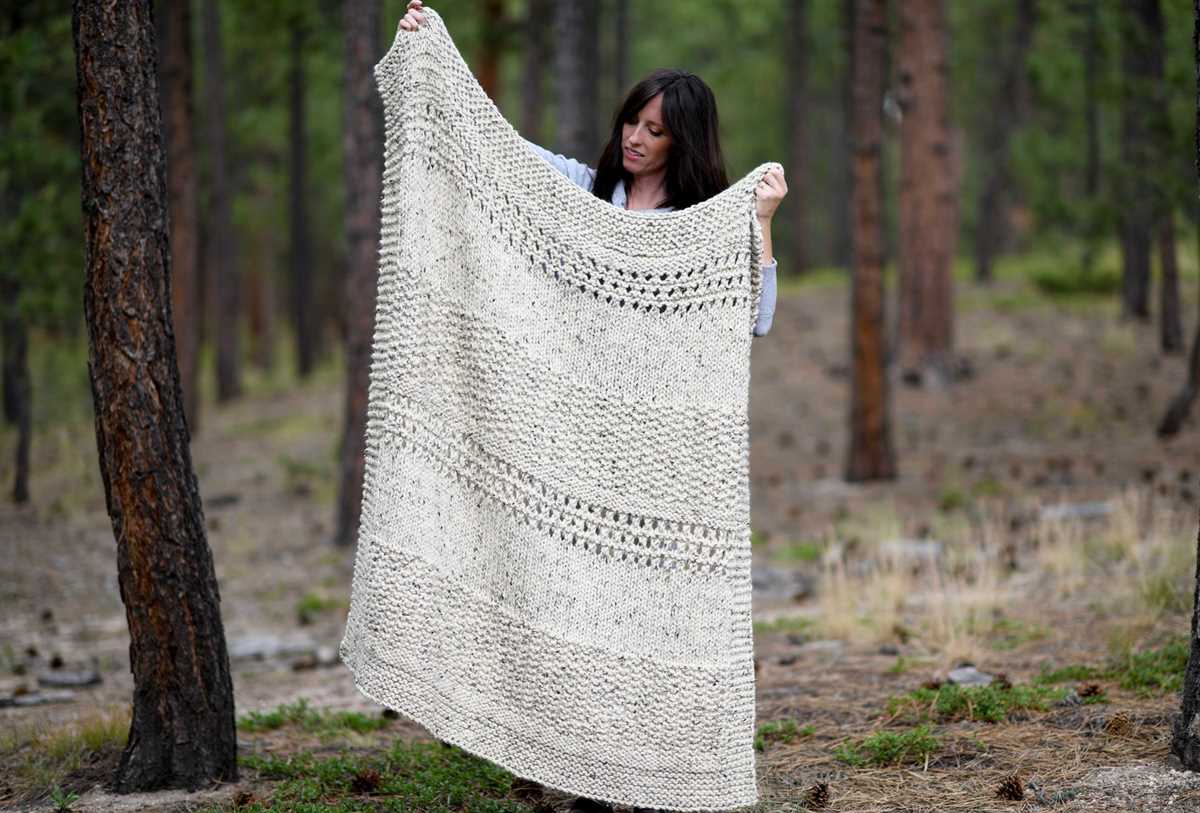
Creating the Texture: Adding Stitch Patterns
One of the key elements to consider when creating a throw blanket is the texture. Adding stitch patterns can not only enhance the overall aesthetic of the blanket but also make it more interesting to knit. There are numerous stitch patterns to choose from, each offering a unique texture and design.
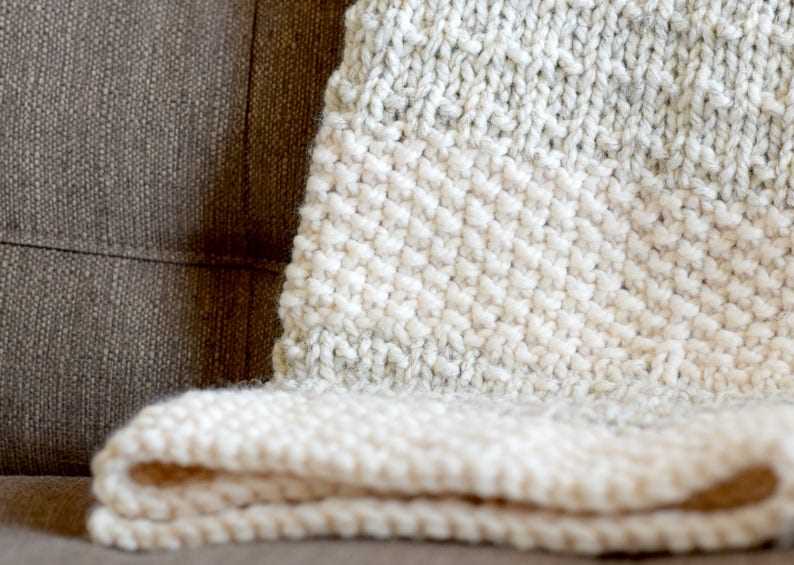
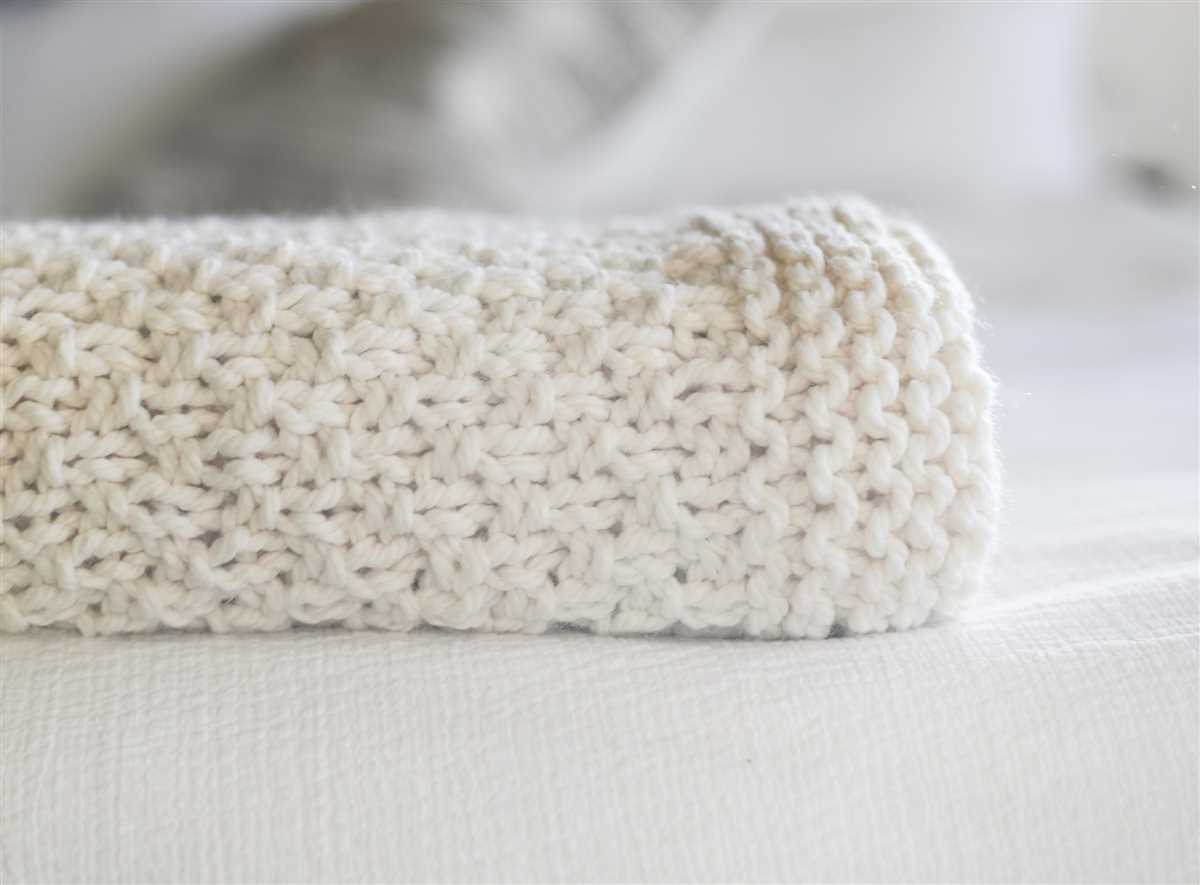
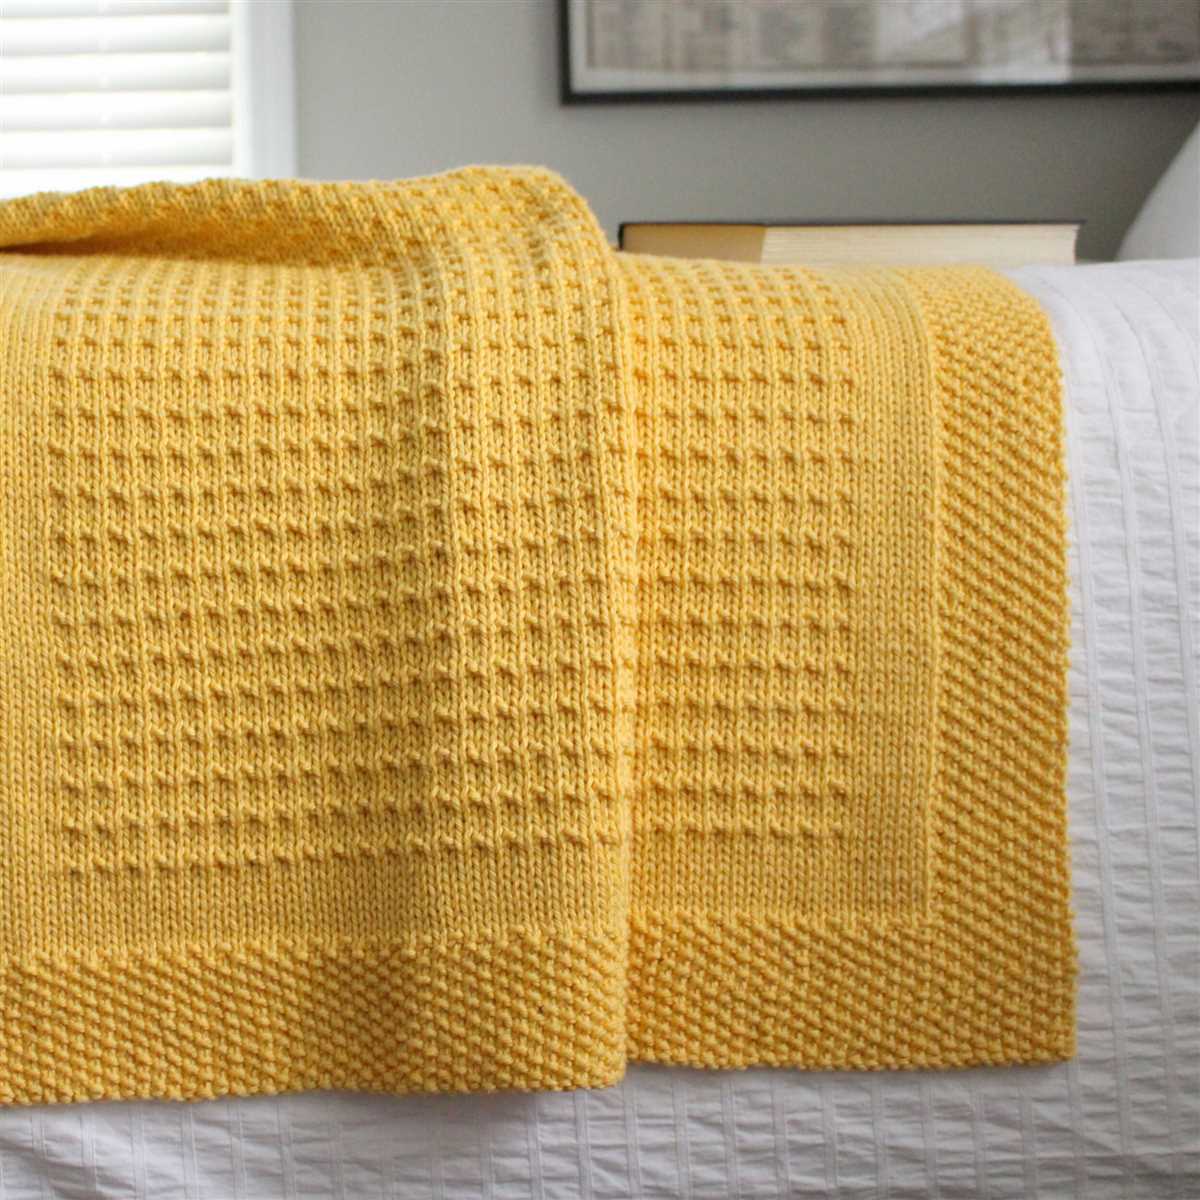
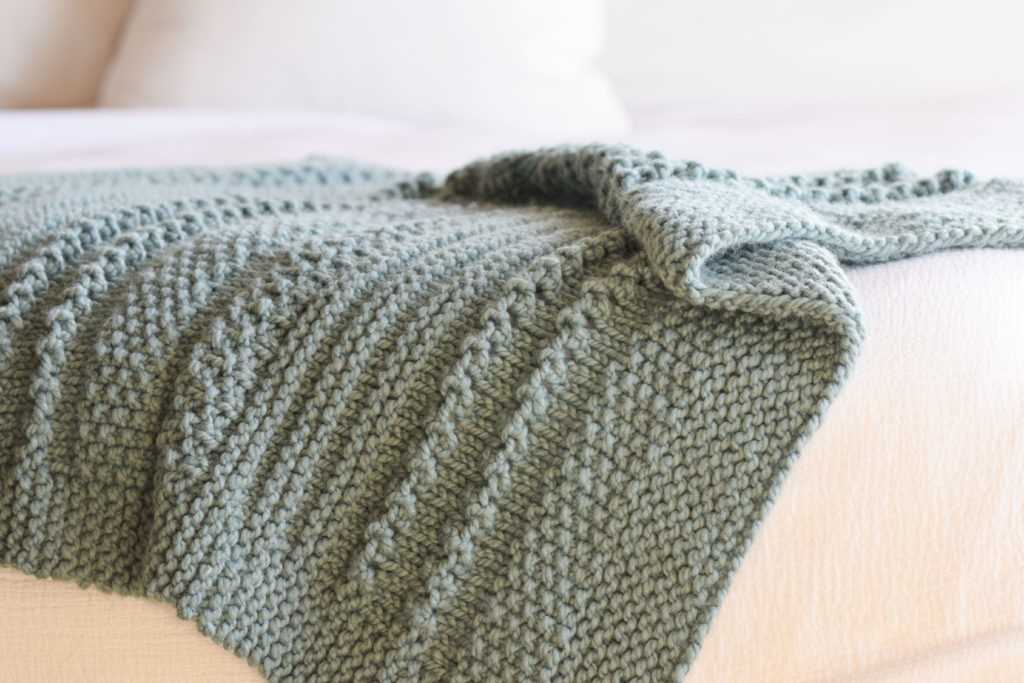
Garter Stitch: This is one of the simplest stitch patterns and creates a ridged texture. It involves knitting every stitch in every row. The garter stitch adds a classic and cozy look to the blanket.
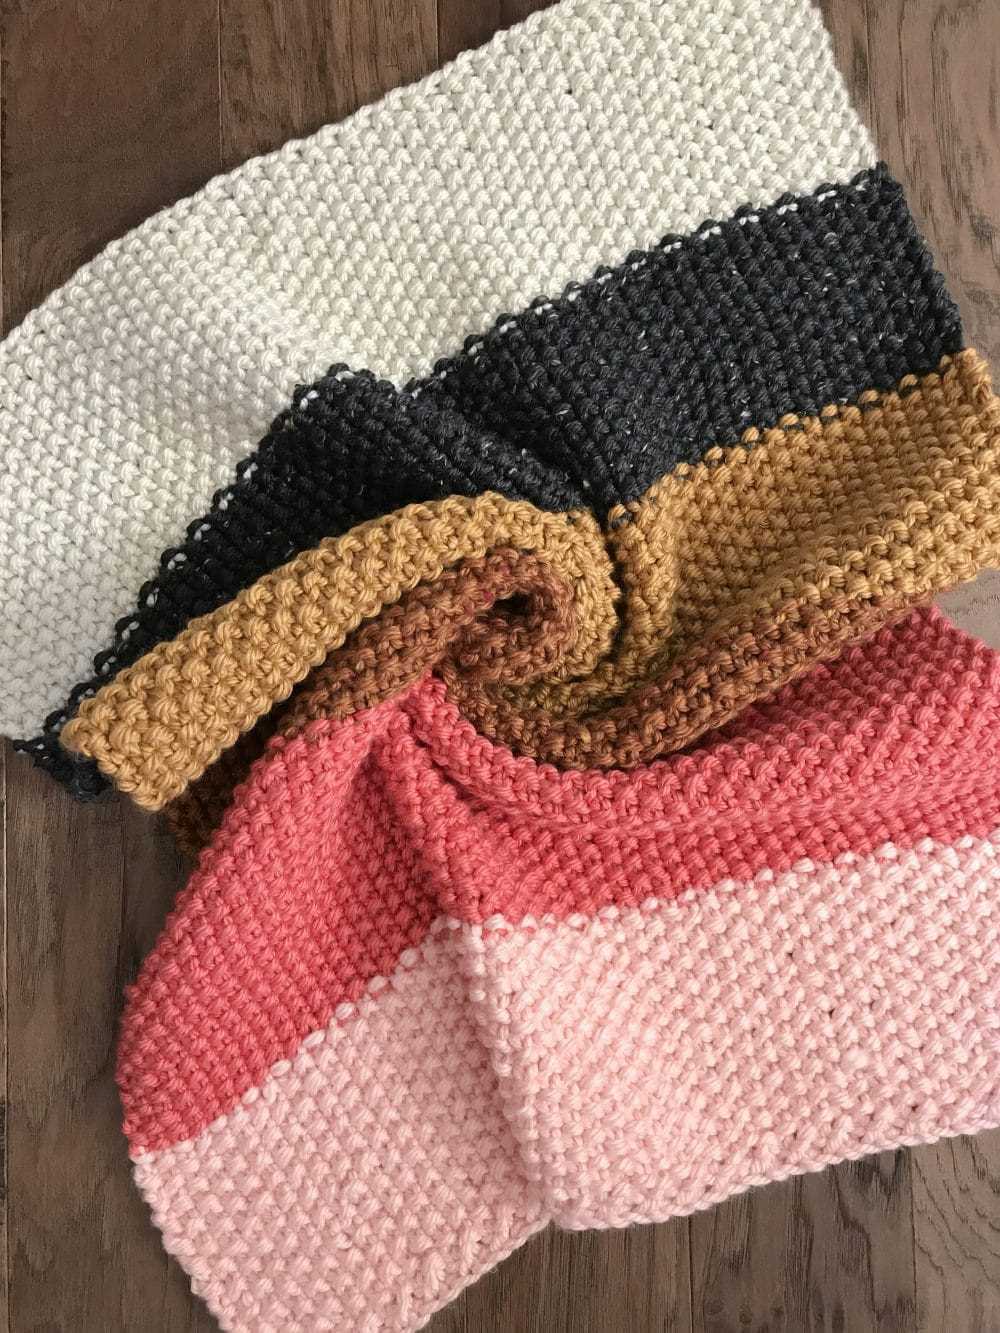
Seed Stitch: This stitch features alternating knit and purl stitches to create small, raised bumps. The seed stitch is great for adding texture and visual interest to the blanket.
Rib Stitch: The rib stitch is commonly used for borders or edges of a blanket. It involves alternating knit and purl stitches in a regular pattern, creating vertical columns. The rib stitch adds a stretchy and defined texture to the blanket.
Cable Stitch: This stitch is more advanced but can add beautiful texture and depth to the blanket. It involves crossing stitches over each other to create intricate cable patterns. The cable stitch is perfect for showcasing your knitting skills and adding a luxurious touch to the blanket.
Lace Stitch: If you prefer a more delicate and airy texture, the lace stitch is an excellent choice. It involves creating patterns of yarn-overs and decreases to form open, lacy designs. The lace stitch adds an elegant and sophisticated look to the blanket.
By incorporating these various stitch patterns into your throw blanket, you can create a textured masterpiece that is not only visually appealing but also enjoyable to knit. Experimenting with different stitch patterns allows you to customize the blanket to your liking and showcase your knitting skills. Whether you prefer a classic garter stitch or an intricate cable design, the options are endless when it comes to adding texture to your throw blanket.
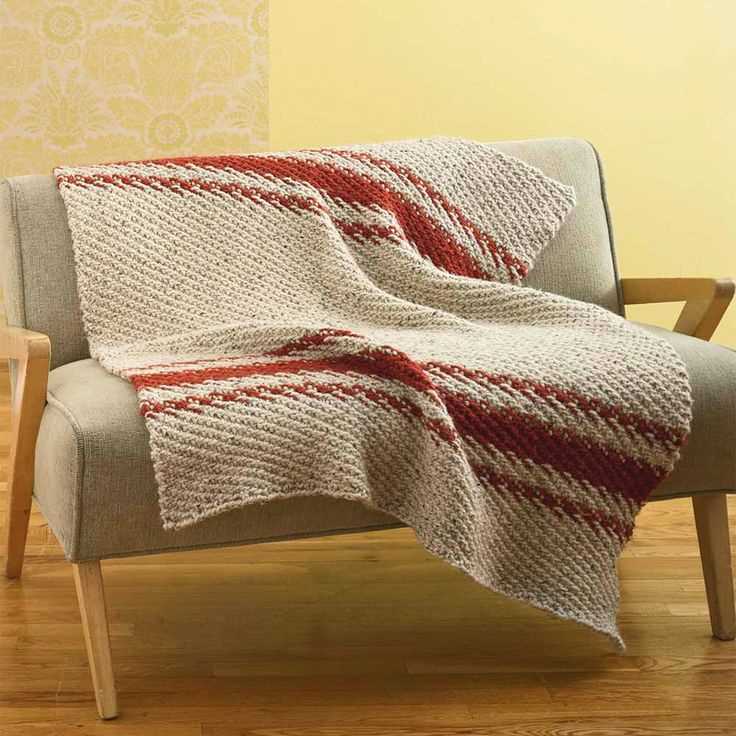
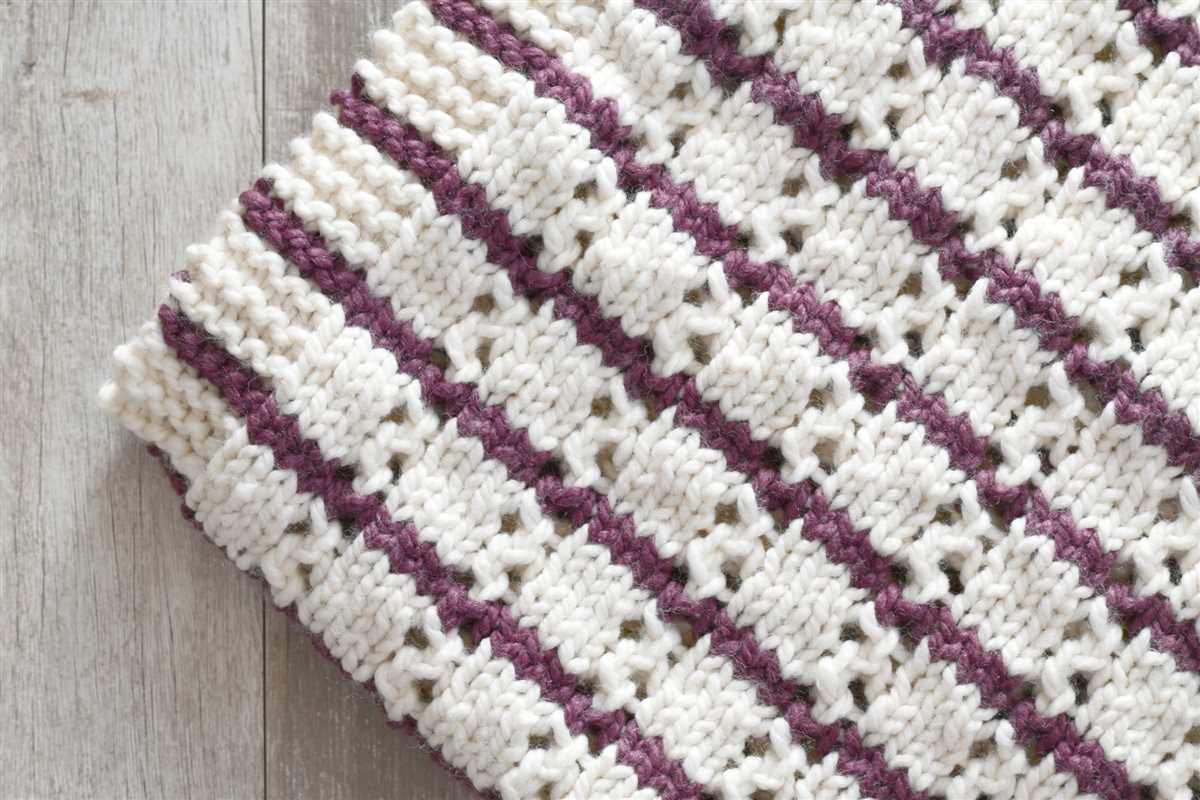
Transitioning Between Colors
Transitioning between colors in a knitting pattern can add visual interest and dimension to your throw blanket. Whether you want to create stripes, a gradient effect, or incorporate different colors for motifs or patterns, understanding how to transition between colors is essential for achieving the desired aesthetic.
1. Changing colors: To change colors in your knitting, work until you reach the point where you want to introduce the new color. When you are one stitch away from the color change, insert your right-hand needle into the next stitch, but instead of completing the stitch with the current color, drop the old color and pick up the new color. Then, complete the stitch using the new color. This method helps to ensure a smooth and even color transition.
2. Weaving in ends: When switching between colors, you will have loose ends that need to be secured. To weave in the ends, thread them onto a tapestry needle and insert the needle through the back of the stitches, following the same color path. This will hide the loose ends and prevent them from unraveling over time.
3. Stripes: For a striped pattern, simply alternate between two or more colors, knitting rows or rounds with each color. To achieve clean color changes, carry the unused color up the side of your work, twisting the yarns together at the beginning of each new row or round. This prevents gaps or holes from forming between color changes.
4. Gradient effect: To create a gradient effect, start with one color and gradually transition to another by blending the two colors together. You can achieve this by working rows or rounds with both colors held together and gradually decreasing the amount of the first color while increasing the amount of the second color.
5. Motifs and patterns: Adding motifs or patterns to your throw blanket can be a fun way to incorporate different colors. When introducing a new color for a motif or pattern, follow the same color change technique mentioned earlier. Pay attention to the stitch count and color changes required in the pattern to ensure an accurate and visually appealing result.
By understanding and practicing these techniques, you can achieve beautiful color transitions in your knitting project, adding depth and character to your throw blanket.
Increasing and Decreasing Stitches
When knitting a throw blanket, it’s important to understand how to increase and decrease stitches in order to achieve different shapes and patterns. These techniques will help you create intricate designs and add shaping to your project.
Increasing stitches: To add stitches, you can use various methods such as yarn overs, knitting into the front and back of a stitch, or making a stitch by picking up the horizontal strand between stitches. Yarn overs are commonly used to create decorative eyelets and lace patterns, while knitting into the front and back of a stitch is commonly used for shaping and adding stitches evenly across a row. The specific method you choose will depend on the pattern you are following or the desired effect you want to achieve.
Decreasing stitches: When you need to remove stitches from your knitting, there are several techniques you can use. The most common methods include knit two stitches together (k2tog), slip, slip, knit (ssk), and slip, slip, purl (ssp). K2tog decreases two stitches into one by knitting them together, while ssk and ssp decrease stitches slanting to the left by slipping two stitches individually, then either knitting or purling them together. Again, the method you choose will depend on the pattern or design you are working on.
It’s important to practice increasing and decreasing stitches on a small swatch before incorporating them into your throw blanket. This will help you become familiar with the techniques and ensure that you achieve the desired results. Remember to pay attention to your tension and stitch count as you work to maintain an even and consistent fabric.
Finishing Touches: Binding Off
After completing the final row of your throw blanket, it’s time to bind off to secure the stitches and create a clean edge. Binding off, also known as casting off, is the process of removing stitches from the needle in a way that prevents them from unraveling.
To bind off, start by knitting two stitches as you normally would. Then, insert the left needle into the first stitch on the right needle and lift it over the second stitch and off the needle. Repeat this process of knitting one stitch and lifting the first stitch over the second until you have one stitch remaining on the right needle.
Once you have just one stitch left, cut the yarn, leaving a long tail. Thread the tail through the last stitch, pull tight, and secure with a knot. This will create a neat and finished edge for your throw blanket.
Binding off is an important step in completing your knitting project, as it ensures that your stitches won’t unravel and provides a polished finish to your work. Remember to keep your tension consistent as you bind off to maintain an even edge. With these simple steps, you’ll have a beautiful throw blanket ready to cozy up with or give as a gift.
Blocking and Washing Your Blanket
Once you have completed knitting your throw blanket, the next step is to block and wash it. Blocking is an important process that helps shape your knitted piece and create a more professional look. Washing, on the other hand, is necessary to clean your blanket and make it fresh and ready for use.
Before blocking, it is important to check the care instructions for the specific yarn you used for your blanket. Some yarns are more delicate and may require special handling. If there are no specific instructions, you can proceed with the general blocking and washing process.
Blocking:
- Start by pinning your blanket to a blocking board or a clean, flat surface. Make sure it is stretched evenly and the edges are straight.
- Using rust-proof T-pins, secure the edges of your blanket to the board. You can also use blocking wires to help create straight edges.
- Mist your blanket with water using a spray bottle. Be careful not to soak it too much, as excessive moisture can cause stretching or distortion.
- Allow your blanket to dry completely before unpinning. This may take several hours or even overnight.
- Once your blanket is dry, unpin it and gently shake out any remaining wrinkles or creases.
Washing:
- Fill a sink or basin with lukewarm water and add a mild detergent specifically designed for hand washing knitted items.
- Gently submerge your blanket in the water and agitate it gently with your hands. Avoid rubbing or twisting the fabric, as this can cause felting or stretching.
- Rinse your blanket thoroughly with clean water until all the detergent is removed.
- Press out the excess water gently without wringing or squeezing. You can roll your blanket in a towel to remove more moisture.
- Lay your blanket flat to dry on a clean towel or on a drying rack. Avoid hanging it, as this can cause it to stretch or distort.
By following these steps, you can ensure that your throw blanket is blocked and washed properly, resulting in a beautiful and clean finished product. Remember to always read the care instructions for your specific yarn and adjust the blocking and washing process accordingly.
Caring for Your Knitted Blanket
Knitted blankets are not only cozy and beautiful, but they also require special care to ensure they last a long time. Here are some tips on how to care for your knitted blanket:
1. Follow the Care Instructions: Before washing your knitted blanket, always check the care label attached. Different yarns and fibers have specific care requirements, including recommended washing methods and temperatures. Following these instructions will help maintain the quality and appearance of your blanket.
2. Hand Wash or Machine Wash on Gentle Cycle: Hand washing is usually the safest method for knitted blankets, as it minimizes the risk of stretching or damaging the delicate fibers. If you prefer to machine wash, use a gentle cycle and place the blanket in a mesh laundry bag to protect it. Avoid using harsh detergents and fabric softeners that can damage the fibers.
3. Lay Flat to Dry: After washing, it’s important to dry your knitted blanket properly. Lay it flat on a clean, dry towel or a blocking board. Avoid hanging the blanket to dry as it can stretch and lose its shape. Keep it away from heat sources and direct sunlight to prevent fading and damage.
4. Store Properly: When not in use, store your knitted blanket in a clean, dry place. Keep it away from pets and avoid folding it tightly, as this can create creases that are difficult to remove. Using a breathable cotton storage bag can help protect the blanket from dust and moisture.
Summary:
Caring for your knitted blanket is essential to extend its lifespan and preserve its beauty. Always follow the care instructions provided and hand wash or use a gentle cycle when machine washing. Dry it flat and store it properly to prevent stretching, creasing, and damage. With proper care, your knitted blanket will continue to bring warmth and comfort for years to come.
Q&A:
Can you recommend an easy knitting pattern for a throw blanket?
Yes, I can! A popular easy knitting pattern for a throw blanket is a simple garter stitch pattern. All you need to do is knit every row, which makes it perfect for beginners. It creates a cozy and textured blanket that is great for snuggling up with.
What materials do I need for knitting a throw blanket?
To knit a throw blanket, you will need a set of knitting needles that are appropriate for the yarn you choose, a pair of scissors, and of course, the yarn itself. The type and amount of yarn will depend on the size of the blanket you want to make and your personal preferences.
How long does it usually take to knit a throw blanket?
The time it takes to knit a throw blanket can vary depending on your knitting speed and the complexity of the pattern you choose. However, as a rough estimate, it can take anywhere from a few weeks to several months to complete a throw blanket, especially if you are a beginner or if it is a larger project.
Are there any other easy knitting patterns for throw blankets besides garter stitch?
Yes, there are plenty of other easy knitting patterns for throw blankets. Some popular ones include the seed stitch, which alternates knit and purl stitches, and the rib stitch, which creates a stretchy and textured fabric. You can also experiment with different colors and yarn types to add more interest to your blanket.
I’ve never knitted before. Is it still possible for me to make a throw blanket?
Absolutely! Even if you have never knitted before, you can still make a throw blanket. There are many beginner-friendly knitting patterns available, and with practice, you will quickly get the hang of it. Start with simpler patterns and take your time, and soon you’ll have a beautiful throw blanket to show off.
What is a good easy knitting pattern for a throw blanket?
A simple and easy knitting pattern for a throw blanket is the garter stitch pattern. To make a throw blanket using this pattern, all you need to do is knit every row. This creates a beautiful and textured blanket that is perfect for beginners.
How much yarn will I need for a throw blanket?
The amount of yarn you will need for a throw blanket depends on the size of the blanket and the weight of the yarn you are using. As a general guideline, you can expect to need around 1500-2000 yards of yarn for a standard throw blanket. However, it is always a good idea to check the specific yarn requirements listed on the pattern you are using.