
If you’re new to knitting or looking for a quick and easy project, a beanie hat is a great place to start. With just a few basic stitches and a couple of hours, you can create a cozy and stylish accessory that will keep you warm all winter long. In this article, we’ll walk you through a simple knitting pattern for a classic beanie hat.
Before you get started, make sure you have the following supplies: a pair of size 8 knitting needles, a skein of worsted weight yarn, a tape measure, a yarn needle, and a pair of scissors. You’ll also need to know how to cast on stitches, knit, purl, and decrease stitches.
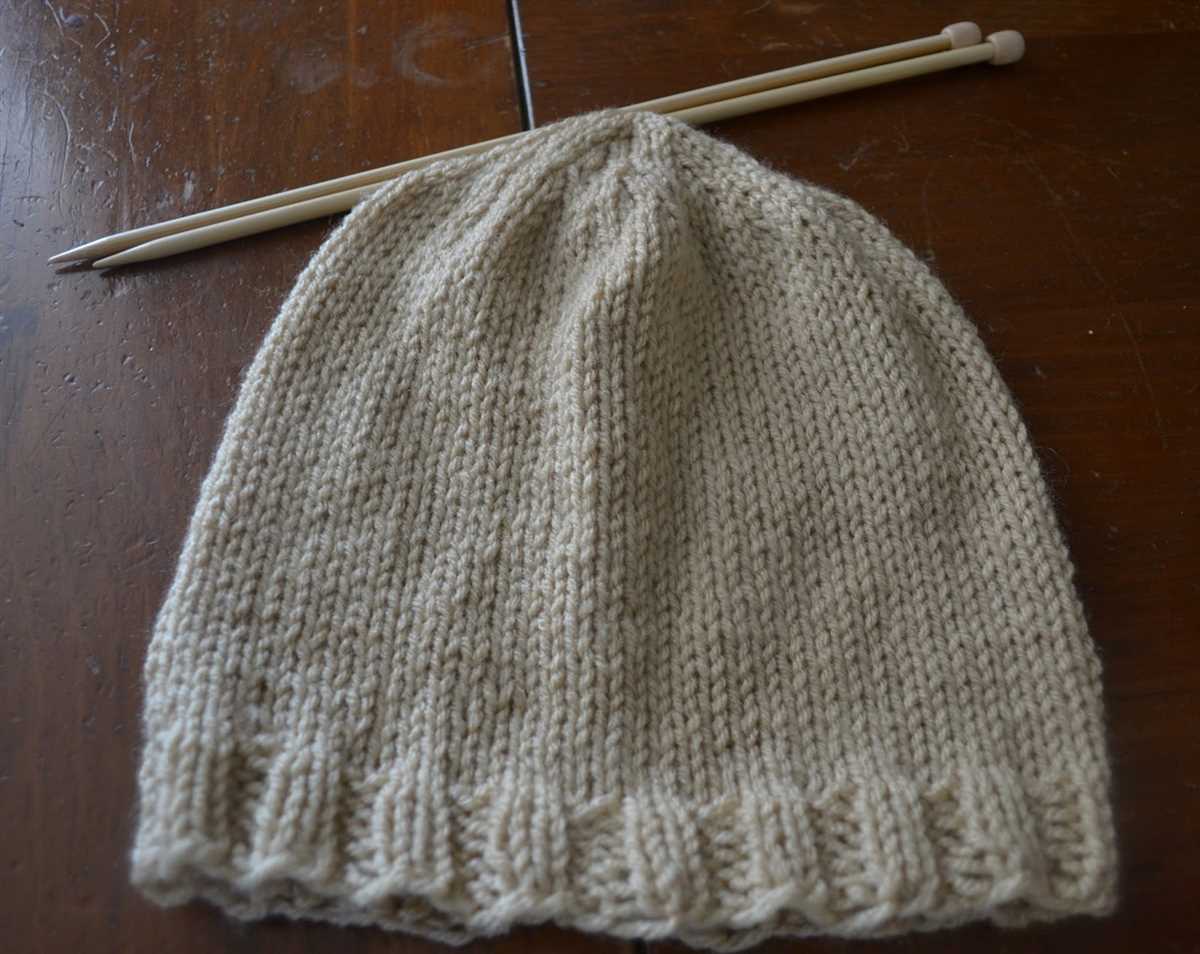
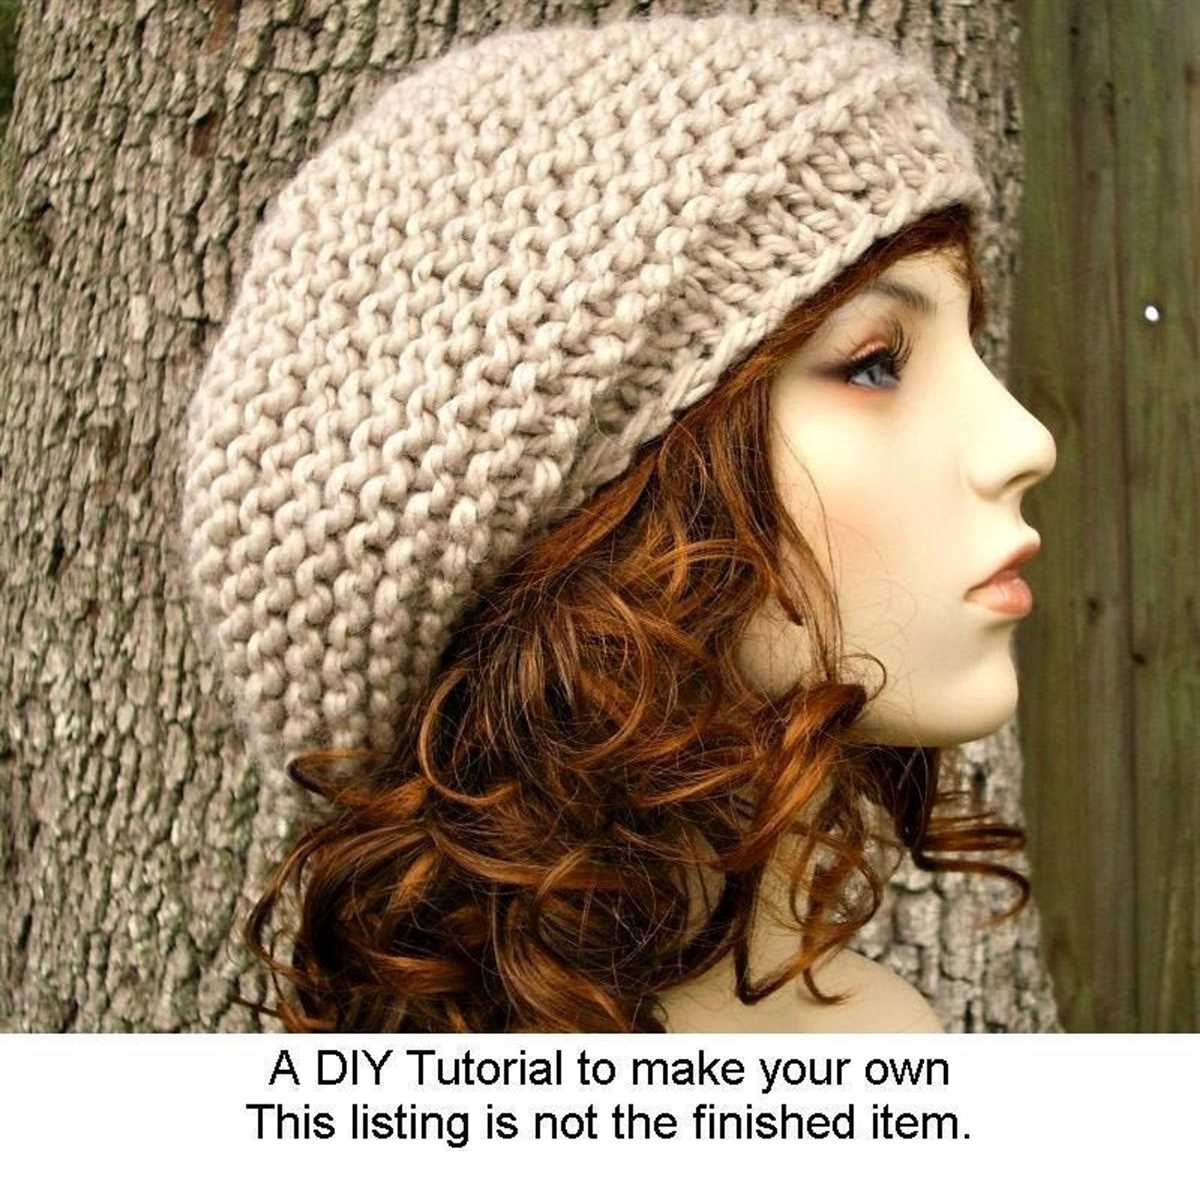
To begin, cast on 80 stitches using the long tail cast on method. This will create the ribbed brim of the hat, which will help it fit snugly on your head. Next, work in a K2, P2 rib stitch for 1.5 inches, or until the brim measures the desired length. This rib stitch creates a stretchy fabric that will comfortably fit a range of head sizes. Once you’ve finished the ribbed brim, switch to a stockinette stitch for the body of the hat. Knit every round until the hat measures approximately 8 inches from the cast-on edge.
Materials needed for the beanie hat
To knit a beanie hat, you will need a few materials to get started. Here is a list of the essential items you will need:
- Yarn: Choose a soft and warm yarn suitable for hats. Opt for a medium weight yarn that is easy to work with.
- Knitting Needles: You will need a set of double-pointed knitting needles or a circular needle, depending on your preference. Make sure the size of the needles matches the gauge of the yarn you have chosen.
- Tape Measure: A tape measure will come in handy for measuring your head circumference and ensuring the hat fits correctly.
- Stitch Markers: Stitch markers are useful for keeping track of your stitches and marking important points in the pattern.
- Tapestry Needle: A tapestry needle is needed for weaving in loose ends and finishing off the hat.
- Scissors: A pair of scissors is necessary for cutting the yarn and trimming any excess.
These materials can be easily found at your local craft store or online. Once you have gathered all the necessary supplies, you will be ready to start knitting your beanie hat!
Yarn, knitting needles, and measuring tape

When it comes to knitting a beanie hat, there are three essential tools that you will need: yarn, knitting needles, and a measuring tape. These tools are crucial for creating a well-fitting and stylish hat.
Yarn is the main material you will be working with. It is important to choose a yarn that matches the requirements of your pattern. Yarn comes in various weights and fibers, each suited for different projects. For a beanie hat, you will typically want to choose a medium-weight yarn that is soft and warm, such as acrylic or wool.
Knitting needles are used to create the stitches that form the beanie hat. The size of the needles will depend on the thickness of your yarn and the tension or gauge required in your pattern. Most beanie hats can be knit using a pair of circular or double-pointed needles in sizes US 7-9 (4.5-5.5mm).
Finally, a measuring tape is an essential tool for ensuring the correct size of your beanie hat. You will need to measure the circumference of your head to determine the size to knit. This measurement will help you select the appropriate size in your pattern and ensure a comfortable fit.
In conclusion, yarn, knitting needles, and measuring tape are the key tools you need to knit a beanie hat. By selecting the right yarn, using the correct knitting needles, and measuring accurately, you can create a beautiful and well-fitting hat for yourself or as a gift.
Choosing the right yarn for the beanie hat
When it comes to knitting a beanie hat, choosing the right yarn is essential. The yarn you choose will not only determine the look and feel of the finished hat, but it will also affect its warmth and durability. There are several factors to consider when selecting yarn for your beanie hat project.
1. Weight and thickness:
The weight and thickness of the yarn are important considerations. Generally, a medium-weight yarn (also known as worsted weight or 4-ply) is a popular choice for beanie hats as it provides a good balance between warmth and flexibility. However, you can also use heavier or lighter weight yarn depending on your preference and the desired thickness of the hat.
2. Fiber content:
The fiber content of the yarn will determine its softness, warmth, and durability. Common yarn fibers include wool, acrylic, cotton, and blends of different fibers. Wool is a popular choice for winter hats as it has excellent insulation properties. Acrylic yarns are often a more affordable option and can be softer than wool. Cotton yarns are lightweight and breathable, making them suitable for warmer climates. Consider your temperature preferences and the intended use of the beanie hat when choosing the fiber content.
3. Color and pattern:
The color and pattern of the yarn will greatly impact the overall look of your beanie hat. Solid colors are versatile and can easily complement different outfits. If you prefer a more unique and eye-catching design, you can opt for variegated or self-striping yarns that create interesting color patterns on their own. It’s important to consider how the color and pattern of the yarn will work with your chosen knitting pattern or stitch pattern.
Overall, choosing the right yarn for your beanie hat is a personal preference that depends on factors such as weight, fiber content, and color. Take your time to explore different options and consider the intended use and style of the hat. With the right yarn, you’ll be able to create a cozy and stylish beanie hat that you’ll love wearing.
Consider the fiber, weight, and texture of the yarn
When choosing yarn for your beanie hat, it is important to consider the fiber, weight, and texture of the yarn. These factors will greatly impact the final look and feel of your finished hat.
The fiber of the yarn refers to the material that it is made from. Common yarn fibers include wool, acrylic, cotton, and alpaca. Each fiber has its own unique properties, such as warmth, softness, and durability. Wool, for example, is known for its excellent insulation, while acrylic is often preferred for its affordability and easy care. Consider what qualities you want your hat to have, and choose a yarn fiber that aligns with those preferences.
The weight of the yarn determines how thick or thin it is. Yarns are typically categorized into different weights, such as lace, fingering, sport, worsted, and bulky. Thinner yarns will create a more lightweight and delicate fabric, while thicker yarns will result in a chunkier and warmer hat. Consider the climate or season when choosing the weight of your yarn, as well as your knitting style and preference for the finished look.
The texture of the yarn refers to its surface characteristics, such as smoothness, fuzziness, or texture changes. Some yarns have a smooth and even texture, while others may have a fluffy or nubby texture. The texture of the yarn can add visual interest and dimension to your beanie hat. Consider the stitch pattern or design you plan to use and choose a yarn with a texture that complements it. For example, a simple stockinette stitch may look great with a smooth and glossy yarn, while a cabled or textured pattern may benefit from a yarn with more luscious texture.
By carefully considering the fiber, weight, and texture of the yarn, you can select the perfect yarn for your beanie hat project. Whether you want a warm and cozy hat for winter or a lightweight hat for spring, there is a yarn out there that will help you achieve the desired result.
Determining the size of the beanie hat
When knitting a beanie hat, it is important to determine the correct size to ensure a proper fit. There are several factors to consider when determining the size of the hat, including the age of the wearer and the desired fit.
Measuring the head circumference: The first step in determining the size of the beanie hat is to measure the head circumference. This can be done by placing a flexible measuring tape around the widest part of the head, typically just above the ears and eyebrows. It is important to measure snugly, but not too tight, to ensure an accurate measurement. Once the head circumference is determined, it can be used as a guide to choose the appropriate size for the beanie hat.
Referencing a sizing chart: After measuring the head circumference, it is helpful to reference a sizing chart to determine the corresponding size for the beanie hat. Most knitting patterns will include a sizing chart that lists the head circumference range for each size. It is important to select a size that closely matches the measured head circumference to ensure a proper fit.
Considering the desired fit: In addition to the head circumference, it is important to consider the desired fit of the beanie hat. Some individuals prefer a snug fit, while others prefer a looser fit. When choosing a size, it is helpful to consider the amount of stretch in the chosen yarn and the personal preference of the wearer. Knitting patterns will often provide guidance on the desired ease for each size, which can help in selecting the appropriate size for the desired fit.
By taking these factors into consideration and accurately measuring the head circumference, it is possible to determine the correct size for the beanie hat. This will ensure a comfortable and properly fitting hat that can be enjoyed for years to come.
Measure the circumference and length of the head
Before starting to knit a beanie hat, it is important to measure the circumference and length of the head for which the hat is being made. This ensures a proper fit and comfortable wearing experience.
To measure the circumference of the head, take a measuring tape and wrap it around the forehead, just above the ears and eyebrows. Make sure the tape is parallel to the ground and not too tight or too loose. Take note of the measurement in inches or centimeters.
To measure the length of the head, place the measuring tape at the center of the forehead and extend it towards the back of the head. It should follow the natural curve of the skull. Again, make sure the tape is not too tight or too loose. Take note of the measurement in inches or centimeters.
Casting on stitches for the beanie hat
Before you can begin knitting your beanie hat, you need to cast on the appropriate number of stitches. Casting on is the process of creating the foundation row of stitches that will form the brim of the hat. There are several different methods for casting on stitches, but for this easy knitting pattern, we’ll use the long-tail cast on method.
To begin, you’ll need to estimate the number of stitches you’ll need for your hat. This will vary depending on the size of the hat and the thickness of your yarn. Check the pattern or use a sizing chart to determine the correct number of stitches for your specific project.
Step 1: To start the long-tail cast on, leave a long tail of yarn, approximately three times the width of your finished project. This tail will be used to create the first row of stitches.
Step 2: Make a slipknot by making a loop with the yarn, leaving a small tail, and pulling the yarn through the loop. Place this slipknot on one of your knitting needles.
Step 3: Hold the knitting needle with the slipknot in your right hand, and the tail of the yarn in your left hand. Create a slingshot shape with the yarn by wrapping it around your thumb and holding it with your remaining fingers.
Step 4: Insert the knitting needle into the loop on your thumb, from right to left. Push the needle upwards through the loop, catching the yarn that is wrapped around your thumb.
Step 5: With your right hand, bring the knitting needle from left to right, under the yarn that is wrapped around your thumb. This will create a loop on the knitting needle.
Step 6: Release the yarn from your thumb and tighten the loop on the knitting needle. This will create the first stitch of your cast on row.
Step 7: Repeat steps 4-6 until you have cast on the desired number of stitches for your hat. Make sure to keep your tension even and consistent throughout.
Once you have cast on all of your stitches, you’re ready to start knitting the body of the beanie hat. Follow the pattern instructions for the specific stitch pattern and shaping techniques.
Using the long-tail cast on method
The long-tail cast on method is a popular choice for many knitting projects, including beanie hats. It creates a neat and stretchy edge that is perfect for fitting comfortably around the head. To use this method, you will need a pair of knitting needles and a ball of yarn.
To begin, measure a length of yarn for your cast on. It should be about three times the width of your finished project. Make a slipknot at the end of the yarn and place it on one of the knitting needles. Hold the yarn in your right hand, with the tail (the end of the yarn attached to the ball) over your thumb and the working yarn (the end of the yarn connected to the slipknot) over your index finger.
Step 1: Insert the tip of the right-hand needle into the slipknot from left to right, making sure that the yarn is held in place with your thumb and index finger.
Step 2: With the tip of the right-hand needle, catch the working yarn (over your index finger) and bring it through the slipknot. This will create a loop on the right-hand needle.
Step 3: Slip this loop onto the left-hand needle, making sure the loop is not too tight.
Step 4: Pull the tail of the yarn to tighten the stitch on the left-hand needle.
Repeat steps 1-4 until you have cast on the desired number of stitches for your beanie hat. This method creates a sturdy and even foundation for your knitting project.
Note: It’s important to leave a long tail when using this cast on method, as it will be used later for seaming the edges of the hat together.
Knitting the Ribbing for the Beanie Hat
When knitting a beanie hat, one of the important steps is to create the ribbing. Ribbing is a knitting technique that creates a stretchy and elastic edge, which helps to ensure a snug and comfortable fit. It is typically worked at the beginning of the hat and provides a nice finished look.
To knit the ribbing for a beanie hat, you will need to use smaller needles than the ones used for the main body of the hat. This helps to create a tighter fabric that will hold its shape. Most commonly, a smaller circular needle or double-pointed needles are used for this part of the project.
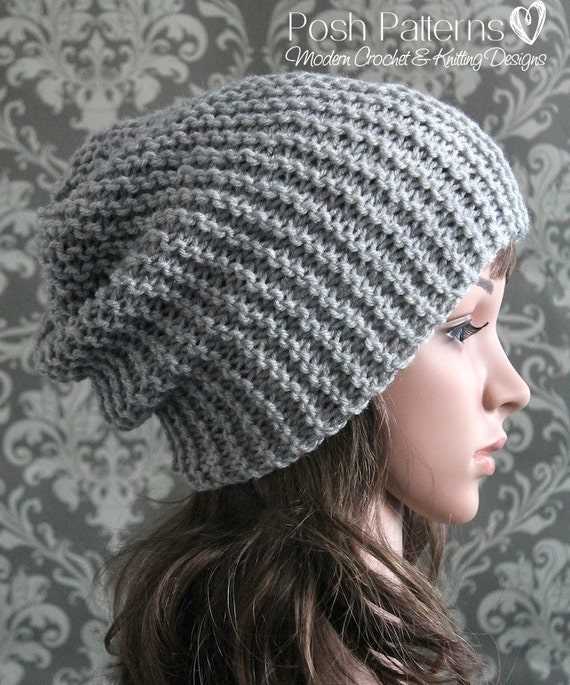
The most common ribbing pattern used for beanie hats is the 2×2 ribbing:
To create the 2×2 ribbing, you will knit two stitches and purl two stitches alternately across the row. This pattern is repeated for several rows to create the desired length of the ribbing. The number of rows can vary depending on the desired height of the ribbing.
Here is a step-by-step guide on how to knit the 2×2 ribbing:
- Cast on the desired number of stitches using the smaller needles. This can vary depending on the size of the hat.
- Row 1: *Knit 2 stitches, purl 2 stitches.* Repeat from * to * across the row.
- Row 2: *Purl 2 stitches, knit 2 stitches.* Repeat from * to * across the row.
- Repeat rows 1 and 2 until the ribbing reaches the desired length. This can be around 1-2 inches, or more if desired.
- Once the ribbing is complete, you can switch to larger needles to continue with the main body of the hat using your chosen stitch pattern.
By following these simple steps, you will be able to knit a beautiful ribbed edge for your beanie hat. Happy knitting!
Creating a Stretchy and Snug Fit
When knitting a beanie hat, it is important to ensure that it has a stretchy and snug fit. This will not only make the hat more comfortable to wear, but also help it stay in place on the head. There are a few key factors to consider when creating this fit.
Yarn Choice: Selecting the right yarn is crucial for achieving a stretchy and snug fit. Opt for a yarn that has some elasticity, such as a blend of wool and acrylic or a yarn specifically labeled as stretchy. These types of yarns will allow the hat to stretch slightly to accommodate different head sizes while still providing a snug fit.
Needle Size: The size of the needles you use will also impact the fit of the beanie hat. Using smaller needles will result in a tighter stitch, which can help create a snugger fit. If you want a looser fit, opt for larger needles. It’s important to swatch and check your gauge before starting the project to ensure the intended fit.
Additionally, using a technique called “ribbing” can help create a stretchy and snug fit. Ribbing involves alternating knit and purl stitches in a specific pattern. The most common ribbing pattern is K2, P2, where you knit two stitches and then purl two stitches, repeating this pattern throughout the row. This creates vertical columns of knit stitches followed by columns of purl stitches, which provides elasticity to the fabric. Using ribbing at the brim of the hat can help it fit snugly and comfortably around the head.
In conclusion, selecting the right yarn, choosing the appropriate needle size, and incorporating ribbing can all contribute to creating a stretchy and snug fit in a beanie hat. By paying attention to these factors, you can ensure that your knitted hat will not only be stylish but also comfortable to wear.
Working on the main body of the beanie hat
Once you have completed the ribbing section, it’s time to move on to the main body of the beanie hat. This is where you will start creating the beautiful texture and pattern that will make your hat unique and stylish.
For the main body, you will be using a combination of knit and purl stitches to create the desired pattern. The pattern can be as simple or as intricate as you like, depending on your skill level and personal preference. Remember to refer to the pattern instructions or chart for guidance.
Knit and purl stitches
As you work on the main body, you will be alternating between knit and purl stitches to create the desired texture. The knit stitch is created by inserting the right needle into the front of the stitch on the left needle, wrapping the yarn around the right needle, and pulling it through the stitch. The purl stitch, on the other hand, is created by inserting the right needle into the back of the stitch on the left needle, wrapping the yarn around the right needle, and pulling it through the stitch.
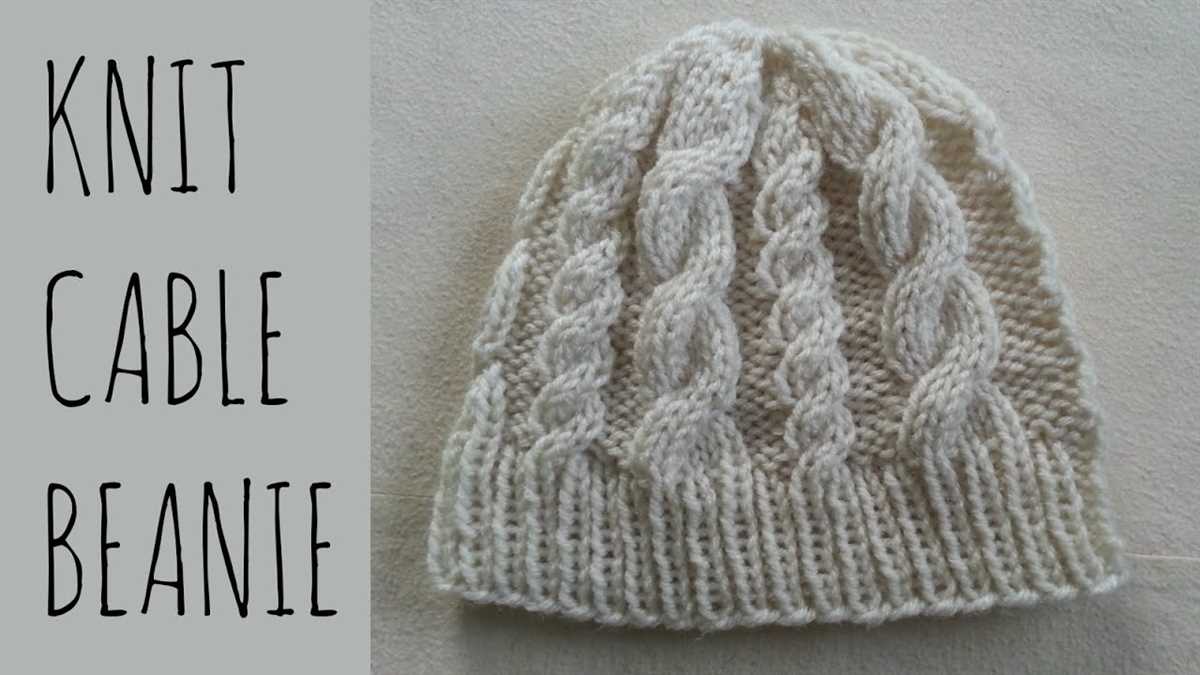
By combining these two stitches in different patterns, you can create a variety of textures and designs on your beanie hat. Some popular options include ribbing, seed stitch, basketweave, and cable patterns. Experiment with different patterns to find the one that suits your style and desired look for the beanie hat.
Tracking your progress
As you work on the main body of the beanie hat, it’s important to keep track of your progress to ensure that you’re following the pattern correctly and creating the desired design. One way to do this is by using stitch markers to mark specific points in the pattern or to highlight areas that require attention. This can help you stay organized and avoid mistakes or confusion.
Additionally, you may find it helpful to use a row counter or keep track of your rows using a pen and paper. This will allow you to easily reference your progress and provide a visual guide of how far you’ve come in the project.
Using basic knitting stitches
In knitting, there are several basic stitches that are commonly used to create various patterns and designs. By mastering these stitches, you can create a wide range of projects, including hats, scarves, and blankets.
One of the most basic stitches is the knit stitch, often abbreviated as “k.” This stitch involves inserting the right-hand needle into the front of the stitch on the left-hand needle, wrapping the yarn around the needle, and pulling it through to create a new loop on the right-hand needle. The knit stitch creates a smooth, flat fabric with “v” shaped bumps on one side and rows of horizontal bumps on the other side.
- Key phrase: Knit stitch
The purl stitch, often abbreviated as “p,” is another basic stitch that is commonly used alongside the knit stitch. It is the reverse of the knit stitch and creates a bumpy texture on the fabric. To purl, you insert the right-hand needle into the stitch on the left-hand needle from the back to the front, wrap the yarn around the needle, and pull it through to create a new loop on the right-hand needle. The purl stitch creates rows of horizontal bumps on one side and smooth, flat fabric with “v” shaped bumps on the other side.
- Key phrase: Purl stitch
Combining these two basic stitches, you can create a variety of patterns and textures in your knitting project. For example, alternating rows of knit and purl stitches can create a ribbed texture, while repeating a specific sequence of knit and purl stitches can create intricate cables or lace patterns. By practicing and experimenting with these basic stitches, you can unlock endless possibilities in your knitting projects.
Shaping the crown of the beanie hat
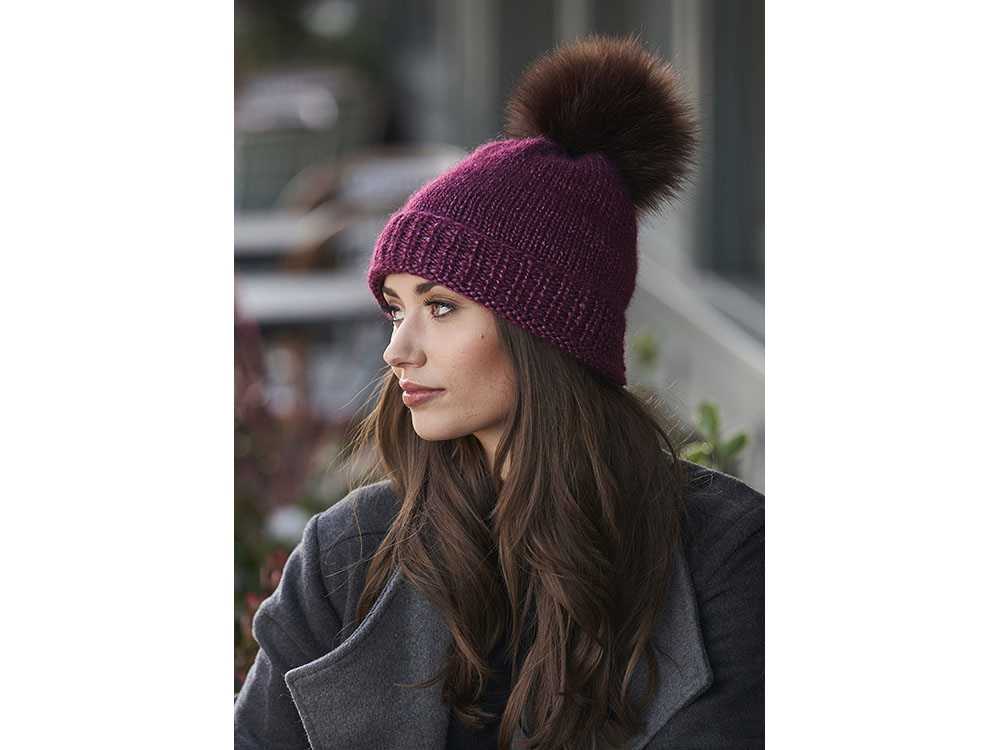
Once you have reached the desired length of your beanie hat, it’s time to shape the crown. This is the part that will give your hat its distinctive shape and ensure it fits snugly on your head. There are several methods you can use to shape the crown of your beanie hat, depending on the style and look you want to achieve.
The most common method is to decrease stitches evenly across the rounds. This can be done by knitting two stitches together or using a combination of knitting two stitches together and knitting a certain number of stitches in between. You will continue decreasing stitches until you have a small enough opening to close off the top of the hat.
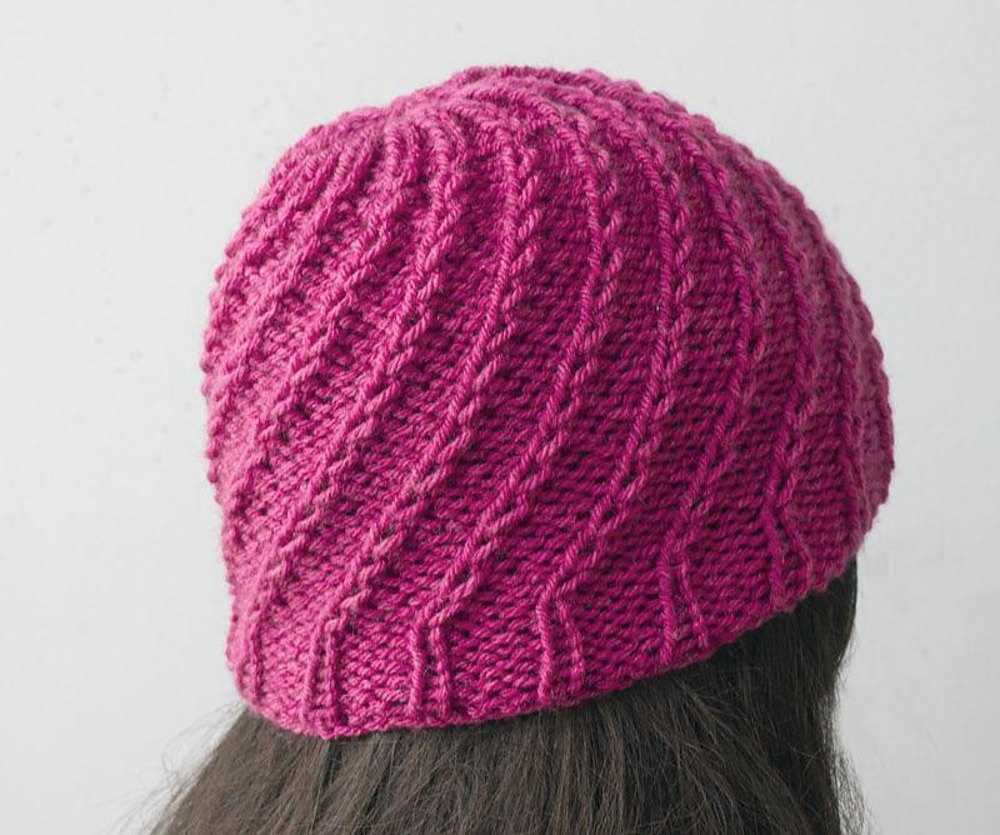
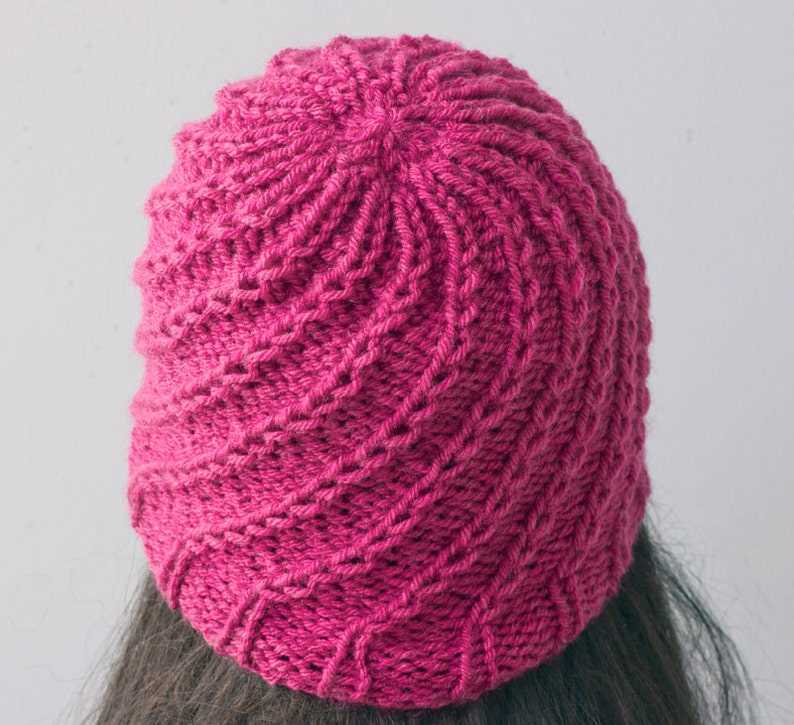
Another method is to create a spiral pattern by decreasing stitches in a specific pattern. This can be achieved by following a chart or a written pattern that tells you which stitches to decrease in each round. This technique can give your beanie hat a unique and interesting design.
After shaping the crown, you will need to bind off your stitches to secure the top of the hat. You can do this by knitting two stitches together and pulling the first stitch over the second stitch, or by using a stretchy bind off technique such as the tubular bind off. This will give your hat a neat and finished edge.
Summary:
- Shaping the crown is an important step in knitting a beanie hat.
- The most common method is to decrease stitches evenly across the rounds.
- Another method is to create a spiral pattern by decreasing stitches in a specific pattern.
- After shaping the crown, bind off your stitches to secure the top of the hat.
By following these instructions, you’ll be able to shape the crown of your beanie hat and create a stylish and comfortable accessory that will keep you warm during the colder months.