
Knitting is a wonderful hobby that allows you to create beautiful handcrafted items. If you’re just starting out, knitting socks may seem like a daunting task. However, with the right patterns and some basic knitting skills, you can easily create your own cozy socks.
When it comes to sock knitting, it’s important to start with simple patterns that are specifically designed for beginners. These patterns usually feature basic stitches and techniques, making them perfect for those who are new to knitting. With a little practice, you’ll soon be able to tackle more complex patterns.
One of the easiest sock patterns for beginners is the basic top-down sock. This pattern typically uses a circular needle and double-pointed needles. It involves knitting in the round and shaping the sock using simple decreases and increases. With this pattern, you can customize the length and fit of your socks to suit your preferences.
If you’re looking for a slightly different approach, try the toe-up sock pattern. This pattern starts at the toe and works its way up to the cuff. It also uses circular needles and double-pointed needles, but it gives you the freedom to adjust the size of the socks as you go. This is a great option for those who prefer to try on their socks as they knit.
Whether you choose the basic top-down sock or the toe-up sock, the key to success is to take it one step at a time and not be afraid to make mistakes. With practice and patience, you’ll soon be creating comfortable and stylish socks that you can proudly wear or give as gifts.
Easy Knitted Sock Patterns for Beginners
Knitting socks can seem like a daunting task for beginners, but with the right pattern, it can be an enjoyable and rewarding project. Whether you’re looking to knit your first pair of socks or want a simple pattern to practice your skills, there are plenty of easy sock patterns available for beginners.
One popular option for beginners is a basic ribbed sock pattern. This pattern typically uses a combination of knit and purl stitches to create a stretchy and comfortable sock. The ribbing also adds a decorative element to the design. This pattern is a great starting point for beginners as it allows them to practice the basic stitches while creating a functional garment.
Easy Stockinette Socks
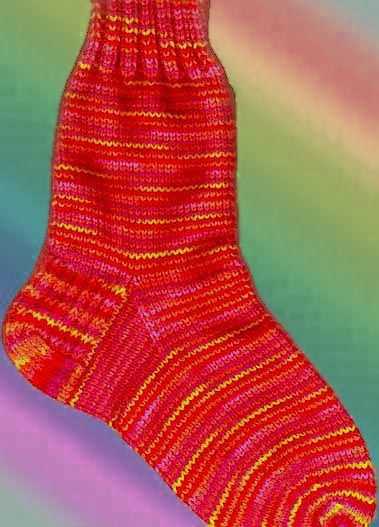
Another beginner-friendly sock pattern is the stockinette stitch socks. The stockinette stitch is a simple pattern that involves knitting one row and purling the next, creating a smooth and even fabric. This pattern is perfect for beginners who want to practice their tension and stitch consistency. The stockinette stitch socks can be customized with different colors or stripes to add some visual interest.
For those who prefer a more structured sock pattern, a simple cable knit sock is a great choice. Cables are created by crossing stitches over each other, creating a textured and intricate design. This pattern might require some additional skills, such as using cable needles, but it is still accessible for beginners. Working on cable knit socks is a great way to learn new techniques and add some interest to your knitting projects.
When choosing an easy knitted sock pattern for beginners, it’s important to consider your skill level and comfort with different techniques. With some practice and patience, you’ll soon be knitting beautiful and cozy socks that you can be proud of.
How to Choose the Right Yarn for Your Socks
Choosing the right yarn for your socks is an important decision that can greatly affect the comfort, durability, and overall look of your finished project. Here are some factors to consider when selecting yarn for your socks:
Fiber Content:
The fiber content of the yarn is a crucial consideration when choosing yarn for socks. Wool, such as merino or cashmere, is a popular choice as it is soft, breathable, and has natural moisture-wicking properties. It also provides insulation and helps regulate temperature, making it suitable for both warm and cold climates. Additionally, wool is known for its durability, which is important for socks that will receive regular wear and tear. Other fiber options for socks include cotton, bamboo, and nylon blends, each with their unique properties and benefits.
Yarn Weight:
The yarn weight determines the thickness and density of your socks. Socks typically require a fingering or sport weight yarn for a comfortable and snug fit. Fingering weight yarn creates lightweight socks that are suitable for everyday wear and fit well in shoes. Sport weight yarn is slightly thicker and provides a bit more warmth and cushioning. It’s important to check the recommended gauge on the pattern you are using to ensure that the yarn weight matches the desired outcome.
Sock Structure:
The structure of your socks can also influence the type of yarn you choose. If you are knitting plain stockinette or ribbed socks, a smooth, plied yarn with good stitch definition will showcase the pattern and create a polished finish. However, if you plan to incorporate texture, cables, or lace patterns in your socks, a yarn with more elasticity and drape may be preferred to enhance the stitch definition and showcase the intricate details.
Color and Dyeing Techniques:
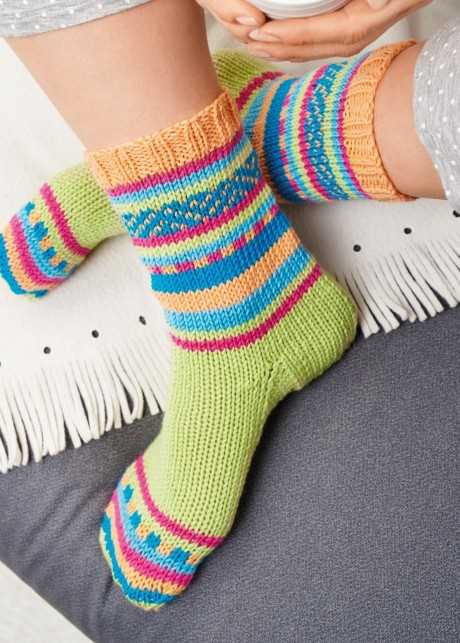
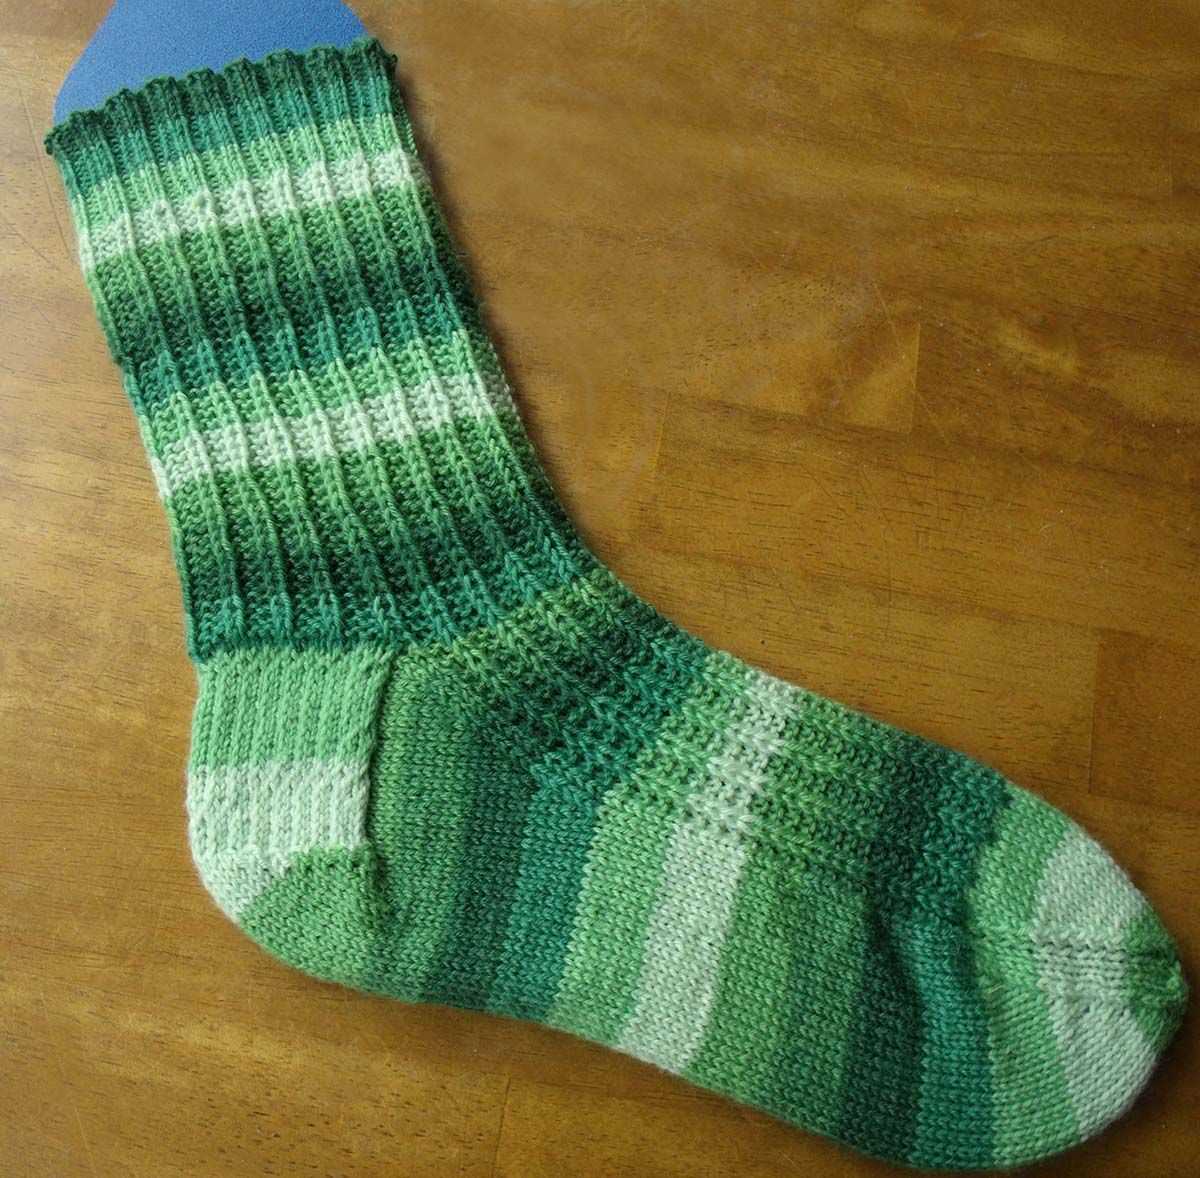
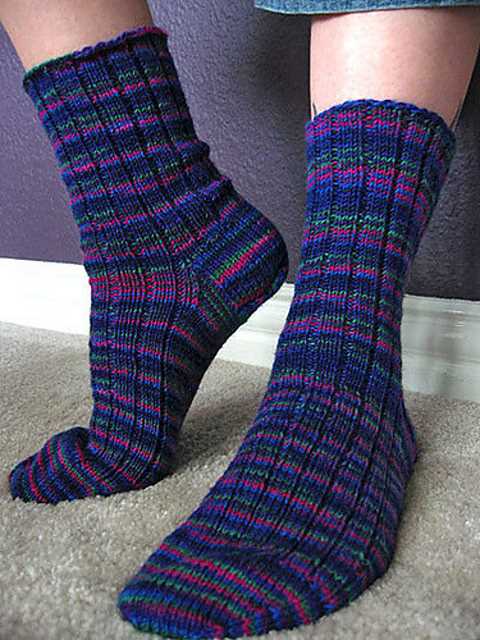
The color and dyeing technique of the yarn can add personality and interest to your socks. Solid or semi-solid yarns in neutral or vibrant colors are versatile and can complement any outfit. Variegated or self-striping yarns create fun and visually appealing socks with minimal effort. For more adventurous knitters, hand-dyed or speckled yarns offer unique and artistic options. Consider how the colors and patterns of the yarn will work with the design and stitch pattern of your socks.
By carefully considering the fiber content, yarn weight, sock structure, and color options, you can choose the perfect yarn for your socks. Experimenting with different yarns can also add variety and excitement to your knitting projects. Remember to check the care instructions on the yarn label to ensure your socks maintain their quality wash after wash.
Needles and Gauge: What You Need to Know
When it comes to knitting socks, one of the most important things to consider is the type of needles you will be using. The size and type of needle can have a significant impact on the final outcome of your sock, so it’s essential to choose the right ones for the job.
Firstly, let’s discuss the size of the needles. The size of the needle will determine the stitch and row gauge for your sock. Gauge refers to the number of stitches and rows per inch in your knitting. It’s crucial to get the gauge right when knitting socks, as it will ensure that your sock fits properly. A too loose or too tight gauge can result in ill-fitting socks that are uncomfortable to wear. To achieve the correct gauge, you may need to adjust your needle size or type of yarn.
There are different types of knitting needles available, such as straight needles, double-pointed needles (DPNs), and circular needles. Straight needles are the most commonly used for beginner knitters, as they are easy to handle and control. However, when it comes to knitting socks, DPNs or circular needles are often the preferred choice. Using DPNs allows you to work on a small circumference, such as the leg or the toe of the sock, without having to rearrange the stitches. Circular needles, on the other hand, are a good option if you prefer to knit the entire sock in one piece, as they offer the flexibility to work in the round.
In summary, when knitting socks as a beginner, it’s important to choose the right needles and establish the correct gauge. The needle size and type will determine the stitch and row gauge, which in turn will ensure that your socks fit properly. Whether you choose straight needles, DPNs, or circular needles, make sure to find what works best for you and enjoy the process of knitting your first pair of socks.
Getting Started with Basic Sock Construction
Are you ready to embark on your knitting journey and try your hand at making your own socks? Knitting socks may seem like a daunting task, but with the right guidance and a few basic techniques, you’ll be well on your way to creating cozy and comfortable socks that you’ll love to wear. In this article, we’ll guide you through the process of getting started with basic sock construction, from selecting the right yarn and needles to understanding the anatomy of a sock.
1. Yarn and Needle Selection: The first step in creating a pair of socks is choosing the right yarn and needles. Since socks are a high-wear item, it’s important to select a yarn that is durable and can withstand repeated washing and wearing. Look for yarns that have some nylon or polyester content to add strength and elasticity. As for needles, double-pointed needles (DPNs) or circular needles with a small circumference are commonly used for sock knitting. Choose a needle size that gives you the desired gauge and comfortable knitting experience.
2. Understanding Sock Anatomy: To successfully knit a sock, it’s important to understand the basic anatomy of a sock. Socks are typically knit from the cuff down or from the toe up. They consist of a ribbed or decorative cuff, a leg, a heel flap, a gusset or instep, and finally, a toe. Each section serves a specific purpose in creating a comfortable and functional sock. Familiarize yourself with these components and how they come together to create a finished sock.
3. Basic Sock Pattern: Once you have the materials and the knowledge of sock anatomy, it’s time to find a simple sock pattern to get started. Look for beginner-friendly patterns that include step-by-step instructions and clear explanations of the techniques involved. Consider starting with a plain vanilla sock pattern that uses basic knitting stitches and minimal shaping. This will allow you to focus on the construction process and get comfortable with the techniques before moving on to more complex designs.
4. Gauge Swatch: Before diving into knitting your socks, it’s essential to make a gauge swatch. Gauge refers to the number of stitches and rows per inch in your knitting. Since everyone knits differently, it’s crucial to match the gauge indicated in the pattern to ensure the correct sizing and fit of your socks. Make a swatch using the recommended yarn and needle size, and measure it against the gauge given in the pattern. Adjust your needle size if necessary to obtain the correct gauge.
With these initial steps, you’ll be well-prepared to begin your sock-knitting adventure. Take your time, practice the basic techniques, and don’t be afraid to ask for help or seek out additional resources if needed. Soon enough, you’ll be enjoying the satisfaction of wearing your very own handmade socks!
Beginner-Friendly Sock Stitch Patterns
When starting out with knitting socks, it’s important to choose a stitch pattern that is suitable for beginners. The right stitch pattern can make the process easier and more enjoyable, while still creating a beautiful finished sock. Here are a few beginner-friendly sock stitch patterns to consider:
1. Stockinette Stitch
The stockinette stitch is a classic choice for knitting socks. It creates a smooth and stretchy fabric that is perfect for a snug and comfortable fit. This stitch pattern is simple and easy to knit, making it ideal for beginners. Just be mindful of maintaining an even tension to prevent the fabric from becoming too loose or too tight.
2. Rib Stitch
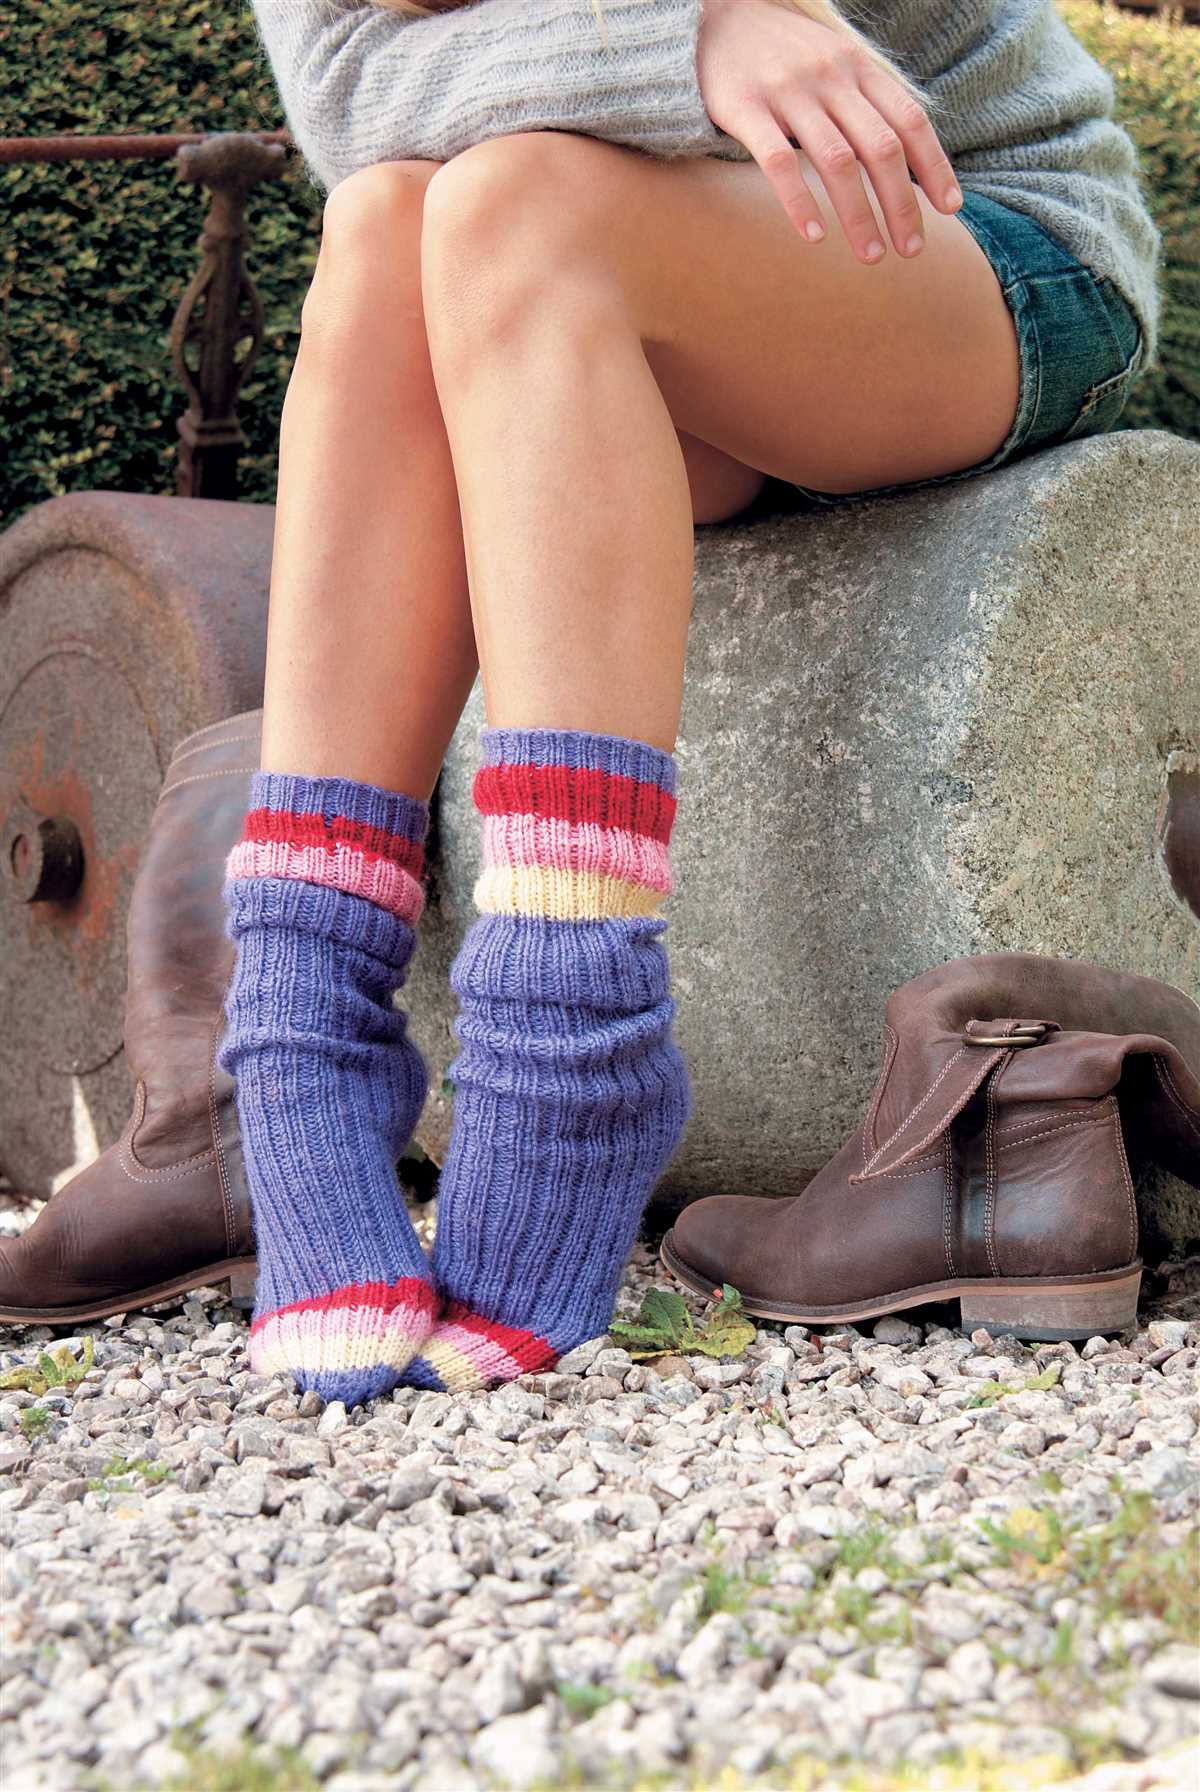
The rib stitch is another great option for beginner sock knitters. It creates a textured fabric that is both stretchy and durable. The most common rib stitch patterns for socks are the 1×1 rib (knit 1, purl 1) and the 2×2 rib (knit 2, purl 2). These patterns are repetitive and easy to memorize, making them perfect for beginners.
3. Seed Stitch
The seed stitch is a simple yet attractive stitch pattern that can add a touch of texture to your socks. It consists of alternating knits and purls in a specific pattern. The seed stitch is beginner-friendly because it only requires basic knit and purl stitches. Although it may take a bit longer to complete compared to other stitch patterns, the end result is worth it!
These beginner-friendly sock stitch patterns are perfect for those just starting out with knitting socks. They are relatively easy to learn and will help you create beautiful and comfortable socks. Remember to practice your tension and take your time with each stitch. With a bit of patience and practice, you’ll be knitting socks like a pro in no time!
Tips for Knitting Socks in the Round
Knitting socks in the round can be a fun and rewarding project for beginners. It allows you to create a seamless and comfortable sock that fits perfectly. Here are some tips to help you get started:
1. Choose the right yarn
When knitting socks, it’s important to select a yarn that is durable and suitable for socks. Look for yarn that has a high percentage of wool or a wool blend, as this will make your socks warm and soft. Avoid using yarns that are too slippery or prone to stretching, as they may not hold their shape well.
2. Use the magic loop method
The magic loop method is a popular technique for knitting socks in the round. It involves using a long circular needle and dividing the stitches onto two halves of the needle. This method eliminates the need for double-pointed needles and allows you to easily knit small circumference projects like socks.
3. Casting on and joining the round
To cast on for your sock, use a flexible cast-on method such as the long tail cast-on. Make sure to cast on the correct number of stitches for the size of your foot. Once you have cast on, join the round by knitting the first stitch from the left-hand needle onto the right-hand needle. Be careful not to twist the stitches when joining.
4. Using stitch markers
Stitch markers can be very helpful when knitting socks in the round. Place a stitch marker at the beginning of the round to easily keep track of your progress. You can also use additional stitch markers to mark any pattern repeats or decreases in your sock pattern.
5. Working the heel and toe
The heel and toe are the most important parts of a sock that require some additional techniques. There are various methods for working these sections, including short rows and decreases. Follow the instructions of your sock pattern or consult a sock-knitting guide for detailed instructions on how to work the heel and toe.
- Remember to take breaks and stretch your hands and fingers periodically to prevent fatigue.
- Experiment with different stitches and patterns to add variety and personalize your socks.
- Don’t be afraid to ask for help or join a knitting group for support and advice.
Once you have completed the main body of your sock, it’s time to move on to making the heel. This is an essential part of the sock construction and adds shape and support to the sock. While it may seem intimidating at first, with a little practice and patience, you will be able to master making the heel of your knitted sock.
Gather your materials
Before you begin making the heel, make sure you have all the necessary materials on hand. You will need your knitting needles, a tapestry needle, and your yarn. It’s important to choose a yarn that is strong and durable, as the heel is a high-wear area of the sock.
Start with the heel flap
To begin making the heel, you will first need to create the heel flap. This is a rectangular section that fits over the back of your heel. To make the heel flap, you will work back and forth on just a portion of the stitches, leaving the remaining stitches on hold.
Start by knitting a set number of stitches onto one of your needles. The number of stitches will depend on the size of your sock and your gauge. Consult your pattern for specific instructions.
Once you have the required number of stitches on your needle, turn your work and begin the heel flap. This is typically done in a simple knit or purl stitch pattern, such as stockinette or a 2×2 rib. Work the stitch pattern for the recommended number of rows, again consulting your pattern for specific instructions.
Shape the heel
Once the heel flap is complete, it’s time to shape the heel. This involves decreasing stitches to create a curved shape that fits around your heel. The most common method for shaping the heel is the “heel turn” technique.
To shape the heel, you will work a series of short rows, turning your work partway through each row instead of knitting across all the stitches. This creates a curved shape that conforms to the natural shape of your heel.
Follow your pattern’s instructions for the specific short row technique to use and the number of stitches to work each row. Pay careful attention to the turning points and make sure to count your stitches to ensure accuracy.
Continue with the gusset
After shaping the heel, it’s time to move on to the gusset. The gusset is the section of the sock that transitions from the flat heel to the circumference of the foot. It adds extra width and ensures a comfortable fit.
To create the gusset, you will pick up stitches along the edge of the heel flap and work them into the main body of the sock. This is typically done by knitting or purling the picked-up stitches together with the stitches on the main needle.
Follow your pattern’s instructions for the specific number of stitches to pick up and how to work them into the main body of the sock. Make sure to distribute the stitches evenly across your needles and adjust your stitch count as needed.
Congratulations! You have now completed the heel of your knitted sock. Continuing on from the gusset, you can proceed to work the foot of the sock and eventually the toe. With each sock you make, you will gain more confidence and eventually become a sock-knitting pro!
Picking up Stitches for the Gusset
One important step in knitting socks is picking up stitches for the gusset. The gusset is the triangular panel that is formed on each side of the foot after turning the heel. It provides extra width and comfort to the sock. Picking up stitches for the gusset may seem intimidating for beginners, but with some practice, it can become a manageable task.
To begin, you will need a spare double-pointed needle that is the same size as your working needle. Start by inserting the needle into the first stitch on the left-hand needle, from front to back. Then, wrap the yarn around the needle and pull it through the stitch, just as you would for a regular knit stitch. Repeat this process for all the stitches along the side of the heel flap until you reach the corner.
Once you reach the corner, you will need to pick up stitches along the edge of the heel flap. This is done by inserting the needle into the edge of the flap, under both loops of the V-shaped stitches. Wrap the yarn around the needle and pull it through to create a new stitch. Continue this process until you have picked up the desired number of stitches along the edge of the heel flap.
After picking up stitches along the edge of the heel flap, you will need to pick up stitches along the other side of the gusset. This is done in a similar manner as picking up stitches along the side of the heel flap. Insert the needle into the first stitch on the right-hand needle, from front to back, and then wrap the yarn around the needle and pull it through the stitch. Repeat this process until you have picked up the desired number of stitches along the side of the gusset.
Once you have picked up all the stitches for the gusset, you can continue knitting the rest of the sock according to the pattern instructions. Picking up stitches for the gusset may take some practice to get comfortable with, but with time, it will become easier. Just remember to take your time and be patient, and soon you’ll be able to confidently knit socks with beautiful gussets.
Decreasing for the Toe: Simple Techniques

When knitting socks, decreasing for the toe is an essential skill to learn. It allows you to shape the toe and create a comfortable fit. There are several simple techniques you can use to decrease stitches and shape the toe of your knitted sock.
1. K2tog (Knit Two Stitches Together)
The k2tog decrease is one of the most common and simplest techniques used for decreasing stitches in knitting. To perform this decrease, simply insert your right needle into the next two stitches on the left needle and knit them together as if they were one stitch. This decreases the number of stitches on your needle by one.
2. SSK (Slip, Slip, Knit)
The SSK decrease is another popular technique used for shaping the toe. To perform this decrease, slip the next two stitches on the left needle one at a time as if to knit, then insert the left needle into the front of both slipped stitches and knit them together. This also decreases the number of stitches on your needle by one.
3. Toe Decrease Patterns
There are also various toe decrease patterns you can follow to shape the toe of your sock. Two commonly used patterns are the Round Toe Decrease and the Star Toe Decrease. In the Round Toe Decrease, you decrease stitches evenly on all sides of the sock, while in the Star Toe Decrease, you decrease stitches in a star-like pattern to create a more decorative toe shape.
4. Trying Different Techniques
It is advisable to try different toe decrease techniques and patterns to see which ones you prefer and which ones work best for the type of sock you are knitting. Some techniques may create a tighter or looser toe, while some patterns may create a more rounded or pointed toe shape.
Overall, practicing and experimenting with different toe decrease techniques will help you become more confident and skilled in shaping the toe of your knitted socks. Whether you prefer the simplicity of k2tog and SSK or the more intricate patterns, perfecting toe decreases will ensure your socks fit comfortably and look great.
Finishing Touches: Binding Off and Weaving in Ends
After you have completed knitting the main part of your sock, it’s time to finish the project by binding off and weaving in the ends. These final steps are crucial for ensuring that your socks have a clean and polished look.
Binding off: To bind off, also known as casting off, you will need a pair of knitting needles and scissors. Start by knitting two stitches onto the working needle. Then, using your left-hand needle, lift the first stitch up and over the second stitch, allowing it to drop off the needle. Continue this process, knitting one stitch and passing the previous stitch over until you have just one stitch left. Cut the yarn, leaving a tail that is long enough to comfortably weave in.
Weaving in ends: To weave in the ends of your sock, thread the yarn through a tapestry needle. Starting from the inside of the sock, insert the needle under the stitches along the edge of the fabric, working in a horizontal or vertical path. Take care not to pull too tight, as this can distort the fabric. Continue weaving in the ends for a few inches, then cut off any excess yarn.
By properly binding off and weaving in ends, you can ensure that your knitted socks have a professional finish. Taking the time to complete these final steps will make your socks more comfortable to wear and prevent them from unraveling over time. Now your socks are ready to be enjoyed or given as a thoughtful handmade gift!
Fun Variations to Try with Easy Sock Patterns
If you’ve mastered the basics of knitting socks and are looking for some fun variations to try, look no further! There are plenty of ways to add interesting details and personalize your easy sock patterns. Whether it’s a unique stitch pattern or a bold color choice, these variations will ensure that your knitted socks stand out from the crowd.
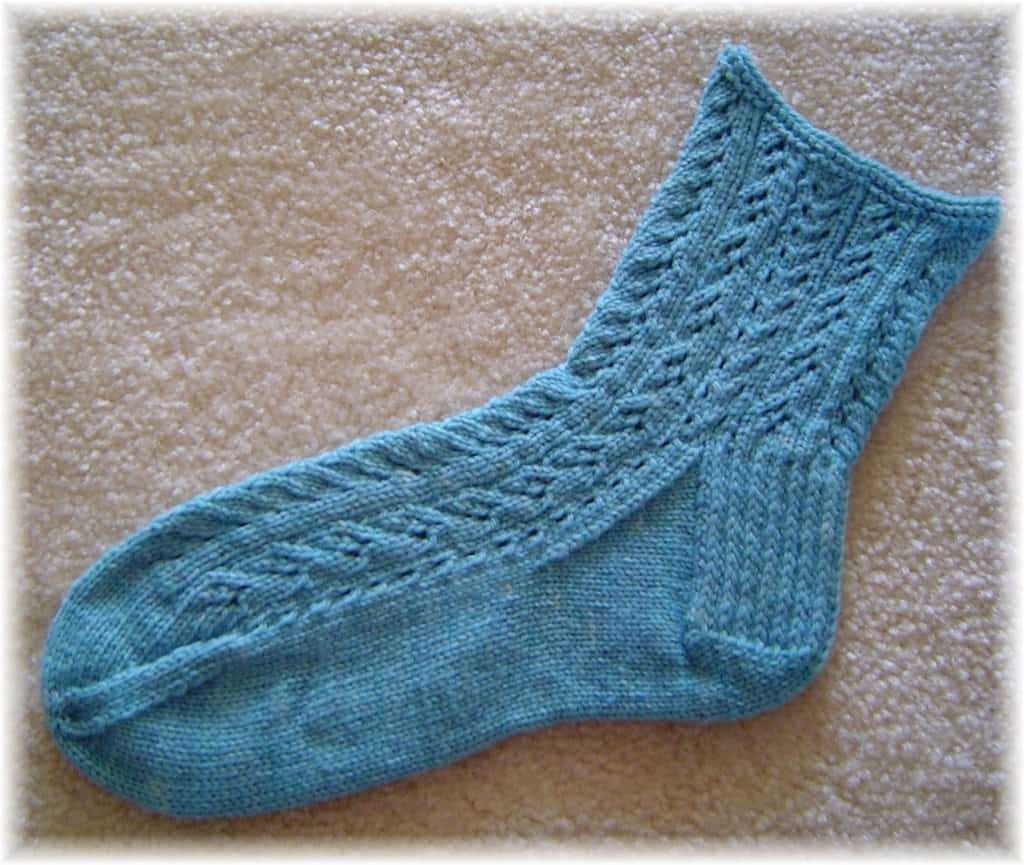
1. Lace Inserts
Add a touch of elegance to your socks by incorporating lace inserts. These delicate and intricate patterns can be used along the leg or even on the foot of the sock. Lace adds an extra level of visual interest and can make your socks feel extra luxurious.
2. Colorwork
Experiment with colorwork techniques such as Fair Isle or stranded knitting to create colorful patterns on your socks. By using multiple colors, you can create geometric designs, stripes, or even pictures of animals or flowers. Colorwork adds a pop of personality to your socks and makes them truly one-of-a-kind.
3. Cables
Add texture and dimension to your socks by incorporating cable stitches. Cables create beautiful twists and braids that add visual interest and keep you engaged in your knitting project. You can choose to have the cables run down the front of the sock or create an all-over cable pattern.
4. Ribbing Variations
Instead of the traditional ribbing pattern, try experimenting with different ribbing variations. You can play around with the number of knit and purl stitches in each repeat or try different types of ribbing stitches, such as mock ribbing or twisted ribbing. These small variations can make a big difference in the overall look and feel of your socks.
5. Embellishments
Add some extra flair to your socks by incorporating embellishments such as buttons, bows, or small knitted flowers. These small details can add a touch of whimsy and make your socks even more fun to wear. Just make sure they are securely attached so they don’t come loose during wear or washing.
With these fun variations, you can take your easy sock patterns to the next level and create socks that are uniquely yours. Don’t be afraid to experiment and let your creativity shine through in your knitting projects.
Resources and Next Steps
Knitting socks can be a fun and rewarding project for beginners. With the right resources and a little practice, you can create beautiful and cozy socks for yourself or as gifts for loved ones. Here are some additional resources and next steps to help you on your sock knitting journey:
Online Tutorials and Videos
There are a variety of online tutorials and videos available that can help you learn and improve your sock knitting skills. Websites such as YouTube and KnittingHelp.com offer step-by-step instructions and demonstrations for different sock patterns and techniques. Watching these videos can provide visual guidance and make it easier to understand the knitting process.
Pattern Books and Magazines
Investing in a good pattern book or subscribing to a knitting magazine can give you access to a wide range of sock patterns and inspiration. Books like “The Sock Knitter’s Handbook” by Charlene Schurch and “Vogue Knitting: The Ultimate Sock Book” by Vogue Knitting Magazine offer detailed instructions and patterns for all skill levels. These resources can help you explore different sock construction techniques and experiment with different stitch patterns.
Joining Knitting Communities
Joining online knitting communities and forums can provide you with a support network of fellow knitters who can offer advice, tips, and encouragement. Websites like Ravelry have dedicated groups and forums specifically for sock knitting, where you can connect with other beginners and experienced knitters alike. Sharing your progress, asking questions, and participating in knit-alongs are all great ways to enhance your skills and gain inspiration from others.
Practice and Experiment
The key to becoming a confident sock knitter is practice. Start with simple patterns and gradually work your way up to more complex designs. Don’t be afraid to experiment with different yarns, needles, and stitch patterns to create unique and personalized socks. With each project, you’ll gain more experience and confidence in your knitting abilities.
Remember, knitting socks is a journey and it’s okay to make mistakes along the way. Embrace the process, be patient with yourself, and enjoy the satisfaction of creating something handmade and beautiful.