
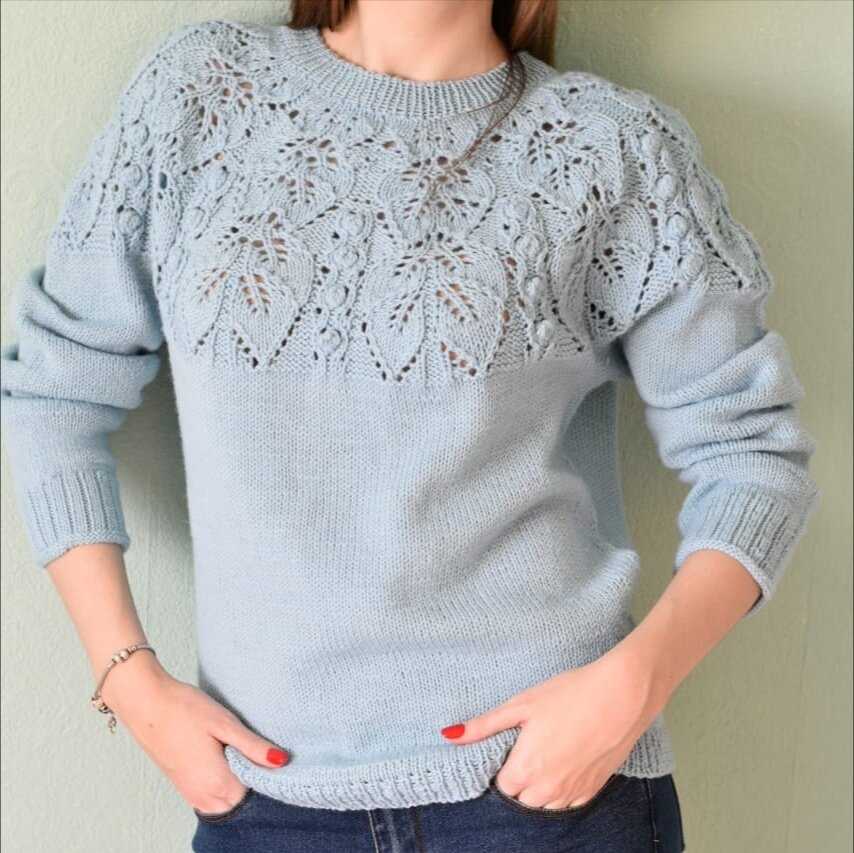
Knitting is a popular craft that allows you to create beautiful and cozy garments. If you’re looking for a simple yet stylish project, an easy knit sweater pattern in the round is a great option. This pattern eliminates the need for seams, making it a straightforward and enjoyable project for both beginners and experienced knitters.
The key to a successful knit sweater is choosing the right yarn and needle size. For this pattern, it’s best to use a medium-weight yarn and circular needles. Circular needles are ideal for knitting in the round as they allow you to work the pattern seamlessly without the need to sew up any seams.
Knitting a sweater in the round also gives you the opportunity to customize the fit and length. You can easily try the sweater on as you go, making adjustments to the length and width as needed. This pattern provides you with the freedom to create a sweater that fits perfectly and suits your personal style.
Easy Knit Sweater Pattern in the Round
If you’re in search of a simple and enjoyable knitting project, look no further than this easy knit sweater pattern in the round. Knitting in the round eliminates the need for side seams, making the finishing process much easier. Plus, the classic stockinette stitch used in this pattern creates a sleek and polished look that is perfect for any occasion.
To begin, you’ll need to gather your materials. This pattern calls for a medium-weight yarn and circular knitting needles in the appropriate size. You’ll also need a set of double-pointed needles for the sleeves, stitch markers, and a tapestry needle for weaving in ends.
Pattern:
- With your circular knitting needles, cast on the required number of stitches for your size.
- Place a stitch marker to indicate the beginning of the round.
- Knit in the round using the stockinette stitch until the body of the sweater measures the desired length.
- Separate the sleeves by placing the required number of stitches for each sleeve onto separate sets of double-pointed needles.
- Continue knitting the body of the sweater until the desired length is reached.
- Switch back to your circular knitting needles and join the sleeves and body together to knit the yoke.
- Decrease stitches evenly throughout the yoke until you have reached the desired neckline.
- Bind off all stitches and weave in any remaining ends.
This easy knit sweater pattern in the round is a great project for knitters of all skill levels. The circular knitting technique makes it perfect for beginners looking to expand their skills, while more experienced knitters will appreciate the simplicity and versatility of the pattern. Once finished, you’ll have a stylish and cozy sweater that you can wear with pride.
What You’ll Need
In order to knit this easy sweater pattern in the round, you will need several materials and tools. Here is a list of what you’ll need:
- Yarn: You will need a suitable yarn for your sweater. Choose a yarn that is suitable for the desired size and style of your sweater.
- Knitting Needles: You will need a set of circular knitting needles in the appropriate size for your yarn. Make sure the length of the needles is long enough to comfortably accommodate the width of your sweater.
- Stitch Markers: You will need stitch markers to help you keep track of your stitches and round markers to mark the beginning of each round.
- Tape Measure: A tape measure will come in handy to measure your gauge and ensure your sweater fits properly.
- Darning Needle: You will need a darning needle or a yarn needle to weave in the loose ends of your yarn and finish your sweater.
- Scissors: You will need a pair of scissors to cut your yarn when needed.
- Pattern: Finally, you will need the easy knit sweater pattern in the round. Make sure to have a printed copy of the pattern or access to it on your computer or device.
With these materials and tools, you will be ready to start knitting your easy sweater pattern in the round. Gather everything together and get ready to create a cozy and stylish sweater.
Choosing the Right Yarn
When it comes to knitting a sweater, choosing the right yarn is essential. The type of yarn you use can greatly affect the final result and the overall look and feel of your garment. It’s important to consider both the fiber content and the weight of the yarn when making your decision.
Fiber Content
One of the first things to consider when choosing yarn for a sweater is the fiber content. There are many different types of yarn available, each with its own unique properties. Some common choices for sweater yarn include wool, cotton, acrylic, and blends of these fibers.
Wool: Wool is a popular choice for sweaters because of its warmth and durability. It has excellent insulating properties and can retain heat even when wet. Wool is also naturally elastic, which helps the garment retain its shape over time.
Cotton: Cotton is a light and breathable fiber, making it a great choice for sweaters that will be worn in warmer climates or during the summer months. It is known for its softness and hypoallergenic properties, making it suitable for those with sensitive skin.
Acrylic: Acrylic yarn is a synthetic fiber that is often used as a more affordable alternative to natural fibers. It is lightweight and easy to care for, with many acrylic yarns being machine washable. Acrylic is also known for its vibrant colors and durability.
Blends: Yarn blends combine two or more fibers to create a yarn with unique properties. For example, a wool-cotton blend may combine the warmth and durability of wool with the softness and breathability of cotton. Blends can offer the best of both worlds, but it’s important to consider the qualities of each fiber in the blend when making your decision.
Yarn Weight
In addition to fiber content, yarn weight is another important consideration when choosing yarn for a sweater. Yarn weight refers to the thickness of the yarn and can vary from very thin lace weight to thick bulky weight. The pattern you are using will often specify the recommended yarn weight, and it’s important to follow these guidelines to ensure a successful outcome.
Fingering/Sock weight: Fingering or sock weight yarn is very thin and creates a lightweight and drapey fabric. It is often used for delicate and lacy sweaters.
Sport/DK weight: Sport or DK weight yarn is slightly thicker than fingering weight and is a popular choice for sweaters. It creates a balanced fabric with good drape and is suitable for a variety of stitch patterns.
Worsted/Aran weight: Worsted or Aran weight yarn is a medium-weight yarn that is commonly used for sweaters. It is versatile and can produce a wide range of fabric textures, making it a popular choice for a variety of projects.
Bulky/Chunky weight: Bulky or chunky weight yarn is thick and creates a cozy and warm fabric. It is often used for winter sweaters and projects that require a quick knit.
By considering the fiber content and weight of the yarn, you can ensure that your knitted sweater turns out just the way you envision it. Take the time to explore different options and experiment with different yarns to find the perfect match for your project.
Selecting the Right Needles

When starting a knitting project, one of the most important decisions to make is selecting the right needles. Having the correct size and type of needles can greatly impact the outcome of your project and affect how comfortable and enjoyable it is to knit. Here are some factors to consider when choosing your needles:
Size
The size of your needles will directly affect the gauge and tension of your knitting. Different yarns and patterns require different needle sizes to achieve the desired result. It is essential to check the pattern or yarn label for the recommended needle size and adjust accordingly. Using the wrong size of needles can result in a finished project that is too loose or too tight.
Type
There are various types of knitting needles available, including straight needles, circular needles, and double-pointed needles. Each type has its own advantages and is suitable for different projects. Straight needles are commonly used for flat knitting, such as scarves and blankets. Circular needles are versatile and great for knitting in the round or larger projects. Double-pointed needles are ideal for small circumference knitting, like socks and sleeves. Consider the specific requirements of your project and choose the type of needles that will work best.
Material
Knitting needles are made from different materials, such as wood, metal, and plastic. Each material has its own characteristics and can affect the overall feel and performance of the needles. Wooden needles are lightweight, warm to the touch, and have a natural grip. Metal needles are durable, smooth, and great for fast knitting. Plastic needles are affordable, lightweight, and a good option for beginners. Consider your personal preferences and the specific needs of your project when selecting the material of your needles.
Comfort
Lastly, it is important to consider your own comfort while knitting. Some knitters may prefer needles with a smaller diameter for a tighter grip, while others may prefer larger diameter needles for easier handling. Additionally, paying attention to the weight of the needles can be helpful, especially for longer knitting sessions. It is advisable to try out different types and sizes of needles to find what works best for you and ensures a pleasant knitting experience.
By taking the time to select the right needles for your knitting project, you can set yourself up for success and create beautiful, well-fitting garments and accessories.
Gauge Swatch
Before you start knitting your easy knit sweater in the round, it’s important to swatch and check your gauge. The gauge refers to the number of stitches and rows per inch in your knitting. This information is crucial for ensuring that your finished sweater will fit properly.
To create a gauge swatch, cast on a few more stitches than the recommended gauge over a 4×4 inch square. For example, if the pattern recommends a gauge of 18 stitches and 24 rows per 4 inches, you might cast on about 22 stitches and work for 28 rows to create your swatch.
Why is it important to cast on more stitches and work more rows than the recommended gauge?
By casting on more stitches and working more rows, you are simulating a larger piece of fabric. This takes into account any potential variations in your tension throughout the sweater. It also allows you to measure over a larger area to get a more accurate gauge.
How to measure your gauge swatch:
- After you’ve finished knitting your gauge swatch, lay it flat on a hard surface.
- Using a ruler or tape measure, count the number of stitches and rows within the 4×4 inch square.
- Divide the number of stitches and rows by 4 to get the average per inch.
- Compare your measurements to the recommended gauge in the pattern. If your gauge is too tight, try using larger needles. If it’s too loose, try using smaller needles.
Why is it important to match the gauge in the pattern?
Matching the gauge in the pattern ensures that the finished sweater will have the correct measurements and fit you properly. If your gauge is significantly different from the pattern, your sweater may end up too small or too big.
Remember, taking the time to knit a gauge swatch before starting your easy knit sweater in the round will save you from potential disappointment and frustration down the line. Happy knitting!
Casting On
The first step in knitting a sweater in the round is casting on. Casting on refers to the process of creating the initial stitches on the knitting needle. There are several different methods you can use to cast on, but for this pattern, we will use the long-tail cast on method.
To begin, you will need your knitting needle and some yarn. Leave a long tail of yarn, approximately three times the width of the finished sweater. Hold the needle in your right hand and make a slipknot by creating a loop with the long tail and passing the end of the yarn through it. Place the slipknot on the needle, leaving a small loop at the end of the tail.
Hold the needle with the slipknot in your right hand and the yarn tail in your left hand. Using your thumb and index finger of your left hand, make a “V” shape with the yarn tail. Insert the needle into the “V” from left to right and then bring the needle under the right-hand strand of yarn, forming a loop on the needle. This loop counts as your first stitch.
Continue this process, making “V” shapes with the yarn tail and inserting the needle from left to right, forming loops on the needle until you have the desired number of stitches for your sweater. It is important to keep the tension of the yarn consistent, neither too tight nor too loose, to ensure an even cast on.
Once all the stitches are cast on, you will be ready to begin knitting in the round. Make sure the stitches are evenly distributed around the needle and join them in a circle, being careful not to twist the stitches. Now you are ready to start the body of your sweater!
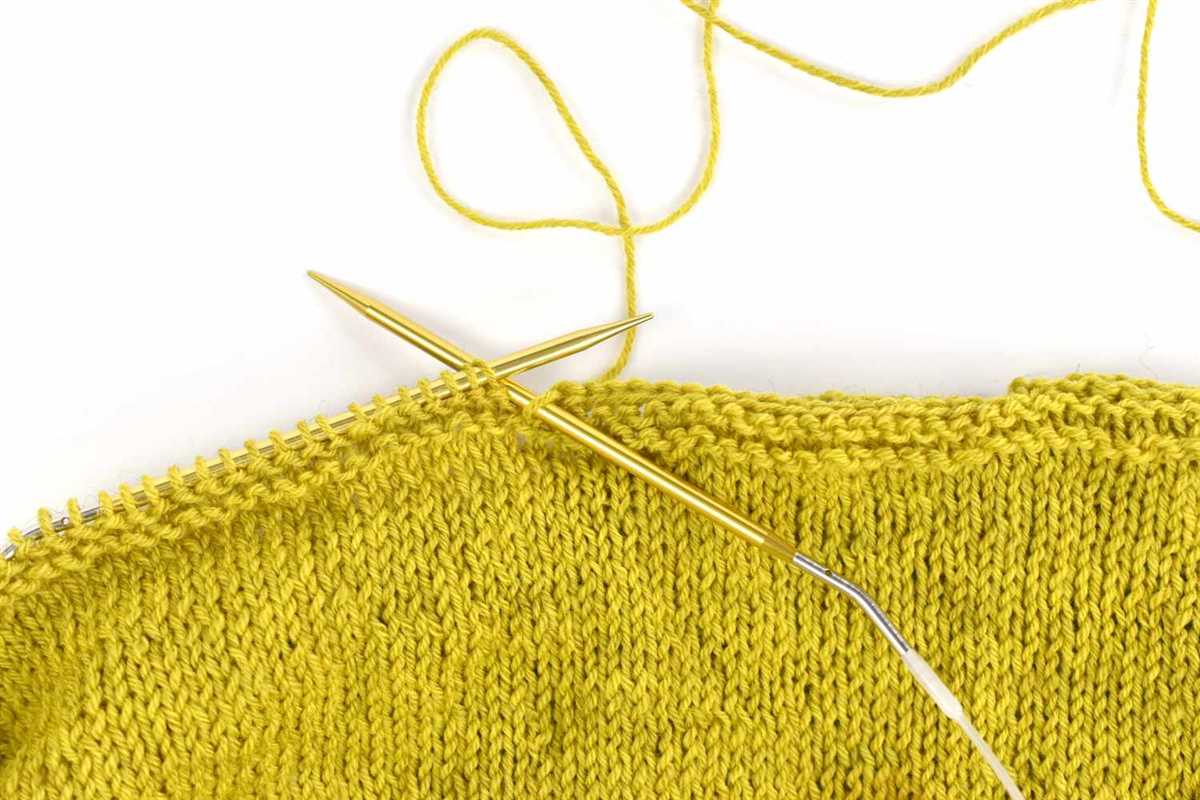
Joining in the Round
Joining in the round is an important step in knitting a sweater pattern. When knitting in the round, the stitches are joined together to create a continuous loop, eliminating the need to sew seams later on. This technique is commonly used in knitting sweaters, hats, and other seamless garments.
To join in the round, you will need to cast on the desired number of stitches onto a circular needle. Make sure that the ends of the cast-on stitches are not twisted before joining. Hold the needle with the first cast-on stitch in your right hand and the last cast-on stitch in your left hand.
Step 1: Insert the right needle point into the first stitch on the left needle as if to knit.
Step 2: Bring the yarn over the right needle from back to front, creating a loop around the needle.
Step 3: Pull the loop through the first stitch, creating a new stitch on the right needle.
Step 4: Slip the first stitch from the left needle onto the right needle without knitting it, to prevent a gap from forming.
Continue knitting in the round as indicated in the pattern. It is important to be mindful of the direction in which you are knitting, as the right side of the work should be facing you. Make sure to use stitch markers to mark the beginning of each round, especially if the pattern requires shaping or changes in stitch count.
Knitting the Body
After completing the ribbing and establishing the stitch pattern for the body of the sweater, it’s time to knit the body!
Using the same circular needle, continue knitting in the round, following the pattern instructions. Make sure to keep track of your stitch count, as it may change throughout the body of the sweater.
Increase Rounds: Following the pattern, there may be specific rounds where you need to increase your stitch count. This can be done by making one or more knit or purl stitches in between designated markers.
Length: Continue knitting in the round until you reach the desired length for the body of the sweater. This will vary depending on the size and style of the sweater. Use a measuring tape or try the sweater on to determine the desired length.
Shaping: Some sweater patterns may have shaping instructions for the body, such as waist shaping or A-line shaping. Follow the pattern instructions to shape the body accordingly. This usually involves decreasing or increasing stitches at specific intervals or in specific sections of the body.
Finishing: Once you have reached the desired length and completed any shaping instructions, finish the body by binding off all stitches. Cut the yarn, leaving a tail for weaving in later.
Blocking: Blocking the completed body is an important step to ensure that the sweater retains its shape and the stitches are even. Refer to the pattern instructions for specific blocking techniques and measurements.
With the body of the sweater completed, you can now move on to knitting the sleeves and finishing details to complete your easy knit sweater in the round.
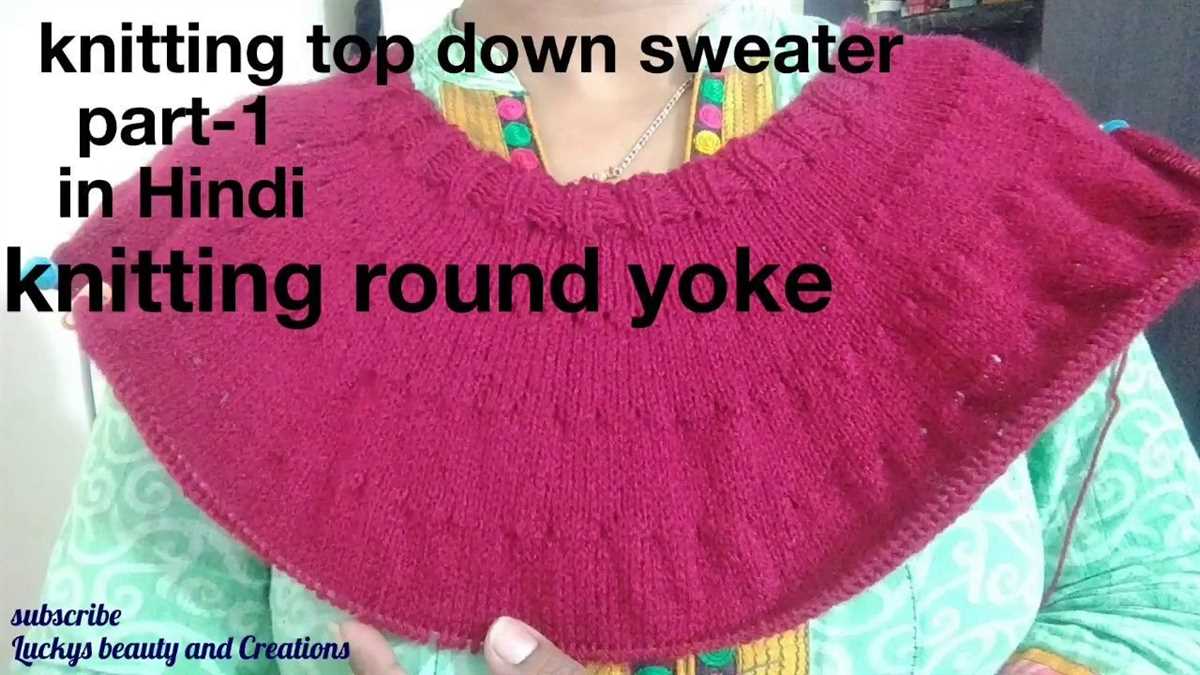
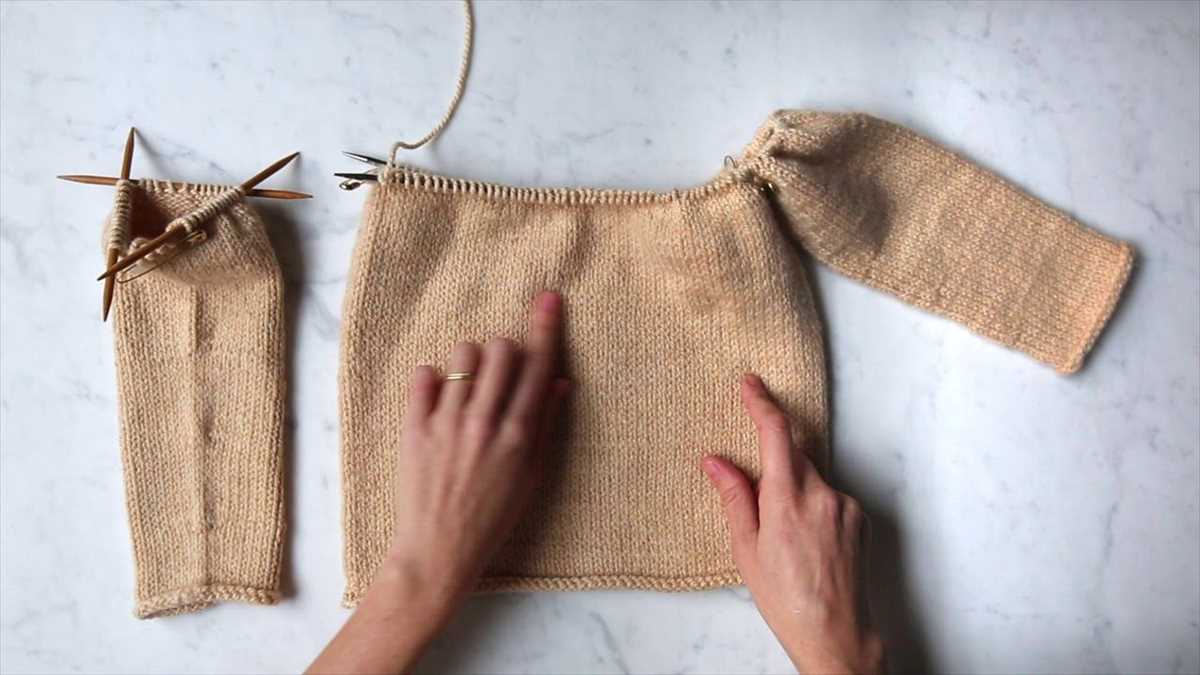
Separating the yoke
Once you have completed the yoke section of the easy knit sweater pattern in the round, it’s time to separate the stitches for the body and sleeves. This is an important step in the knitting process as it will help define the shape of the sweater and allow you to work on each section separately.
To separate the yoke, you will need to divide the stitches onto separate needles or stitch holders. Start by placing a marker at the beginning and end of the round to mark the center of the underarm stitch. You can use a contrasting color yarn, a safety pin, or a removable stitch marker for this purpose.
Next, you will need to work on the body section first. Take the total number of stitches for the body (which is usually given in the pattern) and place them onto a separate needle or stitch holder. This will be the main section of the sweater that will cover your torso.
After separating the body stitches, you can move on to the sleeve sections. Place the next set of stitches onto another needle or stitch holder. These stitches will be used to knit the sleeves of your sweater. Make sure to keep the stitches for each sleeve separate, as you will be working on them individually.
By separating the yoke into the body and sleeve sections, you can now continue knitting each part separately to create the desired length and shape. This technique gives you more control over the fit of the sweater and allows for customization based on your measurements and preferences.
Once you have finished knitting the body and sleeves separately, you can then join them together again at the underarm stitches and continue with the rest of the sweater pattern, such as adding ribbing or finishing touches.
Knitting the Sleeves
The sleeves are an important part of any sweater and require attention to detail to ensure a perfect fit. When knitting the sleeves for your easy knit sweater in the round, there are a few key steps to consider.
1. Cast on and join the round:

Start by casting on the required number of stitches for your sleeve. Make sure to follow the pattern instructions to determine the correct number of stitches. Once you have cast on, join the round by carefully knitting the first stitch onto the last stitch of the cast on row. This will create a continuous loop of stitches that you will be working on for the remainder of the sleeve.
2. Increase stitches:
As you knit your sleeve, you will need to gradually increase the number of stitches to shape it properly. The pattern will specify how often to increase and how many stitches to add each time. The increases are typically done by working either yarn overs or knit front and back (KFB) stitches. Follow the pattern instructions and place markers if necessary to keep track of your increases.
3. Knit in the round:
Once you have cast on and increased the necessary number of stitches, continue knitting in the round following the pattern instructions. This typically involves working in the stockinette stitch, which is knitting on the right side and purling on the wrong side. Pay attention to any pattern changes or stitch variations that may be specified for the sleeves.
4. Shape the sleeve:
As you near the desired length for your sleeve, you may need to start decreasing stitches to shape the sleeve cuff. Just like with the increases, the pattern will specify when and how to decrease. This is usually done by either knitting two stitches together (K2tog) or slipping one stitch knitwise, knitting the next stitch, and then passing the slipped stitch over the knit stitch (SSK).
Repeat the decrease rounds as specified in the pattern until you have reached the desired number of stitches for the cuff. Bind off the stitches and repeat the process for the second sleeve.
By following these steps and carefully reading the pattern instructions, you can successfully knit the sleeves for your easy knit sweater in the round. Remember to adjust the pattern to your desired size and gauge if necessary and take your time to ensure a professional-looking finish.
Adding Shaping
When knitting a sweater in the round, adding shaping is essential to achieve a proper fit. There are several ways you can add shaping to your knitted sweater, depending on the design and style you want to achieve.
One common way to add shaping is through increases and decreases. This can be done by working increases, such as yarn overs or make one stitches, on either side of specific markers. These increases create additional stitches and shape the fabric by widening it. On the other hand, decreases, such as knit two together or slip slip knit, can be worked to reduce the number of stitches and create a tapered effect.
Another method of adding shaping is through short rows. Short rows are partial rows of knitting that create darts or curves in the fabric. They are typically worked by knitting or purling a certain number of stitches and then turning the work before reaching the end of the row. This technique can be used to shape the back, bust, or waist of a sweater and can create a more fitted silhouette.
Incorporating waist shaping is another popular option for adding flattering curves to a knitted sweater. This is typically done by working decreases on either side of the waist, creating an hourglass shape. Alternatively, you can also use increases to create an A-line shape, where the sweater flares out from the waist to the hem.
Ultimately, the method of adding shaping to your knitted sweater will depend on your desired fit and the specific pattern you are following. By strategically incorporating increases, decreases, short rows, or waist shaping, you can create a beautifully fitted sweater that flatters your body shape.
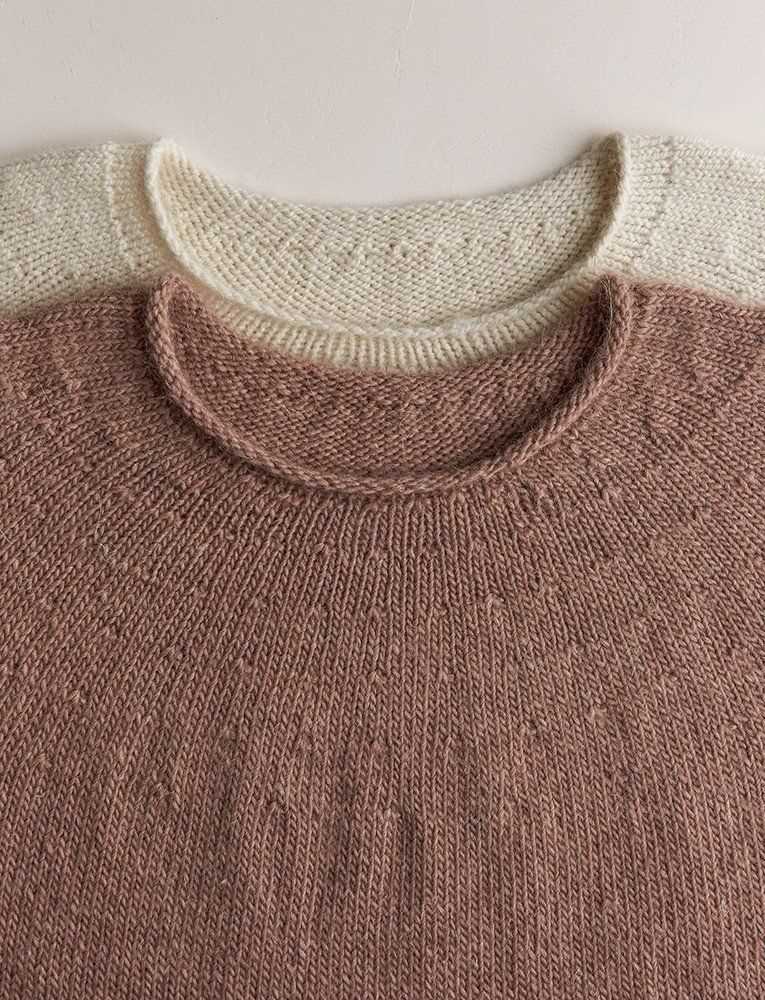
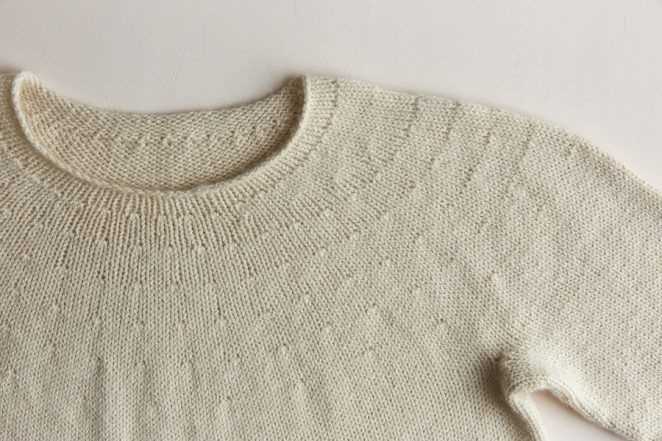
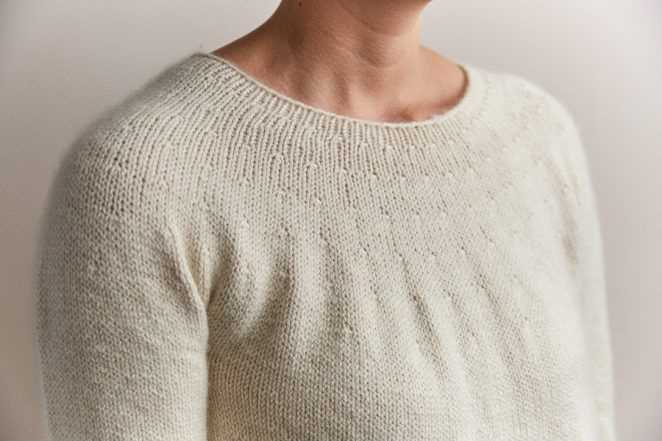
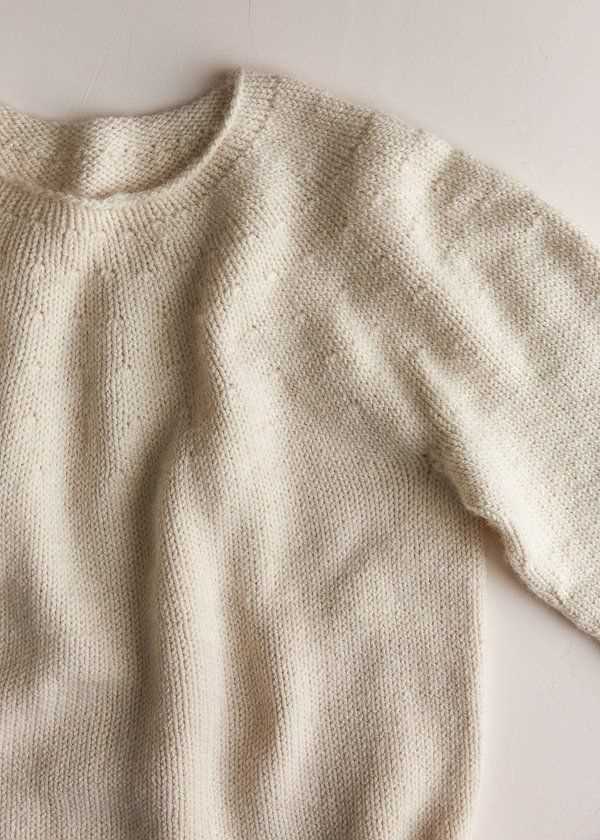
Finishing the Neckline
Once you have completed the body of your easy knit sweater in the round, it’s time to finish the neckline. This final step will give your sweater a polished and professional look.
To start, you will need to remove the stitches from the holders that were placed at the beginning of the project for the front and back neckline. Place these stitches onto your circular needle, making sure to separate the front and back stitches.
Next, you can begin working the ribbed collar. You can choose to continue with the same stitch pattern as the body of the sweater, or switch to a different ribbing pattern for added interest. Knit the collar in rounds using a smaller needle size to create a snug fit around the neckline.
Once you have reached the desired length for the collar, you can bind off the stitches. Make sure to bind off loosely to prevent the neckline from feeling too tight.
After binding off, you may choose to add any desired finishing touches, such as weaving in loose ends or blocking the sweater to even out the stitches and improve the drape of the fabric. This will give your finished sweater a polished and professional look.
With these simple steps, you can easily finish the neckline of your knit sweater in the round, completing your project and resulting in a stylish and cozy garment. Enjoy wearing your handmade creation or gift it to a loved one!
Finishing Touches
Once you have completed knitting the body and sleeves of your sweater in the round, it’s time to add the finishing touches to make your sweater look polished and professional.
First, you’ll need to weave in any loose ends. Use a yarn needle to carefully thread each end through the stitches, making sure to avoid distorting the fabric. Once all the ends are woven in, you can cut off any excess yarn.
Next, you may want to block your sweater to give it a smoother, more even appearance. Wet blocking is the most common method for blocking acrylic and wool blend yarns. Fill a basin with lukewarm water and a small amount of mild detergent, then gently soak your sweater. Gently squeeze out the excess water and lay the sweater flat on a clean towel. Shape the sweater to the desired dimensions and let it dry completely. Be sure to read the yarn label for any specific blocking instructions for your chosen yarn.
Finally, you can add any additional embellishments to personalize your sweater. This could include buttons, a decorative trim, or embroidery. Use a sewing needle and thread to attach buttons or sew on a trim. If you want to add embroidery, use a tapestry needle and embroidery floss to create your design.
Congratulations, you’ve completed your easy knit sweater! Now you can confidently wear and show off your handmade creation.