
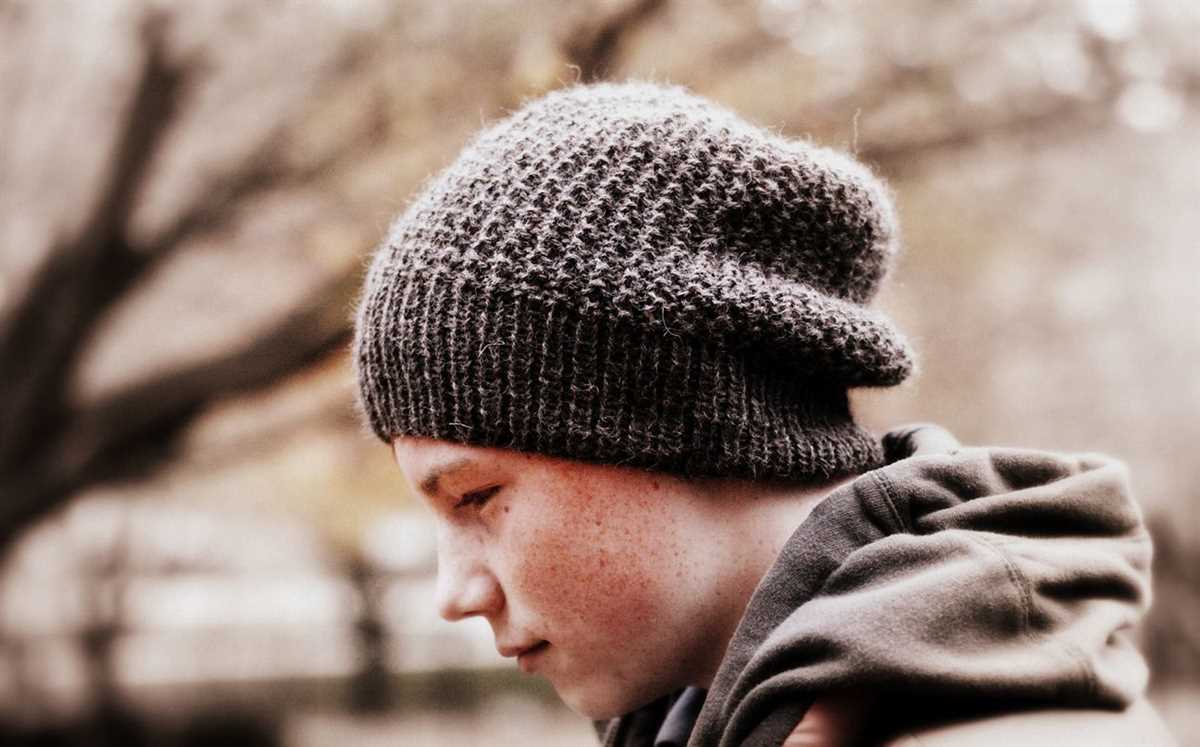
Knitting hats is a fun and rewarding project for knitters of all skill levels. Whether you’re a beginner looking to practice your knitting skills or an experienced knitter looking for a quick and easy project, free patterns for knit hats are a great place to start. These patterns offer a variety of styles, from classic beanies to slouchy hats and even cozy earflap designs.
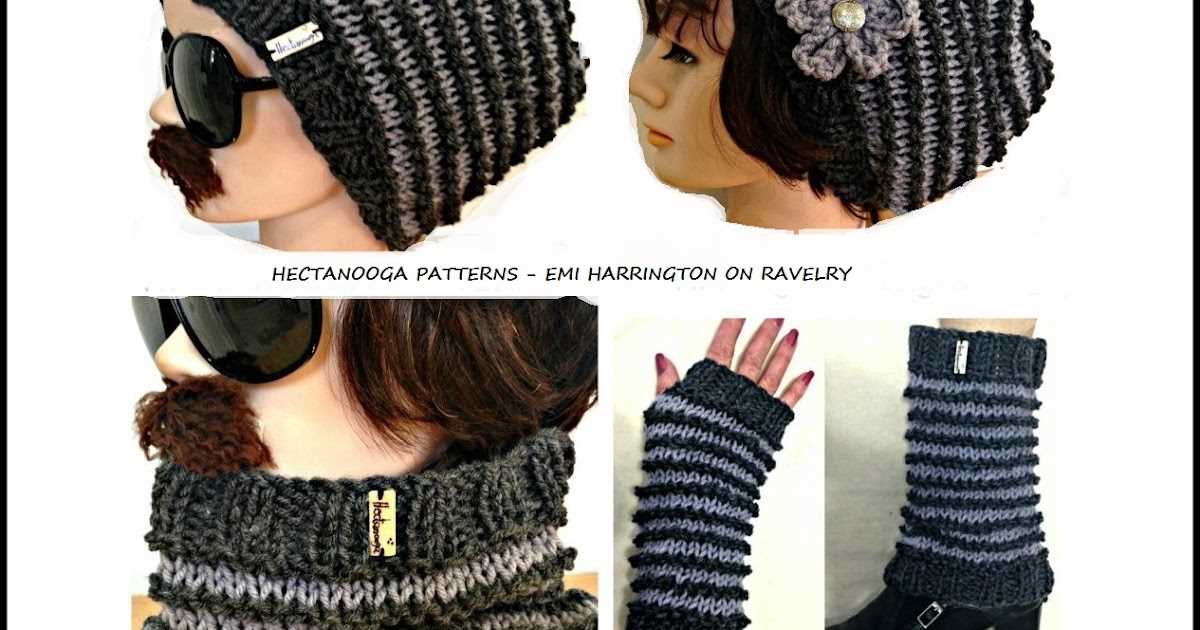
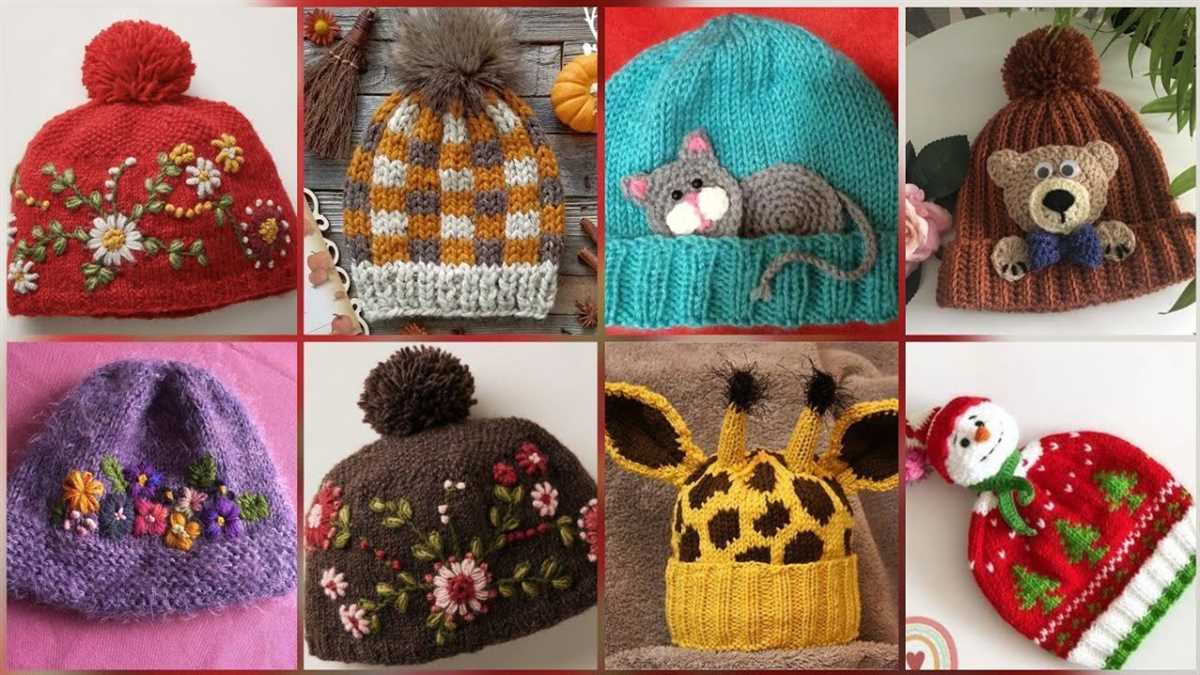
One of the great things about knitting hats is that they make perfect gifts for family and friends. You can personalize each hat by choosing different yarn colors and textures, or by embellishing them with pom-poms, buttons, or other decorations. With free patterns, you can create a variety of hats to suit anyone’s style and taste.
Whether you prefer circular needles or double-pointed needles, there are free patterns available for both. Circular needles are great for knitting hats in the round, while double-pointed needles are ideal for knitting hats with a traditional seam. Whichever method you prefer, these free patterns will guide you through the process step by step, making it easy to create beautiful, handmade hats.
So, whether you’re looking to stay warm in the winter months or just want to add some style to your wardrobe, try your hand at knitting hats with these easy and free patterns. With a little practice, you’ll be able to create hats that show off your skills and keep you cozy all season long.
Easy Knit Hats Free Patterns
Knitting hats can be a fun and rewarding project for knitters of all skill levels. Whether you are a beginner or an experienced knitter, there are plenty of easy knit hat patterns available for free online. These patterns often use simple stitches and techniques, making them perfect for quick and enjoyable knitting projects.
One popular easy knit hat pattern is the ribbed brim hat. This pattern typically starts with a ribbed brim, which is created by alternating knitting and purling stitches. The rest of the hat is then worked in a simple stockinette stitch, making it a great project for beginners who are looking to practice their knitting skills. This pattern can be easily customized by adding stripes, color changes, or other embellishments.
Another easy knit hat pattern is the garter stitch hat. The garter stitch is created by knitting every row, resulting in a textured fabric that is both warm and stretchy. This pattern is perfect for beginners, as it only requires knowledge of the basic knit stitch. The garter stitch hat can be knit in any color or yarn weight, allowing for endless customization options.
Free Patterns for Easy Knit Hats
- Ribbed Brim Hat: This pattern can be found on various knitting websites and blogs. It typically requires worsted weight yarn and size 8 knitting needles.
- Garter Stitch Hat: This pattern is available on many knitting pattern databases. It can be knit using any weight of yarn and appropriate knitting needles.
- Beginner’s Basic Hat: This pattern is great for first-time hat knitters. It uses only knit and purl stitches and is perfect for practicing basic knitting techniques.
In conclusion, easy knit hats free patterns are widely available online and are suitable for knitters of all skill levels. These patterns often use simple stitches and techniques, making them perfect for quick and enjoyable knitting projects. Whether you choose to knit a ribbed brim hat, a garter stitch hat, or another beginner-friendly pattern, you are sure to create a cozy and stylish hat to keep you warm during the colder months.
The Benefits of Knitting Your Own Hats

Knitting your own hats can be a rewarding and enjoyable hobby that comes with many benefits. Whether you are an experienced knitter or just starting out, making your own hats allows you to have complete control over the design, materials, and fit of the finished product. This personalized touch ensures that the hat will not only be stylish, but also perfectly suited to your individual preferences.
Customization: When you knit your own hat, you have the freedom to choose from a wide range of patterns, stitches, and colors. This means that you can create unique and one-of-a-kind hats that reflect your personal style and taste. You can experiment with different yarns and textures to achieve the exact look and feel you desire. Additionally, you can easily modify the pattern to make adjustments for size or add personalized details, such as a pom-pom or a decorative trim.
Quality: Hand-knit hats are often of higher quality than mass-produced ones. By using high-quality yarns and your own craftsmanship, you can create hats that are more durable and long-lasting. You have the ability to choose yarns that are soft, warm, and comfortable to wear, ensuring that your hats will keep you cozy during the colder months. Additionally, since you are in control of the entire knitting process, you can pay close attention to the details and ensure that your hat is meticulously crafted.
Cost savings: While knitting your own hats may require an upfront investment in knitting needles and yarn, in the long run, it can save you money. Instead of purchasing expensive designer hats or constantly replacing cheaply made ones, you can create hats that will stand the test of time. Plus, you can take advantage of sales and discounts on yarn to reduce the cost even further.
In conclusion, knitting your own hats provides a range of benefits, including customization, higher quality, and cost savings. It is a creative and fulfilling hobby that allows you to express your individuality and create unique accessories that you can be proud of. So why not pick up your knitting needles and start crafting your own hats today?
Choosing the Right Yarn for Your Hat Project
When it comes to knitting a hat, one of the most important decisions you’ll make is choosing the right yarn. The type of yarn you use can greatly affect the look, feel, and functionality of your finished project. Here are a few factors to consider when selecting yarn for your hat:
Fiber Content
The first thing to consider is the fiber content of the yarn. Different fibers have different properties, and each can give your hat a unique look and feel. For a cozy and warm winter hat, you might choose a yarn with a high percentage of wool. If you’re looking for something more lightweight and breathable, a cotton or bamboo blend might be a better choice. Take into account the intended use of the hat and the preferences of the wearer when choosing the fiber content.
Weight
The weight of the yarn is another important consideration. The weight determines the thickness of the yarn and can affect the overall look of the hat. Bulky or super bulky yarns are great for creating chunky hats with lots of texture, while finer weights like fingering or sport yarns are better suited for lightweight hats or intricate stitch patterns. Consider the desired drape and warmth of your hat when choosing the weight of the yarn.
Color and Pattern
Finally, don’t forget to consider the color and pattern of the yarn. The right color can complement the style and skin tone of the wearer, while a fun pattern or variegated yarn can add visual interest to the hat. Think about the overall aesthetic you want to achieve and choose a yarn that aligns with your vision.
Ultimately, choosing the right yarn for your hat project is a personal decision. Take the time to explore different options, feel the texture of the yarn, and consider how it will work with your chosen knitting pattern. With the right yarn, you’ll be able to create a hat that is not only beautiful but also functional and enjoyable to wear.
Essential Knitting Needles and Tools for Hat Making
When it comes to making knit hats, having the right tools and needles is essential for a successful project. Whether you’re a beginner or an experienced knitter, having a good set of knitting needles, along with a few key tools, can make your hat-making process more enjoyable and efficient.
Knitting Needles: The type of knitting needles you choose for your hat project is important and can greatly impact the final result. Circular needles are often recommended for hat-making, as they allow you to easily knit in the round and create a seamless finished product. Look for circular knitting needles made from a durable material, such as bamboo or stainless steel, that are comfortable to hold and use.
Double-Pointed Needles
Another type of knitting needle that is commonly used for hat-making is double-pointed needles (DPNs). DPNs are perfect for creating the crown of a hat or for working on smaller sections of stitches, such as decreases or decreases. They come in sets of four or five and have pointed ends on both sides. Choose a set of DPNs that are the appropriate size for your chosen yarn and desired hat circumference.
Tape Measure and Stitch Markers
Measuring your head circumference and tracking your progress as you knit is important when making a hat. A tape measure is an essential tool for accurately measuring head size and ensuring that your hat will fit snugly. Additionally, stitch markers are helpful for marking key sections of your hat, such as the beginning of the round or any pattern repeats. They can be easily placed on your needles and moved as needed.
Darning Needle and Scissors
A darning needle, also known as a yarn needle, is necessary for weaving in loose ends and finishing your hat. This needle has a large eye and a blunt end, making it easy to thread and work with yarn. A good pair of scissors is also essential for trimming yarn and cutting any additional materials that may be used in your hat, such as pom poms or tassels.
By having the right knitting needles and tools, you can confidently tackle any hat-making project and create beautiful and cozy knit hats for yourself or others. Remember to choose needles that are comfortable and suitable for your project, and to keep your essential tools handy for a smooth knitting experience.
Basic Knitting Stitches for Beginners
When starting out with knitting, it’s important to learn the basic stitches that will serve as the foundation for many different projects. These stitches are relatively easy to learn and once mastered, can be combined and modified to create a wide variety of knitting patterns. Here are a few of the most commonly used basic stitches:
1. Knit Stitch
The knit stitch, also known as the garter stitch, is the most basic knitting stitch. It is created by inserting the right needle into the first stitch of the left needle from the front, wrapping the yarn around the right needle, and pulling it through to create a new stitch. This stitch creates a smooth, flat fabric that is reversible.
2. Purl Stitch
The purl stitch is the opposite of the knit stitch and is created by inserting the right needle into the first stitch of the left needle from the back, wrapping the yarn around the right needle, and pulling it through to create a new stitch. This stitch creates a bumpy texture and is often used in combination with the knit stitch to create different patterns.
3. Stockinette Stitch
The stockinette stitch is created by alternating rows of knit stitches and purl stitches. When working in the round, every row is knit, creating a smooth fabric on the right side and a bumpy fabric on the wrong side. This stitch is commonly used for sweaters, scarves, and other garments.
4. Ribbing
Ribbing is a combination of knit and purl stitches that creates a stretchy fabric. It is commonly used for cuffs, collars, and waistbands. The most common ribbing pattern is the 1×1 rib, which alternates between one knit stitch and one purl stitch.
By practicing these basic knitting stitches, beginners will gain the skills and confidence needed to tackle more complex knitting patterns and projects. With time and practice, the possibilities for creating beautiful knit items are endless.
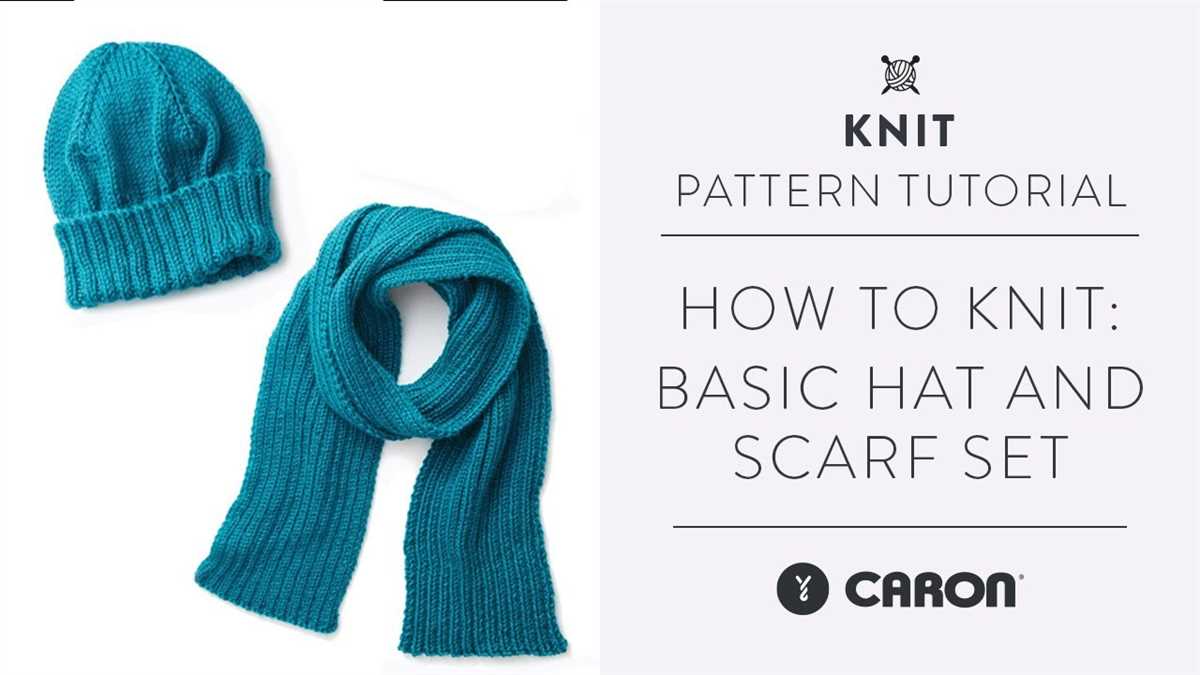
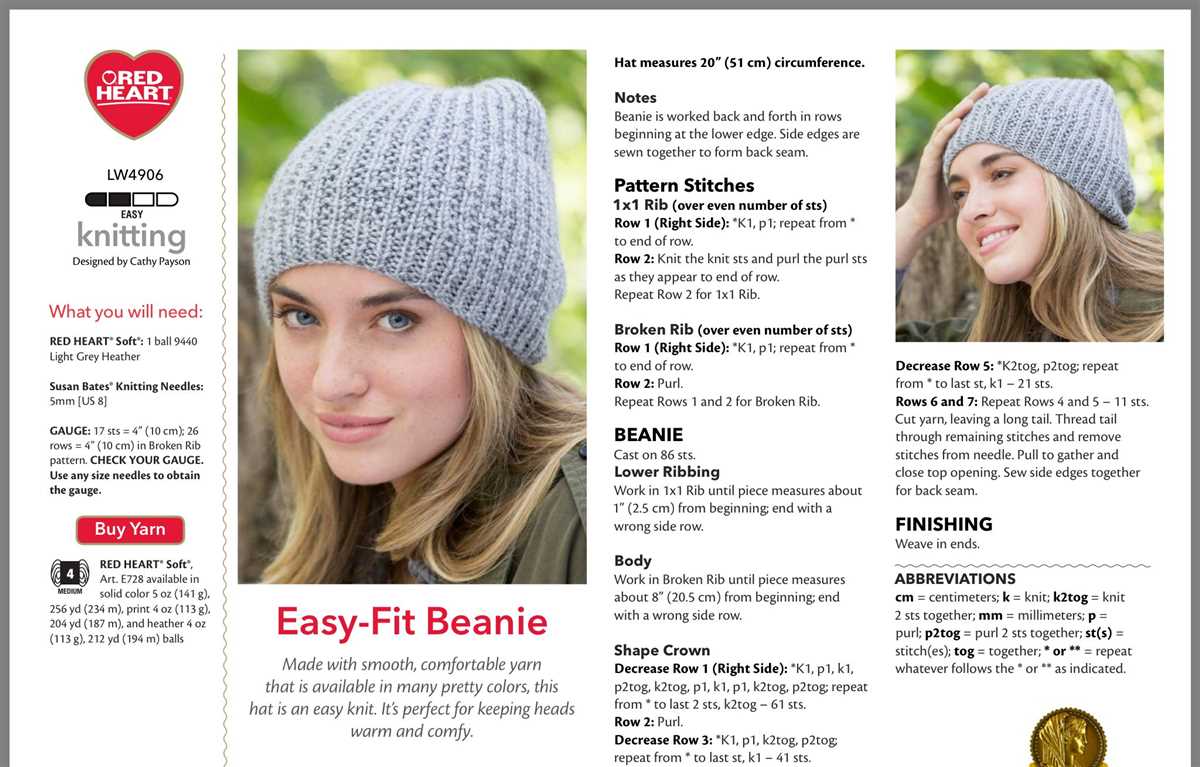
Simple Ribbed Hat Pattern for Beginners
Knitting your own hat can be a fun and rewarding project. If you’re a beginner and looking for an easy pattern to start with, a simple ribbed hat might be just what you need. The ribbed pattern adds texture and stretch to the hat, making it comfortable to wear and fitting for a variety of head sizes.
This pattern requires basic knitting skills such as casting on, knitting, purling, and binding off. It can be completed using straight or circular needles, depending on your preference. Here’s a step-by-step guide to help you get started:
Materials:
- Worsted weight yarn in your desired color
- Size US 8 (5mm) knitting needles
- Tapestry needle for weaving in ends
Instructions:
- Cast on 80 stitches.
- Row 1: *K2, P2* – repeat across the row.
- Row 2: *P2, K2* – repeat across the row.
- Repeat rows 1 and 2 until the hat measures approximately 8 inches from the cast-on edge. You can adjust the length to your preference.
- Next row: *K2tog* – repeat across the row. (40 stitches remaining)
- Next row: *K1, P2tog* – repeat across the row. (27 stitches remaining)
- Next row: *K2tog* – repeat across the row. (14 stitches remaining)
- Cut the yarn, leaving a long tail. Thread the tail through a tapestry needle and slip the remaining stitches onto the needle. Pull tight to close the top of the hat.
- Weave in any loose ends.
And there you have it – a simple ribbed hat that’s perfect for beginners! Feel free to add embellishments such as a pom-pom or a decorative button to personalize your hat. Happy knitting!
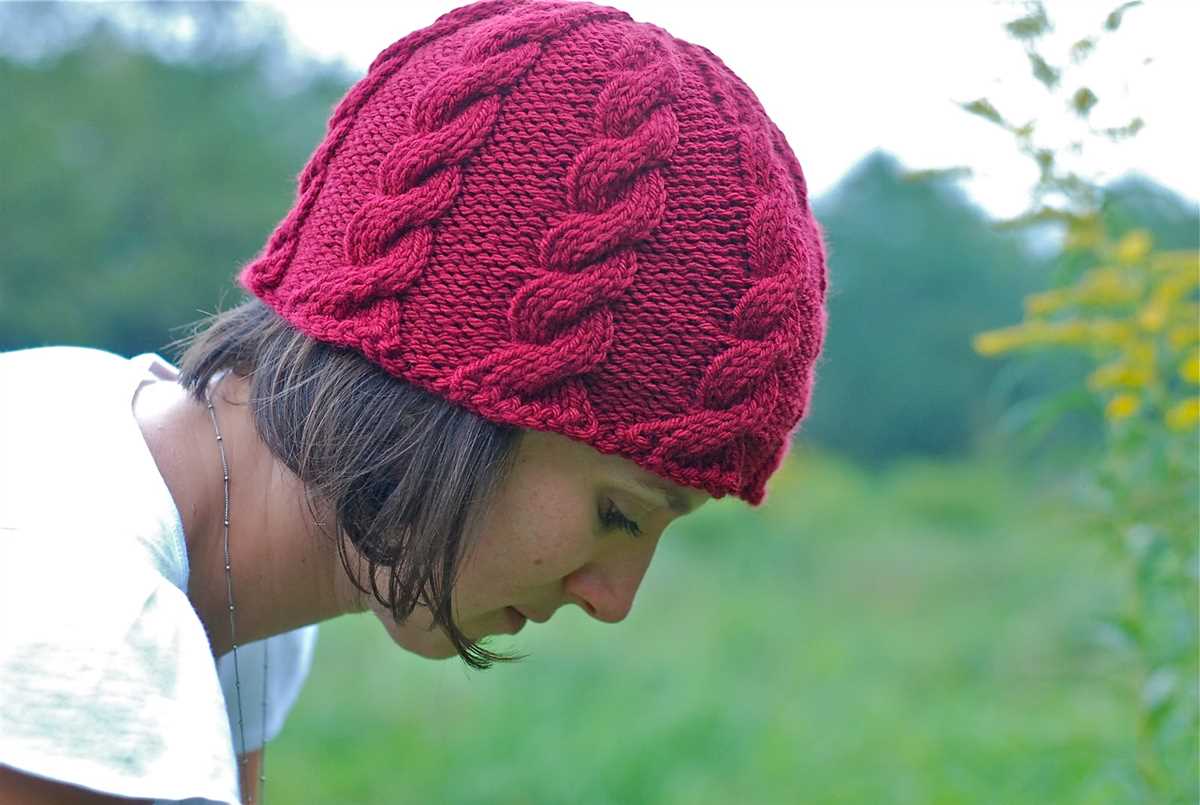
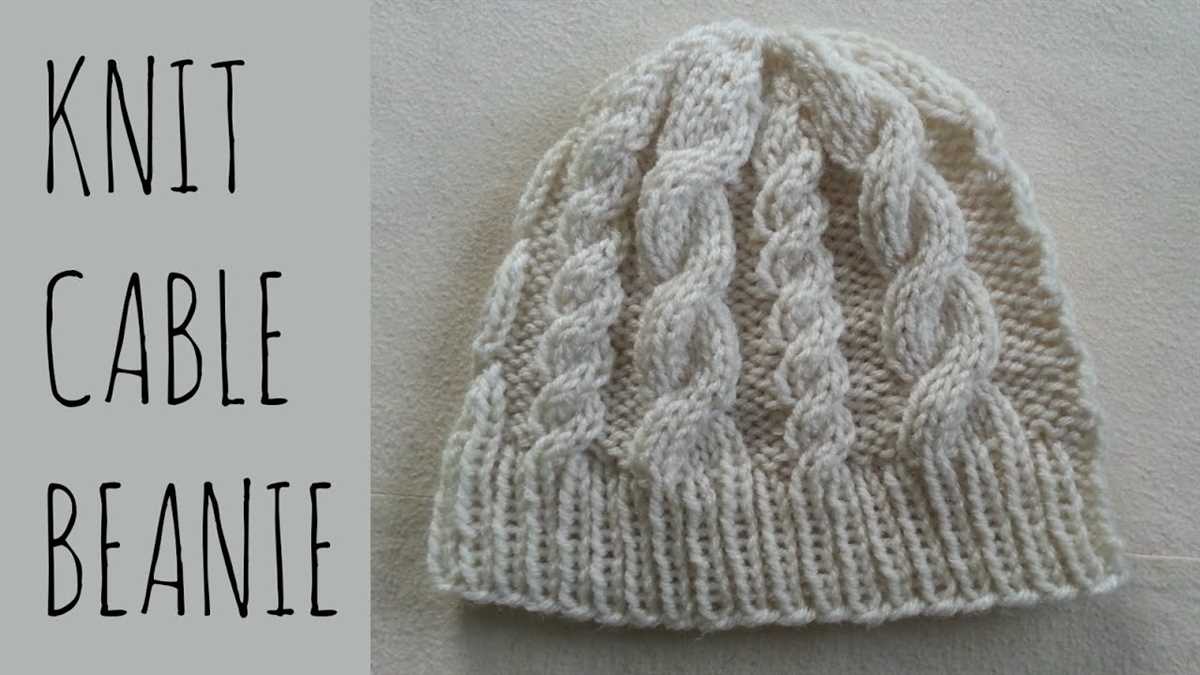
Warm and Cozy Cabled Hat Pattern
Stay warm and stylish with this beautiful cabled hat pattern. The intricate cable design adds texture and interest to the hat, making it a fashionable accessory for the colder months. The pattern is easy to follow, making it perfect for knitters of all skill levels. Whether you’re a beginner or an experienced knitter, you’ll love making this cozy hat.
To create this hat, you’ll need a few basic supplies. You’ll need a set of knitting needles in the appropriate size for your yarn, as well as a cable needle. You’ll also need a soft and warm yarn in your chosen color. Choose a yarn that will keep you cozy and comfortable in the winter weather.
The pattern starts with a ribbed brim, which creates a snug and comfortable fit. The hat is then worked in a beautiful cable pattern, which adds depth and dimension to the design. The cable pattern may look complex, but it’s actually quite simple to knit. The pattern includes clear instructions and even a chart to help you along the way.
Once you finish knitting the cable pattern, you’ll shape the crown of the hat by decreasing stitches. This creates a tapered and flattering fit. The pattern provides instructions for finishing the hat, including how to sew up the seam and weave in any loose ends.
This cabled hat pattern is a great project for knitters who want to improve their cable knitting skills. The finished hat is not only warm and cozy, but also stylish and on-trend. With this pattern, you can create a beautiful accessory that will keep you warm all winter long.
- Stylish cable design adds texture and interest
- Easy-to-follow pattern for all skill levels
- Requires basic supplies
- Ribbed brim for a snug fit
- Instructions and chart for cable pattern
- Shaping the crown for a flattering fit
- A great project to improve cable knitting skills
Stylish Slouchy Hat Pattern for Fashionable Individuals
For those looking to add a touch of style to their winter wardrobe, a stylish slouchy hat pattern is the perfect accessory. With its relaxed and fashionable design, this hat is ideal for those who want to make a statement while staying warm.
The pattern features a unique combination of stitches that create a textured and eye-catching design. Whether you prefer a solid color or a multi-colored yarn, this pattern allows for endless customization options. You can choose to add embellishments, such as a pom-pom or a decorative button, to make the hat truly your own.
Materials:
- Chunky weight yarn
- Size 8 circular knitting needles
- Size 8 double-pointed knitting needles
- Stitch markers
- Darning needle
Instructions:
- Cast on 80 stitches using the circular needles.
- Place a stitch marker at the beginning of the round.
- Knit in a 2×2 rib stitch pattern for 1 inch.
- Switch to the double-pointed needles and begin the main stitch pattern.
- Continue knitting in the main stitch pattern until the hat measures 10 inches from the cast on edge.
- Decrease stitches evenly around the hat until only a few stitches remain.
- Cut the yarn, leaving a long tail. Thread the tail through the darning needle and slip the remaining stitches onto the needle. Pull tight to close the top of the hat.
- Weave in any remaining ends.
With the stylish slouchy hat pattern, you can create a fashionable accessory that is both trendy and functional. Whether you’re heading out for a casual day of shopping or attending a winter event, this hat will keep you warm and stylish all season long.
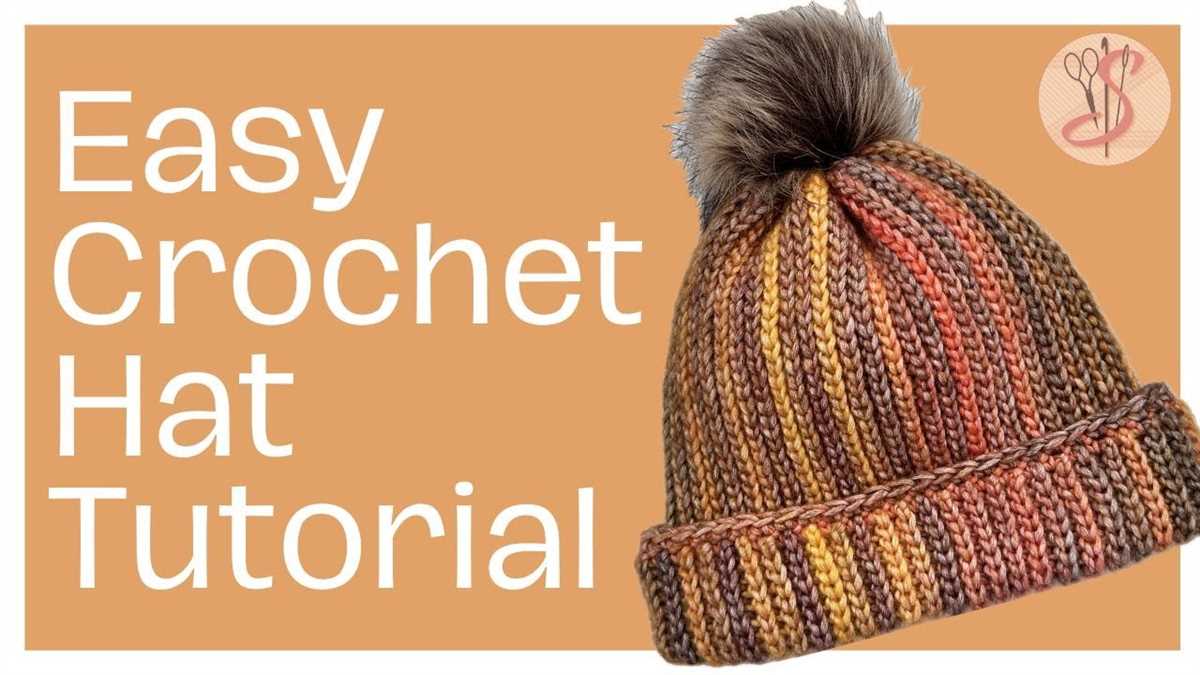
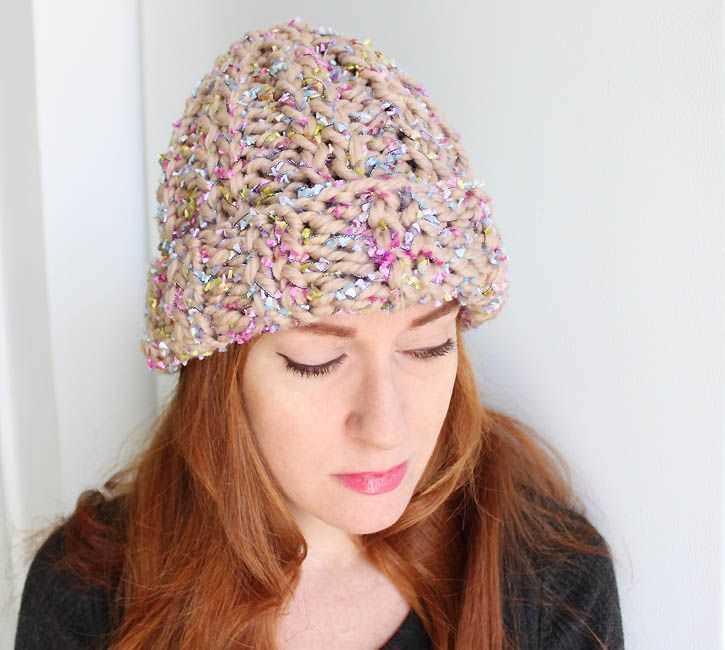
Chunky Pom Pom Hat Pattern for a Fun and Playful Look
Stay cozy and stylish this winter with an adorable chunky pom pom hat. This hat pattern is perfect for those who want a fun and playful look while keeping warm. The chunky knit design adds a trendy touch to any outfit, and the pom pom on top adds a cute and whimsical flair.
One of the great things about this hat pattern is that it is easy to knit, making it a perfect project for beginners or those who are looking for a quick and satisfying knit. The pattern uses basic knitting stitches, such as knit and purl, and only requires a limited number of supplies.
To start knitting your chunky pom pom hat, you will need super bulky weight yarn in the color of your choice and a pair of size 10 knitting needles. Begin by casting on the desired number of stitches and working in a rib stitch pattern for a stretchy and comfortable fit.
Once you have completed the rib stitch, continue knitting in stockinette stitch until the hat reaches your desired length. For a slouchy look, you can add a few extra inches to the length. When you are ready to finish the hat, bind off and sew the seams together using a tapestry needle.
The final step is to attach the pom pom on top of the hat. To make your own pom pom, you can use a pom pom maker or simply wrap yarn around your fingers and tie it in the middle. Trim the ends to create a fluffy pom pom, and then sew it securely onto the hat.
Once your chunky pom pom hat is complete, you can proudly wear it and show off your knitting skills. This hat is not only functional but also adds a playful and stylish touch to any winter ensemble. Whether you’re heading out for a snowy adventure or simply want to stay cozy at home, this hat is a must-have accessory.
Fair Isle Hat Pattern for a Colorful and Unique Design

When it comes to knitting hats, a Fair Isle pattern is a great choice for creating a colorful and unique design. The Fair Isle technique originated in the Fair Isle region of Scotland and involves using multiple colors in a single row of knitting to create intricate and beautiful patterns. This technique is perfect for adding an interesting and eye-catching design to your knitted hats.
To create a Fair Isle hat, you will need to choose your color palette. It’s best to choose colors that complement each other and create a harmonious combination. Traditionally, Fair Isle patterns often feature a combination of natural or earthy tones, but feel free to get creative and choose colors that reflect your personal style and taste.
Once you have your color palette, you can start knitting your Fair Isle hat. Begin by casting on the desired number of stitches and establishing your ribbing pattern. Then, you can start incorporating the Fair Isle technique by following a chart or creating your own pattern. Remember to carry the unused yarns along the back of your work to avoid long floats.
A Fair Isle hat not only adds a pop of color to your winter wardrobe, but it also provides an opportunity to showcase your knitting skills. Whether you’re a beginner or an experienced knitter, this pattern allows you to experiment with color and design, creating a hat that is truly one-of-a-kind. So grab your knitting needles and yarn, and get ready to create a colorful and unique Fair Isle hat that will keep you warm and stylish all winter long.
Knitting a Hat in the Round vs. Flat: Pros and Cons
Knitting in the round:
Pros:
- Seamless finish: When knitting in the round, you are creating a tube, which means there are no seams to sew at the end. This gives your hat a clean and professional look.
- Efficiency: Knitting in the round allows you to work continuously without having to turn your work. There is no need to purl, and you can easily create ribbing or other stitch patterns.
- Easy to try on: With a hat knitted in the round, you can try it on as you go. This makes it easier to adjust the size and make modifications if needed.
Cons:
- Needles: Knitting in the round requires either double-pointed needles or circular needles, depending on the circumference of your project. If you don’t already have these needles, it may require an additional purchase.
- Learning curve: If you’re new to knitting in the round, there may be a learning curve as you adjust to working with multiple needles or a circular needle.
Knitting flat:
Pros:
- Accessibility: Knitting flat requires basic knitting skills and can be done with straight needles, which are more common and easier to find. This method is great for beginners or knitters who are more comfortable with flat knitting.
- Easy to visualize: When knitting flat, it’s easier to see and understand the stitch pattern, as you are working row by row.
- No special tools needed: If you already have straight knitting needles in the appropriate size, you can start knitting a hat flat without needing to make any additional purchases.
Cons:
- Seaming: When knitting a hat flat, you will need to sew a seam to connect the ends of the hat together. This can be time-consuming and may require additional skills, such as mattress stitch or whip stitch.
- Limited stitch patterns: Knitting flat can be limiting in terms of stitch patterns, as you typically need to purl on every other row to create a stockinette stitch. This may not be ideal if you want to incorporate more complex patterns or textures into your hat.
In conclusion, the decision to knit a hat in the round or flat depends on your personal preferences, skill level, and the specific project you’re working on. Consider the pros and cons outlined above to help you make an informed choice for your next hat knitting adventure.
Tips and Tricks for Finishing and Adding Embellishments to Your Knit Hats
Once you have completed knitting your hat, there are a few finishing touches you can add to make it even more special. Here are some tips and tricks for finishing and adding embellishments to your knit hats:
1. Blocking
Blocking is the process of shaping and stretching your knitted piece to give it a more polished and even appearance. To block your knit hat, you can use a blocking mat or towel and some rust-resistant pins. Wet your hat, gently squeeze out the excess water, and shape it to the desired size and form. Then, pin it to the blocking mat and let it dry completely. Blocking can help even out any uneven stitches and give your hat a more professional look.
2. Sewing in Ends
After finishing your hat, be sure to properly sew in all the loose ends. Using a tapestry needle, carefully weave the ends into the stitches of your hat to secure them. This will prevent them from coming undone over time and give your hat a neat and clean finish.
3. Adding Pom Poms
Pom poms are a fun and popular embellishment for knit hats. You can make your own pom poms using a pom pom maker or buy pre-made ones. To attach a pom pom, thread a tapestry needle with a strand of yarn, pass it through the center of the pom pom, and then stitch it securely to the top of your hat. Be sure to double knot the yarn to ensure the pom pom stays in place.
4. Embroidery and Appliqués
If you want to add some extra flair to your hat, consider embroidering or adding appliqués. You can use contrasting yarn to create beautiful designs or sew on small patches or embellishments. Be creative and let your personal style shine through!
5. Blocking and Storing
Finally, once you have finished embellishing your hat, it’s important to store it properly to maintain its shape. You can use a hat block or stuff the hat with tissue paper to help it retain its shape. Store your hats in a cool, dry place to prevent any damage.
These tips and tricks for finishing and adding embellishments to your knit hats will help you create hats that are not only warm and cozy but also stylish and unique. Have fun experimenting with different techniques and make each hat your own!