
Double-pointed needles, also known as DPNs, are a versatile tool for knitters. They allow you to create seamless, tubular knitted pieces, such as socks, hats, and mittens. While DPN knitting may seem daunting to beginners, it is a skill that can be easily mastered with practice.
This easy DPN knitting pattern is perfect for those new to using double-pointed needles. It is a simple and straightforward project that will help you gain confidence in your DPN knitting skills.
For this pattern, you will need a set of five double-pointed needles and a ball of yarn in the color of your choice. The pattern is designed for adult-sized mittens, but can be easily adjusted for smaller or larger sizes.
By following this easy DPN knitting pattern, you will learn how to cast on stitches using DPNs, knit in the round, create a ribbed cuff, shape the thumb gusset, and finish off the mittens with a neat bind-off. So grab your needles and yarn, and let’s get knitting!
Easy DPN Knitting Pattern
Knitting with double-pointed needles (DPNs) can seem intimidating at first, but once you grasp the basic technique, it opens up a world of possibilities for creating seamless projects. This easy DPN knitting pattern is a great way to get started and practice your skills.
Materials:
- Set of double-pointed knitting needles (size US 8)
- Approximately 100 yards of worsted weight yarn
- Tapestry needle
- Scissors
Instructions:
1. Cast on 48 stitches using the long-tail cast-on method, dividing the stitches evenly onto three double-pointed needles (16 stitches per needle).
2. Join in the round, being careful not to twist the stitches.
3. Round 1: *Knit 2, purl 2; repeat from * to the end of the round.
4. Round 2: Knit all stitches.
5. Repeat Rounds 1 and 2 until the work measures 6 inches from the cast-on edge.
6. Decrease Round: *Knit 2 together, purl 2; repeat from * to the end of the round (36 stitches remain).
7. Next Round: Knit all stitches.
8. Repeat the last 2 rounds until only 12 stitches remain.
9. Finishing: Cut the yarn, leaving a long tail. Thread the tail through the tapestry needle and slip the needle through the remaining stitches, removing them from the knitting needles. Pull tight to close the top of the project and secure the yarn. Weave in any loose ends with the tapestry needle.
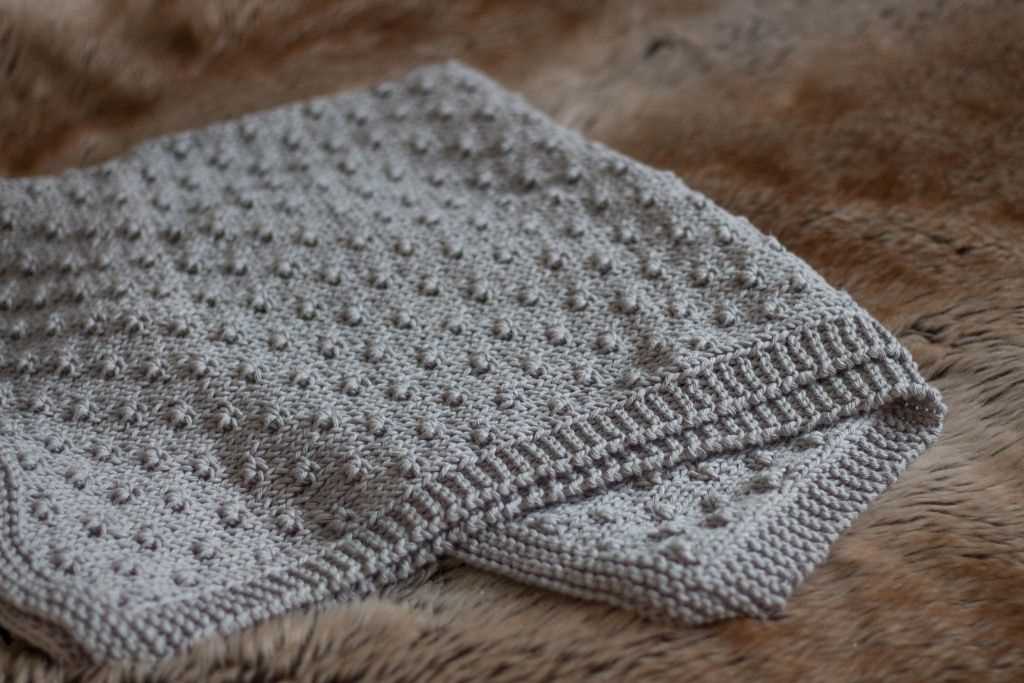
This easy DPN knitting pattern is a versatile blank canvas for your creativity, allowing you to experiment with different stitch patterns and yarns. Whether you’re knitting socks, hats, or fingerless gloves, mastering the art of knitting with double-pointed needles will open up a world of possibilities for your knitting projects.
What Are DPNs and Why Use Them?
Double-pointed needles (DPNs) are a type of knitting needles that have points at both ends. They are usually shorter in length, typically ranging from 5 to 8 inches, and come in sets of four or five needles. DPNs are commonly used for small, circular knitting projects, such as knitting in the round for socks, hats, mittens, and other similar items.
One of the main advantages of using DPNs is their ability to create seamless and continuous knitting. By using DPNs, knitters can avoid the need for seams or joining stitches, allowing them to create finished projects that have a clean and professional look. Additionally, DPNs provide a great deal of flexibility in terms of stitch count and pattern complexity, as they allow for easy shaping and decreases without the limitations of traditional straight needles.
When working with DPNs, it is important to pay attention to the needle size and material. The size of the needles should correspond to the desired gauge and the thickness of the yarn being used. Additionally, the material of the needles can vary, with options such as bamboo, wood, or metal. Each material has its own unique characteristics, such as flexibility, smoothness, and warmth, so knitters can choose based on their personal preferences and the requirements of the project.
Benefits of Using DPNs:
- Ability to create seamless and continuous knitting
- Flexibility in stitch count and pattern complexity
- Great for small, circular knitting projects
- Allows for easy shaping and decreases
Overall, DPNs are a valuable tool in a knitter’s arsenal, offering versatility and the ability to create intricate and seamless projects. Whether you’re a beginner or an experienced knitter, learning to use DPNs can open up a world of possibilities in your knitting projects.
Choosing the Right DPNs

When it comes to choosing the right double pointed needles (DPNs) for your next knitting project, there are a few factors to consider. The right needles can make a big difference in your knitting experience, so it’s important to choose wisely.
One of the first things to consider is the material of the DPNs. There are various options available, including metal, wood, and bamboo. Each material has its own unique qualities. Metal needles are strong and durable, making them a great choice for knitting with heavier yarns. Wood needles have a warm and smooth feel, making them great for more delicate projects. Bamboo needles are lightweight and flexible, which can be helpful for reducing strain on your hands and wrists.
Another important factor to consider is the size of the DPNs. The size of the needles will depend on the gauge and thickness of the yarn you are using for your project. It’s important to choose DPNs that are the correct size for your yarn in order to achieve the desired tension and stitch definition. Be sure to check the recommended needle size listed on your yarn label or pattern to ensure you choose the right DPNs.
Next, consider the length of the DPNs. They are typically available in lengths ranging from 4 to 8 inches. The length you choose will depend on the size of your project and personal preference. Smaller DPNs are great for knitting small items like socks or mittens, while longer DPNs are better suited for larger projects like hats or sweaters.
Lastly, it’s important to consider the number of DPNs in a set. DPNs are usually sold in sets of four or five, although sets of six or more are also available. The number of DPNs you need will depend on the pattern you are working on. Some patterns may require four DPNs, while others may require five or six. It’s always a good idea to have a few extra DPNs on hand, just in case.
In conclusion, when choosing the right DPNs, consider the material, size, length, and number of needles in a set. By taking these factors into account, you can ensure a more enjoyable and successful knitting experience.
Getting Started with DPN Knitting
Double-pointed needle (DPN) knitting is a technique used to knit in the round on a small circumference, such as socks, hats, or gloves. It involves using multiple needles, typically four or five, to distribute the stitches evenly and create a continuous loop. DPN knitting may seem intimidating at first, but with a little practice, it can become an enjoyable and versatile method to expand your knitting skills.
To get started with DPN knitting, you will need a set of double-pointed needles in the appropriate size for your project, as well as yarn and any other knitting supplies necessary. It is also helpful to have stitch markers to indicate the beginning of rounds and any pattern repeats. Before beginning, make sure you are comfortable with basic knitting techniques, such as casting on, knitting, purling, and binding off.
Step 1: Casting On
Once you have all your materials ready, you can begin by casting on the required number of stitches onto one of the DPNs. Make sure to leave a long tail for later weaving in. Once you have cast on all the stitches, evenly distribute them onto the other needles, with an equal number of stitches on each needle. Use stitch markers to indicate the beginning of the round if needed.
Step 2: Joining in the Round
To join in the round, hold the DPNs with the working yarn attached to the rightmost needle. Take the leftmost needle and knit the first stitch of the first needle with the working yarn. This will create a continuous loop of stitches, which is the beginning of your project in the round. Make sure not to twist the stitches when joining, as this will affect the final result.
Step 3: Knitting in the Round
Once you have joined in the round, you can begin working the pattern according to the instructions. When knitting with DPNs, it is important to pay attention to which needle you are using, as it can be easy to mix them up. Take your time and keep track of your stitches to avoid any confusion. As you progress, you can shift the stitches onto different needles to make the knitting more manageable.
Step 4: Switching Needles
As you work your project, you will eventually need to switch needles as you reach the end of each needle. To do this, simply knit the last stitch of the current needle onto the first stitch of the next needle. This will ensure a smooth transition and prevent any gaps or holes from forming in your work.
Step 5: Finishing and Weaving In Ends
Once you have completed your project, it is time to finish and weave in the ends. Carefully bind off the stitches using your preferred method, making sure to maintain the elasticity of the edge. Then, use a tapestry needle to weave in the loose ends, hiding them within the stitches to create a neat and polished finish. Blocking your project can also help to even out the stitches and enhance the final result.
With these steps, you are now ready to embark on your DPN knitting journey. Remember to be patient and practice regularly to improve your skills. Soon enough, you will be able to tackle more complex patterns and create beautiful projects using double-pointed needles.
Casting On with DPNs
Using double-pointed needles (DPNs) may seem intimidating at first, but with a little practice, it becomes a breeze. Casting on with DPNs is similar to casting on with straight needles, but there are a few key differences to keep in mind.
Before you begin, make sure you have the correct number of DPNs for your project. Most patterns will specify the size and length of the needles you’ll need. It’s also a good idea to use DPNs that are made from a material with some grip, like bamboo or wood, to prevent your stitches from slipping off.
Start by making a slipknot and sliding it onto one of the DPNs. Hold the DPN with the slipknot in your right hand and the other DPNs in your left hand. Now, using your right hand, make a loop with the working yarn and slide it onto the first DPN.
Repeat this process, making loops and sliding them onto each DPN until you have the desired number of stitches. Make sure to distribute the stitches evenly among the DPNs to prevent any gaps or ladders in your work.
Once you have all your stitches on the DPNs, you’re ready to start knitting in the round. Hold the working yarn in your right hand and begin knitting with the first DPN. As you work, be mindful of the transition between the DPNs to maintain an even tension.
When you’re comfortable with casting on and knitting with DPNs, you’ll have a world of projects at your fingertips. From socks and mittens to hats and shawls, DPNs are a versatile tool for any knitter. Just keep practicing and soon you’ll be casting on with ease.
Knitting in the Round on Double Pointed Needles (DPNs)
Knitting in the round on double pointed needles (DPNs) is a popular technique used to create seamless projects such as hats, socks, and sleeves. It allows for continuous knitting in a circular motion, eliminating the need for seams. DPNs come in sets of four or five, and each needle has points on both ends, making it easy to knit in the round.
When starting a project with DPNs, it is important to divide your stitches evenly among the needles to ensure an even distribution of stitches. This can be done by either casting on the desired number of stitches directly onto the DPNs or by transferring stitches from a circular needle or stitch holder.
Once your stitches are divided, join the round by knitting the first stitch from the first needle onto the last stitch of the final needle. This will create a continuous circle of stitches. It is important to be careful not to twist your stitches at this point, as this will result in a twisted or misaligned pattern.
As you continue knitting in the round, you will work with two needles at a time, while the other needles hold the rest of the stitches. To transition between needles, simply leave the empty needle behind and pick up the next needle with the working yarn. This ensures a seamless transition and prevents holes from forming in your project.
Knitting in the round on DPNs can be a bit tricky at first, especially for beginners, but with practice, it becomes a versatile and efficient technique. With DPNs, you can easily create intricate patterns, such as cables and lace, that may be difficult to achieve with other knitting techniques. Grab your DPNs and start experimenting with this fun and versatile technique today!
Increasing and Decreasing with DPNs
When knitting with double-pointed needles (DPNs), it’s important to understand how to increase and decrease your stitches in order to shape your project. By using specific techniques, you can create various patterns and designs with ease.
Increasing with DPNs
One way to increase stitches when working with DPNs is to use the “knit front and back” method. To do this, knit the stitch as you normally would, but before slipping it off the needle, bring your right needle through the back loop of the same stitch and knit it again. This will create an additional stitch.
Another method for increasing with DPNs is the “make one” technique. To make one stitch, insert the right needle from front to back under the horizontal strand between the next two stitches. Then, knit into the back loop of this strand, creating a new stitch.
Decreasing with DPNs
When it comes to decreasing stitches with DPNs, there are several techniques to choose from. One common method is the “knit two together” decrease. Simply insert the right needle through the front loops of the next two stitches on the left needle, and knit them together as if they were one stitch.
Another popular decrease method is the “slip, slip, knit” decrease. To execute this decrease, slip the next two stitches, one at a time, from the left needle to the right needle as if to knit. Then, insert the left needle into the front loops of these two slipped stitches and knit them together.
By mastering these increasing and decreasing techniques with DPNs, you can add depth and dimension to your knitting projects. Experiment with different patterns and stitches to achieve the desired effects and create beautifully textured garments and accessories.
Switching Needles with DPNs
When working with double-pointed needles (DPNs) in knitting, you will often need to switch between needles as you progress through your project. This is especially true when knitting in the round, such as when making a hat or a sock. Switching needles with DPNs requires a bit of coordination and attention to detail, but it becomes easier with practice.
One important tip when switching needles with DPNs is to make sure you are always knitting with the working needle. The working needle is the one holding the live stitches. As you complete one needle and move on to the next, transfer the working needle from your right hand to your left hand, and pick up the next needle with your right hand to continue knitting.
As you switch between needles, it’s also important to make sure you don’t accidentally twist your stitches. Twisted stitches can affect the appearance and fit of your finished project. To prevent this, always make sure the working yarn is positioned correctly before starting a new needle. This means that the working yarn should be coming from the last stitch on the previous needle, not from the middle or the back of the needle.
One technique that can help with switching needles smoothly is to use stitch markers. Place a stitch marker at the beginning of each needle section to help you keep track of your progress and avoid any confusion. This way, you will always know which needle is the working needle and which one to pick up next.
With a bit of practice, switching needles with DPNs will become second nature. It may feel awkward at first, but as you knit more projects using DPNs, you will develop a rhythm and find a technique that works best for you. So don’t be discouraged if it feels challenging at first, keep practicing and soon you will be able to tackle more complex DPN patterns with ease!
Finishing Off with DPNs
When you have finished knitting with double-pointed needles (DPNs), it’s important to properly finish off your project to ensure a clean and professional-looking result. Here are some tips to help you finish off your knitting with DPNs:
Weaving in Ends:
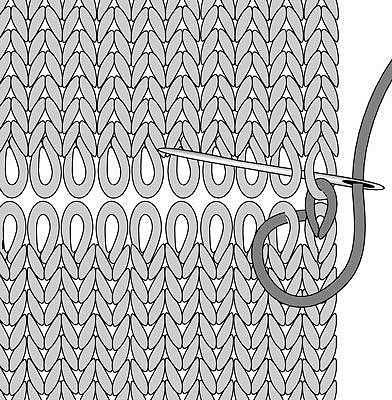
First, you’ll want to weave in any loose ends of yarn that you have from changing colors or joining new balls of yarn. Using a tapestry needle, carefully thread the end of the yarn through several stitches on the wrong side of the work, being sure to go in different directions to secure the end. Trim any excess yarn, leaving a tail of about 2-3 inches.
Blocking:
Blocking your finished knitting can help to even out the stitches and give your project a more polished look. To block your project, gently wash it according to the yarn’s care instructions, then lay it flat on a clean towel and shape it to the desired dimensions. Use pins to hold the edges in place if necessary, and allow it to dry completely before removing the pins.
Seaming:
If you have knitted separate pieces that need to be joined together, such as sleeves or a collar, you’ll need to seam them using a method like mattress stitch or whip stitch. Lay the pieces flat with the right sides facing each other, then use a tapestry needle and matching yarn to stitch them together. Be sure to keep your stitches even and consistent for a professional finish.
Finishing Details:
Finally, take a few moments to add any finishing details that your pattern calls for. This could include adding buttons or other closures, sewing on decorative patches or appliques, or weaving in additional yarn tails. Pay attention to the pattern instructions to ensure your finishing details are in the correct place and position.
By following these steps, you can successfully finish off your knitting project and achieve a clean and professional result using DPNs.
Common Mistakes to Avoid
Making mistakes is a natural part of learning, and knitting with double-pointed needles (DPNs) is no exception. However, by being aware of some common pitfalls, you can save yourself time and frustration. Here are a few mistakes to avoid when using DPNs:
1. Twisted Stitches:
One of the most common mistakes when using DPNs is accidentally twisting your stitches. This can happen when you transfer your work from one needle to another. To avoid this, always double-check that your stitches are aligned and facing the same direction before you start knitting with a new needle.
2. Dropped Stitches:
With multiple needles in play, it’s easy for a stitch to slip off unnoticed. To prevent dropped stitches, make sure to keep a close eye on your work as you knit. If you do drop a stitch, don’t panic – you can use a stitch marker or safety pin to hold it in place temporarily until you’re ready to fix it.
3. Uneven Tension:
Knitting with DPNs can result in uneven tension if you’re not careful. This can be especially noticeable when transitioning between needles. To maintain consistent tension, pay attention to your knitting and make any necessary adjustments as you go. Taking breaks and periodically checking your work can also help prevent tension issues.
4. Using Too Many Stitch Markers:
Stitch markers can be helpful for indicating important points in your pattern, but using too many can actually hinder your progress. It’s easy to lose track of which marker corresponds to which stitch. Instead, use markers sparingly and rely on other visual cues, such as the position of your working yarn or the shape of your project, to guide your knitting.
- Twisted Stitches
- Dropped Stitches
- Uneven Tension
- Using Too Many Stitch Markers
Advanced Techniques with DPNs
In addition to the basic techniques of knitting in the round on double-pointed needles (DPNs), there are several advanced techniques that you can explore to take your DPN knitting skills to the next level. These techniques will allow you to create more intricate and detailed patterns, as well as add a touch of elegance to your knitting projects.
One advanced technique is the “Magic Loop” method, which allows you to knit in the round using a long circular needle instead of DPNs. This technique is particularly useful when knitting small projects such as socks or mittens, as it eliminates the need for multiple DPNs and can make your knitting process more efficient. It involves sliding a section of the stitches onto the cable of the circular needle, creating a loop, and then knitting the stitches from the other end of the circular needle.
Other advanced techniques that you can try with DPNs include:
- Lace Knitting: Lace knitting involves intricate stitch patterns that create openwork designs. By working lace patterns with DPNs, you can create exquisite lace accessories such as shawls or delicate socks.
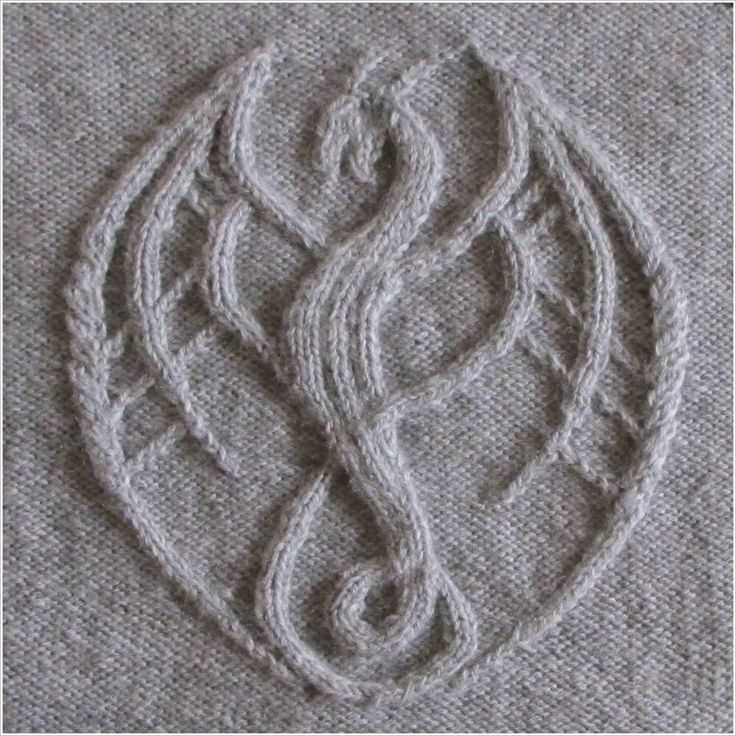
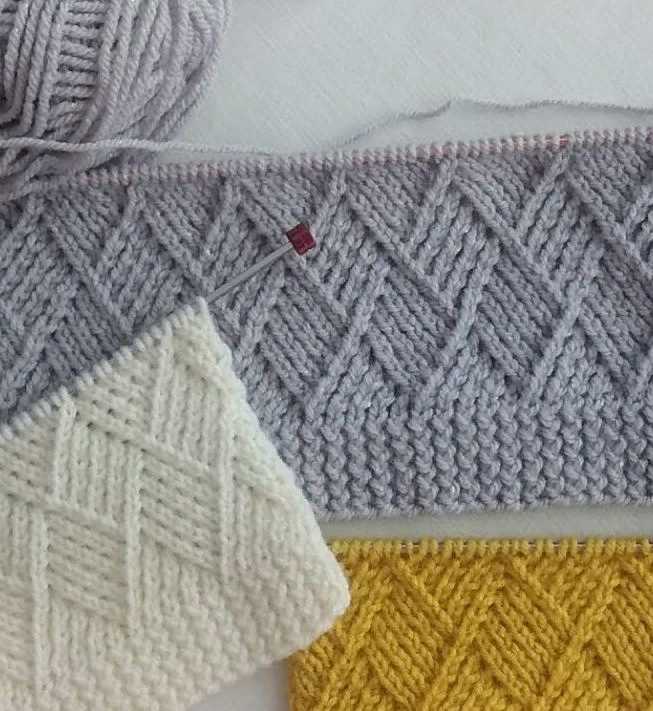
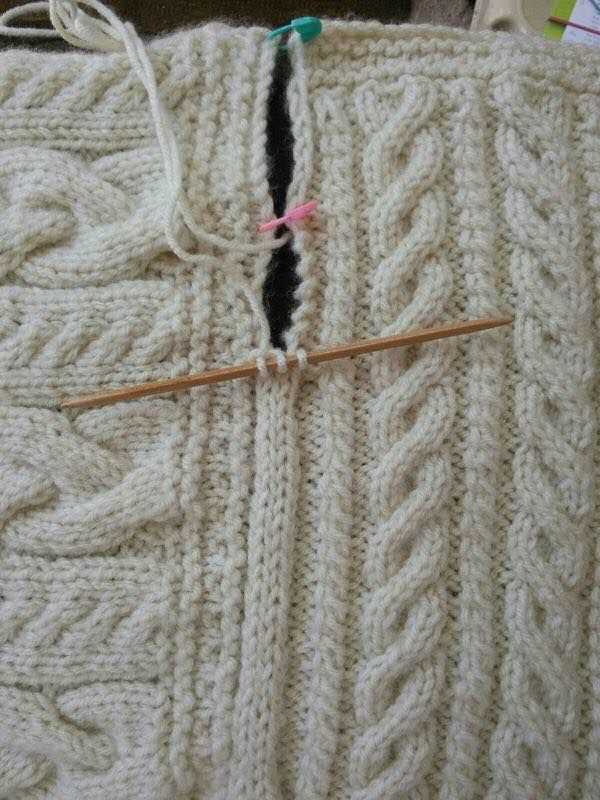
- Cabling: Cables are created by crossing stitches over each other, resulting in beautiful twisted designs. With DPNs, you can create complex cable patterns that add visual interest to your knitting projects.
- Colorwork: Using DPNs, you can explore colorwork techniques such as fair isle or stranded knitting. This allows you to create patterns and designs using multiple colors, resulting in vibrant and eye-catching projects.
- Knitting in the Round with Different Needle Sizes: By using different sizes of DPNs, you can create interesting patterns and textures within your knitting. This technique can be particularly effective when working on hats or cowls.
By incorporating these advanced techniques into your DPN knitting projects, you can expand your knitting repertoire and create unique and stunning items. Experiment with different patterns and designs, and don’t be afraid to challenge yourself with more complex projects. With practice, you’ll become a master of DPN knitting and be able to tackle any pattern with ease!