
If you’re new to knitting or looking for a quick and easy project, a cable scarf is a great choice. With just a few basic stitches and some simple cable techniques, you can create a beautiful and cozy scarf for yourself or as a gift. Whether you’re a beginner or an experienced knitter, this easy cable scarf pattern is sure to become a favorite.
This pattern uses a chunky weight yarn and size 10 needles, making it a quick and satisfying project. The cable design adds a touch of texture and interest to the scarf, while still being easy to create. The pattern is written in standard knitting abbreviations and includes both written instructions and a chart, making it suitable for knitters of all skill levels.
To get started, you’ll need to gather your supplies. You’ll need approximately 300-400 yards of chunky weight yarn, depending on how long you want your scarf to be. Choose a soft and cozy yarn in a color that you love. You’ll also need a pair of size 10 knitting needles, a cable needle, and a tapestry needle for finishing.
Once you have your supplies, you’re ready to begin knitting. The pattern begins with a few rows of ribbing, followed by the cable pattern. The cable pattern is simple and easy to memorize, so you’ll be able to knit without constantly referring to the pattern. The scarf is knit in one piece, so there’s no need to worry about sewing or finishing seams.
Easy Cable Scarf Knitting Pattern: A Stylish Accessory for Cold Weather
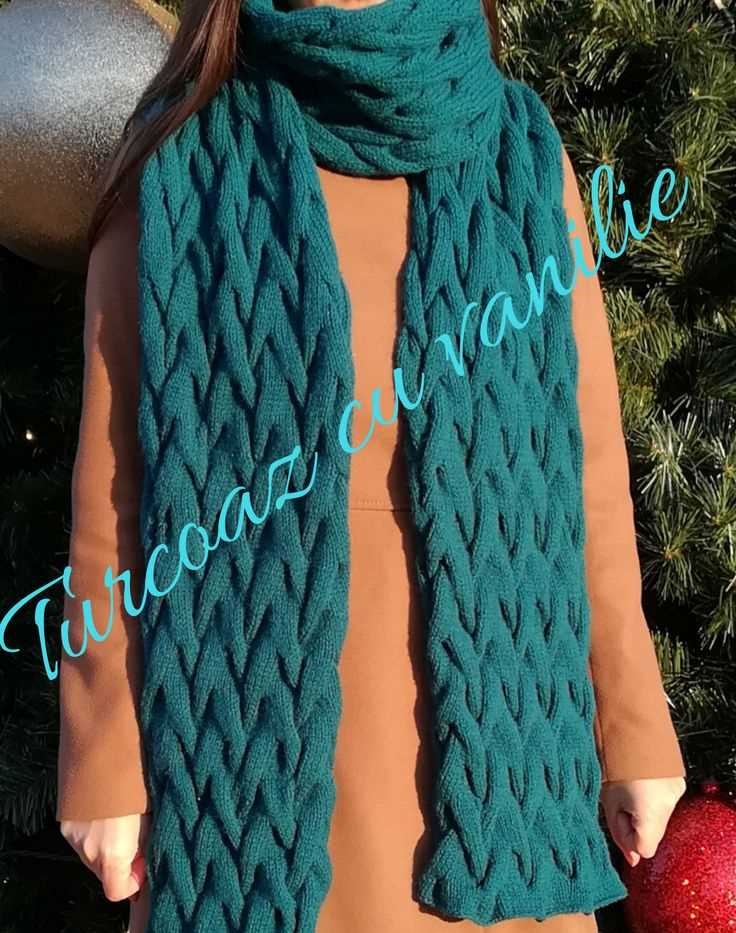
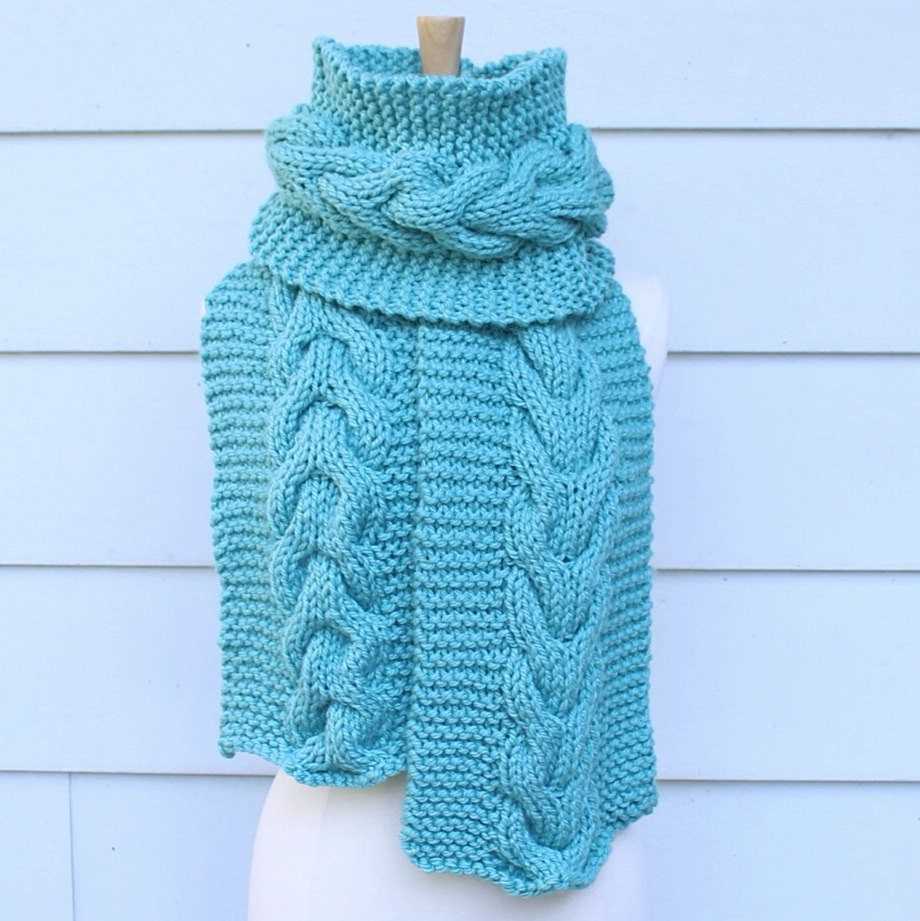
As the temperature drops, it’s time to bundle up and stay warm. And what better way to do that than with a cozy and stylish cable scarf? This easy cable scarf knitting pattern is perfect for beginners and experienced knitters alike, making it a versatile and accessible project for anyone looking to add a touch of warmth and fashion to their winter wardrobe.
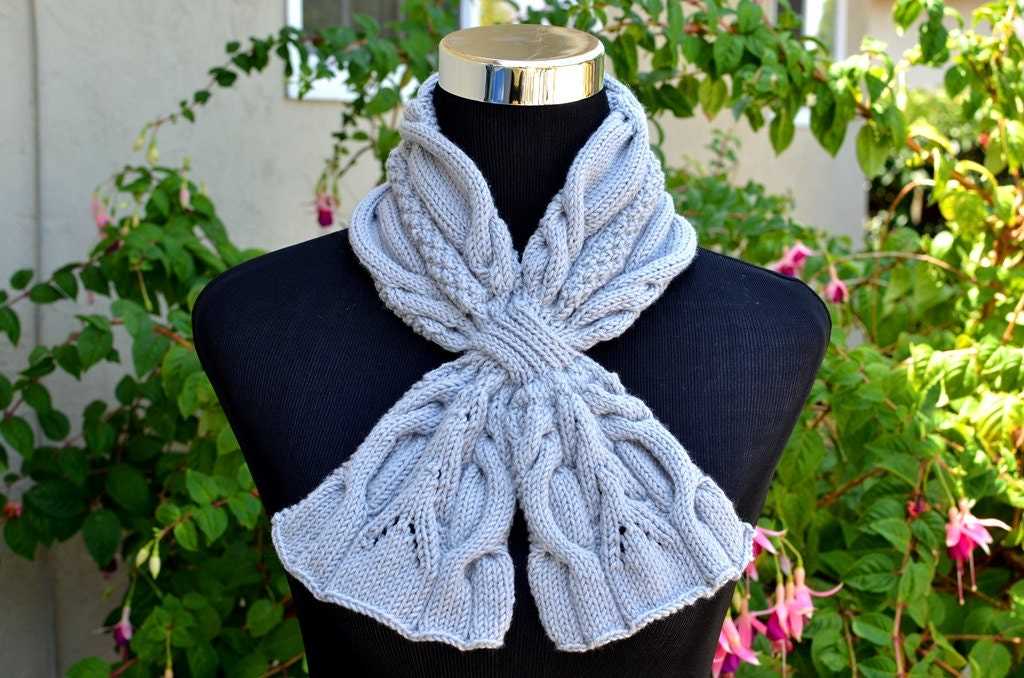
The cable pattern adds an elegant and sophisticated look to the scarf, elevating it from a simple accessory to a statement piece. The intertwining twists and turns create a visually appealing design that is sure to turn heads. Plus, the cables add extra insulation, making this scarf even more perfect for those chilly winter days.
Materials:
- Size 8 knitting needles
- Worsted weight yarn
- Cable needle
- Tapestry needle
Instructions:
- Cast on 40 stitches.
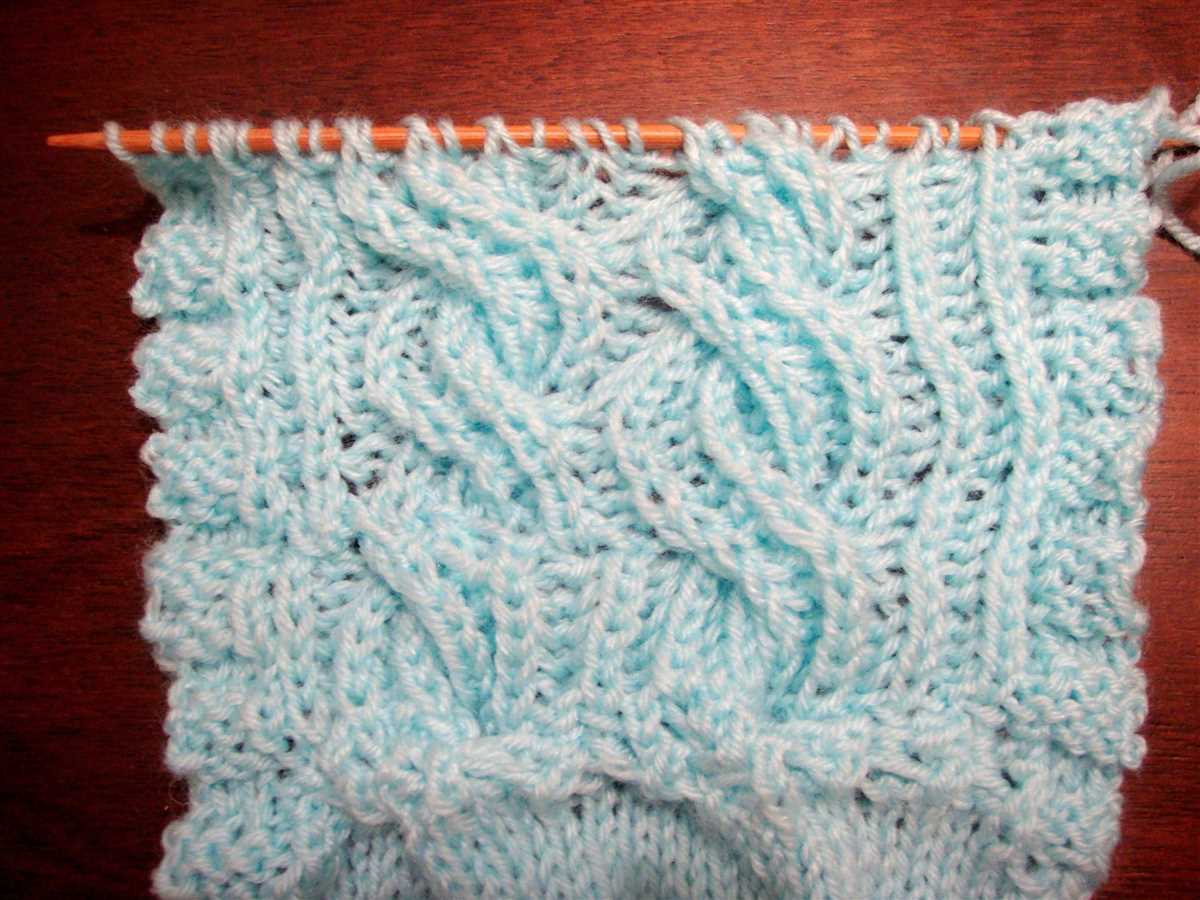
- Row 1: *P2, K6, P2.* Repeat from * to * until the end of the row.
- Row 2: *P2, slip 3 stitches onto the cable needle and hold at the back, K3, K3 from the cable needle, P2.* Repeat from * to * until the end of the row.
- Repeat rows 1 and 2 until the scarf reaches your desired length.
- Bind off all stitches.
- Weave in any loose ends with a tapestry needle.
Once you’ve completed the knitting, you can embellish your scarf with tassels or pom-poms for an extra touch of style. Experiment with different colors and yarns to match your individual taste and create a truly unique accessory. Whether you’re keeping warm on your daily commute or adding a finishing touch to your winter outfit, this easy cable scarf knitting pattern is a must-have for the colder months.
What is Cable Knitting?
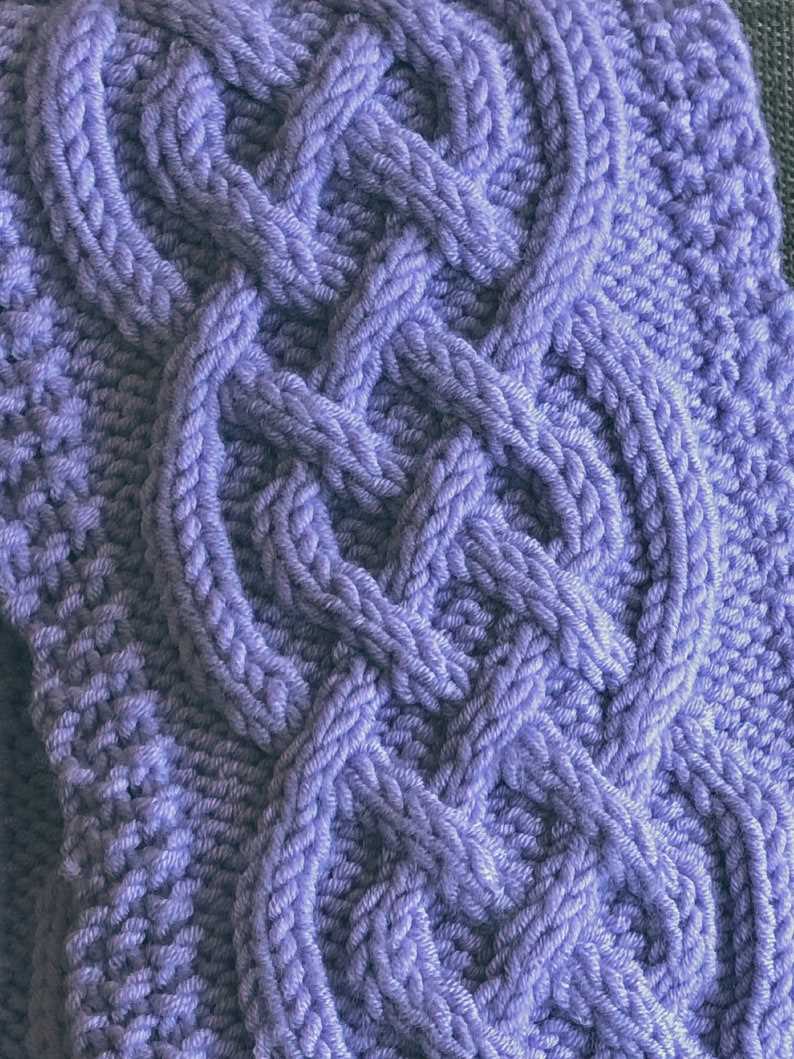
Cable knitting is a technique in which stitches are crossed over each other to create a twisted, interlocking pattern. This technique creates a beautiful texture and adds depth and interest to knitted garments and accessories. Cables are often used in sweaters, scarves, hats, and blankets to give them a classic, timeless look.
To create cable stitches, you typically use a cable needle or a double-pointed needle to hold the stitches while you work stitches out of order. This allows you to cross the stitches over each other and create the desired cable pattern. By rearranging the order of the stitches, you can create various cable designs, such as ropes, twists, braids, or diamonds.
When knitting cables, it’s important to pay attention to the pattern instructions and charts to ensure that the stitches are crossed correctly. It may take a bit of practice to get the hang of cable knitting, but once you understand the basic technique, you’ll be able to create intricate and stunning cable designs.
The Beauty of Cable Knitting
The beauty of cable knitting lies in the intricate and textured patterns it creates. Whether you’re a beginner or an experienced knitter, cables add a touch of elegance and sophistication to your projects.
Additionally, cable knitting allows you to experiment with different stitch combinations, creating unique and personalized designs. By combining cables with other stitch patterns or using different yarns, you can further enhance the visual appeal of your knitted items.
Cable knitting is not only visually appealing but also functional. The twisted stitches of the cables add warmth and insulation to garments and accessories, making them perfect for colder climates. So not only do you get a fashionable accessory or garment, but you also get the added bonus of extra warmth.
- Cable knitting creates beautiful texture and depth in knitted garments and accessories.
- It involves crossing stitches over each other to create twisted, interlocking patterns.
- Cables are commonly used in sweaters, scarves, hats, and blankets.
- By rearranging the order of stitches, various cable designs can be created.
- Pay attention to pattern instructions and charts for correct stitch crossings.
- Cables add elegance, sophistication, and warmth to knitted items.
- Experimenting with stitch combinations and yarns can further enhance the visual appeal.
Choosing the Right Yarn and Needles for Your Cable Scarf
When knitting a cable scarf, one of the most important factors to consider is the type of yarn you use. The yarn you choose will greatly impact the overall look and feel of your finished scarf. To achieve the best results, it’s important to select a yarn that is both soft and warm, as well as durable enough to withstand the twisting and turning of the cable stitch pattern.
When it comes to choosing the right yarn for your cable scarf, consider the weight and fiber content. Worsted or aran weight yarns work well for cable scarves as they provide enough bulk to showcase the textures of the cables while still being comfortable to wear. Look for yarns that are made of natural fibers, such as wool or alpaca, as these tend to have excellent stitch definition and help the cables pop.
Another important consideration is the color of the yarn. While it’s ultimately a matter of personal preference, solid or lightly variegated yarns tend to show off the cable pattern the best. Avoid highly variegated or busy yarns that may distract from the intricacy of the cables.
Once you’ve chosen the right yarn, it’s time to select the appropriate needles. The size of your needles will depend on the weight of your chosen yarn and the desired density of your stitches. Larger needles will create a looser, more open fabric, while smaller needles will result in a tighter, denser fabric. It’s important to choose a needle size that allows the cables to stand out while still creating a fabric that is comfortable to wear.
In conclusion, when knitting a cable scarf, the choice of yarn and needles is crucial for achieving a successful and visually appealing result. Pay attention to the weight and fiber content of the yarn, as well as the color, to enhance the look of the cables. Select the appropriate needle size to create the desired fabric density. With the right yarn and needles, your cable scarf will not only be stylish but also cozy and warm.
Getting Started: Casting On and Making the Foundation Rows
Before you can start knitting your cable scarf, you need to cast on your stitches and make the foundation rows. This will create the base for your scarf and set the stage for the cable pattern.
To begin, you’ll need a pair of knitting needles and your chosen yarn. Start by making a slipknot at the end of your yarn, leaving a tail of about 6 inches. Insert one knitting needle into the slipknot loop, holding it in your right hand.
With your left hand, hold the tail of the yarn and the working yarn together, creating a tension between them. Now, use your right hand to wrap the working yarn under and over the tip of the needle, creating a loop around it. This is known as a cast-on stitch.
Continue making cast-on stitches until you have the desired number of stitches on your needle. Remember to count each loop that you create as one stitch. Once you have cast on all your stitches, you can start making the foundation rows.
The foundation rows are usually worked in a simple knit stitch or a combination of knit and purl stitches. The purpose of these rows is to create a solid base for the cable pattern that will be worked later on. Follow the pattern instructions for the specific number of foundation rows you need to make.
As you work each row, make sure to keep your tension even and consistent. This will ensure that your scarf has a neat and professional finish. Take your time with each stitch, especially if you’re a beginner, to ensure that they are all uniform in size and appearance.
Once you have completed the foundation rows, you’re ready to move on to the cable pattern. The foundation rows provide a stable starting point for the intricate cable design that will give your scarf its unique and stylish look. With the foundation in place, you’re one step closer to creating a beautiful cable scarf that you can wear with pride.
Mastering Basic Cable Stitches for Your Scarf
Knitting a cable scarf can seem intimidating for beginner knitters, but with a little practice, anyone can master the basic cable stitches. By learning and understanding the basic cable stitches, you can create beautiful and intricate designs that will make your scarf stand out.
1. The Cable Stitch: The cable stitch is created by taking a few stitches out of order and crossing them over each other. This creates the twisted and braided pattern that is characteristic of cable knitting. To perform the cable stitch, you will need a cable needle, which is a small needle with a straight or curved shape.
2. Types of Cable Stitches: There are various types of cable stitches that you can incorporate into your scarf design. The most common ones include the 2-stitch cable, where two stitches are crossed over each other, and the 4-stitch cable, where four stitches are crossed over each other. Experimenting with different cable stitches can add depth and dimension to your scarf.
3. Basic Cable Stitch Pattern: To create a basic cable stitch pattern, you will typically need to knit a few rows in a basic knit or purl stitch before starting the cable. Then, follow the instructions for crossing the stitches over each other using a cable needle. Repeat this pattern throughout your scarf to create beautiful cable designs.
4. Reading Cable Stitch Patterns: When working with cable stitch patterns, it is important to be able to read and understand the instructions. Cable stitch patterns are typically represented by symbols or written out row by row. Take your time to familiarize yourself with the symbols and the corresponding instructions to ensure you are knitting the cables correctly.
5. Practice Makes Perfect: Like any new skill, mastering basic cable stitches takes practice. Start with simpler cable patterns and gradually move on to more complex ones as you gain confidence and skill. Don’t get discouraged if your first few attempts don’t turn out perfectly; keep practicing and soon you’ll be creating beautiful cable scarves.
Remember, knitting is a creative and enjoyable craft. Don’t be afraid to experiment and add your own personal touch to your scarf. With time and practice, you’ll become a pro at knitting cable stitches and create stunning scarves that you’ll be proud to wear or gift to your loved ones.
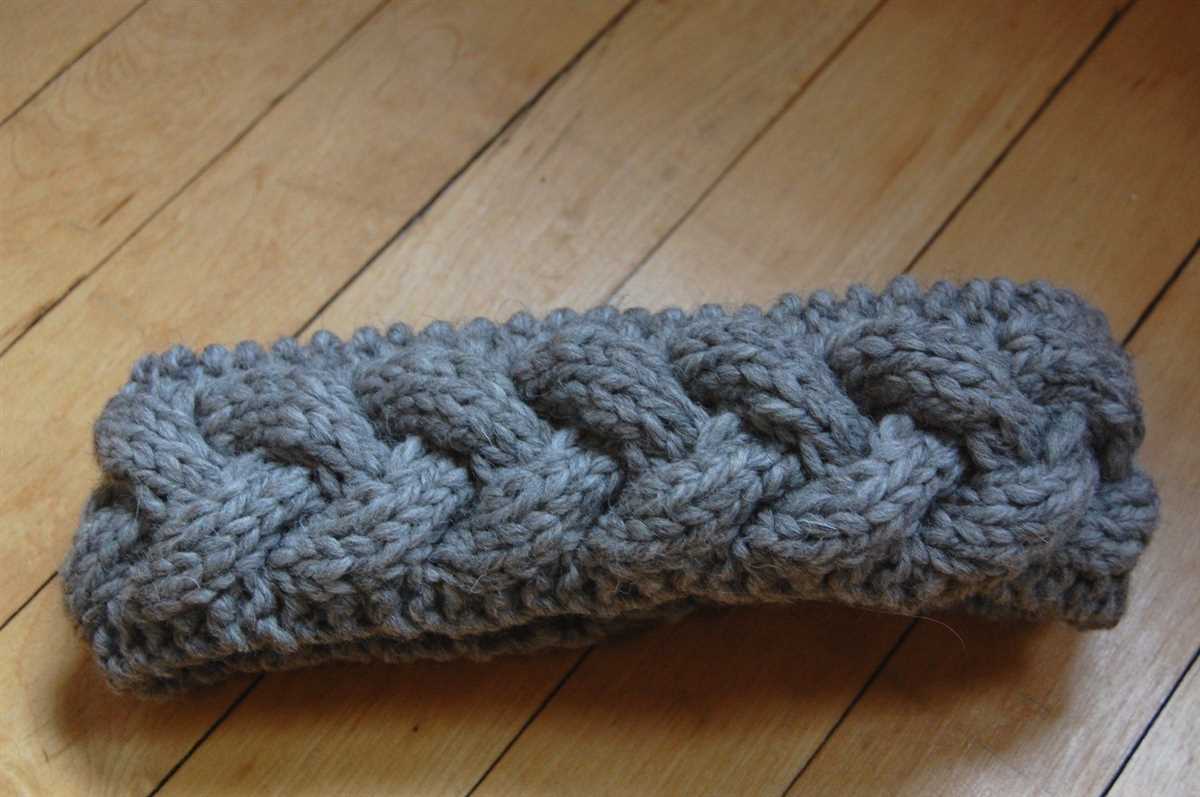
Creating Intricate Cable Patterns with Simple Techniques
Cable patterns are a beautiful way to add texture to your knitting projects. They create intricate designs that make any piece stand out. However, intricate cable patterns don’t always have to be difficult to knit. With a few simple techniques, you can create stunning cable patterns without the fuss.
One technique to simplify cable knitting is to use a cable needle. A cable needle is a short, double-pointed needle that helps you hold stitches while you cross them over each other. By using a cable needle, you can easily manipulate the stitches and create stunning cable designs.
Another technique that makes cable knitting easier is to use a stitch pattern chart. A stitch pattern chart is a visual representation of the cable pattern, showing you which stitches to knit or purl in each row. By following the chart, you can easily keep track of the cable pattern and create intricate designs without getting lost in the pattern.
In addition to using a cable needle and a stitch pattern chart, it’s also important to use the right yarn and needle size. Be sure to choose a yarn that has good stitch definition, so that the cables stand out. Additionally, using a smaller needle size than recommended for the yarn can help create tighter stitches, which enhances the cable pattern.
To get started, you can try knitting a simple cable scarf using these techniques. With a basic cable pattern and the right techniques, you’ll be able to create a stunning accessory that will impress everyone. Don’t be intimidated by intricate cable patterns – with a little practice and the right techniques, you’ll be creating beautiful designs in no time!
Adding Variations to Your Cable Scarf: Incorporating Seed Stitch or Ribbing
Once you have mastered the basic cable stitch for your scarf, you may want to add some variety and texture to your design. Two popular options for incorporating variations into your cable scarf are seed stitch and ribbing.
Seed Stitch: Seed stitch is a simple yet effective way to add texture to your cable scarf. It is made by alternating knit and purl stitches across each row. For example, you could knit one stitch, purl one stitch, and repeat this pattern across the row. On the next row, you would purl the knit stitches and knit the purl stitches. This creates a bumpy texture that pairs well with the smoothness of the cable stitches. You could choose to incorporate seed stitch throughout the entire scarf, or use it as a border or accent on the ends.
Ribbing: Another option for adding variation to your cable scarf is to incorporate ribbing. Ribbing is created by alternating knit and purl stitches, but instead of alternating stitches within a row, you alternate stitches across multiple rows. Common ribbing patterns include 1×1 ribbing, where you knit one and purl one stitch across the row, and 2×2 ribbing, where you knit two and purl two stitches across the row. Ribbing adds elasticity and stretch to your scarf, making it a great choice if you want a snug fit. You can choose to incorporate ribbing throughout the entire scarf, or use it as a border or accent.
Experimenting with different stitch patterns like seed stitch or ribbing can help you personalize your cable scarf and create a unique design. By incorporating these variations, you can add depth and visual interest to your project, making it stand out from the crowd. So why not have some fun and get creative with your cable scarf knitting? The possibilities are endless!
Transforming Your Cable Scarf with Different Colors
Knitting a cable scarf is a fun and rewarding project that can keep you warm during the colder months. If you are looking to add an extra touch to your cable scarf, consider using different colors to create a unique and eye-catching design. By using different colors for the cables and background, you can create stunning visual effects and make your scarf truly stand out.
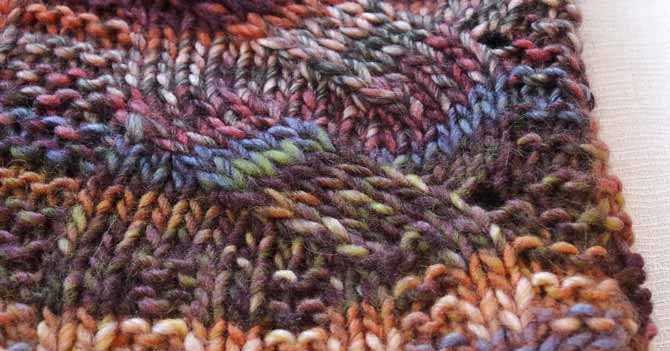
1. Contrast Colors: To create a bold and striking look, choose contrasting colors for your cables and background. For example, if you have a dark background color, choose a lighter color for the cables to make them pop. This will create a visually appealing contrast and add depth to your scarf.
2. Gradient Colors: If you prefer a more subtle and gradual change in colors, consider using gradient colors for your cables. Start with one color at the beginning of the scarf, and gradually transition to another color as you work your way through the pattern. This will create a beautiful and seamless color gradient effect.
3. Ombre Colors: Another option is to use ombre colors for your cables. Ombre colors transition from one shade to another within the same color family. This can create a soft and elegant look, perfect for a more sophisticated scarf design.
4. Multicolored Cables: For a truly unique and eye-catching design, consider knitting your cables in different colors. This can be achieved by using multiple strands of yarn and following the cable pattern with each color. This will create a vibrant and dynamic look that will surely make a statement.
By experimenting with different colors, you can transform your cable scarf into a one-of-a-kind piece that reflects your personal style and creativity. Whether you choose contrasting colors, gradient colors, ombre colors, or multicolored cables, the possibilities are endless. Have fun and let your imagination run wild as you create a stunning and colorful cable scarf!
Finishing and Binding Off: Giving Your Scarf a Polished Look
Once you’ve completed knitting your easy cable scarf, it’s time to give it a polished look by finishing and binding off. Follow these steps to ensure your scarf looks its best:
1. Weaving in Ends: Start by weaving in any loose ends of yarn. Use a tapestry needle to thread each end through several stitches on the wrong side of the scarf. This will help secure the ends and prevent them from unraveling.
2. Blocking: Blocking can help to even out the stitches and give your scarf a professional finish. To block your scarf, dampen it with water and lay it flat on a clean towel. Gently stretch and shape the scarf to your desired dimensions, taking care not to distort the cables. Leave the scarf to dry completely before removing it from the towel.
3. Edging: To give your scarf a finished edge, you can choose to add a simple garter stitch or ribbed border. Knit a few rows using your chosen edging pattern at the beginning and end of your scarf. This will help prevent the edges from rolling and give your scarf a neat and tidy appearance.
4. Blocking Again: After adding the edging, you may want to block your scarf once more to ensure the new stitches blend seamlessly with the rest of the scarf. Follow the same blocking process as before, being careful not to stretch the edging too much.
5. Binding Off: Finally, it’s time to bind off your scarf. To do this, knit the first two stitches as normal. Then, use the left needle to lift the first stitch over the second stitch and off the right needle. Knit one more stitch, then lift the previous stitch over the new stitch. Repeat this process until only one stitch remains on the right needle. Cut the yarn, leaving a tail, and thread it through the last stitch to secure it.
By following these steps, you can give your easy cable scarf a polished look that will make it a stylish and cozy accessory for the colder months.
Blocking Your Cable Scarf: Enhancing Its Drape and Texture
If you have just completed knitting your cable scarf, you may be wondering how to give it that final finishing touch. One way to enhance the overall look and feel of your scarf is to block it. Blocking is a technique used to shape and stretch knitted items, allowing the stitches to relax into place and giving the fabric a more polished look.
To begin the blocking process, start by filling a basin or sink with cool water. Add a few squirts of gentle wool wash or mild soap and mix it in. Gently place your cable scarf into the water, making sure it is fully submerged. Allow the scarf to soak for about 15-20 minutes, ensuring that the fibers are well saturated.
Next, remove the scarf from the water, being careful not to wring or twist it. Lay a clean, absorbent towel on a flat surface and place the scarf on top. Gently roll up the towel, pressing down to remove excess water. Do not rub or scrub the scarf, as this can cause the cables to lose their shape.
After removing the excess water, it’s time to stretch and shape the scarf to enhance its drape and texture. Lay the scarf on a blocking mat or a clean, flat surface. Using rust-resistant pins, begin by pinning the edges of the scarf in place, making sure to maintain the desired width and length.
Next, focus on the cables and the pattern. Gently stretch and manipulate the cables to accentuate their design. Use pins to hold them in place, ensuring that they are evenly spaced and symmetrical along the length of the scarf. This step is crucial in achieving a professional-looking finish.
Leave the scarf to dry completely before removing the pins. This can take anywhere from a couple of hours to overnight, depending on the humidity and airflow in the room. Be patient and resist the temptation to speed up the drying process, as this can lead to misshapen cables and unwanted wrinkles.
Once your cable scarf is fully dry, carefully remove the pins and admire your handiwork. The blocking process not only enhances the drape and texture of your scarf but also helps to even out any inconsistencies in tension and shape. Now, you can confidently wear or gift your beautifully blocked cable scarf, knowing that it will be appreciated for its craftsmanship and attention to detail.
Troubleshooting Common Cable Knitting Mistakes
Knitting cables can be a fun and rewarding technique, but it can also be challenging. Making mistakes is a part of the learning process, and can often lead to frustration. However, with a little troubleshooting, you can easily fix common cable knitting mistakes and avoid them in the future.
Dropped Stitches
One of the most common mistakes in cable knitting is dropping stitches. This occurs when a stitch slips off the needle accidentally. To fix this, you will need a crochet hook or a spare knitting needle. Insert the crochet hook or needle into the dropped stitch from the front, and then use it to catch the loop of the dropped stitch and pull it through the neighboring stitches, working from bottom to top. Once the stitch is secured, place it back onto the left-hand needle and continue knitting.
Twisted Cables
Another common mistake is twisting your cables in the wrong direction. To fix this, carefully unravel the stitches that make up the cable, all the way back to the row before the mistake. Then, re-knit the cable in the correct direction, making sure to cross the stitches in the desired way. Pay close attention to the cable chart or pattern instructions to ensure you are crossing the stitches correctly.
Inconsistent Tension
One of the challenges in cable knitting is maintaining consistent tension throughout your work. Inconsistent tension can result in cables that appear stretched or compressed. To improve your tension, try using a smaller needle size or adjusting your knitting style. It may also help to practice knitting cables on a smaller swatch before starting a larger project, to get a feel for the tension required.
Misplaced Cable Crosses
Sometimes, you may accidentally cross your cables in the wrong place, resulting in a pattern that looks off. To fix this, unravel the stitches that form the misplaced cable cross back to the row before the mistake. Then, re-knit the cable cross in the correct place, following the cable chart or pattern instructions. Pay close attention to the symbols or instructions to ensure you are placing the cable cross correctly.
Untwisted Cables
If your cables are not twisting as prominently as desired, it is possible that you are not crossing the stitches tightly enough. To fix this, try crossing the stitches with a little extra tension, pulling the stitches snugly to create a more defined cable. Experiment with the amount of tension to achieve the desired effect.
By troubleshooting and correcting common cable knitting mistakes, you can achieve beautiful and professional-looking cables in your knitting projects. Remember to be patient with yourself and practice regularly to improve your cable knitting skills.
Personalizing Your Cable Scarf: Adding Fringe or Tassels
Looking to add a little extra flair to your cable scarf? Consider adding some fringe or tassels to make it truly personalized. These simple additions can add a touch of style and texture to your scarf, making it stand out from the rest.
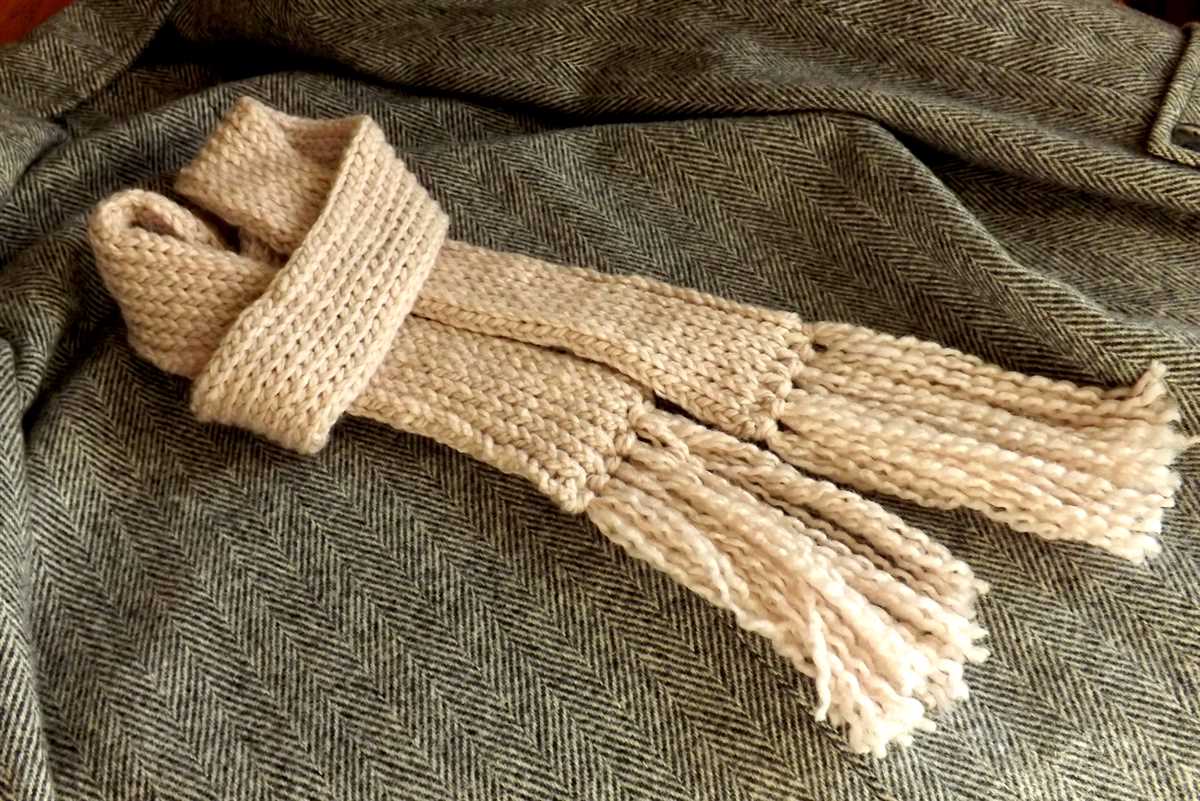
Fringe: Adding fringe to the ends of your cable scarf is a great way to give it a boho-chic look. To add fringe, simply cut lengths of yarn that are about twice as long as you want your fringe to be. Fold each length in half and insert the folded end through the bottom edge of your scarf. Bring the loose ends of the fringe through the folded loop and pull tight. Repeat this process along each end of the scarf until you achieve your desired fringe density.
Tassels: Tassels are another popular embellishment for cable scarves. To make tassels, start by wrapping yarn around a small piece of cardboard or your fingers, depending on the desired size of the tassel. Wrap the yarn multiple times to create a thick bundle. Once you have wrapped enough yarn, carefully slide it off the cardboard or your fingers. Cut a separate piece of yarn and tie it tightly around the top of the wrapped yarn bundle, about 1 inch from the top. Cut the loops at the opposite end of the tied yarn, creating the tassel’s fringe. Repeat this process to create additional tassels, then attach them to your cable scarf by threading the top tied yarn through the stitches and knotting it securely.
Final Touches: Once you have added your fringe or tassels, take the time to trim any uneven ends and adjust the length to your liking. You can also experiment with different colors or textures of yarn to create a unique and eye-catching look. Don’t be afraid to get creative and make your cable scarf truly one-of-a-kind.
Tips and Inspiration for Styling and Wearing Your Cable Scarf
Now that you have completed your beautiful cable scarf, it’s time to style and wear it with confidence. Whether you’re looking for a casual or a more sophisticated look, the cable scarf can be a versatile accessory that adds a touch of elegance to any outfit. Here are some tips and inspiration to help you make the most of your cable scarf:
- Pair it with a coat: One of the easiest ways to style your cable scarf is by pairing it with a coat. Whether you’re wearing a classic wool coat or a trendy leather jacket, the cable scarf will add warmth and style to your ensemble.
- Create a layered look: For a cozy and fashionable look, layer your cable scarf over a sweater or under a blazer. This will not only keep you warm, but it will also add texture and dimension to your outfit.
- Experiment with different knots: Don’t be afraid to play around with different ways of tying your cable scarf. Whether you prefer a simple knot, a looped knot, or a more intricate knot, each style will give your scarf a unique and personalized look.
- Accessorize with a brooch: Add a touch of sparkle or a pop of color to your cable scarf by accessorizing it with a stylish brooch. This will instantly elevate your outfit and make your scarf a focal point.
If you’re in need of some inspiration, here are a few ways you can incorporate your cable scarf into different outfits:
- Everyday Casual: Pair your cable scarf with a chunky sweater, jeans, and ankle boots for a cozy and effortless everyday look.
- Office Chic: Layer your cable scarf over a tailored blazer, a button-down shirt, and dress pants for a polished and professional ensemble.
- Weekend Getaway: Wrap your cable scarf around a lightweight sweater, add some leggings, and finish the look with tall boots for a stylish and comfortable outfit for a weekend getaway.
- Date Night Glamour: Drape your cable scarf over a little black dress, slip on some heels, and accessorize with statement jewelry for an elegant and sophisticated look.
Remember, the cable scarf is more than just an accessory to keep you warm. It’s a fashion statement that reflects your personal style and adds a cozy touch to any outfit. So go ahead and experiment with different ways of styling and wearing your cable scarf, and let your creativity shine!