
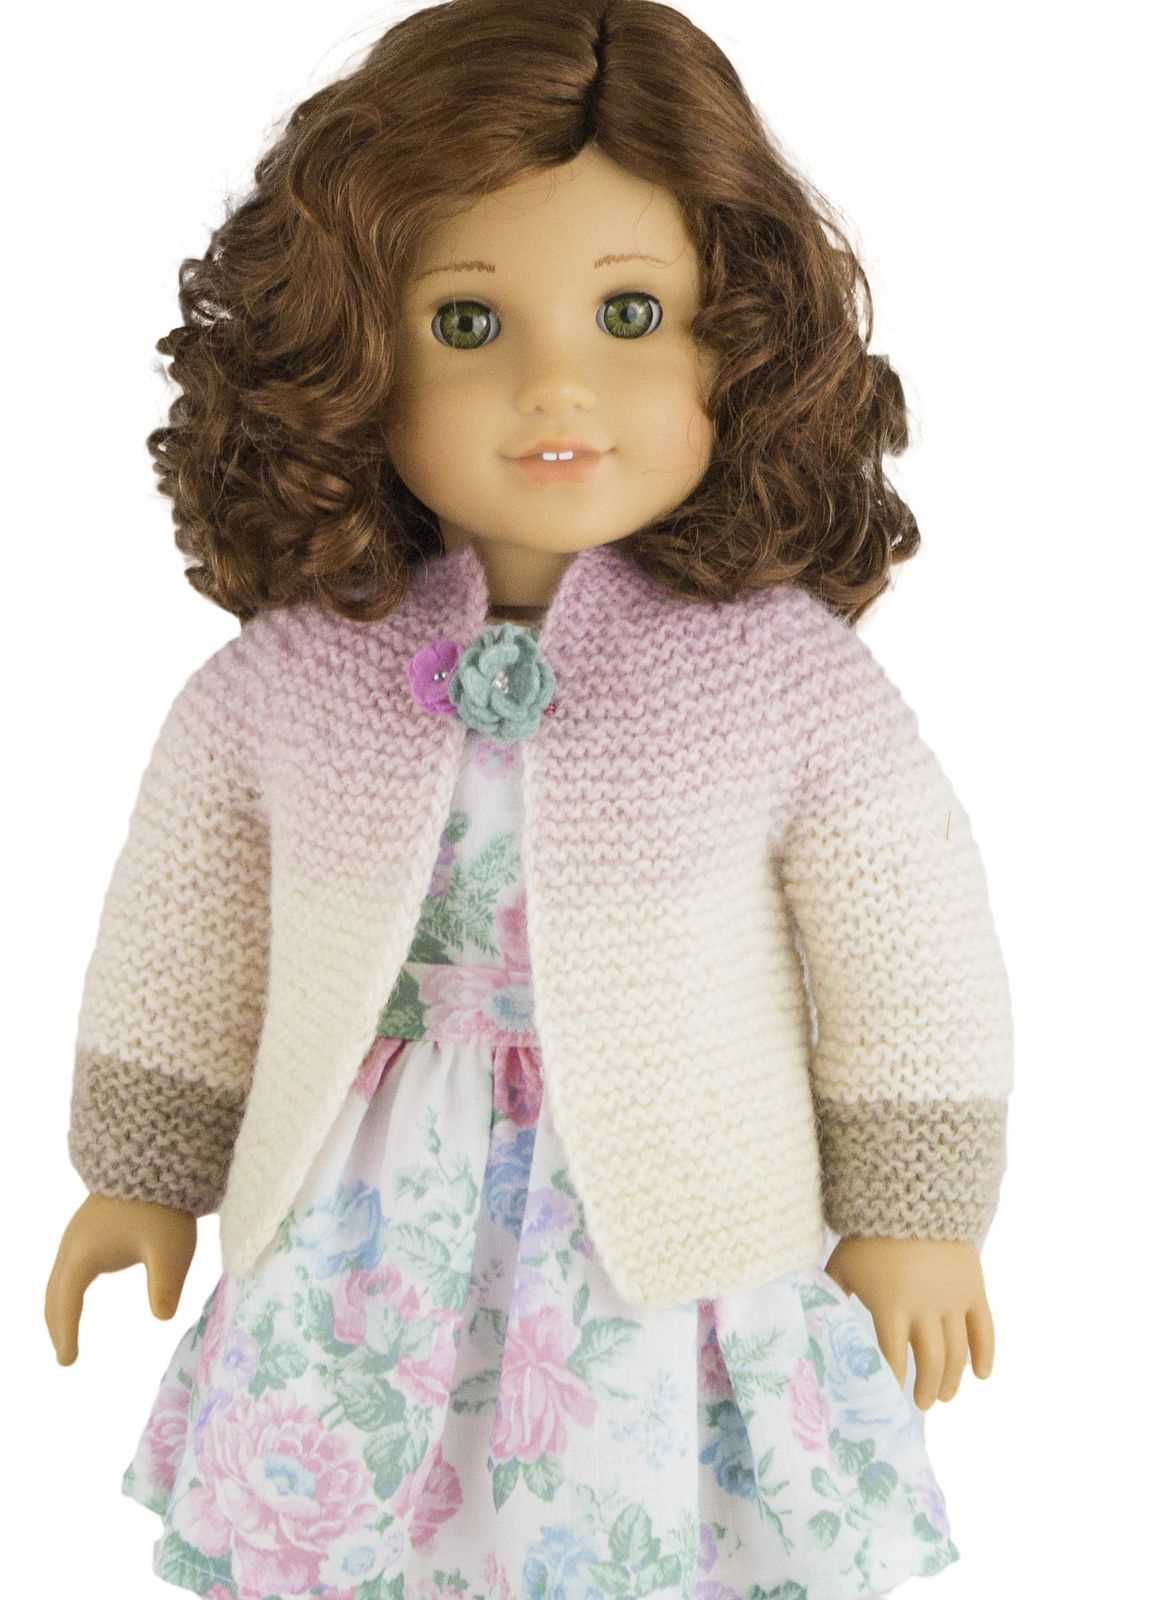
Knitting is a beloved craft that allows people to create beautiful and unique garments. One of the popular items to knit is a cardigan, and this pattern is specifically designed for dolls. Whether you have a collection of dolls or are making a gift for a child, this dolls cardigan knitting pattern is perfect for adding a touch of style to any doll’s wardrobe.
This pattern is suitable for intermediate knitters who are comfortable with basic knitting techniques, such as casting on, knitting, purling, and binding off. The pattern includes instructions for knitting the cardigan in multiple sizes to fit a variety of doll sizes, ranging from small dolls to larger-sized dolls. Additionally, you can customize the pattern by choosing your favorite yarn colors to match any doll’s style.
Knitting a cardigan for a doll is not only a fun and rewarding project, but it also allows you to unleash your creativity and experiment with different stitch patterns and embellishments. Whether you prefer a simple and classic design or want to try out more intricate patterns, this dolls cardigan knitting pattern is a versatile base that you can build upon. So, grab your knitting needles, choose your favorite yarn, and get ready to create a cozy and stylish cardigan for your beloved dolls!
Choosing the right yarn and needles
When it comes to knitting a dolls cardigan, choosing the right yarn and needles is crucial. The yarn you select will determine the overall look and feel of the finished garment. It is important to consider the doll’s size and the desired level of warmth when choosing the yarn.
Yarn: For doll clothes, it is best to use a lightweight yarn that is suitable for the doll’s scale. Look for a yarn that has good stitch definition and is soft enough for the doll’s delicate skin. Fine weight or sport weight yarns are generally a good choice for small dolls, while worsted weight or DK weight yarns can be used for larger dolls.
Needles: The choice of needles will depend on the yarn you have chosen and the required gauge. Smaller needles, such as size 1 or 2, are typically used for fine weight yarns, while larger needles, such as size 5 or 6, are used for worsted weight or DK weight yarns. It is important to check the gauge before starting the project to ensure that your needles are the correct size.
Additionally, consider the material of the needles. Metal needles are known for their smoothness and durability, while bamboo or wooden needles provide a warmer and softer feel. Both types can be suitable for knitting doll clothes, so choose the material that you feel most comfortable working with.
In summary, when knitting a dolls cardigan, selecting the right yarn and needles is essential. Choose a lightweight yarn that suits the doll’s scale and has good stitch definition. Select needles that match the gauge of your chosen yarn and consider the material that you find most comfortable to work with.
Understanding the pattern
When tackling a doll’s cardigan knitting pattern, it’s essential to have a clear understanding of the instructions before you begin. This will ensure that you are able to successfully complete the project and create a beautifully knitted cardigan for your doll.
1. Read the pattern
Start by carefully reading through the entire pattern. Take note of any specific instructions, abbreviations, or terminology used. This will help you become familiar with the pattern and understand what is required at each step.
2. Check the gauge
Next, check the gauge to ensure that your knitting will be the correct size. Most patterns will provide a gauge measurement, such as the number of stitches and rows per inch. Use the recommended needle size and yarn to knit a swatch and compare it to the gauge provided in the pattern. Adjust your needle size if necessary to achieve the correct gauge.
3. Look for repeat sections
Many knitting patterns will have repeat sections where a set of instructions is repeated multiple times. Look for any sections marked as “repeat” or where the instructions are given in brackets or parentheses. Pay attention to how many times the section should be repeated and ensure that you follow the instructions accurately each time.
4. Note any special techniques
Some patterns may include special techniques, such as shaping or different stitch patterns. Make sure to read and understand these instructions before you begin. If you are unfamiliar with a specific technique, take the time to research and practice it before starting the pattern.
5. Keep track of your progress
As you work through the pattern, it is helpful to keep track of your progress. Use stitch markers, highlighters, or a piece of paper to mark off each completed step. This will help you stay organized and ensure that you don’t miss any important details.
By taking the time to thoroughly understand the doll’s cardigan knitting pattern, you will be well-prepared to tackle the project and create a beautiful finished product. Happy knitting!
Getting started
Before you begin knitting your doll’s cardigan, make sure you have all the necessary supplies. You will need a set of knitting needles, preferably size 5 or 6, and the recommended yarn for the pattern. You may also want to have a tape measure nearby to check your gauge as you work.
Once you have gathered your supplies, it’s time to cast on. The pattern will specify the number of stitches to cast on, so refer to that and use your preferred cast-on method. It’s important to cast on loosely to ensure that the cardigan has a comfortable fit.
Now that you have cast on, you can begin working the pattern. Start with the first row and follow the instructions carefully. The pattern may include different stitch patterns, such as ribbing or lace, so make sure to pay attention to any special instructions provided.
As you work through the pattern, it’s a good idea to check your gauge every few rows to ensure that you are on track. If your gauge is off, you may need to adjust your needle size or tension to achieve the correct measurements.
Continue working through the pattern, knitting each row as instructed. Take your time and enjoy the process of creating something beautiful for your doll. Before you know it, you will have a finished cardigan that is ready to be worn and admired.
Knitting the body of the cardigan
After completing the ribbing and button band for the doll’s cardigan, it’s time to start knitting the body of the cardigan. This section will provide instructions on how to knit the body of the cardigan.
The body of the cardigan is worked in stockinette stitch, which means knitting every row on the right side and purling every row on the wrong side. To begin, you will need to cast on the required number of stitches for the size you are making. Make sure to follow the pattern instructions for the specific doll cardigan you are working on.
Once you have cast on the stitches, you will continue knitting in stockinette stitch for the desired length. It’s important to keep track of your row count to ensure that the cardigan is symmetrical and the buttonholes are placed correctly.
If the pattern calls for any shaping, such as increasing or decreasing stitches, make sure to follow the instructions provided. This will help create the desired fit and shape of the cardigan. Keep in mind that shaping is often done on the right side (knit side) of the fabric.
As you work on the body of the cardigan, you can also incorporate any additional design elements, such as stripes or color changes. This is a great way to personalize the cardigan and make it unique.
Once you have reached the desired length for the body of the cardigan, you will be ready to move on to the next section, which typically involves shaping the sleeves or adding the finishing touches. Follow the pattern instructions to ensure you are progressing correctly and achieving the desired result.
Knitting the sleeves
Once you have finished knitting the body of the cardigan, it’s time to move on to the sleeves. The sleeves are an important part of the doll’s cardigan as they add warmth and coziness to the overall look. To start knitting the sleeves, you will need to pick up stitches along the armhole edges.
Begin by attaching the yarn to the first stitch on the armhole edge. Insert your needle into the stitch and wrap the yarn around the needle. Pull the yarn through the stitch to create a new loop on the needle. Repeat this process along the entire armhole edge, picking up stitches evenly.
An important detail to consider while knitting the sleeves is the length. Measure the length of the doll’s arm and decide how long you want the sleeves to be. You can choose to knit the sleeves to the wrist or make them shorter, depending on the desired style.
Once you have picked up the stitches and determined the desired length, you can begin knitting the sleeves in the pattern of your choice. You can continue with the same stitch pattern used for the body or choose a different stitch pattern for a contrasting look. Remember to maintain the same gauge and tension as the body to ensure a proper fit.
Knit the sleeves until you reach the desired length, then bind off the stitches. Make sure to leave a long tail of yarn for sewing the sleeves to the body of the cardigan. Repeat the same process for the second sleeve, making sure to match the length and stitch pattern of the first sleeve.
Adding buttons or other closures
When knitting a cardigan for dolls, adding buttons or other closures can be a fun and functional way to secure the garment and enhance its aesthetic appeal. There are several options to choose from when it comes to closures, depending on the desired style and level of difficulty.
Buttons: Buttons are a classic choice for adding closures to a cardigan. They are available in a wide range of sizes, shapes, and materials, allowing for endless customization possibilities. To attach buttons, simply sew them onto one side of the cardigan at regular intervals, making sure to align them with the corresponding buttonholes on the other side.
Snap fasteners: Snap fasteners are another popular choice for doll cardigans. They consist of two interlocking parts: a socket and a stud. To attach snap fasteners, sew the socket part to one side of the cardigan and the stud part to the other side, making sure they align when the cardigan is closed. Snap fasteners are convenient and easy to use, making them an ideal choice for children’s dolls.
Hook and eye closures: Hook and eye closures are a simple and secure option for adding closures to a doll cardigan. These closures consist of a small hook and a small loop. To attach hook and eye closures, sew the hook part onto one side of the cardigan and the eye part onto the other side, ensuring they align when the cardigan is closed. These closures are discreet and provide a neat and tidy finish to the garment.
Other closure options for doll cardigans include ribbon ties, toggles, and even zippers. The choice of closure ultimately depends on personal preference and the desired look and functionality of the cardigan. Experimenting with different closures can add a unique touch to the finished garment and make it more versatile for playing and dressing up dolls.
Finishing touches
Once you have completed knitting the cardigan for your doll, it’s time to add the finishing touches to make it even more special. These little details can bring your project to life and give it a professional-looking finish. Here are some suggestions for adding those final touches:
1. Buttons: Sewing on buttons can be a fun and decorative way to fasten the cardigan. Choose buttons that match the color and style of the cardigan. Ensure that they are securely attached so they don’t fall off during playtime.
2. Embroidery: Adding embroidered details can enhance the overall design of the cardigan. You can use simple stitches to create patterns or motifs on the sleeves, collar, or pockets. This personal touch can make the cardigan truly one-of-a-kind.
3. Ribbons and bows: If you want to make the cardigan look more feminine, you can sew on ribbons or bows as embellishments. These can be placed at the neckline, cuffs, or along the button placket. Choose ribbons that complement the cardigan’s color.
4. Blocking: Blocking is the process of shaping and stretching the knitted fabric to give it a neater appearance. You can do this by wetting the cardigan and laying it flat to dry, pinning it into the desired shape. Blocking can help smooth out any uneven stitches and give the cardigan a more polished look.
5. Steam ironing: Steam ironing can also help in giving the cardigan a professional finish. Make sure to use a low heat setting and hold the iron just above the fabric, without making direct contact. Gently steam the cardigan to remove any wrinkles and give it a crisp look.
By adding these finishing touches, you can turn a simple knitted cardigan into a beautiful piece for your doll to wear and enjoy. Take your time with these details, as they can truly elevate the overall look and feel of the cardigan.
Tips and tricks
When knitting a doll’s cardigan, there are a few tips and tricks that can help you achieve the best results. Here are some pointers to keep in mind:
- Choose the right yarn: Opt for a soft and lightweight yarn that is suitable for knitting dolls’ clothes. Avoid using bulky or heavy yarns as they may make the cardigan look bulky on the doll.
- Use the correct knitting needles: Make sure you use the appropriate size of knitting needles recommended for the yarn you are using. This will ensure that the stitches are not too tight or too loose.
- Read the pattern carefully: Before you start knitting, take the time to read through the pattern instructions thoroughly. Make sure you understand all the terms and abbreviations used in the pattern.
- Check your gauge: Knit a swatch using the recommended needle size and yarn to check your gauge. This will help you determine if your stitches and rows match the measurements specified in the pattern. Adjust your needle size if necessary.
- Pay attention to shaping: Follow the shaping instructions carefully to create a well-fitted cardigan for the doll. Keep track of your rows and stitches to ensure accurate shaping.
- Add personal touches: Feel free to make modifications or add personal touches to the doll’s cardigan. You can use different colors, stitch patterns, or embellishments to make it unique.
In conclusion, knitting a doll’s cardigan can be a fun and rewarding project. By following these tips and tricks, you can create a beautiful and well-fitted cardigan for your doll. Enjoy the process and let your creativity shine!