
Are you a fan of the unconventional superhero Deadpool? Do you love to show off your fandom in unique and creative ways? If so, we have just the project for you! Introducing the Deadpool knit hat pattern, a must-have for any true Deadpool fan.
This pattern allows you to create your very own Deadpool-inspired hat, complete with the iconic red and black color scheme and the recognizable Deadpool symbol. The hat is perfect for keeping warm during the colder months, and it also makes for a great conversation starter at any comic convention or fan gathering.
Whether you’re an experienced knitter or just starting out, this pattern is suitable for all skill levels. Clear and easy-to-follow instructions will guide you every step of the way, ensuring that you create a hat that reflects your love for Deadpool in the most accurate and stylish way possible.
So, why wait? Grab your knitting needles and get ready to create your very own Deadpool knit hat. With this pattern, you’ll be able to showcase your love for the anti-hero in a fashionable and fun way. Get ready to turn heads and join the ranks of fellow Deadpool enthusiasts with your very own handmade hat.
How to Make a Deadpool Knit Hat: Guide for Beginners
If you’re a fan of Deadpool and want to show off your love for the Merc with a Mouth, why not make your very own Deadpool knit hat? This guide is perfect for beginners who are new to knitting and want to try their hand at creating a fun and unique accessory.
To start, you’ll need the following materials:
- A set of knitting needles (size 8 or whichever size gives you the desired gauge)
- Red and black yarn (or colors of your choice)
- Tapestry needle
- Scissors
- Stitch markers
Once you have your materials ready, you can begin knitting your Deadpool hat. Here’s a step-by-step guide:
- Start by casting on stitches in red yarn, making sure to leave a long tail for sewing up the hat later.
- Knit in the round for a few rows in a rib stitch pattern (alternating knits and purls) to create the brim of the hat.
- Switch to black yarn and continue knitting in the round until the hat reaches your desired length.
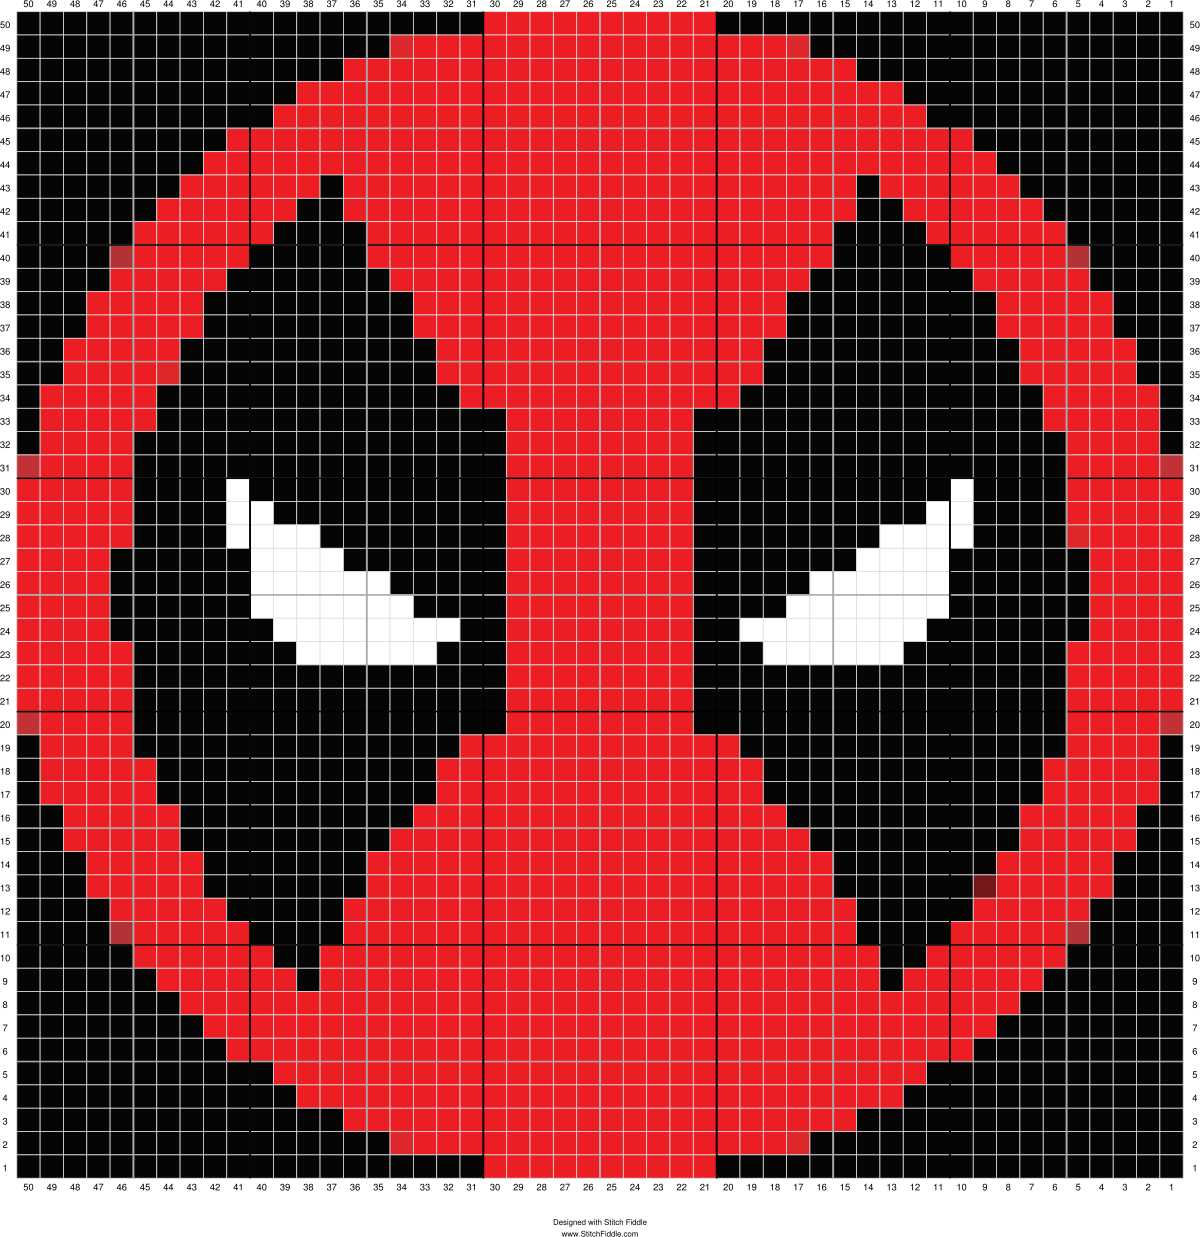
- At this point, you can add Deadpool’s logo to the front of the hat. You can do this by cross-stitching or embroidery using red yarn.
- Once you’re satisfied with the length and design of your hat, it’s time to finish it off. Cut the yarn, leaving a long tail, and thread it through the tapestry needle. Slip the needle through the remaining stitches and remove them from the knitting needle.
- Pull the tail tight to close the top of the hat, then use the tapestry needle to sew up the side seam of the hat.
- Weave in any loose ends and trim off excess yarn.
And there you have it! Your very own Deadpool knit hat that you can wear with pride. This pattern is a great introduction to knitting in the round and basic colorwork techniques. Have fun experimenting with different colors and designs to make your Deadpool hat unique to you!
Gather the necessary materials
Before you start knitting your Deadpool hat, it’s important to gather all the necessary materials. Here’s a list of what you’ll need:
- Red yarn: You’ll need a good amount of red yarn to create the main body of the hat. Make sure to choose a soft and cozy yarn that will keep you warm.
- Black yarn: You’ll also need some black yarn to create the mask and other details on the hat. Again, look for a soft yarn that will be comfortable to wear.
- White yarn: For the eyes and other accent details, you’ll need some white yarn. Opt for a yarn that is easy to work with and has good stitch definition.
- Knitting needles: You’ll need a set of double-pointed knitting needles in a size that works well with your chosen yarn. Check the yarn label for recommended needle size.
- Circular knitting needles: A longer circular needle will be useful for knitting the main body of the hat. Choose a size that matches your chosen yarn.
- Tapestry needle: This needle will be used for sewing in loose ends and adding extra details to the hat.
- Stitch markers: You’ll need a few stitch markers to help keep track of your stitches and pattern repeats.
- Scissors: A good pair of scissors will be needed for cutting the yarn and trimming any excess.
Once you have gathered all of these materials, you’ll be ready to start knitting your Deadpool hat. Make sure to read through the pattern and instructions before you begin, and keep all of your materials organized and easily accessible as you work.
Choose the right yarn for your Deadpool hat
When it comes to knitting a Deadpool hat, selecting the right yarn is essential to achieve the desired look and feel. The type of yarn you choose will greatly influence the overall appearance, durability, and comfort of the hat.
1. Red and black yarn: To capture the iconic Deadpool look, it is best to use a vibrant red and black yarn combination. Look for yarns in these colors that have good stitch definition and are soft to the touch. Acrylic or wool blends are great options as they provide warmth and durability.
2. Worsted weight yarn: A Deadpool hat needs to be warm and cozy, so choosing a worsted weight yarn is a smart choice. This weight of yarn is commonly used for hats and offers a good balance between warmth and breathability. It also allows for a quicker and easier knitting process, making it suitable for beginners.
3. Gauge and fiber content: Pay attention to the recommended gauge for the pattern and choose a yarn that matches it. This will ensure that your hat turns out the correct size and shape. Additionally, consider the fiber content of the yarn. Acrylic yarns are generally more affordable and easy to care for, while wool blends provide warmth and natural moisture-wicking properties.
4. Variegated or solid color: Depending on your preference, you can choose between variegated or solid color yarns for your Deadpool hat. Variegated yarns can add an interesting visual element to the design, while solid colors will give a more uniform and classic look. Consider the pattern and how the colors will interact to achieve the desired effect.
5. Test swatch: Before starting your Deadpool hat, it is always a good idea to make a test swatch with your chosen yarn. This will help you determine if you need to adjust your tension or needle size to achieve the correct gauge. It will also give you an idea of how the yarn looks and feels when knitted up.
In conclusion, selecting the right yarn for your Deadpool hat is crucial to create a hat that accurately portrays the character and is comfortable to wear. Consider factors such as color, weight, gauge, fiber content, and personal preference when making your choice. By doing so, you can create a hat that is not only visually appealing but also functional and enjoyable to wear.
Select the appropriate needle size
When knitting a Deadpool knit hat, it is important to select the appropriate needle size to achieve the desired stitch gauge and fit. The needle size will determine the size and tension of your stitches, which in turn will affect the overall size and drape of the finished hat.
Before starting your project, it is recommended to check the pattern instructions for the recommended needle size. This information is usually provided to help you achieve the correct gauge and ensure your hat turns out as intended.
Cast on stitches
When starting a knitting project, one of the first steps is to cast on stitches. This creates a foundation row that will serve as the starting point for the rest of the pattern. There are several methods for casting on stitches, but for the Deadpool knit hat pattern, the long-tail cast on method is recommended.
The long-tail cast on method is a versatile and popular technique that creates a neat and elastic edge. To begin, measure a long tail of yarn, approximately three times the width of the finished piece. Make a slipknot at the end of the tail, leaving a small loop.
- Hold the slipknot in your left hand, with the tail coming from the bottom and the working yarn coming from the top.
- Insert the knitting needle through the loop from right to left, then bring the needle over the tail.
- With your right hand, bring the working yarn over the needle from back to front.
- Bring the needle under the working yarn, creating a new loop.
- Slide the new loop onto the needle, tightening it slightly.
- Repeat these steps until the desired number of stitches is cast on.
It’s important to keep the tension of the stitches consistent throughout the cast on process. To achieve this, hold the working yarn with your right hand and slightly pull on it after each stitch. This will help to ensure that the stitches are evenly spaced and not too loose or tight.
Once all the stitches are cast on, the next step is to begin knitting the first row according to the pattern instructions. In the case of the Deadpool knit hat, this may involve ribbing or another stitch pattern. Following the cast on stitches, the knitting project can continue to take shape and bring the Deadpool design to life.
Knit the ribbing section
In order to create the Deadpool knit hat, you will first need to knit the ribbing section. The ribbing is the part of the hat that goes around the bottom edge and provides a snug fit. It is typically knit in a stretchy stitch pattern, such as a 1×1 or 2×2 rib.
To begin, cast on the required number of stitches using your chosen yarn and needle size. For a standard adult-sized hat, you will typically cast on around 80-100 stitches. However, it is always a good idea to check your gauge to ensure the ribbing will be the appropriate size.
Once you have cast on, you will begin knitting in the rib stitch pattern. For a 1×1 rib, you will alternate between knitting one stitch and purling one stitch across the row. This creates a stretchy fabric that is perfect for the ribbing section of the hat. For a 2×2 rib, you will alternate between knitting two stitches and purling two stitches across the row.
Continue knitting in the rib stitch pattern for the desired length of the ribbing section. This will depend on your personal preference and the pattern you are following. Typically, the ribbing section is knit for 1-2 inches or until it reaches the desired snugness around the head.
Once you have finished knitting the ribbing section, you can then move on to the next section of the hat pattern, such as the main body or any decorative elements. The ribbing section sets the foundation for the hat and ensures a comfortable and secure fit.
Begin knitting the body of the hat

Once you have completed the ribbing for the brim of the hat, it is time to start knitting the body of the hat. This is where the pattern and design of the hat really come to life.
To begin, you will need to continue using the circular knitting needles. Make sure to join the round with a stitch marker so you can keep track of your progress. Then, you will start knitting in the round, following the specified stitch pattern for the Deadpool hat.
The stitch pattern may involve various techniques, such as knitting, purling, and possibly even color changes for the Deadpool logo or design. Make sure to carefully follow the pattern instructions provided, as they will guide you through each step and stitch required to create the hat.
As you knit the body of the hat, you will likely need to adjust the size of your circular needles to accommodate the increasing number of stitches. Be sure to check the gauge and measurements of your work as you go along to ensure that the hat will fit properly.
Continue knitting in the round until you reach the desired length for the body of the hat. This may vary depending on personal preference or the specific pattern instructions.
Once the body of the hat is complete, you can continue on to finish the top of the hat, which may involve decreasing stitches to create a snug fit. From there, you can proceed to the final steps of the pattern, such as weaving in any loose ends or adding any additional embellishments to complete the Deadpool knit hat.
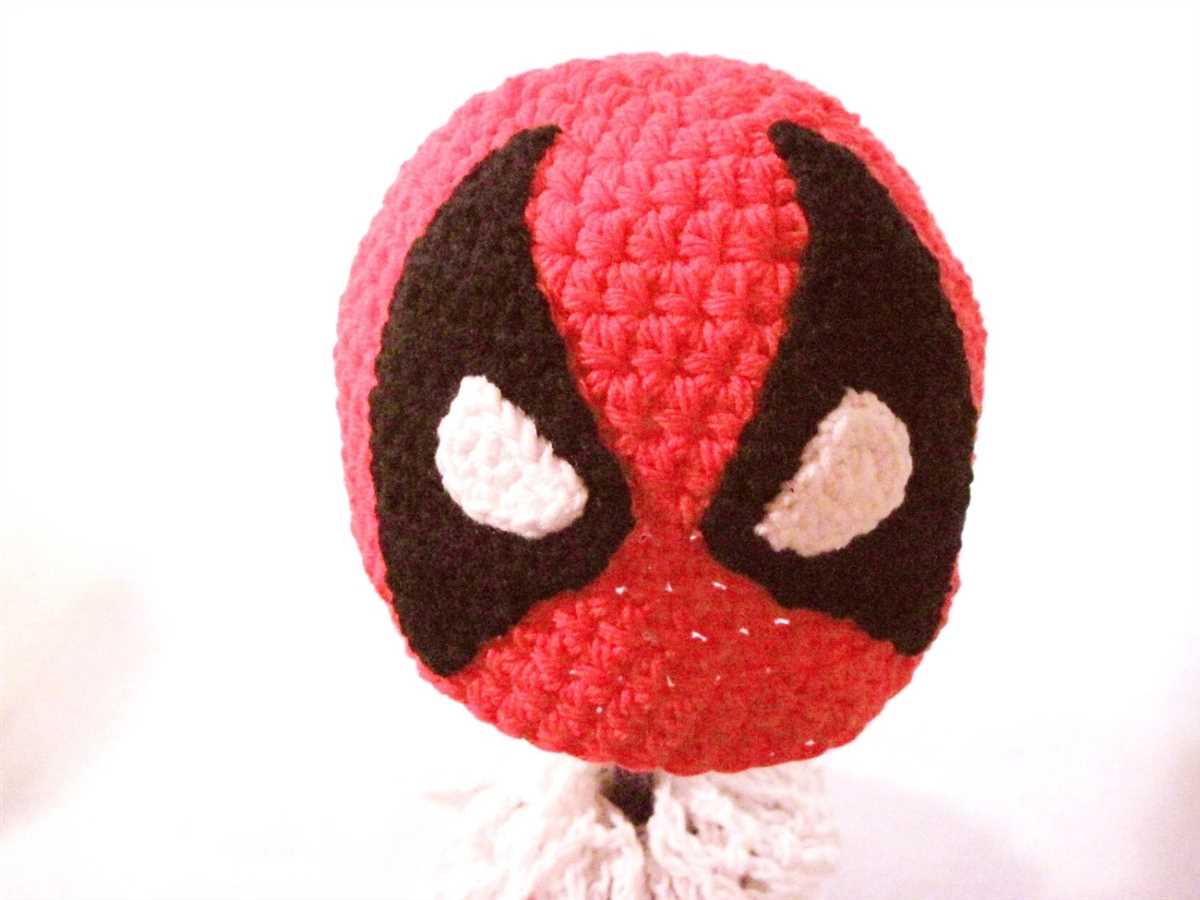
Create the Deadpool logo
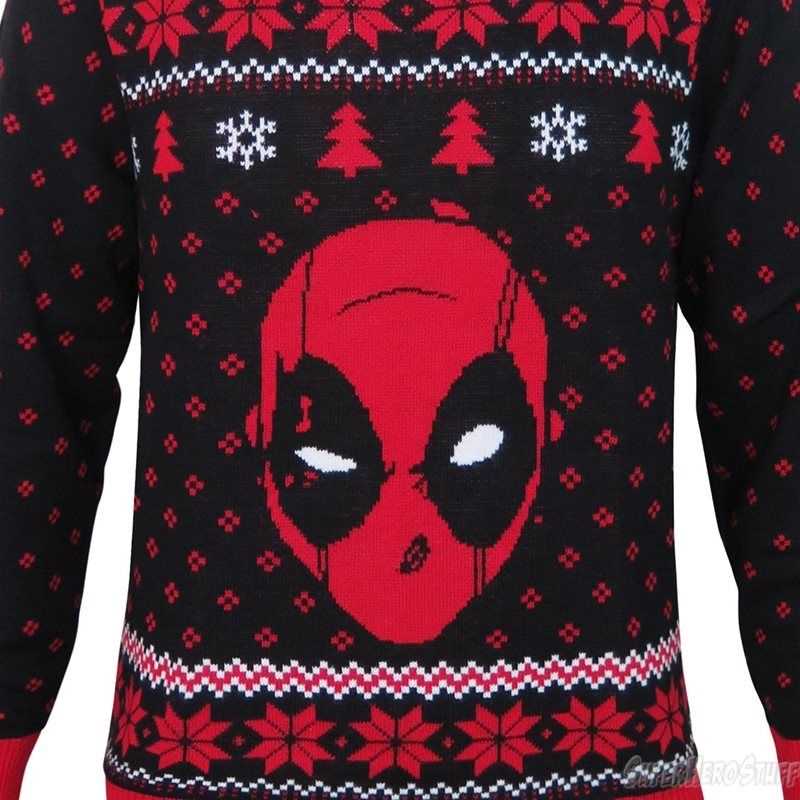
The Deadpool logo is a popular symbol associated with the character. It features a stylized representation of the character’s mask, with two large black eyes and red background. To create the Deadpool logo, you will need to follow a step-by-step process.
First, start by gathering the necessary materials. You will need red and black yarn, knitting needles, a tapestry needle, and scissors. Once you have all the materials, you can begin knitting the logo.
Step 1: Cast on
Begin by casting on the desired number of stitches using the red yarn. This will form the base of the logo.
Step 2: Knit the black eyes
Next, switch to the black yarn and knit the two eyes of the logo. You can use a chart or a pattern to guide you in creating the eye shapes. Pay attention to the size and proportion to ensure an accurate representation of the Deadpool logo.
Step 3: Switch back to red
After completing the black eyes, switch back to the red yarn and continue knitting the rest of the logo. This will involve creating the red background and shaping the remaining details of the mask.
Step 4: Finishing touches
Once you have completed knitting the logo, bind off the stitches and weave in any loose ends using the tapestry needle. Trim any excess yarn with the scissors.
By following these steps, you can create your own Deadpool logo using knitting techniques. This logo can then be incorporated into various projects, such as knitting a Deadpool-inspired hat or incorporating it into a larger knitting project.
Shape the crown of the hat
Once you have completed the ribbing for the brim of the hat, it is time to shape the crown of the hat. This is where the hat will start to take on its characteristic shape and fit snugly on your head.
To shape the crown, you will need to decrease the number of stitches gradually. This can be done in a variety of ways, but one common method is to use a knit 2 together (k2tog) decrease. This involves knitting two stitches together as if they were one, effectively reducing the stitch count by one.
Start by knitting a row or two without any decreases to maintain the width of the hat. Then, begin decreasing by working a k2tog decrease every few stitches. The exact pattern and frequency of decreases will depend on the size of the hat and the desired fit.
Continue working the decrease rounds until you have reached the desired number of stitches for the crown of the hat. At this point, you can either continue working in stockinette stitch or switch to a different stitch pattern for the crown.
Once the crown of the hat is complete, you can finish off the hat by cinching the remaining stitches together and weaving in any loose ends. This will give the hat its final shape and ready it for wearing.
Now that you know how to shape the crown of the hat, you can confidently tackle any Deadpool knit hat pattern and create a cozy and stylish accessory for yourself or a loved one.
Finish off the hat
Once you have completed knitting the Deadpool hat pattern, it’s time to finish it off and make it ready to wear. Here are a few steps to follow:
Step 1: Cut the yarn, leaving a tail of about 6 inches. Thread the tail through the remaining stitches on your knitting needle, one at a time, removing them from the needle as you go.
Step 2: Pull the tail tight to close the top of the hat. Make sure it is secure and won’t unravel. You can also use a yarn needle to sew the top closed if you prefer.
Step 3: Weave in any loose ends of yarn on the inside of the hat using a yarn needle. This will give the hat a clean and polished look.
Step 4: If desired, you can add any additional embellishments to your Deadpool hat, such as a pompom or a logo patch. This will give it a more authentic and personalized touch.
Step 5: Lastly, try on your completed Deadpool hat and make any necessary adjustments. You can fold up the brim for a snug fit or leave it unfolded for a slouchy look.
- Congratulations, you have successfully finished knitting your Deadpool hat!
- Be proud to wear your handmade creation and show off your love for the anti-hero!
Add the finishing touches: optional embellishments
Once you’ve completed knitting your Deadpool knit hat, you can add some optional embellishments to give it that extra special touch. These embellishments can help make your hat stand out and showcase your personal style.
Pom-poms: One popular option is to add a pom-pom to the top of your hat. You can create pom-poms using yarn in contrasting colors or even use faux fur for a luxurious look. Attach the pom-pom securely to the top of the hat using a needle and thread or a hot glue gun.
Embroidery: Another way to customize your Deadpool knit hat is to add some embroidered details. You can use embroidery floss in different colors to create the iconic Deadpool logo or other designs on the front or sides of the hat. This method allows for endless creativity and personalization.
Ribbons or bows: If you want to add a feminine touch to your hat, consider attaching ribbons or bows. You can choose ribbons in playful patterns or colors that match your Deadpool theme. Simply attach them securely to the sides or back of the hat using thread or small safety pins.
Buttons: Adding buttons to your hat can add an interesting visual element. Choose buttons that complement the colors in your hat or select buttons with Deadpool-themed designs. Sew the buttons onto the hat securely, making sure they won’t come loose during wear.
Sequins or beads: For those looking to add some sparkle to their Deadpool knit hat, consider adding sequins or beads. You can sew these embellishments directly onto the hat or use fabric glue to attach them. Create patterns or designs with the sequins and beads for a unique look.
Feel free to mix and match these embellishment ideas or come up with your own unique ways to make your Deadpool knit hat one-of-a-kind. Whether you prefer a subtle addition or want something bold and eye-catching, the finishing touches will truly bring your hat to life.
Wear and Enjoy Your Homemade Deadpool Knit Hat
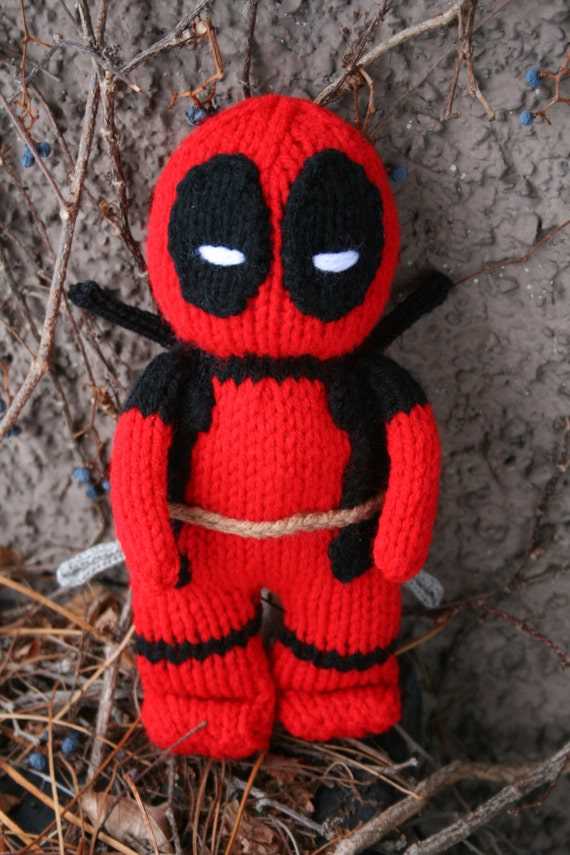
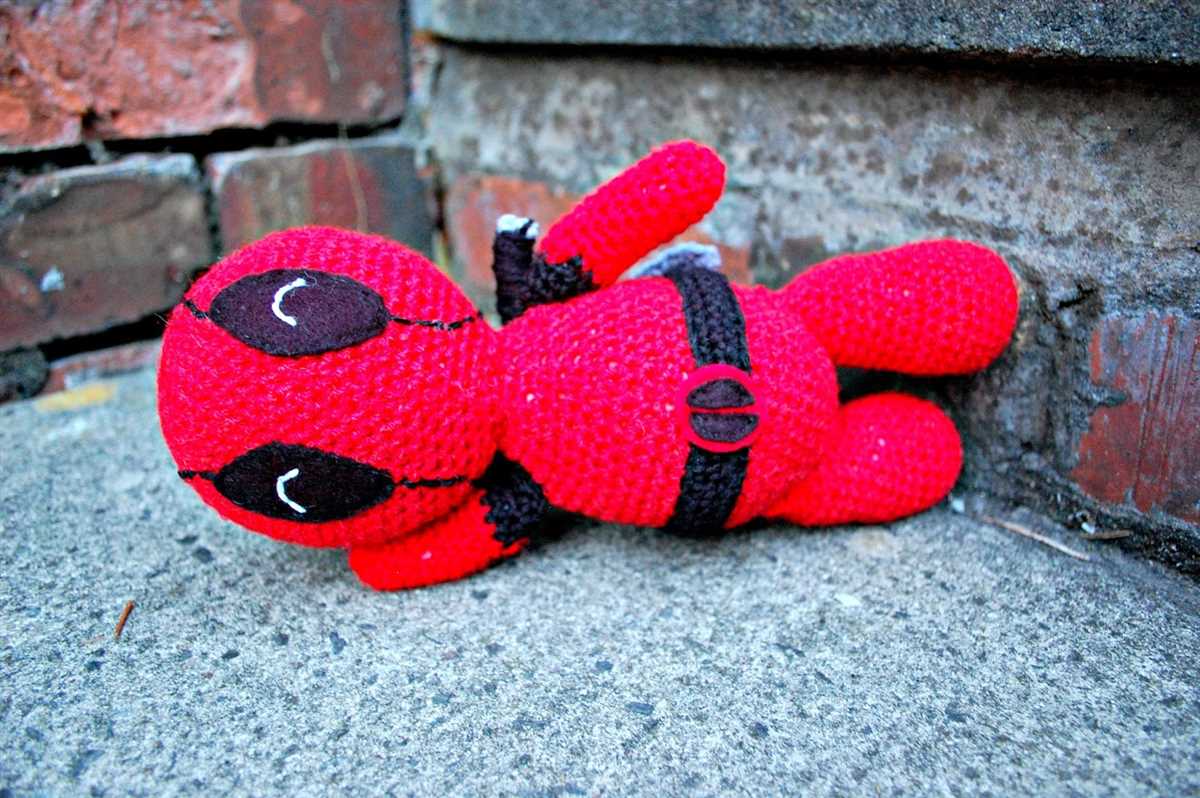
Now that you have completed your Deadpool knit hat, it’s time to show it off and enjoy the fruits of your labor! Whether you’re a fan of the Marvel comics or just looking for a stylish and cozy hat, this Deadpool-inspired design is sure to impress.
With its bold red and black colors and the iconic Deadpool logo, this hat is a statement piece that will make you stand out from the crowd. Wear it during the colder months to keep your head warm and to show off your love for the Merc with a Mouth.
The best part about a homemade knit hat is that it’s unique and made with love. You’ll feel a sense of accomplishment every time you wear it, knowing that you created something special with your own hands. Plus, you can customize it to fit your style and preferences, making it even more personal.
Not only is this hat stylish, but it’s also practical. The knit fabric provides insulation, keeping your head warm in chilly weather. The snug fit ensures that the hat stays in place, even during outdoor activities. Whether you’re going for a walk, hitting the slopes, or simply running errands, your Deadpool knit hat will keep you cozy and comfortable.
Another great thing about this hat is that it makes for an excellent gift. If you know someone who is a fan of Deadpool or simply loves handmade items, consider making them a Deadpool knit hat. They will appreciate the thought and effort that went into creating a unique and personalized gift just for them.
In conclusion, wearing and enjoying your homemade Deadpool knit hat is a rewarding experience. It’s not only a fashion statement but also a practical accessory for colder weather. Whether you’re a fan of the Marvel comics or simply love knitting, this hat is a great way to showcase your creativity and keep warm at the same time. So put on your hat, embrace your inner Deadpool, and let the world see your unique style!