
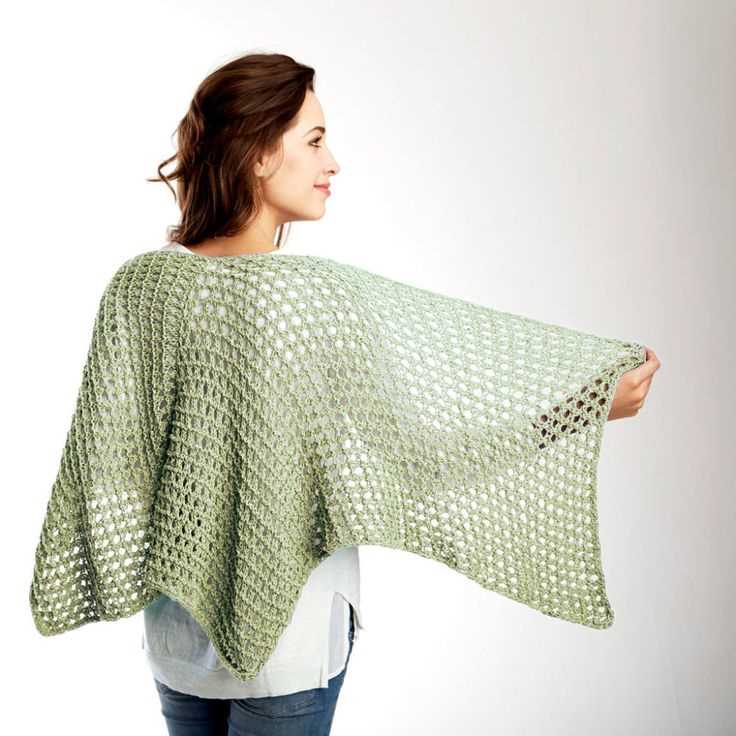
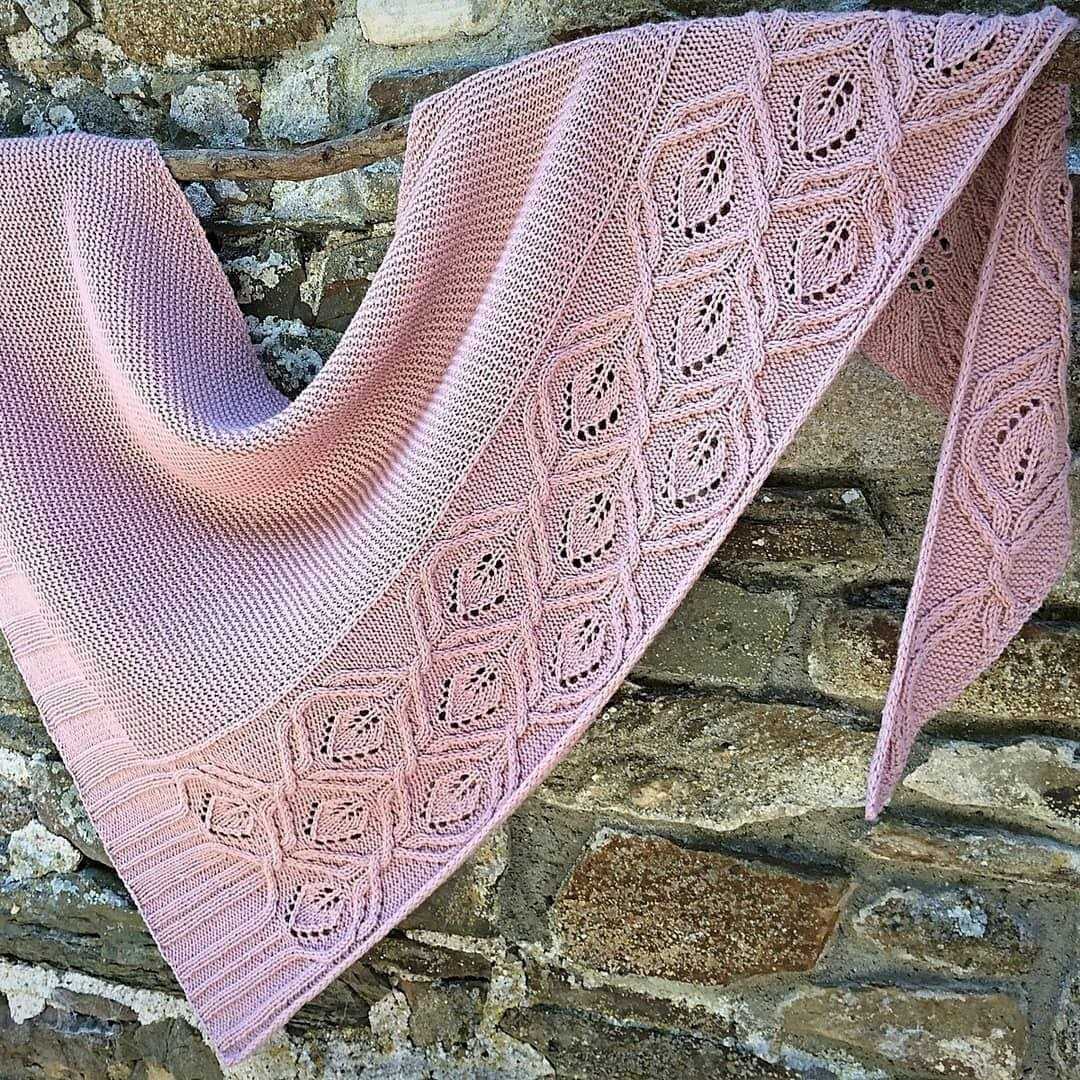
If you’re looking for a versatile and stylish accessory to add to your wardrobe, look no further than a cotton shawl. Knitting your own cotton shawl allows you to choose the perfect color and design to match your personal style. Plus, the breathable and lightweight nature of cotton makes it the ideal fabric for warm weather.
This knitting pattern is suitable for all skill levels, whether you’re a beginner or an experienced knitter. The pattern features a combination of basic stitches, such as knit and purl, as well as some more advanced techniques like lace knitting. Don’t worry though, the pattern includes detailed instructions and tips to guide you through each step.
One of the great things about this cotton shawl pattern is its versatility. Depending on the length and width you choose, you can use it as a beach cover-up, a wrap for chilly evenings, or even a decorative scarf. The pattern is easily customizable, allowing you to make it as small or as large as you prefer. You can also experiment with different stitch patterns or add fringe for a unique touch!
Cotton Shawl Knitting Pattern

Knitting a cotton shawl is a popular project for many knitting enthusiasts. The use of cotton yarn creates a lightweight and breathable shawl that is perfect for warmer weather. With its versatile and stylish design, a cotton shawl can be worn as an accessory or used for added comfort on chilly summer evenings.
To start your cotton shawl knitting project, you will need to gather the necessary materials. This includes a pair of knitting needles suitable for cotton yarn, a skein or two of cotton yarn in your desired color, and a set of stitch markers. Once you have your materials ready, you can begin following the knitting pattern.
Instructions:
- Cast on the desired number of stitches. The pattern should specify the recommended number of stitches for the size of shawl you are making.
- Begin with the basic knit stitch, working each row until the desired length is reached.
- Once you have reached the desired length, it’s time to add some decorative elements. This might include lace patterns, cables, or textured stitches. Follow the pattern instructions to create these design elements.
- Continue knitting until you reach the desired size or until you have used up all of your yarn.
- Finish off your shawl by binding off all stitches. Cut the yarn, leaving a long tail for weaving in the ends.
- Weave in any loose ends using a darning needle, making sure to hide them within the stitches to create a seamless finish.
- Block your shawl by gently stretching it out and pinning it in place on a blocking mat. Mist it with water and allow it to dry completely before unpinning.
- Your cotton shawl is now ready to be worn or gifted to someone special!
With this simple knitting pattern, you can create a beautiful cotton shawl that will be a stylish and practical addition to any wardrobe. Whether you’re a beginner or an experienced knitter, this project is sure to provide you with both enjoyment and a stunning finished product.
Choosing the Right Yarn and Needles
When embarking on a knitting project, the choice of yarn and needles is crucial. The type of yarn you choose will greatly impact the final result of your project. For a cotton shawl, it is important to select a cotton yarn that is lightweight, breathable, and soft. Cotton is a versatile fiber that is ideal for warm weather garments, like shawls, as it provides comfort and keeps you cool.
When selecting the needles for your cotton shawl, it is important to consider the thickness, length, and material of the needles. The needle size will depend on the desired gauge of your project, as specified in the knitting pattern. For a cotton shawl, you may typically use needles in the range of US size 4-7 (3.5-4.5mm) to achieve a loose and drapey fabric. It is advisable to use circular needles for larger projects like shawls, as they provide better support and distribute the weight of the project more evenly.
Yarn Characteristics
- Lightweight: Choose a cotton yarn that is not heavy, as you want your shawl to be comfortable to wear.
- Breathable: Opt for a cotton yarn that allows air to circulate, ensuring that your shawl is cool and not too warm.
- Soft: Look for a cotton yarn that is soft to the touch, as it will feel pleasant against your skin.
Needle Selection
- Size: Select needles that correspond to the gauge specified in the knitting pattern for your cotton shawl.
- Length: Consider using circular needles to accommodate the size of the shawl and provide better support throughout the project.
- Material: Choose needles made from a material that you find comfortable to work with, such as bamboo, metal, or plastic.
Casting On and Getting Started
When starting to knit a cotton shawl, the first step is to cast on the stitches. The cast on method you choose will depend on your personal preference and the desired outcome of your project. Some common cast on methods for shawls include the long tail cast on, the cable cast on, and the provisional cast on. Each method has its own unique characteristics and may be more suitable for certain types of shawls.
Once you have cast on the desired number of stitches, it’s time to start knitting. Before diving into complex stitch patterns or lacework, it’s a good idea to practice basic knitting stitches to get comfortable with the yarn and needles. This will help you to develop a rhythm and ensure that your stitches are consistent and even.
One popular stitch pattern for cotton shawls is the garter stitch, which is achieved by knitting every row. This simple yet versatile stitch creates a fabric with a nice drape and is suitable for both beginner and experienced knitters. Another option is the stockinette stitch, which alternates between knitting and purling rows to create a smooth and textured fabric.
When knitting a cotton shawl, it’s important to choose the right type of yarn and needles. Cotton yarn is a popular choice for shawls as it is breathable, lightweight, and easy to care for. However, it can also be less stretchy and more prone to splitting than other types of yarn. As for needles, circular needles are often recommended for shawls as they allow for easier handling of the growing fabric. Make sure to choose a needle size that matches the yarn weight and creates a fabric with the desired drape.
With the right cast on method, knitting stitches, yarn, and needles, you are ready to embark on your cotton shawl knitting adventure. Whether you are creating a delicate lace shawl or a cozy textured piece, remember to take your time and enjoy the process. Happy knitting!
Basic Knitting Stitches for the Shawl
When knitting a cotton shawl, it is important to have a good understanding of the basic knitting stitches. These stitches form the foundation of the shawl design and determine its overall appearance and texture. Here are some key stitches that you should know when working on a cotton shawl:
1. Knit Stitch:
The knit stitch is the most basic knitting stitch and is used to create the majority of the fabric in a cotton shawl. It is done by inserting the right-hand needle into the stitch on the left-hand needle, wrapping the yarn around the needle and pulling it through to create a new stitch. This stitch creates a smooth and flat fabric.
2. Purl Stitch:
The purl stitch is another fundamental knitting stitch and is often used in combination with the knit stitch to create various textured patterns in a cotton shawl. It is done by inserting the right-hand needle into the stitch on the left-hand needle from right to left, bringing the yarn to the front of the work, and then wrapping the yarn around the needle and pulling it through the stitch. This stitch creates a bumpy texture on the fabric.
3. Yarn Over:
A yarn over is a simple technique used to create an eyelet or lace pattern in a cotton shawl. It involves bringing the yarn to the front of the work, then wrapping it around the right-hand needle as if to purl, and then bringing the yarn to the back of the work again. This creates an extra stitch on the needle, which creates an open hole in the fabric when worked in combination with other stitches.
4. Slip Stitch:
The slip stitch is a technique used to create decorative stitches and textures in a cotton shawl. It involves transferring a stitch from the left-hand needle to the right-hand needle without knitting or purling it. This can be done by inserting the right-hand needle into the stitch as if to purl and then slipping it off the left-hand needle. Slip stitches can be worked in various ways to create interesting patterns.
By mastering these basic knitting stitches, you will be able to create a beautiful cotton shawl with different textures and patterns. Experiment with different stitch combinations and techniques to create your own unique design. Happy knitting!
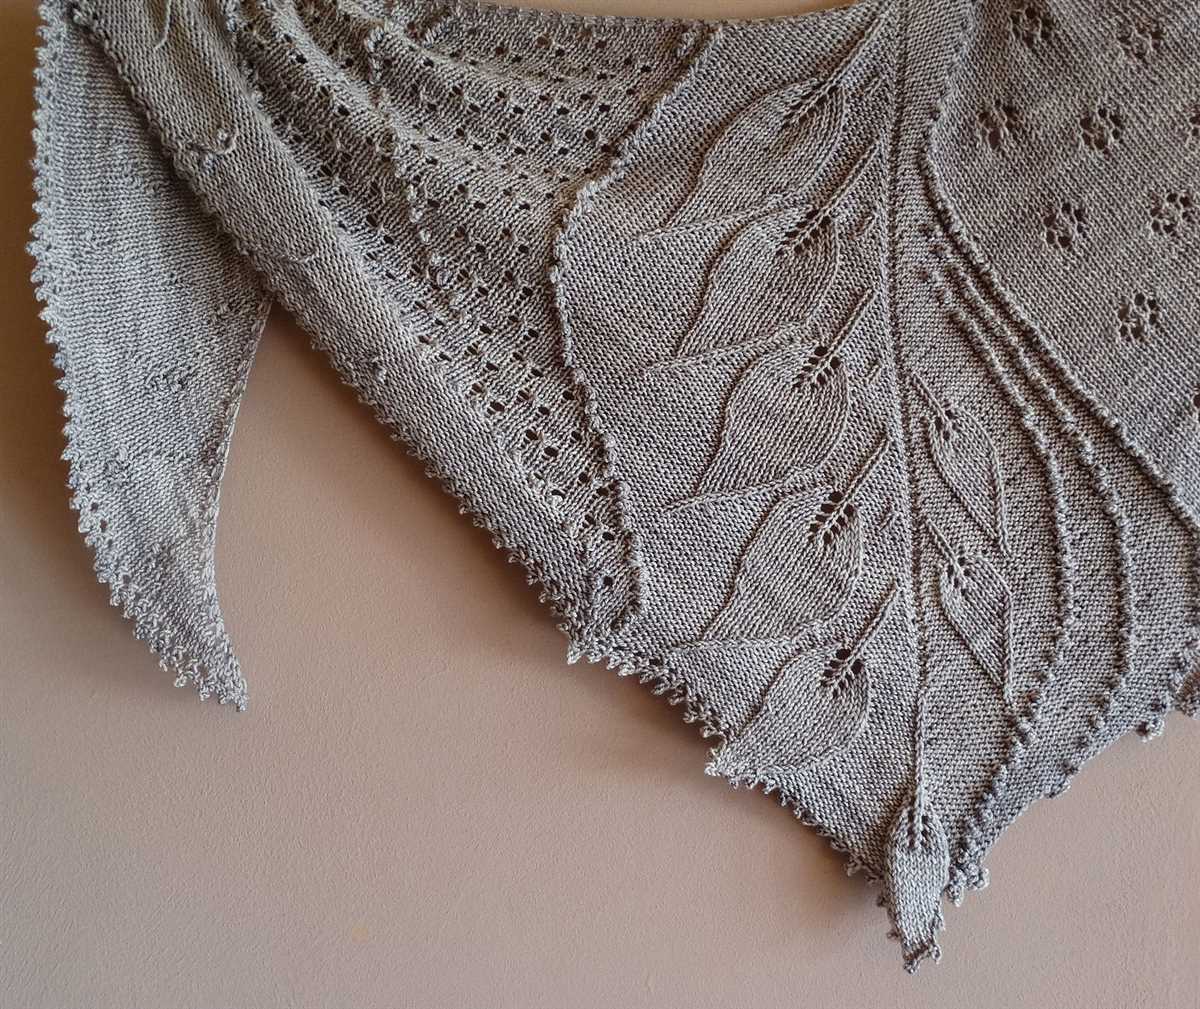
Creating Eyelet Patterns
When it comes to knitting eyelet patterns, there are a few essential techniques and considerations to keep in mind. Eyelet patterns are a popular choice for adding beautiful texture and interest to knitted garments, such as shawls, scarves, and sweaters. These patterns consist of yarn overs and decreases, resulting in lace-like holes that create a delicate and airy look.
One of the main techniques used in creating eyelet patterns is the yarn over (YO). This simple maneuver involves wrapping the yarn around the needle to create an extra stitch. The placement of the yarn over in the pattern determines the positioning of the eyelet hole. For example, a yarn over followed by a knit stitch will create an eyelet above the knit stitch, while a yarn over followed by a purl stitch will create an eyelet below the purl stitch.
It’s also important to consider the decrease stitches used in the eyelet pattern. These decrease stitches are typically worked in conjunction with the yarn overs to create the desired pattern. The most common decrease stitch used in eyelet patterns is the knit two together (K2tog), which involves knitting two stitches together as if they were one. This decrease stitch helps to balance out the eyelet holes and create a cohesive lace pattern.
To create more intricate eyelet patterns, knitters can also experiment with different stitch combinations and variations. For example, adding multiple yarn overs and decreases in a single row can create more complex and intricate lace patterns. Additionally, incorporating other stitch techniques, such as lace knitting or cables, can further enhance the beauty and texture of eyelet patterns.
Overall, creating eyelet patterns in knitting requires a combination of yarn overs, decrease stitches, and careful stitch placement. By experimenting with different techniques and stitch combinations, knitters can achieve stunning and unique eyelet patterns that add an elegant touch to their projects. Whether knitting a cotton shawl or a cozy sweater, eyelet patterns are a versatile and beautiful choice for any knitting project.
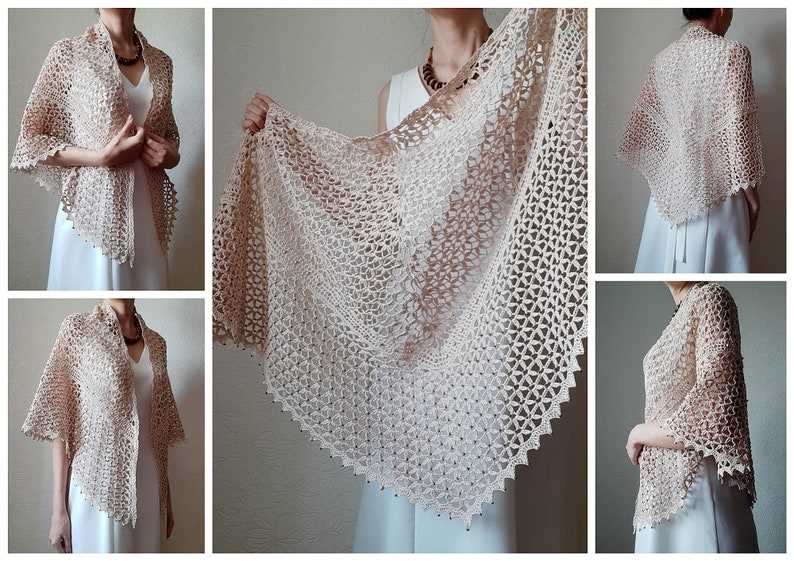
Adding Decorative Edges to the Shawl
Adding decorative edges to a cotton shawl can elevate its overall appearance and make it more visually appealing. There are several techniques you can use to achieve this, including lace edging, picot edging, and fringe.
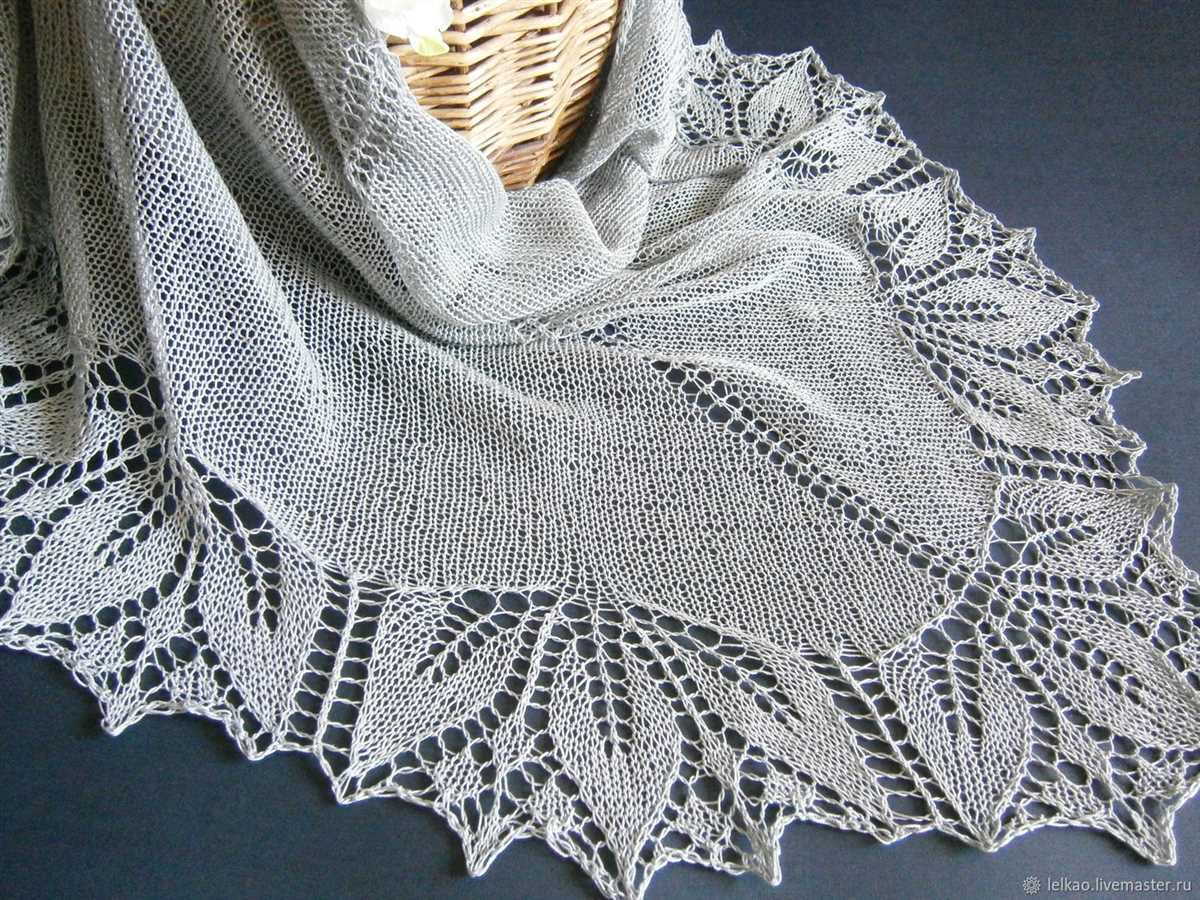
Lace Edging: Lace edging is a popular choice for adding a delicate and feminine touch to a cotton shawl. You can incorporate lace patterns into the edges of the shawl by knitting or crocheting them separately and then attaching them. There are various lace patterns to choose from, ranging from simple to intricate designs.
Picot Edging: Picot edging is another decorative technique that can enhance the look of a cotton shawl. Picots are small loops of yarn that are created by making a series of chain stitches. These loops can be added along the edge of the shawl, creating a decorative and textured border. Picot edging can be simple and subtle or more elaborate, depending on the desired effect.
Fringe: Fringe is a classic choice for adding a decorative edge to a shawl. It can give the shawl a bohemian or playful look, depending on the length and thickness of the fringe. To add fringe, you can use strands of yarn that match or complement the color of the shawl. The strands are attached at regular intervals along the edge of the shawl, creating a decorative border.
When choosing a decorative edge for your cotton shawl, consider the overall style and purpose of the shawl. Lace edging can add elegance, picot edging can provide a touch of whimsy, and fringe can give a relaxed and casual vibe. Experiment with different techniques to find the one that best complements your shawl and personal style.
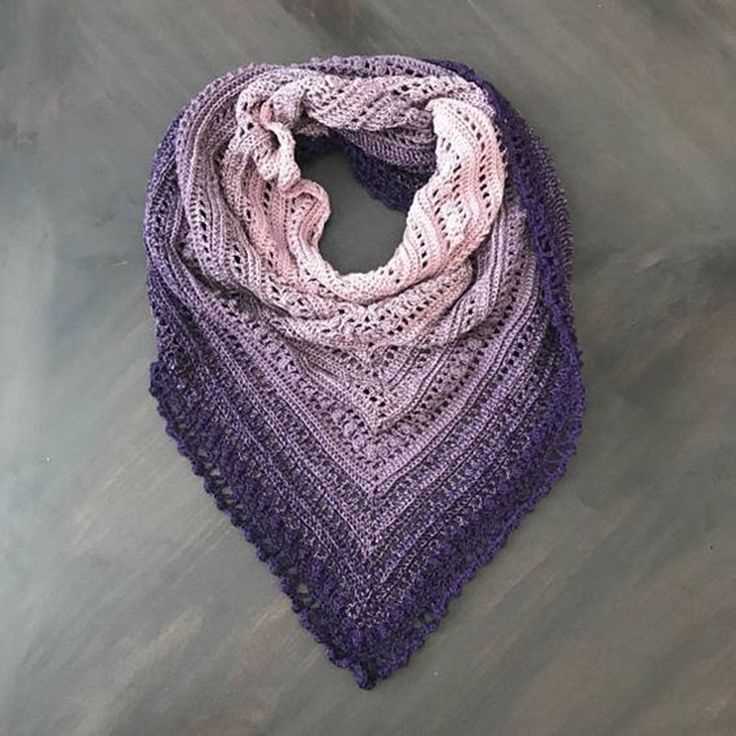
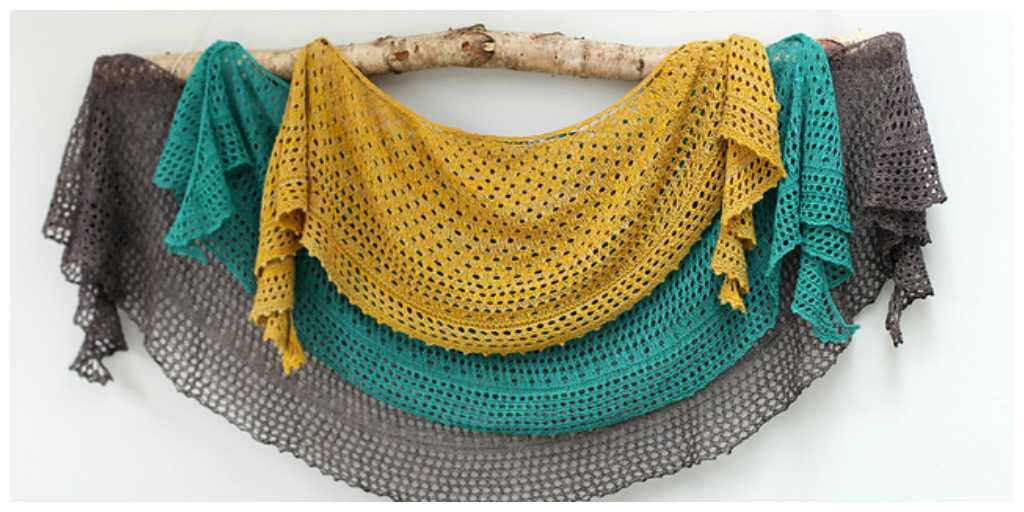
Incorporating Different Colors
Adding different colors to a cotton shawl can be a fun and creative way to enhance its design. By using a variety of colors, you can create unique patterns and add visual interest to your shawl. Here are some tips on how to incorporate different colors into your knitting project:
1. Choose complementary colors
When selecting the colors for your cotton shawl, consider using complementary colors that work well together. Complementary colors are opposite each other on the color wheel and can create a beautiful contrast when combined. For example, you could pair a light blue with a deep orange or a pale pink with a vibrant green.
2. Experiment with color blocking
Color blocking is a popular technique that involves knitting separate sections of your shawl in different colors. This can create a bold and modern look. You can choose to alternate colors every few rows or create larger color blocks for a more dramatic effect. Consider using different textures or stitch patterns in each color block to add even more visual interest.
3. Use variegated yarn
Variegated yarn is a great option for adding multiple colors to your cotton shawl without having to change yarns. Variegated yarn features different colors within the same strand, creating a beautiful and unique effect. This can save you time and effort in changing colors while still achieving a colorful and vibrant shawl.
4. Introduce color through stripes
Adding stripes to your cotton shawl is another way to incorporate different colors. You can choose to knit narrow or wide stripes, depending on your desired look. Stripes can be created by alternating between two or more colors, or by using a self-striping yarn. This technique adds a dynamic and playful element to your shawl.
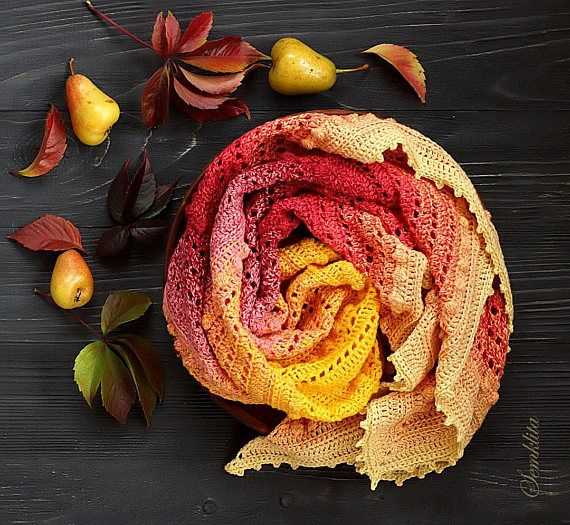
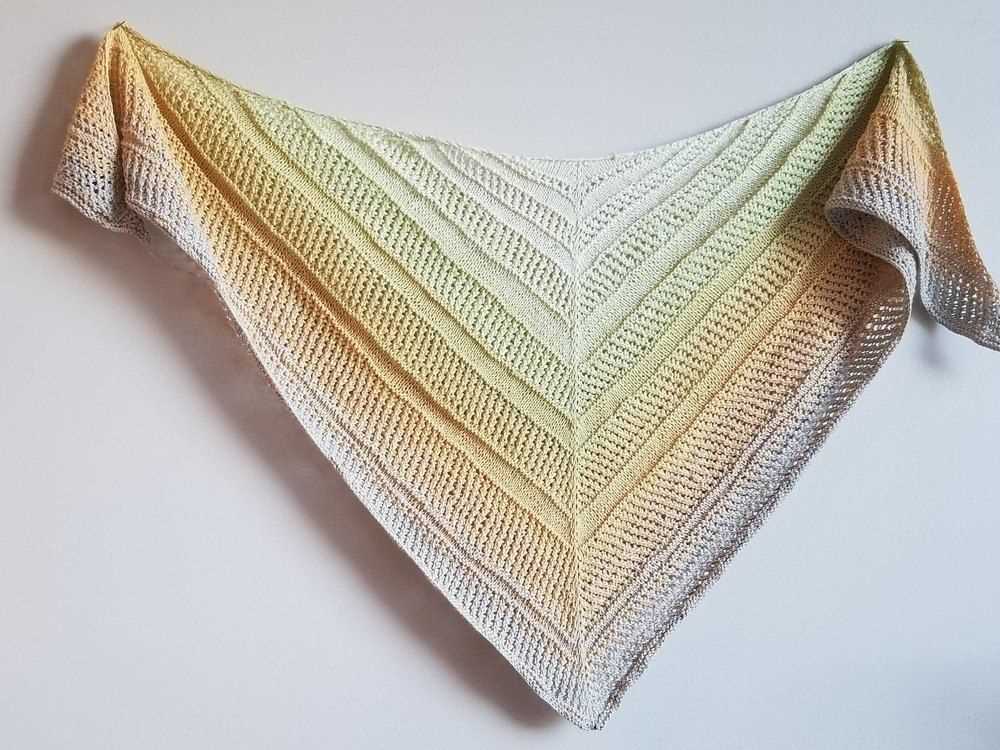
5. Create a color gradient
If you want to create a more subtle transition between colors, you can try creating a color gradient in your cotton shawl. This can be done by using yarns that gradually change in color or by manually blending different shades together. A color gradient can give your shawl a soft and gradient effect, perfect for a more delicate and sophisticated look.
When incorporating different colors into your cotton shawl, don’t be afraid to experiment and try new techniques. The possibilities are endless, and by using different colors, you can create a truly unique and personalized shawl that reflects your own style and creativity.
Increasing and Decreasing Stitches
When knitting a cotton shawl, it is important to understand how to increase and decrease stitches to create various patterns and shapes. Increases and decreases are used to shape the shawl and add interesting design elements.
Increasing stitches: To increase stitches, you can use different techniques such as yarn overs (YO), make 1 left (M1L), make 1 right (M1R), or knit front and back (KFB). Yarn overs create an eyelet and are commonly used to create decorative lace patterns. Make 1 left and make 1 right stitches are used to increase stitches by picking up the horizontal loop between stitches and knitting into it. Knit front and back is another common technique where you knit into the front of the stitch as usual, but before slipping it off the left needle, you knit into the back of the same stitch.
Decreasing stitches: To decrease stitches, you can use techniques such as knit two together (K2tog), slip slip knit (SSK), or slip slip knit pass slipped stitches over (SSKPS). Knit two together is a simple technique where you knit two stitches together as one. Slip slip knit is a technique where you slip two stitches knitwise one at a time, then insert the left needle into the front loops of the slipped stitches and knit them together through the back loop. Slip slip knit pass slipped stitches over is a similar technique, but after knitting the two stitches together through the back loop, you pass the slipped stitches over the knitted stitch to decrease one stitch.
Note: It is essential to follow the pattern instructions when increasing or decreasing stitches as different patterns may require specific techniques or stitch counts. Always check your gauge before starting to ensure the shawl turns out the right size.
By mastering the art of increasing and decreasing stitches, you can create unique and beautiful cotton shawls with intricate designs and shapes.
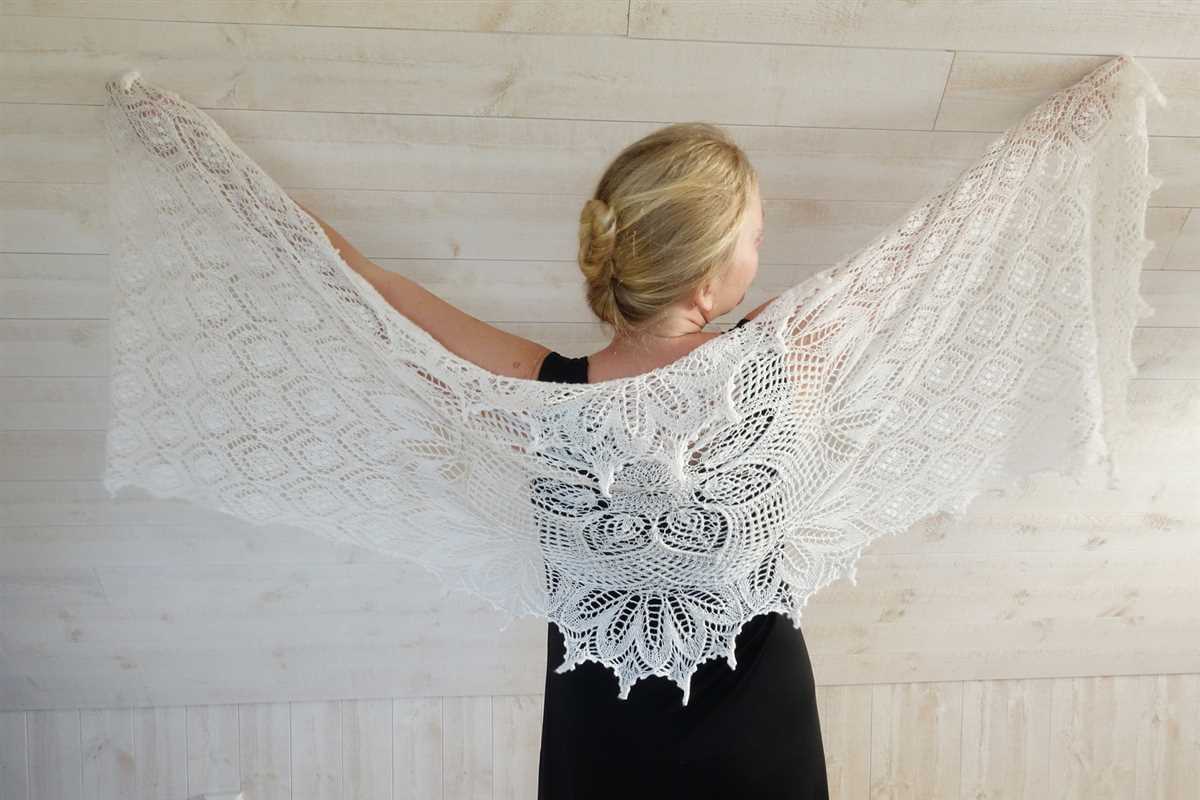
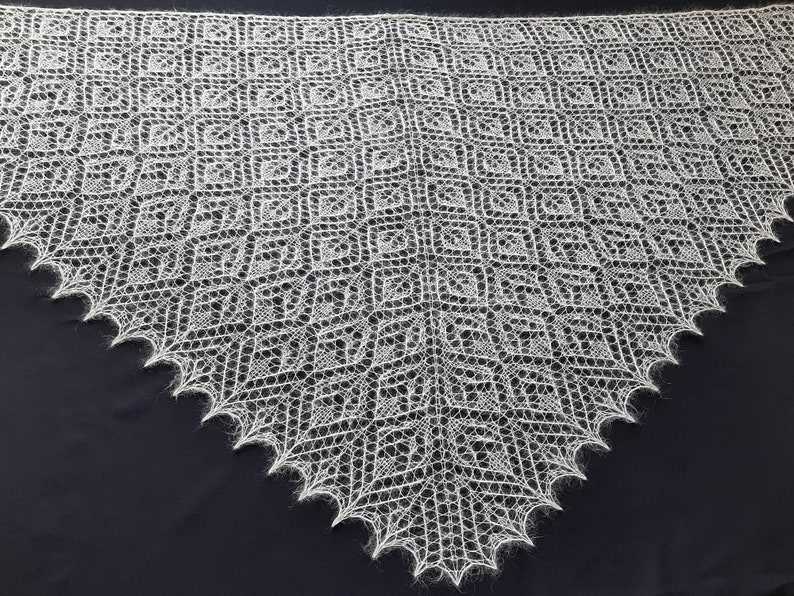
Knitting Lace Patterns
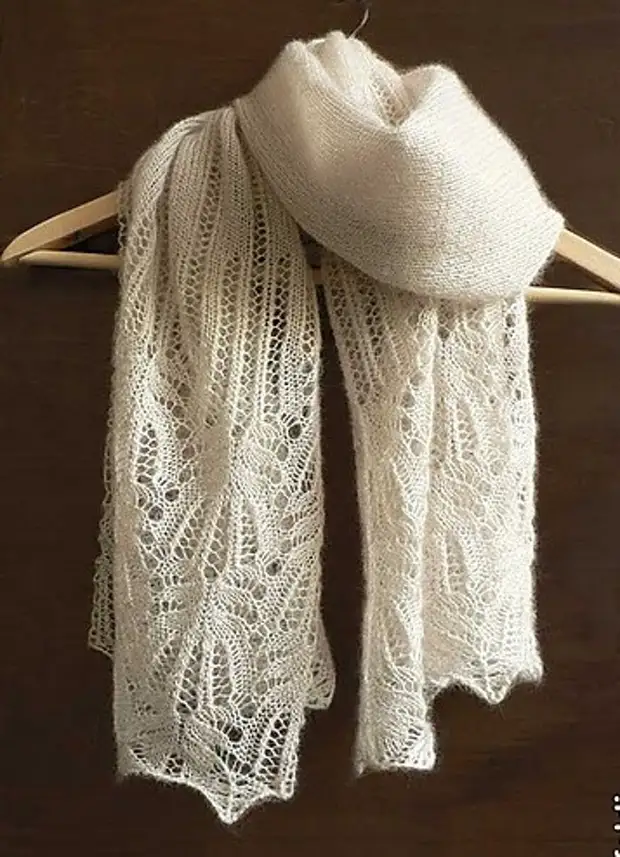
Knitting lace patterns is a beautiful and intricate technique that adds a delicate touch to any project. Whether you’re knitting a shawl, scarf, or even a lacy sweater, lace patterns can elevate your knitting to the next level. Lace patterns are characterized by their openwork, which is created by intentionally adding yarn overs and decreases in specific combinations. This results in beautiful motifs, intricate designs, and a lightweight fabric.
One popular lace pattern is the “Feather and Fan” stitch, also known as “Old Shale”. This pattern consists of alternating sections of increases and decreases, creating a wave-like effect. The result is a stunning pattern that resembles feathers or waves. It is commonly used in shawls and scarves and can be easily modified to fit different sizes and projects.
Another popular lace pattern is the “Diamonds” stitch. This pattern features a repeating diamond motif, created by a combination of yarn overs, decreases, and twisted stitches. The diamonds can be interspersed with other motifs, such as eyelet patterns or cables, for added complexity and visual interest.
When knitting lace patterns, it’s important to use a yarn and needle size that allow for good stitch definition and drape. Lace patterns often require finer yarns and smaller needles to achieve the desired effect. Additionally, using stitch markers and keeping track of pattern repeats can help ensure accuracy and maintain the rhythm of the lace.
Whether you’re a beginner or an experienced knitter, lace patterns offer endless possibilities for creativity and expression. With practice and patience, you can create stunning lace garments and accessories that will be cherished for years to come.
Blocking and Finishing the Shawl
Once you have completed knitting your cotton shawl, the next step is to block and finish it to enhance its overall appearance and drape. Blocking is a technique used to shape and even out the stitches, making the finished shawl look more polished and professional.
Begin by washing the shawl using cold water and a gentle detergent. Gently squeeze out the excess water, being careful not to wring or twist the shawl. Lay the shawl flat on a clean, dry towel and roll it up, applying gentle pressure to remove even more water.
Now it’s time to block the shawl. Lay out a clean, flat surface and cover it with a blocking mat or a thick towel. Pin the edges of the shawl to the desired dimensions using rust-proof blocking pins. Make sure to stretch the fabric evenly without distorting the pattern.
Tip: If you want a more structured look, you can wet block the shawl by spraying it with water until damp, then pinning it to the blocking surface. This method will result in a crisper finish.
Allow the shawl to dry completely. This can take anywhere from a few hours to a day or two, depending on the humidity and air circulation. Once dry, carefully remove the blocking pins and admire your beautifully blocked shawl.
To finish the shawl, weave in any loose ends using a yarn needle, making sure to secure them tightly. You can then add any desired embellishments, such as tassels or fringe, by attaching them to the edges or corners of the shawl.
Tip: If you want to add a professional touch to your shawl, consider adding a decorative border using a crochet hook or small knitting needles. This can give your shawl a unique and personalized look.
- Wash the shawl using cold water and a gentle detergent.
- Lay the shawl flat on a clean, dry towel and roll it up to remove excess water.
- Block the shawl by pinning it to a blocking surface.
- Allow the shawl to dry completely.
- Weave in any loose ends and add embellishments if desired.
- Consider adding a decorative border for a professional touch.
Final Thoughts on Your Cotton Shawl Project
Knitting a cotton shawl can be a rewarding and enjoyable project. Whether you are a beginner or an experienced knitter, this pattern offers a great way to create a beautiful and practical accessory. As you complete your cotton shawl, here are some final thoughts to consider:
- Choose the right yarn: When working on a cotton shawl, it is important to select a yarn that is suitable for the project. Look for a soft and lightweight cotton yarn that will provide the desired drape and comfort.
- Try different stitch patterns: Experiment with different stitch patterns to add interest and texture to your shawl. Lace patterns, cables, or even simple garter stitch can create unique and eye-catching designs.
- Consider color options: The choice of color for your cotton shawl can greatly enhance its appearance. Opt for a color that complements your personal style and wardrobe, or go for a bold and vibrant shade to make a statement.
- Pay attention to finishing touches: The finishing touches of your cotton shawl, such as blocking and adding fringe, can significantly enhance the final look. Take the time to properly block your shawl to achieve perfect dimensions and ensure smooth edges.
In conclusion, knitting a cotton shawl allows you to showcase your creativity and create a versatile accessory for any season. With the right yarn, stitch patterns, and attention to detail, you can create a stunning shawl that will be a cherished addition to your wardrobe. Enjoy the process and embrace the satisfaction of wearing a beautiful shawl that you made with your own two hands!