
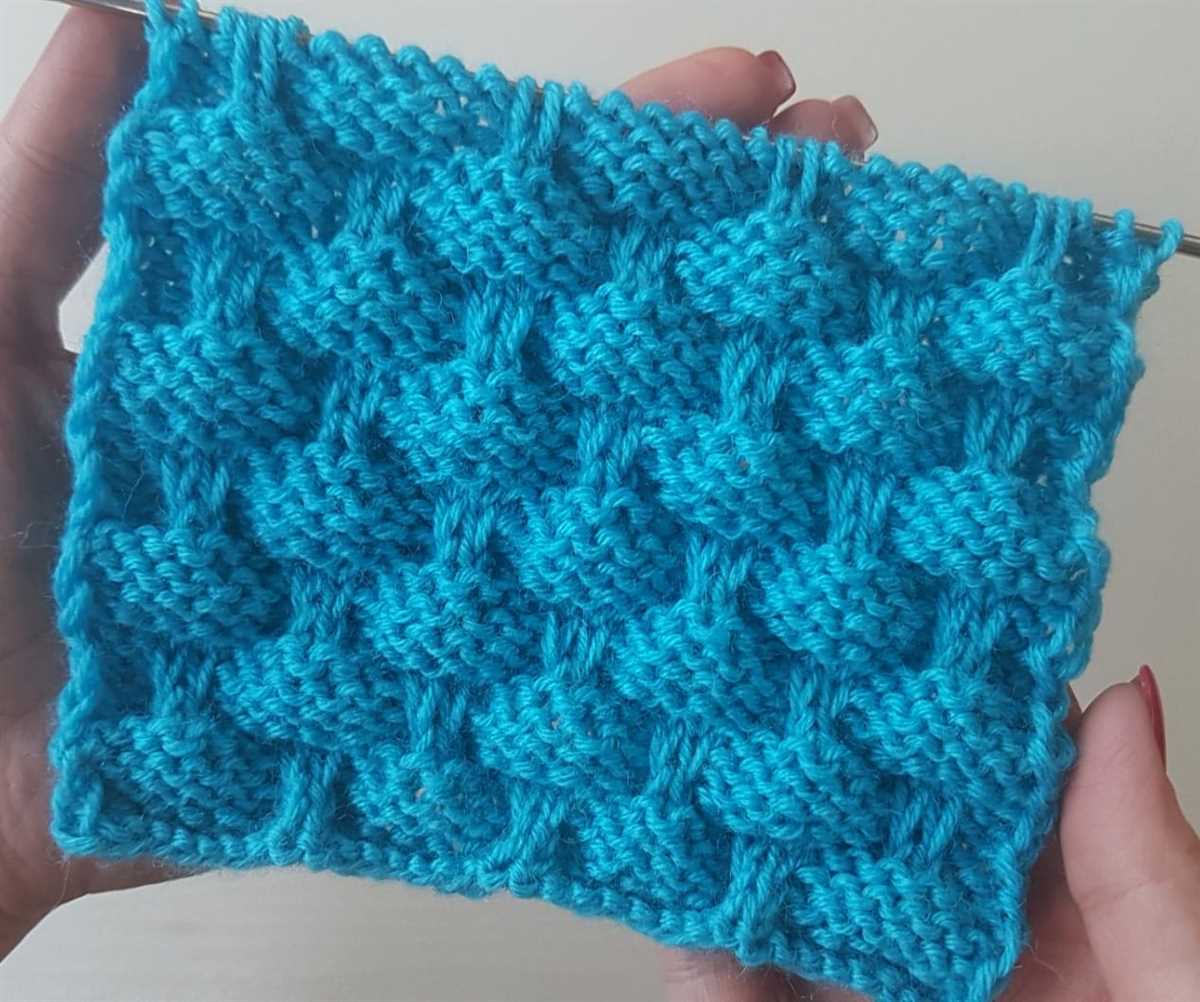
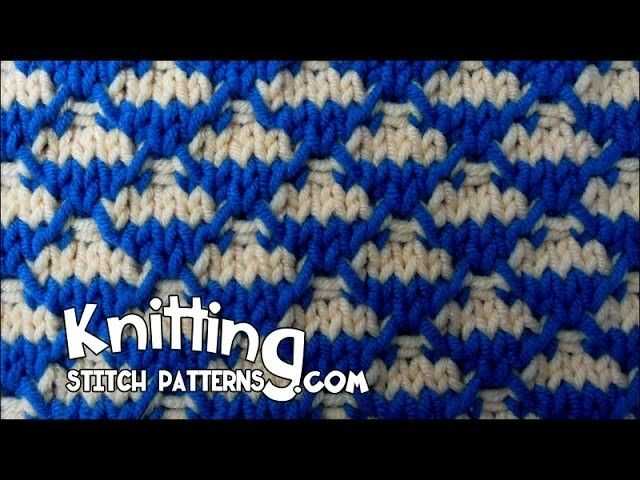
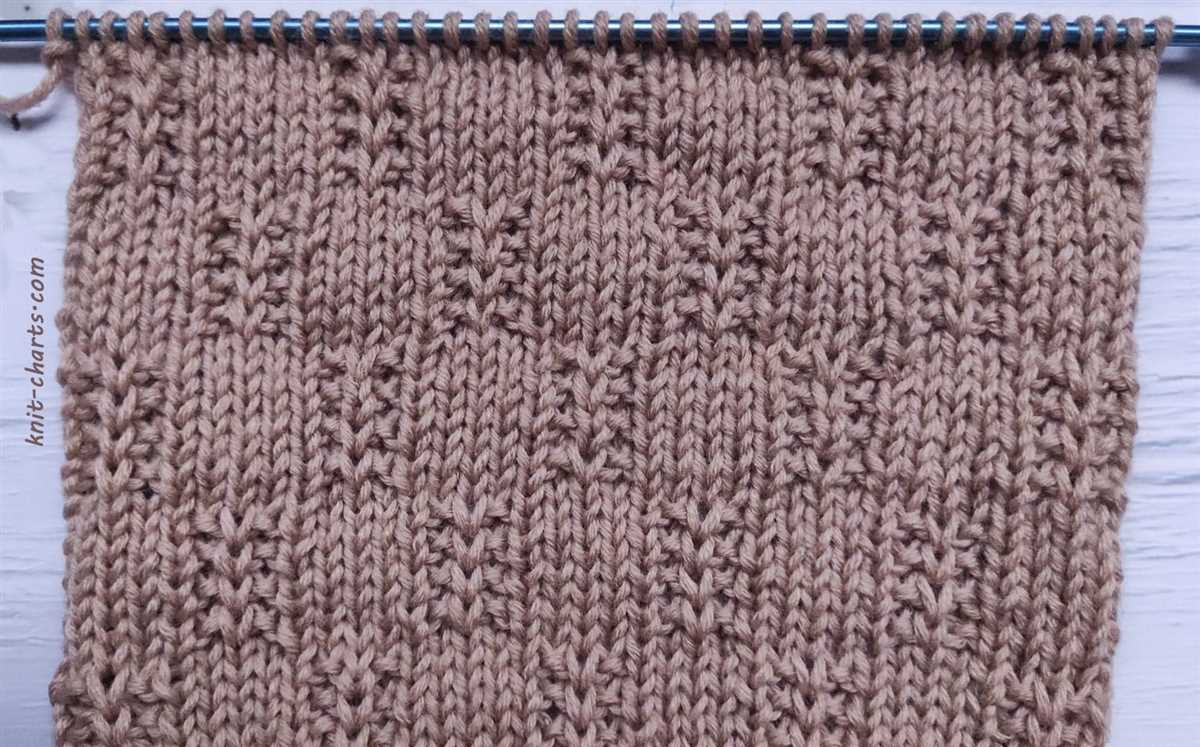
The checker stitch knitting pattern is a classic and versatile technique that is perfect for a wide range of knitting projects. From scarves and blankets to sweaters and hats, this pattern adds a beautiful texture and visual interest to any piece.
The checker stitch pattern is created by alternating blocks of knit and purl stitches, resulting in a checkered pattern. This pattern is relatively simple to learn and is a great option for beginner knitters who want to practice different stitch combinations.
Not only does the checker stitch pattern provide an aesthetically pleasing design, but it also creates a fabric that is warm and cozy. The raised texture of the pattern traps heat, making it an excellent choice for winter accessories and garments.
Whether you’re new to knitting or looking to expand your stitch repertoire, the checker stitch pattern is a must-try. It’s a timeless design that can elevate any knitting project to the next level.
Checker Stitch Knitting Pattern – A Beginner’s Guide
If you are new to knitting and looking to try out a simple yet stylish pattern, the checker stitch knitting pattern is a great place to start. This pattern creates a classic checkered design, making it a versatile choice for a wide range of projects such as scarves, blankets, and even sweaters. By learning this pattern, you will gain a valuable foundation for more complex knitting techniques in the future.
Materials:
- Yarn of your choice – preferably a medium weight yarn
- Knitting needles – appropriate size for your chosen yarn
- Tapestry needle
- Scissors
Instructions:
- Start by casting on an even number of stitches, depending on the desired width of your project. For beginners, it is recommended to start with around 30 stitches to practice the pattern.
- Row 1: Knit all stitches.
- Row 2: Purl all stitches.
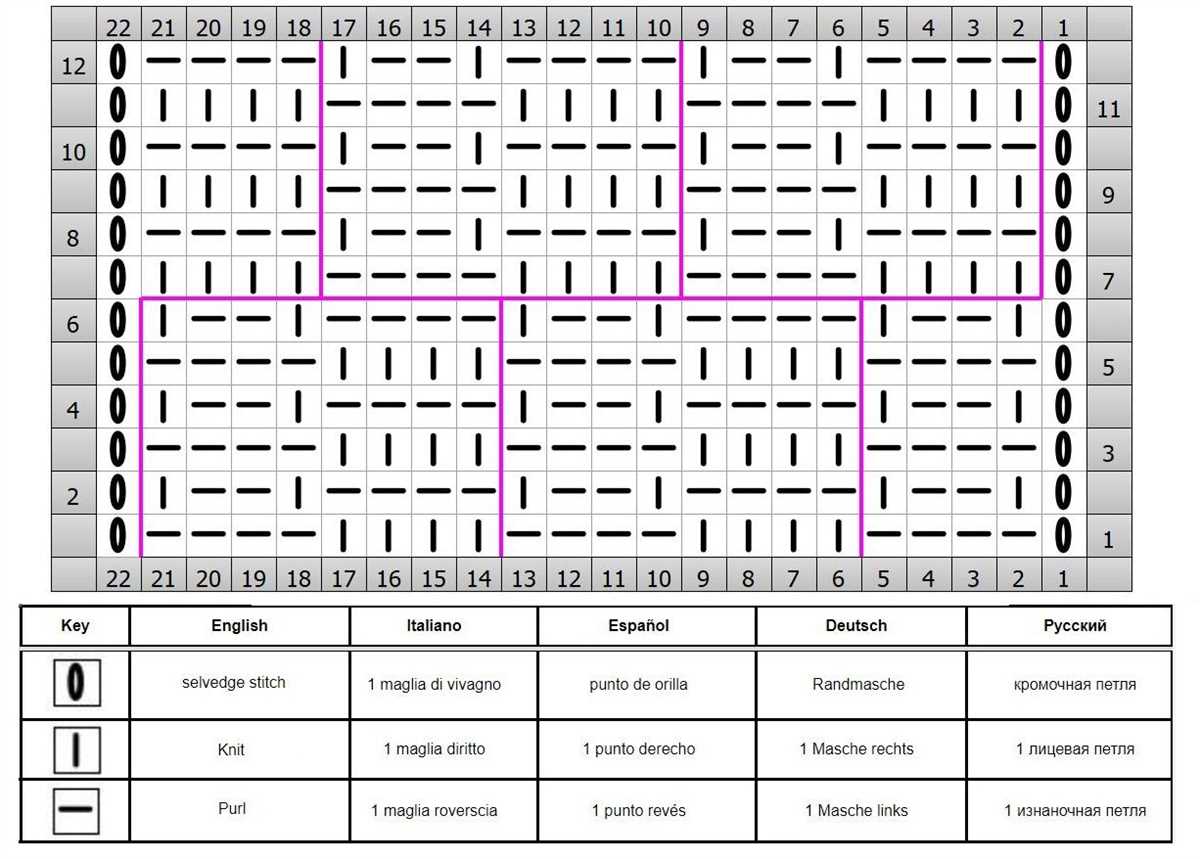
- Row 3: *Knit 2 stitches, purl 2 stitches.* Repeat from * to * until the end of the row.
- Row 4: *Purl 2 stitches, knit 2 stitches.* Repeat from * to * until the end of the row.
- Repeat rows 3 and 4 until desired length is reached.
- Finish off your project by knitting the last row, binding off, and weaving in any loose ends.
With just these simple steps, you will be able to create a beautiful checkered pattern. Don’t be afraid to experiment with different colors and yarns to add your own personal touch. As you become more comfortable with the checker stitch knitting pattern, you can try incorporating it into more complex designs and even combine it with other stitch patterns to create unique textures. Happy knitting!
Materials Needed for Checker Stitch Knitting
In order to create the checker stitch knitting pattern, there are several materials that you will need to gather. These materials will help ensure that you have everything necessary to complete the project successfully.
1. Yarn: The first material you will need is yarn. Make sure to choose a yarn type and color that you like and that is suitable for the project. The gauge and weight of the yarn should be appropriate for the size of knitting needles you plan to use.
2. Knitting Needles: You will need a pair of knitting needles to work on the checker stitch knitting pattern. The size of the needles should match the gauge of the yarn you have chosen. It is recommended to use circular or straight knitting needles, depending on your personal preference.
3. Scissors: A pair of scissors is essential for cutting the yarn as needed and trimming any loose ends. Make sure to have a sharp pair of scissors that are suitable for cutting yarn.
4. Stitch Markers: Stitch markers can be useful when working on complex patterns like the checker stitch. These markers will help you keep track of your stitches and ensure that you don’t make any mistakes. Make sure to have enough stitch markers for the number of stitches in your pattern.
5. Tapestry Needle: A tapestry needle is needed for weaving in the loose ends of yarn once you have finished knitting. This will help give your finished project a clean and polished look.
By gathering these materials before starting the checker stitch knitting pattern, you can ensure a smooth and enjoyable knitting experience. Having all the necessary materials on hand will help you stay organized and focused on your project.
Understanding the Basics of Checker Stitch Knitting
If you’re interested in learning how to knit the checker stitch pattern, it’s important to first understand the basics of knitting. Knitting is a craft that involves creating fabric by interlocking loops of yarn with knitting needles. Checker stitch is a popular stitch pattern that creates a textured design resembling a checkered pattern.
To start knitting the checker stitch pattern, you will need a set of knitting needles and yarn. Choose a yarn that is appropriate for the project you have in mind, and select knitting needles that match the recommended size for the yarn. It’s also helpful to have a stitch marker to keep track of your rows.
How to Knit the Checker Stitch Pattern
To knit the checker stitch pattern, follow these steps:
- Cast on: Begin by casting on the required number of stitches for your project.
- Setup rows: Knit the first few rows in a basic stitch pattern, such as garter stitch or stockinette stitch, to create a foundation for the checker stitch pattern.
- Checker stitch pattern: Once you have established the setup rows, begin the checker stitch pattern. This pattern typically alternates between knit and purl stitches in a specific sequence, creating the checkered effect. Consult a pattern or tutorial for the specific instructions on how to knit the checker stitch pattern.
- Repeat rows: Continue knitting the checker stitch pattern for the desired number of rows, repeating the same sequence of knit and purl stitches.
- Finishing: When you have completed the desired number of checker stitch rows, finish off your knitting project by knitting a few rows in the same stitch pattern as the setup rows to create a finished edge. Finally, bind off your stitches to secure the fabric.
Once you have a good understanding of the basics of knitting and how to knit the checker stitch pattern, you can start experimenting with different yarn weights, colors, and project ideas. From scarves and hats to blankets and sweaters, the checker stitch pattern can be used to create a variety of beautiful and unique knitted items.
Step-by-Step Instructions for Checker Stitch Knitting
If you’re looking for a fun and versatile knitting pattern, the checker stitch is a great choice. This pattern creates a checkerboard-like design that adds visual interest to any knitting project. Whether you’re knitting a blanket, scarf, or sweater, the checker stitch is sure to impress.
To get started with the checker stitch, you’ll need a pair of knitting needles and your choice of yarn. It’s recommended to use a medium-weight yarn for this pattern, as it will provide enough structure for the checkerboard pattern to stand out. Once you have your materials ready, follow these step-by-step instructions.
1. Cast on an even number of stitches.
Begin by casting on an even number of stitches onto your knitting needles. The number of stitches is up to you and can vary depending on the size of your project. For a small swatch, you can start with 20 stitches, while a larger project may require 100 or more stitches.
2. Knit the first row.
Once you have cast on your stitches, knit the entire first row. This will create a base row for your checker stitch pattern.
3. Begin the checker stitch pattern.
Now it’s time to start the checker stitch pattern. The pattern is created by alternating between two different stitches: the knit stitch and the purl stitch.
- On the right side (or front) of your work, knit the first stitch.
- Purl the next stitch.
- Continue knitting and purling across the row, alternating between the two stitches.
- Repeat this pattern for every row of your project.
4. Create the checkerboard pattern.
As you continue knitting and purling across each row, you’ll start to see the checkerboard pattern emerge. The knit stitches will create the squares that appear to “pop” out, while the purl stitches will create the squares that appear to “sink” in.
5. Continue knitting until desired length.
Continue knitting the checker stitch pattern until your project reaches the desired length. Remember to keep alternating between the knit and purl stitches for each row.
With these step-by-step instructions, you’ll be able to easily create the checker stitch pattern. Whether you’re a beginner or an experienced knitter, this pattern is a great way to add texture and visual interest to your knitting projects.
Tips and Tricks for Perfecting the Checker Stitch
Knitting the checker stitch can be a fun and rewarding project, but it can also be challenging to achieve the desired pattern. Here are some tips and tricks to help you perfect the checker stitch and create a beautiful finished piece.
1. Use contrasting colors: One of the key elements of the checker stitch is the contrast between the two colors used. Choose two colors that have a significant difference in shade or hue to make the checkerboard pattern more pronounced. This will enhance the visual impact of the stitch and make it stand out.
2. Maintain consistent tension: Consistent tension is crucial in creating an even and uniform checker stitch. Keep an eye on your tension throughout the project, making sure that each stitch is neither too tight nor too loose. Practice good knitting habits, such as holding your yarn in a relaxed manner and using the same level of tension for each stitch.
3. Follow a clear pattern: Checker stitch requires an alternating pattern of knit and purl stitches. To ensure accuracy, it is essential to follow a clear and detailed pattern. Pay close attention to the stitch counts and instructions provided in the pattern, especially when transitioning between rows. Using stitch markers can also help you keep track of the pattern and prevent mistakes.
4. Block your finished piece: Blocking is an essential step in enhancing the appearance of your checker stitch project. After completing the knitting, wet block your piece by soaking it in lukewarm water and laying it flat to dry. This will help even out any uneven tension or stitches, ensuring a polished and professional finish.
5. Practice and be patient: Like any knitting technique, mastering the checker stitch takes practice and patience. Don’t get discouraged if your first few attempts don’t turn out perfectly. Keep practicing, pay attention to the details, and be patient with yourself. With time, you’ll develop the skills and confidence to create stunning checker stitch projects.
By following these tips and tricks, you can perfect the checker stitch and create beautiful, eye-catching knitting projects. Remember, practice makes perfect, so don’t be afraid to experiment and have fun with this versatile stitch pattern.
Common Mistakes to Avoid in Checker Stitch Knitting

Checker stitch knitting is a popular pattern that creates a beautiful texture with alternating squares of knit and purl stitches. However, it is not uncommon for knitters, especially beginners, to make mistakes that can affect the overall look of the pattern. Here are some common mistakes to avoid when working on checker stitch knitting:
Mistake 1: Incorrect Placement of Knit and Purl Stitches
A key element of the checker stitch pattern is the placement of knit and purl stitches in alternating squares. One common mistake is accidentally knitting or purling in the wrong squares, which can disrupt the pattern and result in an uneven appearance. To avoid this mistake, it is important to carefully follow the pattern instructions and double-check your work as you go along.
Mistake 2: Inconsistent Tension
Another common mistake in checker stitch knitting is having inconsistent tension throughout the project. Inconsistent tension can lead to uneven stitches and an overall sloppy appearance. To maintain consistent tension, it is important to keep an even and relaxed grip on your needles and yarn. Practice controlling the tension by adjusting the pressure you apply when knitting or purling.
Mistake 3: Forgetting to Mark the Checker Pattern
When working on a large checker stitch knitting project, it can be easy to lose track of which squares should be knit and which should be purled. To avoid confusion, it is helpful to use stitch markers or yarn markers to clearly mark the pattern repeats. This will make it easier to identify any mistakes and correct them before they become too noticeable.
Mistake 4: Not Checking for Errors Regularly
It is important to periodically check your work for any errors in the checker stitch pattern. By regularly reviewing your stitches, you can catch and fix mistakes early on, preventing them from spreading and affecting the overall pattern. Take the time to examine your work every few rows or after completing a pattern repeat to ensure that the checker stitch pattern is being maintained correctly.
Avoiding these common mistakes in checker stitch knitting can help you achieve a professional-looking finished project. By paying attention to the placement of knit and purl stitches, maintaining consistent tension, marking the pattern, and regularly checking for errors, you can create a beautiful and balanced checker stitch pattern.
Enhancing Your Checker Stitch Knitting with Color
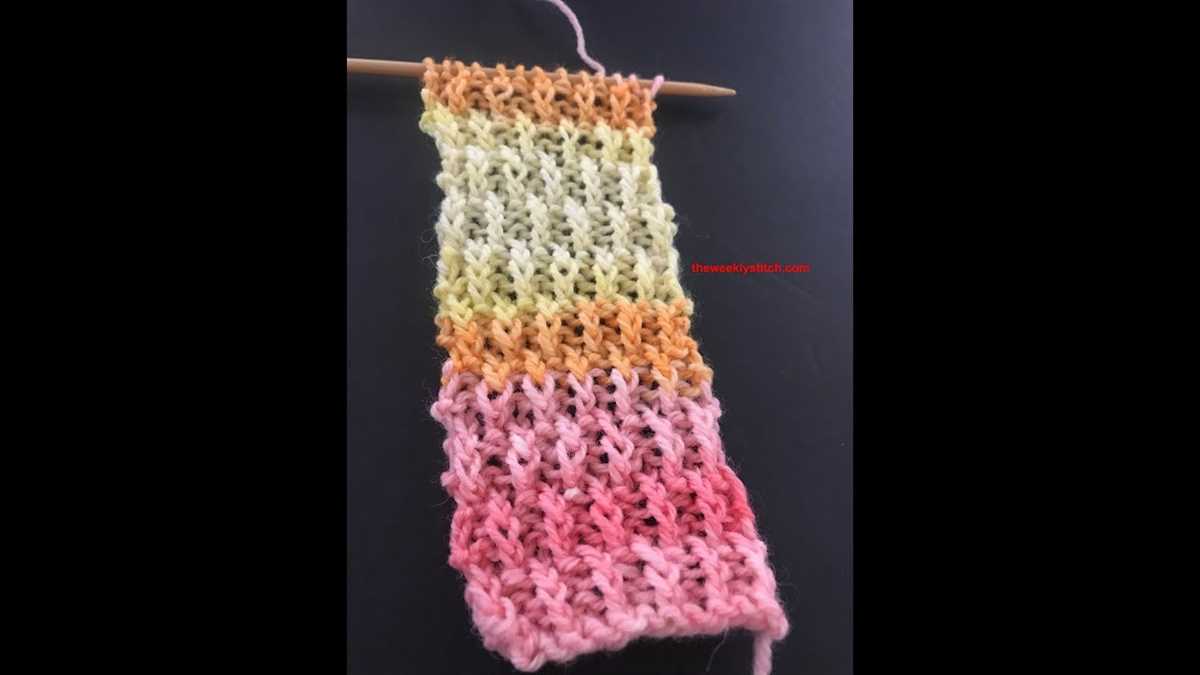
The checker stitch knitting pattern is a versatile design that can be enhanced and personalized with the use of color. By introducing different shades and combinations, you can create unique and eye-catching checker stitch pieces. Whether you’re working on a blanket, scarf, or sweater, incorporating color into your checker stitch knitting can elevate your project and make it truly one-of-a-kind.
1. Choosing the Right Color Palette: When selecting colors for your checker stitch knitting, consider the overall look and feel you want to achieve. For a classic and traditional look, stick to a neutral color palette with shades of gray, black, and white. If you prefer a more vibrant and playful design, opt for bright and bold colors like red, blue, and yellow. Experiment with different combinations and consult color theory to ensure harmonious and visually appealing results.
2. Creating Contrast: One of the key aspects of checker stitch knitting is the contrasting pattern it creates. Take advantage of this by choosing colors that offer a significant contrast to each other. For example, if you have a light gray square, pair it with a dark black or navy square to create a striking checker pattern. This contrast will make the design stand out and add depth to your knitting project.
3. Incorporating Gradient or Ombre Effects: Another way to enhance your checker stitch knitting with color is to incorporate gradient or ombre effects. Start with one color and gradually transition to another within the pattern. This technique can create a beautiful and subtle color variation that adds visual interest and complexity to your checker stitch design.
4. Using Variegated Yarn: Variegated yarn, with its multiple colors and subtle color changes, can be an excellent choice for checker stitch knitting. When working with variegated yarn, allow the colors to speak for themselves and simply follow the pattern. The ever-changing colors will create a unique and dynamic checker stitch pattern that is sure to impress.
Incorporating color into your checker stitch knitting can transform a simple pattern into a stunning and eye-catching piece. By choosing the right color palette, creating contrast, incorporating gradient effects, or using variegated yarn, you can make your checker stitch knitting truly stand out. Let your creativity and personal style shine through as you experiment with different colors and create beautiful checker stitch projects that are uniquely yours.
Adapting the Checker Stitch for Different Knitting Projects
The checker stitch is a versatile knitting pattern that can be adapted for various knitting projects. Whether you are making a cozy blanket, a warm scarf, or a stylish hat, the checker stitch adds a beautiful texture and pattern to your project.
When using the checker stitch for different knitting projects, you can play around with the size and scale of the checks to achieve the desired effect. For a chunky and cozy blanket, you can increase the number of stitches and rows to create larger checks. On the other hand, for a delicate scarf or hat, you can decrease the number of stitches and rows to make smaller checks.
To further adapt the checker stitch, you can also experiment with different yarn weights and types. For a more textured look and feel, you can use a chunky or bouclé yarn. If you prefer a more lightweight and drapey finish, you can opt for a fingering or lace weight yarn. The choice of yarn will also impact the overall size and thickness of your knitting project.
Another way to adapt the checker stitch is by introducing color changes. You can create contrasting checks by using two different colors of yarn. This adds visual interest to your knitting project and allows you to customize it to your personal style. You can create a bold and vibrant design by using bright and contrasting colors, or a more subtle and harmonious look by choosing shades from the same color family.
Overall, the checker stitch is a versatile pattern that lends itself to a variety of knitting projects. By adjusting the size of the checks, experimenting with different yarn weights, and incorporating color changes, you can create unique and personalized pieces that showcase the beauty of this classic knitting pattern.
Checker Stitch Knitting Patterns for Scarves and Shawls
Checker stitch knitting patterns are a popular choice for scarves and shawls. The classic checkered design adds a timeless and elegant touch to any accessory. Whether you’re a beginner or an experienced knitter, these patterns are relatively easy to follow and can be customized to suit your individual style.
To create a checker stitch pattern, you will need two contrasting colors of yarn. The pattern consists of alternating blocks of knit and purl stitches, creating a checkerboard effect. You can choose to knit the entire piece in the checker stitch pattern or incorporate it as a border or accent.
One popular approach is to knit a wide scarf or shawl in the checker stitch pattern and use one color for the background and the other for the checkered squares. This creates a striking contrast and makes the pattern stand out. You can experiment with different color combinations to achieve the desired look.
Another option is to incorporate the checker stitch pattern as a border on a solid-colored scarf or shawl. This adds a touch of visual interest and creates a unique and personalized accessory. You can choose to make the border a few inches wide or extend it along the entire length of the scarf or shawl.
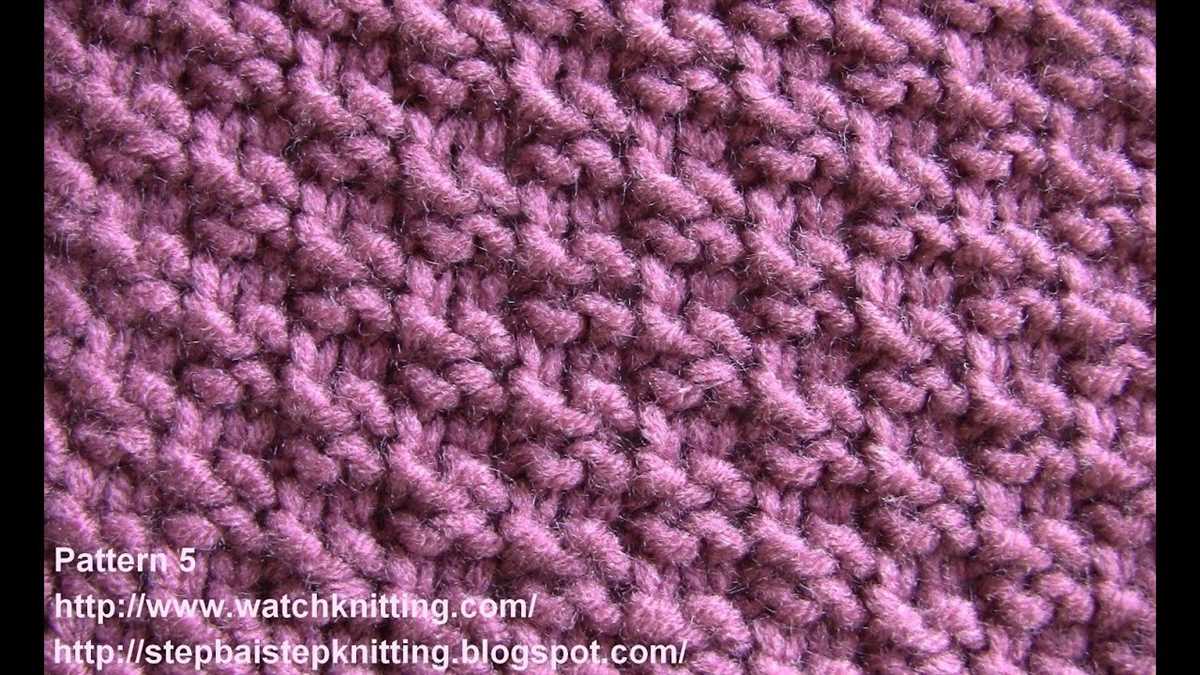
The checker stitch pattern is not only visually appealing, but it also adds texture to your knitted piece. The alternating knits and purls create a bumpy surface that feels cozy and provides extra warmth. This makes checker stitch scarves and shawls perfect for chilly weather and outdoor activities.
Whether you’re knitting a scarf for yourself or as a gift for someone special, the checker stitch pattern is sure to impress. With its timeless design and versatility, this knitting pattern is a great choice for any knitter looking to create a stylish and fashionable accessory.
Checker Stitch Knitting Patterns for Hats and Headbands

If you’re looking for a fun and stylish pattern to knit hats or headbands, then checker stitch patterns are a great option. Checker stitch patterns create a classic, timeless look that can be easily customized to match your personal style.
The checker stitch pattern is created by alternating between knit and purl stitches to create a checkerboard-like design. This pattern is perfect for adding texture and interest to your knitting projects. You can use this pattern to create hats and headbands with a simple, yet eye-catching design.
To create a checker stitch pattern, you’ll need to know how to knit and purl stitches. Start by casting on the desired number of stitches for your project. Then, follow the pattern by knitting one stitch, then purling the next stitch, and continue this pattern until the end of the row. On the next row, you’ll purl the knit stitches and knit the purl stitches to create the checkerboard effect.
When choosing yarn for your checker stitch hat or headband, consider using a medium-weight yarn in a color that complements your outfit. You can also experiment with different color combinations to create a unique and personalized look. Additionally, you can add embellishments such as pom-poms or buttons to further customize your knitted accessories.
Whether you’re a beginner or an experienced knitter, checker stitch patterns are a versatile and enjoyable option for knitting hats and headbands. They offer a classic look that never goes out of style and can be easily customized to match your personal taste. So grab your knitting needles, choose your favorite yarn, and start creating your very own checker stitch hats and headbands!
Checker Stitch Knitting Patterns for Blankets and Throws
Checker stitch knitting patterns are a classic choice for creating beautiful blankets and throws. The checkered design adds a timeless appeal to any home decor, making it a popular choice among knitters. Whether you’re a beginner or an experienced knitter, there are various checker stitch patterns available that you can use to create stunning blankets and throws.
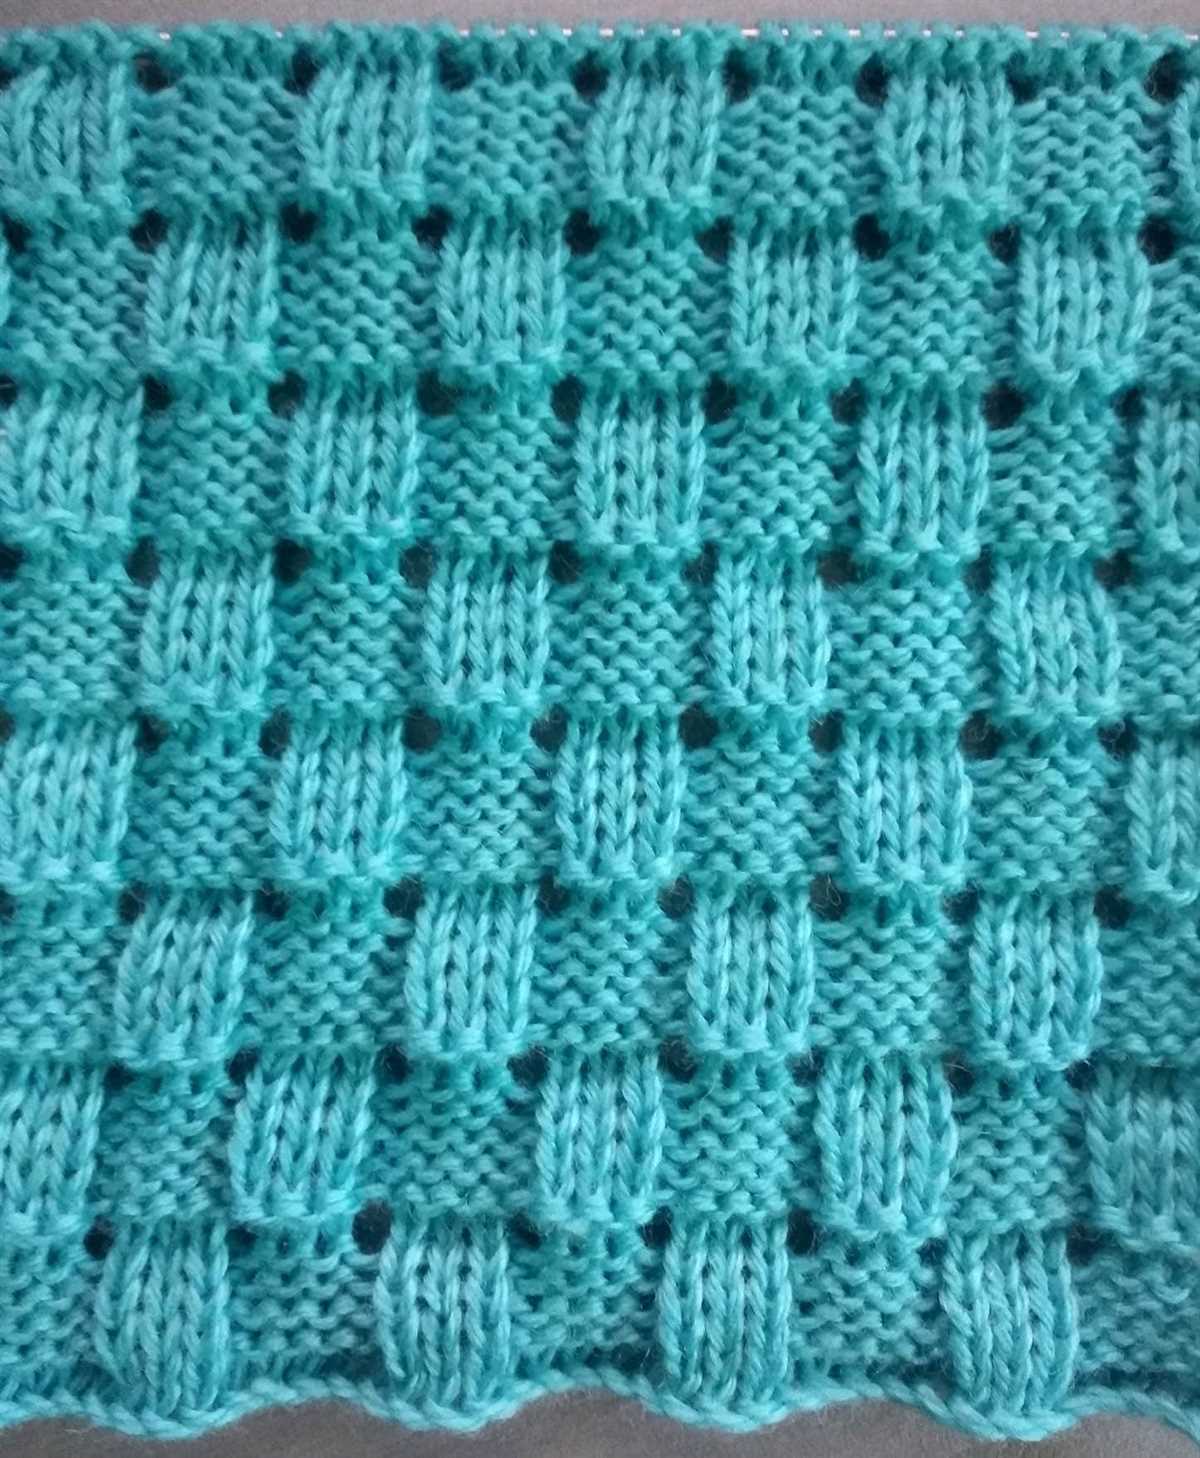
One popular checker stitch pattern is the garter stitch checkerboard:
- Use two contrasting colors of yarn to create a striking checkerboard pattern.
- Knit in the garter stitch, alternating between the two colors every two rows.
- The result is a cozy and eye-catching blanket or throw.
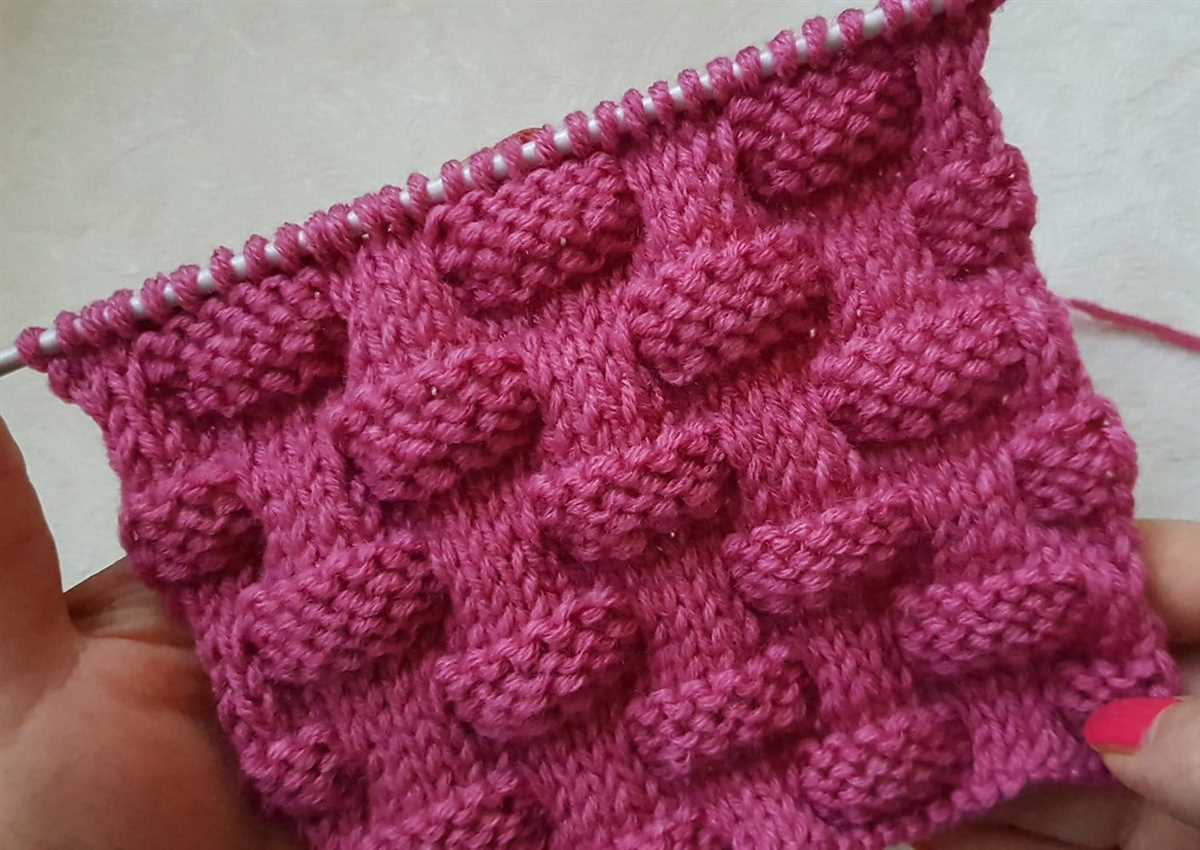
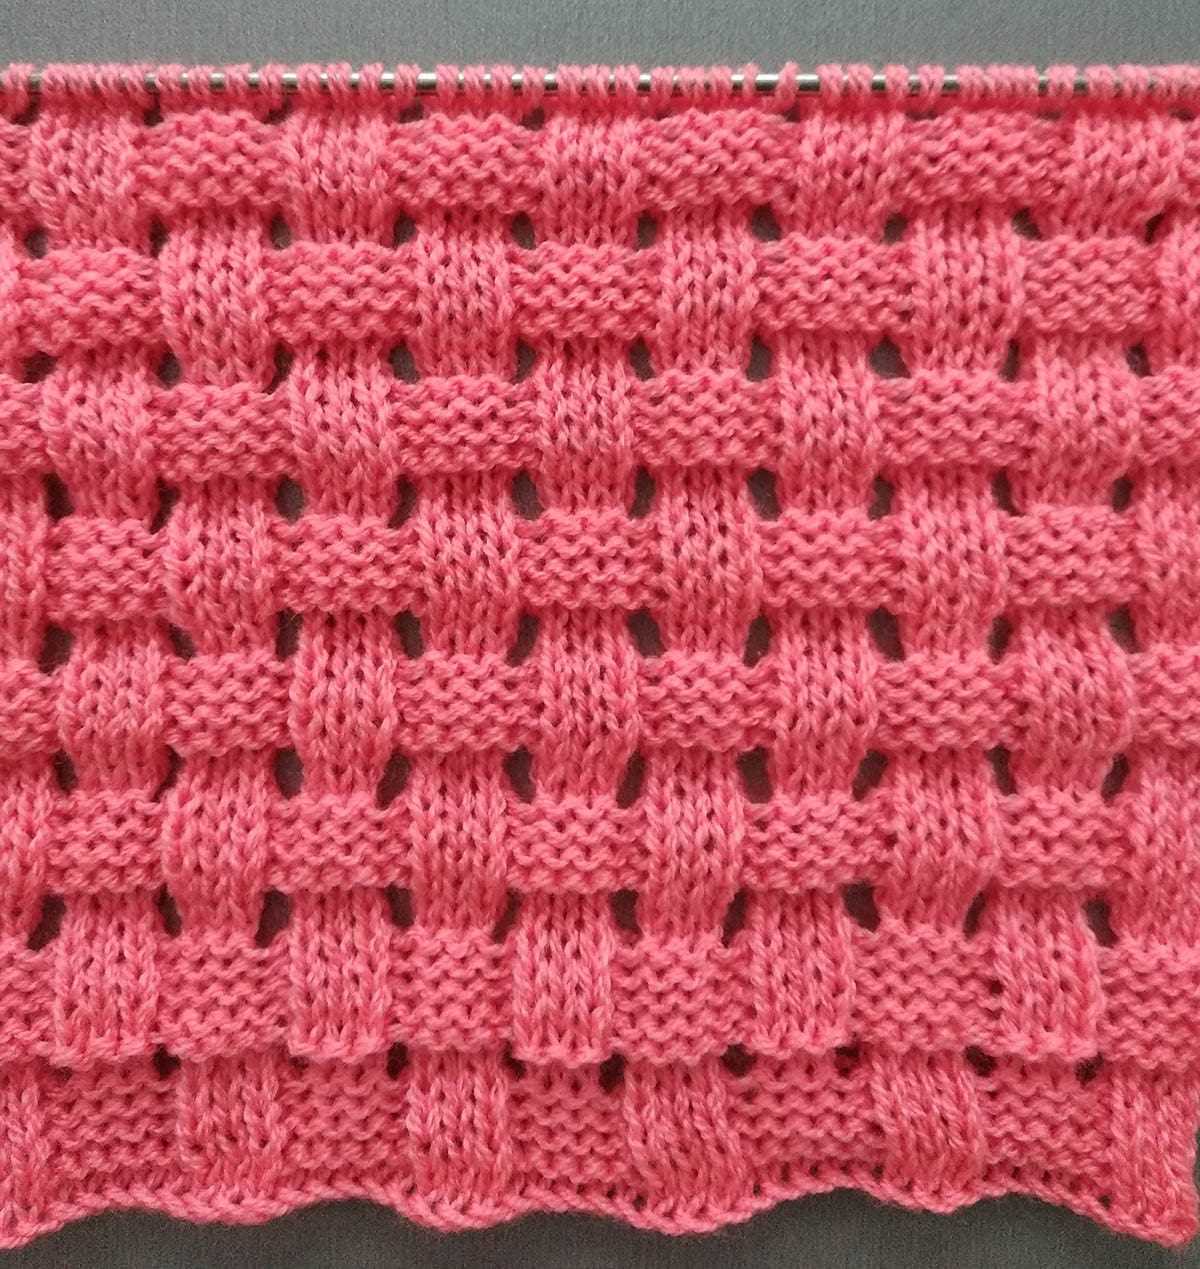
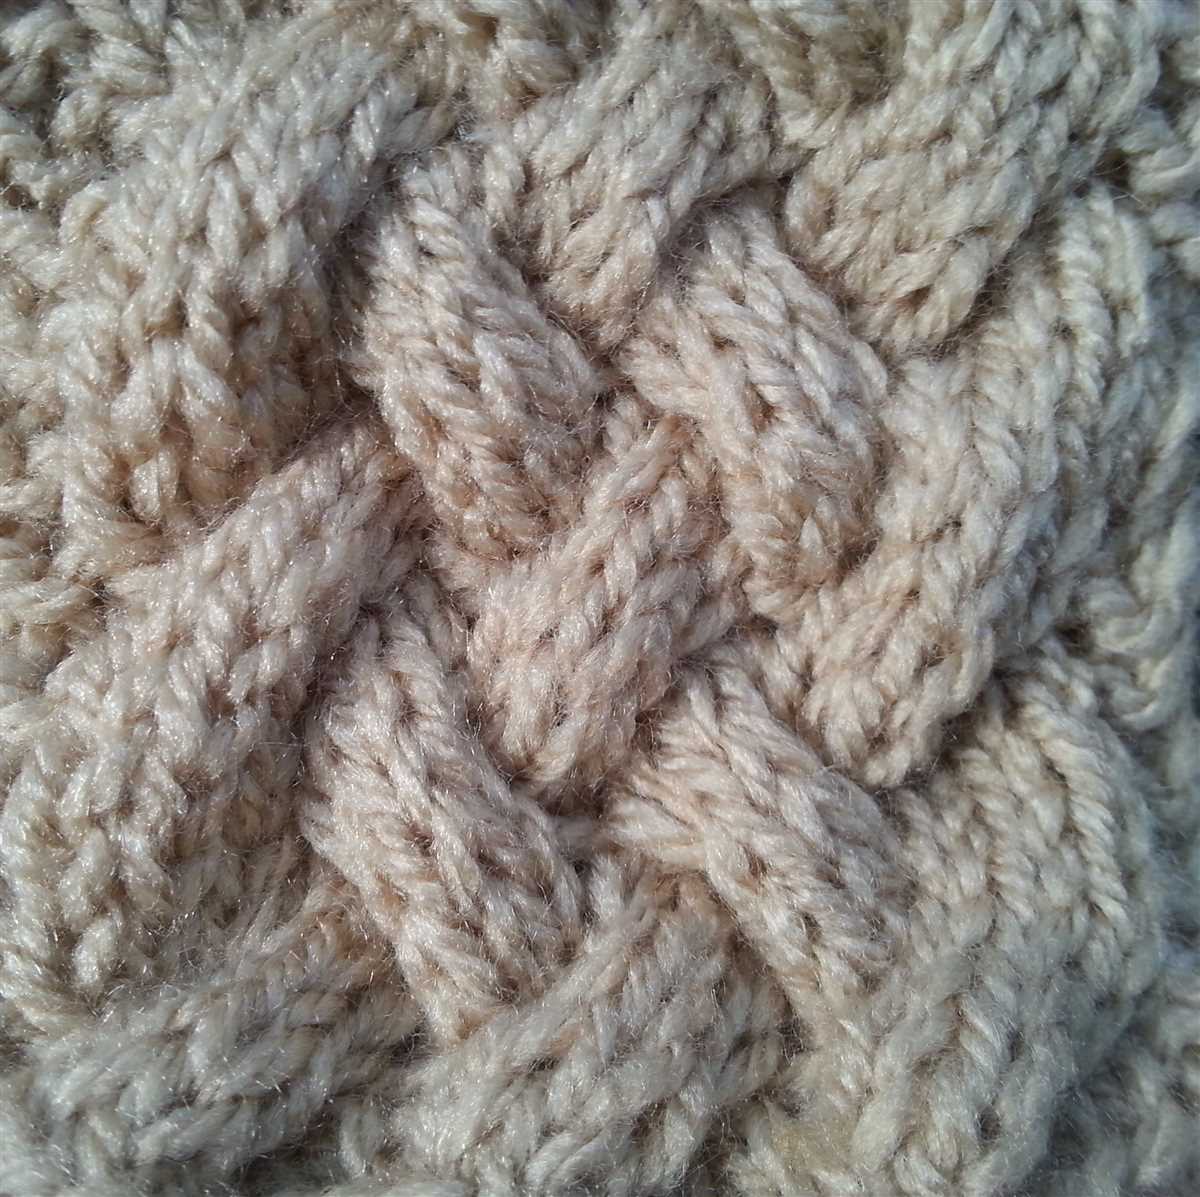
Another option is the basketweave checker stitch pattern:
- This pattern creates a textured, woven look that resembles a basket.
- Using a combination of knit and purl stitches, you can achieve a beautiful checkerboard effect.
- The basketweave pattern adds depth and interest to your blanket or throw.
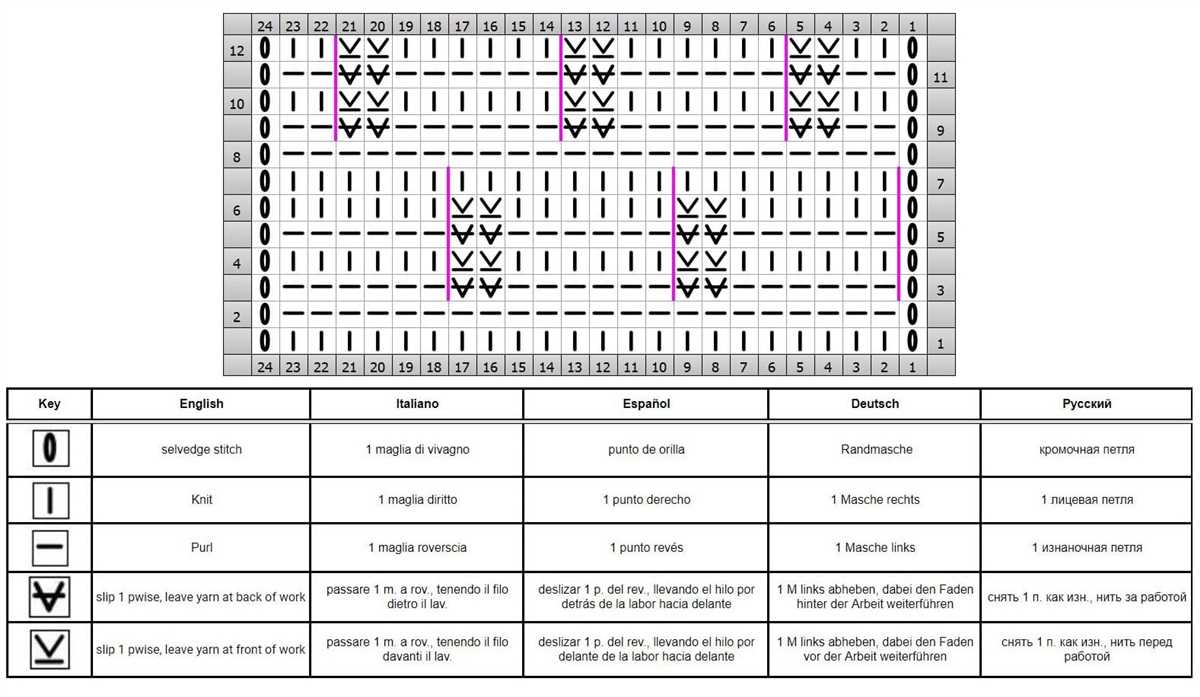
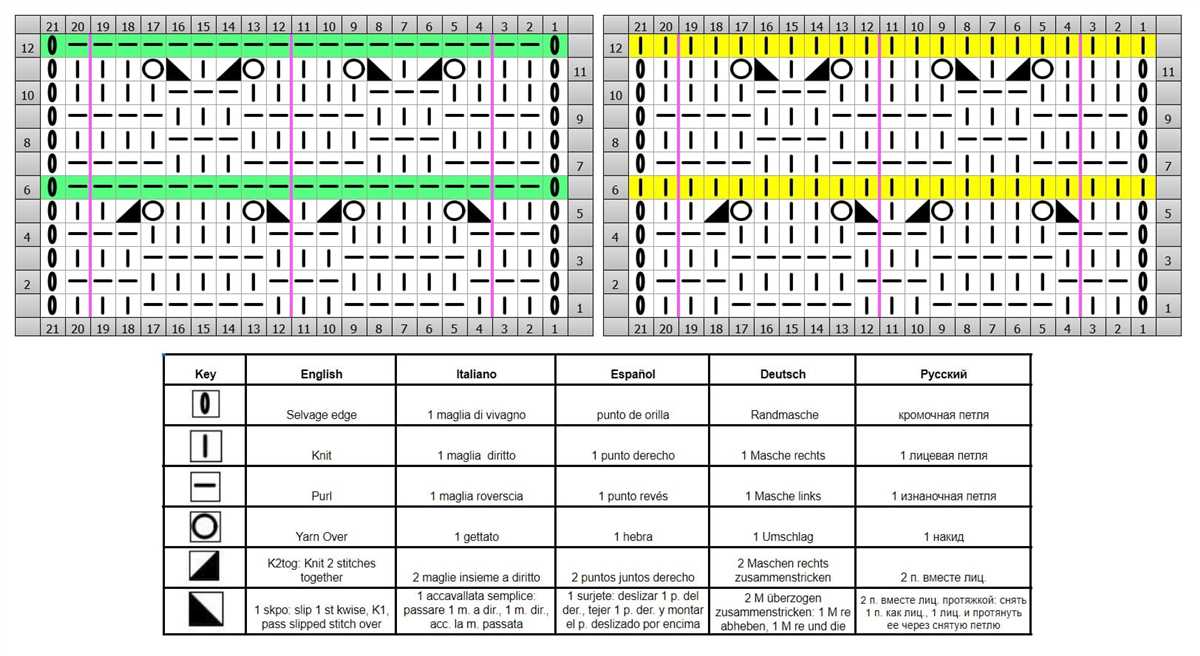
If you’re looking for a more intricate checker stitch pattern, you can try the mosaic checker stitch:
- This pattern involves using slipped stitches to create the checkerboard design.
- By slipping stitches and knitting or purling them on the next row, you can achieve a woven look without using multiple colors.
- The mosaic checker stitch creates a visually stunning pattern that will impress anyone who sees your finished project.
When creating blankets and throws with checker stitch patterns, don’t forget to choose yarns that are suitable for cozy and warm projects. Opt for bulky or chunky yarns to create blankets that are perfect for snuggling up on cold winter nights. Experiment with different color combinations to achieve the desired visual effect. Whether you prefer a simple garter stitch checkerboard or a more intricate mosaic checker stitch, the possibilities are endless when it comes to creating beautiful blankets and throws using checker stitch knitting patterns.
Inspiration and Ideas for Checker Stitch Knitting Projects
Checker stitch is a versatile and classic knitting pattern that can be used in a variety of projects. Whether you’re a beginner or an experienced knitter, there are plenty of ways to incorporate this pattern into your work. Here are some ideas and inspiration to get you started:
1. Blankets and Throws

A checker stitch pattern is perfect for creating cozy and comfortable blankets and throws. You can use the pattern to create a large checkerboard design, or you can alternate between different colors or yarns to create a more dynamic look. Whether you’re knitting for yourself or as a gift, a checker stitch blanket is sure to be appreciated.
2. Scarves and Cowls
Scarves and cowls are great projects for experimenting with different stitch patterns, and checker stitch is no exception. You can create a traditional checkered design, or you can combine checker stitch with other stitch patterns for a unique look. Depending on the yarn and needle size you choose, you can create a cozy winter accessory or a lightweight scarf for cool summer evenings.
3. Dishcloths and Pot Holders
If you’re looking for a practical project, checker stitch is a great option for dishcloths and pot holders. The texture of the checker stitch provides a good grip and makes these items durable, while still being aesthetically pleasing. Plus, they’re quick and easy to knit, making them perfect for last-minute gifts or for using up leftover yarn.
4. Baby Items
Checker stitch can be used to create adorable and cozy baby items. From blankets and hats to booties and cardigans, the possibilities are endless. You can play with different color combinations or use a single color for a classic look. Whether you’re making something for your own little one or as a gift, checker stitch adds a touch of charm to any baby item.
5. Home Decor
Checker stitch can also be used to create stylish and unique home decor items. For example, you can knit checker stitch cushion covers or pillowcases, or you can use the pattern to create a checkerboard design on a wall hanging or tapestry. The pattern adds texture and visual interest to any room, and you can customize the colors to match your existing decor.
Whether you’re a beginner or an experienced knitter, checker stitch offers endless possibilities for creating beautiful and practical items. With these ideas and inspiration, you’ll be able to incorporate checker stitch into your knitting projects and add a touch of charm and style to your work.