
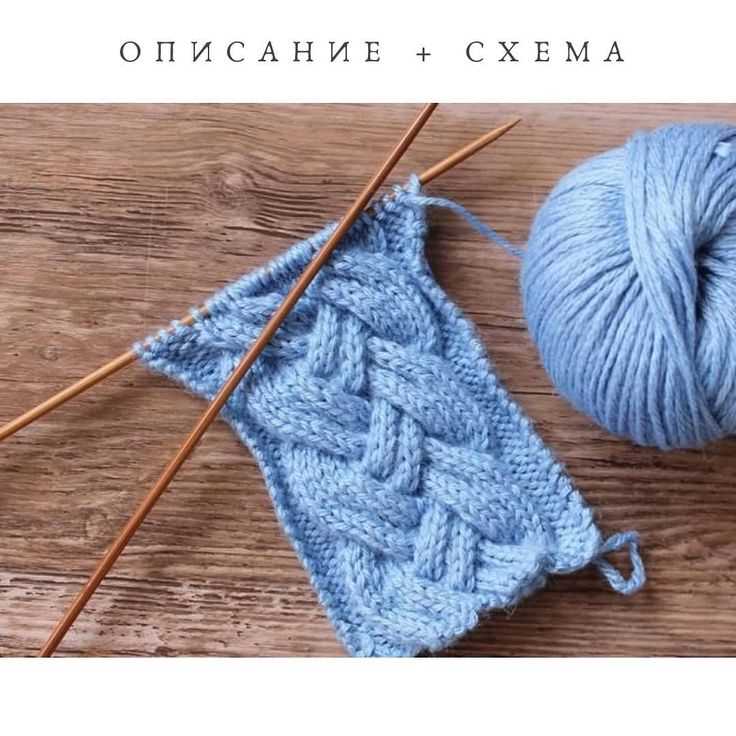
Knitting is a popular pastime for many, allowing individuals to create beautiful and unique pieces of clothing and accessories. One classic knitting stitch that adds texture and elegance to any project is the cable stitch. The cable stitch creates a twisted rope-like appearance, making it perfect for adding interest to a cozy winter hat. In this article, we will explore a cable stitch knit hat pattern that is perfect for both beginner and experienced knitters.
To get started on this cable stitch knit hat pattern, you will need a few supplies. Firstly, you will need a set of knitting needles, typically between size 8 and 10. You will also need a ball of bulky or worsted weight yarn in a color of your choice. Additionally, you will need a cable needle, which is a small, double-pointed needle used to hold stitches while creating the cable pattern. Once you have gathered your supplies, you are ready to begin knitting!
Begin by casting on the desired number of stitches, depending on the size of hat you wish to create. For an adult-sized hat, around 80-90 stitches should be sufficient. Next, work the ribbing for the brim of the hat by knitting one stitch and purling one stitch in a repeating pattern. Continue this ribbing pattern for about 2-3 inches, or until the desired length for the brim is reached. Once the ribbing is complete, it’s time to start the cable stitch pattern.
The cable stitch pattern consists of a series of twists and crosses that create the intricate design. To execute this pattern, follow the instructions for each row carefully. Typically, the pattern will instruct you to hold a certain number of stitches on the cable needle, either in front or in back of the work, while knitting a set of stitches. This creates the twisted appearance of the cable stitch. Continue working the cable stitch pattern for the desired length of the hat, typically around 6-7 inches for an adult-sized hat. Finally, finish off the hat by decreasing the number of stitches gradually until only a few remain. Bind off the stitches, weave in any loose ends, and your cable stitch knit hat is complete!
Cable Stitch Knit Hat Pattern
If you’re looking for a new knitting project, why not try your hand at knitting a cable stitch hat? Cable stitching adds a beautiful texture to any knitted accessory, and a hat is the perfect project to showcase this technique. Whether you’re a beginner knitter or an experienced pro, this hat pattern is sure to keep you warm and stylish during the colder months.
To get started, you’ll need some basic knitting supplies: yarn, knitting needles, a cable needle, and a tapestry needle. Make sure to choose a soft, warm yarn that will be comfortable to wear on your head. For this pattern, it’s recommended to use worsted weight yarn and size 8 knitting needles.
Materials:
- Worsted weight yarn
- Size 8 knitting needles
- Cable needle
- Tapestry needle
Instructions:
- Cast on 80 stitches.
- Knit 2 rows in a rib stitch pattern (knit 2, purl 2).
- Begin the cable stitch pattern:
- Row 1: *Knit 6, place 3 stitches on cable needle and hold in back, knit the next 3 stitches, then knit the 3 stitches from the cable needle.* Repeat from * to * until the end of the row.
- Row 2: Knit all stitches.
- Row 3: *Knit 6, purl 6.* Repeat from * to * until the end of the row.
- Row 4: Knit all stitches.
- Repeat rows 1-4 until the hat measures approximately 8 inches from the cast on edge.
- Decrease rows:
- Row 1: *Knit 6, knit 2 together.* Repeat from * to * until the end of the row.
- Row 2: Knit all stitches.
- Row 3: *Knit 5, knit 2 together.* Repeat from * to * until the end of the row.
- Row 4: Knit all stitches.
- Continue decreasing in this manner, knitting one less stitch between decreases on every knit row, until you have 20 stitches remaining.
- Finishing:
- Cut the yarn, leaving a long tail. Thread the tapestry needle with the tail of yarn and slip stitches off the knitting needle, pulling the yarn tight to close the top of the hat.
- Weave in any loose ends.
- Block the hat by lightly steaming or wetting it and laying it flat to dry.
Once your hat is finished, you can proudly wear it or give it as a thoughtful handmade gift. The cable stitch pattern adds a unique touch to the classic knitted hat design, and you’ll love the cozy warmth it provides during the winter season. Happy knitting!
Choose the Right Yarn and Needles
When it comes to knitting a cable stitch hat, choosing the right yarn and needles is crucial for achieving the desired result. The yarn you select will determine the overall look and feel of the hat, while the needles will affect the gauge and texture of the stitches.
Yarn: When choosing yarn for a cable stitch hat, it’s important to consider the fiber content, weight, and color. For a warm and cozy winter hat, opt for a wool or wool-blend yarn that will provide both insulation and durability. If you prefer a lighter hat or have sensitivity to wool, consider using a soft acrylic or cotton yarn instead. The weight of the yarn will also affect the drape and thickness of the hat, so choose a weight that suits your preference. Lastly, consider the color of the yarn, keeping in mind that cable stitches tend to stand out more on solid or lightly variegated yarns.
Needles: The size and type of needles you use will determine the tension and overall look of the cable stitches. For a standard cable stitch pattern, use a pair of straight or circular needles in the size recommended on the yarn label. If you want a tighter or looser knit, adjust the needle size accordingly. If you’re new to knitting cables, it may be helpful to use a pair of needles with pointed tips to make it easier to manipulate the stitches. Additionally, using cable needles or double-pointed needles can make it easier to create the intricate twists and crosses of the cable stitches.
In summary, selecting the right yarn and needles is key to knitting a beautiful cable stitch hat. Consider the fiber content, weight, and color of the yarn to achieve the desired look and feel. Use needles in the appropriate size and type to control the tension and create well-defined cable stitches. With the right materials, you’ll be able to create a hat that is not only warm and cozy but also showcases the intricate beauty of cable knitting.
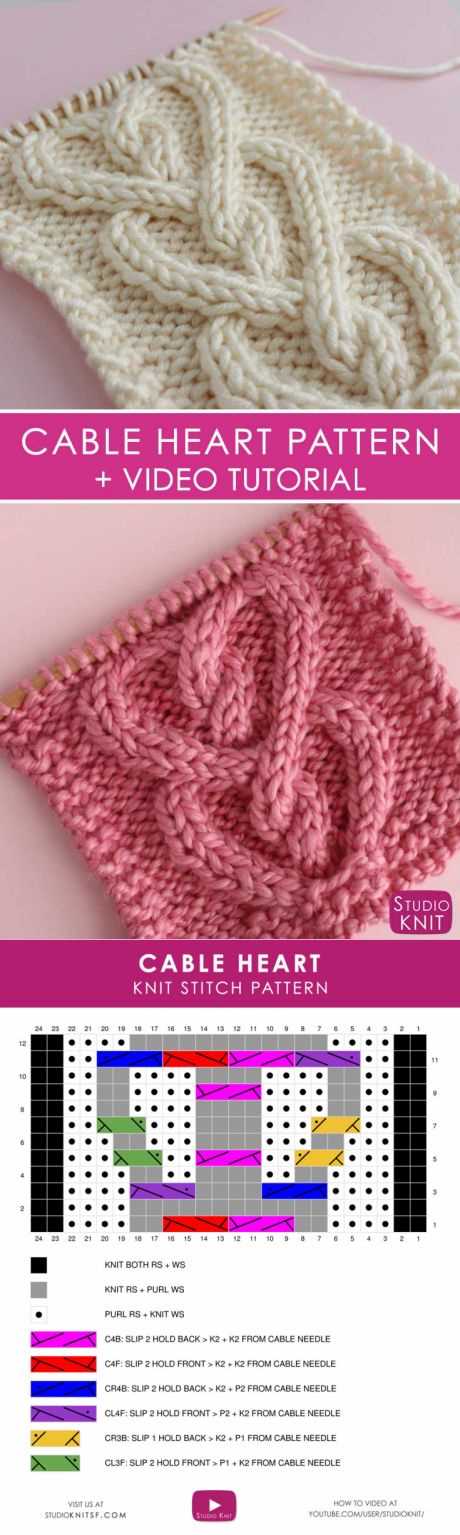
Understand the Cable Stitch Pattern
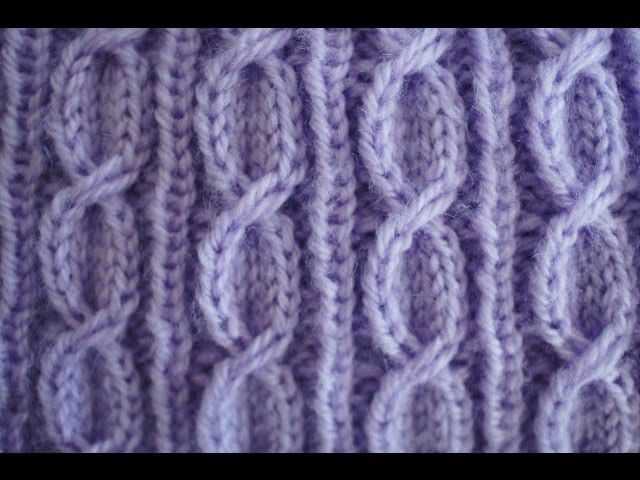
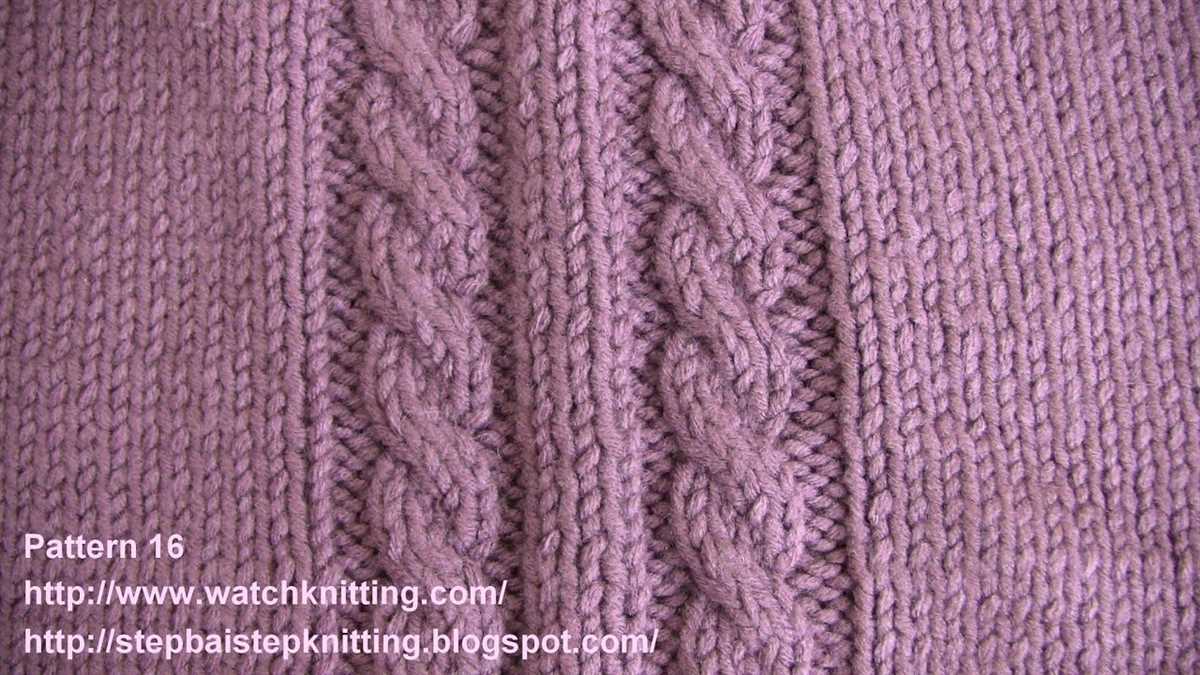
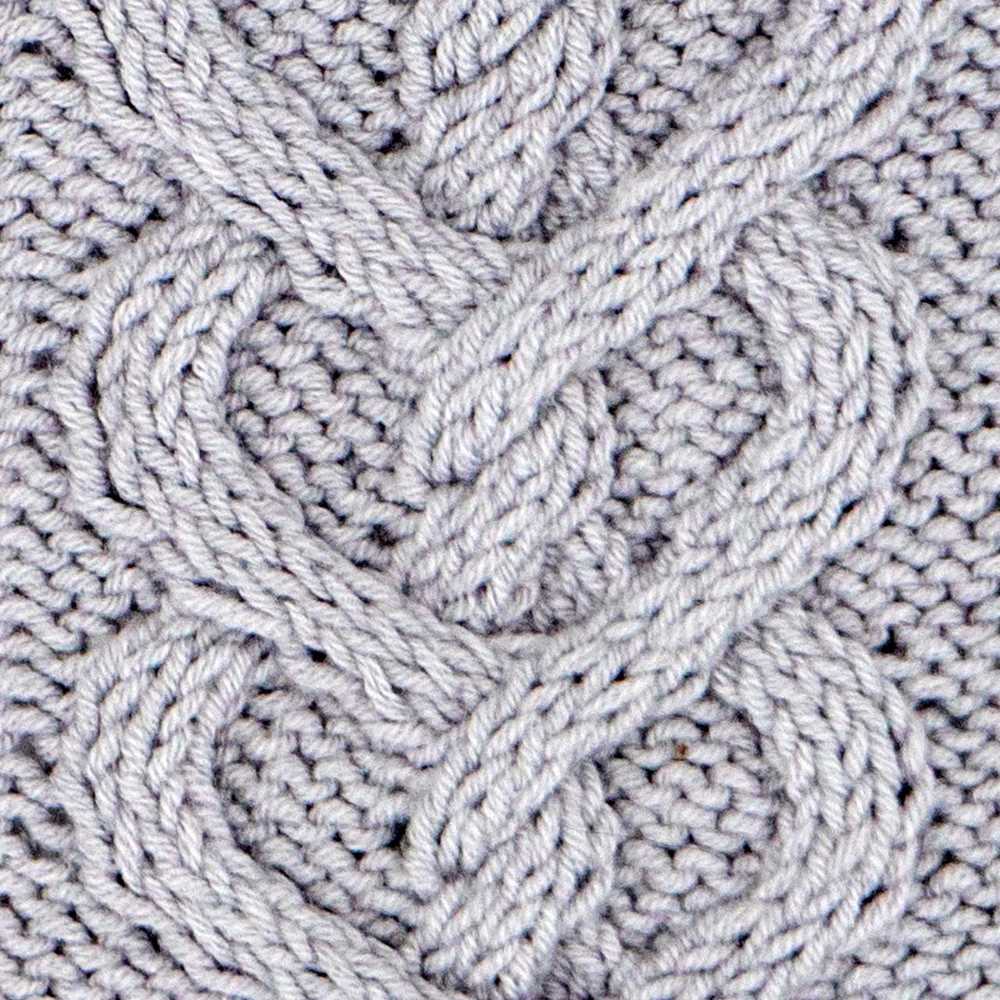
The cable stitch pattern is a popular technique in knitting that creates raised, twisted designs in the fabric. It is achieved by crossing stitches over each other, creating a textured and intricate look. This pattern is often used in knitting hats, scarves, sweaters, and other accessories to add visual interest and dimension to the project. To successfully knit using the cable stitch pattern, it is important to understand the basic concepts and techniques involved.
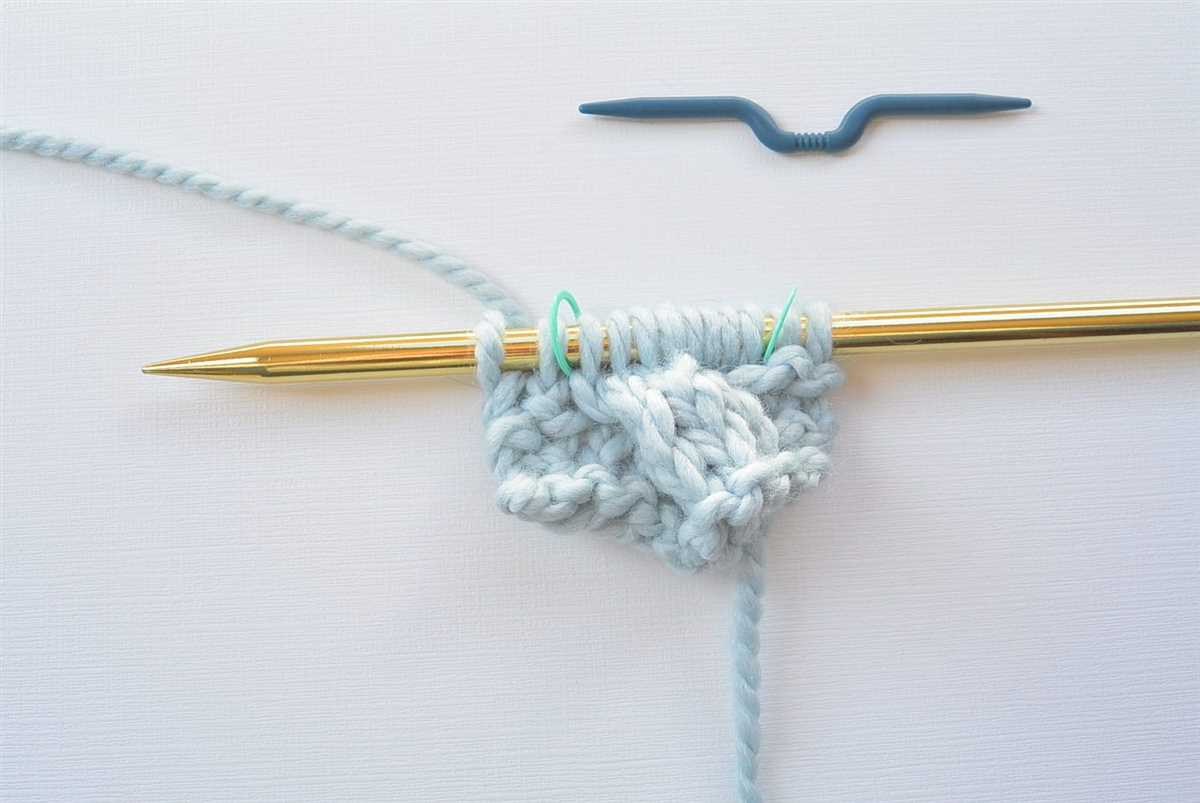
To create the cable stitch pattern, you will need to work with a cable needle. This needle is typically shorter than regular knitting needles and has a smooth, rounded tip. When you come across a cable stitch in your pattern, you will transfer a certain number of stitches onto the cable needle, hold it in front or behind your work, and then knit the next set of stitches. This creates the twisted effect as the stitches are crossed over each other.
Here are the key steps to follow when working with the cable stitch pattern:
- Identify the cable stitch in your pattern. It is usually indicated by a cable symbol or abbreviation.
- Count the number of stitches involved in the cable. This will determine how many stitches you transfer onto the cable needle.
- With the cable needle in the appropriate position (in front or behind your work), slip the designated stitches onto the cable needle.
- Hold the cable needle in the correct position and continue knitting the next set of stitches from your left-hand needle. This will create the crossover effect.
- Once you have completed the set of stitches, return the stitches from the cable needle back onto your left-hand needle and continue knitting as instructed in the pattern.
- Repeat these steps as necessary to create the desired cable stitch pattern throughout your project.
It is important to note that cable stitch patterns require careful attention to detail, as it is easy to lose track of where you are in the pattern. Using stitch markers or keeping track of rows can help ensure accuracy and prevent mistakes. With practice and patience, you will become more comfortable and confident in working with cable stitch patterns, and can create beautifully textured and detailed knitted items.
Cast On Stitches
When starting a cable stitch knit hat pattern, one of the first steps is to cast on stitches. The number of stitches you cast on will depend on the size of the hat you want to make and the gauge of your knitting. Make sure to check the pattern for the recommended number of cast on stitches, as this will be your starting point.
To cast on stitches, you can use a variety of techniques such as the long tail cast on or the knitted cast on. The long tail cast on is a common method that provides a neat edge and is relatively easy to learn. It involves creating a loop with the yarn and sliding the needle through the loop to create a new stitch. Repeat this process until you have cast on the desired number of stitches.
Once you have cast on your stitches, it’s important to make sure they are evenly spaced on the needle. You can do this by gently adjusting the stitches along the needle, making sure they are not too tight or too loose. This will help ensure that your hat will have a consistent and professional look.
If you are new to knitting, casting on stitchescan be a bit challenging at first. It may take some practice to get the tension and spacing just right. Don’t be discouraged if your first few attempts don’t turn out perfectly – knitting is a skill that improves with time and experience.
Work the Ribbing
The first step in knitting the cable stitch hat is to work the ribbing section. The ribbing creates a stretchy and snug band at the bottom of the hat that will keep it securely in place. To start the ribbing, you will first need to cast on the required number of stitches. This can vary depending on the size of the hat and the desired fit. It is important to use a stretchy cast on method, such as the long-tail cast on, to ensure that the ribbing has enough give.
Once you have cast on the stitches, you will begin working the ribbing pattern. The most common ribbing pattern is the knit one, purl one (K1, P1) rib. This creates a textured pattern where the knit stitches stand out and the purl stitches create a bumpy effect. To work the ribbing, you will alternate between knitting one stitch and purling one stitch across the row. This creates the characteristic ribbing pattern. It is important to maintain this pattern throughout the ribbing section to ensure a consistent and professional-looking result.
The ribbing section is typically worked for a certain number of rows to create the desired length. This can vary depending on the pattern, but a common length is around 1-2 inches. The length of the ribbing will affect the overall fit of the hat, so it is important to follow the pattern instructions for the desired size. Once the ribbing section is complete, you will be ready to move on to the main body of the hat, where you will begin working the cable stitch pattern.
Begin Knitting the Cable Stitch
The cable stitch is a popular knitting technique that creates beautiful and intricate patterns. It adds texture and depth to your knitted fabric, making it a great choice for hats, scarves, and other accessories. If you’re new to cable knitting, don’t worry! It may look complex, but with a little practice, you’ll be able to master it.
To begin knitting the cable stitch, select a cable stitch pattern that you want to use for your hat. You can find many different cable stitch patterns in knitting books or online. Once you have your pattern, gather your supplies, including yarn, knitting needles, and a cable needle.
Start by casting on the required number of stitches for your pattern. If you’re unsure about how many stitches to cast on, refer to the instructions provided with your pattern. Once you have your stitches cast on, make sure your working yarn is at the back of your work.
Next, it’s time to begin the first row of the cable stitch pattern. Follow the pattern instructions carefully, as they will guide you through the process of creating the cable twist. You may need to knit some stitches, purl some stitches, and use the cable needle to hold stitches in front or in the back.
As you continue knitting the cable stitch pattern, pay close attention to the instructions to ensure that you create the desired pattern. Keep in mind that cable knitting involves crossing stitches over each other, which creates the cable effect. This may require some extra concentration and attention to detail.
Once you have completed all the rows of the cable stitch pattern, you can continue knitting the rest of the hat using the desired stitch pattern or instructions. Remember to keep track of your rows and stitches to ensure accuracy and consistency in your knitting.
Knitting the cable stitch can be challenging at first, but with practice, it becomes easier and more enjoyable. Don’t be afraid to make mistakes and take the time to learn from them. As you gain experience, you’ll soon be able to create stunning cable stitch patterns with confidence.
Create the Crown Decrease
The crown decrease is the final step in knitting the cable stitch hat. It is the process of reducing the number of stitches in each round to shape the top of the hat and create a tapered, seamless crown. Follow these steps to create the crown decrease:
1. Divide the stitches

Begin by dividing the stitches evenly onto double-pointed needles or a circular needle, depending on your preference. This will make it easier to work the decrease rounds.
2. Decrease rounds
Start the decrease rounds by knitting the first two stitches together, then continue knitting until two stitches before the end of the round. Knit the last two stitches together. Repeat this decrease round for every round until the desired number of stitches remain.
3. Switch to double-pointed needles
Once you have reduced the number of stitches to a few, switch to double-pointed needles to continue working the decrease rounds. This will make it easier to manipulate the smaller number of stitches.
4. Final decrease round
For the final decrease round, knit two stitches together until only a few stitches remain. Cut the yarn, leaving a long tail. Thread the tail through the remaining stitches and pull tight to close the top of the hat.
By following these steps, you can successfully create the crown decrease and finish knitting your cable stitch hat. Remember to adjust the decrease rounds based on the pattern instructions and the desired size of the hat.
Continue Knitting the Hat Body
After finishing the cable stitch pattern, it is time to continue knitting the body of the hat. To do this, simply switch back to the main stitch pattern used in the ribbing section. This could be a simple knit and purl combination, or any other stitch pattern of your choice.
Continue working in rounds, knitting every stitch for a few rows to create the body of the hat. It is important to measure the hat periodically to ensure it is the desired length. Remember that the hat will slightly stretch when worn, so it is better to err on the side of making it slightly shorter rather than too long.
If you want to add any additional design elements or patterns to the hat body, now is the time to do so. You could add stripes, colorwork, or even another cable stitch pattern. The possibilities are endless, so get creative and make the hat your own.
Once you have reached the desired length for the hat body, it is time to start shaping the crown. This typically involves decreasing stitches gradually to create a rounded top for the hat. There are many different ways to shape the crown, so choose a method that you are comfortable with or refer to a hat pattern for guidance.
To finish the hat, cut the yarn leaving a long tail. Thread the tail through a yarn needle and carefully remove the stitches from the knitting needles, threading the needle through each stitch as you go. Once all the stitches have been removed, pull the tail tight to close up the top of the hat. Secure the tail with a knot and weave in any remaining loose ends.
Shape the Top of the Hat
Once you have completed the desired length of your cable stitch knit hat, it is time to shape the top. This involves decreasing stitches in a systematic pattern to create a tapered effect and close off the hat.
To begin shaping the top of the hat, start by knitting together two stitches. This can be done by inserting the right needle into the next two stitches on the left needle and knitting them together as if they were one stitch. Repeat this decrease stitch pattern across the row.
Continue decreasing stitches in this manner for every other row until you have a small number of stitches remaining, usually around 8-10 stitches. At this point, you can use a darning needle to thread the yarn through the remaining stitches, pulling tight to close off the top of the hat.
Once the top is closed, weave in any loose ends and trim excess yarn. Your cable stitch knit hat is now complete and ready to be worn or gifted to someone special! Enjoy the cozy warmth and stylish look of your handmade creation.
Create the Pom Pom (Optional)
Adding a pom pom to the top of your cable stitch knit hat can give it a fun and playful touch. While this step is optional, it can be a great way to personalize your hat and make it unique.
To create the pom pom, you will need some yarn in a coordinating color. You can use the same yarn you used for the hat, or choose a different color to add a pop of contrast.
Here are the steps to create the pom pom:
- Wrap the yarn around your fingers or a small object, such as a pom pom maker or a cardboard piece.
- Continue wrapping until you have achieved your desired fullness. The more you wrap, the fuller the pom pom will be.
- Carefully slide the wrapped yarn off your fingers or object without unraveling it.
- Tie a separate piece of yarn tightly around the center of the wrapped yarn, securing it in place.
- Using sharp scissors, cut the loops of the wrapped yarn. Be careful not to cut the tied yarn in the center.
- Trim the pom pom to your desired shape and size. You can make it round or give it a more irregular look.
Once you have created the pom pom, simply attach it to the top of your cable stitch knit hat. You can sew it on using a yarn needle and some of the leftover yarn, or use a hot glue gun to securely attach it.
Weave in the Ends
Once you have finished knitting your cable stitch hat, there will be loose ends of yarn that need to be secured. Weaving in the ends is an important step in completing your project and ensuring that it does not unravel over time.
To weave in the ends, you will need a yarn needle with a large eye. Take the loose end of yarn and thread it onto the needle. Start by inserting the needle into the back of the hat near the area where the yarn ends. Use the needle to thread the yarn through the stitches, going back and forth to create a secure weave.
Make sure to weave in the ends on the inside of the hat, so that they are not visible on the outside. This will give your hat a clean and professional finish. It is also important to avoid pulling the yarn too tight as this can cause the stitches to pucker or distort.
Repeat this process for each loose end of yarn until all ends have been woven in securely. Once you are satisfied with the weaving, you can trim any excess yarn, leaving a small tail. Be careful not to cut too close to the stitches, as this can cause the yarn to come undone.
By taking the time to properly weave in the ends, you can ensure that your cable stitch knit hat will stay intact and last for years to come. This finishing touch adds a professional look to your project and gives you the satisfaction of knowing that your hard work will not go to waste.
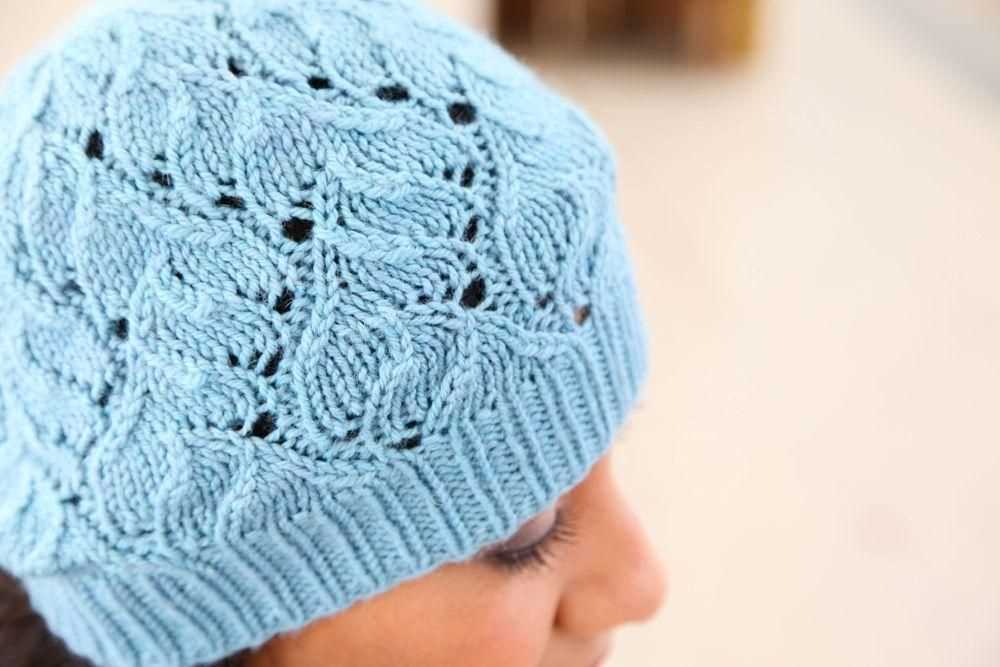
Block the Hat
Blocking is an important step in finishing your cable stitch knit hat. It helps to give the hat its final shape and bring out the intricate cable pattern. To block the hat, follow these steps:
Step 1: Wet the Hat
Fill a basin or sink with lukewarm water and add a small amount of wool wash. Submerge the hat in the water and gently squeeze it to ensure that it is fully soaked. Let it sit in the water for about 10 minutes to allow the fibers to absorb the moisture.
Step 2: Prepare the Blocking Surface
Lay a clean towel on a flat surface and place a blocking mat or foam board on top. This will provide a padded surface for blocking the hat and prevent any moisture from seeping through onto the underlying surface.
Step 3: Shape the Hat
Remove the hat from the water and gently squeeze out any excess moisture. Lay the hat flat on the prepared blocking surface and shape it into the desired size and shape. Use your hands to smooth out any wrinkles or uneven areas.
Step 4: Pin the Hat

Use T-pins or blocking wires to secure the hat in place. Start by pinning the edges of the hat, then work your way towards the center, making sure the cables are evenly spaced and the hat maintains its shape. If necessary, use additional pins to adjust any areas that need more shaping.
Step 5: Let it Dry
Leave the hat to dry completely. This may take anywhere from a few hours to overnight, depending on the thickness of the hat and the humidity of the environment. Avoid moving or disturbing the hat while it is drying to ensure that it maintains its shape.
Once the hat is completely dry, carefully remove the pins or wires. Your cable stitch knit hat is now blocked and ready to be worn or gifted to someone special!
Final Thoughts
In conclusion, the cable stitch knit hat pattern is a great project for those who want to try their hand at cable knitting. With its intricate and beautiful design, this hat is sure to be a showstopper. Whether you are knitting it for yourself or as a gift, it is guaranteed to be a cherished item.
While the cable stitch may seem intimidating at first, the pattern provided breaks it down into manageable steps. By following the instructions and practicing the techniques, even beginners can create a stunning hat.
The versatility of this pattern is another plus. It can be customized by choosing different yarn colors and styles, allowing for endless possibilities. Additionally, the hat can be easily adjusted to fit different head sizes, making it a great project for everyone.
Overall, the cable stitch knit hat pattern is a fantastic way to learn and showcase cable knitting skills. Its timeless design and customizable options make it a worthwhile project for knitters of all levels. So grab your needles and yarn, and start creating your own beautiful cable stitch knit hat today!
Q&A:
What is cable stitch?
Cable stitch is a knitting technique that creates a twisted design in the fabric. It involves crossing a set of stitches over each other to create a cable-like pattern.
Can you explain how to do a cable stitch?
To do a cable stitch, you will need a cable needle. First, slip a few stitches onto the cable needle and hold it to the front or back of your work, depending on the desired effect. Then, knit the next few stitches from the left-hand needle, and finally, knit the stitches from the cable needle. The result will be a twisted cable pattern.
Is cable stitch knitting difficult?
Cable stitch knitting may seem intimidating at first, but with practice, it can become easier. It requires concentration and following a pattern, but once you understand the technique, you will be able to create beautiful cable knit designs.
Is there a cable stitch pattern for a hat?
Yes, there are many cable stitch patterns available for knitting hats. You can find free or paid patterns online or in knitting books that provide instructions and charts for creating cable stitch hats. These patterns often include various cable designs and can be customized to your liking.