
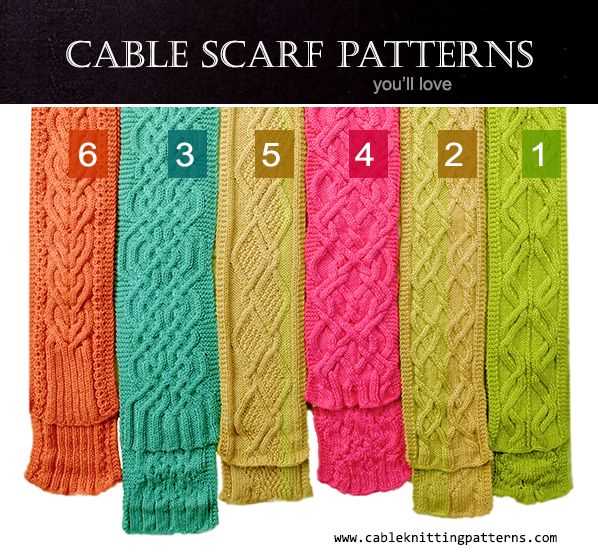
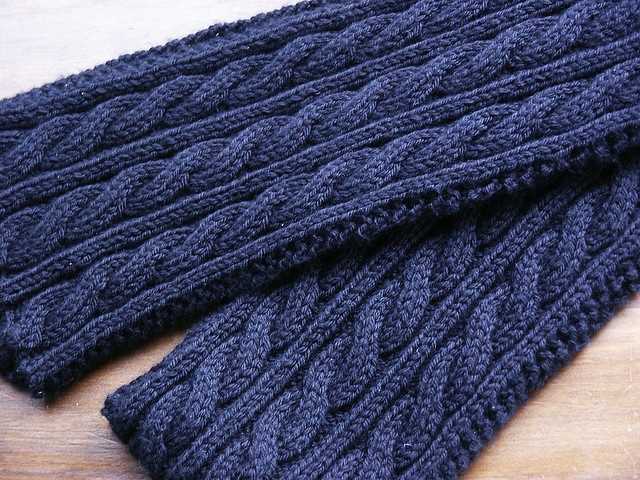
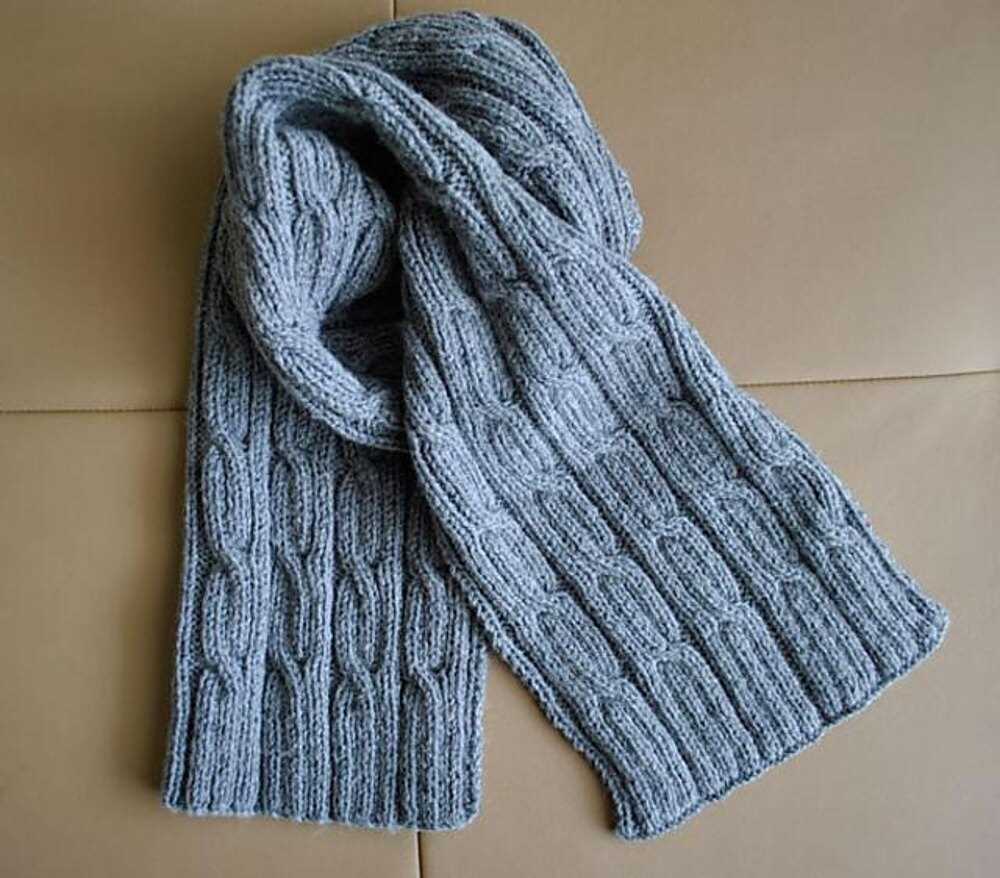
If you’ve always wanted to learn how to knit, a cable knit scarf is the perfect project to start with. Cable knitting is a technique that creates a textured pattern, resembling twisted braids or ropes. Don’t be intimidated by the complex look of cable knitting – it’s actually quite easy to learn, even for beginners.
To get started, you’ll need some basic knitting supplies: yarn, knitting needles, and a cable needle. For beginners, it’s recommended to use a light worsted weight yarn and a pair of size 8 knitting needles. These materials will make it easier to practice the cable knitting technique and create a warm and cozy scarf.
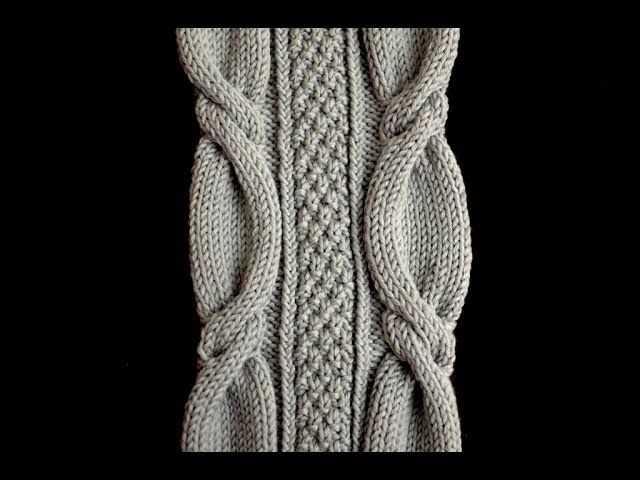
Once you have your supplies ready, it’s time to learn the cable knitting technique. The cable stitch is created by crossing a set of stitches over another set, which gives the pattern its distinctive look. It may sound complicated, but with a little practice, you’ll be able to master it in no time.
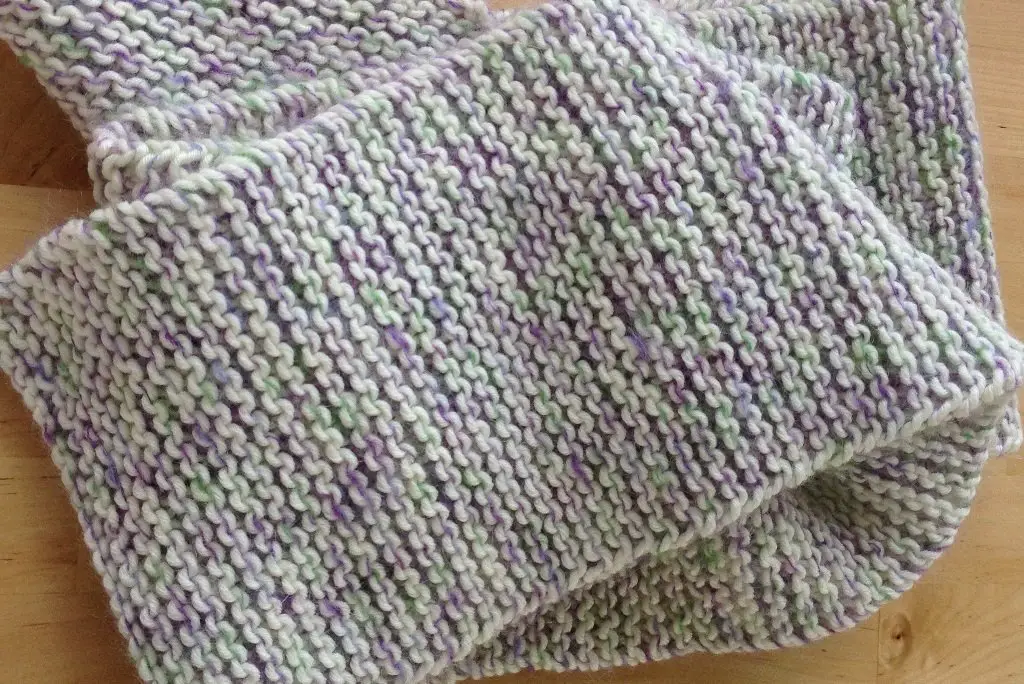
This cable knit scarf pattern for beginners is a great way to practice your cable knitting skills. The pattern consists of a simple cable stitch that creates a beautiful textured pattern. The scarf is knit in a classic garter stitch, which means you’ll be knitting every row. With step-by-step instructions and clear diagrams, this pattern will guide you through each stitch and help you create a gorgeous cable knit scarf.
Cable Knit Scarf Pattern for Beginners: Step-by-Step Guide
Looking to try your hand at cable knitting? This step-by-step guide will help you create a beautiful cable knit scarf, even if you’re a beginner. Whether you’re new to knitting or just looking for a new project, this pattern is perfect for you.
Materials:
- Size 10 knitting needles
- Worsted weight yarn in your desired color
- Cable needle
- Tapestry needle
Step 1: Casting On
Start by casting on 40 stitches onto your size 10 knitting needles. Make sure your tension is not too tight or too loose.
Step 2: The First Row
Row 1: *Purl 2, knit 2. Repeat from * to the end of the row.
Step 3: Creating the Cable
Follow this cable pattern:
| Row 2 and all even rows | Knit the knit stitches and purl the purl stitches |
|---|---|
| Row 3 | *Purl 2, place the next 2 stitches on the cable needle and hold them at the front of your work, knit the following 2 stitches, then knit the 2 stitches from the cable needle. Repeat from * to the end of the row. |
| Row 5 | *Purl 2, knit 4. Repeat from * to the end of the row. |
| Row 7 | *Purl 2, place the next 2 stitches on the cable needle and hold them at the back of your work, knit the following 2 stitches, then knit the 2 stitches from the cable needle. Repeat from * to the end of the row. |
Step 4: Repeat the Pattern
Continue repeating rows 2-7 until your scarf reaches your desired length, making sure to end on an even row.
Step 5: Binding Off
Once you’ve reached your desired length, bind off all stitches. Cut the yarn, leaving a long tail for weaving in the ends.
Step 6: Finishing Touches
Use a tapestry needle to weave in any loose ends, making sure they are secure. Give your scarf a gentle blocking if desired, then it’s ready to be worn or gifted.
With this step-by-step guide, you can confidently tackle cable knitting and create a beautiful cable knit scarf. Happy knitting!
Gathering Materials
Before starting your cable knit scarf project, you will need to gather all the necessary materials. Here is a list of items you will need:
- Yarn: Choose a bulky weight yarn in the color of your choice. Cable knit patterns usually require a thick yarn to create the defined texture.
- Knitting needles: You will need a pair of size US 10 (6 mm) knitting needles, or the appropriate size for your chosen yarn. Make sure you have a set of straight or circular needles, depending on your preference.
- Cable needle: This specialized knitting needle is used to hold stitches aside while creating the cable pattern. It usually has a bent or U shape to keep the stitches secure.
- Tape measure: A tape measure will help you keep track of your scarf’s length and width as you progress.
- Scissors: You will need a pair of scissors for cutting yarn and trimming any loose ends.
- Tapestry needle: A tapestry needle with a large eye is essential for weaving in yarn ends and finishing touches.
Once you have gathered all the materials, you will be ready to start working on your cable knit scarf. Make sure you have a comfortable and well-lit space to work in. It’s also a good idea to have a notebook or pattern book nearby to keep track of your progress and any pattern instructions.
Choosing the Right Yarn and Needles
When it comes to knitting a cable knit scarf, choosing the right yarn and needles is crucial. The yarn you select will determine the final look and feel of your scarf, while the needles will affect the size and ease of your knitting.
Yarn
For a cable knit scarf, it is recommended to choose a yarn that is thick and cozy, as this will showcase the intricate cable patterns and create a warm and luxurious texture. A bulky or super bulky weight yarn is ideal for this project. Consider selecting a yarn made from natural fibers, such as wool or alpaca, for added warmth and softness. If you prefer a more lightweight and breathable scarf, you can opt for a worsted weight yarn.
Needles
When it comes to needle size, it depends on the thickness of your yarn and the desired tension of your knitting. If you are using a bulky weight yarn, you will typically need larger needles, such as US size 10 or 11 (6 or 8 mm). For worsted weight yarn, you can use smaller needles, around US size 7 or 8 (4.5 or 5 mm). It’s important to use the appropriate needle size to achieve the recommended gauge and ensure that your stitches are not too tight or too loose.
Additionally, consider using circular needles or long straight needles, depending on your personal preference and the length of your scarf. Circular needles can be more convenient and comfortable for knitting larger projects, as they distribute the weight of the knitting evenly and allow for easy movement of stitches. Straight needles, on the other hand, give you more control and may be preferred if you prefer to knit in a traditional manner.
Understanding Cable Knitting Basics
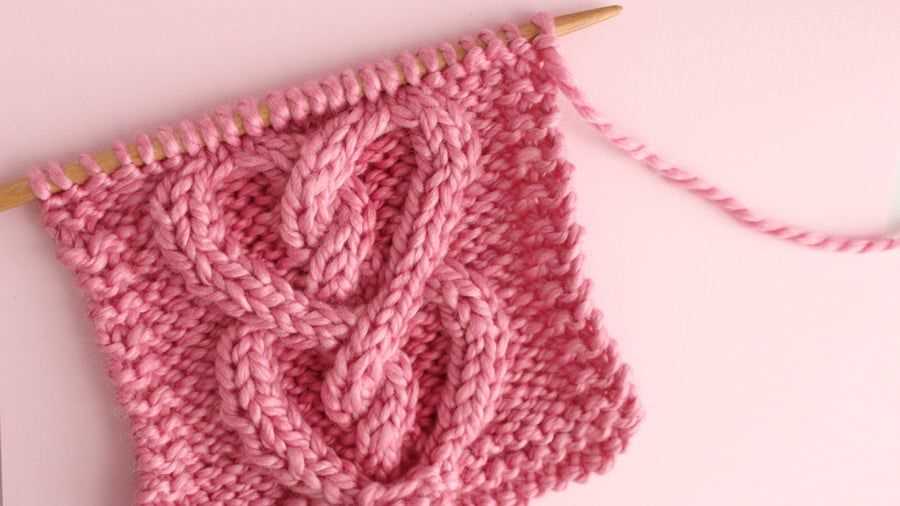
If you’re a beginner at knitting and want to try your hand at a cable knit scarf pattern, it’s important to first understand the basics of cable knitting. Cable knitting is a technique that creates intricate patterns by twisting and crossing stitches over one another. This adds texture and depth to your knitted fabric, giving it a unique and visually appealing look.
How does cable knitting work?
In cable knitting, you’ll typically work with a cable needle, which is a short, double-pointed needle that helps you hold and manipulate stitches. The basic concept of cable knitting involves temporarily moving a group of stitches onto the cable needle, holding it in front or back of your work, and then knitting the next set of stitches. This creates the twisting effect that gives cables their characteristic appearance.
Types of cables:
- One-Over-One Cables: This is the simplest type of cable, where one stitch is crossed over another. It’s a great starting point for beginners.
- Two-Over-Two Cables: This involves crossing two stitches over two others, creating a wider and more intricate cable pattern.
- Three-Over-Three Cables: This is a more advanced cable technique that involves crossing three stitches over three others, resulting in an even more complex and impressive design.
Tips for cable knitting:
- Use a cable needle that is the same size or slightly smaller than your knitting needles to ensure a consistent gauge.
- Practice knitting cables on a swatch before starting your project to get comfortable with the technique.
- Count your stitches regularly to make sure you haven’t accidentally added or dropped any while working the cable pattern.
- Keep your tension even throughout the knitting process to ensure that your cables look uniform and well-defined.
- Don’t be afraid to experiment with different cable patterns and combinations to create your own unique designs.
By understanding the basics of cable knitting and following these tips, you’ll be well on your way to creating beautiful cable knit projects, such as a cozy scarf, even as a beginner.
Cast On Stitches
Before you begin knitting your cable knit scarf, you need to cast on your stitches. Casting on is the process of creating the foundation row of stitches on your knitting needles. In this pattern, we will be using the long-tail cast on method, which is a popular and versatile method for casting on.
Long-Tail Cast On Method
To start with the long-tail cast on, you will need to estimate the amount of yarn you will need for your cast on stitches. It’s better to overestimate rather than to run out of yarn halfway through. Leave a long tail of yarn, approximately three times the width of your finished scarf.
Hold the tail of the yarn in your left hand and the working yarn in your right hand. Make a slipknot by creating a loop with the working yarn, crossing it over the tail, and pulling the working yarn through the loop. Place the slipknot on your knitting needle and tighten it, making sure it is snug but not too tight.
Now, you are ready to start casting on your stitches. Hold the knitting needle with the slipknot in your right hand and the tail of the yarn in your left hand. Insert the right needle into the slipknot from left to right, going under the left-hand yarn and over the right-hand yarn. Bring the right needle back out through the slipknot, creating a loop on the right-hand needle.
Continue this process for each stitch, inserting the right needle under and over the left-hand and right-hand yarns, respectively. Keep the stitches loose enough to easily slide along the needle but not too loose that they become difficult to work with. Once you have cast on the required number of stitches, you are ready to begin knitting your cable knit scarf!
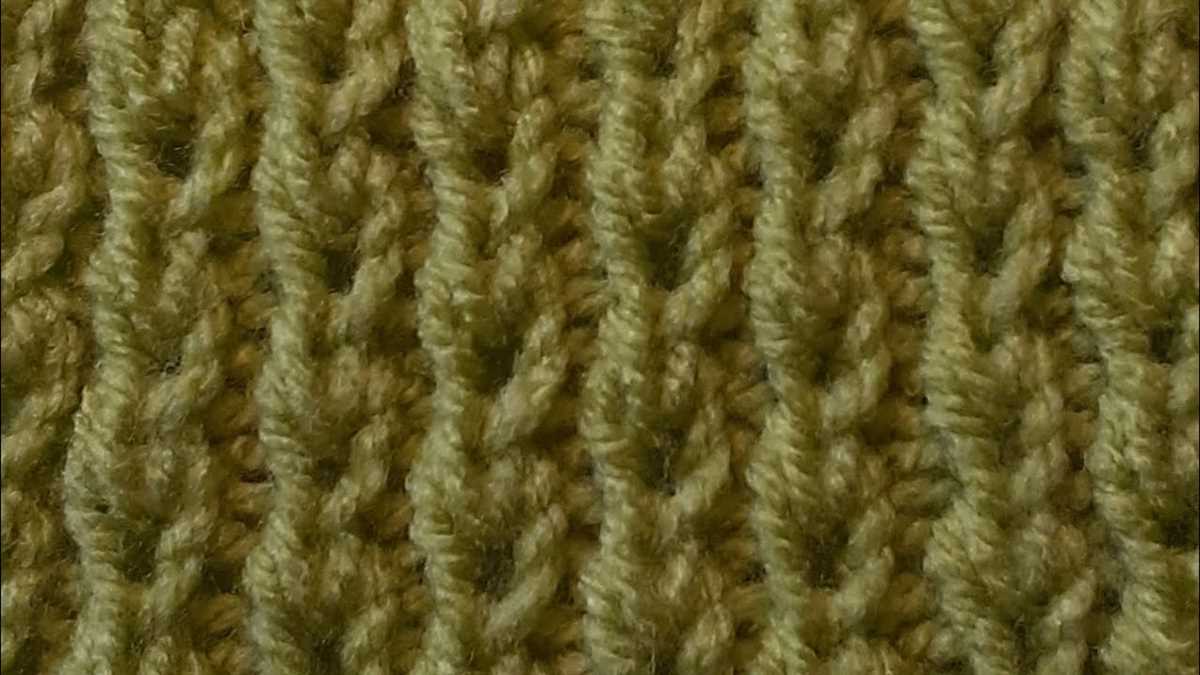
Creating the Ribbing
A cable knit scarf pattern is a great project for beginners looking to expand their knitting skills. One of the first steps in creating a cable knit scarf is to start with the ribbing. Ribbing is a common pattern used in many knitted items, including scarves, hats, and sweaters. It is achieved by alternating knit stitches with purl stitches, creating a stretchy and textured fabric.
To create the ribbing for your cable knit scarf, begin by casting on the desired number of stitches. For beginners, it is recommended to start with a smaller number of stitches, such as 20 or 30, to make it easier to practice the pattern. Once you have cast on your stitches, you will begin working the ribbing pattern.
The ribbing pattern is typically worked over an odd number of stitches. In this example, we will use 21 stitches. To begin the row, knit the first stitch. Then, purl the next stitch. Continue alternating knit and purl stitches across the row until you reach the end. This creates the 1×1 ribbing pattern. Repeat this pattern for each row of ribbing.
If you prefer a different type of ribbing, such as 2×2 or 3×3 ribbing, simply adjust the pattern accordingly. For example, for 2×2 ribbing, you would knit two stitches, then purl two stitches, and repeat this pattern across the row. This creates a thicker ribbed fabric with a more pronounced texture.
Adding Cables to the Pattern
Once you have mastered the basic cable knit pattern, you may want to experiment with adding cables to your scarf design. Cables are a great way to add texture and visual interest to your knitting projects. They can create intricate patterns that will impress even experienced knitters. Here are some tips to help you get started.
To add cables to your scarf pattern, you will need to modify the basic knit and purl stitches. Cables are created by crossing a group of stitches over each other. You will need to knit or purl the stitches in a specific order to achieve the desired cable pattern. For example, a basic cable pattern might involve crossing a group of stitches to the right or left, or even crossing multiple groups of stitches at once.
Choosing a Cable Pattern
When choosing a cable pattern for your scarf, it’s important to consider the complexity of the pattern and your knitting skill level. If you are a beginner, it’s best to start with a simple cable pattern that only involves crossing a few stitches. As you gain more experience, you can try more complex cable patterns that involve crossing larger groups of stitches or multiple cables at once.
There are many resources available online and in knitting books that offer a wide range of cable patterns to choose from. You can find patterns for traditional cables, as well as more modern and unique cable designs. Take the time to explore different patterns and choose one that you find visually appealing.
Modifying Your Scarf Pattern
Once you have chosen a cable pattern, you will need to modify your scarf pattern to incorporate the cable design. This may involve adjusting the number of stitches in your pattern or adding additional rows to accommodate the cable crossings.
It’s important to keep track of your stitches and rows when adding cables to your pattern. You may find it helpful to use stitch markers or a row counter to help you keep track of where to start and finish your cable crossings.
Adding cables to your scarf pattern can add depth and dimension to your knitting. With a little practice and patience, you can create beautiful cable designs that will make your scarf stand out.
Working the Cable Stitch
The cable stitch is a classic and beautiful knitting technique that adds texture and depth to any project. In this tutorial, we will learn how to work the cable stitch in a cable knit scarf pattern for beginners.
To begin, you will need a cable needle, yarn, and knitting needles. Start by casting on the desired number of stitches for your scarf. It’s important to have an odd number of stitches to create the cable pattern.
Step 1: Set up the cable pattern
After casting on, work a few rows in a basic knit stitch to create a border for your scarf. This will help keep the edges clean and prevent rolling.
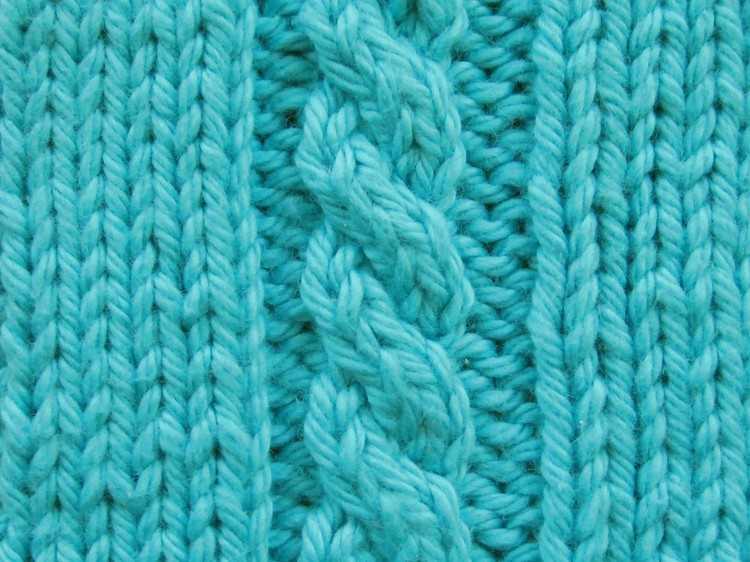
Next, it’s time to set up the cable pattern. The cable stitch is created by crossing stitches over each other. In our beginner’s pattern, we will be working a simple 2×2 cable.
Step 2: Creating the cable
To create the cable, you will need to work with a cable needle. Take the first two stitches on your left-hand needle and slip them onto the cable needle, holding it to the front of your work. Knit the next two stitches from your left-hand needle.
Now, take the two stitches on the cable needle and bring them back to the left-hand needle. Knit these two stitches. Congratulations! You have just created your first cable stitch. Repeat this pattern of crossing stitches over each other at regular intervals to create the cable effect.
Remember to follow the cable pattern instructions carefully, as different patterns will require different numbers and types of cable crosses.
Finally, after completing the cable pattern, finish your scarf by knitting a few more rows in a basic knit stitch and then bind off. Weave in any loose ends, and your cable knit scarf is complete!
Shaping the Scarf
When knitting a cable knit scarf, shaping is an important step to ensure a comfortable and well-fitting final piece. Shaping allows you to create a tapered or curved shape in the scarf, adding a stylish touch and making it more flattering when worn.
To begin shaping the scarf, you will need to determine how many stitches you want to decrease or increase. This will depend on the desired width and length of the scarf, as well as the pattern you are using. You may need to adjust the stitch count at specific points in the pattern, such as at the edges or in the center.
Decreasing Stitches
To decrease stitches in a cable knit scarf, you can use techniques such as knitting or purling two stitches together, or slipping stitches over each other. These decreases can be worked on the right side or wrong side of the scarf, depending on the pattern instructions.
For example, if you want to decrease the width of the scarf gradually, you can work a decrease row where you knit or purl two stitches together across the row. This will create a diagonal slant, gradually reducing the number of stitches.
Increasing Stitches
To increase stitches in a cable knit scarf, you can use techniques such as knitting or purling into the front and back of a stitch, or making a yarn over. These increases can be worked on the right side or wrong side of the scarf, depending on the pattern instructions.
For example, if you want to increase the width of the scarf gradually, you can work an increase row where you knit or purl into the front and back of a stitch across the row. This will create a diagonal slant, gradually increasing the number of stitches.
By shaping your cable knit scarf, you can customize it to your preferred style and fit. Whether you choose to taper the ends, create a curved shape, or add decorative details, shaping can elevate your scarf from a simple accessory to a standout fashion statement. Experiment with different stitch patterns and techniques to achieve the desired shape and look for your cable knit scarf.
Finishing the Edges
Once you have completed knitting your cable knit scarf, it’s time to finish the edges. This final step will give your scarf a polished and professional look. There are several methods you can use to finish the edges, depending on your personal preference and the desired outcome.
1. Fringe: One popular option for finishing the edges of a cable knit scarf is adding fringe. To do this, cut several strands of yarn to your desired length, double that length to account for folding in half, then attach the fringe to the edges of your scarf. Knot the fringe strands securely and trim any uneven ends.
2. Ribbed Edges: Another option is to create a ribbed edge on either side of the scarf. To do this, start by picking up stitches along each edge of the scarf. Then, knit several rows in a rib pattern, such as K2, P2 or K1, P1. This will create a stretchy and neat edge that matches the rest of the scarf.
3. I-Cord Edges: If you prefer a more decorative edge, you can add an I-cord border to your cable knit scarf. An I-cord is a narrow tube of knitted fabric that can be attached to the edge of your scarf for a clean and finished look. You can use double-pointed needles or a circular needle to create the I-cord.
4. Crocheted Edges: If you are comfortable with crochet, you can also finish the edges of your cable knit scarf with a crochet border. This can be done by single crocheting or slip stitching around the edges, creating a neat and decorative finish.
Regardless of the method you choose, be sure to weave in any loose ends and block your finished scarf to give it a final touch. Finishing the edges of your cable knit scarf will not only enhance its appearance but also ensure that it will withstand daily wear and tear for years to come.
Blocking the Finished Scarf
A essential step in finishing your cable knit scarf is blocking. Blocking is the process of gently shaping and setting the stitches of your knitted garment to achieve a professional and polished look. It can also help to even out any irregularities in tension and improve the drape and texture of the finished piece.
To block your cable knit scarf, you will need a few basic supplies including a clean towel or blocking mat, rustproof pins, and a spray bottle filled with water. Start by washing your scarf according to the yarn manufacturer’s instructions. Gently squeeze out any excess water and lay it flat on the towel or blocking mat.
Using your fingers, gently shape the scarf to the desired measurements and smooth out any lumps or uneven areas. If you’re using rustproof pins, carefully pin the edges of the scarf to the towel or blocking mat to keep it in place. Alternatively, you can use a spray bottle to lightly mist the scarf with water, which will help the fibers relax and hold their shape.
Allow the scarf to dry completely before unpinning or removing it from the blocking mat. This might take a day or two, depending on the thickness of the yarn and the humidity in the air. Once dry, your cable knit scarf will have a professional finish and showcase the beautiful cable patterns you’ve created.
Remember, blocking is an essential step in the knitting process and can make a world of difference in the final appearance of your project. So take the time to block your cable knit scarf and enjoy the satisfaction of a well-finished piece!
Enjoying Your Handmade Cable Knit Scarf
Congratulations on completing your cable knit scarf! Now that you have a beautiful and cozy accessory, it’s time to enjoy wearing it and showing off your knitting skills. Here are some ways you can make the most of your handmade scarf:
1. Stay Warm and Stylish:
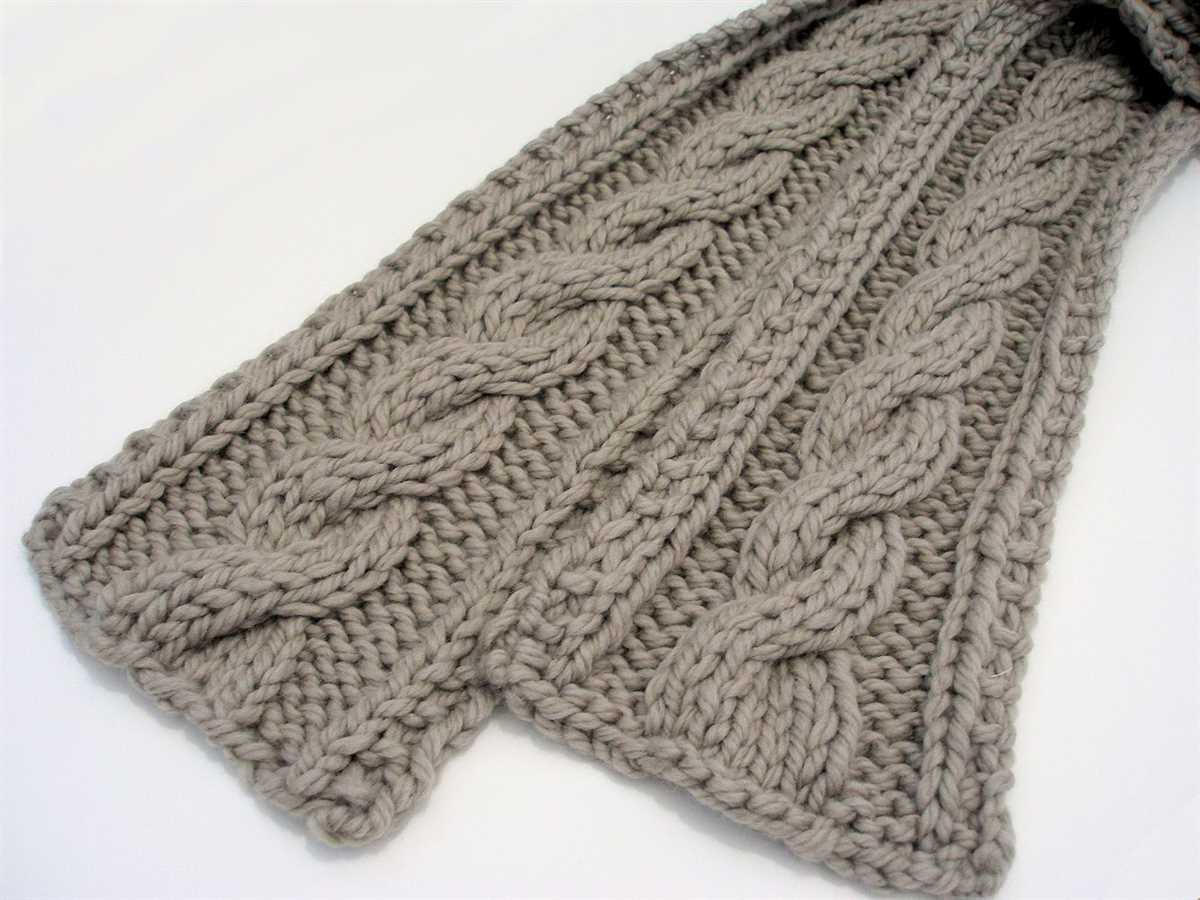
During the colder months, your cable knit scarf will be your go-to accessory for staying warm and stylish. Pair it with your favorite winter coat or sweater for a chic and cozy look. The cable knit pattern adds visual interest and texture to any outfit.
2. Gift it to a Loved One:
If you enjoyed knitting the cable knit scarf, consider making another one as a thoughtful gift for a friend or family member. Handmade gifts are always appreciated and cherished, and your loved ones will be touched by the time and effort you put into creating something special just for them.
3. Learn New Knitting Techniques:
Once you’ve mastered the cable knit pattern, why not challenge yourself to learn more advanced knitting techniques? There are countless patterns and tutorials available that will help you expand your knitting skills and create even more intricate and beautiful pieces.
4. Start a Knitting Group:
If you’re passionate about knitting, why not share your love for the craft with others? Consider starting a knitting group where you can meet regularly to knit, exchange ideas, and share your projects. It’s a great way to make new friends, learn from each other, and inspire one another.
Conclusion:
Knitting your own cable knit scarf is a rewarding and fulfilling experience. Not only do you end up with a cozy and stylish accessory, but you also gain new skills and a sense of accomplishment. So grab your scarf, bundle up, and enjoy the warmth and comfort of your handmade creation!
Q&A:
What is a cable knit scarf pattern?
A cable knit scarf pattern is a knitting pattern that involves creating cable stitches to form a textured design on a scarf. The cables are created by crossing stitches over each other to create a twist effect. It is a popular pattern for scarves as it adds visual interest and can be quite cozy and warm.
Is cable knitting difficult for beginners?
Cable knitting can be a bit more challenging for beginners compared to basic knit and purl stitches. However, with some practice and patience, beginners can learn how to do cable knitting. It may take a bit more time and concentration initially, but it is definitely achievable for beginners who are willing to learn and practice.
Are there any easy cable knit scarf patterns for beginners?
Yes, there are several easy cable knit scarf patterns available for beginners. These patterns usually involve simple cable stitches and are designed to be beginner-friendly. They often come with detailed instructions and diagrams to help beginners understand the cable knitting techniques. It is recommended for beginners to start with these easier patterns before moving on to more complex designs.
What materials do I need to knit a cable knit scarf?
To knit a cable knit scarf, you will need knitting needles in a suitable size for your yarn, cable needles (optional), and yarn of your choice. The yarn should be appropriate for the desired warmth and texture of the scarf. It is also helpful to have a tapestry needle or crochet hook for finishing the project, and scissors for cutting the yarn.
Where can I find cable knit scarf patterns for beginners?
You can find cable knit scarf patterns for beginners in various sources such as knitting books, knitting magazines, and online knitting websites. There are also many video tutorials available on platforms like YouTube that can guide you through the process of knitting a cable knit scarf. Additionally, there are knitting communities and forums where you can ask for recommendations and advice on specific patterns.