
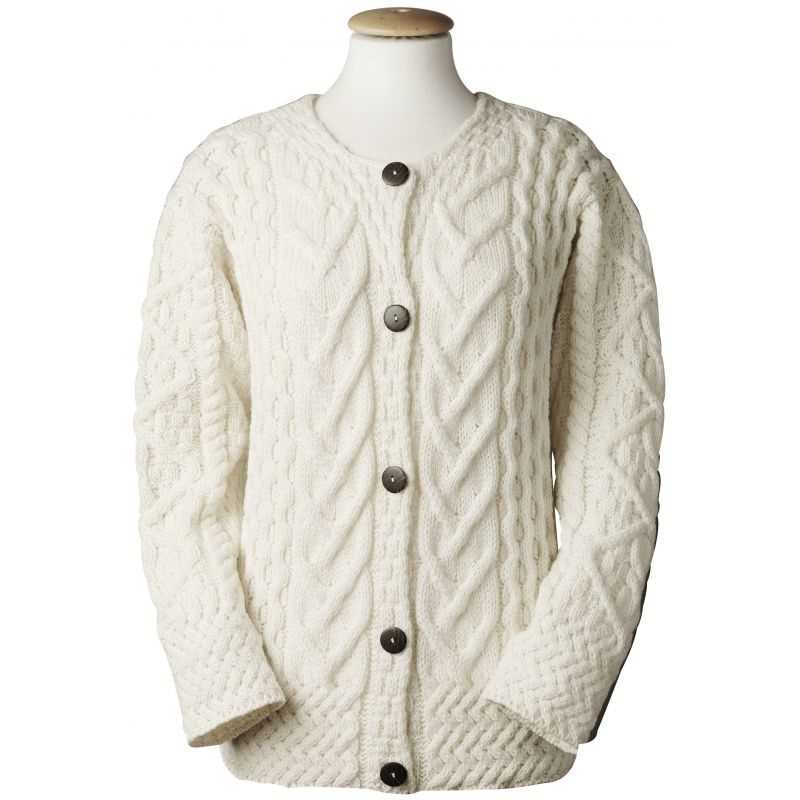
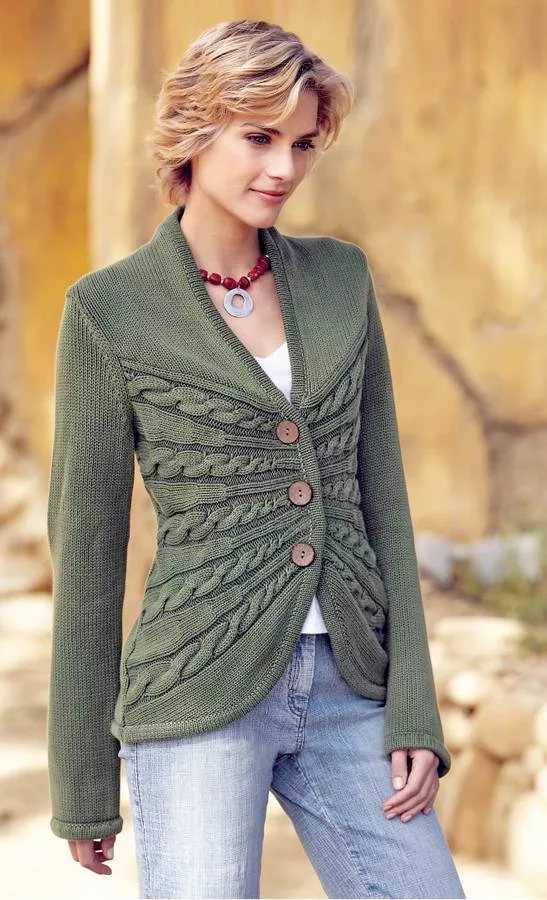
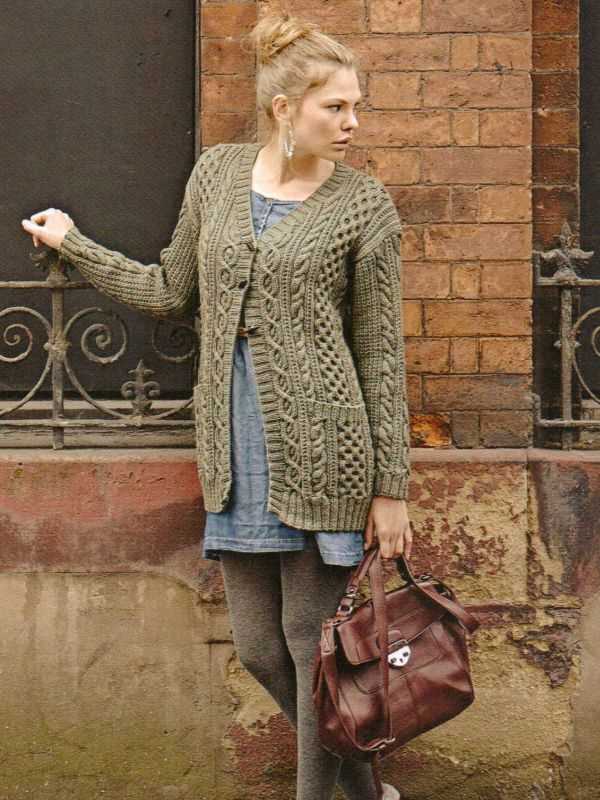
Knitting is a popular hobby that allows people to create beautiful and practical items with just a pair of needles and some yarn. One of the most popular knitting projects is a cable knit jacket. Cable knitting is a technique that adds texture and depth to any pattern, making it perfect for creating a cozy and stylish jacket.
In a cable knit jacket pattern, the design is created by crossing stitches over each other, creating a twisted effect that resembles a cable. This technique adds interest and complexity to the knitting, and can be used to create a wide variety of different patterns. The cables can be small and delicate, or large and bold, depending on the overall look you are going for.
To create a cable knit jacket, you will need to follow a specific pattern that outlines the stitch and row count, as well as the cable placement. This pattern will guide you through the process, and ensure that your jacket turns out the way you want it to. There are many different cable knit jacket patterns available, ranging from beginner-friendly designs to more complex patterns for experienced knitters.
Once you have chosen your pattern, you will need to select the right yarn and needles for the project. A cable knit jacket is typically knit using a medium to heavyweight yarn, such as a worsted weight or chunky yarn. This will create a warm and sturdy jacket that is perfect for colder weather. Be sure to check the pattern for any specific yarn recommendations or gauge requirements, to ensure that your jacket turns out the correct size.
Cable Knit Jacket Pattern
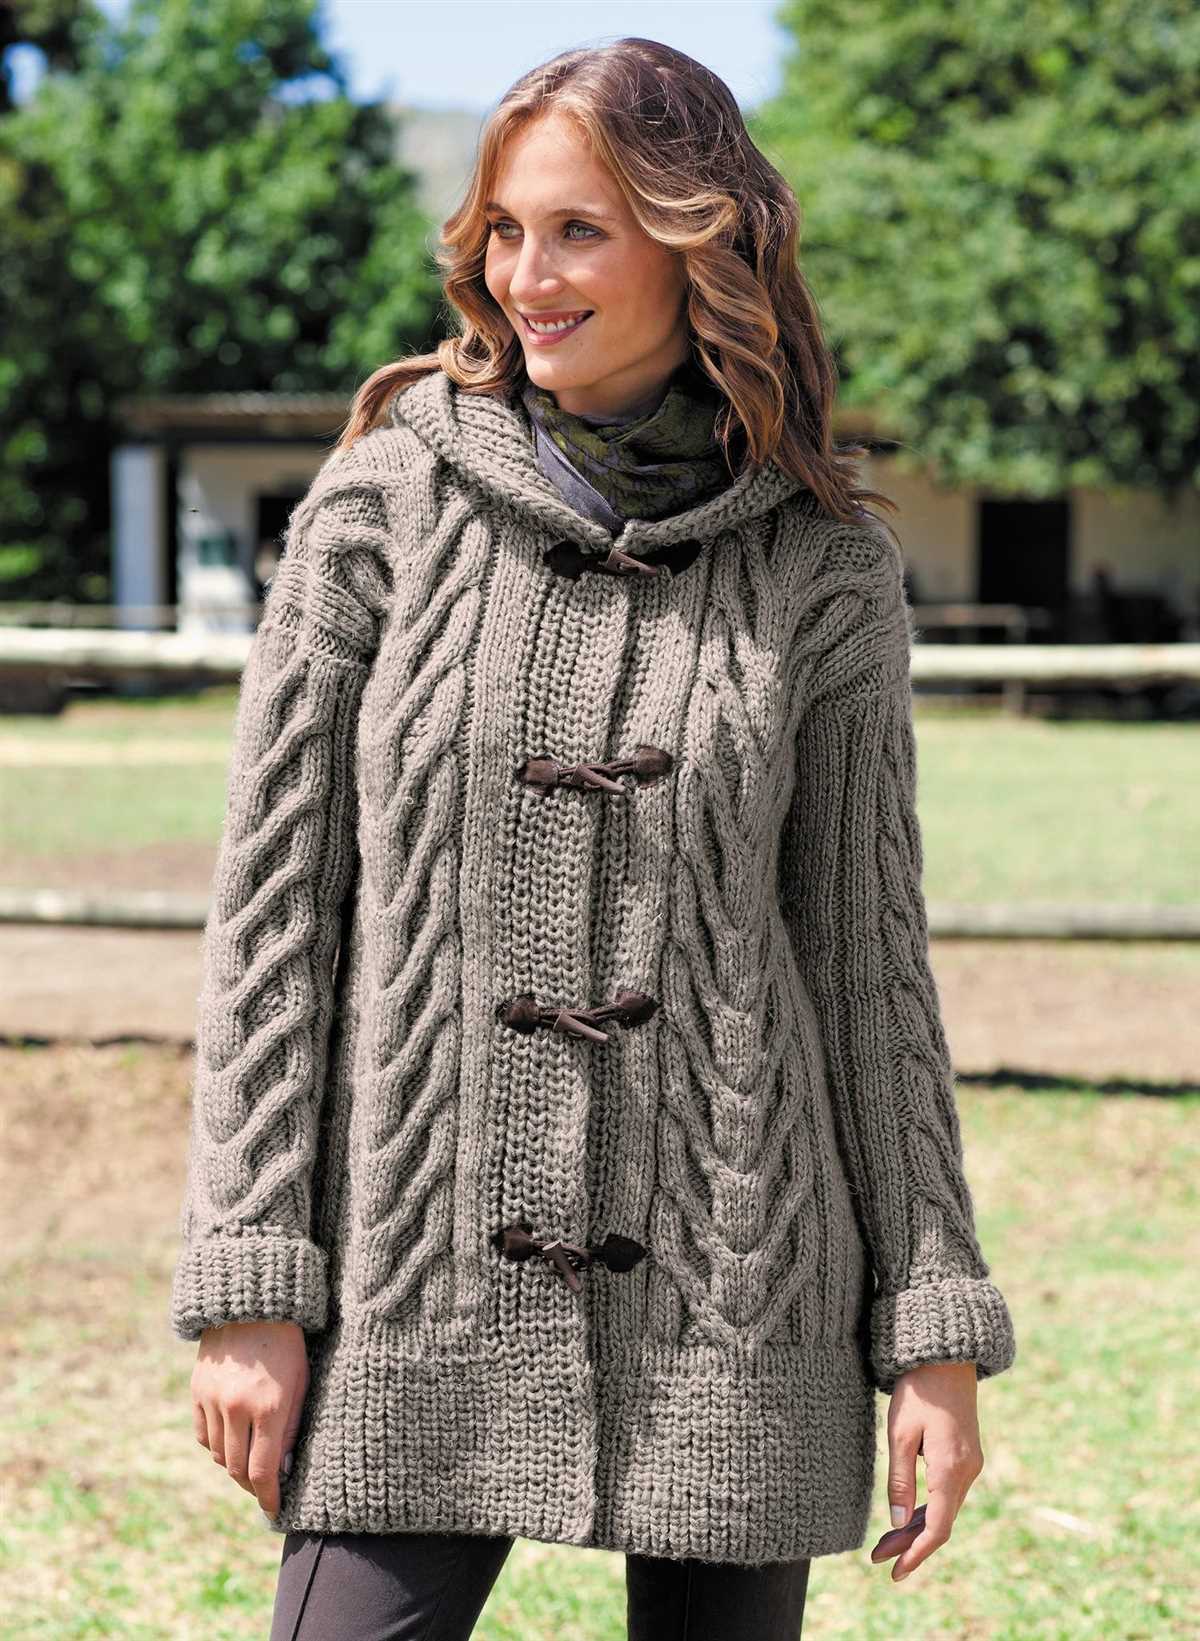
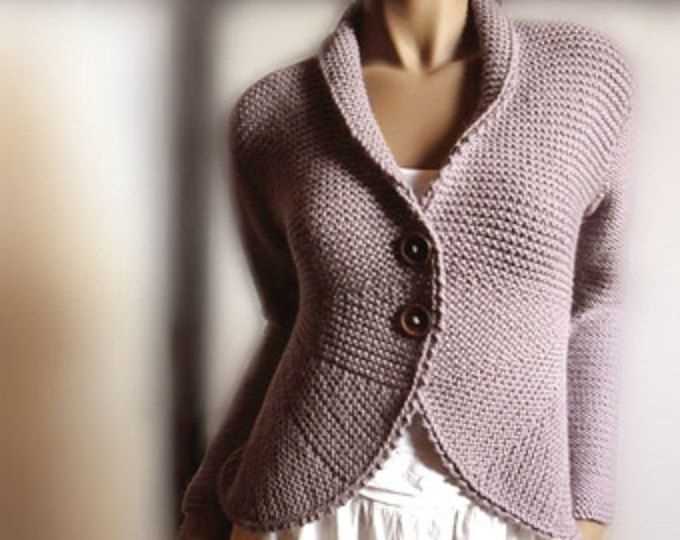
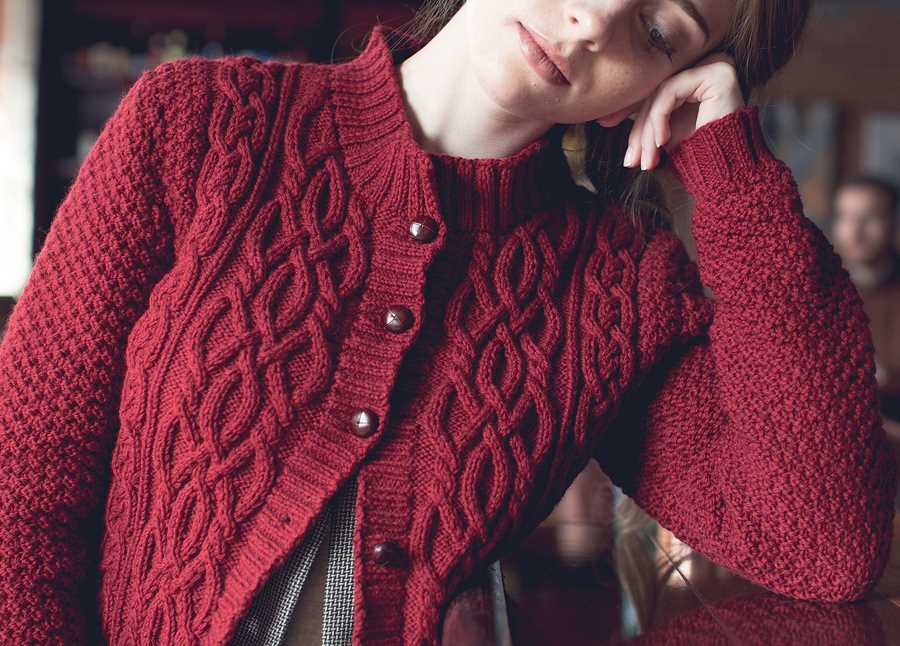
Are you looking for a stylish and cozy jacket to keep you warm during the colder months? Look no further than the cable knit jacket pattern. This pattern features a beautiful cable knit design that adds texture and visual interest to the jacket. Whether you’re a beginner or an experienced knitter, you’ll enjoy working on this project.
The cable knit jacket pattern is a versatile option that can be customized to suit your personal style. You can choose to use a traditional wool yarn for a classic and timeless look, or opt for a more modern and lightweight yarn for a contemporary feel. The pattern typically includes instructions for various sizes, so you can create a jacket that fits you perfectly.
Materials:
- Worsted weight yarn
- Circular knitting needles
- Cable needle
- Stitch markers
- Buttons
- Tape measure
When working on the cable knit jacket pattern, it’s important to pay attention to the cable stitch pattern. This stitch creates a stunning braided effect that gives the jacket its unique look. The pattern typically includes detailed instructions and charts to guide you through the cable stitch pattern.
Once you’ve completed all the cable sections, you’ll move on to the collar, sleeves, and button bands. These sections are usually worked in a rib stitch pattern to provide a stretchy and comfortable fit. Finally, you’ll add buttons to complete the jacket.
Whether you’re knitting the cable knit jacket for yourself or as a gift for a loved one, it’s sure to be a cherished and practical piece of clothing. With its intricate cable design and cozy feel, this jacket will be a stylish addition to your winter wardrobe.
Choosing the Right Yarn for Your Cable Knit Jacket
When it comes to knitting a cable knit jacket, choosing the right yarn is essential for achieving the desired look and ensuring a successful project. The type, weight, and fiber content of the yarn will all contribute to the final result, so it’s important to consider these factors before making a decision.
Type of Yarn: There are different types of yarn available for cable knitting, including acrylic, wool, alpaca, and cotton. Each type has its own unique properties and characteristics. Acrylic yarn is budget-friendly and easy to care for, but it may not have the same warmth and softness as natural fibers. Wool yarn is known for its warmth and elasticity, making it a popular choice for cable knits. Alpaca yarn is luxurious and soft, perfect for creating cozy jackets. Cotton yarn is lightweight and breathable, making it ideal for spring or summer jackets.
Weight of Yarn: The weight of the yarn will determine the thickness and drape of the finished jacket. For a chunky and cozy jacket, opt for a bulky or super bulky yarn. For a more lightweight and fitted jacket, choose a fingering, sport, or DK weight yarn. It’s important to note that using a different weight of yarn than specified in the pattern may alter the size and gauge of the jacket, so it’s best to stick to the recommended weight.
Fiber Content: The fiber content of the yarn will affect the feel, drape, and care instructions of the jacket. Wool and alpaca yarns provide warmth and softness, but may require special care, such as hand washing or laying flat to dry. Cotton yarns are machine washable and great for everyday wear. Consider your preferences and the intended use of the jacket when choosing the fiber content.
Color and Texture: Lastly, consider the color and texture of the yarn. Cable knit jackets can be enhanced by using yarns with interesting textures or subtle color variations. Variegated or self-striping yarns can add visual interest to the cables and create a unique finished look. Solid and neutral colors are versatile and timeless, while bold and vibrant colors can make a statement.
In conclusion, choosing the right yarn for your cable knit jacket is crucial for achieving the desired look and ensuring a successful project. Consider the type, weight, and fiber content of the yarn, as well as the color and texture, to create a jacket that is both visually appealing and practical for your needs. Happy knitting!
Essential Knitting Tools for Cable Knit Jacket Pattern
Knitting a cable knit jacket pattern requires a few essential tools to help you create the perfect finished garment. These tools are designed to make the knitting process easier and more efficient, ensuring that your cable knit jacket turns out beautifully. Here are some of the must-have knitting tools for this project:
- Knitting Needles: The right knitting needles are crucial for any knitting project, and this holds true for a cable knit jacket pattern. Look for needles that are the correct size and length for your project. Circular needles are often preferred for larger projects like jackets, as they can hold a large number of stitches and make the knitting process more comfortable.
- Cable Needles: Cable needles are specifically designed to help you create intricate cable patterns. These needles have a U or V shape, allowing you to hold the stitches while you cross them over one another. Look for cable needles that are the appropriate size for your project and comfortable to hold.
- Tape Measure: Accurate measurements are crucial when knitting a garment, especially when it comes to a cable knit jacket. A tape measure is essential for measuring your gauge, determining the size of the jacket, and ensuring that the finished piece fits properly.
- Stitch Markers: Stitch markers are vital tools for cable knitting, as they help to keep track of the pattern and prevent mistakes. Use stitch markers to mark the beginning of the round or to indicate a specific cable section. They can be easily moved as you work through the pattern.
- Row Counter: A row counter is a handy tool that helps you keep track of the number of rows you have knitted. This is especially important for cable knit patterns, as it can be difficult to count the rows accurately by eye. A row counter clips onto your knitting needles and can be easily incremented with each row.
These essential knitting tools will make your cable knit jacket pattern project much easier and ensure that you achieve beautiful results. Having the right needles, cable needles, tape measure, stitch markers, and row counter will help you stay organized and create a jacket that fits perfectly and showcases the intricate cable patterns.
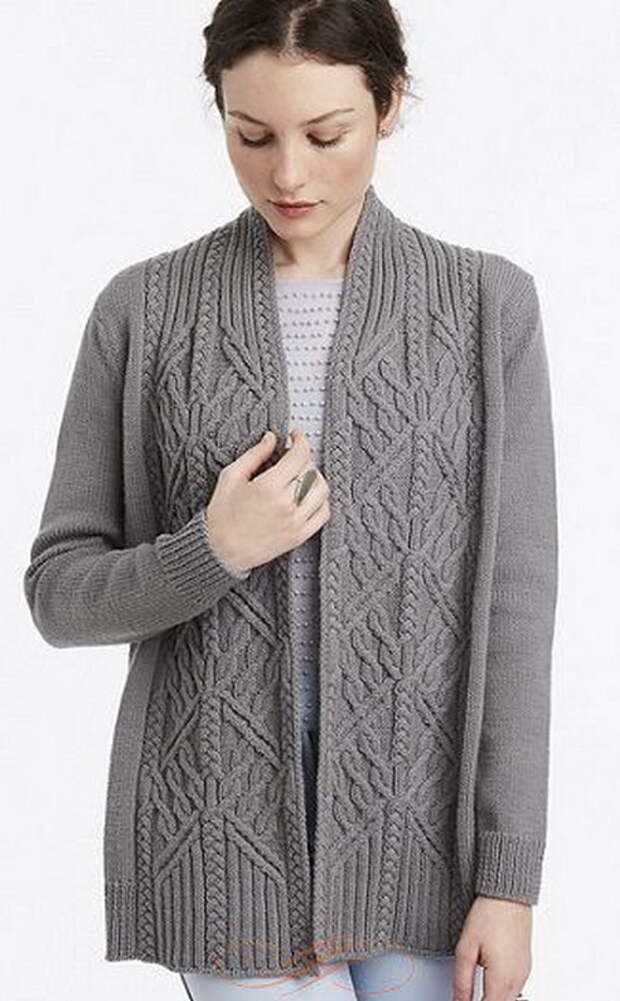
Basic Cable Stitches for Cable Knit Jacket
Cable knit jackets are timeless and classic pieces that add a touch of sophistication and warmth to any outfit. One of the key elements in creating a cable knit jacket is the use of cable stitches. These stitches create intricate patterns and textures that give the jacket its unique and stylish look.
1. C4B (Cable 4 Back): This cable stitch is created by slipping the first 2 stitches onto a cable needle and holding it at the back of the work. Then, knit the next 2 stitches from the left needle and finally knit the 2 stitches from the cable needle. This creates a twist in the cable, with the 2 stitches from the cable needle crossing over the 2 stitches from the left needle.
2. C4F (Cable 4 Front): This cable stitch is similar to the C4B, but the cable needle is held at the front of the work. Slip the first 2 stitches onto the cable needle and hold it at the front. Knit the next 2 stitches from the left needle and finally knit the 2 stitches from the cable needle. This creates a twist in the cable, with the 2 stitches from the left needle crossing over the 2 stitches from the cable needle.
- 3. 2/2 LC (2/2 Left Cross): This cable stitch involves crossing 2 stitches to the left. Slip the next 2 stitches onto a cable needle and hold it at the front. Knit the next 2 stitches from the left needle and finally knit the 2 stitches from the cable needle. This creates a twist in the cable, with the 2 stitches from the cable needle crossing over the 2 stitches from the left needle.
- 4. 2/2 RC (2/2 Right Cross): This cable stitch involves crossing 2 stitches to the right. Slip the next 2 stitches onto a cable needle and hold it at the back. Knit the next 2 stitches from the left needle and finally knit the 2 stitches from the cable needle. This creates a twist in the cable, with the 2 stitches from the left needle crossing over the 2 stitches from the cable needle.
Remember to follow the cable pattern instructions carefully to achieve the desired result. Practice these basic cable stitches to master the art of cable knitting and create a stunning cable knit jacket.
Knitting Gauge for Cable Knit Jacket Pattern
Knitting gauge is an important factor to consider when working on a cable knit jacket pattern. It refers to the number of stitches and rows in a set measurement that determines the size of the finished project. To achieve the correct gauge, it is crucial to select the appropriate yarn weight and needle size recommended in the pattern.
For a cable knit jacket pattern, the gauge is usually specified in a certain number of stitches and rows per inch. This information can be found in the pattern instructions, and it is important to take note of it before starting the project. Gaining the correct gauge ensures that the jacket will fit properly and have the desired dimensions.
When starting a cable knit jacket, it is recommended to make a gauge swatch to measure the gauge before committing to the entire project. The gauge swatch should be at least 4×4 inches in size and should be knitted using the same yarn and needles that will be used for the jacket. By measuring the number of stitches and rows within the swatch, it is possible to determine if the gauge matches the pattern’s requirements.
If the gauge is too small, meaning there are more stitches and rows per inch than specified, the knitter will need to switch to larger needles to achieve the correct gauge. Alternatively, if the gauge is too large, smaller needles can be used. It may take a few attempts and adjustments to find the right needle size and achieve the accurate gauge for the cable knit jacket.
Achieving the correct knitting gauge is crucial for a cable knit jacket pattern as it affects the overall fit and size of the finished project. By carefully following the pattern instructions and adjusting the needle size if necessary, knitters can ensure that their cable knit jackets turn out to be the perfect size and match the desired dimensions.
Casting On for Your Cable Knit Jacket
Before you begin knitting your cable knit jacket, you will first need to cast on stitches to create the foundation row. Casting on is the process of creating loops on your knitting needle that will be used to form the first row of stitches.
To cast on for your cable knit jacket, you can use the long tail cast-on method. This method is commonly used and creates a neat and sturdy edge. To begin, measure a length of yarn approximately three times the width of your desired knitting piece. Make a slipknot at one end of the yarn, leaving a long tail.
Next, hold the knitting needle in your right hand and the slipknot in your left hand. Insert the needle into the slipknot from left to right, and pull it through to create a new loop on the needle. This loop will be your first stitch. Make sure to leave the long tail hanging at the back of your work.
Continue this process by inserting the needle into the loop on the left-hand needle, from front to back, and pulling the yarn through to create a new loop. Repeat until you have cast on the desired number of stitches for your cable knit jacket.
After casting on, it is important to ensure that your stitches are evenly spaced and not too tight or too loose. If your stitches are too tight, you may struggle to knit the following rows. If they are too loose, you may end up with a sloppy and stretched-out edge.
Once you have successfully cast on all the stitches for your cable knit jacket, you are ready to begin knitting the pattern. Be sure to follow the instructions carefully, paying attention to the cable crossings and any special stitches or techniques required. Happy knitting!
Cable Knit Jacket Pattern Instructions
Knitting a cable knit jacket can be a fun and rewarding project for knitters of all skill levels. The intricate cable designs add texture and interest to the finished garment, making it a stylish addition to any wardrobe. Follow these instructions to create your own cable knit jacket:
Materials:
- Yarn: Choose a yarn that is suitable for your chosen pattern and color scheme. Wool or a wool blend is often a good choice for cable knitting, as it provides warmth and elasticity.
- Knitting needles: Use the recommended needle size for your chosen yarn.
- Cable needle: A cable needle is used to hold stitches while crossing cables.
- Tapestry needle: A tapestry needle is used for seaming and weaving in ends.
- Buttons or other closures: Choose buttons or other closures that complement your jacket design.
Instructions:
- Begin by selecting a cable knit jacket pattern that suits your preference. There are many patterns available online or in knitting books.
- Read through the pattern instructions carefully to familiarize yourself with the techniques and stitches used.
- Choose the appropriate size for your jacket and make any necessary adjustments to the pattern to ensure a proper fit.
- Start by knitting a gauge swatch to ensure that your tension matches the pattern requirements. Adjust your needle size if necessary.
- Once you have your gauge swatch and materials ready, cast on the required number of stitches and begin knitting according to the pattern instructions.
- Pay close attention to the cable charts or written instructions for the cable patterns. Follow each cable twist carefully to achieve the desired effect.
- Continue knitting each section of the jacket according to the pattern instructions, incorporating any shaping or finishing details as specified.
- Once all sections are complete, seam the pieces together using a tapestry needle and mattress stitch or your preferred seaming method.
- Add any desired closures, such as buttons or clasps, to complete your cable knit jacket.
- Finally, weave in any loose ends and block your finished jacket to give it a professional finish.
With these instructions and some patience, you can create a beautiful cable knit jacket that you will be proud to wear or give as a gift. Enjoy the process and the satisfaction of completing a handmade garment!
Shaping Your Cable Knit Jacket
When it comes to knitting a cable knit jacket, the shaping plays a crucial role in achieving a perfect fit. Whether you are a beginner or an experienced knitter, understanding how to shape your jacket will help you create a garment that flatters your body and feels comfortable to wear.
1. Increasing and Decreasing: To shape your cable knit jacket, you will need to use both increasing and decreasing techniques. This is done by adding or subtracting stitches at specific points in the knitting process. Increasing stitches can be done by making yarn overs or knitting into the front and back of a stitch, while decreasing stitches can be achieved through techniques like knitting two stitches together or slipping a stitch.
2. Waist Shaping: One of the most common shaping techniques used in cable knit jackets is waist shaping. This creates a more tailored look by cinching in the waist area. Typically, waist shaping involves decreasing stitches gradually on either side of the waist, creating an hourglass figure. The number of stitches to decrease and the frequency of decreases will depend on your specific pattern.
3. Armhole Shaping: Another important aspect of shaping your cable knit jacket is creating armholes that fit comfortably. This is achieved by binding off a certain number of stitches at the beginning of a row for the armhole opening. In some patterns, you may also need to decrease stitches gradually to shape the armhole curve. The specific instructions for armhole shaping will vary based on your chosen pattern.
4. Neckline Shaping: The neckline of your cable knit jacket can be shaped in various ways, depending on the desired style. This may include binding off stitches at the center front for a V-neck, or gradually decreasing stitches to shape a round or scoop neckline. The instructions for neckline shaping will be provided in your pattern.
5. Blocking and Finishing: Once you have completed the shaping of your cable knit jacket, it is important to block and finish your garment correctly. Blocking helps to shape the knitted fabric and even out any uneven tensions. After blocking, you can then sew any seams and add any necessary finishing touches such as buttons or closures.
By following these shaping techniques and paying attention to the specific instructions in your cable knit jacket pattern, you will be able to create a beautifully fitted and flattering garment that you can be proud of.
Finishing Techniques for Your Cable Knit Jacket
Once you have completed knitting your cable knit jacket, it’s time to focus on the finishing techniques to give your garment a polished and professional look. Here are some tips and techniques to consider:
Blocking:
Blocking is a crucial step in the finishing process. It involves wetting and reshaping your knitted piece to achieve the desired measurements and shape. For cable knit jackets, blocking helps to even out the stitches and open up the cables, making them more prominent. Use blocking pins and a blocking mat or towel to pin your jacket in place according to the pattern’s measurements. Allow it to dry completely before moving on to the next step.
Seaming:
Proper seaming is essential to ensure that your cable knit jacket has a seamless appearance. Use a yarn needle and matching yarn to seam the sleeves, sides, and any other pieces together. Take your time and make sure to line up the stitches accurately. Invisible seaming techniques, such as the mattress stitch, can be used to create an almost imperceptible seam.
Buttonholes and Buttons:
If your cable knit jacket includes buttons, you’ll need to create buttonholes and attach the buttons securely. Follow the pattern instructions for the placement and size of the buttonholes. You can create horizontal or vertical buttonholes depending on your preference. To ensure durability, reinforce the buttonholes with a few extra stitches. Sew the buttons on securely using a matching thread.
Finishing Touches:
Finally, give your cable knit jacket some finishing touches to elevate its overall look. Tidy up any loose ends by weaving them in discreetly. Block the collar to make it lie flat and neat. Consider adding a decorative edge or border to your jacket, such as a ribbed or garter stitch trim. You can also attach a label or tag to add a personalized touch.
By following these finishing techniques, you can take your cable knit jacket from a completed knitting project to a stylish and professionally finished garment.
Blocking and Seaming Your Cable Knit Jacket
Blocking and seaming are two important steps in finishing your cable knit jacket. Properly blocking your completed pieces will help to shape and size them correctly, while seaming will bring everything together to create a polished and professional-looking garment. Here are some tips and techniques to ensure that your cable knit jacket turns out beautifully.
Blocking:
Blocking is the process of reshaping your knitted pieces using water and/or steam. This step is crucial for achieving the correct dimensions and drape of your jacket. Start by pinning your knitted panels to the desired measurements and shape on a blocking board or a towel. Then, using a spray bottle or by immersing the pieces in water, wet them thoroughly. Gently squeeze out any excess water and reshape the panels as needed. To aid in shaping, use blocking wires or pins to secure the edges and cables. Allow the pieces to dry completely before moving on to seaming.
Seaming:
Seaming is the process of joining the individual panels of your jacket together to create a cohesive garment. Begin by laying out the blocked pieces in the correct order and orientation. Using a yarn needle and the same yarn you used for knitting, start by seaming the shoulders together. Using mattress stitch or a similar invisible seaming technique, sew from the top down, matching up the stitches as you go. Repeat this process for any other seams, such as the sides or sleeves. Be sure to match up any patterns, such as cables or ribbing, to maintain consistency throughout the garment. Once the seaming is complete, weave in any loose ends and your cable knit jacket is ready to wear!
Tips and Tricks for Cable Knit Jacket Pattern
If you’re embarking on a cable knit jacket pattern, it’s important to have a few tips and tricks up your sleeve to ensure success. The intricate cable stitches can be challenging, but with the right techniques and approaches, you can create a stunning jacket that will impress everyone.
1. Read the Pattern Carefully
Before you begin knitting, thoroughly read through the pattern to familiarize yourself with the instructions. Pay attention to any special abbreviations or stitches that may be used. Understanding the pattern from the outset will help prevent mistakes and ensure a smoother knitting process.
2. Use Cable Needles
Working with cable needles can greatly simplify the cable knitting process. Cable needles are short, double-pointed needles that hold stitches temporarily while you work on the crossed cables. They prevent the stitches from unraveling and make it easier to manipulate the cables. Invest in a set of cable needles to make your cable knitting journey easier.
3. Count Your Stitches
Counting your stitches regularly is essential to maintaining the correct pattern and preventing errors. Cable knit patterns often require an exact number of stitches to create the desired cable design. By counting your stitches at the end of each row, you can quickly catch any mistakes and avoid having to unravel your work.
4. Use Stitch Markers
Stitch markers can be invaluable when working on a cable knit jacket pattern. They can help you keep track of specific sections of your knitting and ensure that your cables are aligned correctly. Use stitch markers to mark the beginning and end of cables or any other significant points in your pattern.
5. Practice Tension Control
Tension control is key when knitting cables. The cable stitches tend to pull the fabric tighter, resulting in a narrower piece of knitting. To avoid this, make a conscious effort to loosen your tension while working on the cable stitches. You can also use larger needles for the cable sections to ensure the finished jacket has a consistent size and shape.
By following these tips and tricks, you’ll be well-equipped to take on a cable knit jacket pattern and create a beautiful garment that showcases your knitting skills. Remember to take your time, be patient with yourself, and enjoy the process of creating something unique and stylish.
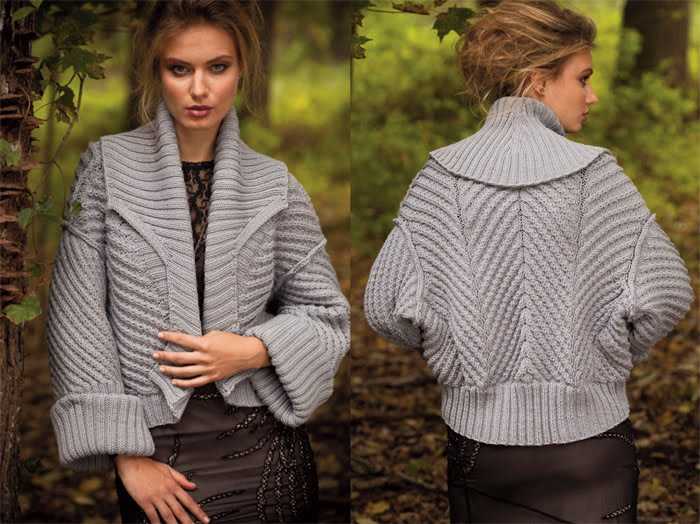
Inspiration and Ideas for Customizing Your Cable Knit Jacket
Now that you have learned how to knit a cable knit jacket and have mastered the basic pattern, it’s time to get creative and make your jacket truly unique. There are endless possibilities for customizing your cable knit jacket to reflect your personal style and taste. Here are some inspiration and ideas to get you started:
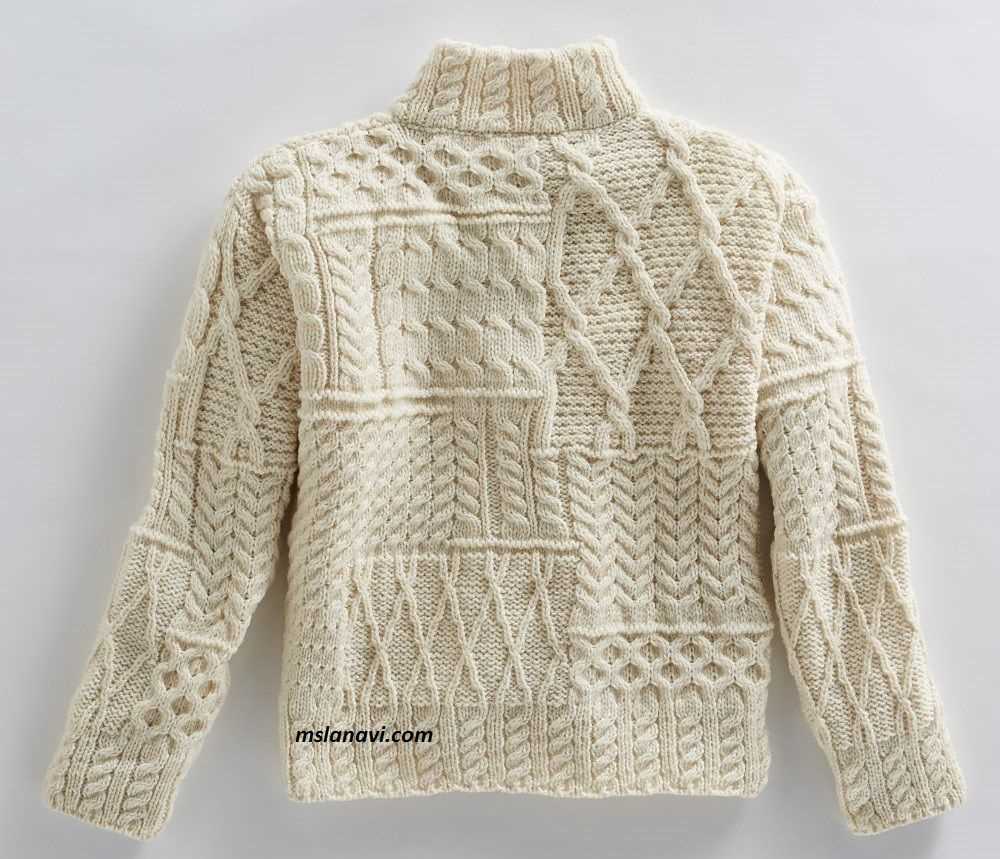
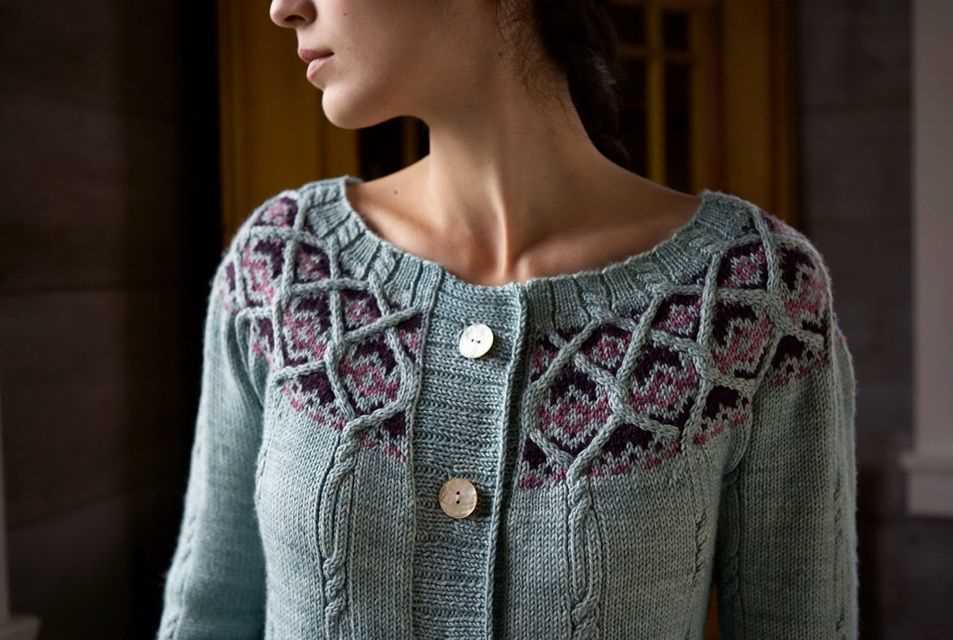
1. Experiment with different cable patterns: While the classic cable pattern is timeless, there are many other cable stitch patterns that you can incorporate into your jacket. Try experimenting with different cable patterns such as honeycomb, horseshoe, or seed stitch cables to add an interesting twist to your design.
2. Add color: Cable knit jackets look stunning in a single neutral color, but adding pops of color can really make your jacket stand out. Consider adding colored accents to the cables or knitting the entire jacket in a vibrant hue. You can also experiment with color-blocking techniques to create a unique look.
3. Play with texture: In addition to cables, you can introduce other textured stitches to your jacket. Consider incorporating ribbing, moss stitch, or even lace patterns to create contrast and add visual interest to your design.
4. Embellish with buttons or toggles: Buttons or toggles can be a fun and practical addition to your cable knit jacket. Choose buttons or toggles that complement the style and color of your jacket, whether they are traditional wooden buttons or modern metallic ones. This small detail can elevate your jacket and make it even more stylish.
5. Personalize with embroidery or patches: If you want to add a personal touch to your cable knit jacket, consider embroidering your initials or adding patches or appliques. This can be a great way to make your jacket truly one-of-a-kind and showcase your creativity.
6. Consider different lengths: Cable knit jackets come in various lengths, from cropped to knee-length. Think about which length would suit your body type and personal style best. You can also experiment with asymmetrical or hi-low hemlines to add a modern twist.
7. Mix yarn weights: Another way to add interest to your cable knit jacket is to mix different yarn weights within the same design. For example, you can use a bulky yarn for the cables and a thinner yarn for the body of the jacket. This creates a visually appealing contrast and adds dimension to your project.
These are just a few ideas to get your creative juices flowing. The most important thing is to have fun and enjoy the process of customizing your cable knit jacket. Let your imagination run wild and create a jacket that is truly unique to you. Happy knitting!