
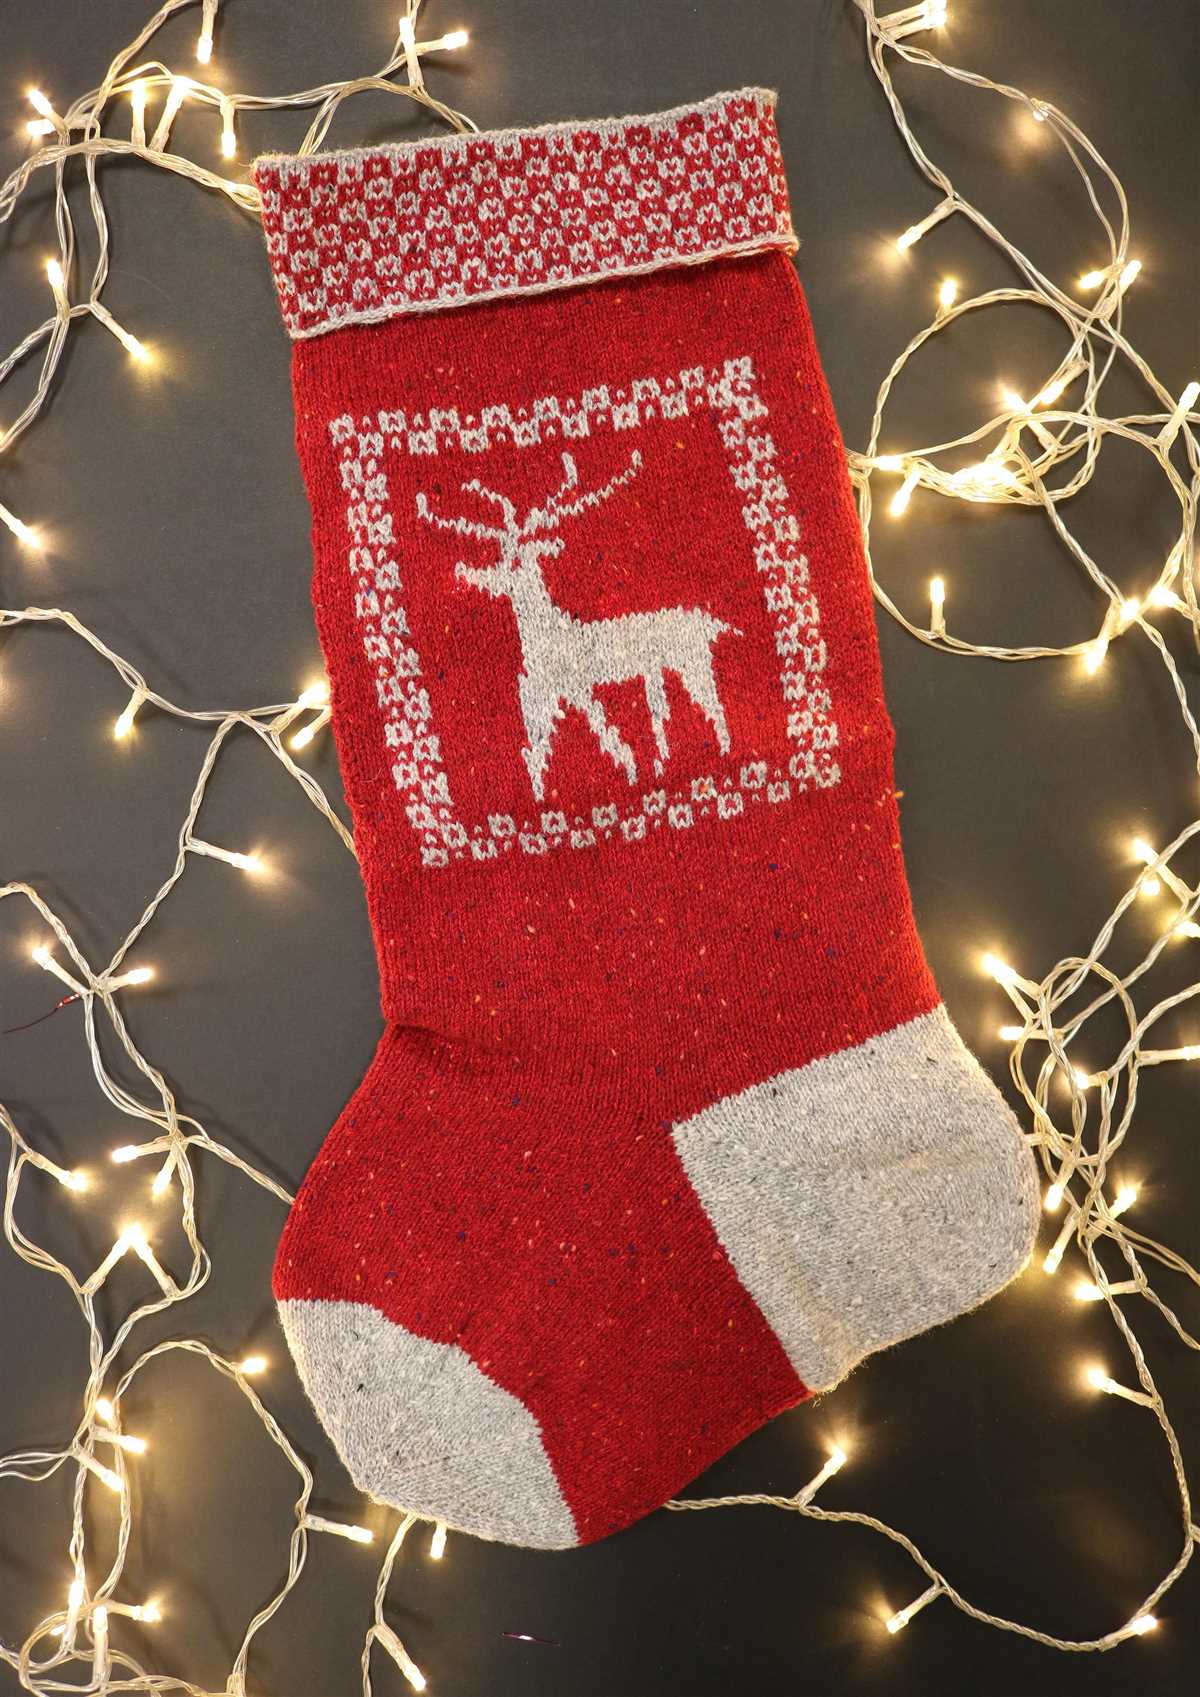
The holiday season is upon us, and what better way to celebrate than by making your own Christmas stockings? If you’re looking for a fun and festive project that is perfect for beginners and experienced knitters alike, then look no further than a bulky knit Christmas stocking pattern. These patterns offer a cozy and warm touch to any festive decor, and they can be easily customized to match your personal style.
Knitting a stocking may seem intimidating, especially if you’re new to knitting. But fear not! With the right pattern and a bit of patience, anyone can create a beautiful and unique Christmas stocking. Using a bulky yarn adds texture and warmth to the stocking, making it extra cozy and perfect for hanging by the fireplace.
One of the great things about a bulky knit Christmas stocking pattern is that it works up quickly. The chunky yarn and larger needles mean that each stitch is larger and requires less time to complete. This makes it an ideal project for those who have limited time or are just starting out with knitting. You’ll be amazed at how quickly you can finish a stocking and start filling it with gifts.
Bulky Knit Christmas Stocking Pattern: Create a Cozy Holiday Decoration
If you enjoy knitting and want to add a personal touch to your holiday decorations, why not try making a bulky knit Christmas stocking? This pattern is perfect for both beginners and experienced knitters, as it uses simple stitches and a chunky yarn to create a warm and cozy stocking.
To start, gather your materials. You will need a pair of size 10 knitting needles, bulky weight yarn in your desired colors, and a tapestry needle for sewing up any seams. You can choose festive holiday colors like red, green, and white, or get creative with your own color combinations.
Instructions:
- Cast on 40 stitches using your main color yarn.
- Knit every row until your stocking measures approximately 16 inches in length, or your desired size. Remember to leave enough yarn for the cuff and toe.
- Once you are happy with the length, switch to your cuff color. Knit 4 rows in a rib stitch (knit 1, purl 1).
- Switch back to your main color yarn and knit 2 rows.
- Now, it’s time to shape the toe. Decrease 1 stitch at the beginning and end of every row until you have 8 stitches left.
- Cut the yarn, leaving a long tail. Thread the tapestry needle with the yarn and slip it through the remaining 8 stitches. Pull the tail tight to close the toe.
- Finally, fold the knitted piece in half and sew up the two sides using the tapestry needle and your main color yarn.
- Attach a loop of yarn to the top corner of the stocking to hang it up.
Once you have finished knitting and sewing up your bulky knit Christmas stocking, it’s time to fill it with treats and hang it on your fireplace mantel or wherever you like to display your holiday decorations. This cozy and personalized stocking will add a festive touch to your home and bring joy to the whole family.
Why Choose a Bulky Knit Christmas Stocking Pattern?
When it comes to knitting Christmas stockings, there are many different patterns and styles to choose from. One popular option is a bulky knit stocking pattern. These patterns use thicker yarn and larger needles, resulting in a chunky and cozy stocking that is perfect for hanging by the fireplace.
1. Quick and Easy: The bulky knit Christmas stocking pattern is a great option for knitters who want to create a beautiful stocking but don’t have a lot of time to spend on the project. The thick yarn and larger needles means that the stocking knits up quickly, allowing you to finish it in just a few evenings.
2. Warm and Cozy: The bulky knit stocking is not only quick to make, but it also creates a warm and cozy stocking. The thicker yarn adds extra insulation to the stocking, making it perfect for holding small gifts and treats. Plus, the chunky texture gives the stocking a cozy and inviting look.
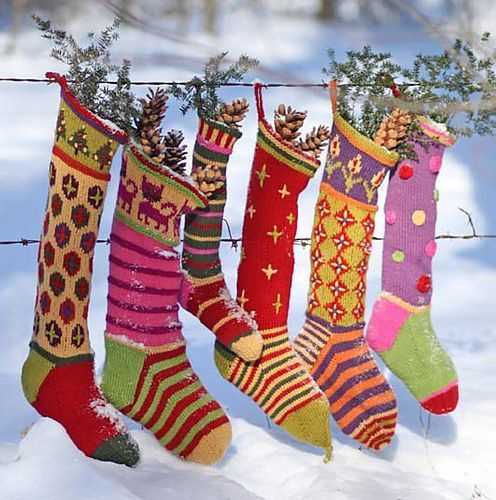
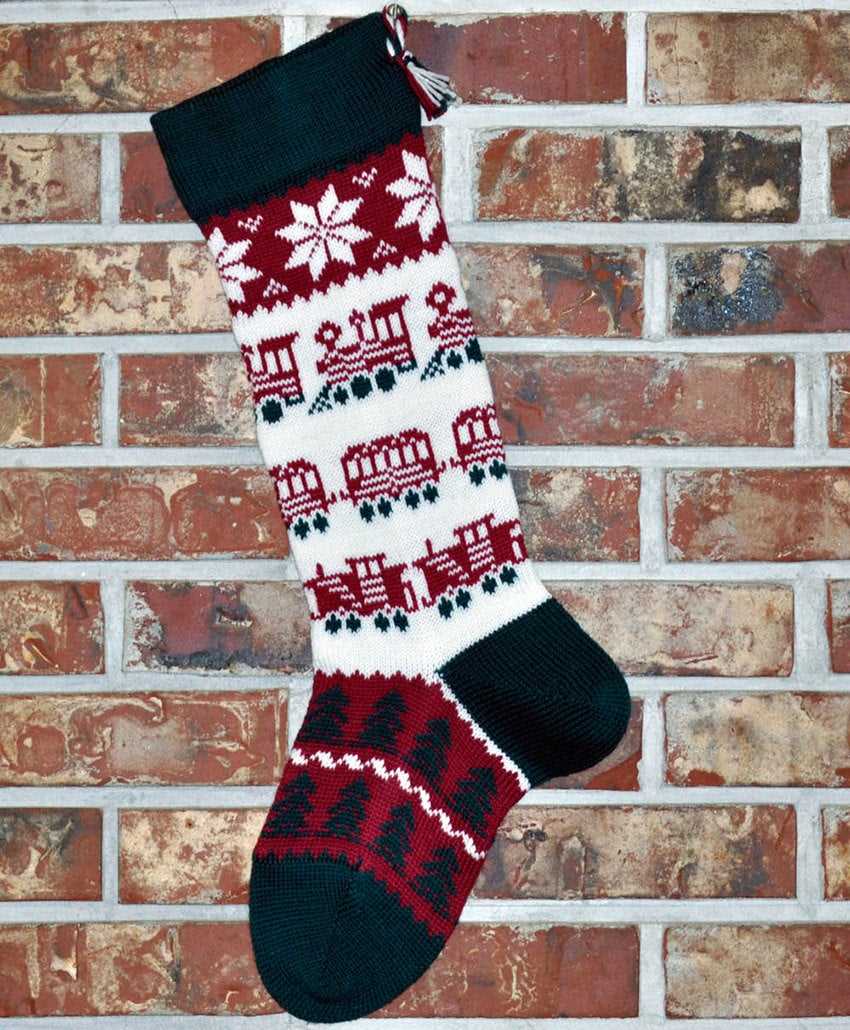
3. Versatile Design Options: Just because you choose a bulky knit stocking pattern doesn’t mean you are limited in design options. There are countless patterns and variations available, allowing you to personalize your stocking to match your holiday decor. From traditional fair isle designs to modern geometric patterns, the options are endless.
4. Perfect for Beginners: If you are new to knitting or looking for a project to practice your skills, a bulky knit stocking pattern is a great choice. The larger needles and thicker yarn make it easier to see your stitches and correct any mistakes. Plus, the simple construction of most stocking patterns makes it a beginner-friendly project.
Overall, a bulky knit Christmas stocking pattern is a practical and stylish choice for knitters of all skill levels. Whether you want a quick and cozy stocking or a personalized design, the bulky knit option offers a variety of benefits. So grab your needles and yarn, and start knitting your own festive Christmas stocking!
Materials Needed for a Bulky Knit Christmas Stocking
If you’re looking to create a cozy and festive Christmas stocking, a bulky knit design is the perfect choice. Here are the materials you’ll need to get started on your project:
1. Bulky Yarn: To achieve the chunky and warm look of a bulky knit stocking, you’ll need to choose a bulky yarn. Look for yarns labeled as super bulky or chunky, as these will provide the desired thickness for your stocking.
2. Knitting Needles: You’ll need a pair of knitting needles in a size that complements your chosen yarn. Check the label on your yarn for the recommended needle size, as this will ensure that your stitches have the right tension and the stocking turns out the way you envision.
3. Stitch Markers: Stitch markers can be incredibly helpful when working on a knitting project, and a bulky knit stocking is no exception. Use stitch markers to mark important points, such as the beginning of a round or specific pattern repeats.
4. Tapestry Needle: A tapestry needle is essential for weaving in loose ends and finishing off your stocking. Choose a needle with a large eye that can easily accommodate the thickness of the yarn you’re using.
5. Scissors: You’ll need a pair of sharp scissors to cut your yarn as you work on your stocking and to trim any excess yarn once you’re done.
6. Embellishments: Depending on your personal style, you might want to add some embellishments to your stocking. Consider adding buttons, ribbons, or even embroidery to make your stocking truly unique.
By gathering these materials, you’ll have everything you need to create a beautiful and cozy bulky knit Christmas stocking. Get ready to enjoy the holiday season with a handmade stocking that will be cherished for years to come.
Getting Started: Casting On and Joining in the Round

When beginning a bulky knit Christmas stocking pattern, the first step is to cast on your stitches. The number of stitches you will cast on will depend on the size of the stocking you want to create. Typically, you will need to cast on a multiple of four stitches, as many traditional knit patterns use a four-stitch pattern repeat.
To cast on, take your knitting needle in your right hand and hold your yarn in your left hand. Make a slip knot with the yarn, leaving a long tail of yarn to weave in later. Insert your right needle into the slip knot and tighten the stitch onto your needle. This is your first cast-on stitch.
Continue casting on by repeating this process, making sure to keep the stitches loose enough that you can easily slide them along the needle but not so loose that they fall off. Once you have cast on all your stitches, arrange them onto your needle so that the working yarn is on the right side.
Next, it’s time to join in the round. This is the point where your knitting starts to form a circle, rather than a flat piece. To join in the round, you will want to make sure that your cast-on stitches are not twisted around the needle. Hold your needle with the cast-on stitches in your right hand, and with your left hand, pick up the working yarn and knit into the first cast-on stitch, being careful not to twist the stitches.
Once you have knitted into the first cast-on stitch, you can slide your stitches along the needle so that they are evenly distributed. Some knitters find it helpful to place a stitch marker at this point to mark the beginning of the round. Now you can continue knitting in the round, following the pattern instructions for your bulky knit Christmas stocking.
Knitting the Body of the Stocking
Once you have completed knitting the ribbed cuff of the stocking, it’s time to move on to the body of the stocking. This is where you will create the main portion of the stocking that will hold all the goodies!
To start, you will need to switch to the main color of yarn that you have chosen for your stocking. Attach the yarn to one of the needles and begin knitting in the round. You can use either circular needles or double-pointed needles for this part, depending on your preference.
Continue knitting in the round until you reach the desired length for your stocking body. This will depend on how big you want your stocking to be and how many presents you plan on filling it with!
As you knit, you can add patterns or texture to the body of the stocking by including different stitches or color changes. This can give your stocking a unique and personalized look. Feel free to get creative and add your own design elements.
Once you have reached the desired length, you can finish off the body of the stocking by binding off the stitches. Cut the yarn, leaving a long tail for seaming.
Now that you have completed the body of the stocking, you are one step closer to having a beautiful and cozy Christmas stocking. The next step will be to knit the toe of the stocking, where you will shape the pointy end. Stay tuned for the next article in this series for instructions on how to knit the toe!
Creating a Cuff: Ribbing vs. Seed Stitch
When it comes to creating a cuff for your bulky knit Christmas stocking, you have a few options to choose from. Two popular choices are ribbing and seed stitch. Each of these stitch patterns has its own unique qualities, and the decision of which one to use will depend on the overall look and feel you want for your stocking.
Ribbing: Ribbing is a common choice for cuffs because it is stretchy and provides a snug fit around the top of the stocking. It is created by alternating knit and purl stitches in a specific pattern, typically 1×1 or 2×2. The result is a ribbed effect that adds texture and elasticity to the cuff. Ribbing is a great option if you want your stocking to have a classic and traditional look.
Seed Stitch: Seed stitch is another option for creating a cuff with texture. It is made by alternating knit and purl stitches, but in a more random pattern than ribbing. This creates a bumpy texture that adds visual interest to the cuff. Seed stitch is not as stretchy as ribbing, so it may not provide as snug of a fit. However, it can give your stocking a more rustic and handmade feel.
Ultimately, the choice between ribbing and seed stitch for your bulky knit Christmas stocking cuff will come down to personal preference. If you want a classic and stretchy cuff, ribbing may be the way to go. If you prefer a more textured and rustic look, seed stitch could be the better option. Whichever stitch pattern you choose, both ribbing and seed stitch can add style and charm to your festive stocking.
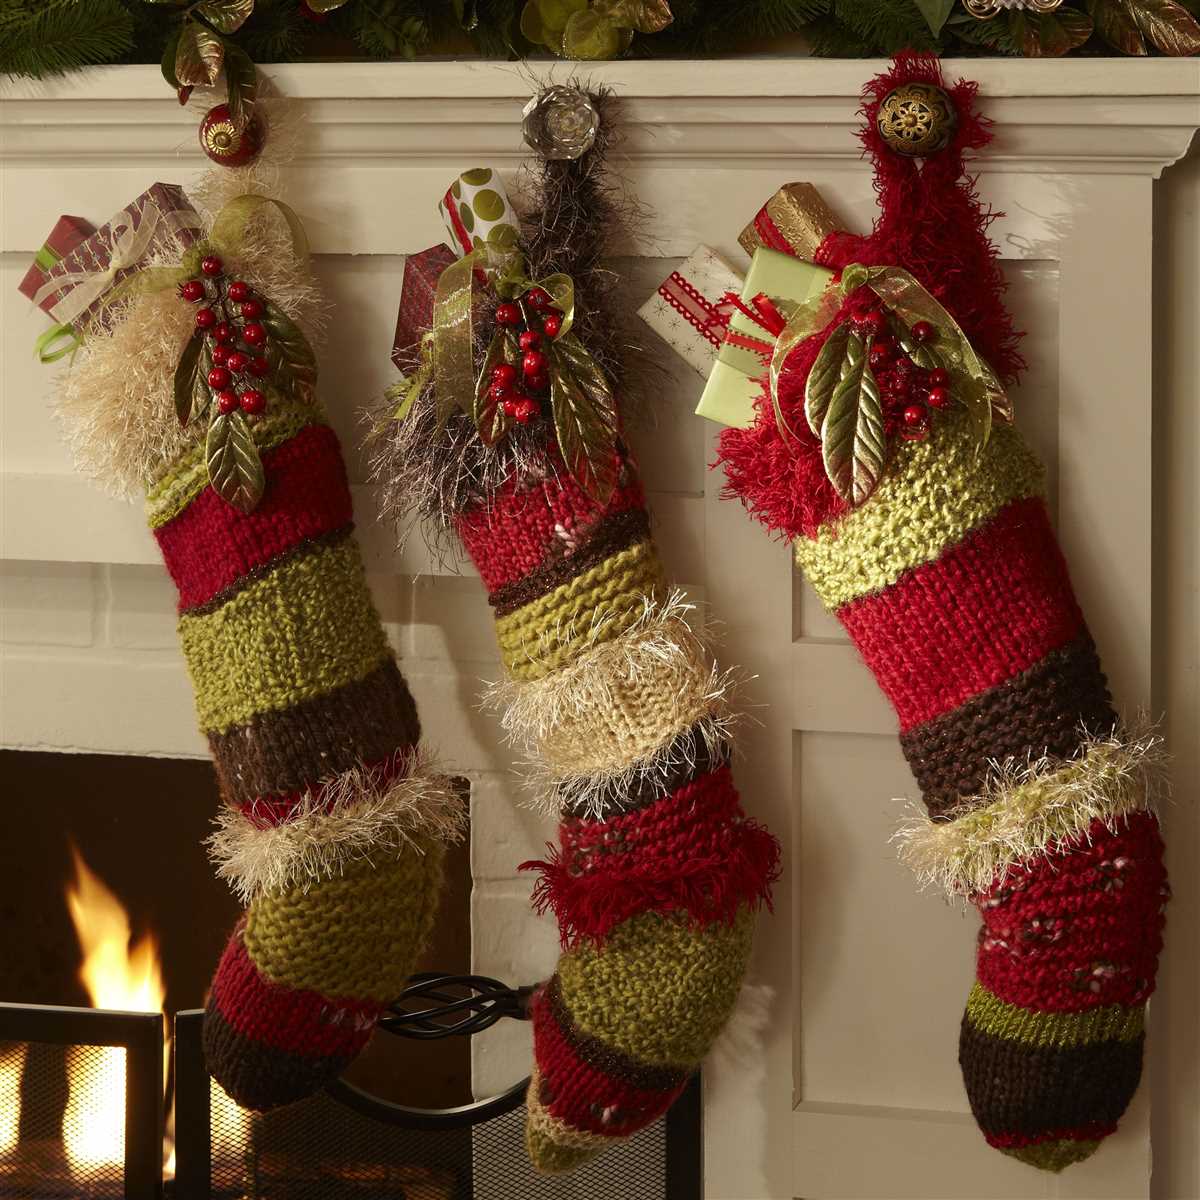
Adding Embellishments: Pom Poms, Tassels, and More
Add a touch of whimsy to your bulky knit Christmas stocking by adding fun embellishments like pom poms, tassels, and more. These playful details not only add visual interest to your stocking but also make it even more unique and personalized.
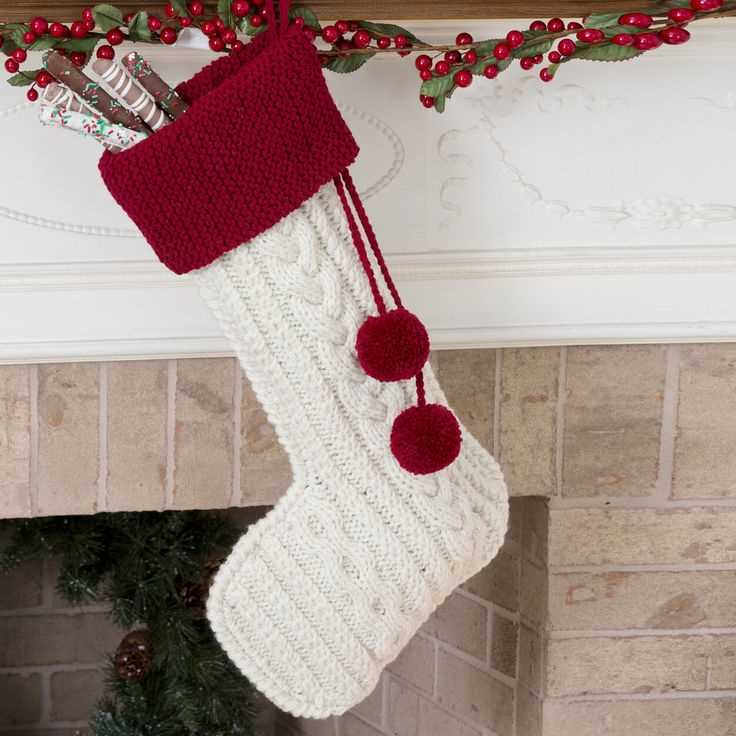
Pom poms: Pom poms are a classic and versatile embellishment that can be easily made with yarn. You can attach them to the cuff of the stocking, at the toe, or even scatter them throughout the body of the stocking. Choose yarn in coordinating or contrasting colors to create a lively and festive look. To make pom poms, simply wrap yarn around your fingers or a pom pom maker, tie it tightly in the middle, and then cut through the loops to create a fluffy pom pom.
Tassels: Tassels are another fun and decorative addition to your bulky knit Christmas stocking. You can attach them to the corners of the stocking or use them to decorate the cuff. Tassels can be made from yarn, embroidery floss, or even ribbon. To make a tassel, wrap yarn or other material around a cardboard or book, tie it tightly at one end, and then cut through the loops at the other end. Fluff and trim the tassel to your desired length.
Embroidery: If you’re feeling more creative, consider adding embroidery to your bulky knit Christmas stocking. You can embroider festive designs, like snowflakes or reindeer, onto the body of the stocking or personalize it with a name or initials. Choose embroidery floss in colors that complement your stocking, and use simple stitches like backstitch or chain stitch to create your designs. Embroidery adds a lovely handmade touch and can make your stocking even more special.
Beads and sequins: For a touch of sparkle, you can add beads or sequins to your bulky knit Christmas stocking. Attach them to the cuff or scattered throughout the body of the stocking for a festive and eye-catching look. You can sew them on individually or use a fabric glue for easier application. Beads and sequins come in a wide variety of colors and shapes, so you can create custom patterns or mix and match for a dazzling effect.
Ribbons and bows: To add a touch of elegance to your bulky knit Christmas stocking, consider adding ribbons and bows. You can tie a ribbon around the cuff or use it to create small bows to attach to the stocking. Satin or velvet ribbons in rich colors like red, green, or gold can give your stocking a luxurious and refined look. You can also experiment with different ribbon widths and textures to achieve the desired effect.
With these embellishments, you can truly make your bulky knit Christmas stocking a one-of-a-kind holiday decoration. Get creative and have fun adding pom poms, tassels, embroidery, beads, sequins, ribbons, and bows to create a stocking that will be cherished for years to come.
Personalizing Your Stocking: Embroidery and Monograms
Adding personal touches to your bulky knit Christmas stocking can make it even more special and unique. One popular way to personalize stockings is through embroidery and monograms. These techniques allow you to add names, initials, or special designs to the stocking, creating a customized look that reflects your own style and personality.
Embroidery is a versatile technique that can be used to create intricate designs on your stocking. You can choose from a wide range of thread colors and stitch patterns to create a design that is both beautiful and meaningful. Whether you want to add a simple border, a festive holiday motif, or a personalized message, embroidery allows you to bring your vision to life.
Monograms are a classic way to personalize stockings. A monogram typically consists of three letters – the first initial of the person’s first name, the first initial of their last name, and the first initial of their middle name. However, monograms can also be created using just one or two initials, or even using numbers or symbols. You can choose from a variety of fonts and styles to create a monogram that suits your taste and complements the overall design of your stocking.
If you’re not confident in your embroidery or monogramming skills, you can also consider hiring a professional to personalize your stocking for you. Many local embroidery shops or online retailers offer custom embroidery services, allowing you to simply provide the design or text you want, and they will take care of the rest. This can be a great option if you want a polished and professional look, or if you don’t have the time or patience to tackle the project yourself.
Remember that the key to successful embroidery or monogramming is proper planning and preparation. Before you start, make sure to sketch out your design and choose the right colors and threads for your stocking. Take your time, and remember that practice makes perfect – if you’re new to embroidery or monogramming, try practicing on a scrap piece of fabric or a sample stocking before working on your actual stocking. With a little bit of patience and creativity, you can create a personalized stocking that will be cherished for years to come.
Finishing Touches: Binding Off and Weaving in Ends
Once you have finished knitting your bulky knit Christmas stocking, it is time to give it the finishing touches. One of the final steps is binding off, which is the process of securing the last row of stitches so they don’t unravel. To bind off, simply knit two stitches, and then use your left needle to lift the first stitch over the second stitch and off the right needle. Repeat this process across the row until there is only one stitch left. Cut the yarn, leaving a long tail, and pull it through the last stitch to secure it.
After binding off, you will have a few loose ends of yarn hanging from your stocking. These ends need to be woven in to ensure that they don’t come undone or create an unsightly appearance. To weave in the ends, thread a tapestry needle with one of the loose ends. Insert the needle under several existing stitches on the wrong side of the stocking, being careful not to pull too tight. Then, bring the needle back through the stitches in the opposite direction, creating a loop. Repeat this process a few times to secure the end, and then cut off any excess yarn.
Key phrases:
- Bulky knit Christmas stocking
- Finishing touches
- Binding off
- Weaving in ends
- Last row of stitches
- Knit two stitches
- Securing the stitches
- Left needle
- Right needle
- Loose ends of yarn
- Tapestry needle
- Wrong side of the stocking
- Insert the needle
- Existing stitches
- Pull too tight
- Cut off any excess yarn
Blocking and Shaping the Stocking
Blocking is a crucial step in finishing a bulky knit Christmas stocking. It helps to shape and even out the stitches, as well as ensure that the stocking maintains its desired size and structure. To start, fill a basin or sink with lukewarm water and add a small amount of wool wash. Submerge the stocking in the water, gently pressing down to ensure it is fully saturated. Let it soak for about 10-15 minutes, allowing the fibers to relax.
After soaking, carefully remove the stocking from the water and gently squeeze out the excess moisture. Lay a clean towel on a flat surface and place the stocking on top, making sure to reshape it into its intended shape. Use your hands to gently stretch and manipulate the fabric, pulling it slightly in all directions to help even out any uneven stitches.
Next, pin the stocking in place using rustproof T-pins or blocking wires. Start by pinning the top edge, keeping it straight and ensuring that any cables or intricate stitch patterns are well defined. Work your way down the stocking, pinning the sides and foot section to maintain the desired shape. If necessary, use additional pins to anchor any areas that seem to be pulling or puckering.
Once the stocking is properly pinned, allow it to air dry completely. The blocking process can take anywhere from a few hours to a full day, depending on the climate and humidity levels. It’s important to be patient and let the stocking dry naturally to avoid any distortion or damage to the fabric.
Once the stocking is fully dry, carefully remove the pins or blocking wires. The stocking should now be beautifully shaped and ready for any additional finishing touches, such as adding a decorative trim or attaching a hanging loop.
Storing and Displaying Your Finished Stocking
Once you have completed knitting your bulky knit Christmas stocking, you may be wondering how to store and display it. There are several options available to ensure that your stocking remains protected and can be admired during the holiday season.
1. Hanging Method: One popular way to display your finished stocking is to hang it by a fireplace or on a wall. You can use a sturdy hook or a decorative hanger to showcase the stocking. This allows your beautifully knitted creation to be a focal point of your holiday decorations.
- 2. Stocking Holder: Another option is to use a stocking holder specifically designed for bulky knit stockings. These holders typically feature a weighted base and a decorative hook or clip to securely hold your stocking. This ensures that your stocking stays in place and can be easily admired.
- 3. Wreath Display: If you want to get creative, you can incorporate your bulky knit stocking into a holiday wreath display. Simply attach your stocking to a wreath using thread or ribbon. This adds a unique touch to your traditional wreath and showcases your knitting skills.
- 4. Decorative Storage: When it comes to storing your bulky knit stocking during the off-season, it’s important to properly protect it from dust and pests. Consider investing in a decorative storage box or bag specifically designed for stockings. These storage solutions often come with dividers to keep each stocking separate and safe.
Overall, there are many ways to store and display your finished bulky knit Christmas stocking. Whether you choose to hang it by a fireplace, use a stocking holder, incorporate it into a wreath display, or store it in a decorative box, your stocking is sure to bring joy and warmth to your holiday decorations.
Give the Gift of Handmade: Ideas for Using your Bulky Knit Christmas Stocking Pattern
Now that you have your bulky knit Christmas stocking pattern, it’s time to start thinking about how you can use it to create thoughtful and personalized gifts for your loved ones. Here are some ideas to inspire you:
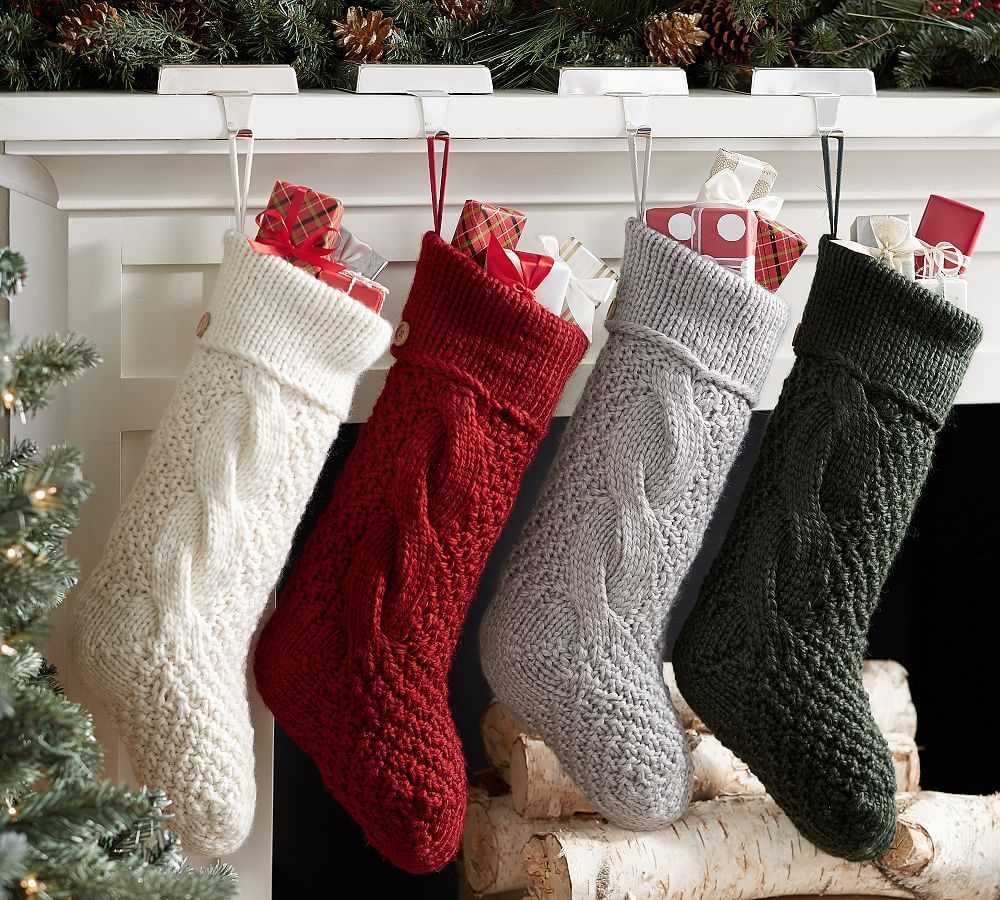
1. Personalized Christmas Stockings
One of the most obvious ways to use your bulky knit Christmas stocking pattern is to create personalized stockings for your family members. Choose different colors and patterns to match each person’s personality and interests. You can even add their initials or names to the stockings using embroidery or applique.
2. Gift Wrapping
Who says Christmas stockings can only be used for holding gifts? With their large size, your bulky knit stockings can also double as unique and reusable gift wrapping. Simply place smaller gifts inside the stockings and tie them with a festive ribbon. This adds an extra touch of charm to your presents and makes unwrapping them even more exciting.
3. Advent Calendar
If you’re feeling ambitious, you can create an advent calendar using your bulky knit stockings. Knit 24 stockings, one for each day leading up to Christmas, and hang them in a row. Fill each stocking with a small gift or treat for each day of advent. This is a fun and interactive way to count down to Christmas and bring joy to the whole family.
4. Home Decor

Your bulky knit stockings can also be used as festive home decor. Hang them on your mantel, staircase railing, or even on the back of dining chairs to add a cozy and rustic touch to your holiday decorations. You can also fill them with pinecones, greenery, or fairy lights to create a charming centerpiece or focal point in your home.
5. Charitable Giving
Consider using your bulky knit stockings for a good cause by donating them to a local charity or community organization. Many organizations collect handmade Christmas stockings to give to those in need during the holiday season. Your thoughtful and handmade gift can bring warmth and cheer to someone who might not otherwise have a merry Christmas.
With these ideas in mind, you can now take your bulky knit Christmas stocking pattern and create meaningful gifts and decorations that will be treasured for years to come. Get creative, have fun, and spread the joy of the holiday season with your handmade creations.