
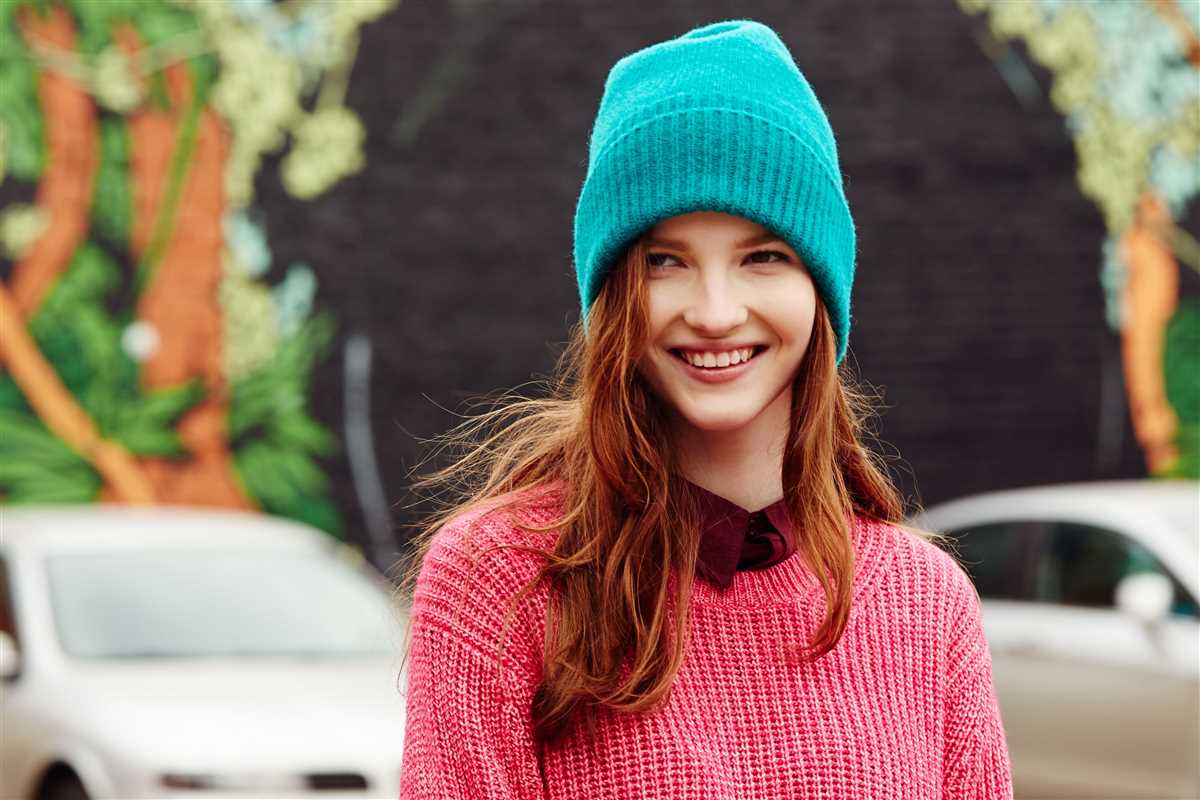
Knitting is a beloved pastime for many, and with the cold winter months upon us, there’s no better time to start a new knitting project. A bubble beanie hat is a stylish and cozy accessory that is perfect for keeping warm during the winter season. Whether you’re a seasoned knitter or just beginning, this bubble beanie hat knitting pattern is a great project for knitters of all skill levels.
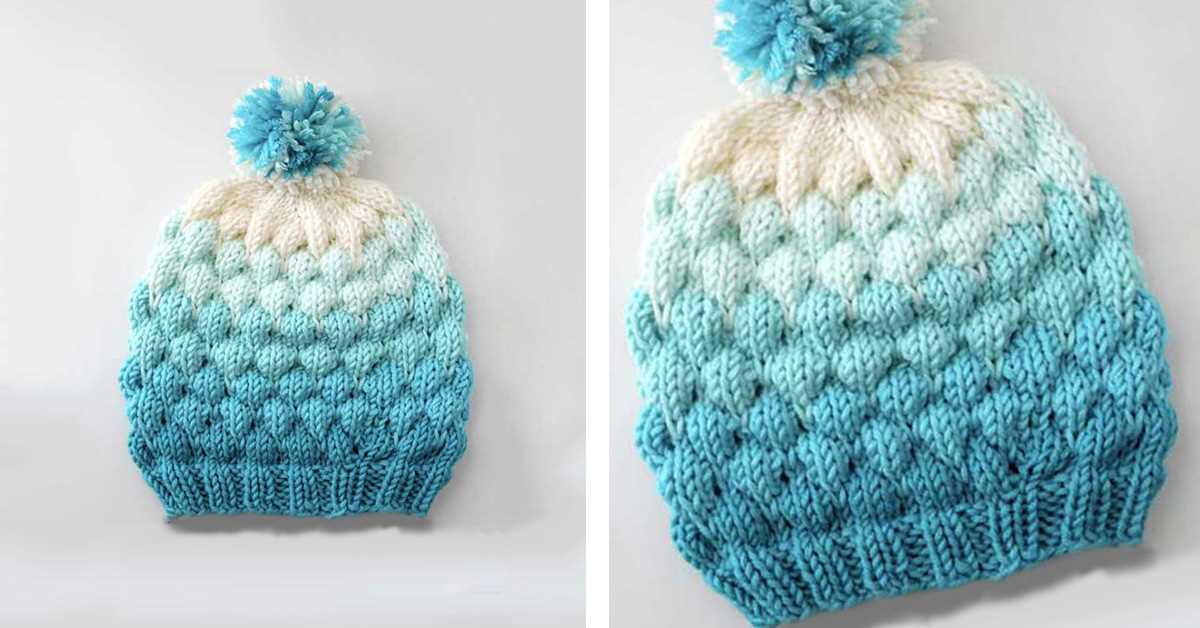
This knitting pattern features a classic beanie shape with a fun twist – bubbles! The bubbles add texture and visual interest to the hat, making it a unique and eye-catching accessory. The pattern is knit in the round using circular needles, making it seamless and comfortable to wear.
With this pattern, you can choose from a variety of yarns to create a hat that matches your personal style. Whether you prefer a neutral color or a bold and vibrant hue, the bubble beanie hat can be customized to suit your taste. This versatile pattern also allows for different sizes, so you can easily adjust the hat to fit anyone from a child to an adult.
So why not pick up your knitting needles and start on this bubble beanie hat? You’ll not only create a beautiful accessory for yourself or a loved one, but you’ll also enjoy the calming and meditative process of knitting. With this pattern, you’ll have a stylish and cozy hat to wear all winter long!
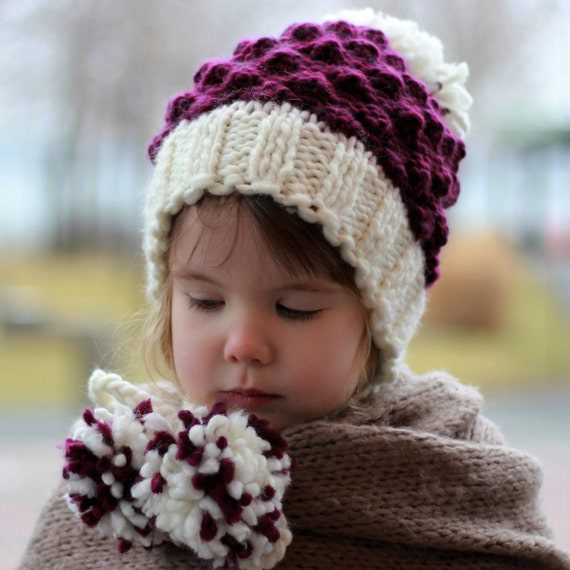
Bubble Beanie Hat Knitting Pattern
Are you looking for a fun and unique knitting project? Look no further than the bubble beanie hat knitting pattern. This pattern features a stylish design with bubbly texture that will make your hat stand out from the crowd. Whether you’re a beginner or an experienced knitter, this pattern is sure to challenge and delight you.
To get started on this project, you’ll need the following materials: knitting needles in the appropriate size, a skein of yarn in your desired color, and a tapestry needle for weaving in ends. Once you have your materials, you can begin casting on and knitting the brim of the hat. The bubble texture is created through a pattern of knit and purl stitches, which gives the hat its unique look.
As you continue knitting, you’ll start to see the bubbles forming on the surface of the hat. This is created through a combination of increasing and decreasing stitches to create a three-dimensional effect. The pattern will guide you through each step, so you don’t have to worry about getting lost along the way.
Once you’ve finished knitting the main body of the hat, it’s time to decrease and shape the crown. This is done by gradually reducing the number of stitches in each row to create a tapered effect. Finally, you’ll bind off the remaining stitches and weave in any loose ends.
Conclusion
The bubble beanie hat knitting pattern is a fun and challenging project that will result in a stylish and unique accessory. With its bubbly texture and three-dimensional design, this hat is sure to turn heads and keep you warm during the colder months. So grab your knitting needles and yarn, and start creating your own bubble beanie hat today!
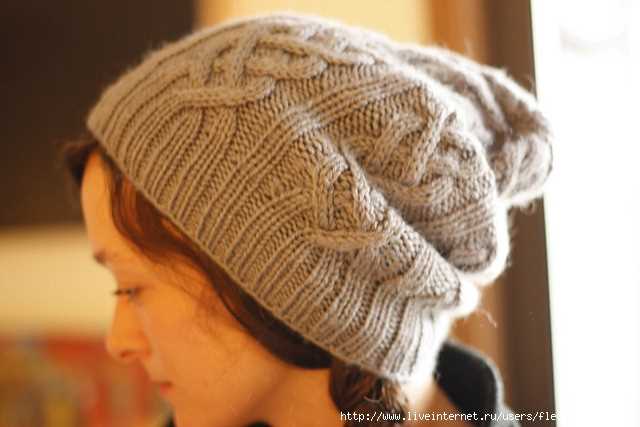
What is a Bubble Beanie Hat?
A bubble beanie hat is a type of knitted hat that features a unique textured pattern created by using a combination of stitches. It is called a “bubble” hat because the pattern creates small, raised bumps or bubbles on the surface of the hat, giving it a fun and playful look.
To create a bubble beanie hat, knitters typically use a combination of knit and purl stitches, as well as increases and decreases, to create the raised bubble pattern. The bubbles are created by working a series of stitches into one stitch, creating multiple loops or bumps on the surface of the hat. This creates a three-dimensional effect and adds texture to the hat.
The bubble beanie hat is a popular choice for those looking for a stylish and trendy accessory during the colder months. It not only provides warmth and comfort but also adds a fun and whimsical touch to any outfit. The unique texture created by the bubble pattern makes it stand out from traditional plain knit hats, making it a fashionable choice for both men and women.
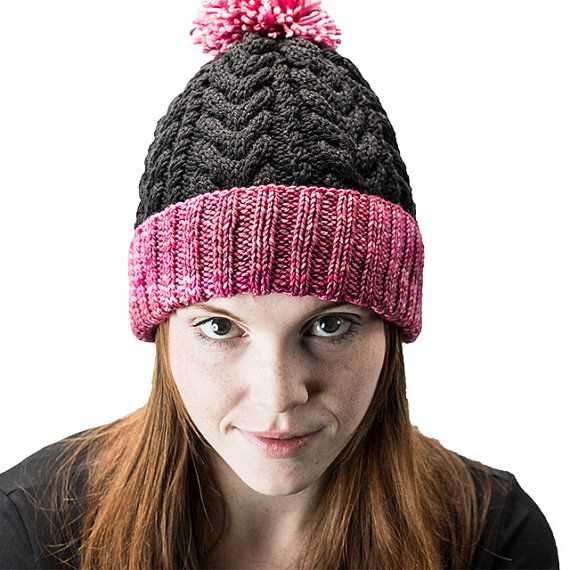
There are many different variations and styles of bubble beanie hats available, ranging from simple and understated designs to more elaborate and intricate patterns. Some bubble beanie hats may feature additional embellishments such as pom-poms or cables to enhance the overall look.
If you’re looking to add a twist to your winter wardrobe or want to try your hand at knitting a fun and textured hat, a bubble beanie hat might be the perfect choice. With its unique raised bubble pattern, this hat is sure to make a statement and keep you warm during the colder months.
Choosing the Right Yarn and Needles
When it comes to knitting a bubble beanie hat, one of the first steps is choosing the right yarn and needles. The type of yarn and size of needles you use can greatly affect the outcome of your project.
Yarn: When selecting yarn for your bubble beanie hat, it’s important to consider the desired warmth, texture, and color of the finished product. Chunky or bulky weight yarns are often preferred for this type of hat as they provide a cozy and plush result. Choosing a yarn with a blend of wool and acrylic can also add warmth and durability to your hat.
Needles: The size of needles you use will depend on the thickness of your yarn and the desired gauge of your hat. For chunky or bulky weight yarns, it’s recommended to use larger size needles such as US size 10 or 11. This will create a looser and more relaxed fabric that enhances the hat’s texture and drape. Circular needles are also commonly used for knitting hats, as they allow for easy knitting in the round without the need for seams.
By carefully selecting the right yarn and needles, you can ensure that your bubble beanie hat turns out just the way you envision it. Whether you prioritize warmth, texture, or color, there are countless options available to help you create a hat that is both functional and stylish.
Casting On
When starting your bubble beanie hat knitting project, the first step is to cast on. Casting on is the process of creating the first row of stitches on your knitting needle. This sets the foundation for your project and determines the number of stitches you will have.
There are various methods for casting on, but for the bubble beanie hat, we will use the long tail cast on method. This method is commonly used and provides a neat and sturdy edge. To start, measure a length of yarn that is approximately three times the width of your finished beanie. Make a slip knot at the end of the yarn, leaving a tail of about 6 inches.
Hold the slip knot in your right hand and place the knitting needle in your left hand. Insert the needle through the slip knot from front to back, with the yarn tail to the right and the working yarn to the left. Use your thumb and index finger to hold the yarns in place, creating a “V” shape.
Now, with your right hand, reach through the “V” shape, from below, and catch the working yarn with your first finger. Pull it through the “V” to create a loop on your knitting needle. This loop is your first cast on stitch. Repeat this process, creating more loops on your needle until you have the required number of stitches for your bubble beanie hat pattern.
The long tail cast on method is great for producing a stretchy edge, which is ideal for hats. It also creates a neat and even row of stitches. Once you have cast on all your stitches, you can move on to the next step of your bubble beanie hat knitting pattern.
Knitting the Ribbing
When knitting the ribbing for a bubble beanie hat, it is important to start with the right number of stitches and the correct needle size. The ribbing is typically worked in a smaller needle size compared to the main body of the hat. This helps to create a snug and stretchy band that fits comfortably around the head.
A common ribbing pattern used for beanie hats is the 1×1 ribbing, where you alternate between knitting and purling stitches. This creates a ribbed effect that is both visually appealing and functional. The 1×1 ribbing is also a great choice for beginner knitters as it is relatively easy to master.
To start the ribbing section, cast on the desired number of stitches using the smaller needle size. Make sure to keep your tension consistent so that the ribbing is not too loose or too tight. Once the stitches are cast on, begin working the 1×1 ribbing pattern by knitting the first stitch, then purling the next stitch. Repeat this pattern until the desired length of ribbing is achieved.
It is important to maintain an even tension throughout the ribbing section to ensure a neat and uniform appearance. Avoid pulling the yarn too tightly or loosely, as this can affect the overall fit of the hat. If necessary, practice knitting the ribbing on a swatch before starting the actual hat to get comfortable with the pattern and ensure the correct gauge.
Creating the Bubble Pattern
Knitting a bubble beanie hat with a fun and eye-catching bubble pattern is a great way to add some personality to your winter accessories. This pattern can be achieved by using a combination of simple knitting techniques and strategically placed yarnovers. The result is a charming texture that resembles bubbles floating on the surface of the hat.
To start creating the bubble pattern, you will need to cast on an even number of stitches onto your knitting needles. It’s important to ensure that the number of stitches is divisible by four, as this will make the pattern easier to follow and maintain.
The bubble pattern is created by alternating between two rows. In the first row, you will knit two stitches together, followed by a yarnover. Repeat this sequence until the end of the row. This will create a row of paired decreases and yarnovers, which will form the basis of the bubble pattern.
In the second row, you will purl all the stitches across. This row acts as a resting row and helps to define the structure of the bubbles. By alternating between the knitting and purling rows, the bubbles will be created as the yarnovers from the previous row are worked into the pattern.
Continue repeating these rows, knitting the paired decreases and yarnovers followed by purling, until the hat reaches the desired length. The bubble pattern will gradually emerge as you work, creating a visually interesting and unique pattern that is sure to turn heads.
Shaping the Crown
One of the defining features of a bubble beanie hat is its round, bubbly crown. To achieve this unique shape, the crown of the hat is shaped using a combination of decreases. These decreases are strategically placed throughout the knitting pattern to create the bubbly effect.
When shaping the crown of a bubble beanie hat, it is important to follow the knitting pattern closely. The pattern will indicate when and where to make the decreases. Typically, the decreases will be made at regular intervals around the crown of the hat to evenly distribute the bubbles. This creates a visually pleasing and balanced pattern.
One common decrease stitch used in shaping the crown of a bubble beanie hat is the knit two together (k2tog) stitch. This stitch involves knitting two stitches together as if they were one stitch. This decrease stitch is often used to create the smaller bubbles in the crown of the hat.
Another decrease stitch that may be used is the slip, slip, knit (ssk) stitch. This stitch involves slipping two stitches individually onto the right needle, then knitting them together through the back loops. The ssk stitch is often used to create larger bubbles in the crown of the hat.
By following the knitting pattern and using the appropriate decrease stitches, you can shape the crown of your bubble beanie hat to achieve the desired bubbly effect. With careful attention to the pattern and precision in your knitting, you can create a unique and fashionable hat that is sure to make a statement.
Finishing the Hat
After completing the knitting portion of the bubble beanie hat, it’s time to finish off the hat and give it a polished look. One of the first steps is to carefully weave in any loose yarn ends. This ensures that the hat will hold its shape and won’t come unraveled during wear. Using a tapestry needle, thread the loose ends through the stitches on the wrong side of the hat. Take care to hide the ends within the hat so that they are not visible from the outside.
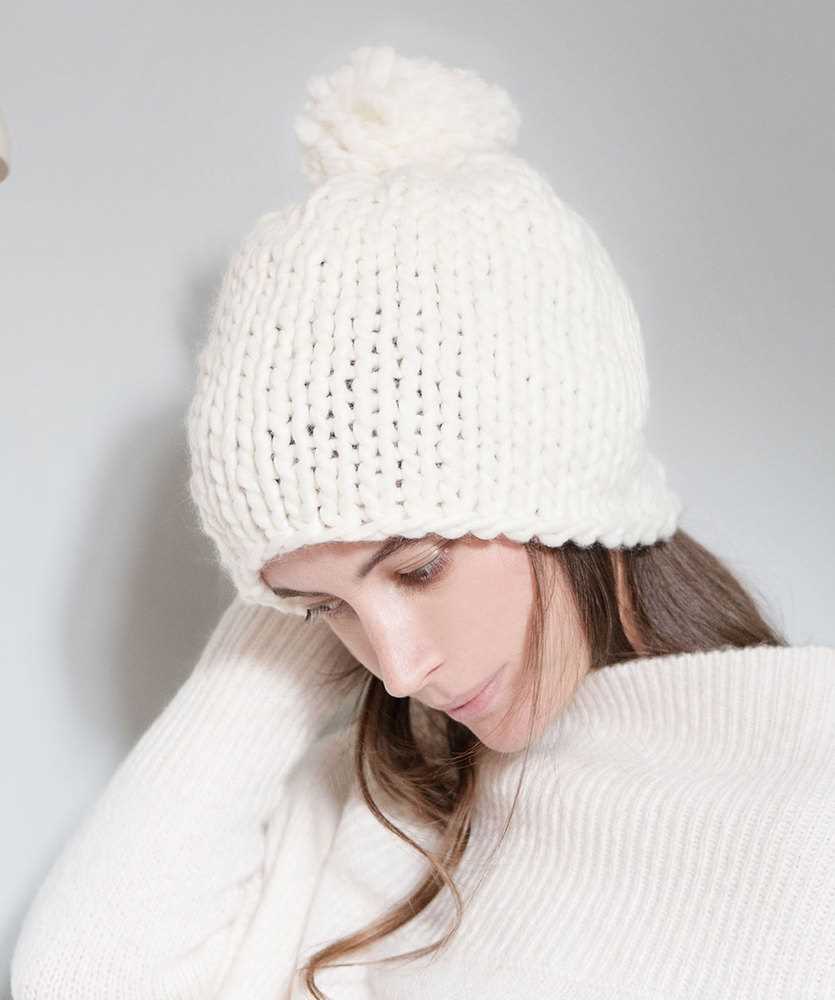
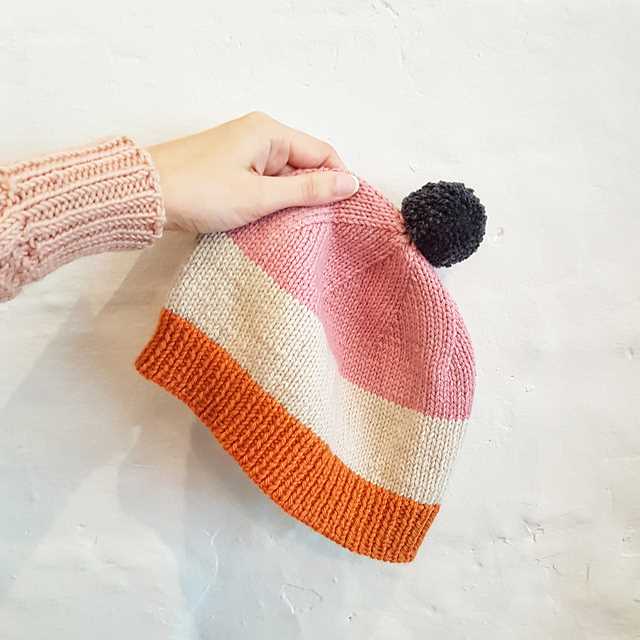
Once the ends are woven in, it’s time to add any desired embellishments to the hat. This can include pom poms, buttons, or other decorative elements. Pom poms can be made by wrapping yarn around a pom pom maker or even a piece of cardboard, and then tying the wrapped yarn together tightly before cutting the loops. Attach the pom poms securely to the top of the hat using the loose yarn ends.
To keep the hat snug and secure, it’s important to add a ribbed edge. This can be achieved by picking up stitches along the bottom edge of the hat and knitting in a rib stitch pattern. The ribbed edge not only adds a finished look, but also helps to keep the hat in place when worn.
Finally, give the hat a good blocking. This can be done by gently washing the hat by hand and then reshaping it while it is damp. Lay the hat flat on a towel and smooth out any wrinkles or bumps. Allow the hat to dry completely before wearing or gifting it. Blocking helps to ensure that the hat retains its shape and fits properly on the wearer’s head.
Adding Embellishments
Once you have completed knitting the bubble beanie hat, you can add embellishments to make it even more unique and personalized. Here are some ideas to get you started:
1. Pom Pom
Add a pom pom on top of the hat for a fun and playful touch. You can use a pom pom maker or create one by wrapping yarn around your fingers and tying it off in the middle.
2. Embroidery
Add embroidered designs or initials to the hat using different colored yarn. You can stitch on flowers, hearts, or any other pattern you like. It’s a great way to add a pop of color and personality to the hat.
3. Buttons
Sew on buttons in a contrasting color or pattern to add a decorative element. You can arrange the buttons in a specific pattern or randomly scatter them across the hat. It adds a unique and eye-catching detail.
4. Ribbons
Attach ribbons to the base of the hat or tie them around the brim. You can choose ribbons in different colors, widths, or patterns to create a pretty and feminine look. It’s a simple yet effective way to elevate the overall design of the hat.
5. Beads
Add beads to the hat by stringing them onto the yarn as you knit or by sewing them on afterward. This adds a touch of sparkle and can create an elegant or bohemian look depending on the type of beads you choose.
- Remember to consider the recipient’s taste and style when choosing embellishments.
- Have fun experimenting with different combinations and techniques to create a truly one-of-a-kind hat.
Tips and Tricks
When knitting a bubble beanie hat, it’s important to follow the pattern closely to achieve the desired result. However, here are a few tips and tricks to make the process easier and ensure your hat turns out perfect.
1. Use circular needles
To knit a bubble beanie hat, it’s best to use circular needles instead of straight needles. Circular needles allow you to easily work in the round, which is essential for creating the seamless and stretchy fabric of the hat. They also help distribute the weight of the project more evenly, reducing strain on your hands and wrists.
2. Choose the right yarn
The yarn you choose for your bubble beanie hat will greatly impact its appearance and functionality. It’s important to select a yarn that is both soft and warm, as the hat will be worn on the head. Additionally, consider the weight and thickness of the yarn. A thicker yarn will create larger bubbles, while a thinner yarn will create smaller bubbles.
3. Knit a gauge swatch
Before diving into the pattern, it’s always a good idea to knit a gauge swatch. This will help you determine how many stitches and rows per inch you are knitting with your chosen yarn and needle size. It’s important to match the gauge specified in the pattern to ensure your hat comes out the correct size.
4. Pay attention to stitch markers
Stitch markers are helpful tools when knitting a bubble beanie hat, especially if the pattern includes increases or decreases. They can help you keep track of where you are in the pattern and ensure that your stitches are in the right place. Be sure to place them correctly and move them up as needed when working in the round.
5. Blocking your finished hat
Once you have finished knitting your bubble beanie hat, it’s recommended to block it to give it a polished, finished look. Blocking involves washing the hat and shaping it to the desired dimensions. This can help even out any uneven stitches and give the hat a professional, smooth appearance.
By following these tips and tricks, you’ll be well-equipped to successfully knit a beautiful bubble beanie hat. Remember to take your time, be patient, and enjoy the process of creating a cozy accessory to keep you warm in the winter months.
Common Mistakes to Avoid
When knitting a bubble beanie hat, there are a few common mistakes that beginners often make. By being aware of these pitfalls, you can save time and frustration in your knitting project.
1. Incorrect Gauge

One of the most important aspects of knitting is achieving the correct gauge. Gauge refers to the number of stitches and rows per inch in your knitting. If you use a different yarn or needle size than what the pattern suggests, your gauge will be off, which will result in a hat that doesn’t fit properly. Always take the time to make a gauge swatch and adjust your needle size as needed.
2. Not Counting Stitches
Counting stitches is crucial for maintaining the pattern and ensuring that your hat turns out the way it’s supposed to. It’s easy to get distracted and lose track of where you are in the pattern, especially when working on more complex stitches or colorwork. Take the time to count your stitches after each row or round to avoid any mistakes.
3. Skipping or Misunderstanding Instructions
When following a knitting pattern, it’s important to read and understand each instruction carefully. Skipping or misinterpreting even a single step can drastically affect the outcome of your hat. Take your time and refer back to the pattern frequently to ensure you’re following it correctly.
4. Not Checking Your Work
As you progress in your knitting project, it’s essential to periodically check your work for mistakes or inconsistencies. Catching and fixing any errors early on can save you a lot of time and frustration in the long run. Double-check your stitch count, pattern alignment, and overall tension to ensure everything looks as it should.
5. Not Blocking Your Hat
Blocking is the process of shaping and setting your knitting project to its final dimensions. Many knitters skip this step, but it can make a significant difference in the finished result. Blocking helps even out stitches and gives your hat a more polished look. Don’t neglect this important finishing touch.
By avoiding these common mistakes, you’ll be well on your way to successfully knitting a bubble beanie hat that looks and fits just right. Happy knitting!
FAQs
Here are some frequently asked questions about the bubble beanie hat knitting pattern:
1. How difficult is it to knit a bubble beanie hat?
Knitting a bubble beanie hat may require some intermediate knitting skills. The bubble stitch pattern used in this hat can be a bit challenging for beginners, but with practice and patience, it can be mastered by knitters of all skill levels.
2. Can I adjust the size of the hat?
Yes, the pattern provides instructions for different sizes ranging from child to adult. However, if you prefer a different size, you can easily adjust the pattern by adding or subtracting stitches and rows.
3. What materials do I need to knit a bubble beanie hat?
To knit a bubble beanie hat, you will need:
- Knitting needles in the appropriate size for your yarn
- Approximately 150-200 yards of yarn in the color of your choice
- A stitch marker
- A tapestry needle for weaving in ends
4. Can I use a different stitch pattern?
While the bubble stitch pattern adds a unique texture to the hat, you can certainly use a different stitch pattern if you prefer. Keep in mind that different stitch patterns may produce different results in terms of fit and overall look.
5. Can I sell the hats I make using this pattern?
Yes, you are free to sell the hats you make using this pattern. However, please do not redistribute or sell the pattern itself as it is protected by copyright.
Knitting a bubble beanie hat can be a fun and rewarding project. With these FAQs answered, you should have all the information you need to get started on creating your own cozy and stylish bubble beanie hats.