
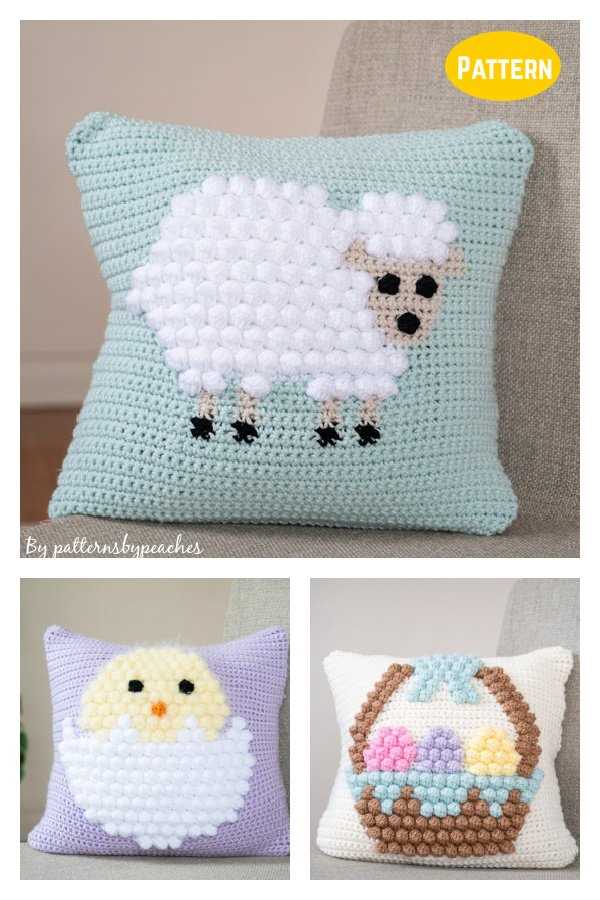
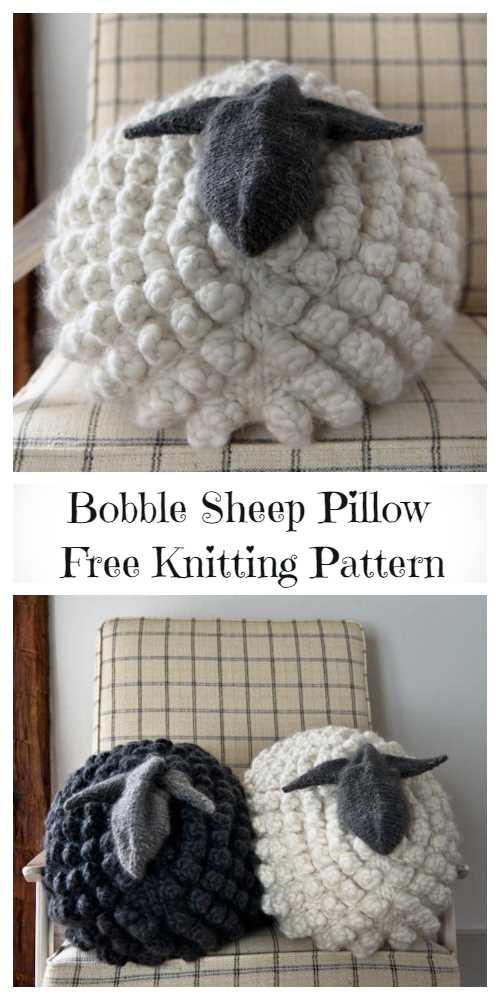
Are you looking for a fun and adorable knitting project to cozy up your home? Look no further than the bobble sheep pillow knitting pattern! This cute and cuddly pillow features a charming bobble sheep design that is sure to bring a smile to your face.
Whether you are a beginner knitter or an experienced pro, this pattern is perfect for all skill levels. The bobble sheep design is created using basic knitting techniques such as knit, purl, and bobbles. With clear and easy-to-follow instructions, you’ll have your very own bobble sheep pillow in no time.
The bobble sheep pillow is not only a delightful addition to your home decor, but it also makes a great gift for friends and family. Imagine the joy on their faces when they receive a handmade pillow featuring these adorable little sheep. They are sure to cherish it for years to come.
Bobble Sheep Pillow Knitting Pattern: How to Create an Adorable Sheep-Shaped Pillow
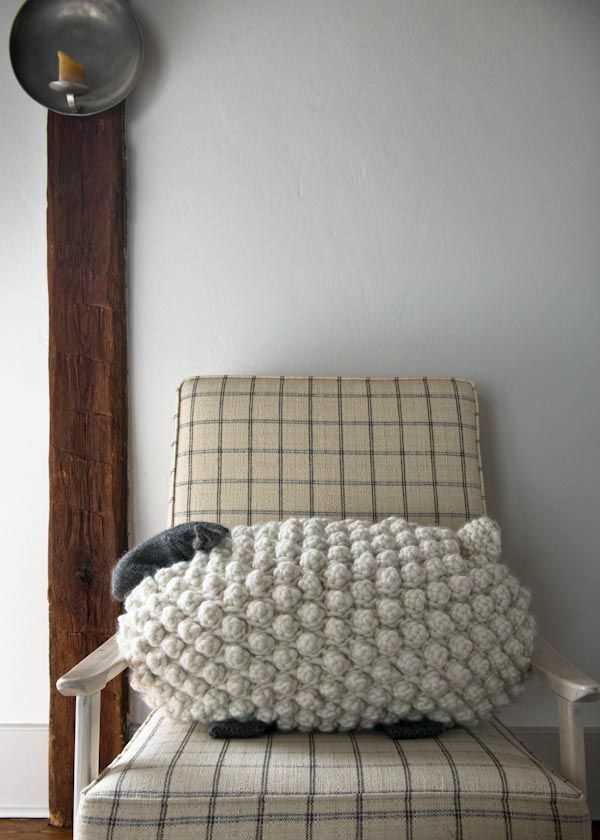
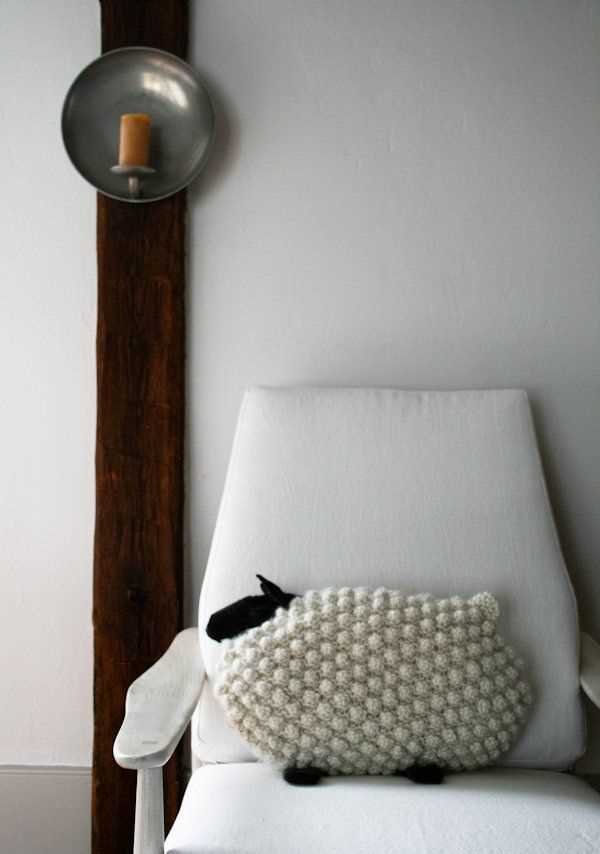
The bobble sheep pillow knitting pattern is a fun and creative way to add a touch of cuteness and coziness to your home decor. With its unique sheep-shaped design, this pillow is sure to be a conversation starter and a favorite among both children and adults.
To create this adorable sheep-shaped pillow, you will need a few basic knitting skills and some patience. The pattern calls for bulky yarn and large knitting needles to achieve a plush and chunky texture. You will also need some stuffing to fill the pillow and give it a soft and squishy feel.
Materials:
- Bulky yarn in your desired sheep color
- Large knitting needles (size 10 mm or as recommended by yarn label)
- Stuffing
- Darning needle
- Scissors
Instructions:
- Cast on the desired number of stitches to create the width of the pillow.
- Follow the bobble sheep pattern chart to create the sheep’s face and body. The chart will guide you on how many stitches to knit and purl to form the different sections of the sheep’s body.
- Once you have completed the sheep’s body, start knitting the back of the pillow in a plain stockinette stitch.
- Continue knitting until the back piece matches the size of the front piece.
- Bind off all stitches.
- Using the darning needle, sew the front and back pieces of the pillow together, leaving a small opening for stuffing.
- Stuff the pillow with filling until it reaches your desired level of fluffiness.
- Close the opening using the darning needle.
And there you have it – your very own bobble sheep pillow! This cute and cuddly addition to your home decor will bring a smile to your face and warmth to your heart. So grab your knitting needles and get started on this delightful project today!
Gather Your Knitting Supplies
Before you start knitting your bobble sheep pillow, it’s important to gather all the necessary supplies. Having everything on hand will make the process smoother and more enjoyable. Here is a list of items you will need:
- Knitting needles: Choose the appropriate size needles for your desired tension and yarn thickness. The pattern will specify the recommended needle size.
- Yarn: Select a soft and fluffy yarn in the colors of your choice. Make sure to buy enough yarn to complete the project, as the bobble sheep pillow requires a considerable amount of yarn.
- Tapestry needle: This needle will be used for weaving in ends and sewing the pieces of the pillow together.
- Scissors: A good pair of sharp scissors is essential for cutting yarn and trimming any excess.
- Stuffing: You will need polyester stuffing or wool filling to stuff the pillow and give it a plush appearance.
- Stitch markers: These clips or rings will help you keep track of your stitches and mark important sections of the pattern.
- Row counter: If you have trouble remembering the number of rows you’ve completed, a row counter can be a handy tool to keep track of your progress.
Once you have gathered all your supplies, you will be ready to start knitting your bobble sheep pillow. Make sure you have enough time set aside for the project, as it can be quite time-consuming. Prepare a comfortable and well-lit workspace, and get ready to create a cozy and adorable pillow that will add a touch of warmth and whimsy to any room.
Choose Your Yarn Colors
When it comes to knitting the bobble sheep pillow, choosing the right yarn colors is an important decision. The colors you choose will determine the overall look and feel of your finished pillow, so it’s worth taking the time to consider your options.
1. Natural Colors: If you want your bobble sheep pillow to have a more realistic and traditional look, consider using natural colors for the sheep’s body, such as white, cream, or light brown. These colors will give the pillow a classic and timeless appeal.
2. Fun and Bright Colors: If you’re looking to add a pop of color and whimsy to your space, consider using bright and bold colors for the sheep’s body. Think vibrant shades like pink, blue, or yellow. These colors will create a playful and eye-catching pillow that is sure to be a conversation starter.
3. Monochrome Palette: For a more modern and sophisticated look, why not try a monochrome color scheme? Choose a single color for the sheep’s body and use different shades of that color to create depth and dimension. This will give your pillow a sleek and contemporary feel.
4. Gradient Effect: If you want to experiment with color and create an ombre or gradient effect, consider using a range of colors that transition from light to dark. This will add visual interest and bring a unique and artistic touch to your bobble sheep pillow.
5. Personalize It: Finally, don’t be afraid to get creative and personalize your bobble sheep pillow with your favorite colors. Whether it’s your favorite sports team’s colors or shades that match your home decor, choosing colors that resonate with you will make your pillow even more special and meaningful.
Cast on Stitches for the Pillow Base
If you are ready to start knitting your bobble sheep pillow, the first step is to cast on the stitches for the pillow base. This will serve as the foundation for your knitting project. To begin, you will need a set of knitting needles and your chosen yarn. Make sure to choose a yarn that is soft and comfortable to touch, as it will be used for the pillow.
To cast on the stitches, hold the knitting needle in your right hand. Take the loose end of the yarn, called the tail, and make a slip knot by crossing the tail over the working yarn, creating a loop. Insert the crochet hook or your knitting needle into the loop and pull it tight. This slip knot will be the first stitch of your cast-on row.
Next, wrap the working yarn around your index finger and hold it in your left hand. Insert the knitting needle into the slip knot and tighten the loop. Take the working yarn and loop it over the needle, creating a new stitch. Repeat this process until you have cast on the desired number of stitches for your pillow base.
Once you have finished casting on the stitches, you can remove the slip knot and continue knitting the first row. It’s important to keep the stitches loose and evenly spaced to ensure an even base for your pillow. Happy knitting!
Knit the Pillow Front
Begin by casting on the required number of stitches, as indicated in the knitting pattern. Use a knitting needle size that allows you to achieve the correct gauge. It’s important to check your gauge before starting to make sure your pillow will turn out the right size.
Work the first few rows according to the pattern instructions. This may involve knitting or purling the stitches in different combinations. Pay attention to any stitch patterns or variations that are specified. Remember to read the pattern carefully and make sure you understand each instruction before proceeding.
Continue following the pattern until you reach the desired length for the pillow front. This may involve repeating a certain pattern or stitch sequence multiple times. Keep track of your progress by using stitch markers or counting rows if necessary.
If the pattern calls for any shaping, such as increasing or decreasing stitches, make sure to follow those instructions carefully. This will help ensure that the pillow front is the correct shape and size.
Once you have completed the required number of rows or reached the desired length, bind off your stitches. Cut the yarn, leaving a long tail for seaming later on. Your pillow front is now complete and ready to be assembled with the pillow back.
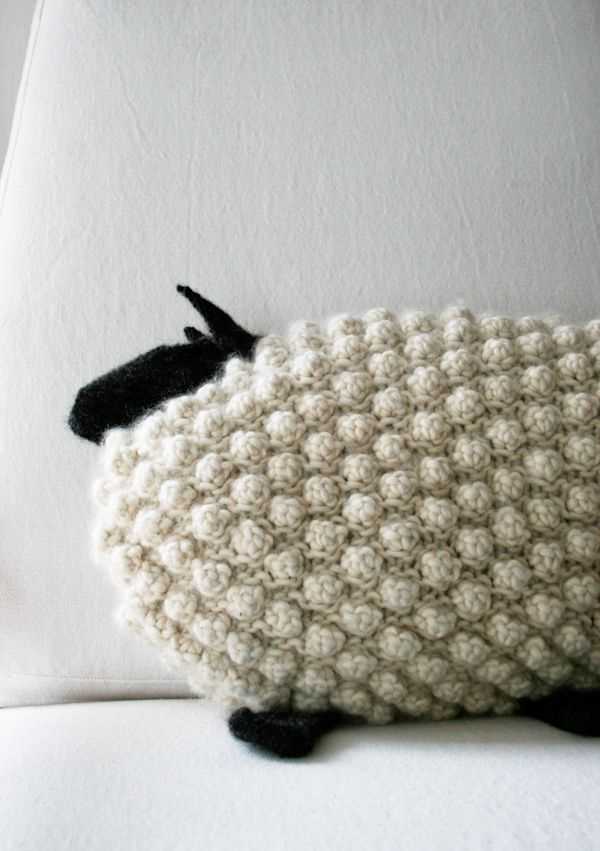
Add Bobble Stitch Details for the Sheep
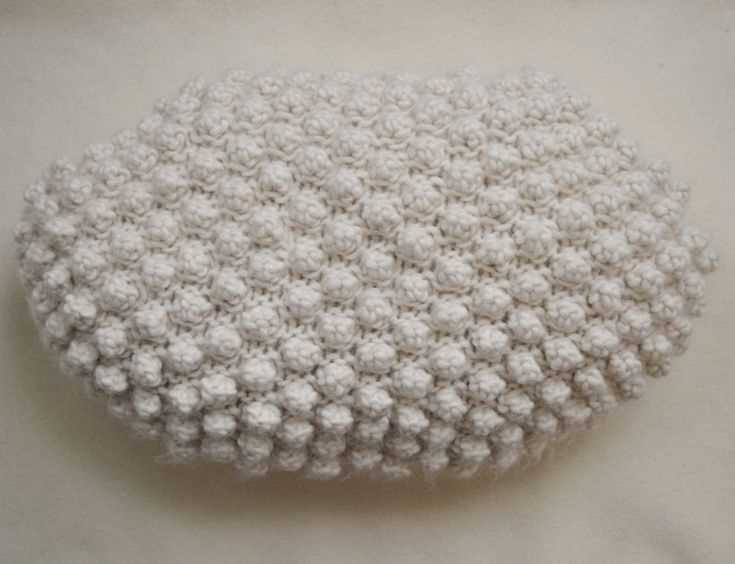
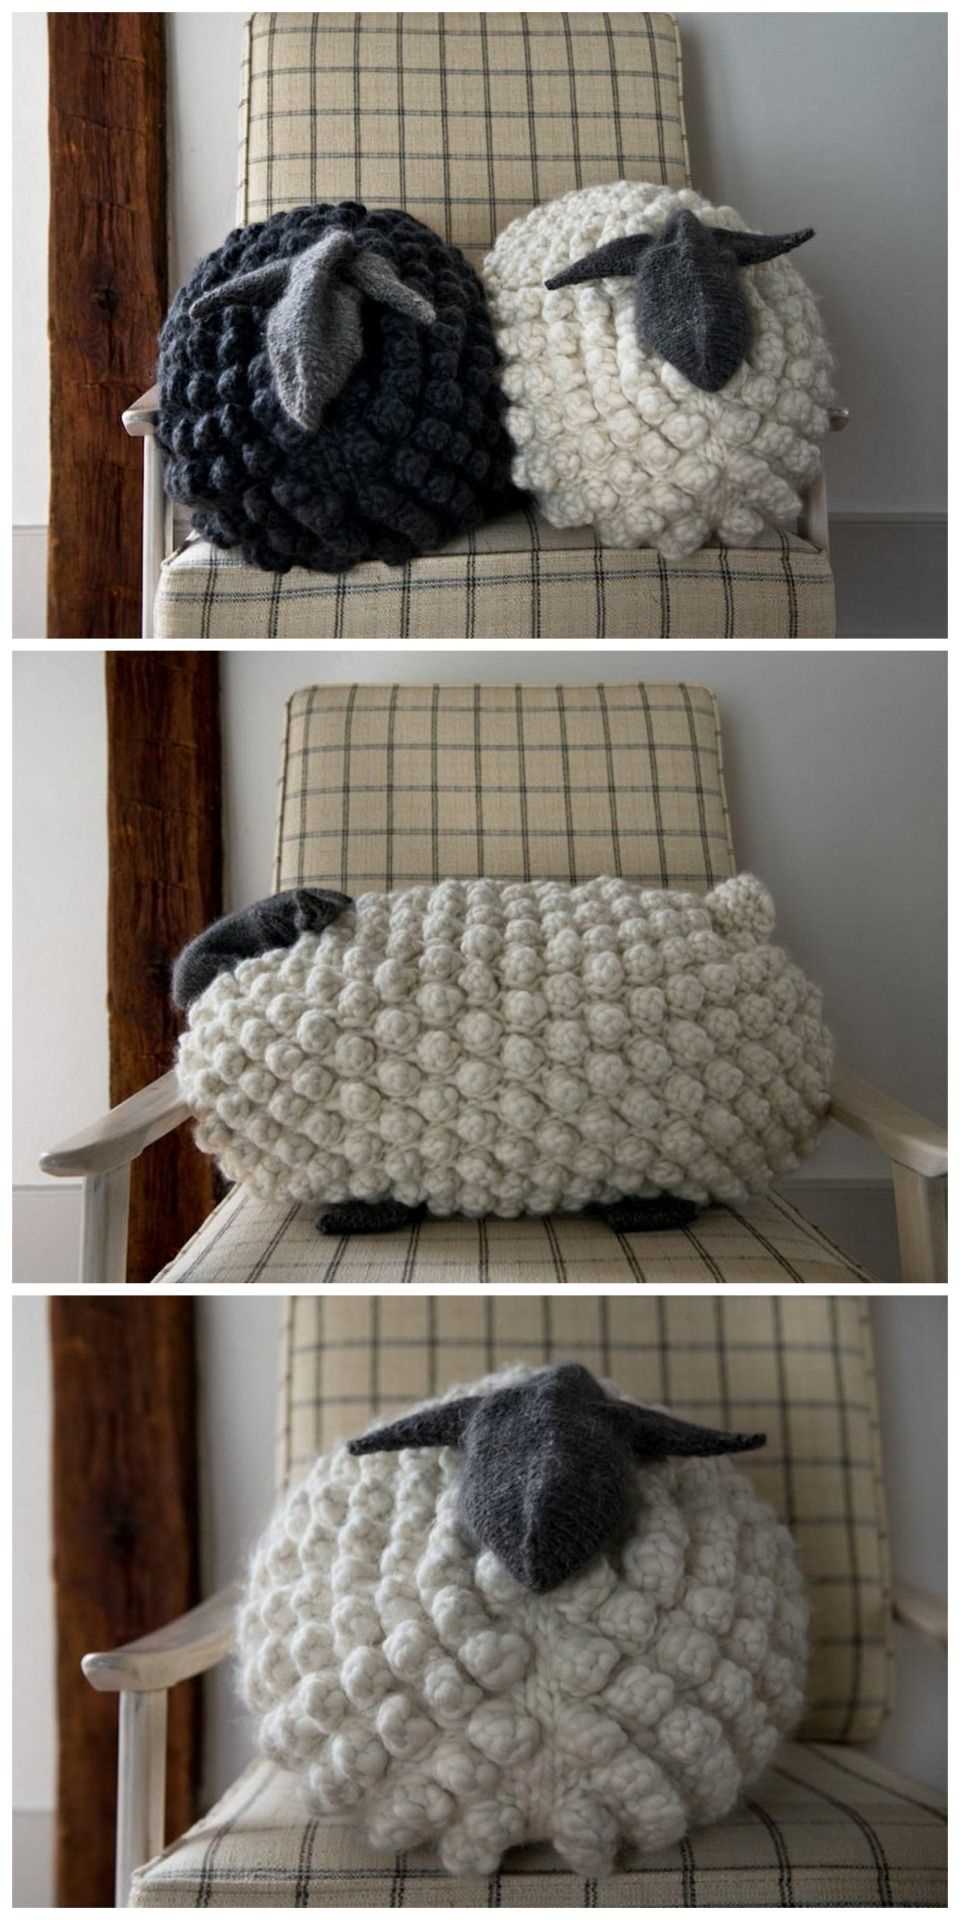
The Bobble sheep pillow knitting pattern is a fun and adorable project to make, and adding bobble stitch details can really make the sheep come to life. The bobble stitch is a simple but effective technique that creates small raised bumps on the fabric, mimicking the texture of sheep’s wool. By incorporating these bobbles into your knitting, you can add an extra level of depth and charm to your sheep pillow.
To create the bobble stitch details for the sheep, you can use a contrasting color yarn or stick with the same color as the body of the sheep. One option is to make small bobbles for the sheep’s face, such as its nose and eyes. You could also add larger bobbles for the sheep’s body, giving it a more fluffy and realistic appearance.
To create a bobble stitch, you will need to work multiple stitches into one stitch. This can be done by knitting, purling, and then knitting into the same stitch, or by working a series of knit or purl stitches into the same stitch. The exact instructions for creating the bobble stitch will depend on the specific knitting pattern you are using, so be sure to follow the instructions carefully.
If you’re new to knitting bobbles, it’s a good idea to practice the technique on a small swatch of fabric before adding the details to your sheep pillow. This will help you get a feel for how the bobbles are created and ensure that you’re comfortable with the process.
By adding bobble stitch details to your sheep pillow, you can take your knitting project to the next level. The bobbles will give the sheep a soft and textured appearance, making it even more adorable and cuddly. Whether you choose to make small bobbles for the face or larger bobbles for the body, the added texture will make your sheep pillow stand out and bring joy to anyone who sees or touches it.
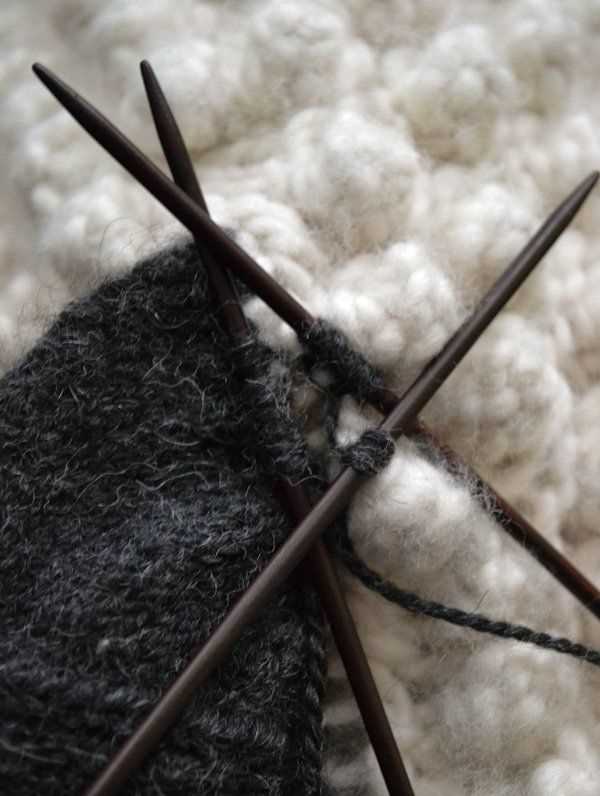
Shape the Sheep’s Head and Ears
After completing the body and legs of the sheep pillow, it’s time to shape the head and ears to give it a cute and realistic look. Follow these steps to achieve the desired shape:
1. Begin Shaping the Head: Using the wool yarn, sew a running stitch around the neck area of the sheep’s body to gather it and create a small head. Pull the yarn tight to secure the shape.
2. Attach the Ears: Cut two triangular pieces of fabric for the ears, making sure they are symmetrical. Fold the edges inwards and sew them in place to give them a neat finish. Attach the ears to the sides of the sheep’s head using a needle and thread, making sure they are evenly positioned.
3. Enhance the Facial Features: Use black yarn or embroidery thread to embroider the sheep’s eyes, nose, and mouth. You can create adorable eyes by making small French knots or using black beads. Embroider a small triangular nose and a smiling mouth to give the sheep a friendly expression.
4. Add Final Touches: If desired, you can add additional details such as rosy cheeks using blush or fabric paint. Additionally, you can create a fluffy texture on the sheep’s face by trimming the yarn at the head to a shorter length, leaving it slightly longer than the body.
By following these steps, you’ll be able to shape the sheep’s head and ears, completing the adorable look of the Bobble sheep pillow. It will make a perfect cuddly companion or decorative accent for any living space.
Knit the Pillow Back
Once you have finished knitting the front panel of the bobble sheep pillow, it’s time to knit the back panel. The back panel is worked in the same stitch pattern as the front panel, but without any bobble sheep design.
Using the same size knitting needles and worsted weight yarn, cast on the required number of stitches for the back panel. You can refer to the pattern instructions for the specific number of stitches needed depending on the size of the pillow.
To create the back panel, knit each row following the same stitch pattern as the front panel. This could be a simple stockinette stitch, garter stitch, or any other stitch pattern that complements the design of the front panel.
Continue knitting until the back panel reaches the desired length, making sure to keep track of your rows if necessary. Once you have reached the desired length, bind off all the stitches. Cut the yarn, leaving a tail for weaving in the ends.
After knitting the back panel, you can now move on to the next step of assembling the pillow, which typically involves sewing or attaching the front and back panels together. Refer to the pattern instructions for specific details on how to assemble the pillow.
Join the Front and Back Pieces
Once you have completed knitting the front and back pieces of the bobble sheep pillow, it’s time to join them together. The front piece features the adorable sheep design and the back piece is the plain knitting. To give the pillow a nice finished look, you will sew these pieces together using a yarn needle.
To begin, lay the front piece and the back piece flat on a table with the right sides facing up. Align the edges of the pieces and pin them together to hold them in place. Make sure the corners match up correctly.
Thread a length of yarn onto a yarn needle, and starting from one corner, begin sewing the pieces together using a whipstitch or mattress stitch. Insert the needle through both layers of fabric, pulling the yarn through and creating a secure stitch. Continue stitching along the edges, keeping your stitches evenly spaced.
Once you have sewn three sides together, stop and stuff the pillow with fiberfill or your preferred filling material. Be sure to fill the pillow evenly and firmly, but not so much that it becomes too hard. After stuffing, continue sewing the fourth side of the pillow closed.
After all four sides are sewn together, weave in any loose ends of yarn to secure them and trim off any excess. Your bobble sheep pillow is now complete and ready to be used or displayed!
Stuff the Pillow with Fiberfill
Once you have finished knitting all the panels for your bobble sheep pillow, it’s time to stuff it with fiberfill. This will give the pillow its soft and fluffy appearance, making it comfortable to rest your head on.
To begin, take one of the panels and fold it in half so that the wrong sides are facing each other. This will create a pocket in which you will insert the fiberfill. Open up the panel slightly and start filling it with small amounts of fiberfill, using your fingers to distribute it evenly. Be careful not to overstuff the panel, as this can cause the shape of the sheep to become distorted.
Pro tip: If you find it difficult to stuff the fiberfill into the narrow corners of the bobble sheep’s legs and head, you can use a small tool like a knitting needle or a chopstick to help push the fiberfill into those areas.
Continue filling the panel with fiberfill until it is plump and feels comfortable when you press on it. Make sure to fill all the nooks and crannies, especially the corners and curves of the sheep’s body. As you stuff the pillow, periodically check the shape and adjust the fiberfill if needed.
Repeat this process with the remaining panels, ensuring that each one is evenly and fully stuffed. Once all the panels are filled, you can sew them together to create the final bobble sheep pillow.
Sew the Pillow Closed
Once you have finished knitting the bobble sheep pillow, it’s time to sew it closed. This step is crucial to ensure that the stuffing does not come out and that the pillow retains its shape. Here is a step-by-step guide on how to sew the pillow closed:
- Gather your materials: Before you begin, make sure you have a yarn needle and matching yarn to sew the pillow closed. This will ensure that the stitches blend in seamlessly.
- Thread the needle: Take the yarn needle and thread it with a piece of yarn that is long enough to sew the entire opening of the pillow closed.
- Align the edges: Fold the edges of the pillow opening inwards so that they align perfectly. This will create a neat and clean look once the pillow is sewn closed.
- Start sewing: Starting from one end of the opening, insert the needle into the folded edge of the fabric and pull it through to the other side. Repeat this step, sewing the edges together using a whip stitch or a mattress stitch. Make sure to pull the yarn tight enough to close the opening securely, but not too tight that it distorts the shape of the pillow.
- Secure the end: Once you reach the end of the opening, secure the yarn by knotting it tightly. Trim any excess yarn to create a neat finish.
By following these steps, you will be able to sew your bobble sheep pillow closed and enjoy the cozy comfort it provides. Happy knitting and sewing!
Add Final Touches to the Sheep’s Face
Once you have completed knitting the main body of the sheep pillow, it’s time to add the final touches to its adorable face. These small details will bring the sheep to life and make it even more charming.
Ears: Begin by knitting two small triangular-shaped ears. Use the same yarn color as the main body of the sheep. Sew the ears onto the top corners of the head, making sure they are positioned evenly.
Eyes: Embroider the sheep’s eyes using black yarn or thread. You can either make small French knots or straight stitches to create the eyes. Position the eyes slightly below the center of the head, spacing them apart evenly.
Nose: Use black yarn or thread to embroider a small triangular-shaped nose. Position it just below the eyes, in the middle of the sheep’s face.
Mouth: Embroider a simple smile using black yarn or thread. Start by stitching a straight line in the shape of a smile, and then add small horizontal stitches on top to give it a textured look. Position the mouth slightly below the nose.
Weaving: To add texture to the sheep’s face, you can weave some yarn through the stitches of the head using a tapestry needle. Choose a complementary color to the main body, such as a light gray or white, and weave it in horizontal lines across the head. This will give the sheep a fluffy and cozy appearance.
Blush: For an extra touch of cuteness, you can add a subtle blush to the sheep’s cheeks. Use a light pink yarn or blush to lightly dab or brush color onto the cheeks, emphasizing their round shape. This will give the sheep a rosy and friendly look.
By adding these final touches to the sheep’s face, you will complete the adorable and huggable bobble sheep pillow. It will make a fantastic addition to any nursery or cozy living space, bringing warmth and joy to whoever encounters it.
Enjoy Your Bobble Sheep Pillow!
Congratulations on completing your bobble sheep pillow knitting project! Now that your adorable sheep pillow is finished, it’s time to enjoy and show off your creation. Whether you’ve made it for yourself or as a gift for a loved one, this pillow is sure to bring joy and comfort.
With its fluffy texture and cute bobble sheep design, this pillow is perfect for snuggling up with on the couch or for adding a touch of whimsy to a child’s room. The softness of the yarn and the squishy nature of the bobbles make it an inviting pillow to rest your head on or to simply hold and squeeze.
Place your bobble sheep pillow on your favorite chair, sofa, or bed, and let it become a cozy companion during moments of relaxation. Its unique design is sure to catch the eye of anyone who sees it, so be prepared for compliments and questions about where you got such a fun and charming pillow.
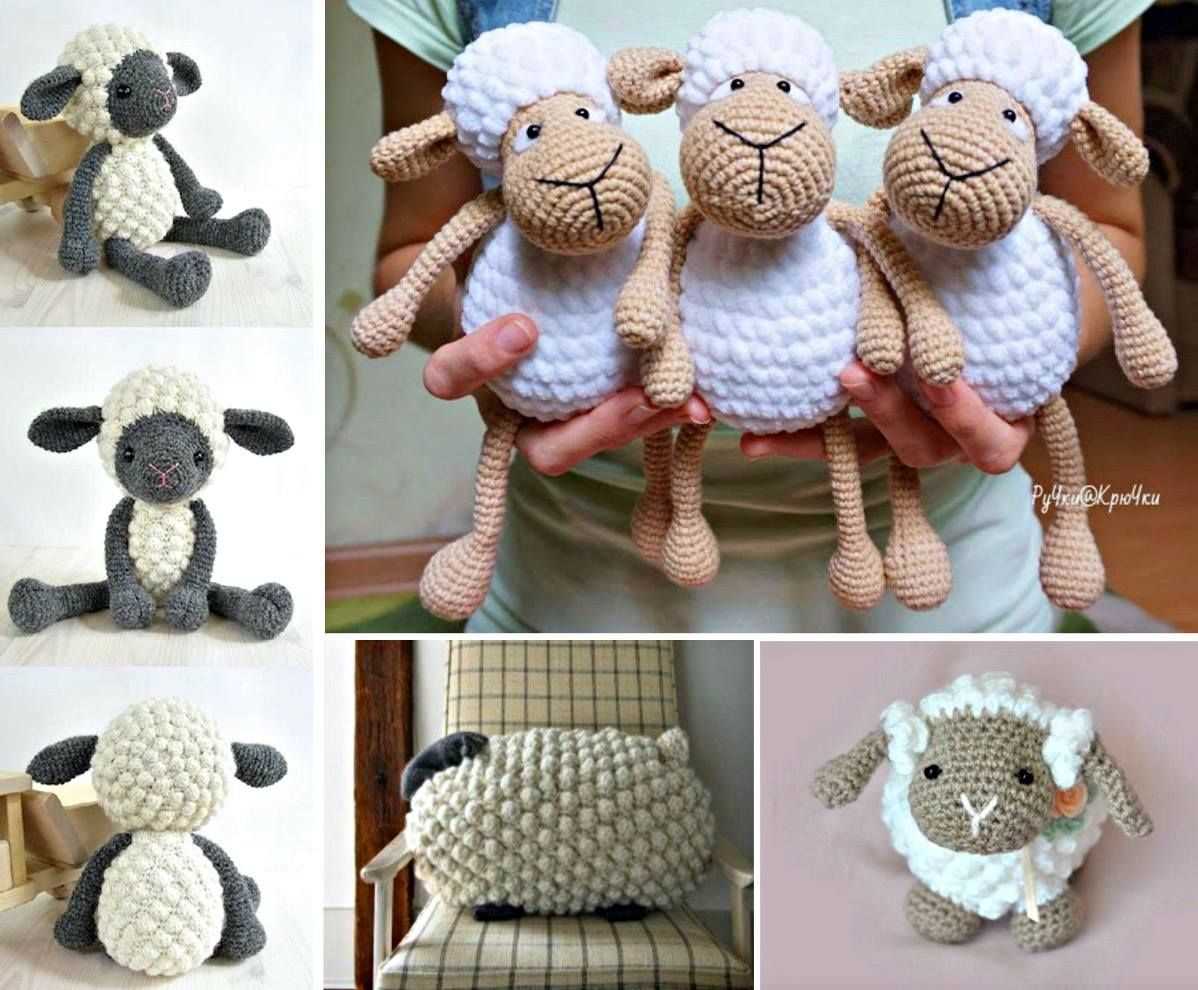
Remember, this pattern is easily customizable, so don’t hesitate to experiment with different colors, yarn weights, or sizes. You can even create a whole flock of bobble sheep pillows in different sizes to create a fun and playful display.
Whether you’re a seasoned knitter or a beginner, the bobble sheep pillow pattern is a delightful project that will bring a smile to your face. So grab your knitting needles, choose your yarn, and get ready to create a cuddly friend that will bring warmth and happiness to your home.
Enjoy your bobble sheep pillow and happy knitting!