
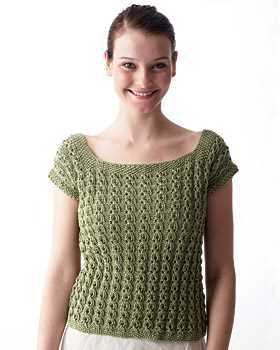
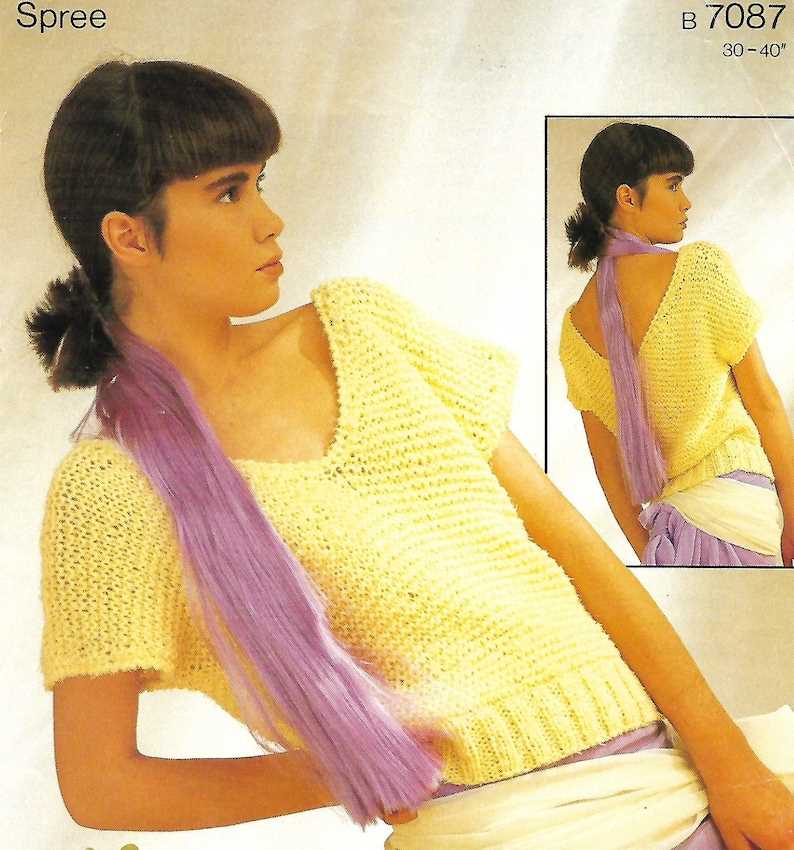
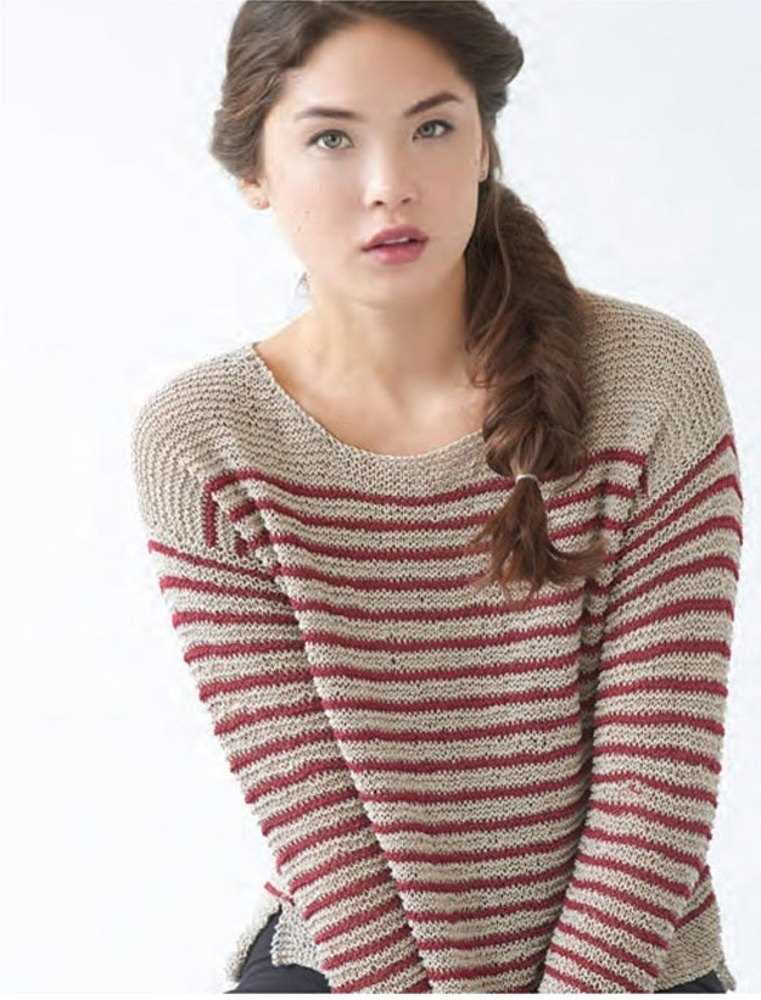
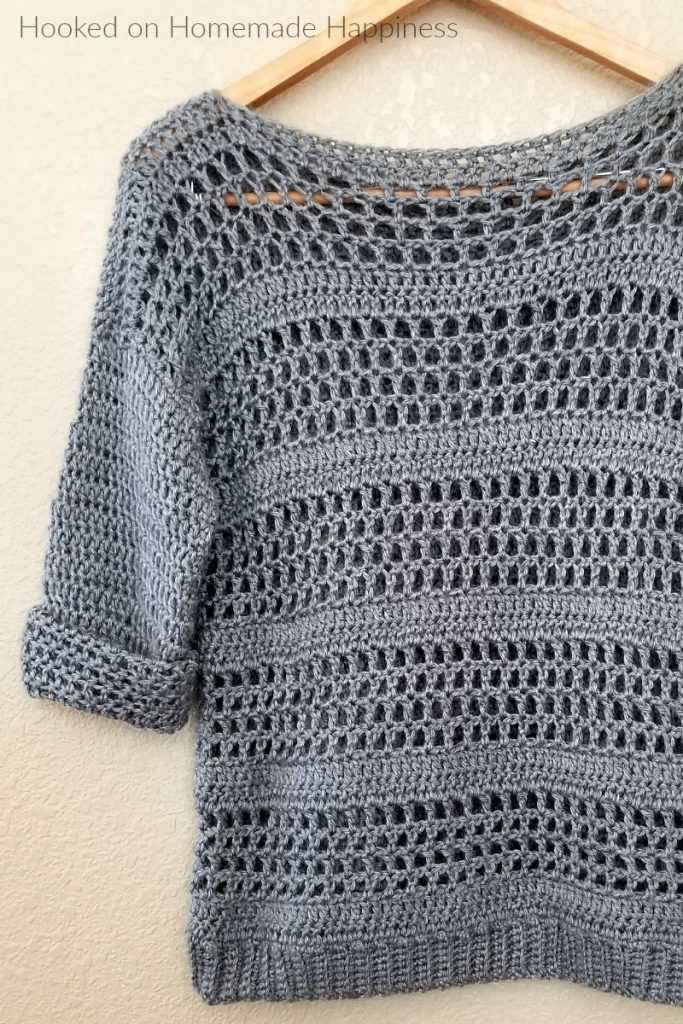
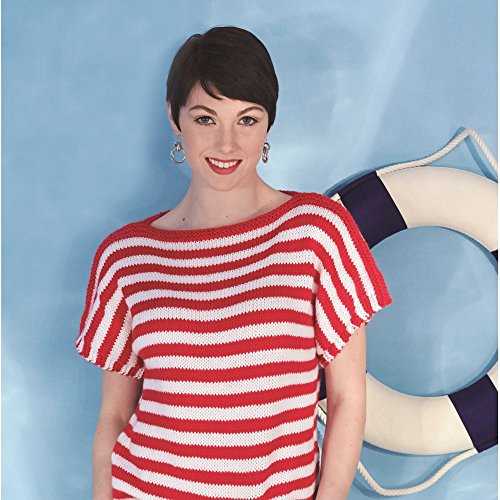
The boat neck knit top pattern is a stylish and versatile piece for any wardrobe. With its wide neckline that sits just above the collarbone, this pattern is perfect for showcasing your favorite statement necklace or earrings. The boat neck design is a timeless and classic style that adds a touch of elegance to any outfit.
Knitting your own boat neck top allows you to customize the fit and choose the perfect yarn and color to match your personal style. Whether you prefer a cozy sweater knit or a lightweight summer yarn, this pattern is adaptable to any season. The boat neck knit top is a great project for knitters of all skill levels, from beginners to more advanced stitchers.
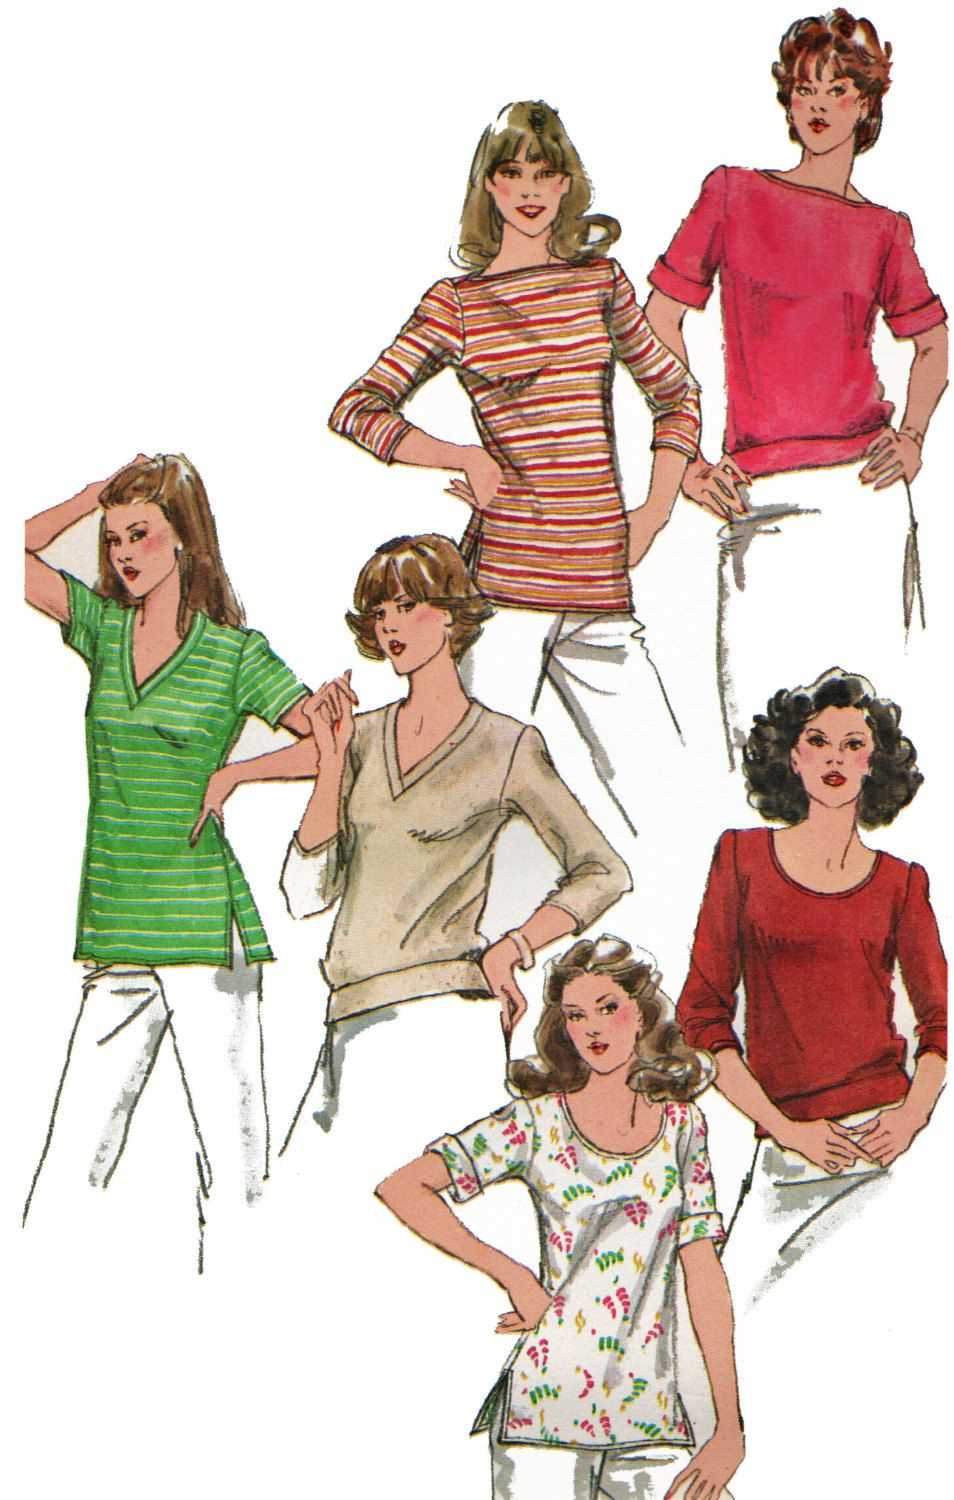
This pattern offers endless opportunities for creativity, with options for different stitch patterns, sleeve lengths, and hemlines. From a classic solid color to a fun and vibrant striped design, the boat neck knit top can be tailored to suit your unique taste. With its flattering silhouette and comfortable fit, this top will quickly become a wardrobe staple for any occasion.
Overview
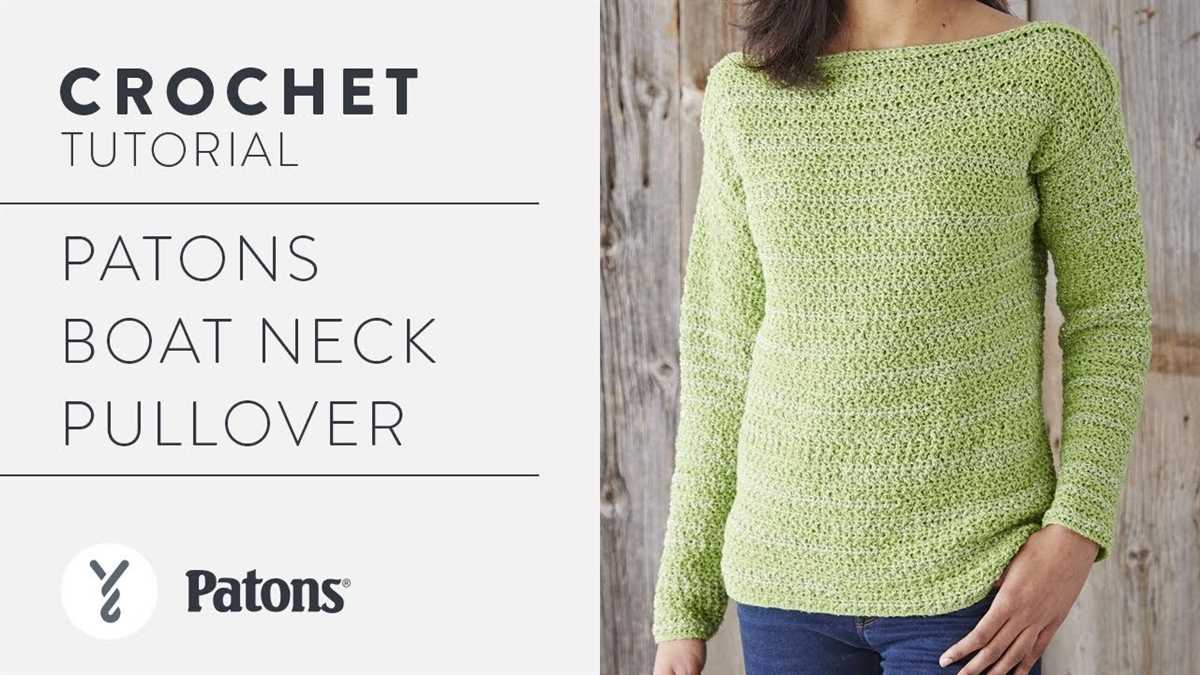
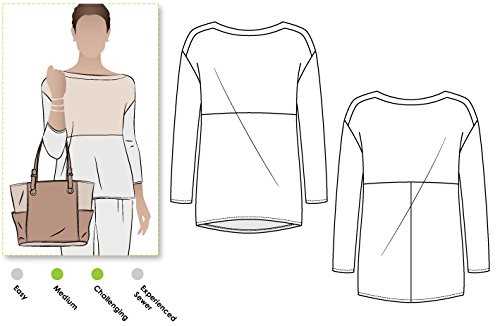
A boat neck knit top is an elegant yet casual piece of clothing that is perfect for any occasion. Its unique boat neck design adds a touch of sophistication, while the comfortable knit fabric makes it suitable for everyday wear.
Whether you are heading to the office, going out for a lunch date, or simply running errands, a boat neck knit top is a versatile and stylish choice. It can be easily dressed up or down depending on the occasion, making it a wardrobe staple for many fashion-forward individuals.
One of the best features of a boat neck knit top is its flattering silhouette. The boat neckline accentuates the shoulders and collarbone, creating a feminine and elegant look. The soft, stretchy knit fabric also drapes beautifully on the body, enhancing your natural curves and giving you a flattering fit.
When it comes to styling a boat neck knit top, the options are endless. You can pair it with jeans or trousers for a casual look, or tuck it into a skirt for a more polished outfit. Layering it with a blazer or cardigan adds an extra layer of warmth and style, making it suitable for colder weather.
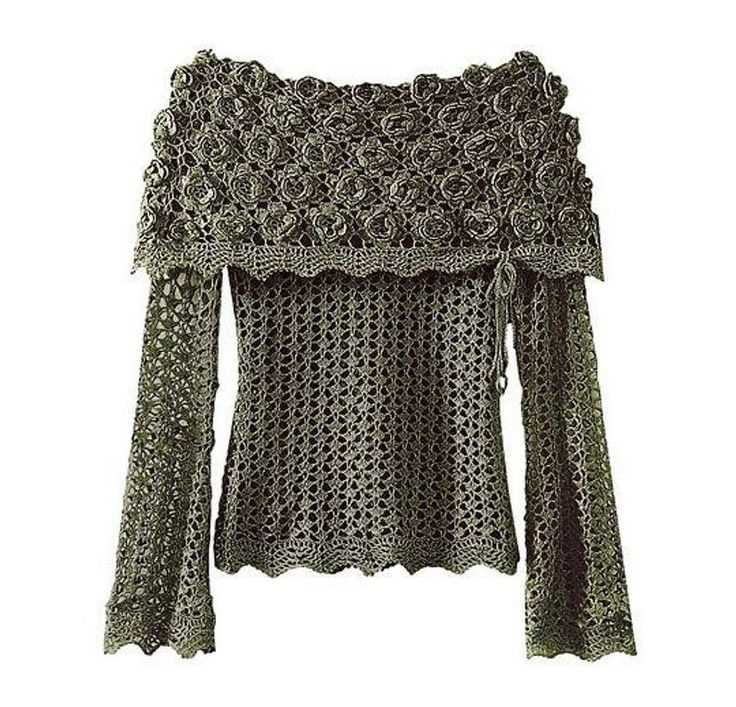
Whether you prefer solid colors or bold prints, there is a boat neck knit top pattern available that will suit your personal style. You can choose from a wide range of patterns, including stripes, florals, polka dots, and more. With so many options to choose from, you can easily find a boat neck knit top pattern that matches your taste and preferences.
Overall, a boat neck knit top is a versatile and stylish addition to any wardrobe. Its flattering silhouette, comfortable fabric, and endless styling options make it an essential piece for both casual and dressier occasions.
Choosing the right yarn
When it comes to knitting a boat neck knit top, choosing the right yarn is crucial for achieving the desired look and fit of the garment.
Consider the season: The season in which you plan to wear the boat neck knit top will greatly influence the type of yarn you should choose. For warmer weather, opt for lighter weight yarns, such as cotton or linen blends, that offer breathability and a light feel. If you plan to wear the top in colder seasons, go for a heavier weight yarn such as wool or alpaca for warmth and coziness.
Look for drape: The boat neck style typically calls for a yarn with good drape, as it hangs loosely around the neckline and shoulders. Yarns with silk or bamboo fibers tend to have a beautiful drape and give the top an elegant and flowy look. Avoid stiff or bulky yarns that may result in a stiff neckline that doesn’t lay nicely.
Consider the stitch pattern: If you plan to use a specific stitch pattern for your boat neck knit top, take into consideration the yarn’s texture and stitch definition. Smooth and even yarns will showcase intricate stitch patterns, while more textured yarns may hide or distort the stitch pattern.
Take into account care instructions: Before selecting a yarn, make sure to check its care instructions. Some yarns require special care, such as hand washing or dry cleaning, which may not be suitable for a low-maintenance garment like a boat neck knit top. Opt for yarns that are machine washable and durable to ensure easy care and longevity of your finished project.
By considering these factors and choosing the right yarn, you can create a boat neck knit top that not only looks beautiful but also feels comfortable and suits your style.
Selecting the right needle size
When knitting a boat neck knit top, it is important to select the right needle size. The needle size you choose will directly affect the gauge and overall look of your finished project.
The first thing to consider when selecting your needle size is the yarn weight. Each yarn weight has a recommended needle size range, which can be found on the yarn label or in a knitting pattern. It is important to choose a needle size within this range to ensure that your stitches are even and the fabric has the desired drape. Using a needle that is too small can result in a stiff and tight fabric, while using a needle that is too large can result in a loose and floppy fabric.
The second factor to consider when selecting your needle size is your knitting tension or gauge. Knitting tension refers to the number of stitches and rows per inch. If you are a tight knitter and tend to have a smaller gauge, you may need to use a larger needle size to achieve the correct gauge. On the other hand, if you are a loose knitter and tend to have a larger gauge, you may need to use a smaller needle size. It is important to make a gauge swatch before starting your project to ensure that you are using the correct needle size to achieve the desired gauge.
In conclusion, selecting the right needle size is crucial when knitting a boat neck knit top. By considering the yarn weight and your knitting tension, you can choose the needle size that will result in a fabric with the desired drape and gauge. Remember to always make a gauge swatch before starting your project to ensure that you are using the correct needle size. Happy knitting!
Understanding Gauge
Gauge is an important aspect to consider when knitting a garment. It refers to the number of stitches and rows per inch in a knitted fabric. Every pattern has a specified gauge that needs to be achieved in order for the finished product to have the correct measurements and fit.
When starting a knitting project, it is crucial to check the gauge swatch to ensure that it matches the pattern’s gauge. To create a gauge swatch, cast on a certain number of stitches, usually recommended in the pattern, and knit a small square using the recommended needle size.
The Importance of Gauge
- Gauge determines the size and fit of the finished garment. If the gauge is too loose, the garment will be larger and may not fit properly. If the gauge is too tight, the garment will be smaller than intended.
- Gauge also affects the drape and texture of the knitted fabric. A looser gauge will result in a more open and airy fabric, while a tighter gauge will create a denser and sturdier fabric.
- Using the correct gauge ensures that the yarn yardage estimated in the pattern will be accurate. If the gauge is off, the amount of yarn required may differ from what is stated in the pattern.
It is essential to match the pattern’s gauge by adjusting the needle size or tension if necessary. If the gauge swatch does not match, then it is important to try different needle sizes until the correct gauge is achieved. It may be necessary to go up or down a size in order to obtain the correct number of stitches and rows per inch.
By taking the time to understand and achieve the correct gauge, knitters can ensure that their finished projects will have the correct size, fit, and appearance as intended by the pattern designer.
Casting on and joining in the round
Casting on and joining in the round is an essential step when knitting a boat neck knit top. This technique allows you to create a seamless and continuous piece of fabric, perfect for the neckline of a top. Before starting, make sure you have the correct needle size and yarn weight for your chosen pattern.
To cast on and join in the round, you will need to use circular knitting needles. These needles have two pointed ends connected by a flexible cable. The cable length should be long enough to comfortably fit all the stitches for your project. Begin by making a slipknot and placing it on one of the needle points. Insert the other needle point into the slipknot, and tighten the stitch.
Next, proceed to cast on your desired number of stitches using the method specified in your pattern. Common cast on techniques include the long-tail cast on or the tubular cast on. Make sure to distribute the stitches evenly across the needles.
Once all the stitches are cast on, hold the needle with the slipknot in your left hand and the empty needle in your right hand. Bring the empty needle through the first stitch on the left needle, from left to right. This will create a stitch on the right needle while transferring the stitch from the left needle to the right needle.
Continue knitting in the round, joining each new round by repeating this process. Remember to always keep the working yarn to the back of your work and be careful not to twist your stitches as you join. You can place a stitch marker to mark the beginning of each round if needed.
In this way, you will be able to create a smooth and seamless fabric for your boat neck knit top, allowing you to focus on the shaping and details of the garment without any interruptions or seams.
Knitting the body
When knitting the body of a boat neck knit top, it is important to start with the correct number of stitches to achieve the desired fit. The pattern will typically provide instructions on how many stitches to cast on, based on your chosen size. Once the stitches are cast on, you will begin working in the specified stitch pattern, such as ribbing or stockinette stitch.
As you progress in knitting the body, it is crucial to regularly check your gauge to ensure your knit top will fit properly. You can do this by knitting a swatch before starting the project and comparing it to the gauge specified in the pattern. Adjustments may be necessary if your gauge does not match the pattern’s gauge.
When it comes to shaping the boat neck knit top, the pattern may include instructions for increasing or decreasing stitches to create the desired shape. This could involve shaping the armholes, adding bust darts, or creating waist shaping. Following the pattern’s instructions carefully will ensure that the garment fits well and looks as intended.
During the knitting process, it is important to keep track of your progress and make note of any changes made, such as stitch counts, shaping adjustments, or modifications to the stitch pattern. This will help you if you need to refer back to certain sections of the pattern or if you plan to make the same knit top again in the future.
Here are some important considerations when knitting the body of a boat neck knit top:
- Start with the correct number of stitches based on the pattern and your chosen size.
- Regularly check your gauge to ensure proper fit.
- Follow the pattern’s instructions for shaping the garment.
- Keep track of your progress and any modifications made.
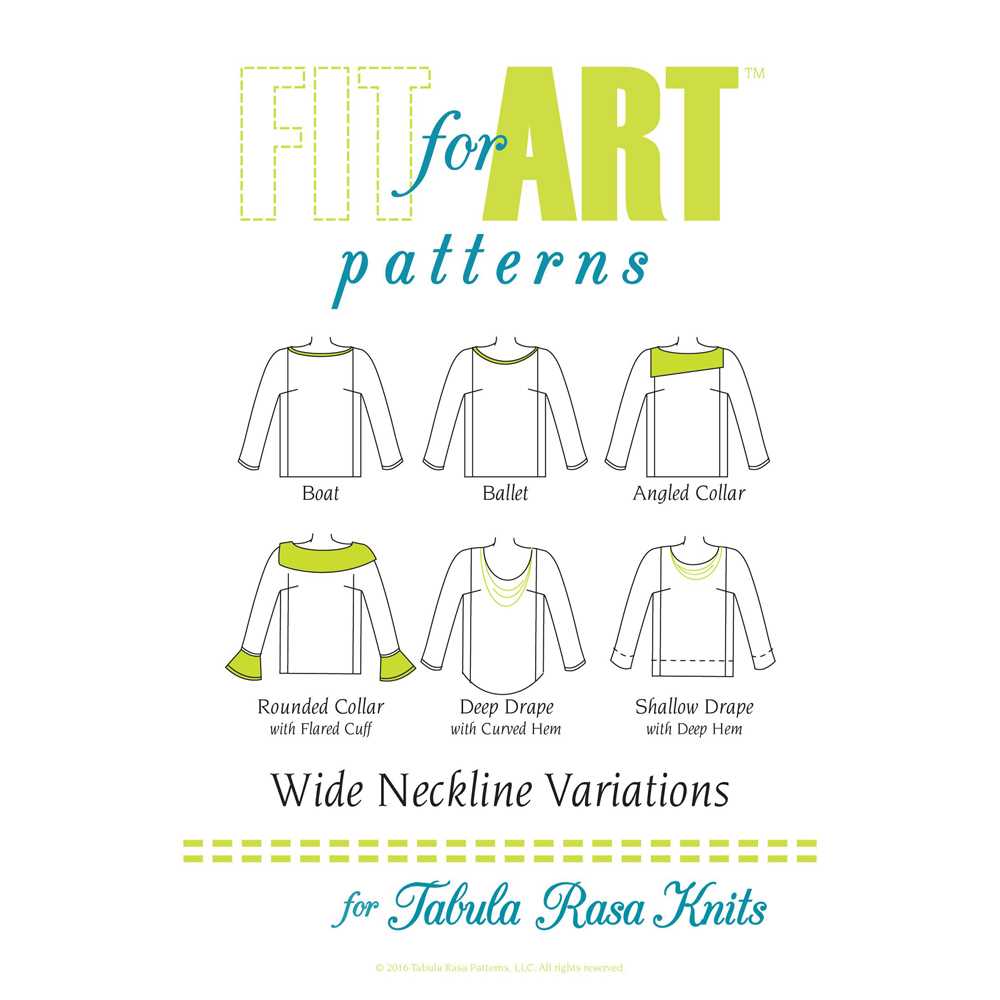
Creating the boat neck
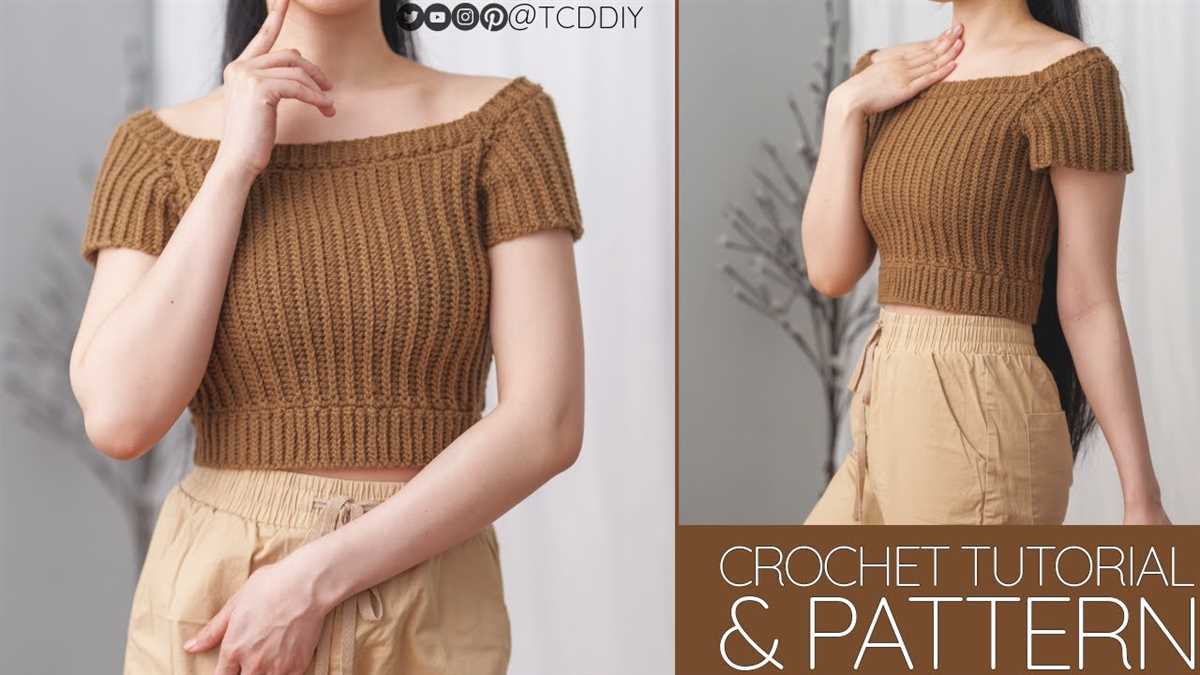
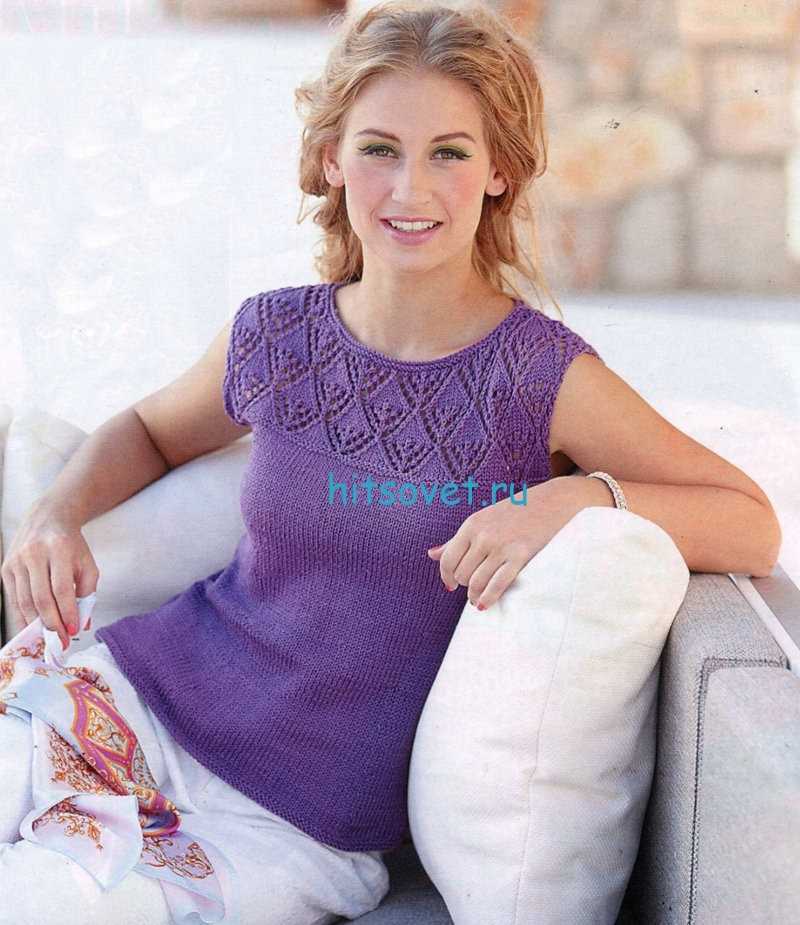
One of the key features of a boat neck knit top is, of course, the boat neck itself. This style of neckline creates a wide and shallow curve that sits just below the collarbone, showcasing the shoulders and collarbone area. It is a flattering and elegant neckline that can be found in various garments, including sweaters, tops, and dresses.
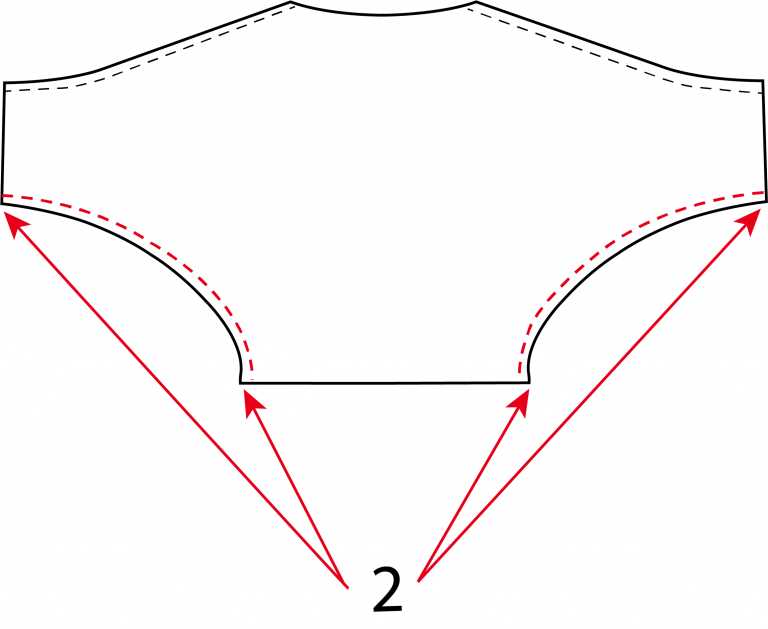
To create a boat neck for your knit top, you will need to modify the pattern or design your own from scratch. Start by measuring and marking the desired width of the neckline on the front and back pattern pieces. The width can vary depending on your preference, but a typical boat neck width is around 2-3 inches.
Once you have marked the width, use a French curve or any other curved ruler to create the boat neck shape. The curve should start from a point near the shoulder seam and gradually slope down to the desired depth of the neckline. Keep in mind that a boat neck is meant to be wide and shallow, so avoid creating a steep V-shaped neckline.
After you have drawn the boat neck shape on the pattern pieces, add seam allowance to the neckline. You can make the seam allowance around ½ inch to 1 inch, depending on your preference and the thickness of the fabric you will be using. Lastly, cut out the modified pattern pieces and follow the rest of the instructions for assembling and finishing your knit top.
Shaping the shoulders
When knitting a boat neck knit top, shaping the shoulders is an important step to ensure the garment fits well. The shoulders play a crucial role in providing support and structure to the top, and proper shaping will help prevent any sagging or drooping.
To shape the shoulders, you will need to decrease stitches gradually to create a sloping effect. This can be achieved by working decreases at regular intervals on either side of the shoulders. The exact number of decreases and interval will depend on the pattern and desired fit of the garment.
One common technique for shoulder shaping is using short rows. This method involves knitting a section of the shoulder stitches and then turning the work before reaching the end of the row. This creates a partial row, which adds height to the shoulder area, resulting in a more rounded and comfortable fit. Short rows are especially useful for creating a smooth and seamless shoulder line.
Another technique involves using decreases, such as k2tog (knit two stitches together) or ssk (slip, slip, knit). These decreases decrease the total number of stitches on either side of the shoulders, creating a gradual slope. It is important to distribute the decreases evenly and symmetrically to ensure balanced shaping.
You can also consider using shoulder pads to enhance the shape and structure of the shoulders. Shoulder pads can add definition and stability to the garment, especially if you prefer a more structured look.
Shaping the shoulders is an essential step in knitting a boat neck knit top. By using techniques such as short rows or decreases, you can create well-fitting and visually appealing shoulders that complement the overall design of the top.
Knitting the sleeves
Once you have completed the body of the boat neck knit top, it’s time to move on to knitting the sleeves. The sleeves are an important part of the garment, as they provide comfort and mobility for the wearer.
Here is a step-by-step guide to help you knit the sleeves:
- 1. Measure and calculate: Start by measuring your arm circumference and the desired sleeve length. Use these measurements to calculate the number of stitches and rows you will need for the sleeve.
- 2. Cast on: Once you have calculated the number of stitches, cast on the required number using your preferred method.
- 3. Knit in the round: Join the cast-on stitches in the round using double-pointed needles or a circular needle. Continue knitting in the round until you reach the desired length for the sleeve cuff.
- 4. Increase or decrease: Depending on the pattern, you may need to increase or decrease stitches to shape the sleeve. Follow the instructions provided in the pattern to ensure the correct fit.
- 5. Continue knitting: Once you have shaped the sleeve, continue knitting in the round until you reach the desired length for the sleeve. This length will depend on the style and fit you prefer.
- 6. Bind off: When you have reached the desired length for the sleeve, bind off the stitches using your preferred method. Make sure to bind off loosely to avoid any tightness or restriction in the sleeve.
- 7. Repeat for the second sleeve: After completing the first sleeve, repeat the same steps to knit the second sleeve. This will ensure that both sleeves have the same measurements and fit.
By following these steps, you can successfully knit the sleeves for your boat neck knit top. Remember to check the pattern instructions for any specific details or techniques required for your chosen design.
Finishing touches

When completing your boat neck knit top, it’s important to pay attention to the finishing touches to ensure a polished and professional look.
First, you’ll want to carefully weave in any loose ends or yarn tails from your knitting. This can be done with a tapestry needle, weaving the yarn through the stitches and securing it in place. Take your time and make sure the ends are secure and won’t come undone with wear.
Next, consider blocking your finished piece. Blocking involves wetting or steaming the fabric to reshape and set the stitches. This can help even out any inconsistencies in tension and give your top a more uniform look. Follow the instructions for blocking provided with your yarn or consult a tutorial for the best method to use.
After blocking, it’s time to add any desired embellishments or details. You might choose to add buttons, beads, or embroidery to personalize your boat neck knit top. Consider the overall aesthetic and style you want to achieve, and carefully plan and execute these additions to enhance your finished piece.
A final step is to sew in any necessary seams or finishes. This could include sewing up the sides or adding a ribbed or garter stitch border. Take the time to carefully sew these seams to ensure a neat and tidy appearance. Use a sewing needle and thread that matches your yarn to minimize visibility of the seams.
By paying attention to these finishing touches, you can elevate your boat neck knit top from a basic garment to a beautifully finished and wearable piece.
Blocking and Care Instructions
Once you have finished knitting your boat neck knit top, it is important to block it to give it a professional and polished finish. Blocking helps to even out the stitches, relax the fabric, and make the finished garment look its best. Follow these care instructions to ensure your knit top stays in great condition for years to come.
Blocking
Blocking is the process of wetting and reshaping your knit top to achieve the desired fit and shape. Here’s how to block your boat neck knit top:
- Fill a basin with lukewarm water and add a mild wool wash or gentle detergent.
- Gently submerge your knit top in the water, making sure it is fully saturated.
- Allow the top to soak for about 15-20 minutes.
- Drain the water from the basin and press out any excess water from the top.
- Transfer the top to a clean towel and roll it up to squeeze out even more water.
- Lay the top flat on a clean, dry towel or blocking mat, and gently stretch and shape it to the desired measurements.
- Leave the top to dry completely in a well-ventilated area, away from direct sunlight or heat sources.
Care Instructions
To keep your boat neck knit top in the best condition, follow these care instructions:
- Hand wash your knit top in lukewarm water with a mild wool wash or gentle detergent.
- Do not wring or twist the top when washing or drying.
- Gently squeeze out excess water and lay the top flat to dry.
- Store the knit top folded or rolled, rather than hanging, to prevent stretching.
- Avoid wearing the top with jewelry or accessories that may snag the delicate knit fabric.
Following these blocking and care instructions will ensure that your boat neck knit top retains its shape, texture, and overall appearance. With proper care, your knit top will continue to be a stylish and comfortable wardrobe staple for years to come.