
If you are a bird lover and enjoy knitting, then this bird sweater knitting pattern is just for you! This pattern allows you to create adorable sweaters for birds to keep them warm and cozy during the colder months. Whether you have pet birds or want to help your backyard feathered friends, these sweaters are a perfect way to show your love and care.
This knitting pattern is suitable for both beginner and experienced knitters. With detailed instructions and step-by-step photos, you will be able to create beautiful and snug sweaters in no time. Not only will the sweaters protect the birds from chilly weather, but they will also make them look even more adorable!
There are various designs and sizes available in this bird sweater knitting pattern. You can choose from different colors, patterns, and styles to suit your preferences and the birds’ personalities. Additionally, you can customize the sweaters by adding cute accessories like buttons or pom-poms to make them even more charming.
Bird Sweater Knitting Pattern
Knitting bird sweaters is a fun and unique way to not only keep birds warm during the colder months, but also to show off your knitting skills. These tiny sweaters can be knit with colorful yarns and intricate patterns, making them a charming addition to any bird’s wardrobe. Whether you want to add some warmth to your backyard bird feeder or create a cute sweater for your pet bird, there are countless patterns available to suit your style and skill level.
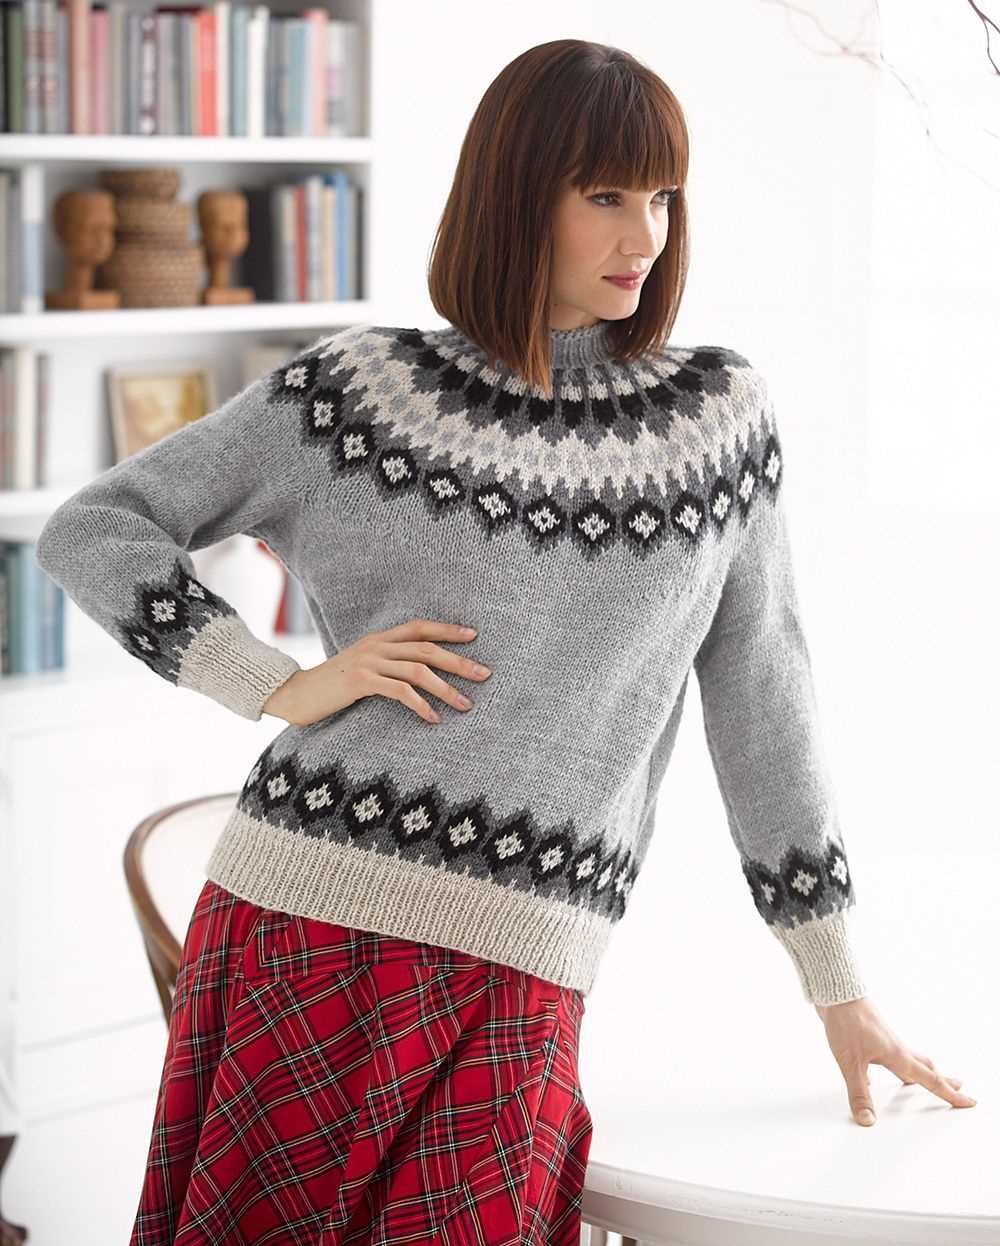
One popular bird sweater knitting pattern is the “Feathered Friends” design. This pattern features a simple stockinette stitch body with a bold stripe pattern along the chest area. The sweater is finished off with ribbed cuffs and a button closure, making it easy to put on and take off. The “Feathered Friends” pattern is perfect for beginners looking to try their hand at knitting bird sweaters.
Materials Needed:
- Worsted weight yarn in various colors
- Knitting needles (size may vary depending on desired gauge)
- Buttons for closure (optional)
- Tapestry needle for weaving in ends
Instructions:
- Start by casting on the desired number of stitches, depending on the size of the bird sweater.
- Knit the body of the sweater in stockinette stitch, alternating colors for the stripe pattern.
- Continue knitting until the desired length is reached.
- For the cuffs, switch to ribbing stitch and knit a few rows.
- Bind off the stitches and weave in any loose ends.
- If desired, sew buttons onto the front of the sweater for closure.
- Your bird sweater is now ready to be worn by a fashionable feathered friend!
Remember to choose yarns that are safe for birds and avoid using any small embellishments, such as beads or sequins, that could pose a choking hazard. Knitting bird sweaters can be a fun and creative project that not only benefits the birds but also allows you to showcase your knitting talents. So grab your yarn and needles, and start knitting some cozy sweaters for our feathered friends!
Materials Needed for Knitting a Bird Sweater

When it comes to knitting a bird sweater, it’s important to gather the right materials to ensure a successful project. Here is a list of the essential materials you will need:
- Yarn: Choose a soft and lightweight yarn in the desired colors for your bird sweater. Consider using acrylic or wool blends for easy maintenance.
- Knitting Needles: Select the appropriate size of knitting needles based on the recommended gauge for your chosen yarn. Circular or double-pointed needles may be required depending on the sweater’s design.
- Tape Measure: A tape measure is essential for accurately measuring your bird’s body and wingspan to determine the correct size for the sweater.
- Tailoring Scissors: Good quality scissors will be needed for cutting and trimming yarn as you work on your bird sweater.
- Tapestry Needle: This large-eyed needle will be necessary for weaving in loose ends and sewing up any seams on the finished sweater.
- Stitch Markers: Stitch markers can be useful for keeping track of specific stitches or pattern repeats, especially if your bird sweater has intricate designs.
- Buttons or Fasteners: Depending on the style of your bird sweater, you may need buttons or other fasteners for securing the garment on your bird.
With these materials on hand, you’ll be well-prepared to start knitting your bird sweater and create a cozy and fashionable outfit for your feathered friend.
Choosing the Right Yarn for Your Bird Sweater
When it comes to knitting a bird sweater, one of the most important factors to consider is the type of yarn you choose. The right yarn can make all the difference in the final look and fit of your sweater, as well as its functionality. Here are some key points to keep in mind when selecting yarn for your bird sweater:
Fiber Content: The fiber content of your yarn will determine its warmth, breathability, and durability. For bird sweaters, it is important to choose a yarn that is soft and comfortable against the delicate feathers of the bird. Natural fibers like merino wool, alpaca, or cashmere are excellent options as they provide warmth without being too heavy or scratchy.
Weight: The weight of the yarn refers to its thickness. Bird sweaters are typically knit with a lightweight yarn to ensure a snug fit and ease of movement for the bird. Lace or fingering weight yarns are great choices for bird sweaters, as they provide the necessary warmth while still maintaining a lightweight feel.
Color: The color of your yarn is another important consideration. When choosing a color for your bird sweater, it is best to opt for a color that complements the bird’s natural coloring. This will help the sweater blend in with the bird’s plumage and make it less noticeable. Avoid bright or bold colors that may startle or attract unwanted attention to the bird.
- Washability: Birds can be messy creatures, so it is important to choose a yarn that is machine washable or easy to clean. This will make it easier to maintain the cleanliness of the sweater and ensure that it can be worn by the bird for a longer period of time.
- Texture: Consider the texture of the yarn and how it will feel against the bird’s feathers. Avoid yarns with a rough or textured surface, as these can be uncomfortable for the bird. Opt for a smooth and soft yarn that will be gentle on the bird’s skin.
- Gauge: When selecting yarn for your bird sweater, it is important to match the gauge specified in the knitting pattern. This will ensure that your sweater will fit the bird properly and have the desired shape and drape.
By considering these factors and choosing the right yarn for your bird sweater, you can create a comfortable and stylish garment that will keep your feathered friend warm and happy.
Selecting the Correct Needle Size
When it comes to bird sweater knitting patterns, choosing the right needle size is crucial to ensure that the final garment fits well and has the desired look. The needle size you use affects the gauge, or the number of stitches and rows per inch, which in turn determines the size and drape of the fabric. Therefore, it is important to carefully consider the recommended needle size for your chosen pattern.
Types of Needles: Before diving into needle sizes, it’s important to understand the types of needles available. Knitting needles come in various materials, including metal, wood, and plastic. Each material has its own characteristics, such as flexibility and grip, which can affect the overall knitting experience. It’s a good idea to experiment with different types of needles to find the ones that you feel most comfortable using.
Checking Gauge: Before starting your bird sweater project, it is highly recommended to make a gauge swatch. A gauge swatch is a small piece of fabric that you knit using the recommended needle size and stitch pattern. By comparing the gauge of your swatch to the gauge specified in the pattern, you can determine if your tension and needle size are correct. If your swatch doesn’t match the recommended gauge, you may need to adjust the needle size to achieve the desired results.
Pattern Recommendations: Most bird sweater knitting patterns will provide a recommended needle size. This recommendation is usually based on the designer’s intended fabric drape and gauge. It’s important to follow these recommendations as closely as possible to ensure that your finished sweater matches the desired measurements and appearance. However, keep in mind that everyone knits differently, so using the recommended needle size doesn’t guarantee an exact match. Don’t be afraid to make adjustments to the needle size if needed, but be prepared to make additional gauge swatches to check for the desired results.
Overall, selecting the correct needle size for your bird sweater knitting project is essential for achieving the desired fit and look. By understanding the different types of needles, checking your gauge, and following the pattern recommendations, you can ensure a successful knitting experience and a beautiful finished garment.
Basic Knitting Techniques for the Bird Sweater
Knitting a bird sweater can be a fun and rewarding project for those who are passionate about knitting and love birds. To successfully create a bird sweater, it is important to have a good understanding of basic knitting techniques. This article will outline some essential techniques that will help you create a beautiful and functional bird sweater.
Casting On
Before you can start knitting your bird sweater, you need to cast on. Casting on is the process of creating the foundation row of stitches on the knitting needle. There are several methods of casting on, but one of the most commonly used techniques for a bird sweater is the long tail cast on. This method creates a neat and stretchy edge that is perfect for the collar of the sweater.
Knit and Purl Stitches
The two most basic stitches in knitting are knit and purl. Knit stitches are created by inserting the right-hand needle into the front of the stitch on the left-hand needle and pulling the yarn through. Purl stitches, on the other hand, are created by inserting the right-hand needle into the back of the stitch on the left-hand needle and pulling the yarn through. By combining these two stitches, you can create a variety of patterns and textures on your bird sweater.
Increasing and Decreasing
In order to shape the bird sweater and create sleeves, you will need to know how to increase and decrease stitches. Increasing involves adding stitches to your knitting, while decreasing involves removing stitches. The most common methods of increasing and decreasing are knitting or purling two stitches together, or yarn overs. By mastering these techniques, you can shape your bird sweater to fit your feathered friend perfectly.
Finishing Techniques
Once you have knitted the main body and sleeves of your bird sweater, it’s time to finish it off. This involves binding off, or removing the stitches from the needle, and weaving in any loose ends. Binding off ensures that the stitches do not unravel, while weaving in ends creates a neat and professional finish. Additionally, you may want to consider adding buttons or other closures to the bird sweater to make it easier to put on and take off.
With these basic knitting techniques, you can confidently embark on your bird sweater knitting project. Whether you are knitting for your own pet bird or creating a gift for a bird enthusiast, following these techniques will ensure that your bird sweater turns out beautifully and is functional for its feathered wearer.
Knitting the Body of the Sweater
Once you have completed the neckline of the bird sweater, it is time to begin knitting the body. This part of the pattern is where you will really start to see the shape of the sweater take form.
Start by joining the yarn at the underarm and casting on the necessary number of stitches for your size. You may need to increase or decrease the number of stitches to ensure a proper fit. Once the stitches are cast on, you can begin working in the stitch pattern specified in the pattern. This could be a simple stockinette stitch or a more complex pattern like cables or colorwork.
Continue knitting the body of the sweater in the stitch pattern until you reach the desired length. Remember to check your gauge periodically to make sure your sweater is coming out the correct size. Some patterns may include shaping instructions for the body, such as waist shaping or hip increases. Follow these instructions carefully to achieve the desired fit.
If you are adding any design elements to the body of the sweater, such as colorwork or lace panels, make sure to keep track of your progress and follow the chart or instructions provided in the pattern. It’s also a good idea to place markers at the beginning and end of any design sections to help you keep track of where you are in the pattern.
Once the body of the sweater is complete, you can move on to knitting the sleeves and finishing touches. But for now, focus on enjoying the rhythm of the stitch pattern and watching your sweater grow with each row.
Creating the Armholes
Once you have completed the main body of the bird sweater, it’s time to create the armholes. This step is essential for allowing your bird’s wings to move freely while wearing the sweater. Follow these instructions to seamlessly incorporate the armholes into your knitting pattern.
Begin by determining where you want the armholes to be placed on your bird sweater. This will vary depending on the size of your bird and the specific design of your sweater. Use stitch markers to mark the positions of the armholes on both sides of the sweater.
Shaping the Armholes
- Row 1: Knit up to the first armhole marker. Slip the next X number of stitches onto a stitch holder or a piece of scrap yarn. These will become the stitches for one armhole.
- Row 2: Continue knitting the remaining stitches in the row as usual.
Repeat Rows 1 and 2 for the second armhole, knitting up to the second armhole marker and slipping the same number of stitches onto a stitch holder or scrap yarn.
Once you have completed the armhole shaping, you can continue knitting the remaining sections of the bird sweater as indicated in your pattern. Don’t forget to securely attach the stitch holders or scrap yarn to ensure the armhole stitches stay in place. With the armholes in place, your bird sweater will provide both warmth and comfort for your feathered friend.
Shaping the Neckline
When knitting a bird sweater, shaping the neckline is an important step to create a comfortable and well-fitting garment for our feathered friends. The neckline should be shaped to allow for easy on and off, while still providing a snug and secure fit.
To begin shaping the neckline, first determine the desired width and depth. This will depend on the size of the bird and the intended style of the sweater. A deeper neckline may be preferred for larger birds, while smaller birds may require a more shallow neckline.
Next, calculate the number of stitches to be decreased. This will depend on the stitch pattern being used and the desired shape of the neckline. For a basic V-neck shape, the decreases can be evenly spaced along each side of the sweater, gradually decreasing the number of stitches until the desired width is reached.
When decreasing stitches, it is important to maintain the pattern and tension of the fabric. This can be achieved by using various decrease methods such as knit two together (k2tog) or slip, slip, knit (ssk). These decrease stitches should be incorporated into the existing stitch pattern to create a seamless and cohesive look.
Once the desired number of stitches have been decreased, continue knitting the neckline until the desired depth is reached. This may involve knitting straight rows or incorporating additional shaping techniques such as short rows, depending on the desired style of the sweater.
In summary, shaping the neckline of a bird sweater involves determining the desired width and depth, calculating the number of stitches to be decreased, and incorporating these decreases into the existing stitch pattern. This process ensures a comfortable and well-fitting sweater for our avian friends.
Adding Sleeves to the Bird Sweater
When creating the perfect bird sweater, one important element to consider is the addition of sleeves. Sleeves not only provide extra warmth and comfort for the wearer, but they also add a stylish and finished look to the overall design. Here are some tips and techniques for adding sleeves to your bird sweater knitting pattern.
1. Choose the Right Sleeve Style
There are various sleeve styles you can consider for your bird sweater, depending on the overall aesthetic you want to achieve. Options include raglan sleeves, set-in sleeves, or even the trendy balloon sleeves. Consider the level of difficulty and the look you desire before making your decision.
2. Plan for Sleeve Placement
Before you start knitting the sleeves, it’s important to plan for their placement on the sweater. Measure the armholes of the sweater body and determine the appropriate sleeve length. Make sure to leave enough room for ease and movement, ensuring that the sleeves fit comfortably.
3. Knitting the Sleeves
When knitting the sleeves, you can use the same stitch pattern as the main body of the sweater or choose a complementary stitch pattern for added visual interest. When measuring the gauge, make sure it matches the gauge of the body to ensure a consistent look. Keep in mind that you might need to decrease or increase stitches as you work towards the cuff, depending on the sleeve style you chose.
4. Attaching the Sleeves
Once the sleeves are complete, it’s time to attach them to the body of the sweater. Pin the sleeves to the armhole edges, making sure they are evenly distributed. Use a mattress stitch or a similar invisible stitch to sew the sleeves in place, creating a seamless and professional finish.
Adding sleeves to your bird sweater can elevate its style and functionality. By selecting the right sleeve style, planning for proper placement, and mastering the knitting and attaching techniques, you can create a sweater that is not only cozy but also fashionable.
Knitting the Collar of the Sweater
When it comes to knitting the collar of a sweater, there are a few different techniques and styles you can choose from to achieve the desired look and fit. The collar is an important part of the sweater as it frames the face and adds the finishing touch to the overall design. It’s important to take your time and pay attention to detail when knitting the collar to ensure it is comfortable and has the desired shape.
One commonly used method for knitting the collar is the ribbing stitch. The ribbing stitch creates a stretchy and snug collar that can easily be folded over. To knit the collar using the ribbing stitch, you will typically start with a smaller needle size than what was used for the body of the sweater. This helps to create a tighter and more structured collar. You will then knit several rows in a 1×1 or 2×2 ribbing pattern, alternating between knit and purl stitches. This creates the classic ribbed texture that is commonly seen on sweaters.
Another option for knitting the collar is the rolled edge technique. The rolled edge technique creates a softer and more relaxed collar that doesn’t have the structured look of ribbing. To knit the collar using the rolled edge technique, you will typically start with the same needle size that was used for the body of the sweater. You will then knit several rows in a simple stockinette stitch, without any ribbing or edge stitches. This allows the edge of the collar to naturally roll over, creating a laid-back and casual look.
- One important factor to consider when knitting the collar is the amount of stretch and ease you want to have. If you prefer a snug fit, you may want to opt for ribbing or a tighter gauge. If you prefer a looser fit, the rolled edge technique or a larger needle size may be more suitable. Additionally, you can also adjust the length of the collar to your preference, whether you want it to sit high on the neck or have a more relaxed drape.
- Finishing touches can also be added to the collar, such as a decorative button or a contrasting trim. This allows you to personalize the sweater and add your own unique style. You can also experiment with different collar shapes, such as a turtleneck or a V-neck, depending on the design and functionality of the sweater.
In conclusion, knitting the collar of a sweater offers a lot of creative possibilities and allows you to add the final touch to your garment. Whether you choose the ribbing stitch for a more structured look or the rolled edge technique for a casual feel, it’s important to consider the fit and style you want to achieve. With careful attention to detail and a bit of experimentation, you can create a beautiful and well-fitting collar that complements your sweater perfectly.
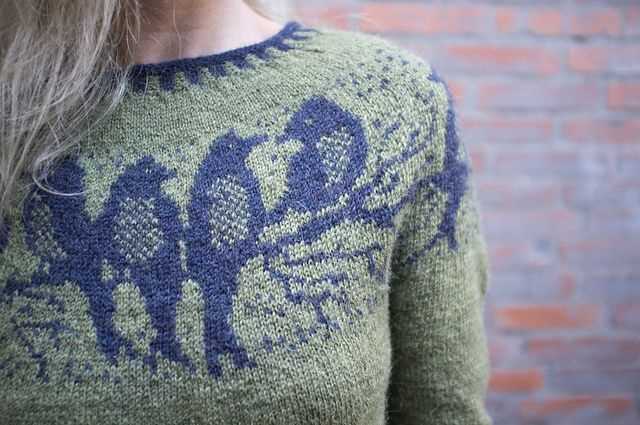
Incorporating Bird Designs into Your Sweater
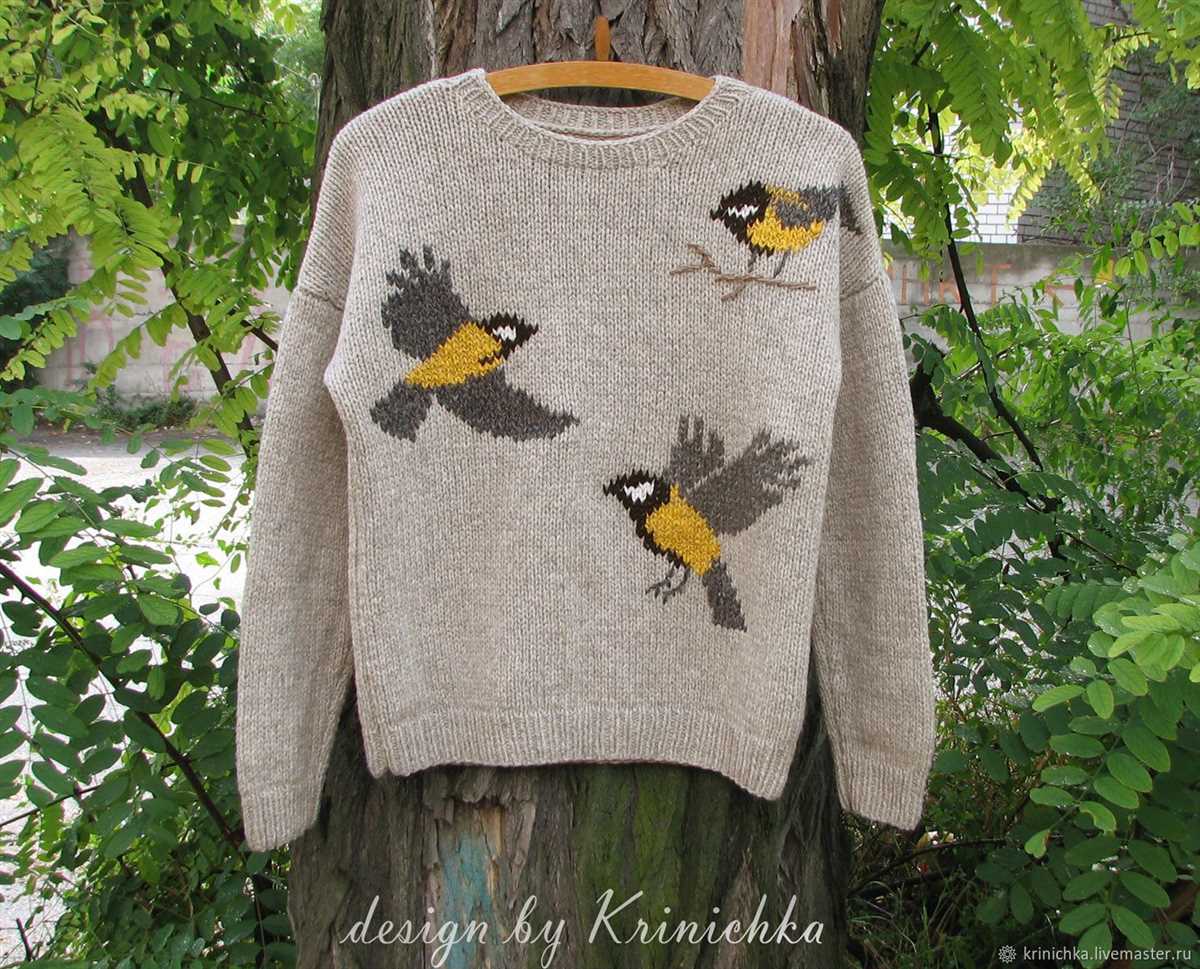
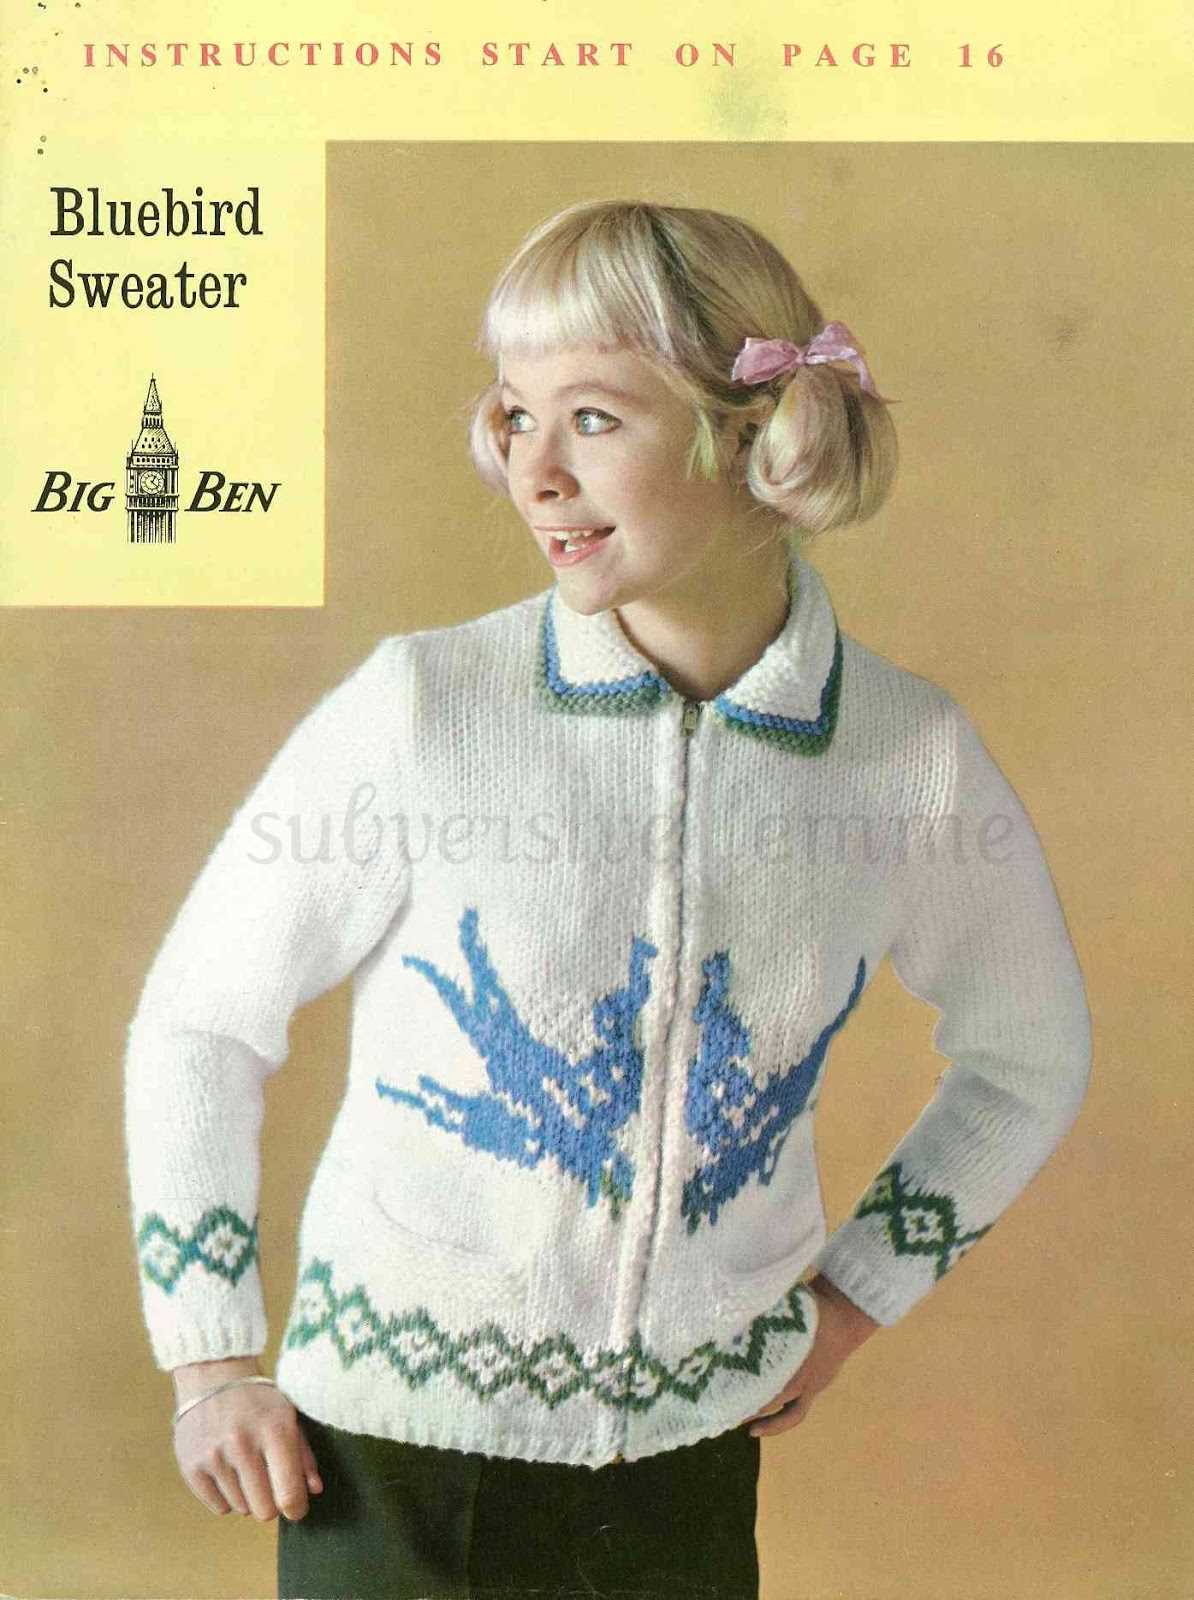
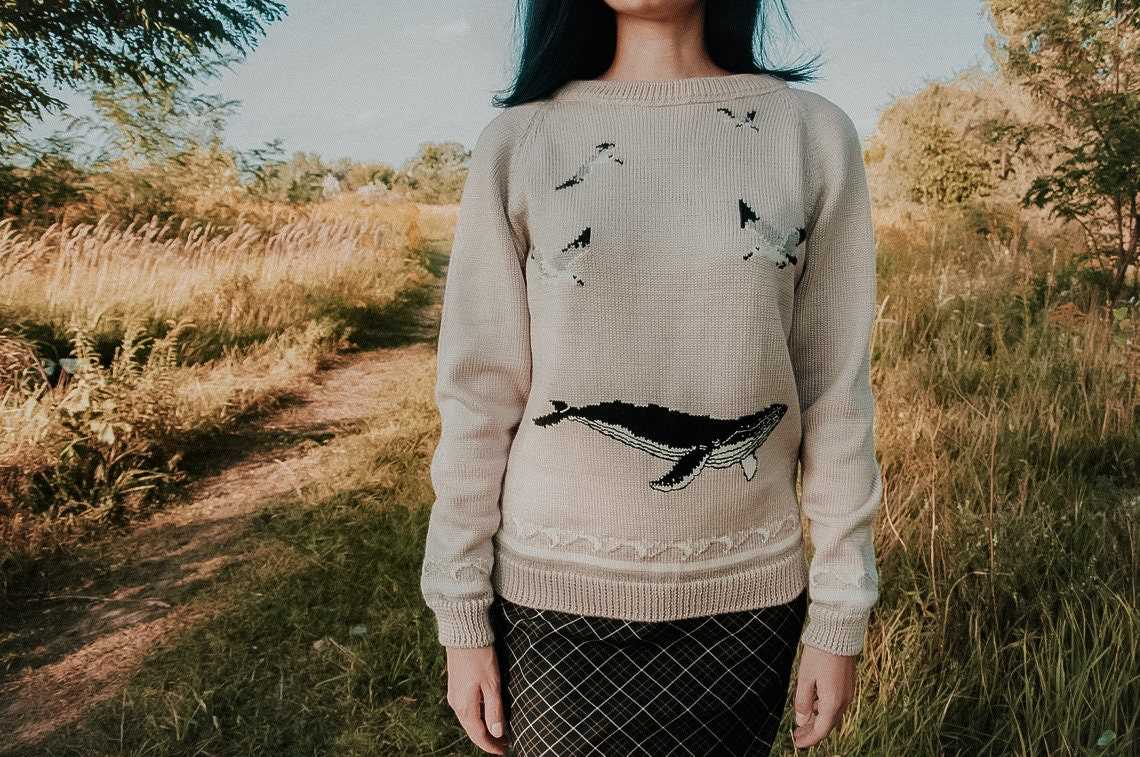
If you’re a knitting enthusiast and love birds, why not combine your passions by incorporating bird designs into your sweater? Adding bird motifs to your knitting project can give it a unique and charming touch, making it truly one-of-a-kind. Whether you want a simple and subtle design or a more elaborate and intricate pattern, there are countless ways to incorporate birds into your sweater.
1. Integrate birds into your colorwork: One way to add bird designs to your sweater is through colorwork. You can include bird silhouettes or feathers by using different colors of yarn to create intricate patterns. Choose colors that complement each other and the overall design of your sweater. The level of complexity is up to you; you can opt for a simple two-tone bird motif or experiment with more complex colorwork techniques.
2. Chart out a bird pattern: Another option is to create a bird pattern using a chart. Knitting charts are visual representations of knitting patterns, and they are a great tool for incorporating bird designs into your sweater. You can find bird-themed knitting charts online or create your own. Follow the chart row by row to create the desired bird motif on your sweater.
3. Embroider bird details: If you prefer a more subtle approach, you can embroider bird details onto your sweater. This technique allows for more flexibility in design and can be easily customized to suit your preferences. You can stitch bird outlines, feathers, or even add small bird-shaped patches using embroidery techniques such as backstitch or satin stitch. Embroidery adds texture and dimension to your sweater and can make the bird designs pop.
4. Add bird-shaped buttons: One fun and playful way to incorporate bird designs into your sweater is by adding bird-shaped buttons. Look for buttons with bird shapes, such as little bird silhouettes or bird heads. Sew these buttons onto your sweater strategically, such as at the collar or cuff, to give it a whimsical touch. This way, the birds become functional as well as decorative elements in your design.
5. Combine different techniques: Don’t be afraid to mix and match different techniques to create a unique bird-inspired sweater. For example, you can combine colorwork with embroidery or use a knitted bird motif as a starting point for adding additional details. By utilizing various techniques, you can create a sweater that truly reflects your personal style and love for birds.
Adding Decorative Details to Your Bird Sweater
When knitting a bird sweater, adding decorative details can take your project to the next level. These small embellishments can make your finished garment truly unique and showcase your knitting skills. Whether you want to add a touch of whimsy with colorful feathers or create intricate bird motifs, there are many ways to personalize your bird sweater.
1. Feathers: One popular way to add decorative details to a bird sweater is by incorporating feathers. You can sew or attach feathers in various colors and sizes to the sweater, creating a fun and eye-catching design. Feathers can be found at craft stores or even repurposed from old accessories.
2. Bird motifs: Another way to add personality to your bird sweater is by knitting or embroidering bird motifs onto the fabric. You can choose from a variety of bird designs, such as birds in flight or perched on a branch. These motifs can be placed strategically around the sweater to create a cohesive and visually appealing look.
3. Beads and sequins: If you want to add some sparkle and shine to your bird sweater, consider using beads and sequins as decorative details. You can sew these embellishments onto the sweater in the shape of bird feathers or create a pattern that mimics the scales of a bird’s wings. The beads and sequins will catch the light and add a touch of glamour to your garment.
4. Structural details: Don’t forget about the structural details that can enhance the overall look of your bird sweater. You can incorporate cables or textured stitches to mimic bird feathers or create a ribbed collar to resemble a bird’s neck. These details not only add visual interest but also provide a tactile element to your sweater.
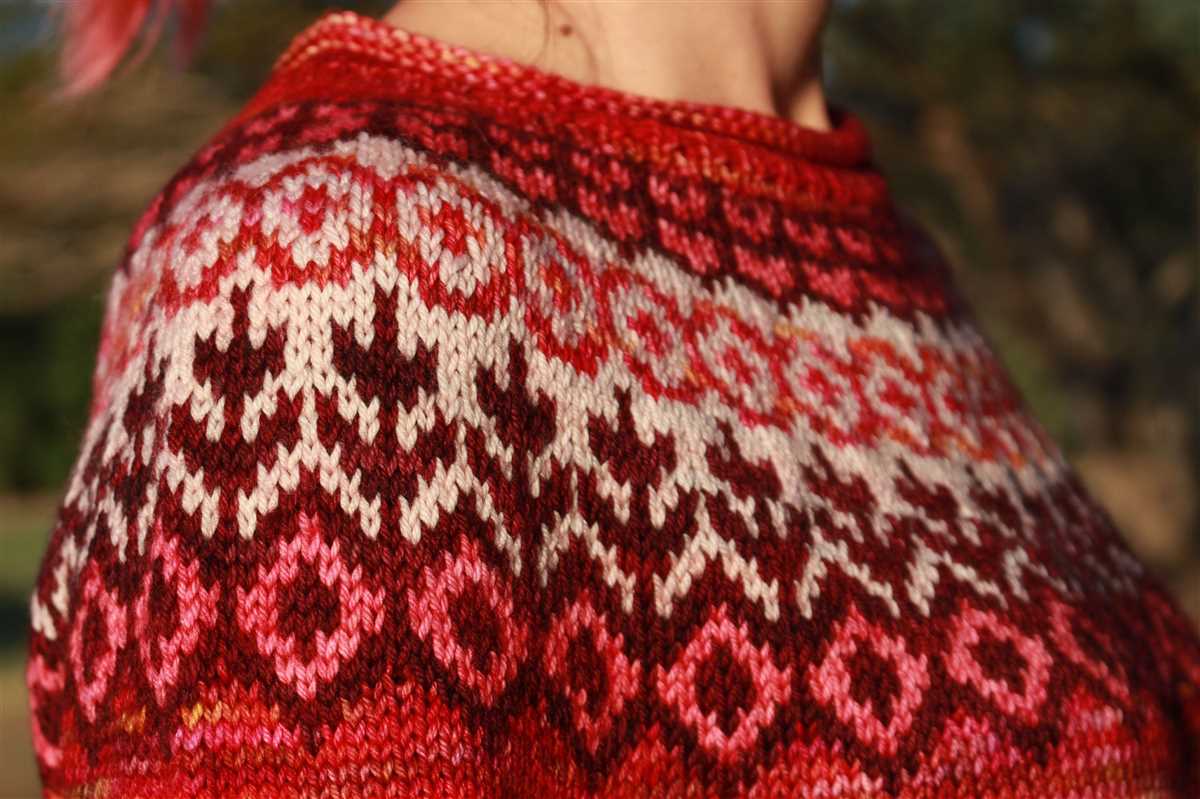
5. Colorwork: Finally, using colorwork techniques such as Fair Isle or intarsia can create stunning visual effects on your bird sweater. You can incorporate different colors to represent different bird species or create intricate patterns that mimic a bird’s plumage. The possibilities are endless when it comes to colorwork, allowing you to truly personalize your bird sweater.
Overall, adding decorative details to your bird sweater can elevate your knitting project and make it a true work of art. Whether you choose feathers, motifs, beads and sequins, structural details, or colorwork, don’t be afraid to get creative and let your imagination soar. The end result will be a unique and eye-catching garment that showcases your love for birds and passion for knitting.
Blocking and Finishing Your Bird Sweater
Blocking and finishing your knitted bird sweater is an important step to give your project a polished and professional look. Here are some tips to help you complete this final stage:
Blocking
Blocking is the process of gently shaping your finished sweater by wetting and then letting it dry in the desired shape. This step helps to even out the stitches, open up any lace or cable patterns, and give the sweater a more polished appearance. Here’s how to block your bird sweater:
- Fill a basin or sink with lukewarm water and add a small amount of gentle wool wash or baby shampoo.
- Gently submerge your knitted sweater in the water, ensuring it is completely soaked.
- Let the sweater soak for about 15-20 minutes.
- Drain the water from the basin and gently press the excess water out of the sweater. Do not wring or twist.
- Place the sweater on a clean and dry towel, and gently roll it up to remove any remaining water.
- Unroll the towel and lay the sweater flat on a blocking mat or several towels, shaping it to the desired measurements and dimensions.
- Use T-pins or blocking wires to secure the edges and any shaping points of the sweater.
- Allow the sweater to dry completely in this shape, usually overnight or for 24-48 hours.
Finishing

Once your bird sweater is blocked and dry, it’s time to add any finishing touches, such as weaving in loose ends and sewing on any embellishments. Here are some finishing steps to consider:
- Use a yarn needle to carefully weave in any loose ends on the inside of the sweater, making sure they are secure and won’t unravel.
- If your pattern includes buttons or other closures, sew them on securely.
- For added detail, consider embroidering eyes or other small features on your bird sweater using a different color of yarn or embroidery floss.
- Give the sweater a final inspection to ensure all seams and stitches are secure and tidy.
Once your bird sweater is blocked, finished, and all the details are in place, you can proudly wear or gift your adorable knitted creation! Enjoy the process of making something unique and personal, and don’t forget to share your finished bird sweater with others in the knitting community.