
If you’re looking for a new knitting project, why not try your hand at making a basket weave knit hat? This unique stitch pattern creates a visually interesting design that is sure to impress. Plus, the hat is not only fashionable but also functional, keeping you warm during the colder months.
To create this basket weave pattern, you’ll need a basic knowledge of knitting techniques such as knit and purl stitches. The pattern consists of alternating sets of knits and purls, creating a textured, woven look. It’s a great way to add some variety to your knitting repertoire.
One of the best things about this pattern is its versatility. You can customize it to fit your style by choosing different yarn colors or adding embellishments like pom-poms or cables. The hat can be made in a variety of sizes, making it suitable for all ages. It’s also a great project for both beginners and experienced knitters alike.
So why not challenge yourself with a basket weave knit hat pattern? It’s a fun and rewarding project that will keep you cozy all winter long. Get your needles and yarn ready and start stitching today!
Basket Weave Knit Hat Pattern

In need of a new knitting project? Look no further than the basket weave knit hat pattern! This pattern combines the classic basket weave stitch with a cozy hat design, perfect for keeping warm during the colder months.
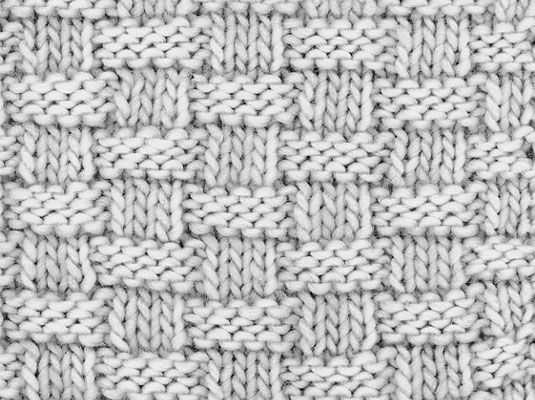
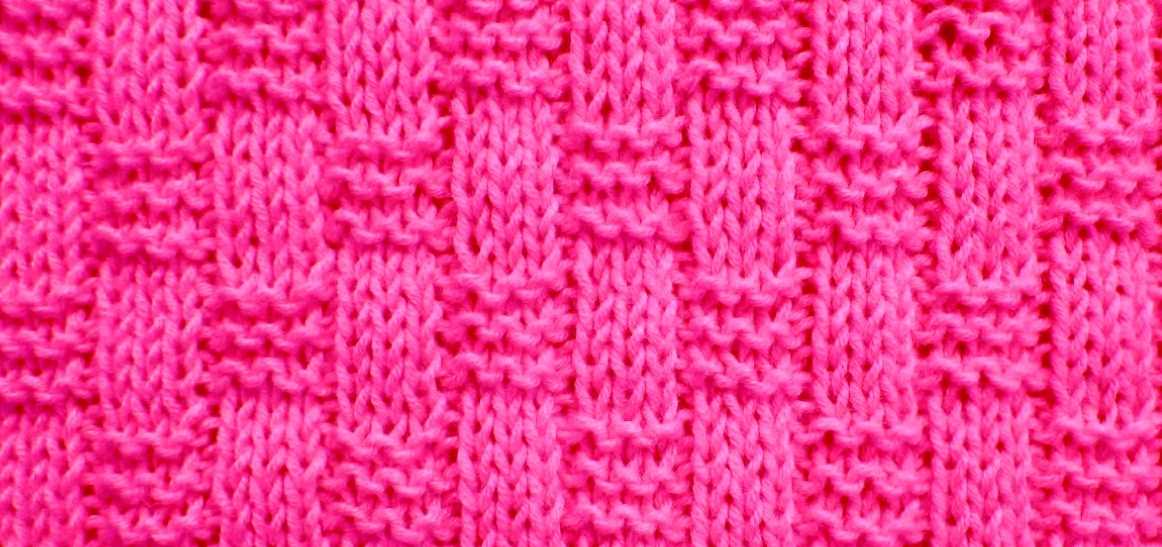
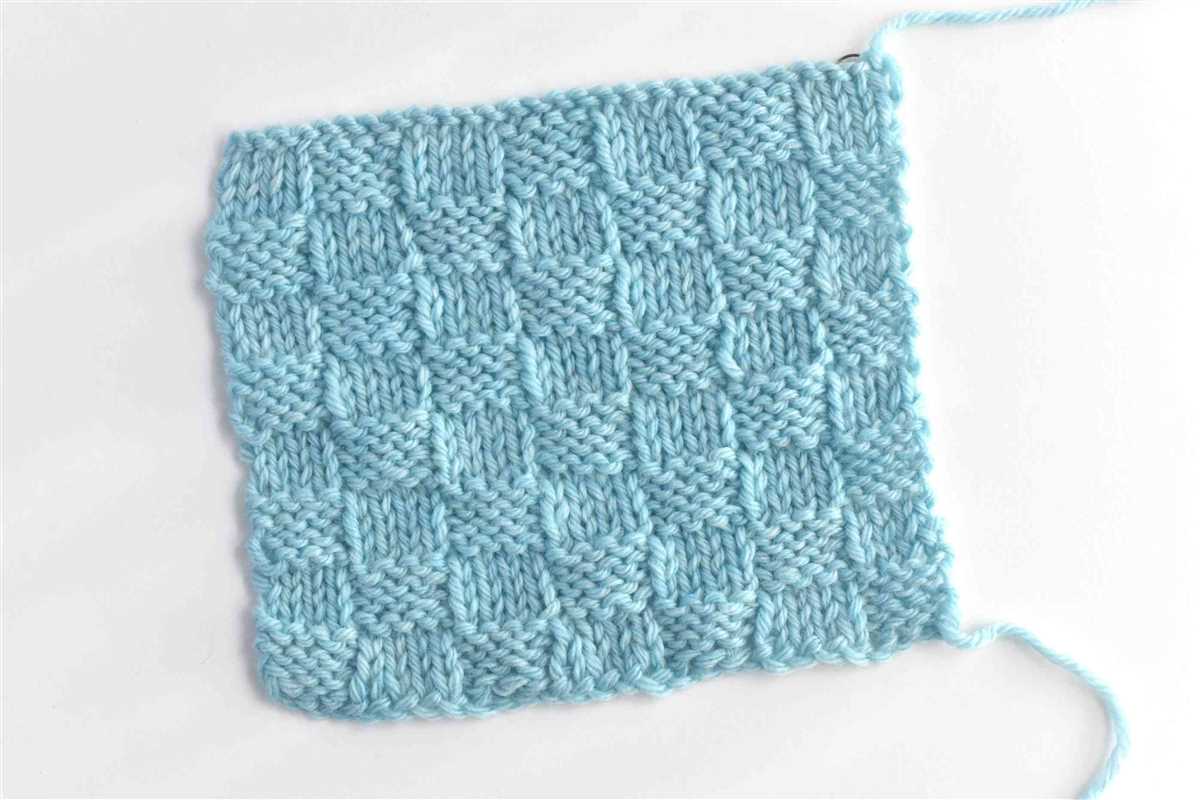
The basket weave stitch is a simple and beautiful pattern that creates a woven texture, resembling the pattern of a woven basket. It is achieved by alternating knits and purls in a specific pattern repeat. The resulting fabric is thick and warm, making it ideal for winter accessories like hats.
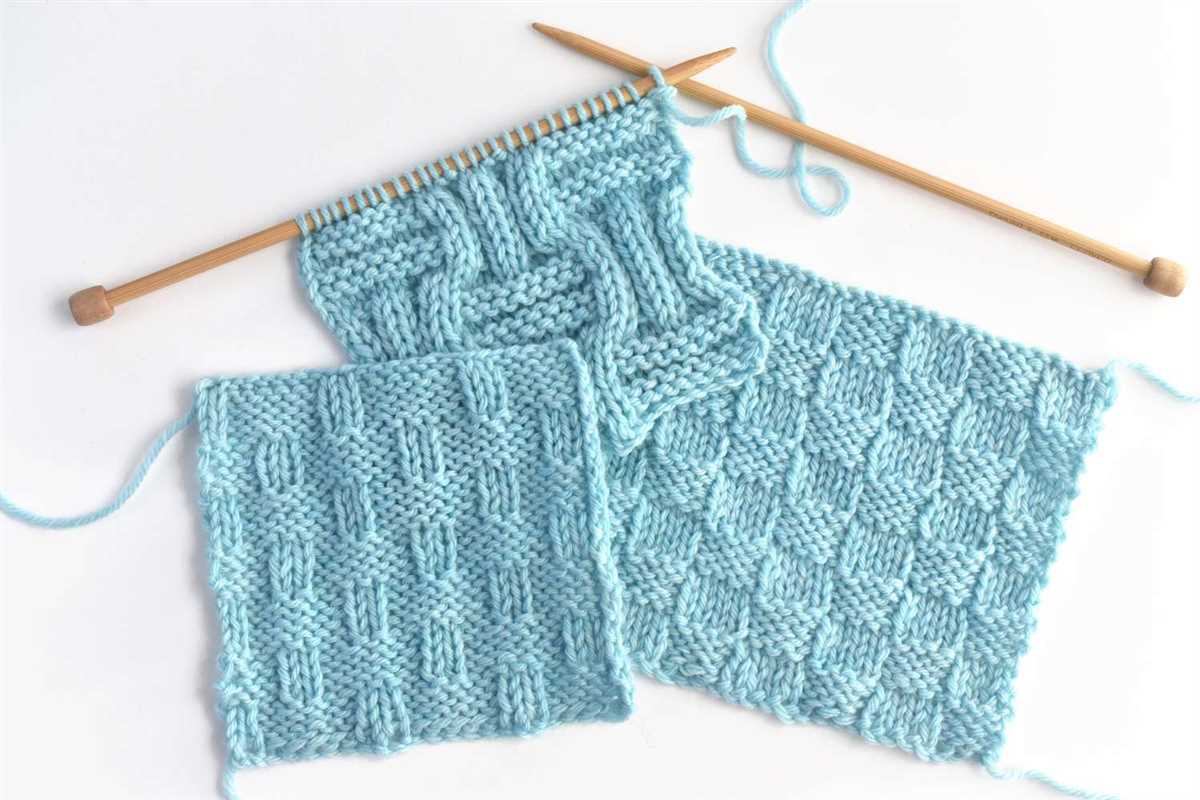
To create your own basket weave knit hat, you’ll need a set of knitting needles, a skein of yarn in your desired color, and a pattern to follow. Start by casting on the required number of stitches, which will vary depending on the size of the hat and your chosen yarn weight.
Once you have your stitches on the needles, you’ll begin working the basket weave pattern. This involves repeating a specific sequence of knits and purls over a set number of rows. As you work each row, the pattern will start to emerge, creating the textured basket weave design.
Continue working the basket weave pattern until the hat reaches your desired length. Remember to periodically check your gauge to ensure that your hat will fit properly. Once the hat is the desired length, you’ll finish off by binding off your stitches and weaving in any loose ends.
The basket weave knit hat pattern is a versatile design that can be customized to fit your personal style. You can experiment with different yarn colors, add a pom-pom or other embellishments, or even incorporate additional stitch patterns into the design. Get creative and have fun with your project!
What is a Basket Weave Knit Hat Pattern?
A basket weave knit hat pattern is a knitting pattern that creates a textured design resembling the weave of a basket. It is a popular choice for knitting hats as it adds a unique and eye-catching look to the finished product.
The basket weave pattern is achieved by alternating rows of knit and purl stitches in a specific sequence. This creates a series of interlocking squares or rectangles, mimicking the appearance of a woven basket. The pattern can be adjusted to create different sizes of squares or rectangles, allowing for customization and variation in the design.
When following a basket weave knit hat pattern, knitters will typically need to be familiar with basic knitting techniques such as casting on, knitting, purling, and binding off. They will also need to be comfortable working with multiple stitches and counting rows to ensure the pattern is formed correctly.
A basket weave knit hat pattern can be used with a variety of yarns and needle sizes, allowing for different levels of thickness and warmth in the finished hat. It is a versatile pattern that can be adapted to different head sizes and styles, making it a popular choice for knitters of all skill levels.
To create a basket weave knit hat, knitters will typically start with a ribbed brim and then transition into the basket weave pattern for the body of the hat. The pattern will usually include instructions for shaping the crown of the hat and finishing off with a top seam or pom-pom.
Overall, a basket weave knit hat pattern is a great option for knitters looking to create a visually interesting and texturally appealing hat. With its woven design and customizable nature, it can be a fun and rewarding project for knitters of all experience levels.
Materials Needed for a Basket Weave Knit Hat Pattern
A basket weave knit hat pattern is a great project for beginner and experienced knitters alike. To get started, you’ll need a few specific materials. Here’s what you’ll need:
1. Yarn
Choose a yarn that is suitable for hat making. Look for a yarn that is soft, warm, and durable. Worsted weight yarn is a good choice for this project. Consider the color and texture of the yarn as well, as it will contribute to the finished look of the hat.
2. Knitting Needles
To knit the basket weave pattern, you’ll need a set of knitting needles in the appropriate size. The size of the needles will depend on the gauge of the yarn you choose and the size of hat you want to make. Check the label of the yarn for the recommended needle size or use a needle gauge to determine the correct size.
3. Stitch Markers
Stitch markers are useful tools for keeping track of your knitting progress and ensuring that your pattern is accurate. You can use small, removable stitch markers to mark specific stitches or sections of your pattern. This can be especially helpful for keeping track of the basket weave pattern, as it involves alternating between different stitch combinations.
4. Yarn Needle
A yarn needle is essential for weaving in loose ends and finishing your hat. Choose a yarn needle with a large eye that can accommodate the thickness of your yarn. This will make it easier to sew in ends and create a clean, polished finish.
5. Scissors
Having a pair of scissors on hand is important for cutting yarn and trimming any excess once you’ve finished your hat. Make sure your scissors are sharp and able to cut through yarn smoothly and cleanly.
With these materials, you’ll be well-equipped to start knitting your own basket weave hat. Enjoy the process and show off your handmade creation once it’s complete!
Step-by-Step Instructions for a Basket Weave Knit Hat Pattern
Knitting a basket weave knit hat is a great way to add texture and interest to your knitting projects. This classic pattern creates a woven effect, similar to the pattern of a traditional basket. Here, we will provide step-by-step instructions to help you create your own basket weave knit hat.
Materials Needed:
- Worsted weight yarn in your desired color
- Size 8 circular knitting needles
- Set of size 8 double-pointed knitting needles
- Tapestry needle for weaving in ends
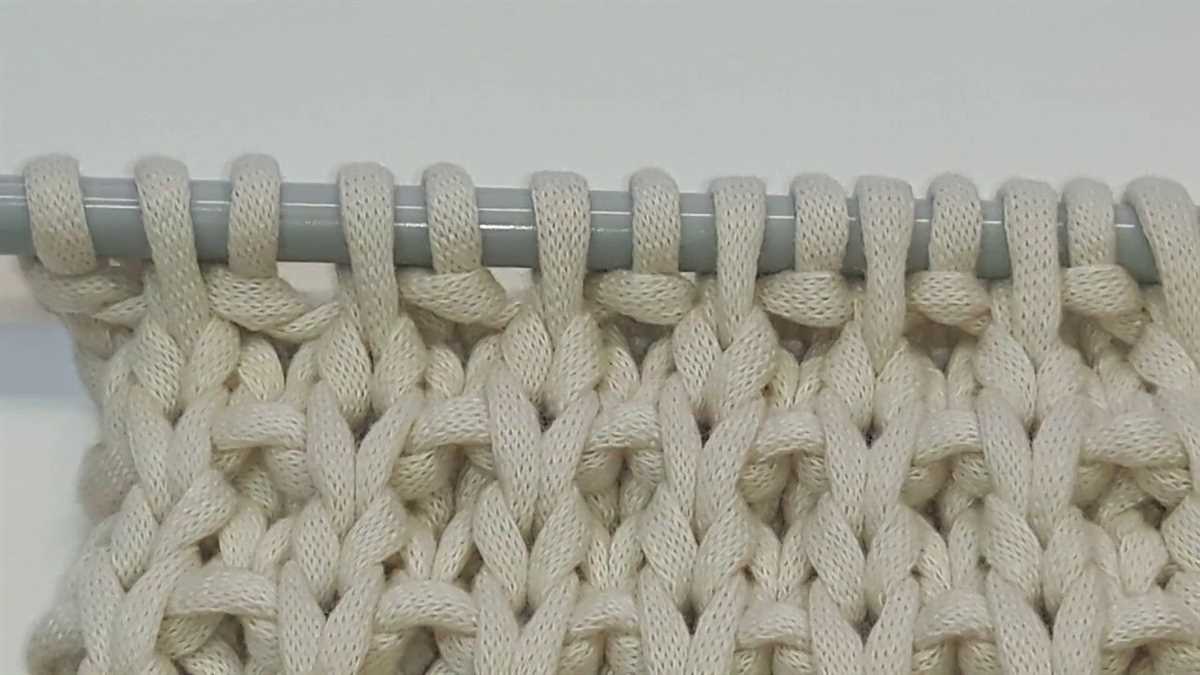
1. Cast on: Begin by casting on 88 stitches using the circular knitting needles. This will create the brim of the hat.
2. Ribbing: Knit 2, purl 2 in a rib stitch pattern for the first 2 inches of the hat. This will create a stretchy and snug brim.
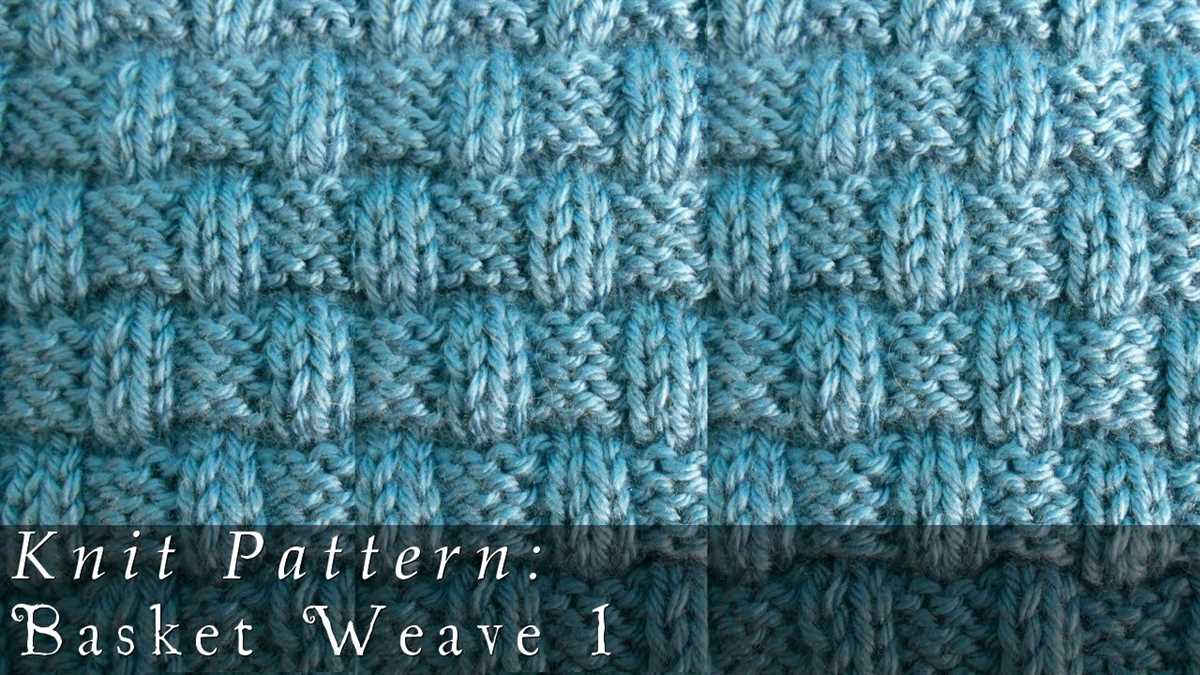
3. Basket weave pattern: For the main body of the hat, switch to the basket weave pattern. This pattern consists of knitting 8 stitches, then purling 8 stitches, and repeating this pattern for each row. Alternate the knitting and purling stitches every 8 stitches to create the woven effect.
4. Continue the basket weave pattern: Continue knitting in the basket weave pattern until the hat measures approximately 8 inches from the cast on edge. This will create a hat that fits most adult head sizes.
5. Decrease rounds: To shape the crown of the hat, switch to the double-pointed needles once the hat becomes too small to comfortably fit on the circular needles. Decrease stitches evenly across each round until you have 8 stitches remaining.
6. Finishing: Cut the yarn, leaving a long tail. Thread the tail through the tapestry needle and weave it through the remaining stitches. Draw the stitches together tightly to close the top of the hat. Weave in any remaining ends. Wash and block the hat to give it its final shape.
With these step-by-step instructions, you can easily knit your own basket weave hat pattern. This versatile and classic pattern will keep your head warm and stylish during the colder months.
Tips and Tricks for Knitting a Basket Weave Knit Hat Pattern
If you’re looking to knit a basket weave knit hat pattern, here are some helpful tips and tricks to make the process easier and more enjoyable:
1. Choose the Right Yarn:
When knitting a basket weave pattern, it’s important to choose a yarn that is suitable for this type of stitch. Look for a yarn that has good stitch definition and is not too bulky or fuzzy. This will help showcase the texture of the basket weave pattern and make your hat look more professional.
2. Follow a Pattern:
While it’s possible to create a basket weave pattern without a pattern, it’s highly recommended for beginners to use a pattern to guide them through the process. A pattern will provide step-by-step instructions and help you understand the intricacies of the stitch pattern. It will also ensure that your hat turns out the correct size and shape.
3. Practice the Basket Weave Stitch:
Before diving into your hat project, take some time to practice the basket weave stitch on a smaller swatch. This will help you get familiar with the stitch and make any necessary adjustments before starting your hat. It’s also a great way to test different needles and yarn combinations to achieve the desired texture.
4. Use Stitch Markers:
Since the basket weave stitch involves multiple pattern repeats, it can be helpful to use stitch markers to keep track of your progress. Place a stitch marker at the beginning of each pattern repeat to easily identify where each section starts and ends. This will help prevent any mistakes and ensure a consistent and neat finish.
5. Block Your Hat:
After completing your basket weave knit hat, be sure to block it to enhance the stitch definition and shape. Blocking involves wetting the hat, carefully shaping it, and allowing it to dry flat. This will help give your hat a polished and professional look.
With these tips and tricks in mind, you’ll be well-prepared to knit a beautiful basket weave knit hat pattern. Enjoy the process and embrace the textured beauty of this stitch pattern!
Adjusting the Size of a Basket Weave Knit Hat Pattern
When working with a basket weave knit hat pattern, you may find that the size provided does not perfectly fit your head circumference. Luckily, adjusting the size of the pattern is relatively simple and allows you to customize the hat to your desired measurements.
To adjust the size of the basket weave knit hat pattern, you will need to modify both the number of stitches and the number of rows in the pattern. The number of stitches will directly affect the circumference of the hat, while the number of rows will determine its length. Both factors are crucial in achieving the desired fit.
To begin, measure the circumference of your head using a flexible measuring tape. This will serve as a reference for adjusting the number of stitches in the pattern. Take note of the gauge of the original pattern and calculate the number of stitches needed to achieve your desired circumference. You may need to increase or decrease the number of stitches evenly across the round to ensure an even distribution.
Next, consider the desired length of the hat. If you prefer a shorter or longer hat, you will need to adjust the number of rows accordingly. Keep in mind that adjusting the number of rows may also affect the overall shape and slouchiness of the hat, so take this into consideration when making modifications.
Once you have determined the adjusted number of stitches and rows, you can start working on your basket weave hat. It’s important to keep track of your changes and make notes on your modified pattern to ensure consistency throughout the knitting process.
Remember, adjusting the size of a basket weave knit hat pattern allows you to create a hat that fits perfectly and suits your individual style. By taking the time to measure and calculate the necessary modifications, you can create a hat that is both comfortable and stylish.
Alternative Stitch Patterns for a Knit Hat
Knitting hats is a popular winter activity, and one way to add interest and texture to your projects is by using different stitch patterns. While the basket weave stitch pattern is a classic choice, there are many other options to explore. By incorporating alternative stitch patterns, you can create unique and eye-catching hats that will stand out from the crowd.
Garter stitch: If you’re looking for a simple yet stylish stitch pattern, garter stitch is a great choice. This stitch pattern is created by knitting every row. It creates a dense and textured fabric that is perfect for keeping you warm during cold winter days.
Ribbing: Ribbing is a versatile stitch pattern that is commonly used for hat brims and cuffs. It is created by alternating knit and purl stitches in a specific pattern, such as knitting two stitches and purling two stitches. Ribbing adds stretch and elasticity to your hat while also providing a nice texture.
Moss stitch: Moss stitch, also known as seed stitch, is another popular choice for hat patterns. It is created by alternating knit and purl stitches, but in a different pattern than ribbing. Moss stitch creates a bumpy texture and adds visual interest to your hat.
Cable stitch: If you’re looking for a stitch pattern that adds a bit of complexity and visual appeal to your hat, consider trying cable stitch. Cable stitch involves crossing stitches over each other to create twisted cables. This stitch pattern adds texture and depth to your hat, making it a great choice for more advanced knitters.
Fisherman’s rib: Fisherman’s rib is a variation of ribbing that creates a thick and plush fabric. It is created by knitting into the stitch below, which gives it its unique texture. Fisherman’s rib is perfect for cozy and warm hats that will keep you comfortable during the coldest winter days.
In conclusion, there are many alternative stitch patterns that you can use to create unique and textured knit hats. Whether you prefer a simple garter stitch or a more complex cable stitch, experimenting with different stitch patterns can add a new dimension to your knitting projects. So grab your needles, choose a stitch pattern that catches your eye, and start creating beautiful and stylish hats that will keep you warm and fashionable all winter long.
How to Add Embellishments to a Basket Weave Knit Hat
Adding embellishments to a basket weave knit hat is a great way to personalize your creation and make it truly unique. Whether you want to add a pop of color, texture, or extra flair, there are several options to choose from.
1. Pompoms: Pompoms are a classic and fun way to add a playful touch to your basket weave knit hat. You can use yarn in a contrasting color to create a bold statement or stick to the same color for a more subtle look. Simply attach the pompom securely to the top of the hat using a needle and thread.
2. Buttons: Buttons can add a touch of charm and elegance to your hat. Choose buttons in a color that complements your hat or opt for unique and eye-catching designs. Sew the buttons onto the hat using thread that matches the color of your yarn.
3. Embroidery: Embroidery is a great way to add intricate designs and patterns to your hat. You can use different colored yarns to create beautiful motifs or even add your initials or a monogram. Use a needle and thread to carefully stitch your desired design onto the hat.
4. Beads or sequins: For a touch of glamour and sparkle, you can attach beads or sequins to your hat. Choose beads or sequins in colors that complement your hat and use a needle and thread to sew them onto the hat. You can create a random scattered pattern or follow a specific design.
5. Ribbons: Ribbons are a versatile option for embellishing your hat. You can tie a ribbon around the base of the hat or create bows and attach them to the sides or top. Experiment with different ribbon widths and colors to find the perfect look for your hat.
Remember to consider the overall style and vibe of your hat when choosing embellishments. Have fun experimenting with different options and let your creativity shine!
Creative Variations of a Basket Weave Knit Hat Pattern
A basket weave knit hat pattern is a classic and timeless design that can be customized and adapted in various creative ways. Whether you’re a beginner or an experienced knitter, these variations will add a unique twist to your knitted hat collection.
1. Colorful Stripes: Instead of using a single color, incorporate multiple colors into your basket weave pattern. This can be done by alternating between different colored yarns every few rows or by creating stripes with contrasting colors. The result is a vibrant and eye-catching hat that will stand out from the crowd.
2. Pom Pom Embellishment: Add a playful touch to your basket weave knit hat by attaching a pom pom to the top. You can use matching yarn or opt for a contrasting color to create a visual contrast. The pom pom adds a fun and whimsical element to the hat, making it even more stylish and fashionable.
3. Cable Knit Accents: Introduce cable knit accents to your basket weave pattern to create a more intricate and textured look. This can be done by incorporating a few rows of cable stitches into the design, either vertically or horizontally. The combination of the basket weave and cable knit creates a visually appealing hat with added dimension and interest.
4. Button Detail: Experiment with button embellishments to add a touch of elegance to your basket weave knit hat. Sew small buttons along the center or edges of the hat, either in a symmetrical or asymmetrical pattern. This detail not only adds visual interest but also allows for further customization and personalization.
5. Chunky Yarns: Use chunky or bulky weight yarns to create a cozy and warm basket weave knit hat. The thicker yarns not only provide extra warmth but also enhance the texture and definition of the basket weave pattern. This variation is perfect for colder climates or for those who prefer a thicker and more substantial hat.
These creative variations of a basket weave knit hat pattern offer endless possibilities for customization and personalization. Whether you choose to add color, texture, or embellishments, your hat will be a unique and stylish accessory that reflects your own personal style.
Common Mistakes to Avoid When Knitting a Basket Weave Hat Pattern
When knitting a basket weave hat pattern, it’s important to avoid common mistakes that can compromise the final result. While the basket weave stitch may seem simple, it requires attention to detail and precision to achieve the desired effect.
1. Incorrect gauge: One of the most common mistakes in knitting is failing to check your gauge before starting a project. Different yarns and needles can yield different results, so it’s crucial to match the gauge specified in the pattern. This ensures that your hat will fit properly and have the correct proportions.
2. Mixing up the pattern: The basket weave stitch pattern consists of alternating knit and purl stitches in various combinations. It’s easy to lose track of where you are in the pattern, especially if you’re not using stitch markers or counting regularly. Take your time and make sure you’re following the pattern correctly to avoid any mistakes that could disrupt the basket weave design.
3. Not using stitch markers: Stitch markers can be extremely helpful when working on a basket weave hat pattern. They can help you keep track of where you need to switch between knit and purl stitches, preventing any errors. By placing a stitch marker every few rows, you can easily identify the beginning of each pattern repeat and avoid confusion.
4. Lack of attention to tension: The basket weave stitch pattern relies on a balanced tension between the knit and purl stitches. If your tension is too loose or too tight, the resulting fabric may not have the desired texture and structure. Pay close attention to your tension as you work and make any necessary adjustments to achieve a consistent and even fabric.
5. Skipping blocking: Blocking is an essential step in finishing any knitting project, and a basket weave hat is no exception. Blocking helps to even out the stitches, relax the tension, and give the hat its final shape. Skipping this step can result in a hat that doesn’t fit properly or lacks the desired drape and appearance.
By avoiding these common mistakes and paying attention to detail, you can successfully knit a beautiful basket weave hat that showcases the intricate stitch pattern and provides warmth and style during the colder months.
Finishing and Styling Tips for a Basket Weave Knit Hat
Once you have completed your basket weave knit hat, there are a few finishing touches you can add to make it even more stylish and personalized. Here are some tips to help you finish and style your hat:
1. Weave in the ends: After you finish knitting the hat, make sure to weave in any loose ends. This will give your hat a neat appearance and prevent the yarn from unraveling.
2. Block your hat: Blocking is a process where you shape and stretch your knitted item to improve its overall appearance. For a basket weave hat, you can wet block it by immersing it in water, gently squeezing out the excess water, and then shaping it to your desired size and shape. Allow it to dry completely before wearing or storing.
3. Embellish with a pom-pom or tassel: Adding a pom-pom or tassel to the top of your hat can give it a fun and playful look. You can make a pom-pom using a pom-pom maker or create a tassel using leftover yarn. Attach it securely to the top of your hat for a whimsical touch.
4. Customize with buttons or patches: If you want to add some extra flair to your hat, consider sewing on some buttons or patches. Choose buttons that complement the colors of your hat or find patches that represent your personal style or interests.
5. Experiment with different colors and yarns: The basket weave pattern looks great in a variety of colors and yarns. Don’t be afraid to experiment and try different combinations. You could knit a hat using a variegated yarn for a unique and eye-catching look, or stick with a classic single-color yarn for a more sophisticated vibe.
6. Pair it with coordinating accessories: Your basket weave knit hat can be part of a complete winter ensemble. Consider knitting a matching scarf, mittens, or headband to create a coordinated look. This will not only keep you warm but also show off your knitting skills.
With these finishing and styling tips, your basket weave knit hat will be ready to keep you cozy and stylish throughout the winter season. Whether you choose to add a pom-pom, customize with buttons, or pair it with coordinating accessories, your hat will be a unique reflection of your personal style.