
Are you looking for a fun and stylish knitting project to keep you warm this winter? Look no further than the baggy hat knitting pattern. This pattern is perfect for beginners and experienced knitters alike, and it will create a trendy and comfortable hat that you will love to wear.
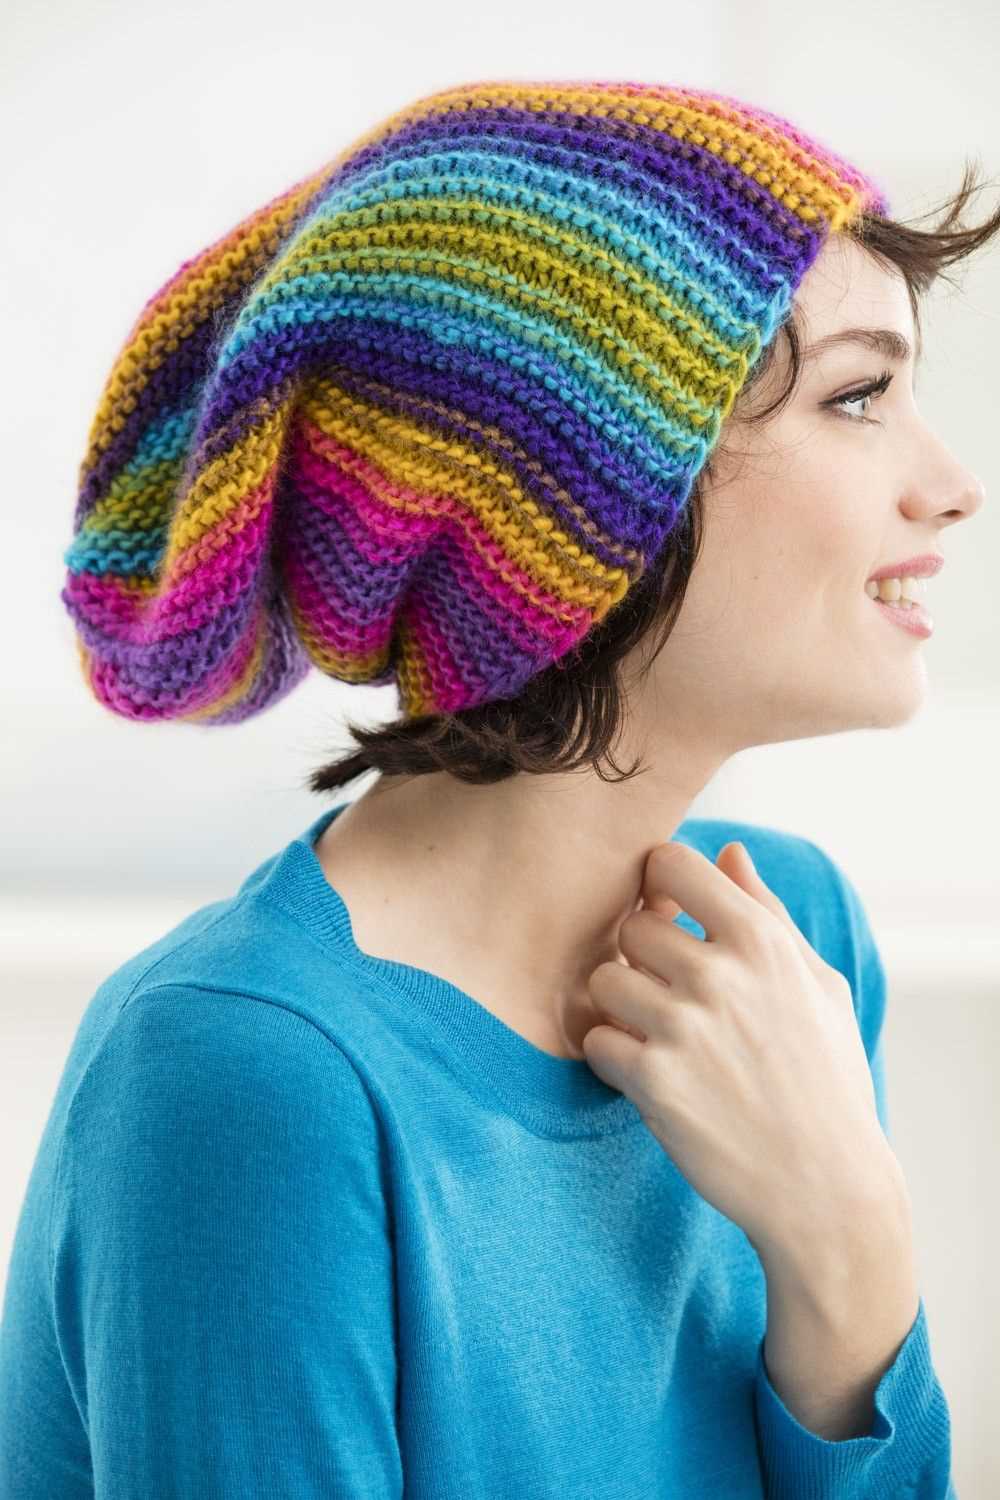
The baggy hat knitting pattern is a versatile design that can be customized to fit your personal style. You can experiment with different colors, textures, and stitch patterns to create a hat that is truly unique. Whether you prefer a simple and classic look or want to add some fun and funky details, this pattern has endless possibilities.
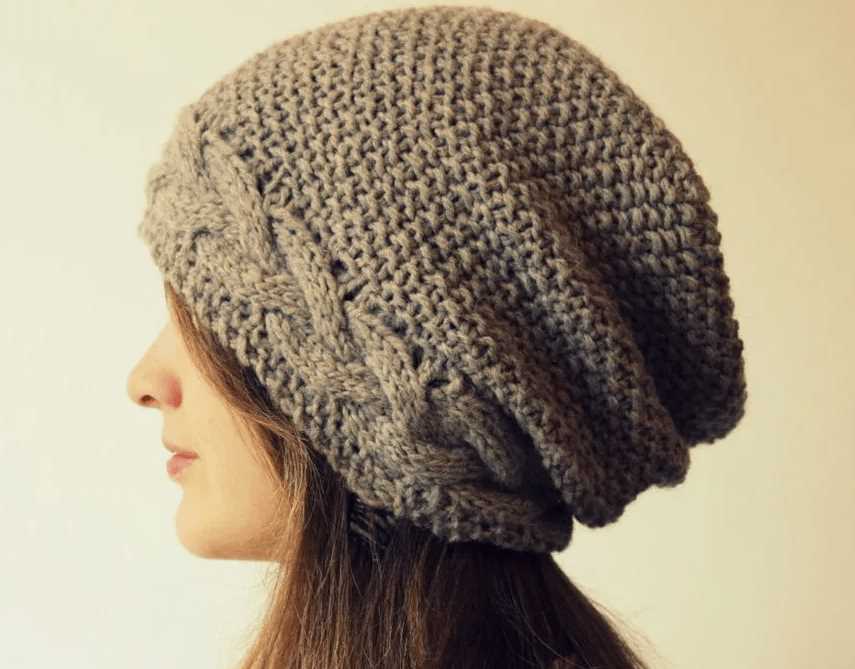
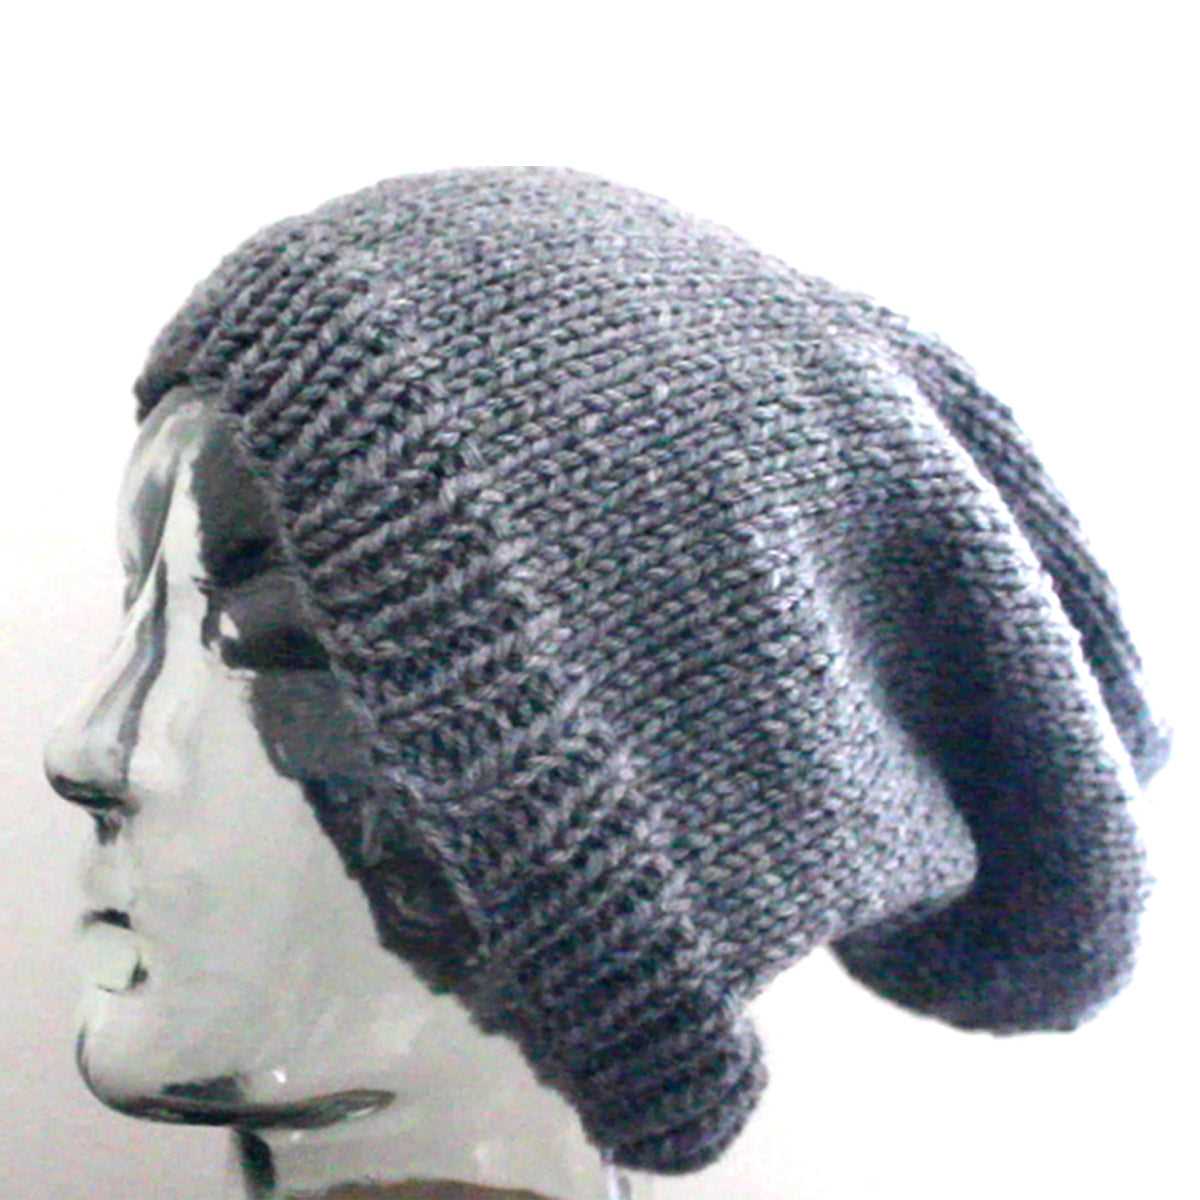
One of the reasons why the baggy hat knitting pattern is so popular is its relaxed and slouchy fit. It is designed to be slightly oversized, giving it a casual and effortless look. This makes it a great accessory for those days when you want to feel cozy and comfortable while still looking stylish. Plus, the baggy fit allows you to tuck your hair inside the hat, making it a great option for those bad hair days.
So, if you’re ready to get started on your next knitting project, give the baggy hat knitting pattern a try. Not only will you enjoy the process of creating something beautiful with your own hands, but you will also have a versatile and stylish accessory that will keep you warm all winter long.
Baggy Hat Knitting Pattern: A Step-by-Step Guide
Knitting a baggy hat can be a fun and rewarding project for both experienced knitters and beginners. With a simple pattern and basic knitting techniques, you can create a stylish and cozy hat to wear during the colder months. In this step-by-step guide, we will walk you through the process of knitting a baggy hat from start to finish.
Materials Needed:
- Size 8 (5mm) knitting needles
- Worsted weight yarn (about 200-250 yards)
- Tapestry needle
- Scissors
Step 1: Casting On
Start by casting on 80 stitches using the long-tail cast-on method. This will create the brim of the hat. Make sure to leave a long tail for later seaming.
Step 2: Ribbing
Once you have cast on, begin knitting in a 1×1 rib stitch. This means alternating between knit stitches and purl stitches. Repeat this pattern for the first 2 inches of the hat, or until you reach your desired brim length.
Step 3: Body of the Hat
After completing the ribbing, switch to knitting in a stockinette stitch for the body of the hat. Continue knitting every stitch for the next 4 inches, or until the hat reaches your desired length.
Step 4: Decreasing
To shape the crown of the hat, you will need to start decreasing stitches. Switch to knitting two stitches together at regular intervals. For example, knit 6, knit 2 together, repeat this pattern until the end of the row. Reduce the number of stitches by about 8-10% with each decrease row.
Step 5: Finishing
Once you have decreased enough stitches to close the top of the hat, cut the yarn, leaving a long tail. Thread the tail through a tapestry needle and slide it through the remaining stitches, removing them from the knitting needle. Pull the tail tight to close the top of the hat and secure it with a knot. Weave in any loose ends with the tapestry needle.
And there you have it! You now have a completed baggy hat that is ready to be worn or gifted. With this simple step-by-step guide, you can easily create more baggy hats in different colors and styles to suit your preferences or give as handmade gifts.
Choosing the Perfect Yarn
When it comes to knitting a baggy hat, choosing the perfect yarn is crucial. The yarn you select will not only determine how the finished hat looks, but also how it feels and holds its shape over time. There are several factors to consider when choosing yarn for your baggy hat project.
Fiber Content: The first consideration is the fiber content of the yarn. Different fibers have different characteristics, so it’s important to choose one that will work well for a baggy hat. Wool is a popular choice for hats as it is warm, breathable, and has good elasticity. Acrylic yarns are another option, as they are often soft and easy to care for, but may not provide the same level of warmth as wool. Other options include blends of natural and synthetic fibers, such as wool and acrylic blends, which can offer the best of both worlds.
Weight: Another important factor to consider is the weight of the yarn. The weight of the yarn will determine how thick or thin the fabric of your hat will be. For a baggy hat, you’ll likely want to choose a yarn that is on the heavier side, such as worsted weight or bulky weight. These yarns will create a thicker fabric that will help keep your head warm and add to the slouchiness of the hat. However, if you prefer a lighter, more breathable hat, you could also consider using a lighter weight yarn, such as sport or DK weight.
Texture and Color: The texture and color of the yarn are also important considerations. Some knitters prefer a smooth, solid-colored yarn for their baggy hat, while others may opt for a yarn with more texture, such as a tweed or a yarn with subtle color variations. The texture and color can add visual interest to your hat and make it unique. It’s always a good idea to check how the yarn looks when knitted up in a sample swatch before committing to a whole hat.
Availability and Price: Finally, consider the availability and price of the yarn. Some yarns may be more readily available in your local yarn store or online, while others may be more difficult to find. Additionally, certain yarns may be more expensive than others. Take into account your budget and convenience when choosing the perfect yarn for your baggy hat.
Selecting the Right Knitting Needles
When it comes to knitting, selecting the right knitting needles is crucial for the success of your project. The needles you choose can greatly impact the look and feel of your finished piece, as well as your overall knitting experience. Here are some key factors to consider when selecting your knitting needles.
Material:
The material of the knitting needles can make a significant difference in how your knitting feels and behaves. Common options include wood, bamboo, metal, and plastic. Wood and bamboo needles are known for their warmth and natural feel, making them a popular choice for those who prefer a traditional knitting experience. Metal needles, on the other hand, are slick and smooth, making them great for working with slippery yarns and creating speedy stitches. Plastic needles are lightweight and affordable, making them a good option for beginners or those on a budget.
Size:
The size of your knitting needles is determined by their width, which is measured in millimeters or US sizes. The size you choose will depend on the thickness of your yarn and the desired tension of your project. Thicker yarns generally require larger needles, while thinner yarns require smaller needles. It’s important to select the right size in order to achieve the correct gauge and ensure that your finished item turns out as intended.
Length:
The length of your knitting needles can also affect your knitting experience. Longer needles are typically used for larger projects, such as blankets or shawls, as they can accommodate a larger number of stitches. Shorter needles, on the other hand, are often used for smaller projects like hats or socks, as they make it easier to work in the round. Consider the size and type of project you’re working on when choosing the length of your needles.
In conclusion, selecting the right knitting needles involves considering factors such as the material, size, and length. By choosing the needles that best suit your project and personal preferences, you’ll be able to enjoy a comfortable and enjoyable knitting experience while creating beautiful and professional-looking pieces.
Understanding Knitting Gauge

Knitting gauge is an important aspect of any knitting project. It refers to the number of stitches and rows per inch or centimeter achieved with a particular yarn and needle size. Understanding knitting gauge is crucial for ensuring that a finished project turns out the right size and shape.
Measuring Gauge
To measure knitting gauge, knitters typically create a swatch, which is a small sample of knitting worked with the same yarn and needle size as the final project. The swatch is then measured to determine the number of stitches and rows per inch or centimeter. This measurement can vary depending on factors like yarn tension, needle size, and individual knitting style.
Importance of Gauge
Knitting gauge is important because it determines the size and fit of a finished project. If the gauge is too loose, the fabric will be too large, and the finished item may be too big. Conversely, if the gauge is too tight, the fabric will be too small, and the finished item may be too small. Achieving the correct gauge ensures that the finished project matches the intended measurements.
Using Gauge to Adjust
If a knitter’s gauge does not match the gauge specified in a pattern, adjustments can be made. To make a project larger, a knitter can use larger needles or heavier weight yarn. To make a project smaller, a knitter can use smaller needles or lighter weight yarn. Additionally, adjusting tension can also impact gauge. It is essential to create a swatch and make any necessary adjustments before starting a project to ensure accurate sizing.
Troubleshooting Gauge Issues
If a knitter is consistently having trouble with gauge, there are a few troubleshooting techniques that can be helpful. These include experimenting with different needle sizes, practicing different knitting techniques and tension, and consulting knitting resources or seeking advice from more experienced knitters. With practice and patience, knitters can become more confident in achieving the correct gauge for their projects.
Casting On: Getting Started with Your Baggy Hat
Before you begin knitting your baggy hat, it’s important to start off with the casting on process. Casting on is the first step in any knitting project, and it creates the foundation row of stitches that will be worked into throughout the project. In this guide, we will take you through the steps of casting on for your baggy hat.
Step 1: Choosing the Right Yarn and Needles
The first thing you need to do is choose the right yarn and needles for your baggy hat. The pattern will typically specify the recommended yarn weight and needle size. Make sure to follow these recommendations to achieve the desired size and drape for your hat. It’s also important to consider the fiber content of the yarn to ensure the hat is comfortable to wear.
Step 2: Making a Slip Knot
The next step is to create a slip knot, which will serve as the first stitch on your needles. To make a slip knot, leave a long tail of yarn and form a loop with the yarn end crossing over the tail. Insert your needle through the loop, tighten the knot, and slide it onto the needle. Adjust the size of the loop if needed.
Step 3: Casting On Stitches
Now that you have your slip knot, it’s time to cast on stitches. Hold the needle with the slip knot in your right hand and the working yarn in your left hand. Insert the needle into the slip knot from front to back, making sure it goes under the working yarn. With your left hand, wrap the working yarn around the needle in a counter-clockwise direction.
Step 4: Continue Casting On
Repeat step 3 for the desired number of stitches. To keep the tension consistent, try to wrap the yarn around the needle in the same manner each time. Depending on your pattern, the number of cast on stitches may vary. Make sure to double-check the instructions to ensure you have the correct stitch count.
Step 5: Ensuring a Loose Cast On
For a baggy hat, it’s essential to have a loose cast on to allow for the desired slouchiness in the finished hat. You can achieve a looser cast on by using larger needles or by simply not pulling the yarn too tight when wrapping it around the needle. Be mindful of maintaining an even tension throughout the entire casting on process.
Once you have completed the casting on process, you are ready to start knitting the body of your baggy hat. Take your time with the casting on, as it sets the foundation for your entire project. With these steps and a bit of practice, you’ll be well on your way to creating a stylish and cozy baggy hat.
Knitting the Body of the Hat

Once you have completed the ribbing section, it is time to move on to knitting the body of the hat. Start by switching to your main color yarn and continue in the round.
Using a circular needle, knit every stitch in each round until the hat measures approximately 8 inches from the cast on edge, or your desired length. This will create the slouchy, baggy look of the hat. Feel free to adjust the length to your preference.
To add some texture or pattern to the body of the hat, you can incorporate different stitch patterns such as ribbing, cables, or eyelet patterns. This will give your hat a unique and personalized touch. You can also experiment with different colors or gradient yarns to create interesting color variations.
As you knit the body of the hat, make sure to periodically try it on to check the fit and length. This will help you determine if you need to make any adjustments or if you are on track to achieve the desired size.
Continue knitting in the round until you reach your desired length for the body of the hat. Once you are satisfied, it’s time to move on to shaping the crown of the hat.
Creating the Ribbed Brim
Once you have cast on the desired number of stitches for your baggy hat, it’s time to create the ribbed brim. The ribbed brim will give your hat a snug and comfortable fit, as well as add a touch of style to your finished project.
To begin, you will need to choose a rib stitch pattern that you would like to use for your hat’s brim. The most common rib stitch patterns include the 1×1 rib, which alternates between knit and purl stitches, and the 2×2 rib, which alternates between two knit stitches and two purl stitches. You can also experiment with other rib stitch patterns to create different textures and designs.
Step 1: Establishing the Rib Stitch Pattern
Start by knitting the first few rows of your chosen rib stitch pattern. For example, if you are using the 1×1 rib pattern, you will knit one stitch, then purl one stitch, and repeat this sequence across the row. This will establish the ribbed texture of the brim.
Continue knitting the rib stitch pattern for the desired length of your brim. Typically, a brim that measures around 2-3 inches will provide a good fit. However, you can adjust the length according to your personal preference and the thickness of your yarn.
Step 2: Finishing the Ribbed Brim
Once you have reached the desired length for your ribbed brim, you can finish it off by binding off the stitches. To do this, simply knit the first two stitches of the row, then pass the first stitch over the second stitch and off the needle. Continue this process across the row until you have bound off all stitches.
After binding off, you can weave in any loose ends of yarn to give your hat a neat and finished appearance. With the ribbed brim completed, you are now ready to move on to the next section of your baggy hat knitting pattern.
Shaping the Crown: Decrease Rounds
Once you have reached the desired length for your baggy hat, it’s time to start shaping the crown. This is where you will gradually decrease the number of stitches to create a rounded top. The decrease rounds are an essential part of the knitting pattern, as they determine the final shape and size of your hat.
To begin the decrease rounds, you will first need to divide your stitches evenly onto double-pointed needles or a circular needle. This will make it easier to work the decrease stitches and maintain the correct tension. Once your stitches are divided, you can start the decrease rounds.
The most common decrease stitch used in baggy hat patterns is the knit two together (k2tog). This stitch involves knitting two stitches together as if they were one, effectively decreasing the stitch count by one. You will need to perform the k2tog stitch at regular intervals, following the specific instructions provided in the knitting pattern.
As you work the decrease rounds, you will notice that the crown of your hat begins to take shape. It’s important to follow the pattern instructions carefully to ensure an even and symmetrical decrease. Depending on the pattern, you may need to work multiple decrease rounds until only a few stitches remain.
Once you have completed the decrease rounds, you will have a small number of stitches left on your needles. These stitches can be gathered and secured using a yarn needle, or you can transfer them to a double-pointed needle and cinch them closed. This will create a neat and tidy finish for the top of your baggy hat.
- Divide your stitches onto needles
- Perform the knit two together (k2tog) stitch at regular intervals
- Follow pattern instructions for even and symmetrical decrease
- Complete the decrease rounds until only a few stitches remain
- Gather and secure remaining stitches for a neat finish
Finishing Touches: Binding Off
After completing your baggy hat knitting pattern, the final step is to bind off the stitches to secure the edges and finish off the hat. Binding off, also known as casting off, is an essential technique in knitting that creates a neat and finished edge.
To bind off, start by knitting the first two stitches as usual. Then, insert the left needle into the first stitch on the right needle, lift it over the second stitch, and let it slip off the right needle. You now have one stitch bound off. Repeat this process for the remaining stitches, always knitting the first stitch and lifting it over the second stitch to bind off.
Once you have bound off all the stitches, cut the yarn, leaving a tail of about 6 inches. Thread the tail through the last stitch, pulling it tight to secure the end. This will ensure that your hat does not unravel. You can also weave in the loose ends using a yarn needle to further secure the edges.
When binding off, make sure not to pull the stitches too tightly, as this can create a tight and inflexible edge. It’s important to maintain an even tension throughout the process to achieve a smooth and comfortable finish. Practice binding off on a scrap piece of knitting before attempting it on your hat to ensure you’re comfortable with the technique.
With the binding off complete, your baggy hat is now finished and ready to be worn or gifted. Admire your handiwork and enjoy the warmth and style of your cozy knitted creation!
Seaming the Hat
Once you have finished knitting your baggy hat, it’s time to seam it together. Seaming is the process of joining the edges of your knitted pieces to create a finished item. For the baggy hat, you will need to seam the back seam and the top seam.
To seam the back seam, fold the hat in half lengthwise, with the wrong sides facing each other. Thread a tapestry needle with the same yarn you used to knit the hat. Insert the needle through the first stitch on one side, and then through the corresponding stitch on the other side. Continue stitching in this manner, going back and forth across the seam until you reach the end. Pull the yarn tight to secure the seam, and weave in any loose ends.
For the top seam, you will need to gather the stitches at the top of the hat. Thread a tapestry needle with a contrasting yarn color, and insert it through the first stitch at the top. Continue to go in and out of each stitch, creating a running stitch. Once you have gone through all the stitches, pull the yarn tight to gather the stitches together. Secure the yarn with a knot, and weave in any loose ends.
The seaming process may seem intimidating at first, but with practice, it becomes easier. Take your time and make sure to line up the stitches as evenly as possible. Once your hat is seamed together, you can add any finishing touches, such as a pom-pom or a decorative edging. Enjoy wearing your handmade baggy hat!
Adding Embellishments: Pom-Poms, Buttons, and More
Once you have finished knitting your baggy hat, you can add embellishments to personalize and enhance its appearance. There are many different options for adding decorative elements to your hat, such as pom-poms, buttons, and more.
Pom-Poms: Pom-poms are a popular choice for adding a playful and fun touch to your hat. You can make pom-poms using yarn in a contrasting color or even use faux fur pom-poms for a luxurious look. Attach the pom-poms to the top of your hat by sewing them securely in place.
Buttons: Buttons can add a touch of elegance or charm to your hat. Choose buttons in a color that complements your hat or opt for decorative buttons with unique designs. Sew the buttons onto the brim or side of your hat to create a focal point.
Embroidery: Embroidery can be used to add intricate designs or patterns to your hat. You can choose to embroider flowers, animals, or any other design that you like. Use embroidery thread in a contrasting color to create a striking effect.
Ribbons: Ribbons can be used to add a feminine and delicate touch to your hat. Choose a ribbon in a color and material that complements your hat. You can tie the ribbon around the base of your hat or create a bow on one side for a whimsical look.
Charms: Charms are small decorative items that can be attached to your hat using a jump ring or sewing them in place. Charms can be in the shape of stars, hearts, or any other design that you like. They add a touch of whimsy and can be a great conversation starter.
Sequins: Sequins can add a touch of glamour and sparkle to your hat. You can sew sequins onto your hat in a random pattern or create a specific design. Choose sequins in a color that complements your hat for a cohesive look.
Bows: Bows are a classic embellishment choice for hats. You can create a bow out of the same yarn as your hat or choose a contrasting color for a pop of color. Sew the bow onto the brim or side of your hat to add a feminine and stylish touch.
Feathers: Feathers can add a bohemian and unique touch to your hat. Choose feathers in colors and sizes that complement your hat. Attach them securely to the brim or side of your hat using hot glue or stitching for a whimsical and eye-catching look.
Tips and Tricks for a Beautiful Baggy Hat
Knitting a baggy hat can be a fun and rewarding project. With the right techniques and some helpful tips, you can create a beautiful hat that is both stylish and cozy. Here are some tips and tricks to help you achieve the best results.
1. Choose the Right Yarn
When knitting a baggy hat, it’s important to choose a yarn that has good stitch definition and is soft and comfortable to wear. Look for a yarn that is medium weight and has a blend of natural fibers for the best results. Experiment with different yarns to find the one that works best for you.
2. Use the Right Needle Size
The needle size you use can have a big impact on the final look and feel of your hat. Opt for a larger needle size to create a looser and more relaxed hat, or a smaller needle size for a tighter and more snug fit. Remember to check the gauge and adjust your needle size accordingly.
3. Pay Attention to Tension
Tension is important when knitting a baggy hat. Make sure you are not knitting too tightly or too loosely, as this can affect the overall fit and appearance of the hat. Practice knitting with a relaxed grip and find the right tension that works for you.
4. Use Ribbing or a Folded Brim
Adding a ribbed or folded brim to your baggy hat can give it a professional and polished look. Ribbing creates elasticity and helps the hat stay in place, while a folded brim adds extra warmth and structure. Experiment with different ribbing patterns and brim styles to find the one that suits your hat best.
5. Add Embellishments
Personalize your baggy hat by adding embellishments such as pom-poms, buttons, or cables. These details can take your hat to the next level and make it truly unique. Be creative and have fun with adding your own personal touch to your hat.
6. Block Your Hat
After you have finished knitting your baggy hat, give it a good blocking to even out the stitches and improve its overall shape. Blocking can make a big difference in the final look and fit of your hat, so don’t skip this step. Follow the instructions for blocking that come with your yarn to ensure the best results.
By following these tips and tricks, you can create a beautiful baggy hat that you will be proud to wear or gift to someone special. Enjoy the process and happy knitting!