
As the summer comes to an end and the temperatures start to drop, it’s the perfect time to start knitting a cozy sweater for the autumn season. Knitting your own sweater allows you to customize the pattern, choose your favorite yarn, and create a garment that is unique to you.
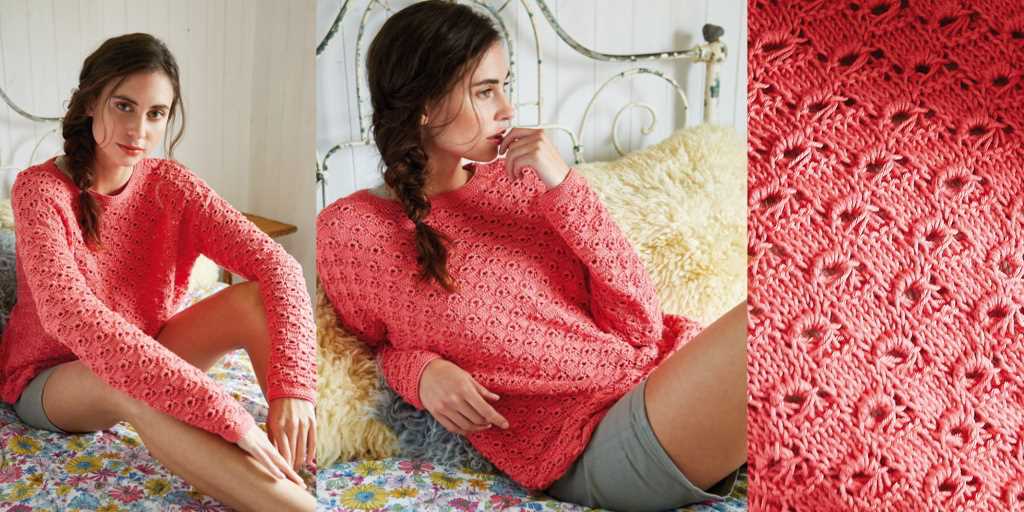
When it comes to choosing a pattern for your autumn sweater, there are endless options to choose from. Whether you prefer a chunky cable knit or a lightweight lace design, there is a pattern out there that will match your style and skill level. You can find patterns online, in knitting magazines, or even create your own using a basic sweater template.
Once you have chosen your pattern, it’s time to select the right yarn for your sweater. Consider the weight, fiber content, and color of the yarn to ensure that it will create the desired drape and warmth. For autumn sweaters, natural fibers like wool, alpaca, and cotton blends are popular choices, as they provide both comfort and breathability.
Knitting a sweater can be a time-consuming project, so it’s important to be patient and take your time. Follow the pattern instructions carefully, counting stitches and rows to ensure accuracy. Don’t be afraid to seek help if you encounter any difficulties along the way – there are plenty of knitting communities and resources available to offer guidance and support.
Autumn Sweater Knitting Pattern
Get ready for the cozy and stylish autumn season with this beautiful sweater knitting pattern. Whether you’re an experienced knitter or just starting out, this pattern is perfect for creating a stunning and warm sweater to keep you comfortable and fashionable.
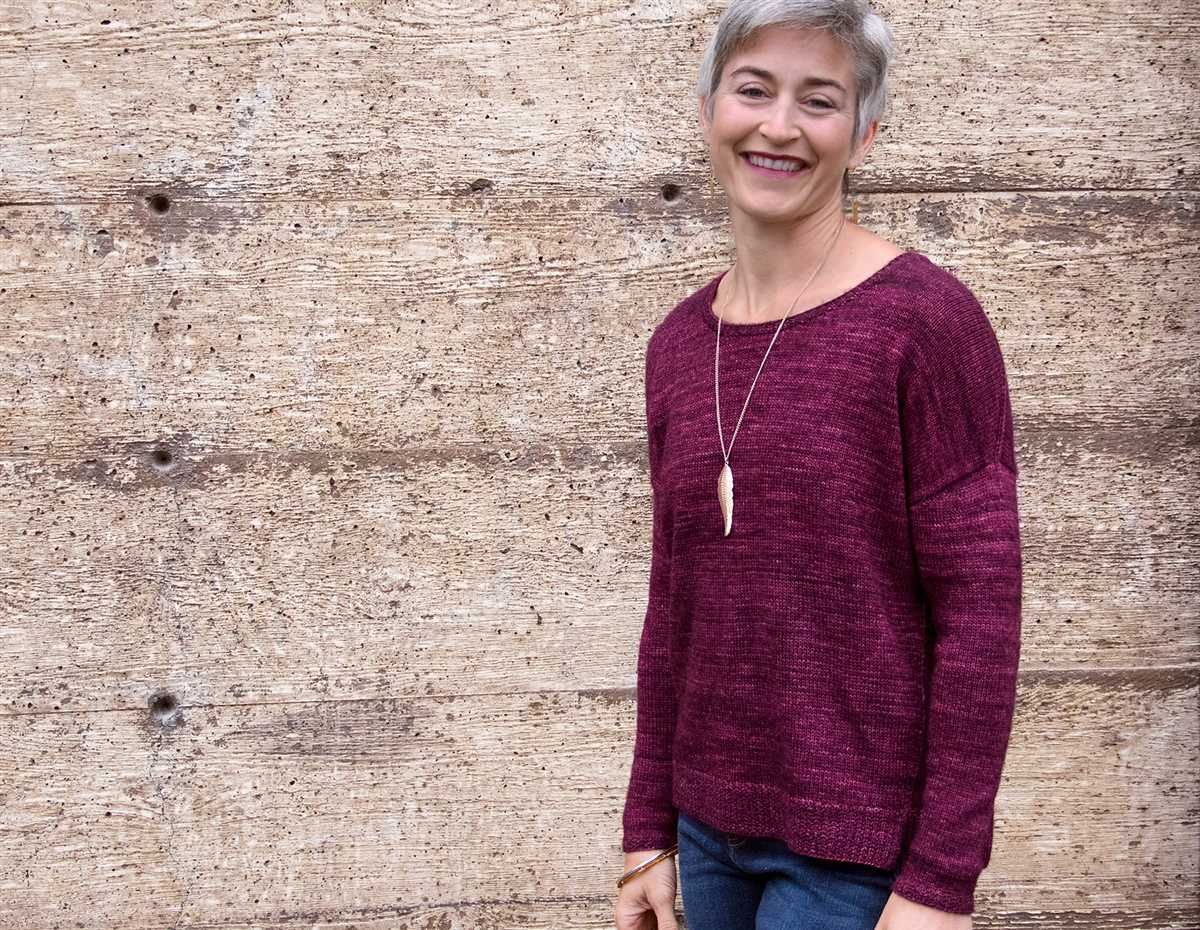
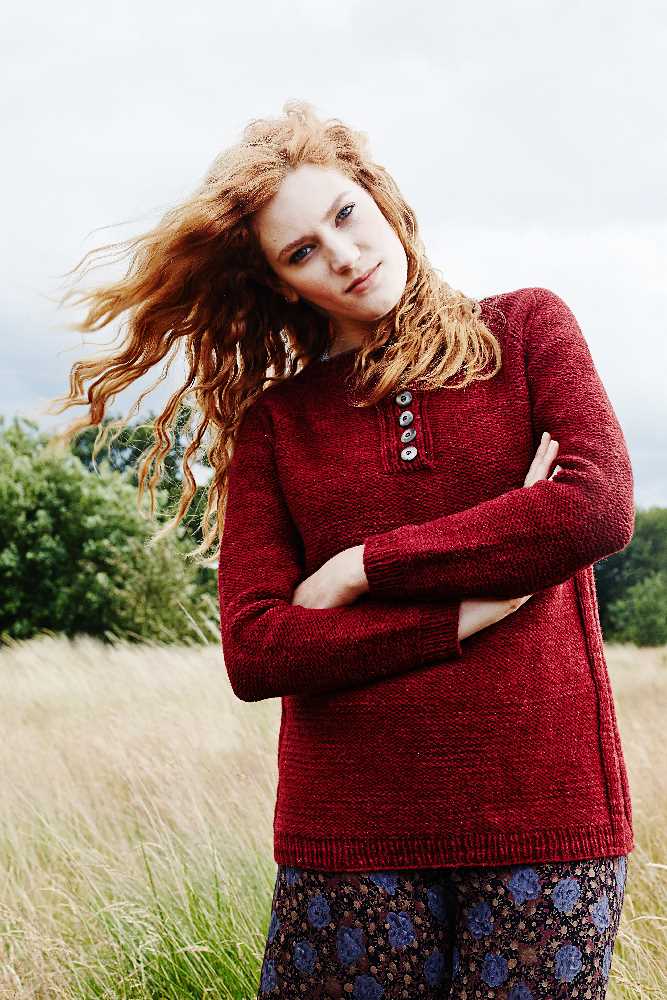
Start by selecting your favorite yarn in autumn-inspired colors such as deep reds, warm oranges, or rich browns. Opt for a soft and chunky yarn to add extra warmth and texture to your sweater. Once you have your yarn, you’ll need to choose the right knitting needles to create the desired stitch gauge and size.
Pattern:
- Begin by knitting the back panel of the sweater. Cast on the required number of stitches and work in your chosen stitch pattern.
- Next, move on to the front panels, following the same stitch pattern as the back.
- Once the front and back panels are complete, join them together at the shoulders using a simple seam.
- Now it’s time to knit the sleeves. Start by casting on the required number of stitches and work in your chosen stitch pattern. Increase or decrease stitches as necessary to shape the sleeve.
- After the sleeves are complete, join them to the body of the sweater, matching up the seams.
- To finish off your sweater, add a ribbed collar and cuffs. This will give your sweater a polished and professional look.
Once you’ve finished knitting all the pieces and sewing them together, don’t forget to block your sweater to ensure it maintains its shape and fits perfectly. Then, proudly wear your handmade autumn sweater and stay warm and stylish all season long!
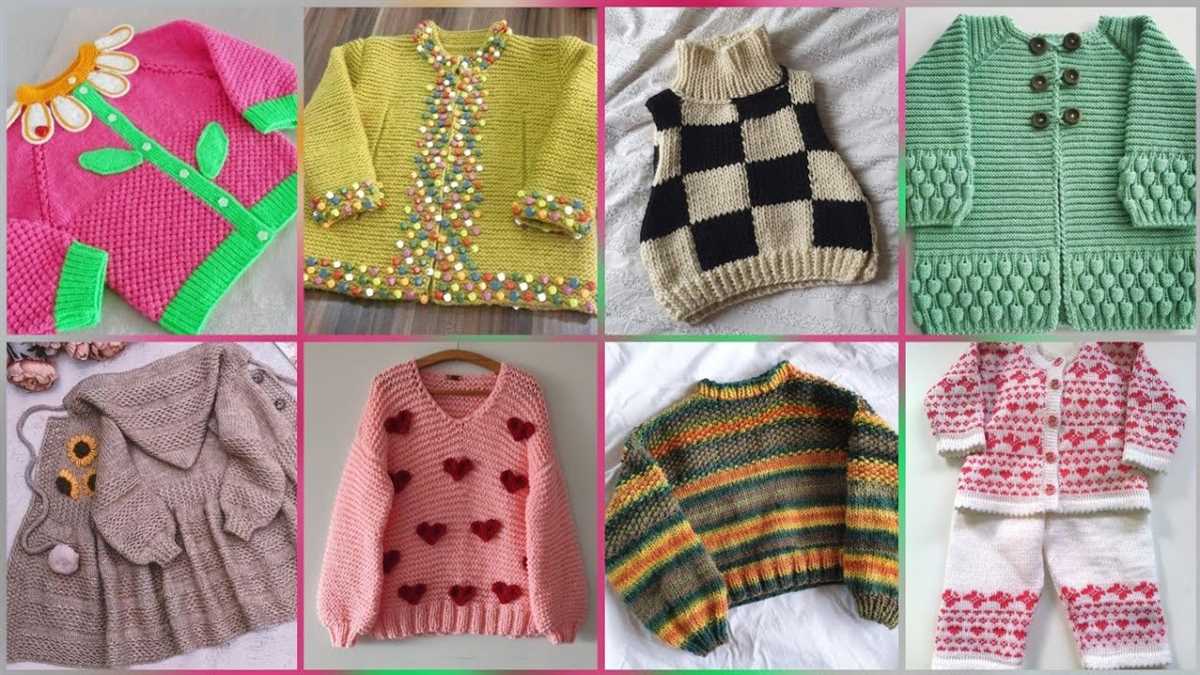
Choose Your Style
If you’re looking for the perfect autumn sweater knitting pattern, you’ve come to the right place. Whether you prefer a classic, timeless design or something more modern and trendy, there are plenty of options to choose from.
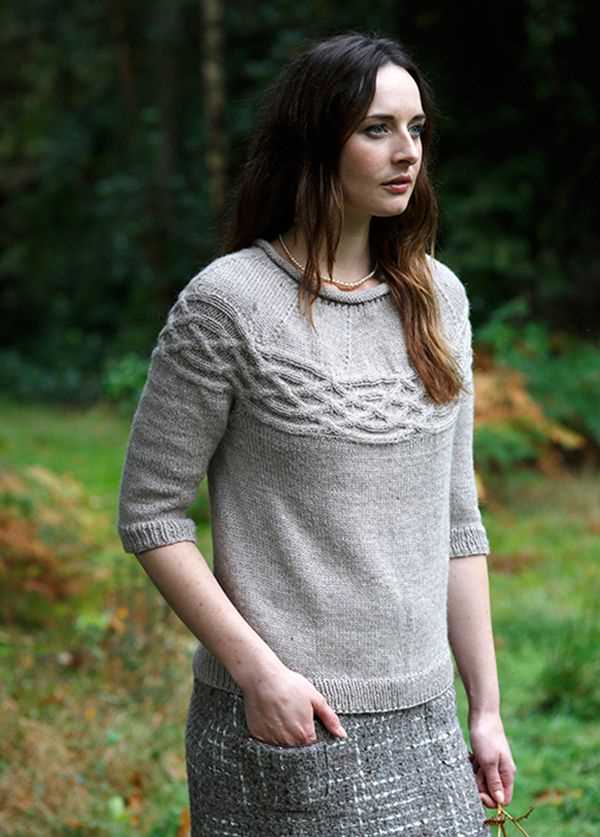
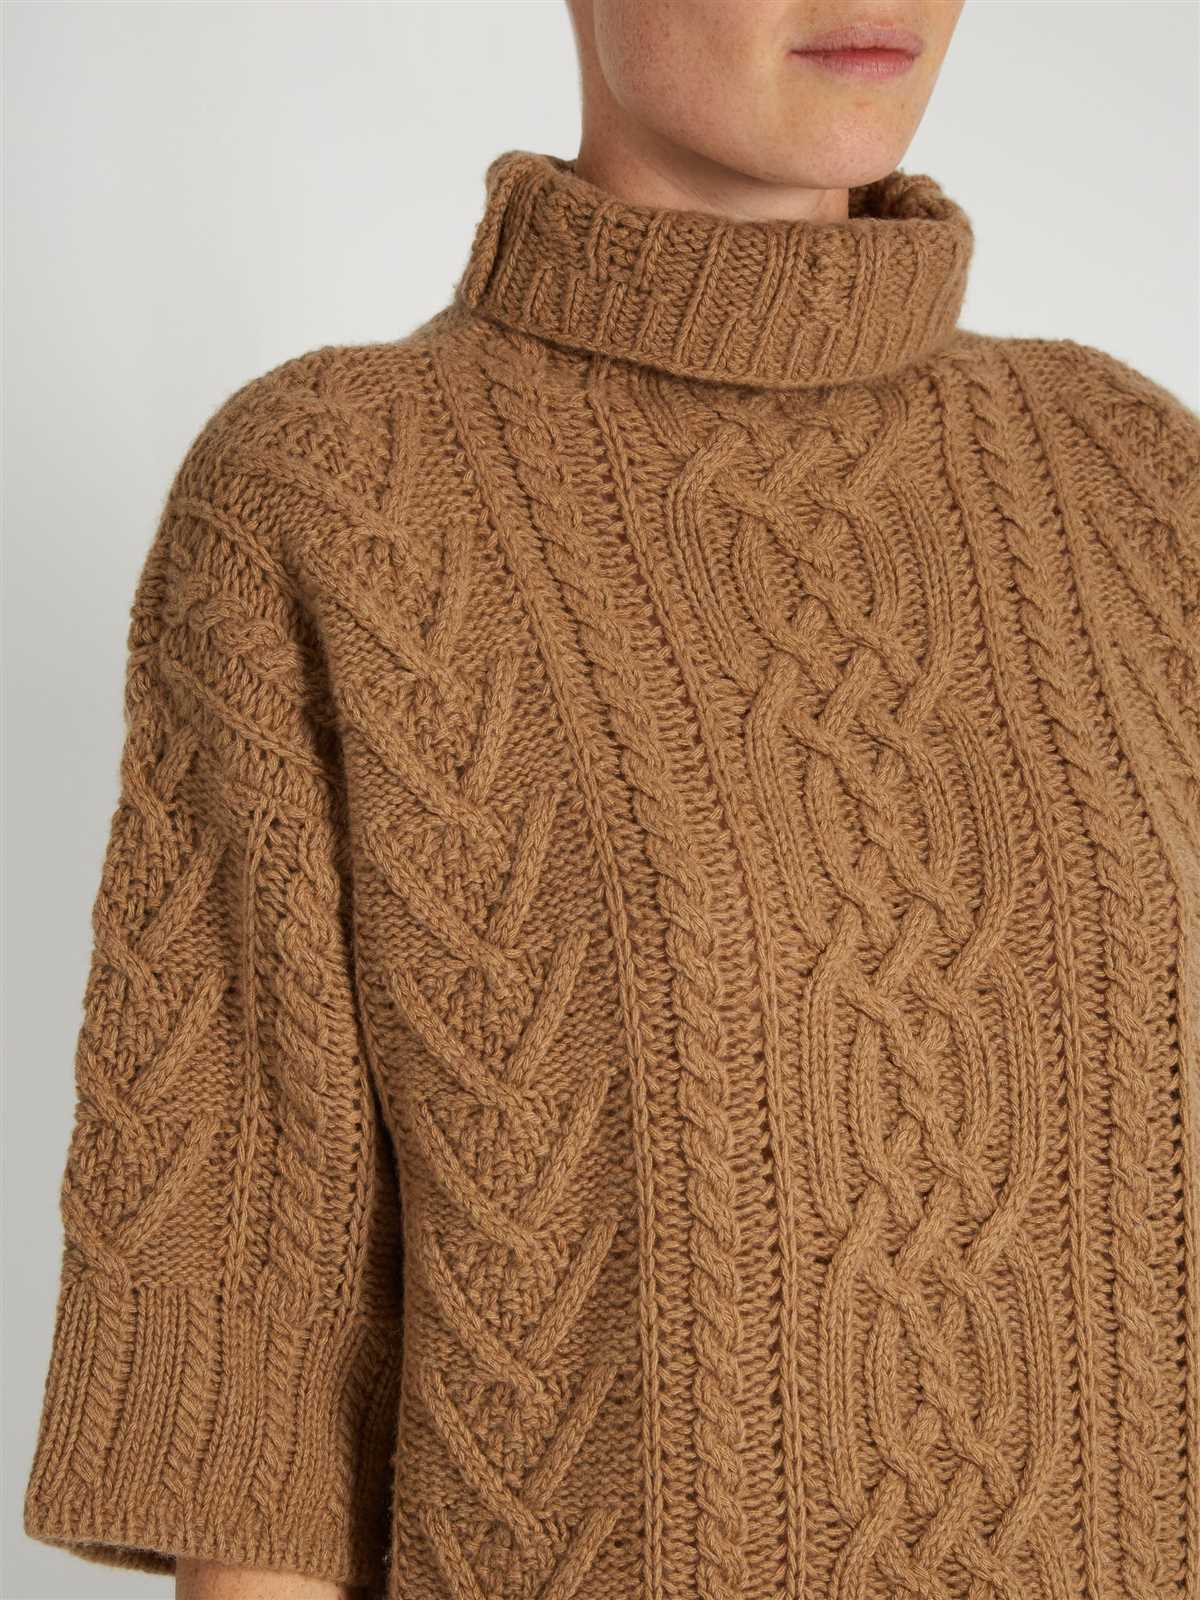
For those who love traditional styles, a cable knit sweater is a great option. With its intricate braided patterns, a cable knit sweater is not only visually appealing but also provides extra warmth and insulation. Pair it with your favorite jeans and boots for a cozy, yet stylish autumn look.
Classic Patterns
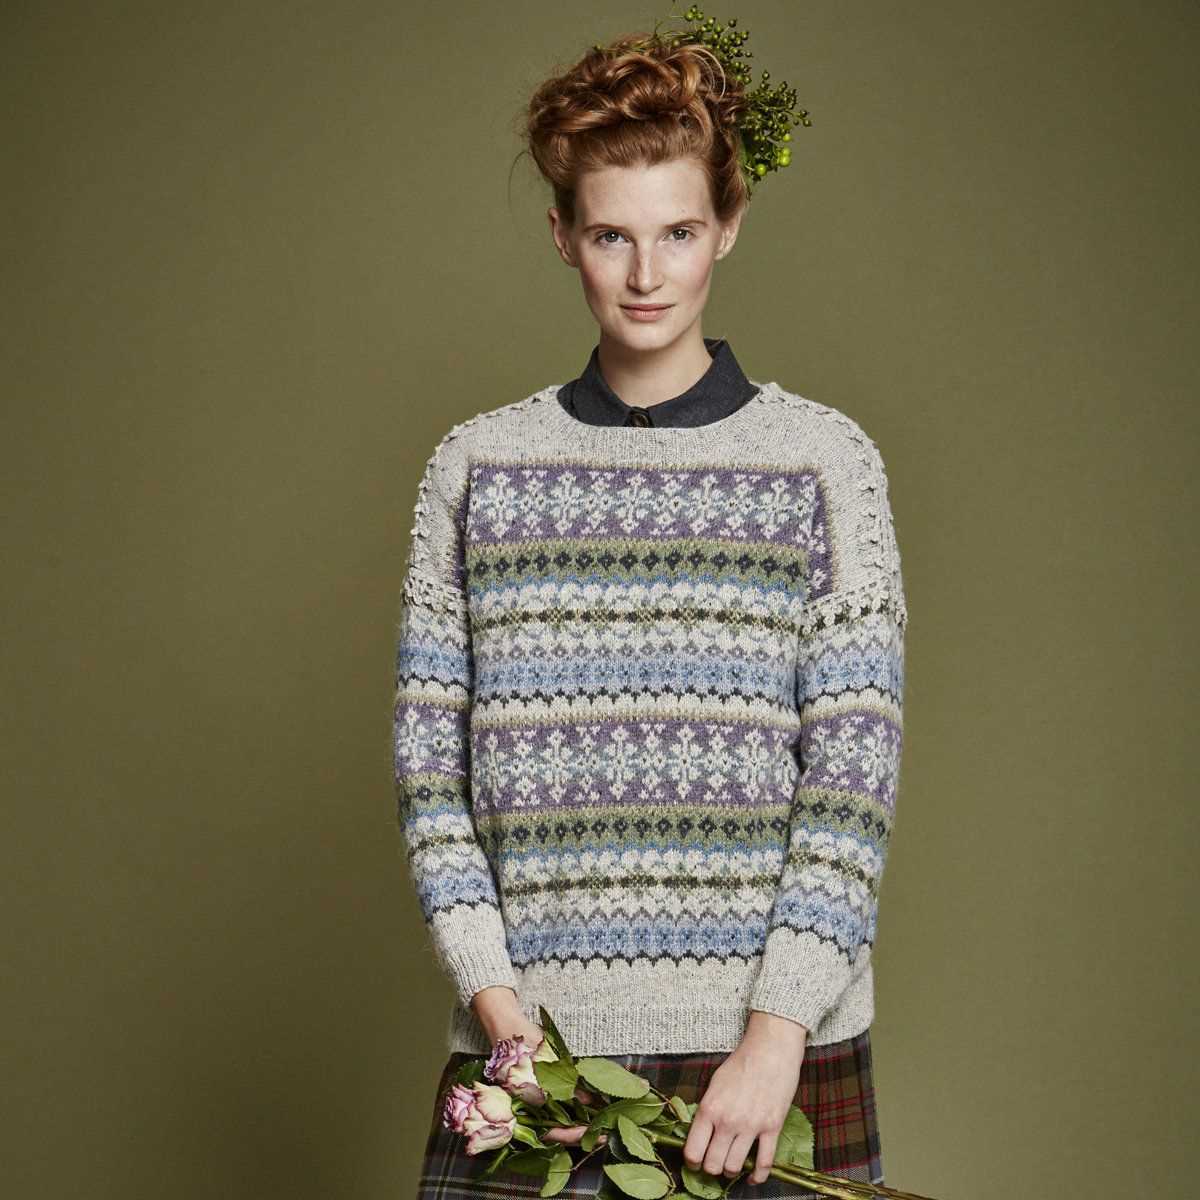
- The classic Fair Isle pattern is another timeless option for fall. With its colorful, geometric designs, a Fair Isle sweater adds a pop of color to any outfit. Wear it with a skirt and tights for a feminine touch or dress it down with leggings and ankle boots for a more casual look.
- If you’re a fan of simplicity, a basic ribbed sweater might be your go-to choice. The ribbed texture adds a subtle, elegant touch to any outfit, making it a versatile piece in your autumn wardrobe. Dress it up with a statement necklace or layer it with a scarf for added warmth.
Modern Trends
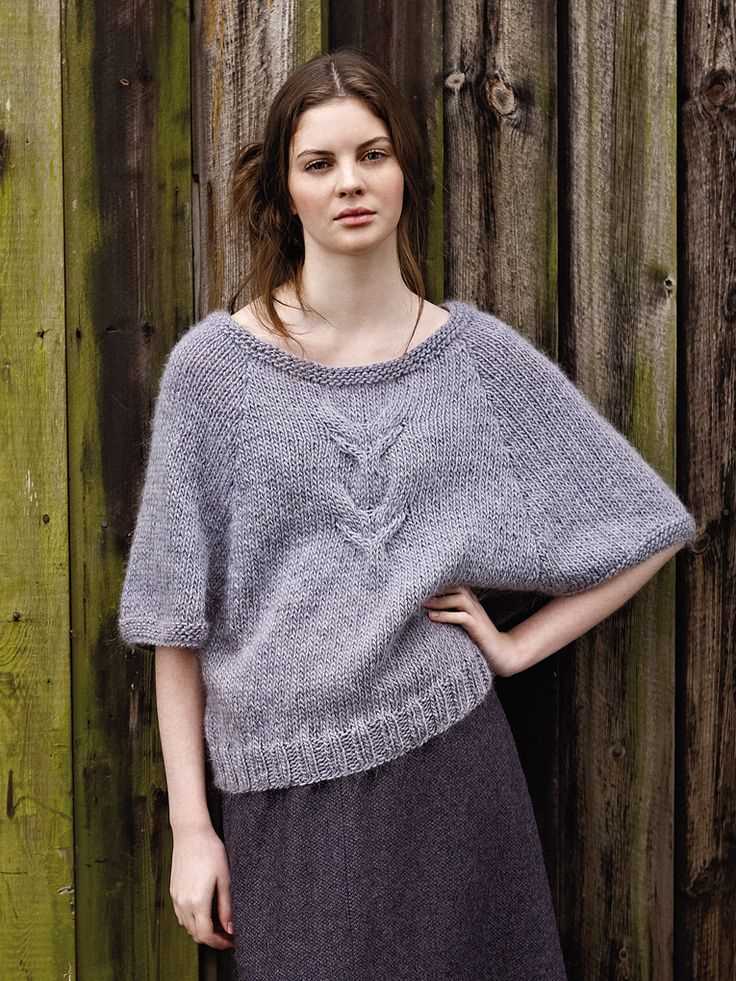
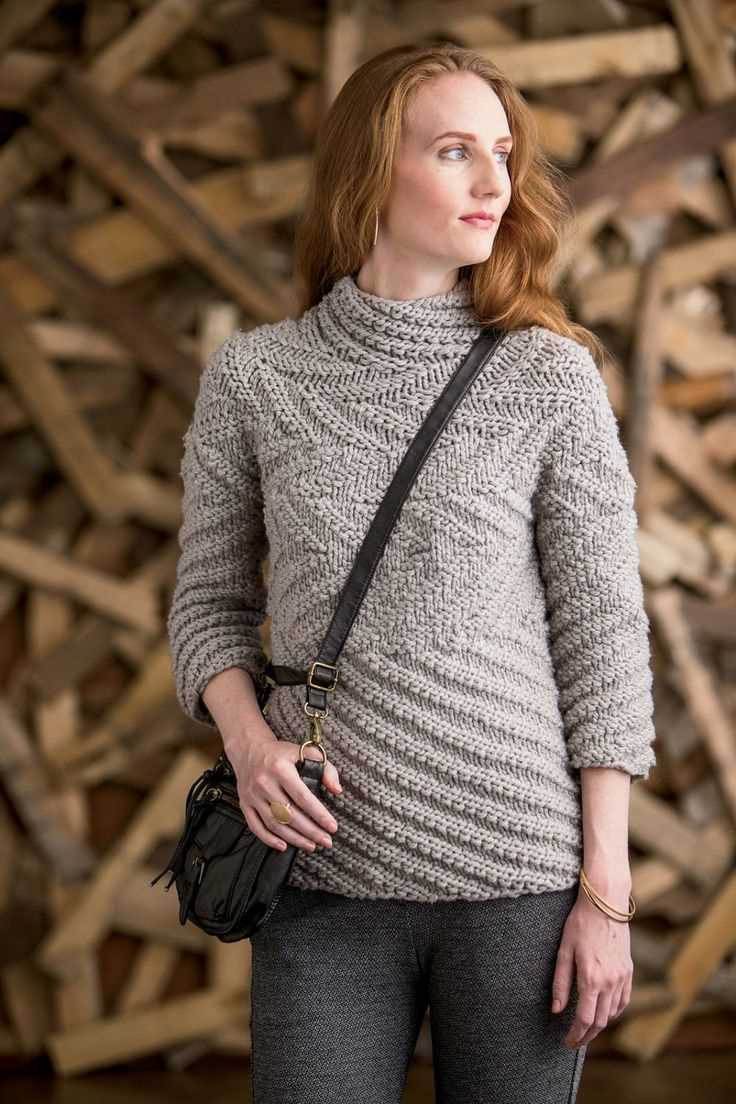
- If you’re looking to stay on-trend this season, consider a chunky oversized sweater. This cozy, slouchy style is perfect for layering over leggings or skinny jeans. Opt for neutral shades like gray or cream for a minimalist look, or go bold with vibrant colors for a statement piece.
- Cardigan sweaters are also having a moment this autumn. Whether you prefer a classic button-up cardigan or a more relaxed open-front style, a cardigan is a versatile addition to your wardrobe. Wear it over a dress for a preppy look or pair it with a t-shirt and jeans for a casual, everyday outfit.
No matter what style you choose, knitting your own autumn sweater allows you to add a personal touch to your wardrobe. Get creative with different colors, yarn weights, and stitch patterns to make your sweater truly unique. Happy knitting!
Select the Right Yarn
When it comes to knitting an autumn sweater, choosing the right yarn is crucial. The yarn you select will determine the look and feel of your garment, as well as its warmth and durability. To ensure that you make the best choice for your sweater, consider the following factors:
- Fiber Content: The fiber content of the yarn will affect the characteristics of your sweater. For a cozy and warm sweater, consider using wool or a blend of wool and other fibers. Wool has excellent insulating properties and will keep you comfortable during the colder months. If you prefer a softer and more lightweight sweater, opt for yarns made from cotton or bamboo.
- Weight: The weight of the yarn refers to its thickness. Choosing the right weight will help you achieve the desired drape and stitch definition for your sweater. Bulky or chunky weight yarns are great for creating cozy and thick sweaters, while fingering or sport weight yarns are more suitable for lightweight and delicate designs.
- Color and Texture: The color and texture of the yarn can greatly impact the overall look of your sweater. Consider the color palette that complements your skin tone and personal style. Additionally, think about the texture you want to achieve. Smooth and uniform yarns are perfect for showcasing intricate stitch patterns, while textured or variegated yarns can add visual interest to a simpler design.
- Care Instructions: It’s important to know how to properly care for your sweater, so take a look at the care instructions for the yarn you choose. Some yarns may require hand washing or dry cleaning, while others can be machine washed and dried. Consider your lifestyle and the amount of time you’re willing to invest in caring for your sweater when selecting the yarn.
By considering these factors and selecting the right yarn, you can ensure that your autumn sweater is not only beautiful but also comfortable and long-lasting. Take your time to explore different options and find the perfect yarn that will bring your knitting project to life.
Get the Right Tools
When it comes to knitting an autumn sweater, having the right tools is essential. To ensure that your knitting project turns out beautifully, invest in high-quality knitting needles. Look for needles made from durable materials such as bamboo or metal, as they will provide a smooth knitting experience. Additionally, make sure to choose the appropriate needle size for your chosen yarn weight.
Another important tool to consider is a set of stitch markers. These small, often colorful, rings are a great way to keep track of your knitting progress and mark important points in your pattern. Whether you’re working on shaping the sleeves or creating a complex stitch pattern, stitch markers will help you stay organized.
Additionally, having a good set of knitting stitch holders or cable needles can be invaluable for tackling more advanced knitting techniques. These tools allow you to securely hold stitches in place while you work on other parts of your project. Whether you’re working on cables or intricate lace patterns, stitch holders and cable needles will make the process much easier and ensure that your stitches are held safely in place.
Finally, don’t forget about a reliable pair of scissors or yarn cutter. While it may seem like a small detail, having a sharp pair of scissors or a handy yarn cutter will make a world of difference when it comes to cutting and securing your yarn. Look for scissors or cutters that are specifically designed for yarn, as they will have a sharp edge that can easily glide through your knitting without damaging the fibers.
- To summarize, here are some essential tools for knitting an autumn sweater:
- – High-quality knitting needles
- – Stitch markers
- – Knitting stitch holders or cable needles
- – Scissors or yarn cutter
Investing in these tools will not only enhance your knitting experience but also ensure that your autumn sweater turns out beautifully. So before you cast on your first stitch, make sure you have the right tools on hand.
Cast On and Create the Ribbing
Before you begin knitting your autumn sweater, you need to cast on and create the ribbing at the bottom of the sweater. The ribbing adds elasticity to your sweater and helps it stay in shape. It is usually created using a smaller needle size than the rest of the sweater to create a tighter fabric.
To cast on, you can use any method that you prefer. One popular method is the long-tail cast on, which creates a neat and stretchy edge. Make sure to leave a long tail when casting on, as you will need this later to sew the ribbing together.
Once you have cast on, it’s time to create the ribbing. The ribbing pattern is usually a combination of knit and purl stitches, which creates the alternating textured effect. For example, you can start by knitting two stitches, followed by purling two stitches, and continue this pattern across the row. This creates a 2×2 ribbing.
It’s important to note that the number of stitches you cast on will determine the width of your ribbing. Make sure to follow the pattern instructions to achieve the desired width. Additionally, you may need to adjust your needle size to achieve the correct gauge for the ribbing.
Continue knitting the ribbing pattern for the specified number of rows or until you reach the desired length for your sweater. The ribbing can be as short or as long as you prefer, depending on the style of your sweater. Once you’re done with the ribbing, you can then move on to the main body of the sweater and start the next section of the knitting pattern.
Create the Body
Now that we have completed the neckline, it’s time to move on to creating the body of the autumn sweater. This is where your knitting skills will really shine as you establish the main structure of the garment.
To begin, refer to the pattern instructions for the desired size and yarn weight. Make sure you have the correct number of stitches on your needles, as specified in the pattern.
Knitting the Main Section:
Using your chosen stitch pattern, continue knitting in the round to create the body of the sweater. Remember to regularly check your gauge to ensure that your stitches and rows match the pattern’s measurements. This will ensure a proper fit once the sweater is complete.
If the pattern calls for any shaping or increases, such as waist shaping, follow the instructions provided. Pay close attention to the placement of the shaping and work it accordingly. This will help to achieve the desired fit and silhouette.
Length and Hem:
Continue knitting until you reach the desired length for the body of the sweater. This will vary depending on your personal preference and the style of the sweater. If the pattern includes specific measurements for the length, make sure to follow them.
Once you have reached the desired length, it’s time to work on the hem. Follow the pattern instructions for any ribbing or other finishing details. These will add a polished look to the bottom edge of the sweater. Make sure to bind off your stitches in the specified manner to create a clean and even edge.
With the body of your autumn sweater complete, you are now ready to move on to the next step in the pattern. Whether it’s sleeves, pockets, or any other design element, continue following the instructions to bring your sweater to life. Happy knitting!
Add Sleeves
Adding sleeves to your autumn sweater is an important step in completing your knitting project. Sleeves not only provide warmth but also give the sweater a more finished and polished look. Follow these steps to successfully add sleeves to your sweater:
1. Prepare the Sleeves: Before starting, make sure you have the correct measurements for your sleeves. Measure the circumference of your arm at the widest point and the length from your shoulder to your wrist. This will help you determine how many stitches to cast on and how long to knit the sleeves.
2. Cast On: Begin by casting on the required number of stitches for your sleeve. Use the same yarn and needles that you used for your sweater body to ensure consistency. You can use a different cast-on method, such as the long-tail cast-on or the cable cast-on, depending on your preference.
3. Knit the Sleeves: Once you have cast on the stitches, start knitting the sleeves in the desired pattern. You can continue with the same stitch pattern used for the sweater body or switch to a different pattern for a contrasting look. Follow the instructions for the pattern, making sure to knit the required number of rows and decrease or increase stitches as needed to shape the sleeve.
4. Attach the Sleeves: After you have completed knitting the sleeves, it’s time to attach them to the sweater body. Lay your sweater flat on a table or surface, with the right side facing up. Place the sleeves at the armholes, aligning the shoulder seams, and pin them in place. Use a tapestry needle and the same yarn to sew the sleeves to the sweater body, making sure to stitch securely and evenly.
5. Finishing Touches: Once the sleeves are attached, you can add any desired finishing touches, such as ribbing or cuffs. You can also block the sweater to give it a polished look and to help the stitches relax and settle. Finally, weave in any loose ends and trim excess yarn to complete your autumn sweater with sleeves.
Adding sleeves to your autumn sweater is a rewarding process that allows you to create a cozy and stylish garment. Follow these steps, and with some patience and skill, you’ll have a beautiful finished sweater to keep you warm throughout the season.
Knit the Neckline
When knitting an autumn sweater, one of the key elements to focus on is the neckline. The neckline not only adds style and visual interest to the sweater, but it also provides a comfortable fit for the wearer. There are several different neckline options to choose from, each with its own unique look and feel.
V-neck: One popular option for the neckline is the V-neck. This neckline is created by shaping the neckline into a V shape, which can be done through decreases on either side of the center stitch. The V-neck is a classic choice that adds a touch of sophistication to any sweater.
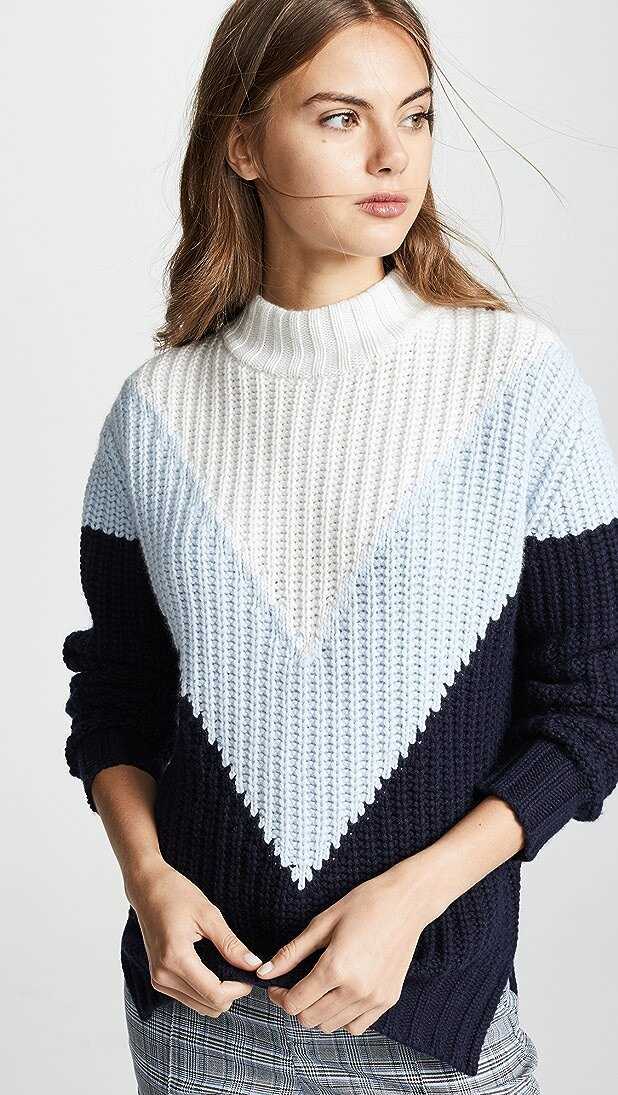
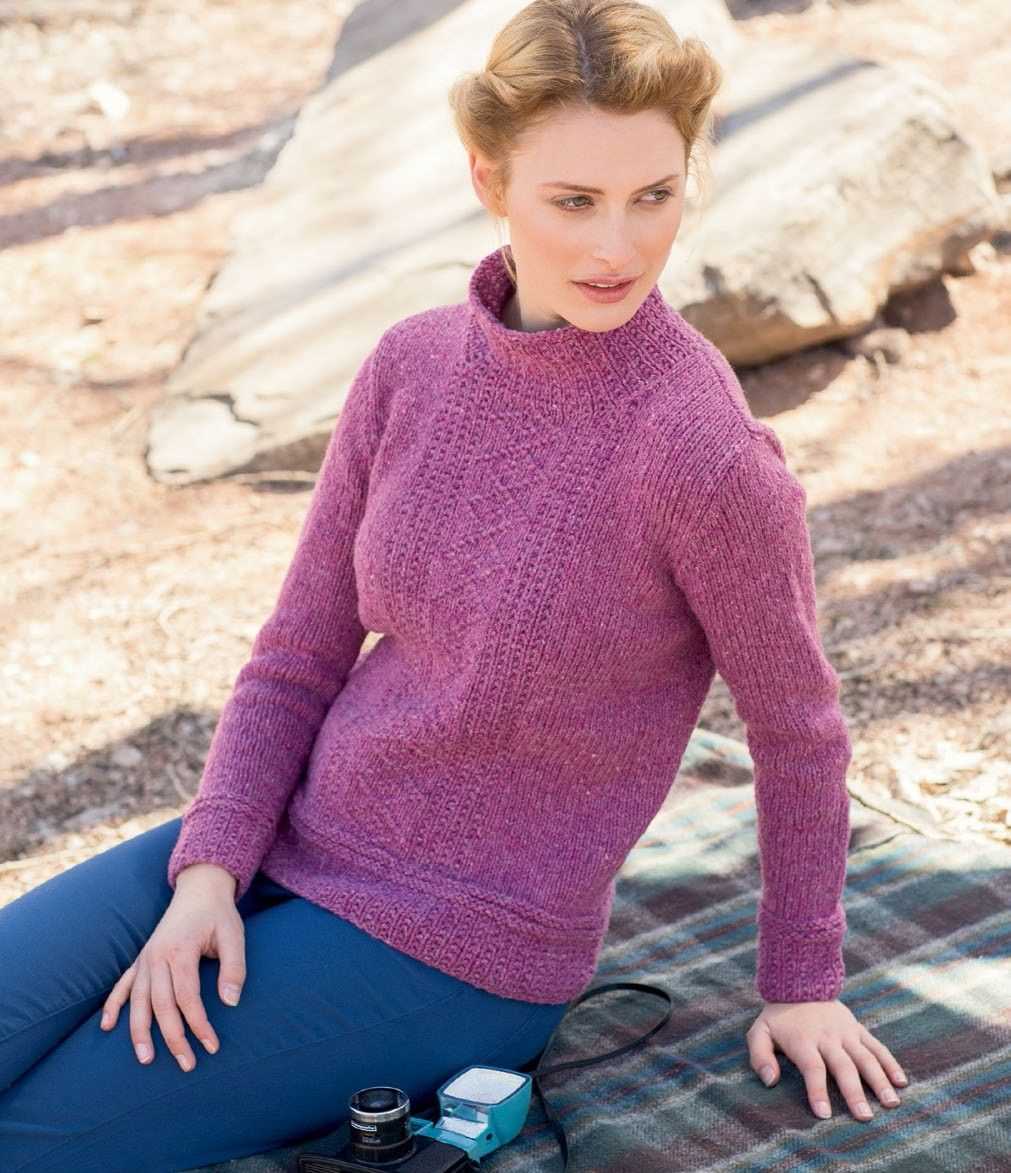
Crew neck: Another timeless neckline option is the crew neck. This neckline is characterized by a rounded shape that sits close to the base of the neck. The crew neck is versatile and suits a variety of body types. It is also relatively easy to knit, making it a great choice for beginners.
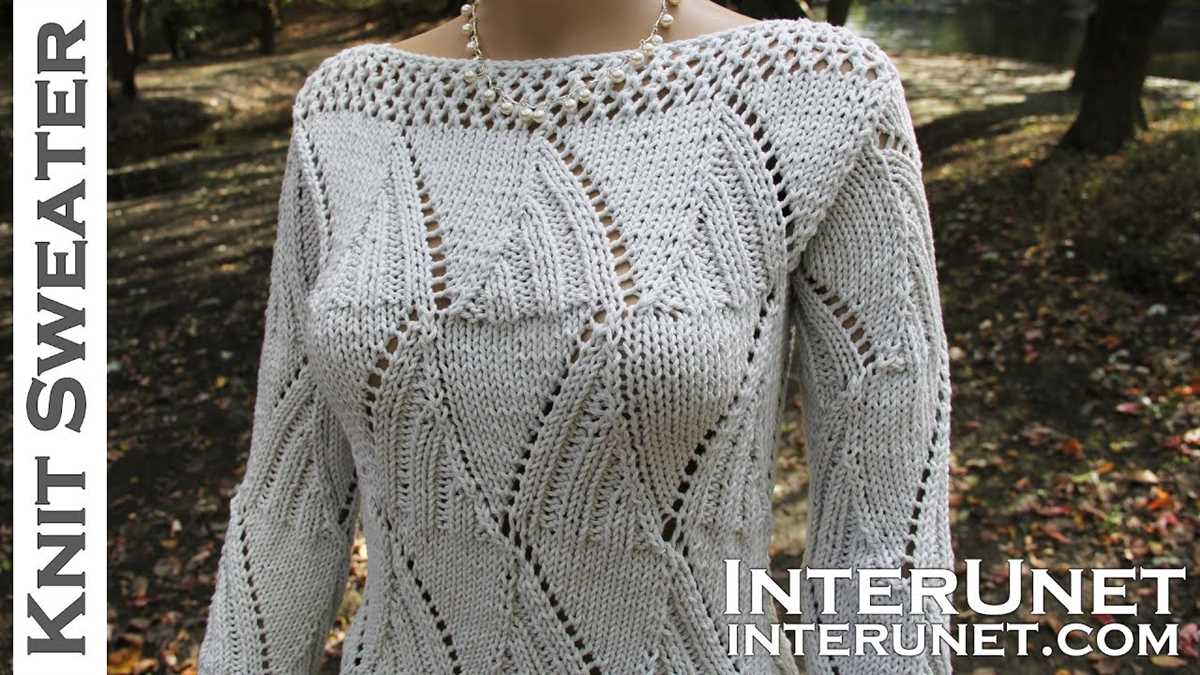
Boat neck: For those looking to add a bit of drama to their sweater, the boat neck is a stylish option. This neckline is wider than the crew neck and sits slightly off the shoulders, creating an elegant and feminine look. The boat neck is perfect for showcasing accessories like statement necklaces.
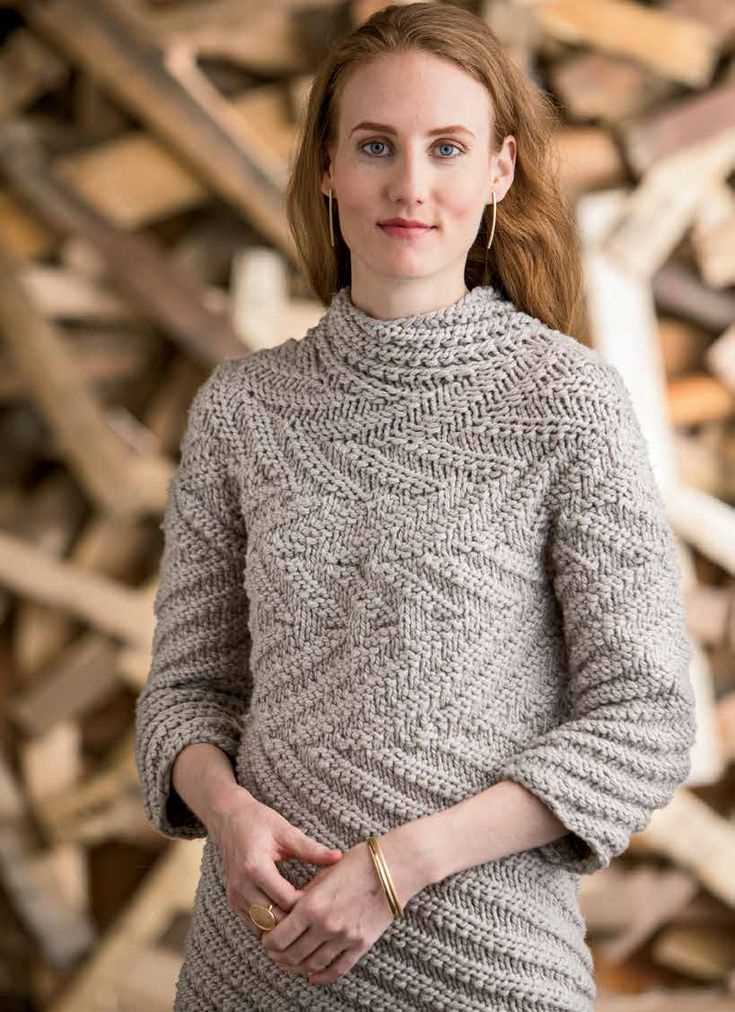
Turtleneck: If you’re looking to stay cozy and warm during the colder months, consider knitting a sweater with a turtleneck neckline. The turtleneck extends upwards to cover the entire neck, providing extra insulation and protection against the elements. This neckline is perfect for pairing with scarves or wearing on its own for a chic and cozy look.
When deciding on a neckline for your autumn sweater, consider factors such as your personal style, body shape, and the overall aesthetic you’re trying to achieve. Experiment with different neckline options to find the one that best suits your needs and preferences. Remember to follow the pattern instructions carefully to ensure a professional-looking finish.
Add the Finishing Touches
Once you have completed knitting your autumn sweater, it’s time to add the finishing touches to make it truly special. Paying attention to the details can elevate your sweater from ordinary to extraordinary, making it a statement piece in your wardrobe.
1. Blocking: Before adding any finishing touches, it’s important to block your sweater to give it a polished and professional look. Blocking involves wetting your sweater and then shaping it to the correct measurements. This will help even out the stitches and ensure that the sweater retains its shape when worn.
2. Sewing seams: If your sweater is knit in separate pieces, such as front, back, and sleeves, it’s time to sew them together. Using a tapestry needle and matching yarn, carefully stitch the seams together, making sure to align the stitches and maintain the desired fit. Take your time with this step to ensure a neat and seamless finish.
3. Adding ribbing or edging: To give your sweater a polished look, consider adding ribbing or edging to the neckline, cuffs, and hem. This adds structure and helps the garment retain its shape. You can use a contrasting color or stick to the same yarn for a more cohesive look.
4. Embellishments: If you want to add some extra flair to your autumn sweater, consider adding embellishments such as buttons, beads, or embroidery. This allows you to personalize your sweater and make it truly unique. Choose embellishments that complement the style and color of your sweater for a cohesive and eye-catching result.
5. Care instructions: Finally, don’t forget to include care instructions for your finished sweater. This will help ensure that it stays in great condition for years to come. Include details on how to wash, dry, and store the sweater to maintain its quality and prevent any damage.
Blocking and Care Instructions
Blocking is an important step in the knitting process that helps to shape and finish your garment. It involves wetting your knitted piece, stretching it to the desired measurements, and allowing it to dry in the correct shape. Here are some instructions on how to block your autumn sweater:
1. Wetting the Sweater
Fill a basin or sink with lukewarm water and add a few drops of mild detergent. Gently submerge your sweater in the water, making sure it is completely saturated. Leave it to soak for about 15 minutes to allow the fibers to relax.
2. Stretching and Pinning
Remove the sweater from the water and gently squeeze out the excess moisture. Lay it flat on a clean towel or blocking mat. Use measuring tape and your pattern as a guide to stretch and shape the sweater to the correct measurements. Pin the edges in place using rust-proof T-pins, starting from the center and working your way outwards.
3. Letting it Dry
Once your sweater is pinned to the desired measurements, leave it to dry completely. This process can take anywhere from a few hours to a couple of days, depending on the thickness of the yarn and the humidity in the air. Avoid moving or manipulating the sweater while it is drying to maintain its shape.
Once your autumn sweater is dry, remove the pins and gently pat it to remove any creases or indentations caused by the blocking process. It is now ready to be worn or stored. To keep your sweater looking its best, here are some care instructions:
1. Handwashing
Knitted garments are delicate, so it is best to handwash them to preserve their shape and prevent damage. Use lukewarm water and a mild detergent specifically designed for wool or delicate fabrics. Gently swirl the sweater in the soapy water, avoiding any rough rubbing or agitation. Rinse it thoroughly with cool water until all the soap is gone.
2. Drying
After handwashing, gently squeeze out the excess water from the sweater. Avoid twisting or wringing it, as this can cause stretching or misshaping. Lay the sweater flat on a clean, dry towel and gently roll it up to absorb more moisture. Then, reshape the sweater and lay it flat on another towel or blocking mat to air dry. Avoid hanging the sweater, as the weight of the water can stretch it out of shape.
3. Storage
When not in use, store your autumn sweater folded neatly in a drawer or on a shelf. Avoid hanging it, as the weight of the garment can cause stretching. Use moth repellents or sachets to protect it from any potential damage from moths or other insects. If the sweater is prone to pilling, you can use a fabric shaver or sweater stone to remove any pills that may form.
Following these blocking and care instructions will ensure that your autumn sweater remains in great condition and can be enjoyed for seasons to come.
Try Different Variations
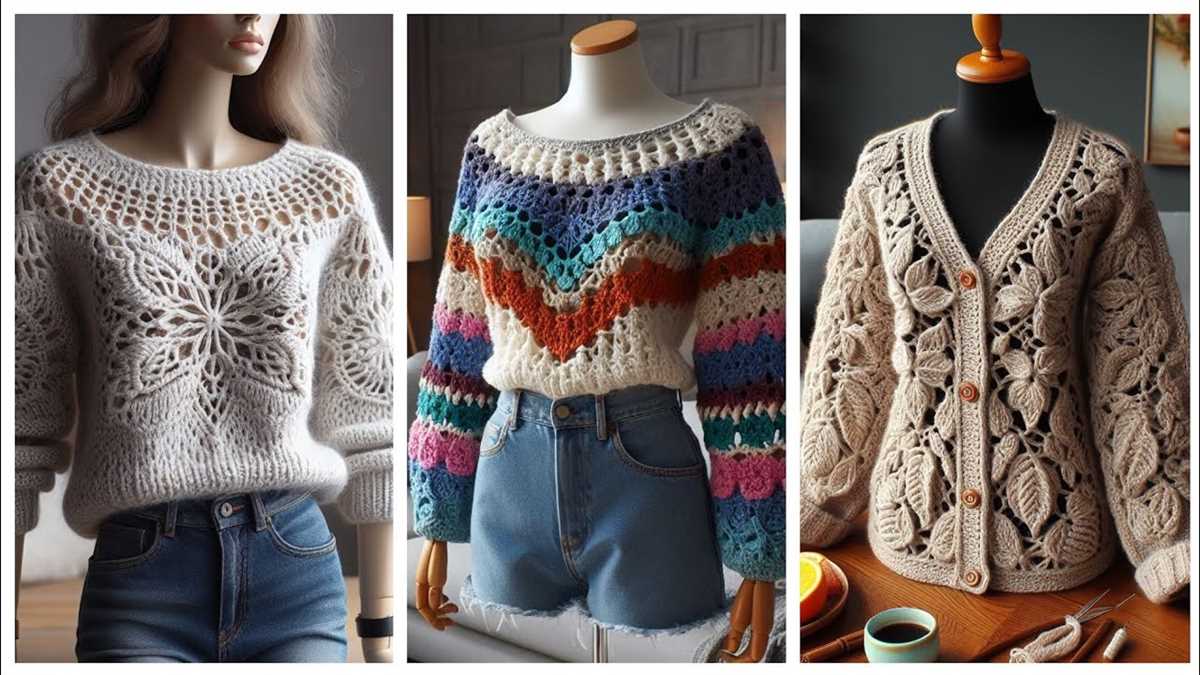
If you’re looking to add some variety to your autumn sweater knitting patterns, there are several different variations you can try. One option is to experiment with different stitch patterns. For example, you could try incorporating cables or lace into your design to create added interest and texture. You could also play around with different color combinations, using multiple colors or gradient yarns to create unique and eye-catching sweaters.
Another option is to try knitting your sweater in a different style or shape. Instead of the traditional pullover style, you could try knitting a cardigan or a poncho. This will not only give you a different look, but also provide you with a different knitting experience. You can also experiment with different necklines, such as a wide boatneck or a cozy turtleneck, to further customize your sweater.
Experiment with Yarn Weights
One way to add variety to your autumn sweater knitting patterns is to experiment with different yarn weights. Instead of always using the same yarn weight, try knitting a chunky sweater for a cozy and warm feel, or opt for a lightweight yarn for a more delicate and airy effect.
Add Embellishments for Extra Style
To further enhance the look of your autumn sweater, consider adding embellishments such as buttons, beads, or embroidery. This can add a touch of personalization and make your sweater truly unique. You could also try experimenting with different finishing techniques, such as ribbing, garter stitch borders, or seed stitch cuffs, to add extra visual interest.
Show Off Your Creation
Now that you have completed your beautiful autumn sweater using this knitting pattern, it’s time to show off your creation to the world! Whether you’re wearing it for a cozy day at home or going out for a stroll in the colorful autumn leaves, your sweater is sure to turn heads and garner compliments.
Share a picture of your finished sweater on social media and use the hashtag #AutumnSweaterKnit to connect with other knitting enthusiasts and show off your knitting skills. You can also join knitting groups and forums online to share your knitting journey and inspire others with your beautiful creation.
Remember, knitting is not just about creating a functional piece of clothing but also about expressing your creativity and personality. Don’t be afraid to customize your sweater by adding your own unique touches, such as embroidery, buttons, or even a contrasting trim. Make it truly yours!
Happy knitting and enjoy wearing your cozy autumn sweater!