
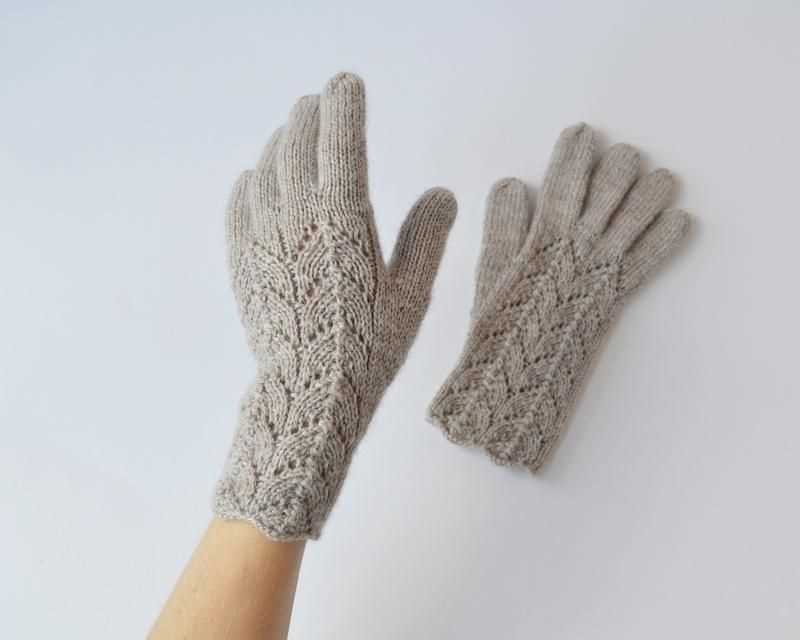
If you’re looking for a warm and stylish accessory to add to your winter wardrobe, look no further than alpaca fingerless gloves. These gloves are not only trendy but also incredibly soft and cozy. Whether you’re an experienced knitter or just starting out, this knitting pattern is perfect for all skill levels.
Alpaca fiber is known for its unique qualities, making it an excellent choice for gloves. It is lightweight and warmer than wool, making it perfect for cold weather. Additionally, alpaca fiber is hypoallergenic, making these gloves suitable for those with sensitive skin.
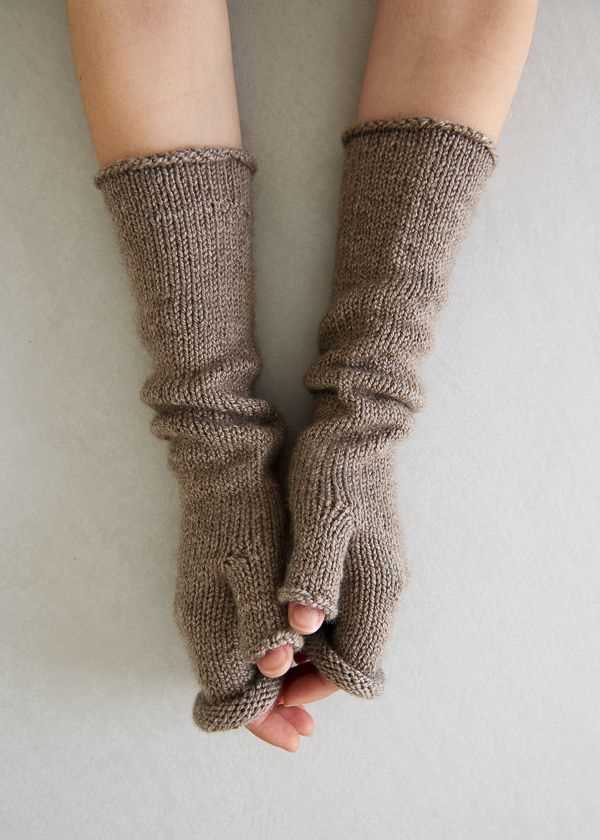
This knitting pattern for alpaca fingerless gloves is straightforward and easy to follow. With just a few basic knitting stitches, you can create a pair of gloves that will keep your hands warm all winter long. The fingerless design allows you to use your phone or perform other tasks without removing your gloves.
So why not add a touch of luxury to your winter wardrobe with a pair of alpaca fingerless gloves? Follow this knitting pattern, and in no time, you’ll have a trendy and cozy accessory to keep you warm and stylish in the colder months.
Benefits of alpaca yarn for fingerless gloves
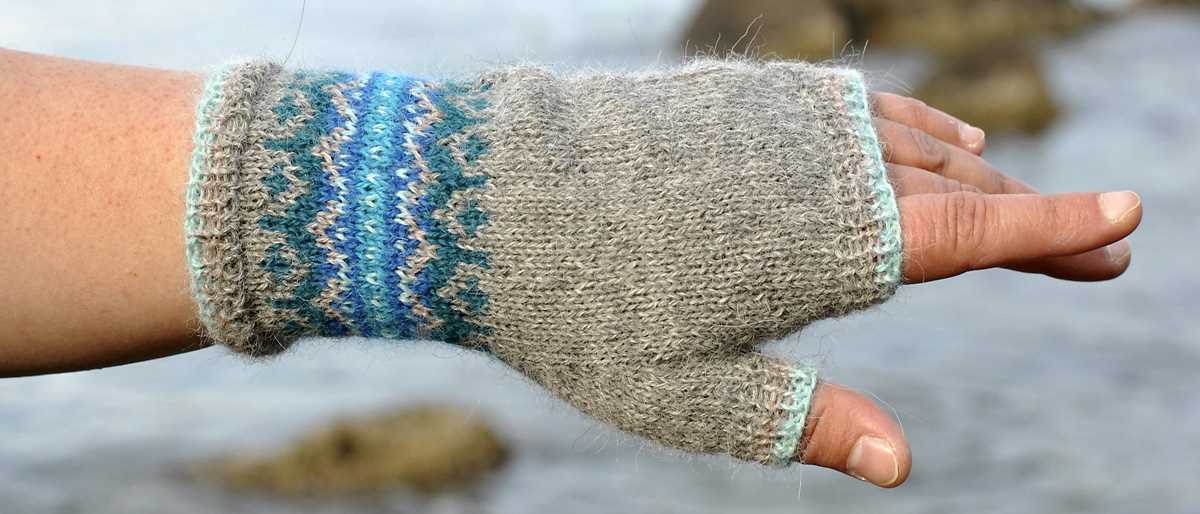
Fingerless gloves made with alpaca yarn offer a range of benefits that make them an excellent choice for keeping hands warm and comfortable during colder weather. Alpaca yarn is known for its exceptional softness, lightweight feel, and insulation properties, making it the ideal material for crafting cozy accessories.
Warmth: Alpaca fiber has a natural ability to retain heat, providing excellent insulation for fingerless gloves. This means that even in chilly conditions, alpaca gloves will keep your hands warm and cozy, while still allowing your fingers the freedom to move.
Softness: Alpaca yarn is incredibly soft to the touch, making it a pleasure to wear against the skin. This luxurious softness adds an extra level of comfort to fingerless gloves, making them a joy to wear for extended periods.
Hypoallergenic: Alpaca yarn is naturally hypoallergenic, making it a great choice for people with sensitive skin or allergies. Unlike other animal fibers, alpaca yarn is less likely to cause irritation, making it suitable for those prone to skin reactions.
Moisture-wicking: Alpaca fiber has excellent moisture-wicking properties, which means it can absorb moisture without feeling damp or heavy. This makes alpaca fingerless gloves a great choice for activities that may cause sweat, such as outdoor sports or winter hikes.
Durability: Alpaca yarn is known for its durability, meaning fingerless gloves made from alpaca yarn are more likely to withstand regular use and retain their shape over time. This makes them a long-lasting investment that can be enjoyed for years to come.
When it comes to fingerless gloves, alpaca yarn offers a winning combination of warmth, softness, hypoallergenic qualities, moisture-wicking properties, and durability. Whether you’re looking for a practical accessory for daily wear or a luxurious treat for yourself or a loved one, alpaca fingerless gloves are an excellent choice.
Choosing the right needles and stitch patterns
When it comes to knitting Alpaca fingerless gloves, choosing the right needles and stitch patterns is crucial to ensure the best results. Knitting with the wrong needles or using the wrong stitch patterns can affect the fit, comfort, and overall appearance of the gloves.
Needles: There are various types of needles available for knitting, including straight needles, double-pointed needles, and circular needles. When knitting fingerless gloves, it is recommended to use either double-pointed needles or circular needles, as they allow you to easily work in the round and create a seamless finish. It is important to choose needles that provide the right gauge and tension for the specific yarn you are using. You can refer to the pattern instructions or do a gauge swatch to determine the appropriate needle size.
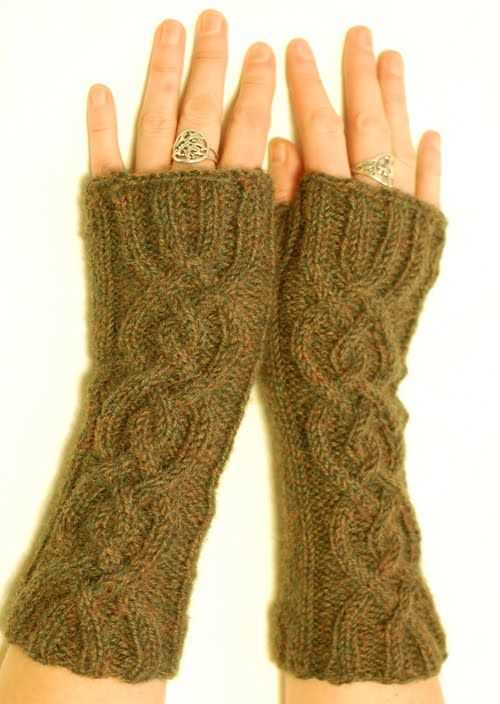
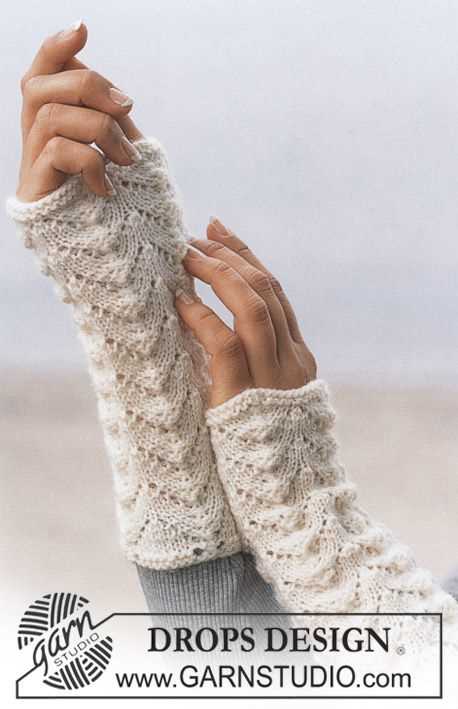
Stitch Patterns: The stitch pattern you choose for your fingerless gloves can greatly impact their appearance and functionality. For a warm and cozy pair of gloves, consider using a rib stitch pattern, such as a 2×2 rib or a 1×1 rib. Ribbing creates a stretchy fabric that hugs the hands and wrists, providing a snug fit. If you prefer a more textured look, you can explore different types of cable or lace stitch patterns. It is important to choose stitch patterns that are suitable for the level of difficulty you are comfortable with, as some patterns might require more advanced knitting techniques.
Overall, choosing the right needles and stitch patterns is essential when knitting Alpaca fingerless gloves. With the right tools and techniques, you can create a pair of gloves that are not only stylish but also fit well and keep your hands cozy and warm.
Getting started with the cuff
To begin knitting the cuff for your alpaca fingerless gloves, you will need to gather the necessary materials. You will need a pair of knitting needles, preferably size US 5 (3.75mm) circular needles with a 9-inch cable. Additionally, you will need a set of double-pointed needles in the same size if you prefer to use them for the smaller circumference of the cuff.
Next, choose your yarn for the project. Alpaca yarn is a popular choice for gloves as it is soft, warm, and lightweight. You will need approximately 150-200 yards of DK or worsted weight alpaca yarn, depending on the size and length of the gloves you wish to make. Select a color that matches your personal style and preference.
Step 1: Casting On
Once you have gathered your materials, it’s time to cast on stitches for the cuff. The pattern suggests using a long-tail cast on method, which is a popular choice for creating a neat and stretchy edge. To do this, make a slipknot with a long tail, leaving a few inches of yarn for the tail. Using your circular needles, start by making a slipknot and place it onto the right-hand needle. Hold the needle with your right hand, leaving the slipknot on the cable.
- Insert the right-hand needle into the slipknot from back to front, with the working yarn at the back.
- Bring the working yarn behind the needle, wrapping it around the needle counter-clockwise.
- Bring the loop through the slipknot, creating a new stitch.
- Continue casting on stitches until you have the desired number, following the pattern’s instructions. Make sure to keep the stitches loose enough to easily fit onto your needles.
Creating the thumbhole
To create the thumbhole in the Alpaca fingerless gloves, you will need to carefully follow the pattern instructions. The thumbhole is an essential part of the glove design, as it allows for easy movement and dexterity of the wearer’s thumb while keeping the rest of the hand warm.
In the pattern, there will be specific instructions on when and where to create the thumbhole. This may involve knitting a certain number of stitches, placing them on a stitch holder or waste yarn, and then continuing to work the rest of the glove without those stitches. The pattern will also indicate when to rejoin the stitches to continue working on the thumb later.
Step 1: Before starting the thumbhole, make sure you have the necessary materials, including stitch holders or waste yarn, as mentioned in the pattern.
Step 2: Follow the pattern instructions on when and where to create the thumbhole. This may involve knitting a specific number of stitches and then transferring them onto a stitch holder or waste yarn.
Step 3: Continue knitting the rest of the glove according to the pattern instructions, excluding the stitches that are on the stitch holder or waste yarn.
Step 4: When indicated in the pattern, rejoin the stitches from the stitch holder or waste yarn and continue working on the thumb section of the glove.
This process may vary depending on the specific pattern you are following, so it is important to carefully read and understand the instructions before proceeding with creating the thumbhole. By following the pattern instructions properly, you will be able to create a thumbhole that fits comfortably and functions well in the Alpaca fingerless gloves.
Knitting the Hand Section
Once you have completed the cuff section of your alpaca fingerless gloves, it’s time to move on to knitting the hand section. This is where the gloves really start to take shape and become functional.
To begin, you will need to transfer the stitches from your cuff to double-pointed needles or a circular needle, depending on your preference. If you are using double-pointed needles, divide the stitches evenly onto three or four needles. If you are using a circular needle, simply continue knitting in the round.
Pro tip: It can be helpful to use stitch markers to indicate the beginning of the round, especially if you are knitting with double-pointed needles. This will help you keep track of your progress and ensure that your stitches don’t become twisted.
Once your stitches are transferred and your markers are in place, you can begin knitting the hand section according to the pattern. This usually involves working in your chosen stitch pattern, whether it be a simple stockinette stitch or a more complex cable or lace pattern.
Note: Keep in mind that the number of stitches you have for the hand section may be different than the cuff section, as you may have increased or decreased stitches to achieve the desired fit. Make sure to follow the pattern instructions carefully to ensure a proper fit.
Continue knitting in the round until the hand section reaches the desired length, typically measuring from the base of your thumb to the point where you want the gloves to end. Remember to try on the gloves periodically to check the fit and make any necessary adjustments.
Pro tip: If you prefer a longer glove that covers more of your fingers, you can add extra length to the hand section by knitting additional rounds before starting the thumb gusset.
Once you are satisfied with the length of the hand section, you can move on to knitting the thumb gusset or continue knitting in pattern if your gloves do not have a gusset. The thumb gusset is an important part of fingerless gloves as it provides room for your thumb to move comfortably.
Shaping the fingers
The fingers are an important part of the design of alpaca fingerless gloves. They allow for greater dexterity and mobility while keeping the hands warm. When knitting the gloves, it is important to shape the fingers correctly to ensure a comfortable fit.
To shape the fingers, start by dividing the stitches evenly onto three or four double-pointed needles, depending on the pattern. This will make it easier to work on each finger individually.
Thumb shaping
The thumb is usually the first finger to be shaped. It is typically placed on hold using waste yarn while working on the rest of the fingers. The thumb can be shaped by decreasing stitches at the sides to create a tapered effect. This is usually done every few rounds until the desired length is reached.
Finger shaping
To shape the fingers, decrease stitches at the sides just like in the thumb shaping process. This can be done at regular intervals, typically every few rounds, to create a tapered effect. It is important to maintain the correct stitch count to ensure a snug fit. Once the desired length is reached, the stitches can be bound off and the finger is complete.
In some patterns, the fingers may be shaped differently. For example, instead of tapering, they may be left straight for a more relaxed fit. It’s important to follow the pattern instructions carefully to achieve the desired fit and look for the gloves.
Overall, shaping the fingers is an essential step in knitting alpaca fingerless gloves. It allows for a more comfortable fit and adds to the overall design. By following the pattern instructions and shaping the fingers correctly, you can create a pair of gloves that are both stylish and functional.
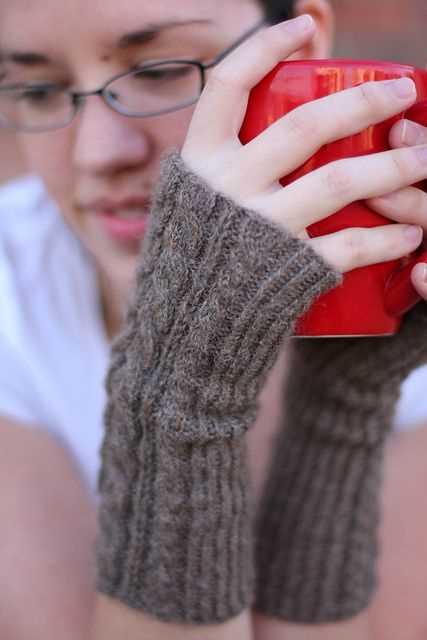
Adding ribbing for a snug fit
When knitting fingerless gloves, one important aspect to consider is the fit. To ensure that the gloves stay in place and provide warmth, adding ribbing is a great option. Ribbing is a stretchy and flexible pattern that helps the gloves conform to the shape of the wearer’s hand.
Ribbing is typically created by alternating knit and purl stitches in a specific pattern. This combination of stitches creates vertical columns that give the fabric elasticity. It allows the gloves to stretch comfortably over the hand without becoming loose or saggy.
When adding ribbing to fingerless gloves, it is essential to choose the right type of ribbing pattern. Common ribbing patterns include 1×1 ribbing (alternating one knit stitch with one purl stitch) and 2×2 ribbing (alternating two knit stitches with two purl stitches). These patterns provide excellent elasticity and are easy to work with for beginners.
To add ribbing to your gloves, start by casting on the desired number of stitches. Then, begin working the ribbing pattern according to the instructions. After completing the ribbing section, continue with the rest of the glove pattern as usual. The ribbing can be added to the cuffs, the fingers, or both, depending on the desired fit and style.
By incorporating ribbing into your fingerless gloves, you can ensure a snug and comfortable fit. The elasticity provided by the ribbing will keep the gloves in place and prevent them from slipping or sliding. Additionally, the ribbing adds a stylish and textured element to the design, enhancing the overall aesthetic appeal of the gloves.
Finishing touches: blocking and seaming
After you have finished knitting your alpaca fingerless gloves, there are a few final steps to make them look polished and professional. Blocking and seaming are the key finishing touches that will enhance the fit and appearance of your gloves.
Blocking: Before seaming the gloves, it’s important to block them first. Blocking is the process of gently reshaping the knitted fabric by wetting it and then allowing it to dry in the desired shape. This step helps to even out any uneven stitches, open up lace patterns, and allow the gloves to fit more comfortably.
To block your fingerless gloves, you can start by soaking them in lukewarm water with a mild detergent. Gently squeeze out the excess water and place them on a clean towel. Lay the gloves flat and use your hands to shape them to the desired size and shape. Smooth out any wrinkles or bumps, and make sure the fingers are evenly aligned. Allow the gloves to dry completely, preferably by air drying them on a flat surface.
Seaming: Once the gloves are dry, it’s time to seam them together to create the finger openings. Use a yarn needle and a strand of yarn to sew up the side seams of the gloves, leaving a gap for the thumb. Make sure to match up the stitches on each side and sew with a neat and even stitch. Repeat the seaming process for the second glove.
If desired, you can also add any additional embellishments or finishing details, such as buttons or decorative stitches, to further personalize your fingerless gloves. Once the seaming and any additional finishing touches are complete, your alpaca fingerless gloves are ready to be worn or given as a thoughtful handmade gift.
Customizing your fingerless gloves
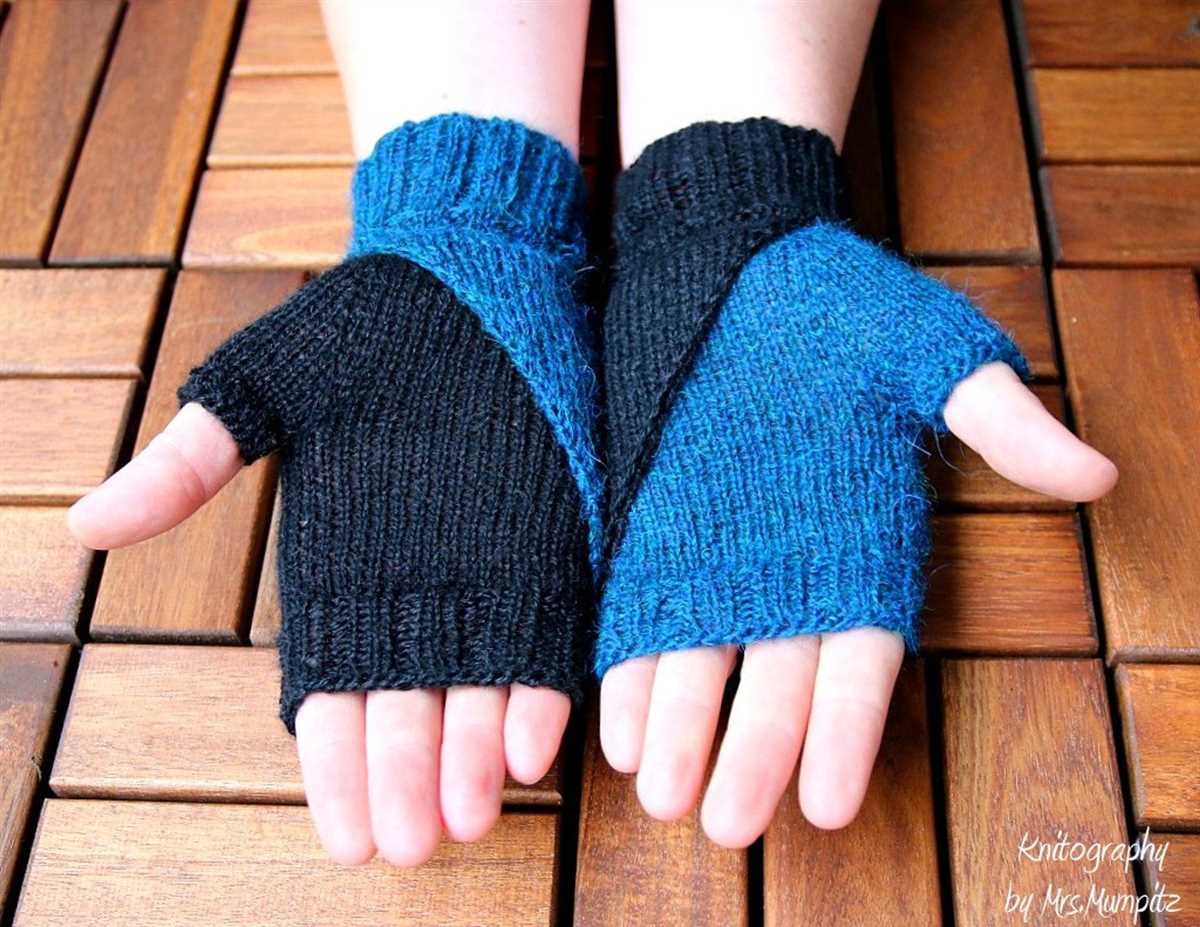
When it comes to fingerless gloves, one of the best things is that you can easily customize them to fit your personal style and preferences. Whether you want to add a pop of color, incorporate a unique stitch pattern, or embellish them with buttons or beads, the possibilities are endless.
Choosing the right yarn: The first step in customizing your fingerless gloves is selecting the right yarn. Consider the weight and fiber content of the yarn to ensure that it will be comfortable and suitable for the purpose of the gloves. For example, if you’re looking for a warm and cozy pair, you might opt for a bulky alpaca yarn. If you prefer a lightweight and breathable option, a merino wool or cotton blend could be a good choice.
Adding color:
- Stripes: For a classic look, you can incorporate stripes into your fingerless gloves. This can be done by using different colored yarns or by using variegated yarn that automatically creates striped patterns.
- Color blocking: Another option for adding color is to create color-blocked sections on your gloves. This can be achieved by knitting different sections in contrasting colors.
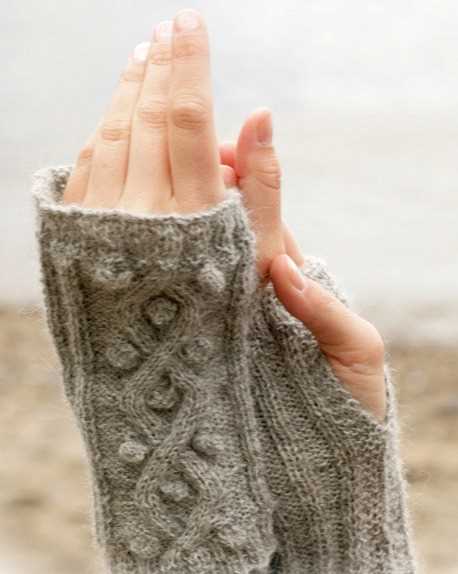
Experimenting with stitch patterns:
Textured stitches: If you want to add some visual interest to your fingerless gloves, try experimenting with different stitch patterns. Cable stitches, ribbing, or lace patterns can all be used to create unique and eye-catching gloves.
Embellishments:
Buttons: Adding buttons to your fingerless gloves can be both functional and decorative. You can choose buttons that match the yarn color or opt for contrasting buttons to make a bold statement.
Beads: Another way to embellish your fingerless gloves is by adding beads. Whether you prefer simple seed beads or sparkling crystal beads, they can add a touch of elegance and individuality to your gloves.
With these customization options, you can create fingerless gloves that are truly one-of-a-kind. Let your creativity and personal style shine through as you knit your own unique pair.
Tips for Caring for Your Alpaca Fingerless Gloves
Alpaca fingerless gloves are not only stylish and warm, but they also require special care to keep them looking and feeling their best. Here are some tips to help you properly maintain your alpaca fingerless gloves:
1. Hand Wash Only:
Alpaca fiber is delicate and can be damaged by the agitation of a washing machine. It is best to hand wash your alpaca fingerless gloves in lukewarm water with a gentle detergent specifically designed for wool or delicate fibers. Gently squeeze out any excess water and lay them flat to dry.
2. Avoid Direct Heat:
Alpaca fiber is highly sensitive to heat and can easily lose its shape or shrink if exposed to high temperatures. It is important to avoid placing your alpaca fingerless gloves near direct heat sources such as radiators or dryers. Instead, let them air dry in a cool, well-ventilated area.
3. Store Them Properly:
When you are not wearing your alpaca fingerless gloves, it is best to store them in a clean, dry place away from sunlight. You can use a ziplock bag or a soft pouch to protect them from dust and moths.
4. Avoid Excessive Stretching:
Alpaca fiber is known for its elasticity, but excessive stretching can cause it to lose its natural shape and become misshapen. When putting on or taking off your alpaca fingerless gloves, handle them with care and avoid pulling or stretching them too forcefully.
5. Gently Remove Pilling:
Pilling is a natural occurrence with alpaca fiber, but it can be easily removed with a pill shaver or a fabric comb. Gently glide the tool over the surface of your alpaca fingerless gloves to remove any pilling. Avoid using scissors, as they can accidentally cut the fiber.
6. Treat Stains Immediately:
If your alpaca fingerless gloves get stained, it is important to treat the stain immediately to prevent it from setting. Blot the stain gently with a clean cloth or sponge using a mild detergent or stain remover. Rinse the area with cool water and gently squeeze out any excess moisture.
By following these care tips, you can ensure that your alpaca fingerless gloves stay soft, warm, and beautiful for years to come.